Software
Houzz Logo Print
webuser_618897318

DIY kitchen cabinet install help. *update, windowsill question*

3 years ago
last modified: 3 years ago
*updated question*

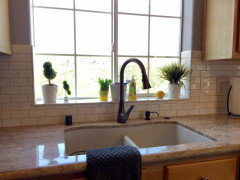
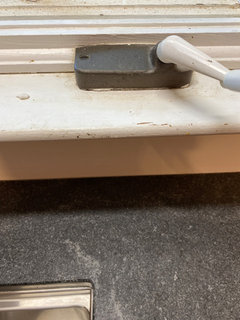
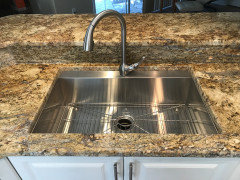
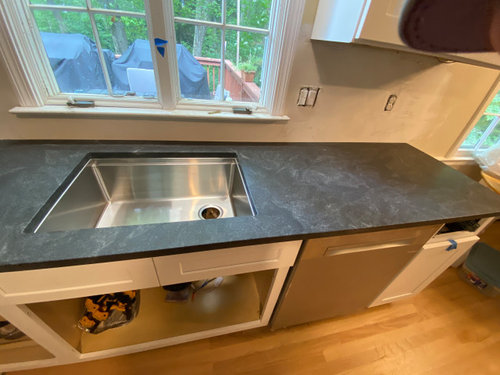
The windowsil needs to be 1” narrower. Our faucet does not fit (see my latest comment below but I did not have it when they measured the counters). What are our options given that our widow cranks sit on the actual sil. We are not looking to replace the whole window at this time. Can this piece be removed wothout taking the whole window out?

****************************

Hello. We are installing new cabinets. This is a DIY situation. My husband has a lot of carpentry and other skills but this is the first time doing kitchen cabinets. Cabinets were delivered and he is preparing to install them. I hope I can come here with our questions along the way and that some of you experienced installers might be gracious enough to answer them.

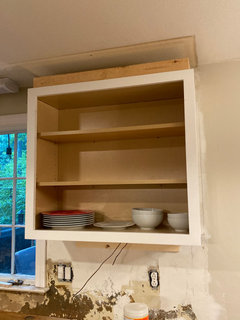
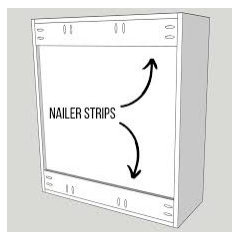
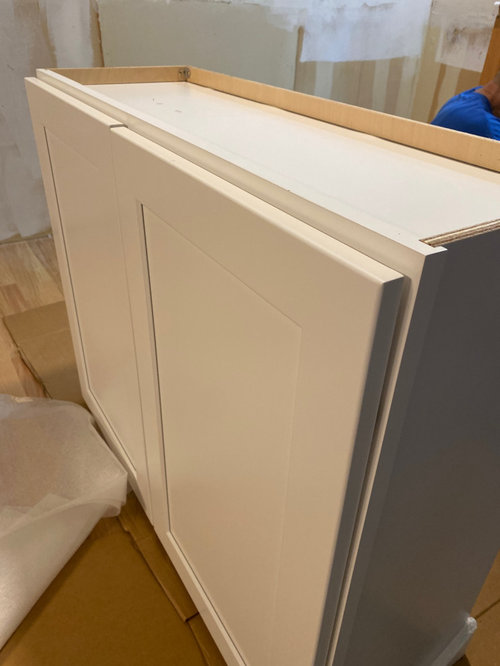
Our cabinets are already assembled and we are wondering what clearance there should be between the top of the upper doors and the crown? It seems we may need to add a strip to the top edge to attach the crown to? Any resources you can point us to?

Here is a photo of one of the uppers.


Comments (75)

  • 3 years ago

    @bry911 this is really helpful, thank you! I was not able to find good pictures so the one you posted will be perfect to show my husband. I think we will plan to have the uppers on either side right up against the hood and then consider the two optiona youve mentioned. Maybe it will look good just scribed to the ceiling.

  • 3 years ago

    And have I seen you mention installing it front to back or am I imagining that?

  • 3 years ago

    I am not sure what you are referring to when you say front to back.

  • 3 years ago

    @bry911 I meant the sink straps. I feel like Ive seen it suggested they be applied front to back.

  • 3 years ago

    Sink straps are not my area of expertise. I would think side to side is better as that is where the solid panels are, but I don’t know for sure.

  • 3 years ago
    last modified: 3 years ago
    Hopefully @Joseph Corlett, LLC will weigh in. Thanks!

  • PRO
    3 years ago

    Either is fne, but side-to-side is preferable.

    Chris H thanked Joseph Corlett, LLC
  • 3 years ago

    @bry911 are four cabinet screws (2.5”) enough for this 33” cabinet (12” deep deep)? It will hold our dishes and is the only upper without another next to it or a wall. Cabinets are plywood construction with wood face frames if it matters. We are worried about it falling off over time. Seems solid at the moment but wanted to check.


  • 3 years ago

    As long as it is at least 1/2” plywood (or the screw is through the stretcher) and going into a stud then yes.

    Chris H thanked bry911
  • 3 years ago

    @bry911 ok good. All are in studs and its exactly 1/2” thick. Im not sure what a stretcher is but Ill tell my husband. Im wondering if we have one even. Thanks!

  • PRO
    3 years ago

    "Stretcher" is a cabinetmaking term for a member that goes from side to side on the top or bottom of a cabinet. Unless your cabinet backs are solid 1/2" or more, you've got one.

  • PRO
    3 years ago
    last modified: 3 years ago

    There should be a ”hanging rail” or nailing rail, on the cabinets, through which all attachment points are screwed into studs, with 𝘤𝘢𝘣𝘪𝘯𝘦𝘵 𝘪𝘯𝘴𝘵𝘢𝘭𝘭 𝘴𝘤𝘳𝘦𝘸𝘴. Never ever drywall screws. The heads snap right off of them under a shear load.


  • PRO
    3 years ago
    last modified: 3 years ago

    Take that down and locate the hanging rail on the back. Toss the drywall screws. Get some GRK cabinet screws, a star bit., and some proper shims. Reinstall, shimming properly to level and square, and through the rail. Do not rack it out of level! That is why you shim.


    https://www.homedepot.com/p/GRK-Fasteners-8-x-2-1-2-in-Star-Drive-Washer-Head-Cabinet-Wood-Screw-330-Piece-per-Pack-110079/203533433


    https://www.homedepot.com/p/GRK-Fasteners-T-25-2-in-Steel-Star-Bits-2-per-Pack-772691874436/202349118


    https://www.homedepot.com/p/7-375-in-Bidrectional-Break-Composite-Shim-Bundle-of-12-SHIM-12-BD/321634110

  • 3 years ago

    Thanks all! There is no hanging rail. It is 1/2 wood so maybe thats why? Ill read through these links @Quicklok Cabinets. Thanks!. It is shimmed and leveled/plummed. Shoukd it still be taken down?. These are not drywall screws but cabinet screws into studs.

  • 3 years ago

    Your screws are fine, sometimes pro's don't mind a little bit of assumption to find something to criticize the DIY people about. Your cabinets don't need to come down as long as they are properly leveled and plumb.

    Chris H thanked bry911
  • PRO
    3 years ago
    last modified: 3 years ago

    Cabinet screws have the bigger washer heads, so they don’t pull though the backing. Little black screw heads are brittle drywall screws, whose heads snap off pretty easily.

  • 3 years ago

    Most Lowes stores are going to carry the black phosphate Hillman cabinet screws which are fine for mounting cabinets.

    The color of the screw means nothing.

    Drywall screws actually have fairly large heads because of the concave needed to dimple (.335), and cabinet screws are only a bit larger (.395 - .425.) I certainly can’t see that difference in that picture, but if you can then great. Good catch.

    Chris H thanked bry911
  • 3 years ago

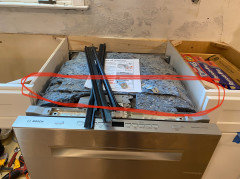
    @Joseph Corlett, LLC or @bry911 should we install any trpe of front rail or support for the counter above the front of the DW? Wondering if leaning on the counter over such a big stretch with nothing under it would he a problem.


  • PRO
    3 years ago

    No.

  • PRO
    3 years ago
    last modified: 3 years ago

    Yes. I always support the DW counter, front and back. You just have to make sure that the opening is top to bottom 24”, and that is actually square, despite the floor slope.

  • 3 years ago

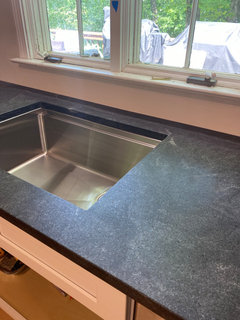
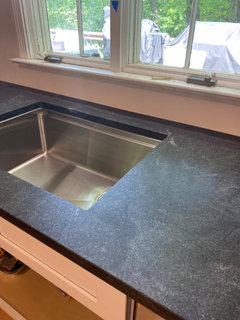
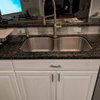
    Countertops were installed today and I love them and they did a great job! Unfortunately the windowsill projects out too far for our faucet. I did not have the faucet picked out when they measured… At any rate, Ive asked them to wait on the faucet holes until we either find a new faucet or figure out how to shave off an inch. Would it be ridiculous to remove the sill and take an inch off the back side and then reinstall? My husband is working so I havent discussed this w him yet and maybe he will already know what to do.

    Appreciate any tips! I cant tag anyone for some reason!

  • 3 years ago

    Looking at it more Im afraid it is more involved than I thought…

  • PRO
    3 years ago
    last modified: 3 years ago

    Remove all of the window trim and tile it, using bullnose trim.


  • 3 years ago

    Would that work though with my window cranks??

  • 3 years ago

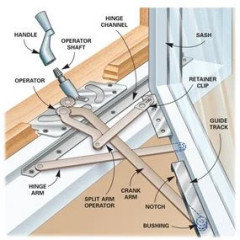
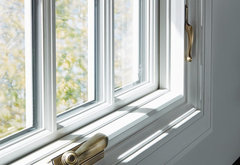
    Your window cranks should be attached to the upper part of that sill closer to the sash with the beveled edge, and the sill that tucks below that would be able to be removed and replaced with another sill that does not project as far as that one does. That part of the sill was added as part of the inside trim with my casement windows and your look like they would be the same. The box for the crank appears to sit on top of that part of the sill.

    Chris H thanked palimpsest
  • 3 years ago
    last modified: 3 years ago

    I had a very shallow back portion too.


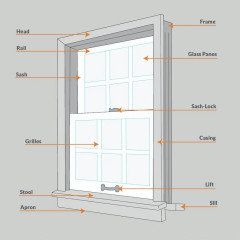
    remove the stool portion

    and just do a nice window casing. (your current window molding is all chewed up anyway, so replacing it will match the new look of the rest of the kitchen. while you're at it, remove the paint and polish the metal cranks, maybe a coat of paint)

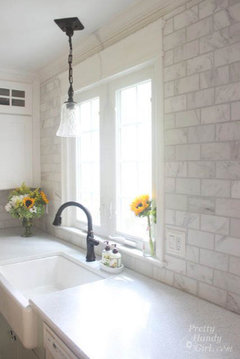
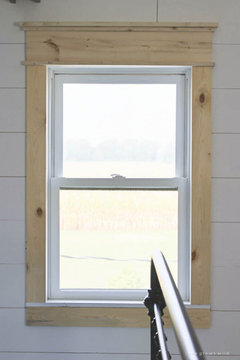
    you could do yours like this. I prefer this type of casing.


    Chris H thanked Beth H. :
  • 3 years ago

    @palimpsest here is a closer picture. Is it what you were thinking?


  • 3 years ago

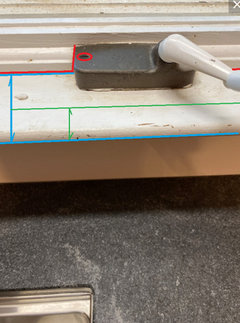
    The crank should be attached to the red part of the sill; it appears to be inset into this

    The part between the blue lines should be able to be removed. It could be replaced with something that was essentially flush with the surface of the wall (green line thereabouts)


    Chris H thanked palimpsest
  • 3 years ago
    last modified: 3 years ago

    how far back can you cut that stool (in front of sill) portion?


    This would be really nice w/the black countertop


    Chris H thanked Beth H. :
  • 3 years ago
    last modified: 3 years ago

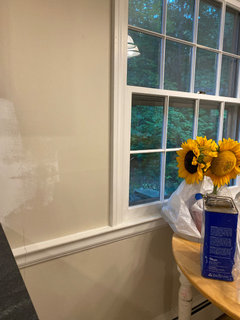
    Beth H (cant tag you for some reason). We have another larger window in the kitchen that has a similar sil (stool?) but its chair rail. Would that look odd to have one like youve pictured and one the way this one is? Thank you @palimpsest that makes more sense to me now. Here is the other window. Stuff is everywhere so its hard to get a good picture.


  • 3 years ago
    last modified: 3 years ago

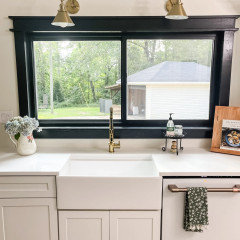
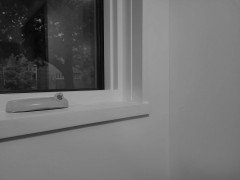
    Here are two variations of the same type of window in my house. The metal covers and cranks are not on the crank mechanism housing because it's all waiting for another coat of paint.

    The white one is in the kitchen. There is no casing on the window at all, it's a flush jamb with a sill that only projects slightly.

    The dark one is in the dining area. This has a no casing/flush jamb but with a wider sill that extends to the wall so the cat has a place to sit. These are the same window configuration, just two different sills done on-site


    Chris H thanked palimpsest
  • 3 years ago
    last modified: 3 years ago

    you wouldn't need a chair rail in the kitchen.

    just do some new casing. if you need the 'stool' for the crank, just make it smaller.

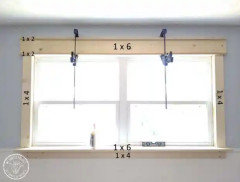
    prob something like this, but a shallow or flush stool piece. not the 1x6 that's shown here


    see how this stool (or the sill) is flush w/the apron? could you do something like this?


    ThisOldHouse has lots of tutorials on how to redo old windows. Also on how to redo the casing

    This one is pretty good too


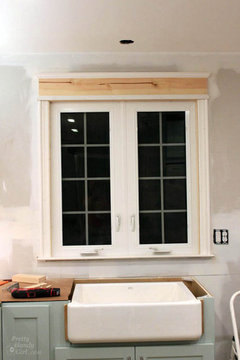
    https://prettyhandygirl.com/frame-casement-window/

    it's just that your trim work has seen better days. all those gaps on the bottom of the window need to be caulked and painted. all those dings and knicks, sanded, filled and painted. if you have to remove the stool, just redo the kaboodle.


    don't forget to smooth off the metal and give it a new coat of paint. i'd make it all one color

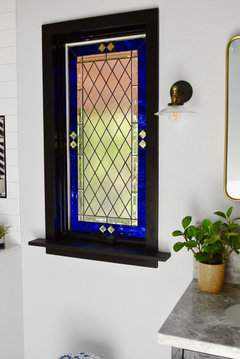
    I have a casement window in my bathroom. I did all custom ebonized red oak (I already had the black crank)


    Chris H thanked Beth H. :
  • 3 years ago

    @Beth H it has certainly seen better days 🫠Now that I know it is not part of the window itself I agree on replacement. The chair rail was on the other window in the little nook area that our kitchen table goes. I will look at these links. I appreciate it!

  • 3 years ago

    I also plan to paint the window and will paint the cranks, too.

  • 3 years ago

    @palimpsest did you use regular paint on the cranks? I like those sills. We are in a traditional new england colonial and all of our windowsills are like this. Im sire my husband can come up with some variation that blends it well

  • 3 years ago

    The cranks don't have any paint on them. They are dark bronze metal, and there is a shell that slides over the part you see there and then a separate crank.

  • PRO
    3 years ago

    "Yes. I always support the DW counter, front and back."


    QC:


    And how do you do that without it showing please?

  • PRO
    3 years ago

    Chris:


    Your countertop fabricator has the blame for the faucet. The front rail of your countertop could have been 3", but it appears to be closer to 6". Had they positioned the sink properly, your faucet would have easily cleared the window stool.


    I doubt they'll go for it, but you could have the sink cutout recut and install a workstation sink with a faucet deck which will be in the proper position.


  • 3 years ago

    Well that’s frustrating. I tried to think of every question/issue ahead of time but looks like I did not. Darn.

  • 3 years ago

    Just measured it and it’s 3 1/2”… must be the angle of my picture. On to narrowing the stool we go! Ha! Just when I thought I was so close to a working kitchen again 😂

  • 3 years ago

    It is not easy to remove the stool and replace. I would take a portable power planer and shave the stool off in place

  • 3 years ago

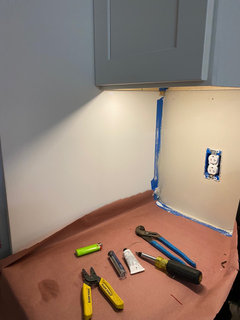
    Thanks everyone! He was able to remove the stool and replace it with a more narrow one. I now am wondering how to prevent this harsh shadow on our UCL? It is several inches away from the wall here but still has this shadow. Is this normal or does this mean it should be moved back some?

  • 3 years ago

    This is also with no other lights on.

  • 3 years ago

    That's normal. If possible you may want to put them on a dimmer.

  • 3 years ago

    Ok. Thanks. We do plan on a dimmer.

  • 3 years ago

    @Palimpsest where did you get the shell? I painted them and oh my what a mess 🫠 I’m stripping the paint now… would love the ones on the sil to be white but we are not replacing them bc it’s complicated and the window will be replaced in the future.

  • 3 years ago

    @palimpsest cant tag you fro some reason

  • 2 years ago
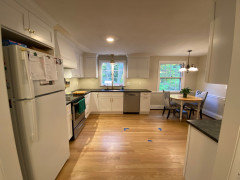
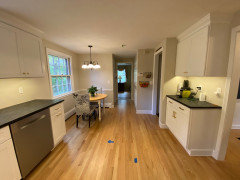
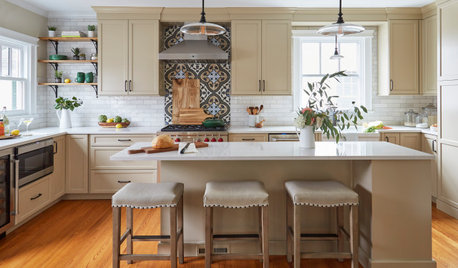
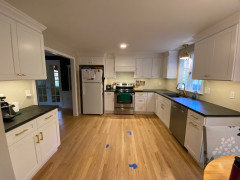
    I just wanted to thank you guys for helping us. We are basically done in the kitchen. I will eventually post a new thread showing the whole thing with details and more updated pictures for anyone who wants them but in the meantime here are some pictures (most current ones I have) 🤗 we have since added recessed lights and the fridge will be replaced (the cutout is designed for a larger fridge that’s why it looks odd). My husband is designing and building a small workstation for the middle of the kitchen w a butcher block top. Anyway, this DIY project was not possible without so many helpful comments by the kind people around here (and the occasional snarky one 😉). A special thanks to @bry911 and @Joseph Corlett, LLC. and really to all of you 💜

  • 2 years ago
    Great job. It looks great and it's a project you should take pride in.