Software
Houzz Logo Print
webuser_208040286

Stenciling with foil mask

12 days ago

Dear all

I’d like to stencil a wall with foil

simple really, the issue is I’d like to use a thin continuous pattern and this would require fixing the stencil to the wall, removing the section through which the foil would be applied, applying the foil and then removing the remaining mask before cleaning and sealing.

The issue is with holding the mask onto the wall. If I attach the complete stencil to the wall remove the pattern to be foiled and leave the mask attached, there will be adhesive under the mask. this will most likely interfere with clean edges for the foil

simply is there any way to apply a mask to a wall where the glue for the mask will not interfere with the sizing for the foil

Comments (20)

  • PRO
    12 days ago

    Simply............nobody will have a clue what you are attempting to do.or why? Also what wall and in what context as it relates to the rest of the room.

    More context for exactly what you are "simply" trying to accomplish?

  • PRO
    12 days ago

    Andrew, the stenciling sounds very cool but I'm having a bit of a problem undestanding exactly what the problem is. Can you post photos of the stenciling and the technique that will be used? That would be helpful.

    Andrew thanked Norwood Architects
  • PRO
    12 days ago

    We need to see what you are using and just more info . I usually use tape to adhere a stencil. Are you using a silver leaf foil or some other leaf ?

    Andrew thanked Patricia Colwell Consulting
  • 12 days ago

    Take a look at the Stenciling Basics videos produced by Royal Design Studios. The How to Use Registration Marks to Repeat Stencil Designs demonstrates what you are trying to do. Note that the stencil is attached to the wall at its edges and with painter's tape* so no adhesive is left on the wall. Also, there are stiff stencil brushes that reduce the chance that paint will get underneath the stencil. Finally, I don't know anything about the quality of its stencils but Royal's How to Clean Paint Off of Your Stencils & Brushes shows that its stencils can be cleaned for reuse.

    -----

    Best painter's tape: FrogTape

    Andrew thanked wdccruise
  • PRO
    12 days ago

    Please provide more information or pictures of what you are trying to do.

    Andrew thanked CAGE Design Build
  • 12 days ago
    last modified: 12 days ago

    Hi

    Sorry this was confusing.

    I am trying to apply fine lines of metal foil to a wall of block colour using a repeating pattern. Because the lines are fine and all joined together a stencil will not hold together. If I apply the the cut pattern of the stencil to the wall with painters tape and remove the fine lines I want to paint the large masked sections of the stencil will fall out.

    So, this is why I need to make sure that the large sections that I do not want to foil are attached to the wall.

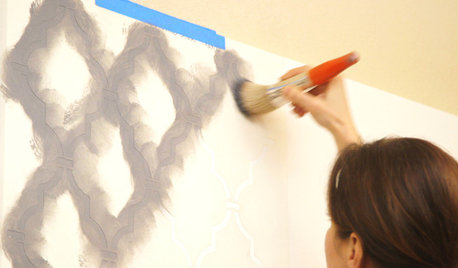
    So for example, the image above shows a gold block colour wall that has had blue paint applied to it through a stencil.

    I have a wall of block colour already and would not like to apply gold foil over the entire wall only to block out the majority of it. I would like to apply a pattern like this by applying a mask (blue shapes) to the wall and foiling around them.

    I can cut and make a mask to do this already and apply it to the wall with repositionble low tack adhesive and if I was painting that would be fine. However, I would like to apply foil.

    This requires glue.

    The mask from the stencil is stuck to the wall with glue.

    This will mean the foil will stick to both types of glue.

    I was asking if there was another way to mask the wall using a stencil to create fine lines.

    I hope this helps


  • 11 days ago

    From CoPilot Ai:

    Question: How to stencil a wall with foil using a stencil that has sections which are discontiguous.

    Answer:

    Foil stenciling gets tricky the moment your stencil has discontiguous islands—little floating shapes that aren’t connected to the main body. The key is controlling adhesion, pressure, and registration so the foil only bonds where you want it and the stencil stays perfectly aligned each time you lift and reposition it.

    Here’s the clean, mechanics‑first way to do it so the foil transfers crisply and the islands don’t shift or smear.

    Core Takeaway

    You stencil with foil by applying foil adhesive through the stencil, letting it tack, then pressing foil onto the adhesive. For discontiguous stencil sections, you must stabilize the stencil, apply adhesive in controlled passes, and foil in stages so the islands stay aligned.

    1. Stabilize the stencil so the islands don’t move

    Discontiguous stencils shift easily when you lift them. You need a temporary bond that holds every island exactly in place.

    Best stabilization methods:

    • Light spray adhesive (repositionable) Mist the back of the stencil lightly. This keeps islands from lifting when you pull the stencil up.
    • Low‑tack stencil adhesive sheets These act like a giant Post‑it backing. Excellent for large wall stencils.
    • Painter’s tape perimeter + finger‑pressure on islands Works if you avoid spray adhesives, but requires more care.

    Avoid: Anything with strong tack (it will pull paint off the wall or distort the stencil).

    2. Apply foil adhesive through the stencil—thin, even, controlled

    Foil requires a special adhesive (size) that dries to a tacky finish. The mistake people make is applying too much, which causes bleeding under the islands.

    Correct application method:

    • Use a dense foam roller or stencil brush
    • Load it lightly, then off‑load onto paper until nearly dry
    • Apply in multiple light passes, not one heavy pass
    • Keep the roller pressure extremely consistent so islands don’t shift

    Goal: A thin, uniform adhesive layer that dries tacky but not wet.

    3. Lift the stencil carefully—this is where discontiguous islands fail

    Because foil adhesive stays tacky, the stencil can stick slightly.

    To avoid pulling islands out of alignment:

    • Lift straight up, not peeled sideways
    • Use two hands, supporting islands with fingertips
    • If the stencil is large, lift one section at a time while holding islands down gently

    If an island shifts, you’ll see it immediately—stop and realign before continuing.

    4. Let the adhesive reach proper tack

    Foil adhesive must reach the “dry‑tacky” stage:

    • It should feel like the back of a Post‑it
    • It should not be wet or stringy
    • Typical tack time: 10–20 minutes, depending on brand and humidity

    If you foil too early, the adhesive smears. If you foil too late, the foil won’t bond.

    5. Apply the foil—pressure matters

    Place the foil sheet over the adhesive and burnish:

    • Use a soft cloth, burnishing brush, or plastic card
    • Apply firm, even pressure
    • Work in small circles or straight strokes
    • Keep the foil sheet from shifting—movement causes double‑imaging

    For large wall stencils, foil in sections, not all at once.

    6. Remove the foil sheet cleanly

    Lift straight up. If some areas didn’t transfer:

    • Re‑burnish with more pressure
    • Or apply a fresh piece of foil and burnish again (foil is forgiving)

    7. Repeat the stencil pattern with registration

    Discontiguous stencils require precise alignment each time you reposition.

    Use:

    • Built‑in registration marks
    • A level or laser line
    • Light pencil marks on the wall (erase later)

    Always check that islands are aligned before applying adhesive again.

    8. Optional: Seal the foil

    Foil is delicate. If the wall is high‑traffic or you want longevity:

    • Use a non‑yellowing clear coat
    • Apply lightly to avoid dulling the metallic finish

    Common Failure Modes (and how to avoid them)

    • Bleeding under islands → Use drier roller + lighter passes
    • Islands shifting → Use repositionable spray adhesive
    • Foil not bonding → Adhesive wasn’t tacky enough
    • Foil smearing → Adhesive was still wet
    • Double images → Foil sheet moved during burnishing
    Andrew thanked wdccruise
  • 11 days ago

    Question: Suppose the islands do not float but the stencil is actually continuous with very thin connections among the islands?

    Answer:

    If the stencil is technically continuous—meaning all those little “islands” are actually connected by very thin bridges—your workflow becomes simpler, but the physics of foil adhesive still demand precision. The thin connectors change how you stabilize, how you roll, and how you lift, but they don’t eliminate the core risks.

    Here’s how the process changes when the stencil has micro‑connections instead of true floating islands.

    1. The stencil will behave like a single sheet—but the thin connectors flex

    Those tiny bridges prevent pieces from drifting independently, which is good. But they also make the stencil more prone to flexing or bowing when you apply pressure.

    What this means mechanically:

    • You no longer need to worry about islands shifting independently.
    • You do need to worry about the stencil bending slightly under roller pressure, which causes adhesive bleed under the narrow arches.

    Adjustment:

    Use even lighter pressure than you would with a floating‑island stencil.

    2. You still need light spray adhesive—but less of it

    Because the stencil is continuous, you don’t need to immobilize individual islands. You only need to keep the entire sheet flat.

    Use:

    • A very light mist of repositionable spray adhesive
    • Only enough to keep the stencil from lifting at the connectors

    If you over‑spray, the stencil will cling too hard and distort when lifted.

    3. The “dry‑roller” technique becomes even more important

    Thin connectors create tiny raised areas where adhesive can pool if the roller is too wet.

    Correct method:

    • Load roller lightly
    • Off‑load until nearly dry
    • Apply adhesive in multiple feather‑light passes
    • Avoid pressing downward—downward pressure flexes the connectors

    This stencil geometry demands a roller that is almost starved of adhesive.

    4. Lifting the stencil is easier—but must be vertical

    Because the stencil is continuous, you don’t need to support individual islands. But the thin connectors can still stretch if you peel sideways.

    Lift technique:

    • Lift straight up
    • Use two hands
    • Avoid peeling from one edge

    Vertical lift = no distortion.

    5. Registration becomes more reliable

    Continuous stencils hold their geometry better. You won’t get the micro‑misalignments that floating islands cause.

    Still:

    • Use a laser level
    • Use registration marks
    • Check alignment before each repeat

    Your Art Deco pattern is visually unforgiving—any drift is noticeable.

    6. Foil application stays the same

    The foil doesn’t care whether the stencil is continuous or not. It only cares about:

    • Adhesive thickness
    • Adhesive tack
    • Burnishing pressure
    • Foil sheet stability

    The narrow arches in your design will show any mistake immediately.

    7. Summary: What actually changes?

    Easier

    • No risk of islands shifting independently
    • Registration is more stable
    • Lifting is simpler

    Still critical

    • Ultra‑dry adhesive application
    • Even roller pressure
    • Vertical lifting
    • Careful burnishing
    • Perfect tack timing

    Still risky

    • Bleed under narrow arches
    • Flexing of thin connectors
    • Foil sheet movement during burnishing
    Andrew thanked wdccruise
  • PRO
    11 days ago

    I use autmotive pin striping for fine lines

    Andrew thanked Patricia Colwell Consulting
  • 11 days ago

    Thanks for all the input everyone

    I have decided to go with a latex mask over a fine line stencil. This seems the simplest, excluding wallpaper, thanks for the suggestion Jan. Wiil let you know how it goes.

    Best


  • 11 days ago

    The art deco stencil you are proposing is for furniture:

    Your proposed project appears to be difficult, extremely time-consuming, and error-prone.

    As Jan Moyer suggested, a wallpaper would be a better choice, IMO.

    Here's a youtube video where the presenter shows how to stencil with foil. Note the amount of effort it takes for just one, small stencil. You'd have to repeat this to cover a wall (vertical and you can't just move the surface around) and each iteration would have to be near perfect.

    Andrew thanked wdccruise
  • 11 days ago
    last modified: 11 days ago

    I'm kinda confused about what you're asking, but I am very experienced with stenciling:

    - The stencils I've used have had a "spot" in the corner to help you "set up the next image". I've put sticky notes on the wall and "marked" this spot with a pencil -- this means I don't have to write on the wall.

    - I've used painters tape to hold the stencil to the wall. If this means covering a portion of your design, I'd say do most of the design ... then move the tape and finish the last bit.

    - I've never used foil, but I know you can buy metalic paint. I'd test both items on poster board before beginning the project on your real wall.

    - The secrets to stenciling are: Load your flat stenciling brush with the least amount of paint possible. Brush it off onto a paper towel. Your brush must-must-must be as dry as possible. Don't "brush" like you're painting -- instead, PUSH the flat brush onto the wall. And wash your stencil every 2-3 images; yes, this gets old, but it's necessary for a good final product.

    - Practice, practice, practice before you start on your wall.

    The process is easy but VERY time consuming.

  • 11 days ago
    last modified: 11 days ago

    "I have decided to go with a latex mask over a fine line stencil"

    So you will do the following, correct?

    1. Attach the stencil to the wall.
    2. Apply latex masking fluid over the stencil.
    3. Remove the stencil, leaving the islands* masked (protected) by the latex.
    4. Apply foil adhesive to the unmasked areas.
    5. Apply, using pressure, the foil sheet to the adhesive.
    6. Peel the the latex off each island.
    7. Repeat Steps 1-6 for each section of wall.

    -----

    *the blue areas in the art deco stencil photo above

  • 11 days ago

    @wdccruise

    Nearly, I will stencil the whole wall at the same time. If I were to use a single stencil that would take forever. I have a machine that can cut stencils . Then remove the islands leaving the fine lines behind and paint pretty much the whole wall with mask, then remove the fine lines leaving the whole wall masked except for the fine lines.

  • PRO
    11 days ago
    last modified: 11 days ago

    : ) And we STILL do not know the where and why of the project, but will await the result and room pic ..on baited breath?

  • 11 days ago

    "Then remove the islands leaving the fine lines behind and paint pretty much the whole wall with mask, then remove the fine lines leaving the whole wall masked except for the fine lines."

    Reread what you wrote here. I don't think the order of activities is what you'll actually be doing.

  • 10 days ago

    Nearly, I will stencil the whole wall at the same time. If I were to use a single stencil that would take forever. I have a machine that can cut stencils .

    That's not particularly realistic.

  • 10 days ago

    Mrs Pete: "That's not particularly realistic."

    It sounds like he's going to cut a bunch of identical stencils, attach them all to the wall, and then do the masking/painting. But what he wrote, "Then remove the islands leaving the fine lines behind and paint pretty much the whole wall with mask, then remove the fine lines leaving the whole wall masked except for the fine lines" doesn't make sense to me. The foil plan seems to have been discarded.

  • 9 days ago
    last modified: 9 days ago

    It would be quicker and more accurate to 3-d print the line pattern on a thin paintable substrate, spray it with gold paint, and adhere it to the wall the way you'd install a wood lattice. Adhering foil is difficult even for pros.