


Remodeling Guides

Build a Beautiful Platform Deck in a Weekend
Create a polished outdoor space for entertaining by building a basic DIY platform deck in your own backyard

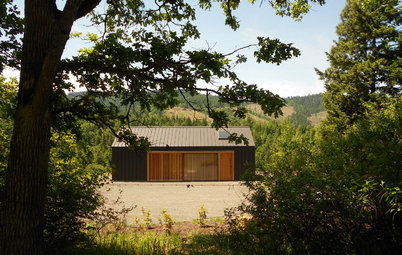
There are few things better than partying down with friends and family, but our small home’s current design isn’t ideal for hosting even one person — let alone a whole crew. While our interior is highly lacking in the space category, our exterior is more than adequate. And with summer finally here, we started scheming our first outdoor gathering.
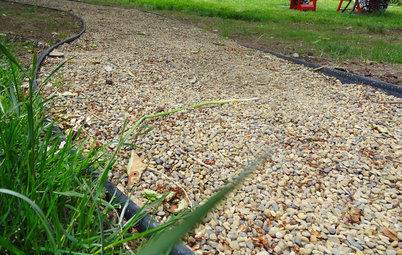
But those festive dreams were quickly shattered once we took one step out the back door and realized our backyard wasn’t the outdoor space my husband and I would be proud to show off. We had taken small steps to improve our outdoor space by adding a budget-friendly pathway and hanging shelves on our lackluster fence, but neither of those could take attention away from the eyesore right outside our entry — a bare piece of earth that just screamed, “Where’s the deck?” With that in mind, we set out to teach ourselves how to build a deck. Here’s what we learned.
But those festive dreams were quickly shattered once we took one step out the back door and realized our backyard wasn’t the outdoor space my husband and I would be proud to show off. We had taken small steps to improve our outdoor space by adding a budget-friendly pathway and hanging shelves on our lackluster fence, but neither of those could take attention away from the eyesore right outside our entry — a bare piece of earth that just screamed, “Where’s the deck?” With that in mind, we set out to teach ourselves how to build a deck. Here’s what we learned.
With your dimensions set and materials purchased, remove the siding where you will install a ledger board. Attach the ledger board the entire length of your deck to the wall of your house. We installed a 2-by-6 pressure-treated board with 3½-inch lag screws into the beam. Use a 3-foot level to ensure the board is level.
To protect the ledger and your home from water damage, install a drip edge by slipping metal flashing underneath the lip of the siding and bending the other end over the side of the ledger board with a scrap piece of wood. Seal the top seam where the flashing and siding meet with caulking.
To protect the ledger and your home from water damage, install a drip edge by slipping metal flashing underneath the lip of the siding and bending the other end over the side of the ledger board with a scrap piece of wood. Seal the top seam where the flashing and siding meet with caulking.
To build our 20- by 12-foot deck's foundation, we planned for the 4-by-4 support beams to be placed parallel to the ledger board at 5½ feet and 11 feet from the house. Distances will vary depending on the specific size of the deck.
To place the supports, measure your desired distance for the first support beam and set all pier blocks. Both your support beams and pier blocks should be no more than 6 feet apart.
Dig square holes with ample space for adjustment for your pier blocks. Have gravel on hand to place underneath the pier blocks. The gravel helps to provide a stable foundation and wards off erosion under the pier blocks.
Note: Consult your local building code to determine any regulations on the distance between support beams.
Once you have your pier blocks in place and have added your support beams, adjust both until they are parallel and at the desired height. Ensure your support beams are level. Next, rest a joist on the support beam perpendicular to and flush with the top of the ledger board. Use a level to determine your desired slope.
Before you attach the support beams to the pier blocks, use a joist flush with the end of the ledger, measure 6 feet in on the ledger from the inside of the board and 8 feet from the inside of the ledger along the joist. When these two marks are 10 feet apart, the joist is perpendicular. Ensure that the ends of your support beams are flush with the outside of this joist.
Once you have both the pier blocks and support beams in your desired location, secure the pier blocks into the support beams with deck screws. We chose to use DeckMate deck screws to reduce corrosion from our region's salty ocean air.
Arguments have been made for both level decks and slight slopes to ward off standing water. We built ours to have a very slight slope of ½ inch over a 12-foot span.
Note: This part of the process is the most important and time consuming. Attention to detail and precision are key to making the rest of the steps go smoothly.
To attach the floor joists, use standard face-mounting joist hangers to fully secure the floor joists to the ledger board with deck screws. Make sure you do not puncture the flashing when attaching the floor joists.
Typically, floor joists for a deck this size should be placed 16 inches on center. Adjustments on the end joists may be needed depending on your deck's specific length.
Next, mark the rim joist every 16 inches. Place the end of the rim joist flush with the end of the first mounted floor joist, flush with the top and centered on each mark for the additional floor joists, and attach with three deck screws on each floor joist end.
Toenail each side of the floor joists into the support beams. Use a tape measure to ensure they are 16 inches on center.
We had to angle one side of our deck to allow for gate clearance and adequate space to walk. To determine the correct angle, the two math teachers on the team used trigonometry.
Trig not your thing? Another option to finding the angle is to place the board flush with the ends to be cut and mark the angle from underneath.
Or keep it simple and skip the angled side altogether.
Trig not your thing? Another option to finding the angle is to place the board flush with the ends to be cut and mark the angle from underneath.
Or keep it simple and skip the angled side altogether.
With the foundation secure, attach the cedar decking to the floor joists with two deck screws. Each screw should be countersunk into the board to avoid a tripping hazard.
Use a 16d nail to create a uniform gap between each board, which will help the deck shed water.
It helps to have two or three people at this point — one to space and one to screw. Also, a shovel dug into the ground is helpful for leveraging a warped board straight.
Tip: Inspect both sides of the board for flaws. Attach the board with its best side up.
For a more finished look, consider filling the screw holes with stainable wood filler.
Next, trim off the overhang with a circular saw.
Power through your next project with your own set of power tools
Power through your next project with your own set of power tools
Our decking was a mix of new boards and older unused boards that had been stored outside, so a good cleaning was in order.
We chose to give the older boards a quick sanding to remove any water stains that had accumulated.
Another cleaning option is washing the deck with a mixture of 6 parts water and 1 part bleach.
Want the look of wood but with less maintenance? There are great recycled-content composite decking options out there, like MoistureShield, which uses 95 percent total recycled content.
Another cleaning option is washing the deck with a mixture of 6 parts water and 1 part bleach.
Want the look of wood but with less maintenance? There are great recycled-content composite decking options out there, like MoistureShield, which uses 95 percent total recycled content.
It is vital to make sure you have a clean surface before staining. So, once we were finished sanding, we swept and wiped down the decking to remove any sanding dust.
Then we checked the weather report and made sure we had a few days of sunny weather, and applied two coats of weatherproofing stain to the top and sides of the deck. We chose Behr Premium Semi-Transparent Weatherproofing Wood Stain in Cordovan Brown.
Then we checked the weather report and made sure we had a few days of sunny weather, and applied two coats of weatherproofing stain to the top and sides of the deck. We chose Behr Premium Semi-Transparent Weatherproofing Wood Stain in Cordovan Brown.
Before applying the first coat of stain, read all recommendations on the stain's label and note the drying time, taking into account any weather that could hinder your attempts at sealing the deck.
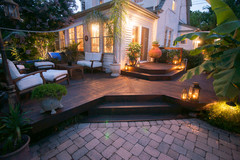
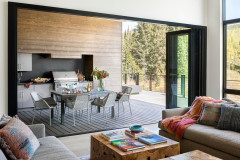
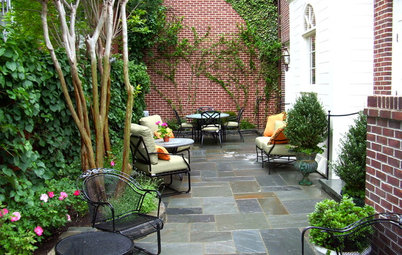
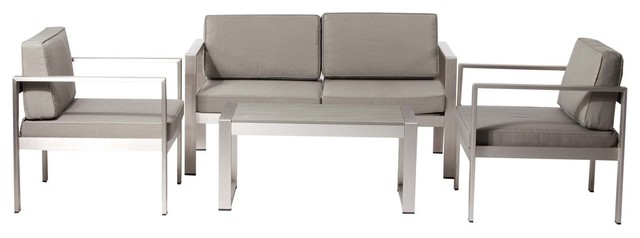
I used my new space to create a cozy outdoor seating area with an outdoor rug, a patio set and floor cushions.
Explore the world of modern patio furniture
Explore the world of modern patio furniture
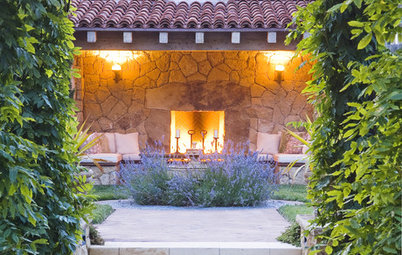
Accessorize with evergreen perennials and glass lanterns for color and texture.
Don't forget to protect your deck from long-term water damage by placing planting pots on a protective tray!
More:
Contractor Tips: Build a Top-Notch Deck
20 Tools Every Homeowner Should Have
More great ideas for decks
More:
Contractor Tips: Build a Top-Notch Deck
20 Tools Every Homeowner Should Have
More great ideas for decks


Whether you have a blank slate, like us, or your current deck or patio has seen better days, building this simple platform deck is easier than you think and can be done in a short amount of time, whether you do it yourself or hire a contractor to build it for you.
Before getting started, check your local building department for any size, height or basic building restrictions or permits required for building your deck.
Materials
Here’s what you need to build a simple backyard deck (quantities will vary depending on the size of your deck):
- Circular saw
- Drill
- Pier blocks
- Metal flashing
- 2-by-6 pressure-treated boards
- 4-by-4 pressure-treated posts
- 2-by-6 cedar decking
- 3½-inch lag screws
- Rustproof deck screws
- Measuring tape
- Level
- Weatherproofing wood stain
- Caulk
Next, design your deck. Measure the deck’s dimensions, map it out and take into account any features of the home you will have to work around. Having a solid plan will save you both time and money, plus a little peace of mind.We designed ours to be 20 feet long by 12 feet wide, an attached deck with an angled corner at one end.