
Search results for "Acceptance" in Home Design Ideas
 Focal Point Hardware
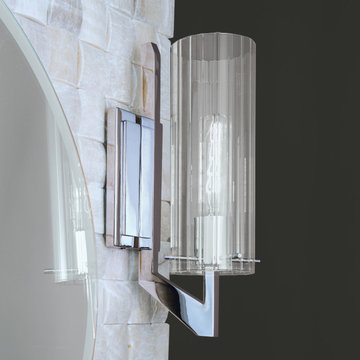
This Nowell lighting product Features:
Finish: Brushed Nickel
Glass: Clear Glass
Glass Size: 9.5" H x 3.5" W
Lamping Standard: (1) 60 Watt max medium base E26
Height: 12.75"
Width: 3.75"
This sconce offers a ribbed, clear glass cylinder. The unique glass detail is complemented by a sleek angular arm. The ribbed glass is supported by clean, ornamental screws that seamlessly hold the glass in place. Accepts one 60-Watt Medium Base incandescent or LED replacement bulb.
 Total Pool + Patio, LLC
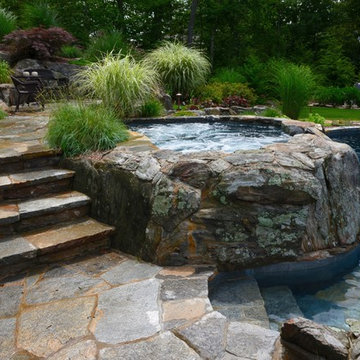
Our client wanted a backyard that would make them feel like they are on vacation all summer long. Challenge accepted! Our signature raised hot tub, dune style plantings, Gunite Pool Installation and natural stone finishings allowed us to blend this poolscape into our client's backyard like it has been there for centuries. Step out into your personal backyard oasis. Yes Please!
 Tile Doctor Ltd
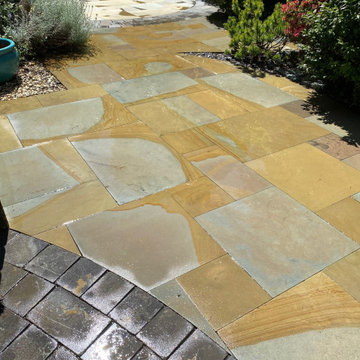
This Indian Sandstone Patio in Bolton-Le-Sands near Lancaster had not been cleaned successfully for several years. Although the owner had power washed it on occasion, that won’t rid you of Black Spot, Mould, Lichen etc and this will build-up over the years. It does clean the stone up to a certain standard but at some point, it will need further treatment.
My client had now reached this point and decided to give Tile Doctor a call to have it renovated. We discussed the Patio which ran around the house and calculated that it measured approximately 60m2. With the measurements and a summary of the issues I was able to work out a quote which they were happy to accept.
To improve the appearance of the stone I started by giving it a power wash to remove the general grime and dirt. I used a top of the range Karcher Pressure Washer for this which can apply up to 20 bars of pressure. The machine also comes with a spinner attachment results in a much more even clean than simply using the spray head.
The patio was left to dry for thirty minutes before applying neat Tile Doctor Patio & Brick Driveway Cleaner. Please note this is a very powerful product meant for professional use so if you’re using it always wear gloves and protective glasses. You leave it on the stone for ten minutes or longer before working it in. The directions on the back of the bottle say recommend leaving it for two to four hours, but its general advice. Personally, I find it is best to test the timing on a small inconspicuous area first, leave it on for say ten minutes then add a bit of water, scrub the surface and if the Black Spot disappears then that is all the time you need. If the stain is stubborn, increase the time. The two to four hour recommendation is really for difficult Black Spots that have become ingrained into the stone and then the product needs longer to digest the stain before it can work.
Once that was done, I used the power washer on low pressure to wash the products off the stone and into the sewerage drain, a wet vacuum comes in handy for this. Don’t dispose of it into the grass or planting areas as the strong chemicals in the product could upset them. Many properties have a soak away to capture rainwater from gutters, so you need to make sure it’s the sewage drain you are using.
As you can see on the pictures, this product really does work and got rid of the Black Spot completely. To maintain the patio a regular jet wash was recommended, the household versions are ideal for keeping it clean and tidy.
Due to the size of the Sandstone patio the whole process took around six hours to complete. Once done though the patio looked transformed and was all ready for a barbeque and some guests. Hopefully, it will stop raining long enough for this to happen.
Russell Taylor
Lancashire Tile Doctor
Find the right local pro for your project
 Probuilt Design + Build
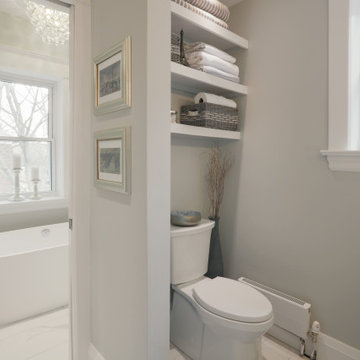
Phase II of our Raymond Project. The challenge was getting as much bathroom into this older Toronto home, and challenge accepted! Providing separate spaces to allow for the relaxing bath or shower. Replacing old radiators with the sleek Stelrad. Stunning!
 Tile Doctor Ltd
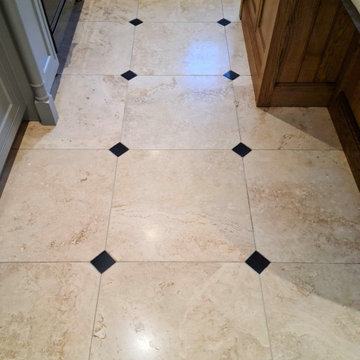
The pictures show a large Limestone floor laid through much of the ground floor of a property situated on the outskirts of York seventeen years prior.
The owners had three dogs that slept in their own doggy room. The floor in this room was in the worst condition of the five rooms as it had been subject to significant wear and tear. The Limestone tiles looked dull with ingrained dirt and the grout was stained and patchy.
The original tiler had laid the floor well, but he had applied a satin topical sealer to the stone most of which had worn off over the years. A floor like this would need a little maintenance and the sealer reapplying from time to time to maintain it.
I completed a test clean for the client to show them what could be achieved which came out well. Happy with the result they accepted my quote for the restoration work, and we booked in a suitable time to complete the work.
The area was quite large, so I separated the job into rooms and started by protecting the skirtings and woodwork from splashing etc. I decided to do a chemical clean first to remove what was left of the old sealer but more importantly to give the grout a thorough clean which was making the floor look scruffy.
For this I opted to apply a strong dilution of Tile Doctor Pro-Clean which was left to dwell for a short while and then worked in with a mechanical rotary cleaner. It gets to work on the ingrained dirt and sealer. It should also help to get rid of the doggy smells. This process turns the cleaning solution black and is then extracted using a wet vacuum keeping the mess to a minimum. I paid particular attention to the grout which was deeply discoloured and found that some areas required going over a couple of times to get them clean. I was only just getting started on the cleaning but immediately the floor was looking so much better.
I then deep cleaned the Limestone with a set of diamond burnishing pads, working in sequence from the 400 grit through to 1500 grit. A small amount of water was used to aid the lubrication and after each pad have been over the entire area few times the solution is rinsed off with more water and extracted with the wet vacuum.
The floor came back to almost new and as the client wanted a satin finish, I ended by applying a 3000-grit pad to add a deeper polish to the Limestone. The floor was then left overnight to dry.
The last step of polishing with the 3000-grit pad already leaves the floor quite dry however I always like to check before sealing so just to be sure I took some reading with a damp meter. The readings were fine, so I started applying the first of two coats of Tile Doctor Ultra Seal to finish the floor. This is an impregnating sealer (as opposed to the previous topical sealer) that soaks into the stone protecting it from within but without affecting its appearance. This product was chosen in consultation with the client who was specific about how they wanted to floor to look.
The floor now looked superb. Both the client and l were very pleased with the finished floor and so where the dogs! For aftercare I recommended Tile Doctor Stone Soap which is designed for cleaning polished stone floors like these, it’s a gentle stone cleaner that helps maintain the patina and ideal for this type of floor.
Nigel Stoker
North West Yorkshire Tile Doctor
 Green Builders GRP LLC
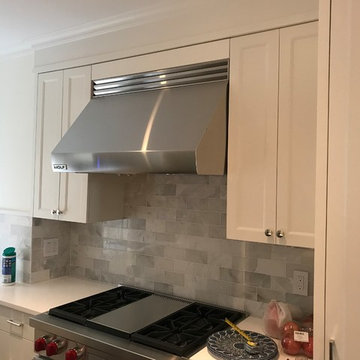
When we got a green light from the designer and the customer after their acceptance of our shop drawing, we started fabrication of those custom made cabinets. During fabrication some changes were made, the designer wanted to gain as much space as possible so the contractor had to open up some additional walls where all electrical and plumbing pipes were hidden.
By doing that, we had to resize some of the cabinets, which resulted in change an order. The kitchen cabinet fronts had a custom profile which was very unique. All of the custom cabinets were made of pre-finished maple inside and satin lacquer fronts outside. Drawers slides were by Blum under mount soft close; cabinet doors hinges by Blum soft closing. The upper cabinets got under mount LED lights.
Living room units were made of pre-finished maple inside and primed outside only; the client wished to apply wall paint on them rather than lacquer that we use to make sure it blends in with the walls leaving rough surface. Overall, we did a fantastic job. Just a small hint to everyone, before you make any decision think first before it might get more costly later.
 Soucie Horner, Ltd.
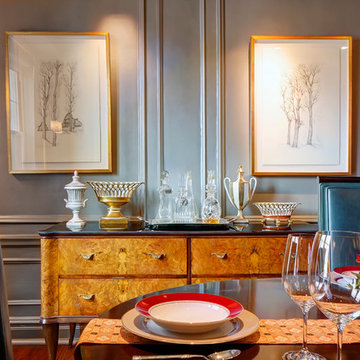
Home of an inveterate collector with a keen eye, the hallmarks of this renovated, 1927 Beaux Arts residence are neutral walls and fabrics that celebrate the treasured artwork, rugs, and architecture within. Eclectic objects and furnishings discovered on world travels, antiquing expeditions, and even those inherited mingle easily in relaxed, strategically un-designed fashion. Intentionally void of superfluous decoration to accept flexible furniture arrangements, the mood of this home can swing in an instant simply by rearranging a chair, or swapping pillows - proving the most personal spaces are also the most versatile.

 User
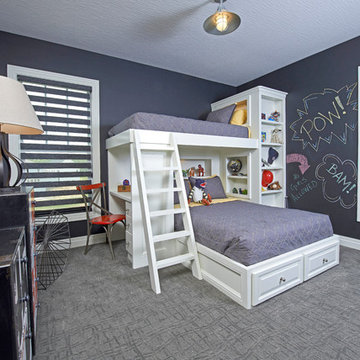
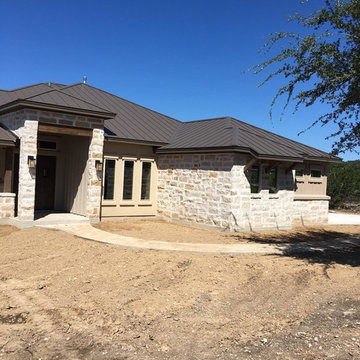
UserMid-sized elegant beige one-story mixed siding house exterior photo in Austin with a hip roof and a metal roof
 A Cut Above, Inc.
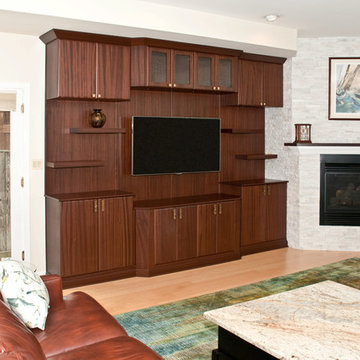
Solid ribbon striped sapele (mahogany) doors, cabinet tops, and moldings along with ribbon-striped sapele veneer paneling result in this stunning contemporary media cabinetry. There is cabinet lighting inside the glass door uppers, beneath the glass door upper cabinet, and beneath the floating shelves each on their own circuit. This is truly one of a kind cabinetry by A Cut Above, Inc.

 Kitchen Refresh
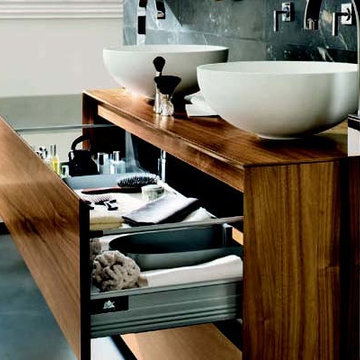
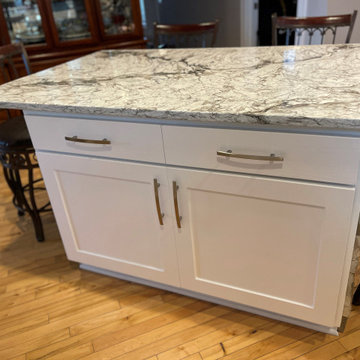
This homeowner was ready for reconfigurations, a new look and modern charm! Updated cabinetry, a new location for the microwave, backsplash, countertops and a nice new hood vent!
HOW MUCH WAS IT?
For $7,971, this kitchen received:
+ All NEW doors
+ NEW top light doors
+ All NEW pantry doors
+ All NEW panel ends
+ All NEW pull hardware/handles
+ All NEW soft-close drawer boxes
+ All NEW concealed soft-close hinges
+ All NEW drawer fronts
+ All NEW crown moulding
+ All NEW storage solution (tilt-out, soft close tray on sink base, spice and pot/pan rack)
+ Cabinet boxes painted to coordinate with the new door finish
Color palette:
Cabinetry: Ash White thermofoil finish
Hardware: Clear Creek - Satin Nickel
For an additional $6,945 Vicostone Avalanche countertops were added, along with $3,812 using Glass Platinum for the backsplash.
Remember, with Kitchen Refresh you get:
+FAST: Makeovers in 1-5 Days, not 2-5 Months!
+BEAUTIFUL: Free expert Design Consultant services!
+AFFORDABLE: Up to 75% less than custom cabinets!
Contact us today:
Complete this form: https://bit.ly/2QLt79w
+Email us at mail@kitchenrefresh.net
+Call us at 701.291.3446
Visa & MasterCard Accepted
Preferred Lender Financing
 Stebnitz Builders, Inc.
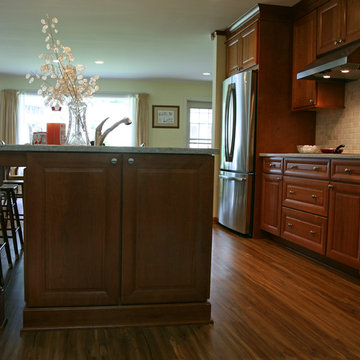
Our clients had a very comfortable getaway home in Williams Bay. But, like the wall of fame that displayed the memorable fish they’d landed over the years, their kitchen needed to be rearranged and refreshed to better serve the friends and family they looked to host.
The small gallery-style kitchen was small and blocked off to the rest of the home. It was very restrictive when friends and family gathered. It needed a new layout to accommodate more people, more comfortably. This required a change to the layout of the adjoining great room and entryway.
Walls were removed and modified to accept the larger kitchen layout and integrate seamlessly with the great room and entryway, creating a warm and comfortable area where our clients could now entertain and interact at the same time – no longer hidden away in the tight quarters of their old kitchen.
And of course … We made plenty of room to display their wall of fame with room to add even more memories.
 De Blueprint
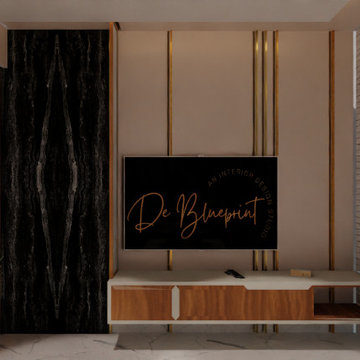
One of our other sample apartment project was completed for a reputable Jaipur builder. The room could be designed as we wanted, as long as it was aesthetically pleasing. This design was accepted right away, which felt like winning the Oscars.
PS: The project is still under progress, the actual photographs will be posted soon
 User
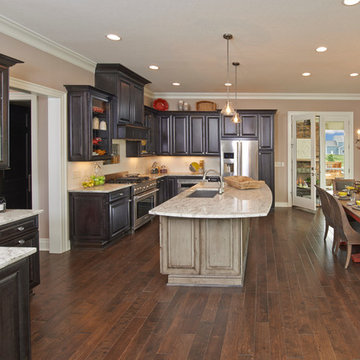
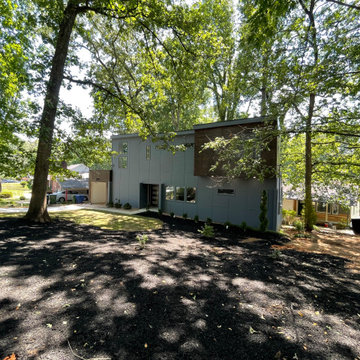
UserIn 2021, Reynard Architectural Designs accepted its first design project. Our team partnered with Tobars Dobbs to transform a tiny, abandoned ranch in West Atlanta into an expansive contemporary modern home.
The first floor, existing brickwork, and main structure where kept in tact. The original ranch was a closed floor plan with 2 bedrooms and 2 bathrooms with an extended hallway. All the interior finishes, appliances and walls were removed to convert the home into an open floor plan that maximizes space on the first floor. The finished home is a modern contemporary design that doubled the number of bedrooms, created four accessible outdoor decks, and created a fresh look that balances simplicity with plenty of character.
The home on Shirley Street takes advantage of minimalist/modern design elements, clean white countertops and cupboards that are complimented nicely by classic stainless steel finishes. The original ranch home was once confined and segmented.
Now, an open stairway that is bathed in natural light leads to the main living space above. Low profile jack and jill vanity mirrors, a soaker tub with a view, and a spacious shower all highlight the serene master bathroom.
The master bedroom makes great use of light with a small, private transom above the bed and easy outdoor access to a private patio deck behind the main sleeping quarters.
A private getaway shaded by the surrounding live oaks is just what's needed after a long day at work. The home on Shirley Street features four of these private patio decks that provide additional entertainment and relaxation space.
 Toulmin Kitchen & Bath
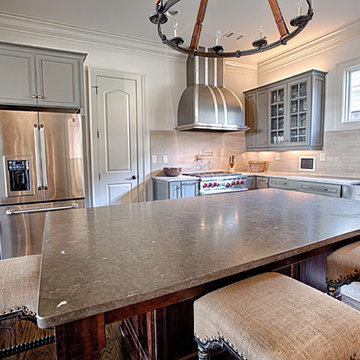
Floor to ceiling diamond shaped wine bins provide ample storage for a wine collection and will accept the larger format Pinot Noir bottles.
Photography: Lance Holloway
 Tile Doctor Ltd
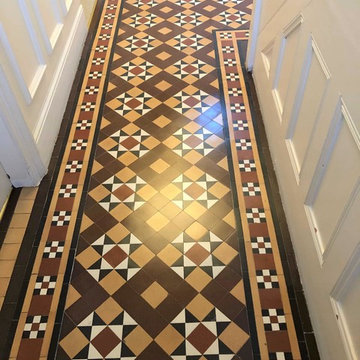
It’s not just major restoration work we do at Tile Doctor, sometimes a simple clean and seal is all that is required and that was the case at this property in Evesham. This medieval market town lies within the Vale of Evesham and is encompassed by the River Avon. It is located between the larger towns of Worcester, Cheltenham and Stratford-upon-Avon.
I was contacted by the owner and I arranged a visit to view their Victorian Hallway. The floor was in very good condition, but the previous sealer was now in-effective and the floor was dull and needed a good clean and seal. The colours were starting to fade, and it was due some attention. Sealers do wear off over time so if you have a similar floor to this it’s worth bearing that in mind. We discussed the work required and the cost involved, my quote was accepted, and the work scheduled.
On arrival I set up my equipment and covered any areas of carpet to protect from splashing during cleaning. I then used Tile Doctor Remove and Go spraying the product onto the floor allowing it to dwell for 10 minutes thus breaking down any sealers. This product is a non-flammable, multi-purpose stripper which works best when left to soak in for some time before scrubbing. This product is also great for drawing out ingrained stains and removing heavy grease build up.
The floor was then pasted with Tile Doctor Acid Gel which works to neutralise any alkaline salts in the tiles that can cause efflorescence later. This is a common issue with old floors which often do not have a damp proof membrane in place. I then went to work with my scrubbing machine and a black pad and worked the products into the tile. The resulting slurry was then rinsed off with water and removed with a wet vacuum.
I then went over the floor with microfibres and water to remove any remaining marks before leaving it to dry off overnight and ready for sealing.
I returned the following day and started by checking the floor was dry using a moisture meter. To seal the floor, I chose Tile Doctor Seal and Go Extra which is a fully breathable semi- gloss sealer which made a huge difference to the floor. Choosing a fully breathable sealer is important for floors that don’t have a damp proof membrane as you want to encourage any dampness to rise through the tile and not get trapped underneath where it might spread into the walls.
The deep clean and new seal brought out the vibrant colours in the tiles which were now shining through enhances by the lovely sheen which customer was very pleased with.
For aftercare I left the customer with a bottle of Tile Doctor Neutral Tile Cleaner which being concentrated goes a long way. Once diluted with water the product becomes completely pH neutral which unlike most household cleaners and washing up liquids which contain bleaches won’t prematurely degrade the sealer with use.
Mark Conway
Worcestershire Tile Doctor
 Klopf Architecture
Built for the Bluff, A Sea Ranch Home is Remade from the Inside Out
The house had always been grounded, on an ocean bluff at The Sea Ranch. It sits unencumbered, adjacent to one of the most dramatic stretches of the Sonoma coast with protected commons meadow to the east, uninterrupted Pacific views to the west, and a bluff trail running alongside. What it lacked was the feeling of home, one that could hold up its own against the natural landscape.
The owners are entrepreneurs with deep involvement across tech, real estate, and development and they know how things are built. The Sea Ranch house had been in their lives for years, a second residence and a place for family to gather. Built for a different time, it felt more compromising than comfortable. Sitting in a closed off nook, the kitchen fit one cook at a time and turned its back on the rest of the house. The entry was dim and compressed, divided by a structural column that presented itself at exactly the wrong moment. The primary suite was small relative to the view outside it. A large rear bedroom sat behind a lowered ceiling with a bathroom that had never been added. The house was certainly worth the trouble of doing it right.
What followed was not one project but four, each with its own design challenge, each addressed over a period of time.
Where the House Meets the Ocean
The most complex piece of the project, in both structural and spatial terms, was the kitchen expansion. The existing room was a single-person galley squeezed in as an afterthought with no meaningful connection to the dining room, the living space, or the deck outside. To make it useful for a family that cooks and gathers, it needed to grow outward into an existing patio and flow into the rooms around it.
A big challenge was the roofline. Several planes at different pitches and angles converged directly where additional volume was needed. A new form had to join that geometry without reading as a correction. The solution found the simplest possible connection between the existing angles, a roofline that from outside the structure, appears entirely original. From the bluff trail where the addition is visible, there is no discernible seam.
Inside, the kitchen is now open to the living and dining rooms without interruption. A large sliding glass door connects the space onto the rear deck. The deck itself was expanded and oriented so that the body of the house shields it from the coastal wind which is a common consideration that determines whether outdoor space at The Sea Ranch actually gets used. The result is a room that works for large family gatherings where no one feels cutoff, and one that makes the boundary between being inside and outside easy to ignore.
Welcoming Light
A structural column stood at the convergence of eight distinct roof planes in the entry. It was load-bearing, but it was also the reason the entry had always felt like a hallway rather than a welcoming arrival.
With the structural engineer, a custom steel connector was designed to receive beams from six separate directions, redistributing the load through a single new continuous beam. The column was surgically removed. Three triangular skylights were then cut into the roof above, their shapes drawn from the
existing geometry of the planes around them. The entry is now bright and open. The skylights feel native to the structure because they follow the logic already present in the roof.
Two Suites, Two Views
At opposite ends of the house, the two bedroom suites were each reconfigured, and each found a different way to introduce more of the landscape into the room.
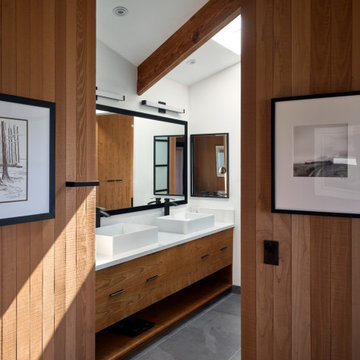
An addition to the primary suite extended the structure outward to create a wraparound plan with a loop from the bedroom through bath and closet that had not been possible before. The expansion opened a slot view from the tub and shower toward the ocean. The view is precise and private. The ocean view is present and deliberate.
The rear bedroom absorbed an adjacent storage room to transform it into a full second suite with a vaulted ceiling, a large bathroom with a tub, a shower, and a sauna. A private fenced garden courtyard sits just beyond the glass bringing the outdoors inside. The tub was placed so that, looking past the courtyard and through the bedroom beyond, the ocean is visible at the far end. It is a long view and it makes the room feel larger and more settled than its footprint would suggest.
Glass on Four Sides, Fire at the Center
The main living and gathering room had always been caught between two competing facts: glass on four sides meant exceptional views but at The Sea Ranch, it also meant a cold room. A 360-degree cylindrical fireplace was added at the center on a raised stone base, providing radiant heat in every direction and giving the room a focal point around which a group naturally orients itself, whether that means two people at the end of the day or the whole family after dinner.
Owners Who Picked Up the Tools
The owner was not a passive client. they came with construction knowledge, specific ideas, and the desire to be an active part of the process, a dynamic that other architects may had found difficult, which Klopf Architecture accepted as an asset. They took it upon themselves to complete some of the work during construction, including the installation of a new radiant heating system beneath the floors.
The radiant system added to the older and less-desirable forced-air setup. At The Sea Ranch, that change matters as the house sits close enough to the ocean and moving air competes with the sound of it, where radiant heat does not. Solar panels were added to the roof as part of the new system. Insulation was upgraded throughout the walls, roof, and crawl space. The house that had always had the right setting now holds warmth the way a house on the bluff should.
They were also deeply involved in the design and selections throughout, and the finished house reflects both of them in ways that are specific rather than generic. The process took longer and moved through more iterations than a more arms-length relationship might have allowed. The result is more defined and personal because of it.
The Landscape Holds Priority
Every exterior decision was shaped by The Sea Ranch Design Standards, which require that buildings defer to the landscape around them rather than compete with it. Because this house sits on the bluff and is visible from the public trail, the additions faced a close review. Existing materials were matched. Geometries were resolved. The additions had to become indistinguishable from the original building.
From the trail, the house reads exactly as it always has — low, cedar-clad, secondary to the meadow and the water. The setting holds priority. Inside, the house has been remade.
Klopf Architecture Project Team: Geoff Campen and Trenton Jewett
Contractor: Shawn Bettega Construction
Photography: ©2025 Mariko Reed
Year Completed: 2023
Location: The Sea Ranch, CA

 G Michael's Restoration
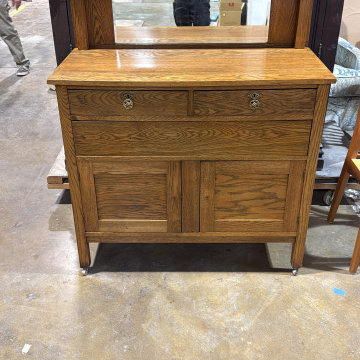
his project presented a challenging but rewarding structural and cosmetic restoration. The piece arrived with the bottom drawer entirely absent and the upper drawer carcasses reduced to facade panels only, requiring complete fabrication of new components before any finishing work could begin.
Scope of Work:
Custom Fabrication — A fully new bottom drawer was constructed from raw oak stock, engineered to match the original joinery profile and interior dimensions precisely. New drawer boxes were fabricated for the upper compartments to accept the existing original front panels.
Color Matching & Toning — Matching new-growth raw oak to an aged, patinated antique finish requires a methodical approach. Custom stain blends were developed and applied in multiple tonal layers to achieve a seamless visual integration between old and new material.
Surface Restoration — Traditional French Polish was applied across the entire piece to unify and revive the original shellac finish, followed by a high-grade paste wax application for long-term surface protection and depth of sheen.
The result is a structurally sound, fully functional piece with a restored finish that honors the original craftsmanship. G. Michaels Restoration specializes in this level of period-accurate restoration for residential, hospitality, and design-led projects throughout Northern Colorado.
 Rebel Builders
After receiving a referral by a family friend, these clients knew that Rebel Builders was the Design + Build company that could transform their space for a new lifestyle: as grandparents!
As young grandparents, our clients wanted a better flow to their first floor so that they could spend more quality time with their growing family.
The challenge, of creating a fun-filled space that the grandkids could enjoy while being a relaxing oasis when the clients are alone, was one that the designers accepted eagerly. Additionally, designers also wanted to give the clients a more cohesive flow between the kitchen and dining area.
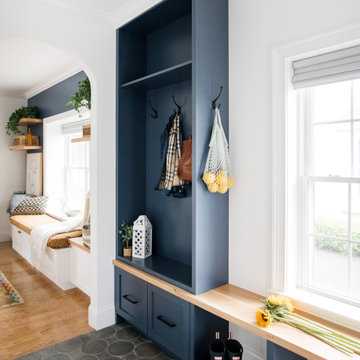
To do this, the team moved the existing fireplace to a central location to open up an area for a larger dining table and create a designated living room space. On the opposite end, we placed the "kids area" with a large window seat and custom storage. The built-ins and archway leading to the mudroom brought an elegant, inviting and utilitarian atmosphere to the house.
The careful selection of the color palette connected all of the spaces and infused the client's personal touch into their home.
 Pennsylvania Landscape & Nursery Association
Terren Landscapes http://www.terrenlandscapes.com
Project Entry: Pembrooke Estate Rain Garden
2014 PLNA Awards for Landscape Excellence Winner
Category: Sustainable Landscape &60,000-$120,000
Award Level: Silver
Project Description:
The client contracted our company to solve multiple existing drainage problems. In a heavy rain event the existing French drain system would overflow, causing water to pool in the driveway. After investigating the system we found that the capacity of the French drain was undersized for the amount of storm water from the large rain events received in recent years. As a result of our findings and at the request of the homeowner, we designed a storm water management system to capture all storm water from the structures on the property and regenerate the underground aquifers for the volume of a 5.8” rainstorm. In addition to the new drain system, the homeowners wanted a rain garden to provide a backdrop for an existing formal garden, provide a habitat for wildlife, and provide screening from an adjacent neighbor.
Throughout the design process many challenges were presented, including an existing gas line, which ran directly through the area that best suited the bioswale. The existence of the gas line caused us to alter the shape and depth of the bioswale in some areas. We also inspected the existing downspouts to make sure there were no obstructions that would impede the system’s efficiency, and then conducted a test pit dig to make sure we had sufficient percolation rates for disposal of storm water.
To effectively capture the storm water runoff, the existing downspouts were piped from the main house and the large detached garage to a large catch basin located at the low point in the driveway. The driveway catch basin contains two outlet pipes at different elevations within the basin allowing water from smaller rain events to enter the bioswale and rain garden area to percolate into the soil before excess water overflows into a sediment trap which filters out any debris and is then piped to an underground StormTech® pit to slowly percolate into the ground. The other outlet pipe in the driveway catch basin is used for larger storm water events, taking the water directly to the StormTech® pit.
Accepting and slowing the velocity of the storm water, mitigation of erosion, and filtering out pollutants contained in the “first flush” of rainfall are the primary functions of the bioswale and rain garden. Planting these areas with mostly native plant species helps carry out these functions while attracting and providing shelter for wildlife.
The ‘Niobe’ weeping willow is the centerpiece of the rain garden, connecting with the axis of the existing formal garden. To screen the neighboring property we chose Chamaecyparis nootkatensis ‘Pendula’ for its graceful evergreen habit and tolerance of wet sites. ‘Ivory Halo’ dogwood and Panicum ‘Cloud Nine’ were used for screening as well as winter interest. To provide deciduous structure to the garden Taxodium distichum and Magnolia virginiana were used in conjunction with witch hazel. Mostly native wetland perennials were used due to their tolerance of wet conditions and occasional drought.
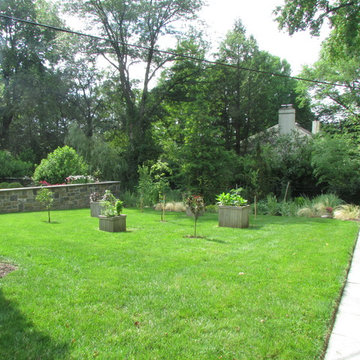
The area above the StormTech® pit provides space for the client’s family to relax. The rain garden and bioswale provide screening, storm water management, a habitat for wildlife, and plants that enhance the adjacent formal garden.
Photo Credit: Terren Landscapes
71