
Search results for "Accurately assess" in Home Design Ideas
 Randolph Design + Build
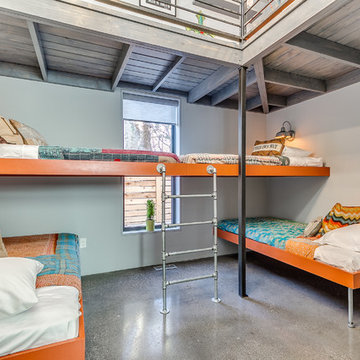
Custom built in bunk beds accommodate many children while providing space needed.
OK Real Estate Photography
Kids' bedroom - contemporary gender-neutral concrete floor and gray floor kids' bedroom idea in Oklahoma City with gray walls
Kids' bedroom - contemporary gender-neutral concrete floor and gray floor kids' bedroom idea in Oklahoma City with gray walls

 Free Lancing
Effective residential construction project management is crucial in today’s fast-moving building industry. It means overseeing every step of building a home, from planning to finishing, to ensure projects are completed time, within budget, and with high quality. Unlike commercial projects, residential projects require special attention to meet homeowners' unique needs and wishes, requiring a customized approach from the beginning to the end.
In 2025, the construction sector will use advanced technologies like AI and integrated project delivery (IPD) to streamline processes and improve stakeholder collaboration. However, project managers face significant challenges, including managing risks, maintaining quality control, and ensuring effective communication among team members.
A WIP Report (Work-in-Progress Report) is a key tool that helps track a project's budget, progress, and resource use. It provides clear insights, making managing costs easier, avoiding delays, and making informed decisions.
By adopting best practices and using modern construction management tools, project managers can overcome these challenges and deliver successful residential construction projects that meet client expectations and contribute to a sustainable future.
This article provides a brief overview of residential construction project management, highlights its importance, and touches on the challenges faced by project managers while incorporating the latest trends and technologies in the field.
Types of Residential Construction Management
Here are the different types of Residential Construction Management:
Single-Family Homes: These are standalone houses built for individual families. Managing these projects involves overseeing construction from planning to completion, ensuring that the home meets the owner's preferences and budget.
Multi-Family Housing: This includes apartments, condominiums, and townhouses. Projects of this type require managing multiple units, often with shared facilities, and ensuring compliance with local building codes.
Custom Home Building: This involves constructing homes tailored to specific client needs. Close collaboration with architects and designers is required to ensure the house reflects the owner's personality and preferences.
Home Renovation and Remodeling: These projects focus on updating or expanding existing homes. They often involve working with subcontractors for specialized tasks like electrical or plumbing work.
Components of Residential Construction Project Management
Managing a residential construction project requires carefully coordinating people, materials, and timelines. A well-structured approach ensures efficiency, cost control, and high-quality results.
Roles and Responsibilities
A project manager plays a vital role in residential construction. They oversee every step from planning to completion and ensure the project stays on schedule, within budget, and meets quality standards.
Project Manager’s Role in Home Construction
The project manager is responsible for organizing tasks, managing resources, and solving problems that arise during construction. They coordinate between different teams, track progress, and ensure safety regulations are followed.
Collaboration with Contractors, Architects, and Stakeholders
Successful residential construction requires teamwork. Project managers work closely with architects to bring designs to new heights, coordinate with contractors to manage labor and materials, and keep stakeholders (such as homeowners and investors) informed about project updates.
Client Communication and Expectations Management
Clear communication with clients is essential. The project manager keeps homeowners updated on timelines, changes, and challenges. Setting realistic expectations and providing regular updates, they help avoid misunderstandings and keep the project running smoothly.
Project Scope & Planning
Practical project planning sets the foundation for a successful residential construction project. It ensures clear goals, minimizes risks, and keeps the project on track.
Defining Project Objectives and Deliverables:
Clearly outlining what needs to be done and what the final result should look like is essential. This involves setting specific, measurable goals that align with the homeowner's vision and budget.
Managing Homeowner Expectations and Scope Creep:
Homeowners often have changing needs or ideas. Effective project managers must manage these expectations to prevent "scope creep," which can delay projects and increase costs. This involves open communication and setting clear boundaries.
Ensuring Compliance with Zoning Laws and Permits:
Before construction begins, it's crucial to ensure that all necessary permits are obtained and that the project complies with local zoning laws. This step avoids costly fines and delays, ensuring the project moves forward smoothly.
Budgeting & Cost Control
Proper budgeting is essential for keeping residential construction projects financially viable. Effective cost management prevents overspending and ensures profitability.
Accurate Cost Estimation for Residential Projects
A precise cost estimate considers labor, materials, permits, and unexpected expenses. Using historical data and Sage 300 CRE for financial management improves accuracy and helps set realistic budgets.
Budget Allocation and Tracking
Allocating funds efficiently ensures that each phase of the project receives the necessary resources. Tracking expenses through Construction & Financial Dashboards allows for real-time monitoring and early detection of budget deviations.
Preventing Budget Overruns
Uncontrolled costs can derail a project. Regular financial reviews, automated alerts for overspending, and contingency planning help keep expenses in check and prevent financial strain.
Scheduling & Timeline Management
Timely project completion is crucial in residential construction. Effective scheduling minimizes delays and ensures a smooth workflow.
Creating Detailed Project Schedules
A structured schedule outlines all tasks, deadlines, and dependencies. Breaking down the project into phases, planning, execution, and finishing, helps maintain order and clarity.
Preventing Delays & Meeting Deadlines
Delays can result from labor shortages, weather conditions, or supply chain issues. To avoid problems, it’s good to check for risks ahead of time, add extra time to schedules, and keep everyone on the same page.
Using Gantt Charts and Critical Path Methods
CPM for Construction helps identify critical activities that directly impact project completion, while Gantt charts provide a visual timeline of tasks. Both tools optimize scheduling and improve efficiency.
Residential Construction Project Management Phases
Managing a residential construction project effectively requires a structured approach through various phases. Each phase plays a critical role in ensuring the project's success, from initial planning to completion.
Pre-Construction Phase
The pre-construction phase sets the foundation for a smooth and efficient building process. Proper planning at this stage helps prevent costly changes and delays later.
Site Analysis & Approvals: A thorough site analysis assesses soil conditions, topography, and environmental factors. Feasibility studies evaluate project viability, including costs and regulatory compliance. Obtaining zoning approvals, permits, and other legal clearances is crucial before breaking ground.
Selecting Materials and Procurement Strategies: Choosing the right materials impacts durability, sustainability, and cost efficiency. A well-planned procurement strategy, including bulk purchasing and reliable supplier partnerships, ensures timely delivery and cost savings. Using Sage 300 CRE for procurement management helps streamline material sourcing and financial planning.
Construction Phase
The construction phase transforms plans into reality. Effective coordination and strict quality control ensure a successful build.
Resource Allocation and Workflow Coordination: Efficiently managing labor, equipment, and materials is key to maintaining progress. Using CPM for Construction, project managers can allocate resources strategically, prevent bottlenecks, and optimize workflows for timely completion.
Project Closeout & Handover
The final phase of residential construction project management is crucial for ensuring a smooth transition from construction to occupancy. Proper closeout procedures guarantee quality, client satisfaction, and long-term project success.
Final Inspections and Quality Assurance: Before finishing the project, a final inspection checks that everything meets safety rules and quality standards. Any problems need to be fixed quickly. Using Procore helps make inspections and tracking issues easier, ensuring a high-quality final product.
Client Walkthrough and Support: A final check helps homeowners see the finished work, ask questions, and make sure it meets their expectations. This is also a chance to explain important home features and maintenance tips. Good communication here builds trust and strengthens relationships.
Warranty Management and Feedback: Efficient warranty management ensures clients get quick help for any issues after construction. A clear process for tracking requests and keeping in touch with homeowners boosts satisfaction. Collecting feedback helps improve future projects. Using S-Curve Forecasting tracks performance trends and refines management strategies.
Software for Residential Construction Project Management
The integration of technology in residential construction project management has revolutionized the way projects are planned, executed, and monitored. Digital tools streamline operations, reduce costs, and improve communication, making them essential for modern construction firms.
Importance of Digital Tools
Investing in digital tools is crucial for construction firms as it transforms the industry by enhancing efficiency, accuracy, and collaboration across the entire project lifecycle. They also improve project management by streamlining processes, automating tasks, and facilitating real-time stakeholder communication.
Top Construction Management Software for Residential Projects
Several software solutions are available for managing residential construction projects:
Procore: Known for its comprehensive project management features, including document management and collaboration tools.
Sage 300 CRE: Offers robust accounting and financial management capabilities, ideal for large-scale construction projects.
Buildertrend: Specializes in residential construction, providing tools for project scheduling, budgeting, and client communication.
CoConstruct: Focuses on custom home building and remodeling, offering features for estimating, scheduling, and project management.
WIP Reports: Useful for tracking work-in-progress and managing project finances effectively.
Features Comparison and Best Use Cases:
Procore: Best for large projects requiring extensive collaboration and document management.
Sage 300 CRE: Ideal for firms needing robust financial management.
Buildertrend: Suitable for residential builders focusing on client communication and project scheduling.
CoConstruct: Perfect for custom home builders who need detailed estimating and scheduling tools.
WIP Reports: Useful for firms needing to track project finances closely.
How Software Improves Project Efficiency
Construction management software significantly enhances project efficiency in several ways:
Automating Accounting and Job Costing: Software like Sage 300 CRE automates financial tasks, reducing manual errors and improving budget tracking.
Streamlining Document Management and Communication: Tools like Procore centralize documents and facilitate real-time communication among team members, reducing misunderstandings and delays.
Mobile-Friendly Solutions for Real-Time Tracking: Mobile apps from platforms like Buildertrend allow for on-site access to project data, enabling real-time tracking and decision-making.
These digital tools and software solutions are essential for modern residential construction project management, offering benefits such as improved efficiency, enhanced collaboration, and better financial control.
Challenges in Residential Construction Project Management
Residential construction projects face a variety of challenges that can impact their success. Here are some of the key issues project managers encounter:
Managing Subcontractors and Labor Shortages
One of the biggest challenges in residential construction is managing subcontractors and dealing with labor shortages. Subcontractors often have their own schedules and priorities, which can lead to delays if not coordinated properly. Additionally, labor shortages can slow down projects and increase costs due to the need for overtime or hiring temporary workers.
Budget Overruns and Unexpected Costs
Budget overruns are common in residential construction due to factors like material price fluctuations, unexpected site conditions, or changes in project scope. Effective budget management involves regularly monitoring expenses and having contingency plans for unexpected costs.
Changing Construction and Eco Rules
Construction and Eco Rules are always changing, so project managers need to keep up with the latest regulations. This involves following guidelines for saving energy, protecting the environment, and ensuring safety. Ignoring these rules can lead to fines, delays, or even stopping the project.
Best Practices
To ensure your residential construction projects run smoothly and successfully, follow these essential best practices:
Setting Clear Project Goals and Milestones
Clearly defining what you want to achieve is the first step to success. Set specific, measurable, achievable, relevant, and time-bound (SMART) goals. This helps everyone involved understand what needs to be done and by when. For example, instead of saying "build a house," say "build a house with three bedrooms and two bathrooms within the next nine months."
Stakeholder Collaboration
Good communication is key to keeping everyone on the same page. Regular meetings with contractors, suppliers, and homeowners help prevent misunderstandings and ensure that everyone knows what's happening and what's next. This open dialogue also helps resolve issues quickly, preventing small problems from becoming big delays.
Using Data-Driven Insights for Decision-Making
Making decisions based on facts rather than guesses is crucial. Use data and analytics to understand project progress, identify potential issues early, and make informed decisions. For instance, if data shows that a particular material is consistently causing delays, you can plan ahead to avoid those delays in the future.
Proactive Risk Management Strategies
Things don't always go as planned, so being prepared is essential. Identify potential risks early and have a plan to manage them. This might include having backup suppliers, planning for weather conditions, or setting aside extra funds for unexpected expenses. Being proactive can prevent small issues from turning into major problems.
Conclusion
Effective residential construction project management requires careful planning, clear communication, and the right digital tools. From single-family homes to multi-family housing and custom projects, managing timelines, budgets, and quality is essential for success.
By following best practices, using project management software, and staying ahead of industry trends, project managers can ensure smooth execution and client satisfaction despite challenges like labor shortages, budget overruns, and regulatory compliance; modern technology and strategic planning help mitigate risks.
Construction firms can improve efficiency, enhance collaboration, and maintain financial control by adopting advanced tools like Procore, Sage 300 CRE, and Buildertrend. A well-managed project delivers a quality home and builds trust and long-term success in the industry.
FAQs
What is residential construction project management?
It involves overseeing all aspects of building residential properties, from initial planning and design to construction and completion, ensuring projects are completed on time, within budget, and to the desired quality standards.
How can I prevent budget overruns in my construction project?
Accurate cost estimation, continuous budget tracking, and having contingency plans for unexpected expenses are key strategies to prevent budget overruns.
What are the main stages of a residential construction project?
The primary stages include design, pre-construction, procurement, and construction.
How does construction management software improve project efficiency?
It streamlines processes like scheduling, budgeting, and communication, providing real-time data access and collaboration among stakeholders, which enhances overall project efficiency.
How can I ensure my project complies with local building codes and regulations?
Engage professionals familiar with local laws, obtain all necessary permits before starting, and conduct regular inspections to ensure adherence to building codes and regulations.
Find the right local pro for your project
 Fabricators Unlimited
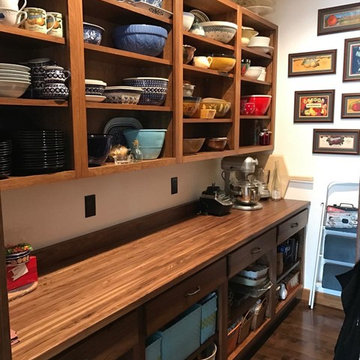
Countertop: Thomas Creek - Narrow edge grain Walnut
Inspiration for a mid-sized timeless galley laminate floor and brown floor kitchen pantry remodel in Minneapolis with shaker cabinets, medium tone wood cabinets, wood countertops, stainless steel appliances and an island
Inspiration for a mid-sized timeless galley laminate floor and brown floor kitchen pantry remodel in Minneapolis with shaker cabinets, medium tone wood cabinets, wood countertops, stainless steel appliances and an island
 Free Lancing
Effective residential construction project management is crucial in today’s fast-moving building industry. It means overseeing every step of building a home, from planning to finishing, to ensure projects are completed time, within budget, and with high quality. Unlike commercial projects, residential projects require special attention to meet homeowners' unique needs and wishes, requiring a customized approach from the beginning to the end.
In 2025, the construction sector will use advanced technologies like AI and integrated project delivery (IPD) to streamline processes and improve stakeholder collaboration. However, project managers face significant challenges, including managing risks, maintaining quality control, and ensuring effective communication among team members.
A WIP Report (Work-in-Progress Report) is a key tool that helps track a project's budget, progress, and resource use. It provides clear insights, making managing costs easier, avoiding delays, and making informed decisions.
By adopting best practices and using modern construction management tools, project managers can overcome these challenges and deliver successful residential construction projects that meet client expectations and contribute to a sustainable future.
This article provides a brief overview of residential construction project management, highlights its importance, and touches on the challenges faced by project managers while incorporating the latest trends and technologies in the field.
Types of Residential Construction Management
Here are the different types of Residential Construction Management:
Single-Family Homes: These are standalone houses built for individual families. Managing these projects involves overseeing construction from planning to completion, ensuring that the home meets the owner's preferences and budget.
Multi-Family Housing: This includes apartments, condominiums, and townhouses. Projects of this type require managing multiple units, often with shared facilities, and ensuring compliance with local building codes.
Custom Home Building: This involves constructing homes tailored to specific client needs. Close collaboration with architects and designers is required to ensure the house reflects the owner's personality and preferences.
Home Renovation and Remodeling: These projects focus on updating or expanding existing homes. They often involve working with subcontractors for specialized tasks like electrical or plumbing work.
Components of Residential Construction Project Management
Managing a residential construction project requires carefully coordinating people, materials, and timelines. A well-structured approach ensures efficiency, cost control, and high-quality results.
Roles and Responsibilities
A project manager plays a vital role in residential construction. They oversee every step from planning to completion and ensure the project stays on schedule, within budget, and meets quality standards.
Project Manager’s Role in Home Construction
The project manager is responsible for organizing tasks, managing resources, and solving problems that arise during construction. They coordinate between different teams, track progress, and ensure safety regulations are followed.
Collaboration with Contractors, Architects, and Stakeholders
Successful residential construction requires teamwork. Project managers work closely with architects to bring designs to new heights, coordinate with contractors to manage labor and materials, and keep stakeholders (such as homeowners and investors) informed about project updates.
Client Communication and Expectations Management
Clear communication with clients is essential. The project manager keeps homeowners updated on timelines, changes, and challenges. Setting realistic expectations and providing regular updates, they help avoid misunderstandings and keep the project running smoothly.
Project Scope & Planning
Practical project planning sets the foundation for a successful residential construction project. It ensures clear goals, minimizes risks, and keeps the project on track.
Defining Project Objectives and Deliverables:
Clearly outlining what needs to be done and what the final result should look like is essential. This involves setting specific, measurable goals that align with the homeowner's vision and budget.
Managing Homeowner Expectations and Scope Creep:
Homeowners often have changing needs or ideas. Effective project managers must manage these expectations to prevent "scope creep," which can delay projects and increase costs. This involves open communication and setting clear boundaries.
Ensuring Compliance with Zoning Laws and Permits:
Before construction begins, it's crucial to ensure that all necessary permits are obtained and that the project complies with local zoning laws. This step avoids costly fines and delays, ensuring the project moves forward smoothly.
Budgeting & Cost Control
Proper budgeting is essential for keeping residential construction projects financially viable. Effective cost management prevents overspending and ensures profitability.
Accurate Cost Estimation for Residential Projects
A precise cost estimate considers labor, materials, permits, and unexpected expenses. Using historical data and Sage 300 CRE for financial management improves accuracy and helps set realistic budgets.
Budget Allocation and Tracking
Allocating funds efficiently ensures that each phase of the project receives the necessary resources. Tracking expenses through Construction & Financial Dashboards allows for real-time monitoring and early detection of budget deviations.
Preventing Budget Overruns
Uncontrolled costs can derail a project. Regular financial reviews, automated alerts for overspending, and contingency planning help keep expenses in check and prevent financial strain.
Scheduling & Timeline Management
Timely project completion is crucial in residential construction. Effective scheduling minimizes delays and ensures a smooth workflow.
Creating Detailed Project Schedules
A structured schedule outlines all tasks, deadlines, and dependencies. Breaking down the project into phases, planning, execution, and finishing, helps maintain order and clarity.
Preventing Delays & Meeting Deadlines
Delays can result from labor shortages, weather conditions, or supply chain issues. To avoid problems, it’s good to check for risks ahead of time, add extra time to schedules, and keep everyone on the same page.
Using Gantt Charts and Critical Path Methods
CPM for Construction helps identify critical activities that directly impact project completion, while Gantt charts provide a visual timeline of tasks. Both tools optimize scheduling and improve efficiency.
Residential Construction Project Management Phases
Managing a residential construction project effectively requires a structured approach through various phases. Each phase plays a critical role in ensuring the project's success, from initial planning to completion.
Pre-Construction Phase
The pre-construction phase sets the foundation for a smooth and efficient building process. Proper planning at this stage helps prevent costly changes and delays later.
Site Analysis & Approvals: A thorough site analysis assesses soil conditions, topography, and environmental factors. Feasibility studies evaluate project viability, including costs and regulatory compliance. Obtaining zoning approvals, permits, and other legal clearances is crucial before breaking ground.
Selecting Materials and Procurement Strategies: Choosing the right materials impacts durability, sustainability, and cost efficiency. A well-planned procurement strategy, including bulk purchasing and reliable supplier partnerships, ensures timely delivery and cost savings. Using Sage 300 CRE for procurement management helps streamline material sourcing and financial planning.
Construction Phase
The construction phase transforms plans into reality. Effective coordination and strict quality control ensure a successful build.
Resource Allocation and Workflow Coordination: Efficiently managing labor, equipment, and materials is key to maintaining progress. Using CPM for Construction, project managers can allocate resources strategically, prevent bottlenecks, and optimize workflows for timely completion.
Quality Control and Ensuring Compliance with Safety Regulations: Strict adherence to building codes and safety standards is non-negotiable. Regular inspections, worker training, and real-time quality monitoring ensure a structurally sound and legally compliant project. Proactive safety measures prevent accidents and project disruptions.
Project Closeout & Handover
The final phase of residential construction project management is crucial for ensuring a smooth transition from construction to occupancy. Proper closeout procedures guarantee quality, client satisfaction, and long-term project success.
Final Inspections and Quality Assurance: Before finishing the project, a final inspection checks that everything meets safety rules and quality standards. Any problems need to be fixed quickly. Using Procore helps make inspections and tracking issues easier, ensuring a high-quality final product.
Client Walkthrough and Support: A final check helps homeowners see the finished work, ask questions, and make sure it meets their expectations. This is also a chance to explain important home features and maintenance tips. Good communication here builds trust and strengthens relationships.
Warranty Management and Feedback: Efficient warranty management ensures clients get quick help for any issues after construction. A clear process for tracking requests and keeping in touch with homeowners boosts satisfaction. Collecting feedback helps improve future projects. Using S-Curve Forecasting tracks performance trends and refines management strategies.
Software for Residential Construction Project Management
The integration of technology in residential construction project management has revolutionized the way projects are planned, executed, and monitored. Digital tools streamline operations, reduce costs, and improve communication, making them essential for modern construction firms.
Importance of Digital Tools
Investing in digital tools is crucial for construction firms as it transforms the industry by enhancing efficiency, accuracy, and collaboration across the entire project lifecycle. They also improve project management by streamlining processes, automating tasks, and facilitating real-time stakeholder communication.
Top Construction Management Software for Residential Projects
Several software solutions are available for managing residential construction projects:
Procore: Known for its comprehensive project management features, including document management and collaboration tools.
Sage 300 CRE: Offers robust accounting and financial management capabilities, ideal for large-scale construction projects.
Buildertrend: Specializes in residential construction, providing tools for project scheduling, budgeting, and client communication.
CoConstruct: Focuses on custom home building and remodeling, offering features for estimating, scheduling, and project management.
WIP Reports: Useful for tracking work-in-progress and managing project finances effectively.
Features Comparison and Best Use Cases:
Procore: Best for large projects requiring extensive collaboration and document management.
Sage 300 CRE: Ideal for firms needing robust financial management.
Buildertrend: Suitable for residential builders focusing on client communication and project scheduling.
CoConstruct: Perfect for custom home builders who need detailed estimating and scheduling tools.
WIP Reports: Useful for firms needing to track project finances closely.
How Software Improves Project Efficiency
Construction management software significantly enhances project efficiency in several ways:
Automating Accounting and Job Costing: Software like Sage 300 CRE automates financial tasks, reducing manual errors and improving budget tracking.
Streamlining Document Management and Communication: Tools like Procore centralize documents and facilitate real-time communication among team members, reducing misunderstandings and delays.
Mobile-Friendly Solutions for Real-Time Tracking: Mobile apps from platforms like Buildertrend allow for on-site access to project data, enabling real-time tracking and decision-making.
These digital tools and software solutions are essential for modern residential construction project management, offering benefits such as improved efficiency, enhanced collaboration, and better financial control.
Challenges in Residential Construction Project Management
Residential construction projects face a variety of challenges that can impact their success. Here are some of the key issues project managers encounter:
Managing Subcontractors and Labor Shortages
One of the biggest challenges in residential construction is managing subcontractors and dealing with labor shortages. Subcontractors often have their own schedules and priorities, which can lead to delays if not coordinated properly. Additionally, labor shortages can slow down projects and increase costs due to the need for overtime or hiring temporary workers.
Budget Overruns and Unexpected Costs
Budget overruns are common in residential construction due to factors like material price fluctuations, unexpected site conditions, or changes in project scope. Effective budget management involves regularly monitoring expenses and having contingency plans for unexpected costs.
Changing Construction and Eco Rules
Construction and Eco Rules are always changing, so project managers need to keep up with the latest regulations. This involves following guidelines for saving energy, protecting the environment, and ensuring safety. Ignoring these rules can lead to fines, delays, or even stopping the project.
Best Practices
To ensure your residential construction projects run smoothly and successfully, follow these essential best practices:
Setting Clear Project Goals and Milestones
Clearly defining what you want to achieve is the first step to success. Set specific, measurable, achievable, relevant, and time-bound (SMART) goals. This helps everyone involved understand what needs to be done and by when. For example, instead of saying "build a house," say "build a house with three bedrooms and two bathrooms within the next nine months."
Stakeholder Collaboration
Good communication is key to keeping everyone on the same page. Regular meetings with contractors, suppliers, and homeowners help prevent misunderstandings and ensure that everyone knows what's happening and what's next. This open dialogue also helps resolve issues quickly, preventing small problems from becoming big delays.
Using Data-Driven Insights for Decision-Making
Making decisions based on facts rather than guesses is crucial. Use data and analytics to understand project progress, identify potential issues early, and make informed decisions. For instance, if data shows that a particular material is consistently causing delays, you can plan ahead to avoid those delays in the future.
Proactive Risk Management Strategies
Things don't always go as planned, so being prepared is essential. Identify potential risks early and have a plan to manage them. This might include having backup suppliers, planning for weather conditions, or setting aside extra funds for unexpected expenses. Being proactive can prevent small issues from turning into major problems.
Conclusion
Effective residential construction project management requires careful planning, clear communication, and the right digital tools. From single-family homes to multi-family housing and custom projects, managing timelines, budgets, and quality is essential for success.
By following best practices, using project management software, and staying ahead of industry trends, project managers can ensure smooth execution and client satisfaction despite challenges like labor shortages, budget overruns, and regulatory compliance; modern technology and strategic planning help mitigate risks.
Construction firms can improve efficiency, enhance collaboration, and maintain financial control by adopting advanced tools like Procore, Sage 300 CRE, and Buildertrend. A well-managed project delivers a quality home and builds trust and long-term success in the industry.
FAQs
What is residential construction project management?
It involves overseeing all aspects of building residential properties, from initial planning and design to construction and completion, ensuring projects are completed on time, within budget, and to the desired quality standards.
How can I prevent budget overruns in my construction project?
Accurate cost estimation, continuous budget tracking, and having contingency plans for unexpected expenses are key strategies to prevent budget overruns.
What are the main stages of a residential construction project?
The primary stages include design, pre-construction, procurement, and construction.
How does construction management software improve project efficiency?
It streamlines processes like scheduling, budgeting, and communication, providing real-time data access and collaboration among stakeholders, which enhances overall project efficiency.
How can I ensure my project complies with local building codes and regulations?
Engage professionals familiar with local laws, obtain all necessary permits before starting, and conduct regular inspections to ensure adherence to building codes and regulations.
 Stacy Alexander Design + Real Estate
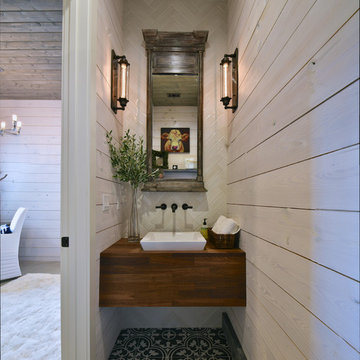
Fire Dance Parade of Homes Texas Hill Country Powder Bath
https://www.hillcountrylight.com

 HMH Architecture + Interiors
The kitchen was reconfigured to accommodate a walk in pantry. Upper cabinets were eliminated to open the kitchen to spectacular views.
© Andrew Pogue Photo

Sponsored
Bealeton, VA

Iris Design Associates
Northern Virginia Landscape Architect - 13x Best of Houzz Winner!
 Windy City Painters
ver look at your iron fence and wonder how rust crept up so fast? For homeowners across Chicago's North Side and Near West Side, that moment of recognition often comes too late. Windy City Painters built this project guide to help you understand exactly what a professional iron fence restoration involves, what products matter, and what Chicago's climate demands from every coat of paint applied to exposed metal.
PROJECT OVERVIEW
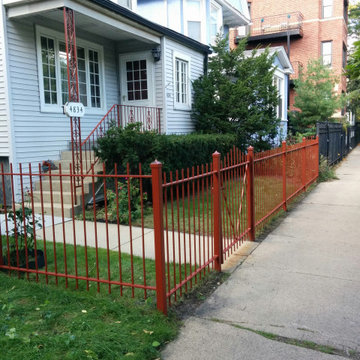
This iron fence restoration involved a multi-unit property featuring an ornamental iron perimeter fence typical of Chicago's greystone and courtyard building streetscape. The fence presented moderate-to-severe surface rust, multiple areas of paint delamination, and two sections with deep pitting requiring needle gun descaling before any coating could be applied. The goal was full rust remediation and a durable topcoat finish built for Chicago's demanding climate. Windy City Painters completed the project in two days with zero damage to surrounding hardscape.
MATERIALS AND PRODUCTS
Ospho Rust Converter - A phosphoric acid-based treatment that chemically transforms iron oxide into iron phosphate, halting active corrosion before primer is applied. Essential on Chicago iron exposed to decades of salt air and freeze-thaw cycling.
Corroseal Rust-Inhibitive Primer - A water-based latex primer with built-in rust inhibitors, applied over converted surfaces to seal and prepare metal for topcoating.
Sherwin-Williams DTM Acrylic Coating - Direct-to-Metal formulation delivering exceptional adhesion, flexibility, and corrosion resistance. Available in satin and semi-gloss, ideal for ornamental iron fence painting across Chicago properties.
THE PROCESS
Step 1 - Mechanical Surface Preparation: Wire wheel grinding with angle grinder attachments removed all loose rust scale, failing paint, and surface contamination. Heavily pitted sections received needle gun descaling to expose clean stable metal beneath. This step determines everything. No primer or topcoat performs correctly over compromised metal, regardless of product quality. Windy City Painters treats prep as the primary investment on every iron fence project.
Step 2 - Rust Conversion: Ospho was applied liberally to all areas showing active rust. The phosphoric acid reaction was allowed to complete fully before any priming began. On severely oxidized sections, a second Ospho application ensured complete conversion. This step is non-negotiable in Chicago where freeze-thaw cycles push moisture into every surface irregularity.
Step 3 - Priming with Corroseal: Full coverage Corroseal primer coat sealed the converted surface and established adhesion for the finish coats. Corroseal's rust-inhibitive chemistry adds a secondary barrier against moisture penetration, extending the effective life of the topcoat by years in Chicago's humid lakefront environment.
Step 4 - DTM Topcoat Application: Two coats of Sherwin-Williams DTM acrylic in satin black were applied by brush to ensure full penetration into ornamental detail. DTM's flexibility accommodates the metal expansion and contraction Chicago temperatures demand, from minus-15 winters to 95-degree July afternoons. Final coverage was uniform and true to color.
CHICAGO-SPECIFIC CHALLENGES
Chicago iron faces challenges most other markets do not. Lake Michigan humidity accelerates surface oxidation year-round. Road salt from winter de-icing migrates to fence bases and lower rails. Freeze-thaw cycling cracks poorly adhered coatings within a single winter. Greystones, two-flats, and Victorian brownstones often feature original ornamental ironwork with decades of layered paint that must be assessed before any new coating is added. Windy City Painters factors all of these conditions into every iron fence estimate and material selection.
WHAT TO EXPECT LONG-TERM
A properly prepared and coated iron fence using the Ospho, Corroseal, and Sherwin-Williams DTM system should deliver 5-8 years of performance in Chicago conditions. Annual visual inspection for chips or scratches, followed by prompt spot priming, extends that timeline significantly. Full refinishing cycles become less frequent when the initial prep work is done correctly.
PRO TIPS
Tip 1 - Never skip the rust converter. Painting over active rust with even the best topcoat guarantees early failure. Ospho or a comparable phosphoric acid treatment must precede any primer on iron showing orange or brown oxidation.
Tip 2 - Assess for weld repairs before scheduling painting. If rust has eaten through the metal creating structural voids or broken sections, a welder must address those areas before painting begins. Windy City Painters identifies weld repair needs during the free estimate.
Tip 3 - Choose satin or semi-gloss finish on iron. Flat finishes on metal hold moisture and show wear faster. Satin DTM provides enough sheen to shed water while maintaining the traditional look Chicago ornamental iron demands.
Ready to restore your iron fence the right way? Visit windypainters.com to schedule your free estimate with Windy City Painters.
FAQ
Q: What does iron fence painting cost in Chicago?
A: Most residential iron fence projects range from $500 to $1,800 depending on linear footage, rust severity, and prep requirements. Windy City Painters provides free detailed on-site estimates for accurate iron fence painting cost in Chicago.
Q: How do I know if my fence needs rust conversion or just repainting?
A: Any visible orange or brown rust requires chemical conversion before priming. Windy City Painters evaluates every fence during the estimate to determine whether Ospho, mechanical prep, or weld repair is needed before coating begins.
Q: Can you paint iron in cold Chicago weather?
A: DTM coatings have lower application temperature thresholds than standard exterior paint, but we avoid application below 35 degrees Fahrenheit. Windy City Painters schedules iron fence projects for appropriate weather windows throughout the season.
Q: How long does iron fence paint last in Chicago?
A: With complete rust conversion, Corroseal priming, and Sherwin-Williams DTM topcoat, iron fence painting in Chicago lasts 5-8 years. Annual inspections and prompt touch-ups of chips extend that timeline further.
Q: Do I need a welder before an iron fence can be painted?
A: Only if rust has created structural voids or breaks in the metal. Windy City Painters assesses this during the free estimate and can coordinate with welders when needed before our painting crew begins.
Q: What is the difference between Ospho and Corroseal?
A: Ospho is a rust converter applied directly to active rust to chemically neutralize it. Corroseal is a rust-inhibitive primer applied over converted or clean metal. Windy City Painters often uses both in sequence for maximum protection on Chicago iron.
Q: How often should Chicago iron fences be inspected?
A: Annual inspection is recommended, ideally in early spring after winter salt and freeze-thaw exposure. Catching small chips and bare spots early allows simple touch-up rather than full iron fence repainting, saving significant cost.
 Maria Blogs
It’s always an excellent idea to renovate some corners in your house if you are looking to sell. It is crucial for you to remember to ‘sell it right,’ which means doing the upgrades and renovations accurately for your homebuyer. Some of the best home renovations — for instance, an upgraded kitchen, remodeled bathroom, or a new deck — can get expensive. This is why it is important to know what kind of return you might expect before you think of taking on a remodeling project.
Top Home Renovations in 2021
If you have smartly budgeted for major remodeling projects, here are some of the upgrades that will immediately add more value to your homes:
Kitchen Remodel
People can go wild in kitchen renovations, but it’s not always required. A kitchen remodeling, if done the right way, is certain to add more value to your home. You will love an even higher return if you remodel a kitchen with traditional designs and builds. This will include replacing your cabinets, refrigerator, stove, flooring, and even sinks and faucets.
Nowadays, a kitchen’s functionality and convenience are becoming more and more important. For instance, lowered light switches, cabinets, and racks can make it simpler for an elderly person or someone with a disability to explore the kitchen if they use a wheelchair. Cabinets with a hydraulic system can make it possible for a homeowner to move their position, ensuring it’s available within your reach no matter your mobility level.
Improving Your Outdoor Appeal
The outdoor appeal is basically the first impression of your home. That old front door, cracked driveway won’t help potential buyers feel an eternal connection with your home. The outdoor appeal can be improved with the application of new paint, gardening, or attractive landscaping. Hence, it is necessary for you to consider beforehand what improvements you are going to make, what you can do yourself, and what you need to outsource.
Begin where your property meets the main street. Are the walls well maintained and colored? Do driveways need to be redone or just a quick water blast to clean them? Do you need to paint your door or close the cracks on them or add a couple of planter pots to give more warmth to the entrance?
More expensive things include painting your house, adding a deck, or fencing your property. Before taking these costly projects, do seek professional advice about whether this will increase your property’s value.
Including Square Footage to Your Home
As mentioned above, expensive additions in remodeling include house extensions and reconfigurations of old rooms. This may lead to a larger ROI, so they’re worth assessing. You may want to add a bedroom, build a home office corner, make the living area by making it more spacious or add another bathroom. These extensions all add value to your home, but you’ll want to guarantee that you can get your money back once you sell the property.
Big projects are more expensive. Homeowners may want to think of applying for a home improvement loan to help them finance the project or ensure they have financial assistance in case the cost goes over the board.
The Bottom Line
Renovating your home not only adds to your excitement but can also increase your home’s value over time, as well.
If you live in an urban area, your listing might be competing with other upgraded homes to grab the buyers’ attention. When you refinance your house, for example, remodeling will be considered when a property appraiser studies your home’s current market value. Higher home value means you’ll get more equity and a lower loan-to-value ratio. Moreover, you might even be able to cancel personal mortgage insurance payments earlier than expected.
When you decide to sell your home, buyers will expect to see a clean, attractive home with modern updates that’s ready to move in.
 Wanda Ely Architect Inc.
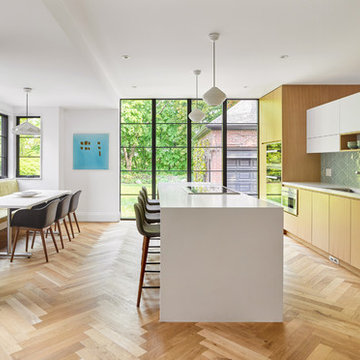
The kitchen becomes the home’s central gathering space; from casual meals at the banquette table, to after-school snacks, or entertaining friends around the island, the kitchen accommodates a variety of ways for family and friends to gather around food and drink.
 Tampa Home Inspections
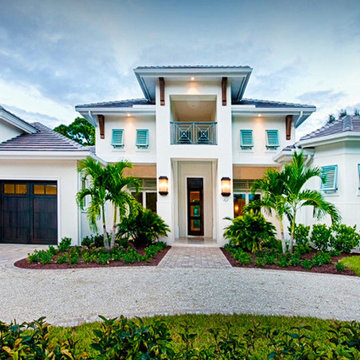
 specializes in home inspection services in Wesley Chapel, FL and the greater Tampa area. Serving all four counties of Hillsborough, Pasco, Hernando, and Pinellas. Our expert team offers a range of services such as Four-Point Inspections, Wind Mitigation Inspections, 11-Month Warranty Inspections, Standard Home Inspections, and Pre-Drywall Inspections. Certified by InterNACHI and highly experienced, we ensure each inspection is conducted with meticulous attention to detail. Whether you're a homeowner seeking peace of mind or a prospective buyer needing a thorough property evaluation, we provide accurate assessments to meet all your inspection needs. Trust us for reliable, efficient, and professional inspection services in the Tampa area.
 Mayflower Construction Group
How Planning Leads to Successful Construction
Construction projects, whether small residential jobs or large commercial builds, require more than just skilled labor and high-quality materials. The foundation of a successful project lies in effective planning. Proper planning ensures efficiency, minimizes risks, and keeps the project within budget and on schedule. Here’s how thorough planning leads to successful construction:
1. Clear Project Scope and Objectives
Defining the project scope early on helps prevent scope creep and miscommunication. Establishing clear goals, deliverables, and timelines ensures that everyone involved understands the expectations. This prevents delays and unnecessary changes during construction.
2. Accurate Budgeting and Cost Control
A well-planned project includes a detailed cost estimation. This accounts for labor, materials, permits, and unexpected contingencies. Without proper budgeting, costs can spiral out of control, leading to financial strain and potential project failure.
3. Efficient Resource Management
Proper planning helps allocate resources effectively, including manpower, equipment, and materials. Scheduling workers and ordering materials at the right time avoids delays caused by shortages or logistical issues.
4. Risk Identification and Mitigation
Every construction project comes with risks—weather delays, supply chain issues, safety hazards, or regulatory compliance concerns. Planning ahead allows for risk assessment and the implementation of strategies to mitigate potential problems before they occur.
5. Compliance with Regulations and Permits
Failing to secure the necessary permits or adhere to building codes can halt a project indefinitely. Planning ensures that all legal requirements are met in advance, avoiding costly fines and legal complications.
6. Seamless Communication and Coordination
A structured plan includes clear communication protocols between contractors, architects, engineers, and clients. When everyone is on the same page, mistakes are reduced, and the workflow remains smooth.
7. Improved Project Scheduling
A construction schedule outlines each phase of the project, from site preparation to finishing touches. A well-planned schedule helps keep tasks on track, prevents unnecessary delays, and ensures timely project completion.
8. Higher Quality Workmanship
Planning allows for a structured approach to quality control. By setting benchmarks, conducting inspections, and using the right materials, projects meet industry standards and client expectations.
9. Better Client Satisfaction
When a project is completed on time, within budget, and meets quality expectations, client satisfaction increases. A satisfied client is more likely to recommend your services and return for future projects.
Conclusion
In construction, planning isn’t just a step—it’s the backbone of success. From budgeting and resource management to compliance and scheduling, thorough planning prevents costly errors, improves efficiency, and ensures a high-quality outcome. Whether you're working on a small driveway installation or a large-scale commercial project, investing time in planning will always pay off in the long run.
Do you need expert concrete construction services that prioritize planning and quality? Contact us today!
 Windy City Painters
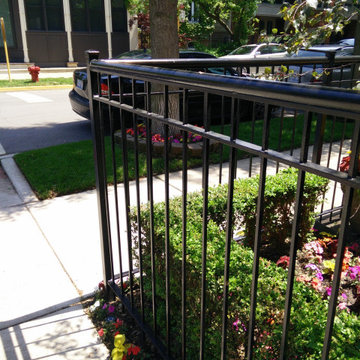
Ever notice how your iron fence looks worse every spring after Chicago winters? That steady seasonal decline is not inevitable - it is a preparation and coating problem that Windy City Painters solves with systematic metal restoration.
PROJECT OVERVIEW
Iron fence painting in Chicago requires more than a fresh coat of paint. Chicago's freeze-thaw cycles, road salt exposure, and high seasonal humidity create conditions that destroy inadequately prepared metal coatings within a year or two. Windy City Painters approaches every iron fence project as a corrosion control job first and a painting job second. The result is a finish that holds up through multiple Chicago winters without peeling, bubbling, or allowing rust to spread beneath the surface.
MAterials AND PRODUCTS
Windy City Painters selects products specifically rated for ferrous metal in high-corrosion environments. For rust conversion, we use Ospho phosphoric acid treatment or Corroseal water-based rust converter, both of which chemically transform active rust into a stable iron phosphate compound. For priming and finish coats, Rust-Oleum DTM and Sherwin-Williams DTM rust-inhibitive direct-to-metal coatings provide excellent adhesion, flexibility, and moisture resistance. These products are formulated to expand and contract with metal through temperature swings without cracking.
THE PROCESS
Step 1 - Mechanical Surface Preparation: Wire wheel grinding and needle gun descaling remove all loose rust, failing paint, and mill scale. This step is non-negotiable. No rust-inhibitive coating performs correctly over contaminated or loosely adhered substrate. Windy City Painters treats this phase as the foundation of the entire project.
Step 2 - Rust Conversion Treatment: Ospho or Corroseal is applied to any remaining rust after mechanical prep. These products do not simply cover rust - they react with iron oxide to create iron phosphate, a chemically stable surface that accepts primer without ongoing corrosion underneath. Contact time and full surface saturation are critical.
Step 3 - Rust-Inhibitive Priming: Rust-Oleum DTM or Sherwin-Williams DTM rust-inhibitive primer is applied by brush to ensure full penetration into ornamental details, crevices, and rail joints where moisture collects. Spray application alone misses critical contact points on older Chicago ironwork.
Step 4 - Finish Coat Application: Two finish coats of Rust-Oleum DTM or Sherwin-Williams DTM topcoat deliver color saturation, UV stability, and a hard film that resists chipping from foot traffic, landscaping equipment, and seasonal debris impact common to Chicago urban properties.
CHICAGO-SPECIFIC CHALLENGES
Chicago iron fences face a combination of stressors that accelerates failure compared to milder climates. Road salt spray migrates well beyond the street surface and deposits chlorides on fence metal throughout winter. Freeze-thaw cycles - sometimes occurring multiple times in a single week - expand and contract metal enough to crack coatings that lack flexibility. Older ornamental iron on greystones, Victorian brownstones, two-flats, and courtyard buildings often has decades of paint buildup that must be addressed before any restoration coating will perform correctly.
WHAT TO EXPECT LONG-TERM
A properly prepared and coated iron fence painted by Windy City Painters typically performs five to seven years before requiring recoating in Chicago conditions. Annual spring inspection for salt residue, minor touch-up of any chips within the first season, and a light rinse to remove winter road chemicals all extend coating life. Structural rust that has compromised rail integrity should be addressed by a welder before painting - Windy City Painters identifies these conditions during initial assessment.
PRO TIPS
Tip 1: Never paint over rust without a conversion treatment first. Paint applied over active rust creates a sealed environment where corrosion accelerates invisibly until the coating fails completely.
Tip 2: Budget for welded repairs on iron fences older than twenty-five years. Ornamental iron on Chicago historic properties often has pitting or section loss that painting alone cannot address structurally.
Tip 3: Time your iron fence painting project for late spring or early fall when temperatures stay consistently above fifty degrees overnight. DTM coatings need adequate cure time before the first freeze to achieve full hardness.
Call Windy City Painters to schedule your iron fence assessment at windypainters.com.
FAQ
Q: What is the cost of iron fence painting in Chicago?
A: Iron fence painting cost in Chicago varies by linear footage, rust severity, and ornamental complexity. Windy City Painters provides free on-site estimates so you receive an accurate number before any commitment is made.
Q: Do you need to remove all old paint before repainting an iron fence?
A: Not always. Windy City Painters assesses existing coating adhesion. Sound paint in good condition can remain. Peeling, bubbling, or paint over active rust must be removed for the new coating to perform correctly.
Q: Can structural rust on an iron fence be repaired without replacing the fence?
A: Depends on severity. Surface and moderate rust responds well to conversion treatment and DTM coatings. If rust has caused section loss or structural weakness, Windy City Painters recommends a welder address those areas before painting.
Q: How long does iron fence painting take?
A: Most residential iron fence projects take one to three days including prep, rust conversion, priming, and two finish coats. Windy City Painters sequences cure time between coats to ensure full adhesion at every stage.
Q: What is the best paint for iron fences in Chicago?
A: Rust-Oleum DTM and Sherwin-Williams DTM rust-inhibitive coatings are among the best options for Chicago iron fences due to their flexibility, moisture resistance, and ability to handle freeze-thaw temperature swings without cracking.
Q: Is it worth painting an old iron fence or should I replace it?
A: Painting is almost always more cost-effective than replacement for structurally sound iron. Windy City Painters assesses every fence honestly and only recommends replacement when restoration would not deliver a durable result.
Q: How do I find a reliable iron fence painting contractor near me in Chicago?
A: Look for contractors who specify rust conversion products by name, explain their mechanical prep process, and provide references from similar Chicago properties. Windy City Painters documents every step and warranties our work.
Sponsored
Sterling, VA

SURROUNDS Landscape Architecture + Construction
DC Area's High-End Custom Landscape Design Build Firm
 Business_Name_Placeholder
Ring Joint Flanges are engineered for demanding piping applications where secure sealing and dependable performance are essential. Buyers can use Pipex.ai as a B2B marketplace to connect with sellers and source suitable flange solutions for oil & gas, petrochemical, power, and process industries. The Ring Joint Flange Weight Chart in KG, MM & PDF helps procurement teams review dimensional and weight information for handling and logistics planning.
Sellers can support buyers with accurate size, pressure class, material, and dimensional details for efficient product selection. The Ring Joint Flange Weight Chart in KG is useful for estimating packaging, transportation, and project requirements, helping buyers manage procurement more effectively.
Growing demand from high-pressure piping and critical industrial projects creates opportunities for sellers offering quality products, competitive pricing, and dependable supply. The Ring Joint Flange Weight Chart can simplify size comparison and weight assessment during bulk procurement through a B2B portal.
 Tile Doctor Ltd
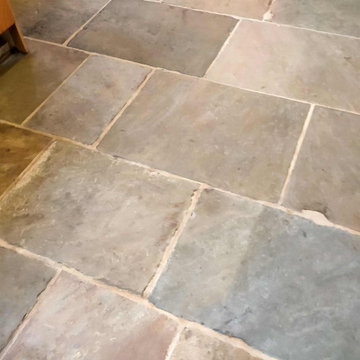
The owner of this period cottage in the old market town of Tadcaster near Leeds, had what was once a beautiful Yorkshire stone floor in the kitchen. It has been a long time since it had been given a proper clean so over the years and with the Kitchen being a high traffic area the whole floor including the grout had darkened and he now wanted it refurbished in time for Christmas.
I visited the property to assess what needed to be done and could see straight away that any protective sealer that was once on the floor had long since worn off. In fact, it was so consistently dirty with years of built-up grease and dirt I had to wonder if one had ever been applied.
I explained what the floor needed was a really deep intensive clean and then a sealer applied to make it easy to keep clean. The problem with most tile and stone is its porosity and if left unprotected dirt easily becomes lodged into its pores making cleaning a struggle.
To prove the difference that can be achieved and to allow me to work out a process on which I could base an accurate quote I ran a test clean on part of the kitchen floor. The test clean went very well, the difference was remarkable, and the cleaned section really stood out. Pleased with the potential of a clean floor they accepted my quote, and we pencilled a date in the diary.
I returned on the appointed date and began by removing the kickboards from under the kitchen units to protect them from splashing. Next, I set about spaying the floor with a strong dilution of Tile Doctor Pro-Clean, this is a purpose made tile and grout cleaner that eats into the grease and dirt so it can be removed. This product works best if you leave it for ten minutes before scrubbing in using a heavy-duty machine fitted with a heavy-duty brush. The soil released from the floor was then extracted using a wet vacuum.
The Pro-Clean did a good job on the grout however it was clear something stronger was required to really get the stone clean, so I stepped up a gear and applied Tile Doctor Remove and Go using the same process as before. This is a really good product for removing deeply ingrained grease and dirt.
The final step of the cleaning process was to give the stone and acid wash using Tile Doctor Grout Clean-Up to remove old grout haze and other mineral deposits; additionally, being an acidic product, it counters the alkaline cleaning products used earlier neutralising the pH level of the floor and leaving it ready for sealing.
Before sealing I like to discuss the different products available and the finishes they can provide. In this case my clients’ main concerns were that they wanted the stone to look natural and easy to maintain going forward.
With this in mind, Tile Doctor Seal & Go Extra was chosen, it’s a modern acrylic-based sealer that brings out the natural colours in the stone and gives a very slight smooth finish. The protection it provides will prevent dirt becoming ingrained int the pores of the stone and ensure the floor is easier to maintain. Several coats were applied, until we achieved the required finish.
The deep cleaning process and fresh sealer transformed the stone floor bringing out its original beauty and my customer couldn’t believe the difference in the floor and was highly delighted.
For aftercare I gave the client a bottle of Tile Doctor Neutral Cleaner, this product is pH neutral so it will clean the floor but won’t damage the sealer. Often people use household cleaners for cleaning tiled floors, but due to the strong chemicals they contain, they can do more harm than good by slowly stripping away the protective sealer and taking the floor back to square one. Tile Doctor Neutral Tile Cleaner is reasonably priced, and the concentrated formula means a small amount goes a long way so it’s well worth using.
This was a pleasurable job for me as it was good to see the floor transform from dull and lifeless to clean and showing the natural colour and beauty of the York stone, and always lovely to have another satisfied client.
Simon Testa
North East Yorkshire Tile Doctor
 Senergy360, LLC.
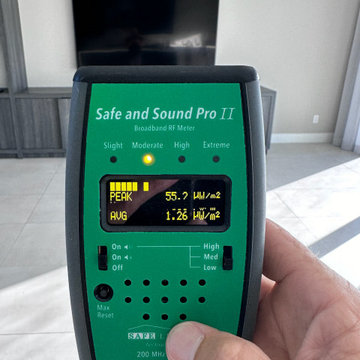
Capturing the critical importance of EMF testing, this professional photo showcases a certified inspector using a state-of-the-art EMF meter to measure dirty electricity levels near a home's electrical panel. The meter's digital display glows with clear numerical readings, while the inspector's careful positioning demonstrates proper testing technique for accurate measurements.
Dirty electricity testing is crucial for modern homes because:
Poor power quality can affect both human health and electronic equipment performance. When your home's electrical system carries microsurges and voltage spikes (dirty electricity), it can contribute to headaches, fatigue, and sleep issues. Additionally, sensitive electronics may malfunction or have shortened lifespans when exposed to poor power quality.
Dirty electricity often stems from modern devices like LED lights, smart appliances, solar inverters, and dimmer switches. These technologies, while energy-efficient, can create electrical noise that travels throughout your home's wiring. Professional testing helps identify problematic areas and guides targeted solutions like whole-house filters or circuit-specific interventions.
For families concerned about creating a truly healthy home environment, dirty electricity testing is an essential but often overlooked assessment. Our comprehensive testing services help identify EMF hotspots and power quality issues, allowing us to recommend effective mitigation strategies for a cleaner electrical environment.
[Note: This description would pair well with a photo on Houzz showcasing EMF inspection services and healthy home practices.]
 Dependable Renovations Ltd
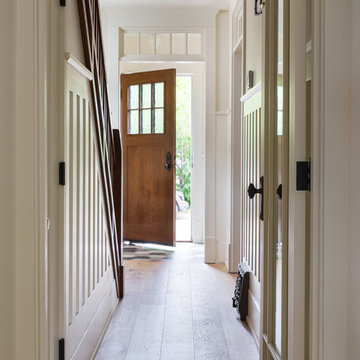
Small elegant light wood floor and beige floor hallway photo in Calgary with white walls


 Business_Name_Placeholder
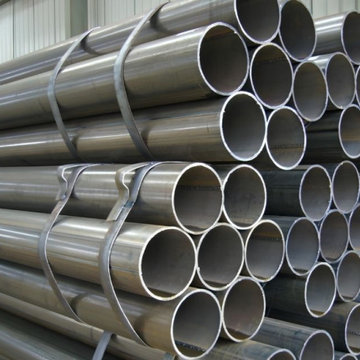
Steel Tubes are widely used in construction, engineering, fabrication, manufacturing, and industrial applications where strength and dimensional accuracy are essential. Buyers can use Pipex.ai as a B2B marketplace to connect with reliable sellers and source suitable products for different project requirements. The Steel Tubes Weight Chart in KG, MM & PDF helps procurement teams compare tube dimensions, sizes, wall thickness, and approximate weights for efficient material planning and logistics.
Sellers can provide accurate details such as steel tube size, outer diameter, wall thickness, length, grade, material, and weight to help buyers make informed purchasing decisions. The Steel Tubes Weight Chart in KG is useful for estimating material quantities, transportation requirements, packaging, handling, and project costs. With growing demand for steel tubes across industrial and infrastructure projects, suppliers can benefit from offering quality products, competitive pricing, and dependable supply through a B2B sourcing platform.
The Steel Tubes Weight Chart makes it easier for buyers to assess different tube sizes and plan bulk purchases according to project needs. A detailed Steel Tube Weight Chart in KG and MM can support procurement, inventory management, and transportation planning. Buyers and sellers can use Pipex.ai to simplify industrial sourcing and connect for suitable Steel Tubes based on specifications, quantity, and application requirements.

 IQnewswire
The End of the Ultra-Slim Wedding Suit
For several years, men’s formalwear was dominated by narrow lapels, short jackets and trousers cut close to the leg. The style created a sharp outline, but it often left little room for sitting, dancing or eating comfortably. Current tailoring is moving towards a more balanced shape, with cleaner shoulders, a defined waist and trousers that follow the leg without gripping it.This change does not mean that wedding suits have become oversized. The newer approach sits between skinny and loose. It keeps the structure expected of formal clothing while allowing the cloth to hang properly. For grooms, that balance is useful during a day that may involve a ceremony, photographs, dinner and several hours on the dance floor.
Look For Shape Rather Than Tightness
A well-fitted suit should create a clear outline without relying on tension. Collections of Marc Darcy suits include tailored three-piece designs, checks and textured fabrics that suit the current preference for visible structure and considered proportions.
The jacket should sit close enough to define the waist, but the front button should fasten without pulling the cloth into an X-shaped crease. At the shoulders, the seam should finish close to the natural shoulder point. Extra width can make the jacket look borrowed, while a shoulder that is too narrow may cause the upper sleeve to collapse.
Fit should be assessed while moving as well as standing. Reach forward, sit down and raise both arms. A tailored jacket will never feel like casual sportswear, but it should allow the groom to carry out ordinary movements without sharp restriction across the back or chest.
Give The Jacket Enough Length
Very short suit jackets became common alongside skinny trousers, but they can disrupt the proportions of a three-piece outfit. If the jacket finishes too high, the waistcoat may appear longer than the outer layer and the trousers may look as though they begin too low.
A more traditional jacket length usually covers most of the seat and divides the body more evenly. This can make the legs appear longer without shortening the jacket excessively. The correct length depends on height and body proportions, so two men wearing the same chest size may still need different jacket lengths.
View the suit from the back and side rather than relying on a front-facing mirror. The vents should lie flat, and the hem should not lift away from the body. A side photograph can reveal an unbalanced jacket more clearly than the changing-room mirror.
Choose Trousers That Fall Cleanly
The move away from very tight tailoring is most noticeable in suit trousers. A modern tailored leg can still be neat at the ankle, but it should provide enough room through the seat and thigh for the fabric to fall without horizontal lines.
Trouser pockets offer a useful fit check. If they pull open while standing, the waist or hips may be too tight. The fly should lie flat, and the waistband should remain in place without depending on an overtightened belt. Higher-rise trousers can work particularly well with a waistcoat because they reduce the chance of shirt fabric appearing between the two pieces.
The hem should make gentle contact with the shoe rather than gathering heavily around it. A short hem can work with narrow trousers but taking it too far may make the suit look dated once the current cropped style moves on. A slight break is easier to wear with different formal shoes and tends to look balanced in full-length wedding photographs.
Let The Waistcoat Support the Silhouette
A waistcoat adds structure through the centre of the outfit, but only when it fits correctly. It should lie flat against the shirt and cover the trouser waistband. Tightening the back strap cannot correct a waistcoat that is the wrong size or too short.
Current three-piece styling often places greater emphasis on the waistcoat. Double-breasted designs, contrasting fabrics and wider openings can distinguish the groom without requiring a brightly coloured jacket. When the groom removes the jacket later, the waistcoat keeps the outfit looking complete.
Allow room for a full meal and several hours of wear. A waistcoat that feels acceptably close during a brief fitting may become uncomfortable at dinner. Sit down with every button fastened and check whether the lower edge presses into the waist or causes the front to bow.
Use Stronger Lapels Carefully
Wider notch and peak lapels are returning after years of extremely narrow designs. A broader lapel can frame the shirt and tie, balance the shoulders and give the jacket a more formal character. Peak lapels create a particularly strong line on double-breasted jackets and evening suits.
The lapel width should still suit the wearer. A very broad lapel can overwhelm a smaller frame, while an extremely narrow one may look out of proportion on a broad chest. The shirt collar, tie width and lapel should relate to one another without matching exactly.
A wider lapel also leaves less need for decorative extras. A simple buttonhole flower or plain pocket square may be enough. Large lapel pins can crowd the upper part of the jacket, especially when the cloth already contains a check.
Avoid Buying According to the Size Label Alone
The same labelled size can fit differently across designs because cut, fabric and construction affect the garment. Begin with accurate chest, waist, inside-leg and approximate jacket-length measurements. Compare those figures with the retailer’s size information rather than ordering the size worn in another brand without checking.
If the jacket fits at the shoulders but needs slight shaping through the waist, a tailor can often make the adjustment. Sleeves and trouser hems are also commonly altered. Major changes to the shoulder line or jacket length are more difficult and may not be economical.
Do not choose the smallest size that can be fastened. A suit that looks tight in the fitting room is unlikely to become more comfortable during a long wedding day. Cloth should skim the body and return to a clean position after movement.
Balance a checked suit with simple styling
Texture and checks remain popular in wedding tailoring, particularly for country houses, converted barns and traditional venues. These fabrics already add depth to the outfit, so the cut should remain controlled and the accessories relatively quiet.
A plain white, pale blue or cream shirt gives a checked suit a clear foundation. Choose a tie from one of the secondary colours in the cloth rather than introducing another strong pattern. A white pocket square works when the suit contains several shades and does not need further decoration.
Shoes should support the proportions of the trousers. A very slim shoe may appear too small beneath a fuller hem, while a heavy casual sole can pull attention away from the tailoring. Oxfords, Derbies and refined brogues usually provide enough visual weight without looking bulky.
Coordinate the wedding party without forcing one fit
Matching groomsmen suits can become difficult when every member of the party has a different build. Insisting on an identical close fit may leave some men comfortable and others visibly restricted. A better approach is to keep the cloth, colour and main design consistent while adjusting jacket and trouser sizes for each person.
The groom can stand apart through a waistcoat, lapel shape or accessory rather than wearing a suit cut much tighter than everyone else. This creates a connection across the group without treating one silhouette as suitable for every body.
Arrange fittings early enough to identify size and alteration issues. Group orders should be checked well before the wedding, particularly when trousers need hemming or jackets require sleeve adjustments. Each person should try the complete outfit with the intended shirt and shoes.
Judge the suit by the whole day
A wedding fitting often lasts less than half an hour, while the suit may be worn for twelve hours or more. Comfort should therefore be tested under realistic conditions. Sit for several minutes, walk upstairs and check the waistband after moving around.
Pay attention to the parts that cannot be seen clearly in a mirror. The collar should remain close to the shirt at the back of the neck. Jacket vents should not pull apart, and the trouser seat should follow the body without sagging or strain.
The current move towards balanced tailoring gives grooms more room to choose clothes that look formal without feeling restrictive. Clean shoulders, a shaped jacket and trousers with a natural fall will outlast extreme proportions. A suit that allows the groom to stand, sit and celebrate comfortably is also more likely to look composed in photographs taken throughout the day.
1