
Search results for "Achieving" in Home Design Ideas
 Earthscape - Landscape Design & Build
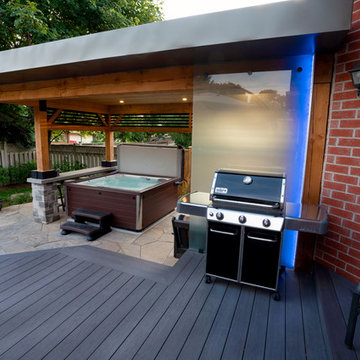
The goal of this project was to transform the existing decrepit landscape into a newly modern space with the purpose of entertaining family and friends. The clients also wanted a hint of ‘steam-punk’ incorporated into the overall theme.
To achieve the wants and needs of the client a new composite deck was installed with an angular form to maximize space on an already tight backyard with large setbacks. A swim spa was built into the deck and a secret hatch door was installed for any future maintenance. Large angled steps lead you from the deck down to the new random flagstone patio.
A large custom pavilion was installed over the patio to shelter users from the elements. Oversized rough Douglas Fir posts and beams were used along with some black powder coated steel bars to achieve the steam punk theme. Extensive engineering was involved to achieve the cantilevered look and reduce the need for an outside post. Tongue and groove cedar planks make up the ceiling of the structure along with LED pot lights. 3 pieces of sandblasted Eramosa stone acts as a bar area for users in the newly installed hot tub. Lastly a frosted glass privacy screen with LED colour changing lights separates the sitting area under the pavilion and the barbecue area of the deck.
Some existing plants and shrubs were salvaged during construction and were reused in the new low maintenance-planting plan. A new section of fence closes off the backyard for the homeowner’s dogs and a new gate was created with the use of steel bars to mirror the pavilion.
 Earthscape - Landscape Design & Build
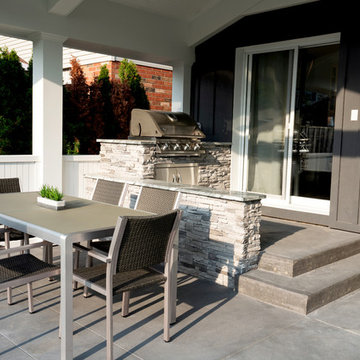
The intent of this was project was to create a porch addition to expand the living area of the house during the warm months of the year. The space accommodates an area for cooking, dining and entertaining. The layout and finishes were chosen to flow with the interior of the home, creating a seamless extension of house. The collar ties add a custom detail making this structure custom and unique.
The built-in kitchen is located directly outside the back door. A small veneer wall creates a separation from the kitchen to the dining table, while also doubling as a seat or serving area for the chef.
The ‘L’ shaped sectional is a cozy sitting area for the family to relax by the new concrete fire table, or to sit in the shade and watch the kids play in the backyard.
The structure is cladded in a PVC material which achieves the clean and simple look that the client was hoping for. The cladding material is also very low maintenance and will continue to look great for many years to come.
Although the client was really drawn to modern design, they wanted to make sure that the porch wouldn’t look out of place with the house. To achieve a look that met their aesthetic requirements, the structure was kept relatively traditional, but a modern flare was achieved with the addition of simple plantings, accents, and natural square cut stepping-stones.

Find the right local pro for your project
 Sunburst Shutters & Window Fashions New York
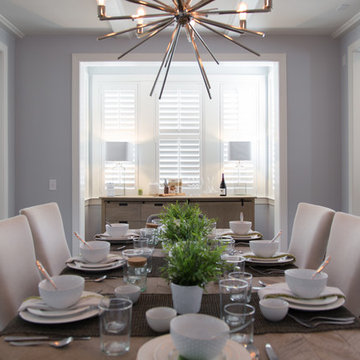
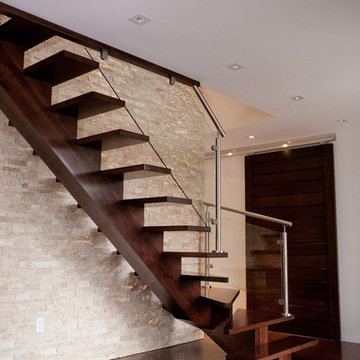
Inspiration for a contemporary dining room remodel in New York
 Michael Nash Design, Build & Homes
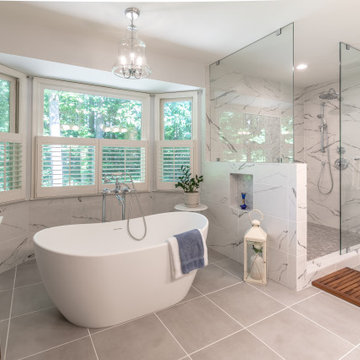
Mid-sized trendy master gray tile and ceramic tile ceramic tile and gray floor bathroom photo in DC Metro with white cabinets, a two-piece toilet, gray walls, an undermount sink, granite countertops and white countertops

 Confluence Design
zoon media
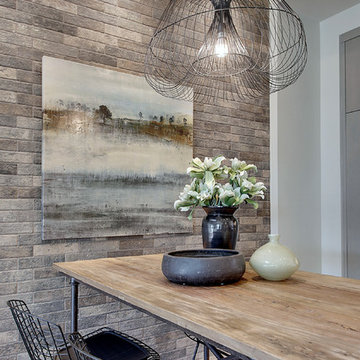
Mid-sized trendy medium tone wood floor and gray floor kitchen/dining room combo photo in Calgary with gray walls
Mid-sized trendy medium tone wood floor and gray floor kitchen/dining room combo photo in Calgary with gray walls
Sponsored
Columbus, OH

Wannemacher Interiors
Customized Award-Winning Interior Design Solutions in Franklin Cnty OH
 Superior Fireplaces
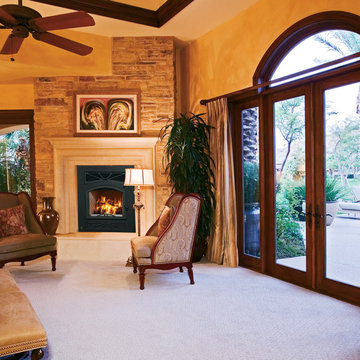
With superior heat output and high-efficiency operation, the WRT4826 wood-burning fireplace excels. It's the ideal option for large spaces, heating up to 2,500 sq. ft.* with catalytic technology that achieves more than 75% efficiency. It also meets EPA Phase II emission standards for clean, environmentally responsible burning. Its tall and expansive size features a single door that provides an unobstructed viewing area. Plus, the Panorama offers premium accessories to complement its impressive stature.
* Heated area depends a great deal on insulation and the design of the home.
Aesthetics
The design of the WRT4826 is an inspirational balance of form and function.
Single door (European-style cast-iron) design provides a tall opening for an unobstructed panoramic view of the fire.
Comfort
Catalytic technolgy achieves more than 75% burning efficiency for up to eight hours of burn time – resulting in fuel savings.
EPA Phase II-certified performance achieves compliance for federal government emission standards.
Powerful blower circulates heat in large spaces or multiple rooms up to 2,500 sq. ft.
Ease of Operation
Ceramic glass for safety and optimum heat transfer.
Airtight combustion chamber for maximum efficiency and highest heat output.
Efficient air wash system keeps viewing glass clean.
Required Venting
7" ASHT+, S-2100+ / HT6000+, HT6103+ or ACBI Chimney (7" Diameter TUBINOX (or PROJET SS) and masonry adaptor kit for masonry applications)
Design Versatility
Decorate distinctively with a variety of optional face and base plate designs.
Decorative cast-iron log retainer provides an upscale touch.
 Interactive Construction
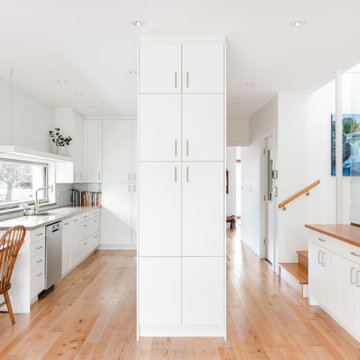
Interactive Construction’s second Passive House shows that it is possible to achieve this high level of energy efficiency in even the tightest of lots. This build challenged the common assumption that you need a lot of south facing windows to achieve the Passive House certification.
The relatively small solar gains from the limited southern exposure was made up for with an extremely tight air-barrier, a top of the line HRV, and higher R-values of insulation.
To achieve the best indoor air quality, low-VOC products were used in the finishes. Solid Maple flooring was used throughout the upper levels to create a beautiful look without the chemicals found in engineered flooring.
Aging-in-place was key to the design, with a central elevator and accessible door sizes and shower access. Smart design can make homes for versatile over their lifespan which reduces the need for costly renovations in the future.
Both the indoor and outdoor areas blend to create tranquil and calm-inspiring spaces.
What the homeowners had to say:
Each area works well for its purpose. We love the stairs and the glass wall that separates the stairs from the living area. We love our windows, doors and skylights which give us so much light.

 Lagois Design Build Renovate
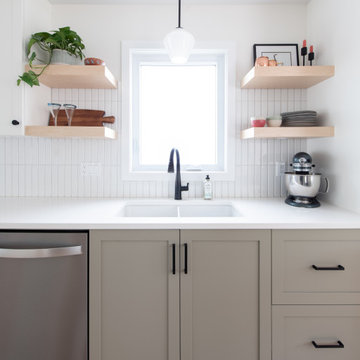
Step into a cozy and inviting atmosphere – a Hygge-inspired Scandinavian kitchen that is sure to warm the heart and bring the family closer together. Previously closed off and isolated from the rest of the home and family, we opened up walls between the kitchen and dining room and created an open-concept space that encourages togetherness and shared moments. Goodbye to isolation and hello to a kitchen that not only looks stunning but also fosters a sense of unity and connection.
The front of the home now has a full glass door as well as a full glass side panel to allow more light into the front entrance. The homeowners needed more storage, so we created a floor-to-ceiling bank of pantry cupboards in an unused part of the eat-in kitchen, and we also created more storage under the bench.
The removal of the wall was a little challenging because it was a load-bearing wall. We needed to add a full-span beam around to the back of the home and have it installed in one piece. We had to reroute the mechanical systems, a bulkhead and mechanical chase now to hide the beam and the plumbing.
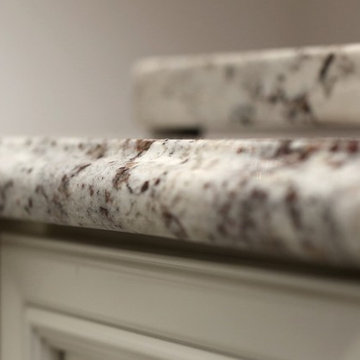
The selections and colours – light cabinetry with sage-coloured lower cabinets, white countertops and natural maple hardwood – add to the beautiful open feeling the homeowners wanted. The original kitchen had dated finishes and was tired looking. The peninsula and meal-homework-and-crafts nook make the perfect setting for a young family.
 Tile Doctor Ltd
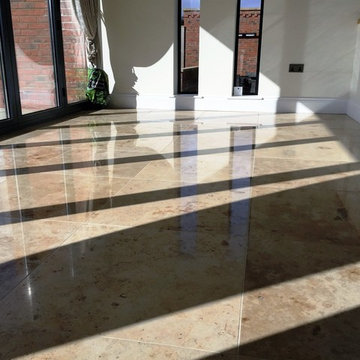
These Marble tiles were installed at a lovely property in North Ferriby by another tile company who although has done a great job laying the floor had neglected to provide the owner with any kind of post-installation maintenance.
Thus the tiles, which covered a large kitchen and hallway area, appeared dull and certainly not up to the standard that could be achieved with the right methods. Funnily enough, the tile company had told the property owner that the stone would need to be sealed, but did not offer to carry out the process themselves.
After conducting their own research, the property owner contacted her local Tile Doctor to see what could be done. I came round to inspect the floor and recommended the floor was polished through a process known as burnishing, followed by the application of a sealer to provide durable protection for the stone.
Burnishing involves the application of diamond encrusted pads with different levels of grit. At Tile Doctor we work with a four pad system that allows us to gradually refine the polish on suitable tiled floors, including Marble and Limestone.
I started the process by applying a Coarse grit burnishing pad across the entire floor lubricated with a little water, the 17 inch pads fit a rotary floor buffing machine and so are relatively straight forward to use but do take time. Following this, I worked my way through the burnishing system, repeating the process with Medium, Fine and Very Fine grit burnishing pads to achieve a brilliant, consistent shine. The floor is given a quick rinse between pads in-order to remove the resultant slurry before starting with the next pad.
The second part of the restoration was to seal the floor to protect the stone against future dirt, stains and damage, which is more common in busy areas of a house like the kitchen. I opted to seal the Marble tiles with two coats of Tile Doctor Ultra Seal.
This is a premium, no-sheen sealer that leaves the Marble with a more natural looking polished appearance. As a solvent-based, penetrating sealer it gets deep into the pores of the stone to protect against stains and ingrained dirt, especially in food preparation areas. To finish off I used the very fine diamond pad just to guarantee the brilliant shine you can see in the photos.
The property owners were exceptionally pleased with the results achieved and will undoubtedly be glad that their lovely Marble tiled flooring is now protected for long-term use. Another satisfied client.
Ronnie Phipps
East Yorkshire Tile Doctor
 Lagois Design Build Renovate
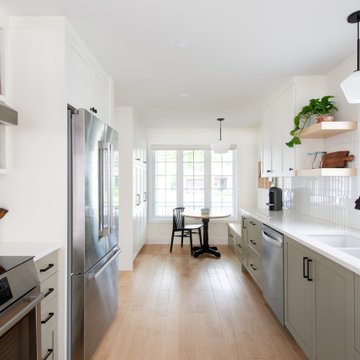
Step into a cozy and inviting atmosphere – a Hygge-inspired Scandinavian kitchen that is sure to warm the heart and bring the family closer together. Previously closed off and isolated from the rest of the home and family, we opened up walls between the kitchen and dining room and created an open-concept space that encourages togetherness and shared moments. Goodbye to isolation and hello to a kitchen that not only looks stunning but also fosters a sense of unity and connection.
The front of the home now has a full glass door as well as a full glass side panel to allow more light into the front entrance. The homeowners needed more storage, so we created a floor-to-ceiling bank of pantry cupboards in an unused part of the eat-in kitchen, and we also created more storage under the bench.
The removal of the wall was a little challenging because it was a load-bearing wall. We needed to add a full-span beam around to the back of the home and have it installed in one piece. We had to reroute the mechanical systems, a bulkhead and mechanical chase now to hide the beam and the plumbing.
The selections and colours – light cabinetry with sage-coloured lower cabinets, white countertops and natural maple hardwood – add to the beautiful open feeling the homeowners wanted. The original kitchen had dated finishes and was tired looking. The peninsula and meal-homework-and-crafts nook make the perfect setting for a young family.
 Confluence Design
zoon media
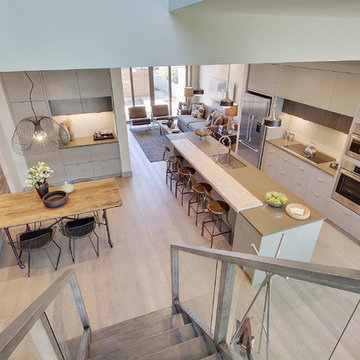
Inspiration for a small contemporary single-wall medium tone wood floor and gray floor open concept kitchen remodel in Calgary with a single-bowl sink, flat-panel cabinets, gray cabinets, quartz countertops, white backsplash, mosaic tile backsplash, stainless steel appliances and an island
Inspiration for a small contemporary single-wall medium tone wood floor and gray floor open concept kitchen remodel in Calgary with a single-bowl sink, flat-panel cabinets, gray cabinets, quartz countertops, white backsplash, mosaic tile backsplash, stainless steel appliances and an island
 Confluence Design
zoon media
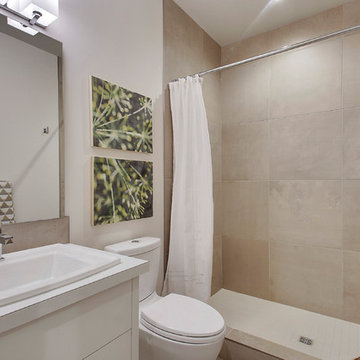
Mid-sized trendy 3/4 beige tile and porcelain tile porcelain tile and beige floor bathroom photo in Calgary with flat-panel cabinets, white cabinets, a one-piece toilet, beige walls, a vessel sink and laminate countertops
Mid-sized trendy 3/4 beige tile and porcelain tile porcelain tile and beige floor bathroom photo in Calgary with flat-panel cabinets, white cabinets, a one-piece toilet, beige walls, a vessel sink and laminate countertops
 Align Design LLC
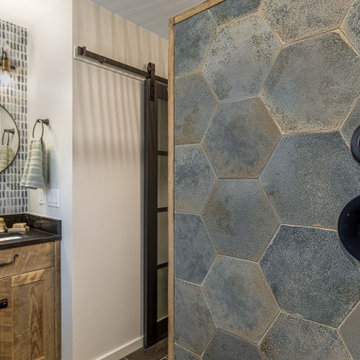
The theme that this owner conveyed for their bathroom was “Boho Garden Shed”
To achieve that, space between the bedroom and bath that was being used as a walk thru closet was captured to expand the square footage. The room went from 44 sq. ft to 96, allowing for a separate soaking tub and walk in shower. New closet cabinets were added to the bedroom to make up for the loss.
An existing HVAC run located inside the original closet had to be incorporated into the design, so a small closet accessed by a barn style door was built out and separates the two custom barnwood vanities in the new bathroom space.
A jeweled green-blue hexagon tile installed in a random pattern achieved the boho look that the owner was seeking. Combining it with slate look black floor tile, rustic barnwood, and mixed finishes on the fixtures, the bathroom achieved the garden shed aspect of the concept.
 Confluence Design
zoon media
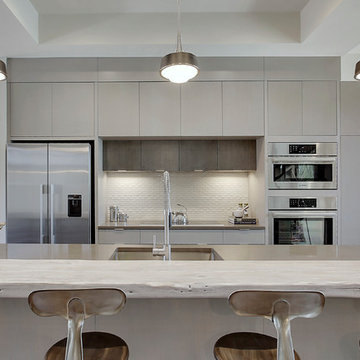
Mid-sized trendy single-wall medium tone wood floor and gray floor open concept kitchen photo in Calgary with a single-bowl sink, flat-panel cabinets, gray cabinets, quartz countertops, white backsplash, mosaic tile backsplash, stainless steel appliances and an island
Mid-sized trendy single-wall medium tone wood floor and gray floor open concept kitchen photo in Calgary with a single-bowl sink, flat-panel cabinets, gray cabinets, quartz countertops, white backsplash, mosaic tile backsplash, stainless steel appliances and an island


 Tile Doctor Ltd
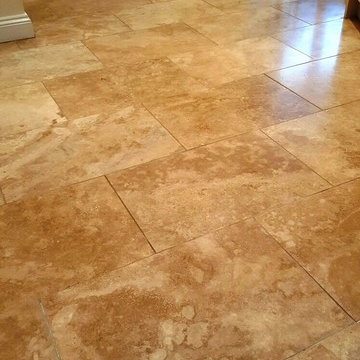
This fantastic Travertine tiled kitchen floor was in a bad way. Not only had it not been treated to a proper clean and seal in a long while, but it has also suffered from natural pitting, leaving lots of little holes that damaged the overall appearance of the floor. Travertine is very aesthetic, but suffers from the drawback of being quite soft compared to other types of stone (typically it sits between 3-4 on the Moh’s scale of mineral hardness).
The customer, who lives in the town of Sleaford a small Lincolnshire market town, was keen to have the situation remedied through a complete restoration. This would need to include small repairs, along with a deep clean and a fresh seal.
My first job was to deep clean the whole area, which I did using a solution of Tile Doctor Pro Clean and clean water. Pro Clean is a strong alkaline product which has a long history of producing reliable results of a wide range of natural stone floors, including Travertine, Granite, Limestone, and Slate. I applied the solution to both the tiles and the grout lines, and proceeded to scrub it in using a scrubbing pad fitted to a rotary floor machine.
This left the floor fresh and clean, but I would also need to restore the polish to the Travertine to really take its appearance to the next level. To do this I used the process known as burnishing, which essentially involves the consecutive application of different gritted pads to achieve a high quality polish on tiles. Our burnishing system, which consists of four pads, achieves fantastic results on high-end polished stone like Limestone, Marble and, of course, Travertine. I started by applying the Coarse grit burnishing pad, before gradually working my way through to the Medium, Fine, and finally Very Fine pads to achieve a brilliant shine and light reflection finish.
To round off the first day of the restoration, I used a flexible matching filler to fill up any pitted holes present on the surface of the tiles. Following this, I installed a turbo dryer to make sure the floor would dry fully overnight, and be ready to seal the following day.
The next day I returned to the property and proceeded to seal the Travertine tiles using several costs of Tile Doctor Colour Grow sealer to protect the tiles and also really enhance the natural colours in the stone. As an impregnating sealer, Colour Grow penetrates into the stone and fills its pores to safeguard it against ingrained dirt and stains from within.
As you can see from the photographs, the combination of a deep clean, high quality polish and fresh seal really transformed the appearance of the floor from dull and lifeless to a really asset to the kitchen. The customer was absolutely delighted with the results, leaving the following feedback: “Very good job – delighted! Thank you Phil!”
Phil Barrs
Lincolnshire Tile Doctor
53