
Search results for "Acidity" in Home Design Ideas
 Tile Doctor Ltd
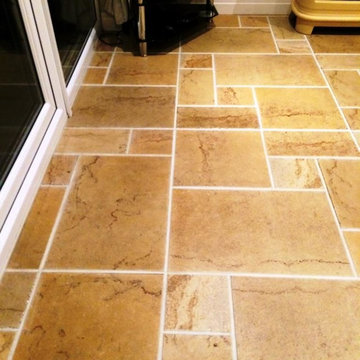
Details below of a Grout colouring job I recently completed at a house in Morecambe. In this instance, the grout had become stained, and my client was no longer happy with it.
There are a number of reasons grout can lose its appearance including the build-up of mould in damp and unvented areas, staining from liquids accidentally spilt on the floor and surprisingly if you have a coloured grout it can lose its colour due to the bleach found in common types of household cleaning products. Grout contains lime which is acid-sensitive and will react to acidic cleaning products so for general cleaning do use a pH Neutral Cleaning product.
To tackle the stained grout I first tried Tile Doctor Pro-Clean which can be used at different levels of concentration to increase its potency. In this case however when this grout dried it went back to being patchy so then the only answer was to restore its appearance using a Grout Colouring kit.
To form a better bond with the Grout Colourant I first treated the grout with a Tile Doctor Pre-Treat Cleaner, which is very slightly acidic and effectively etches the grout. If you have a particularly acid-sensitive stone tile (Limestone, for example), it is recommended to use Tile Doctor Oxy-Pro cleaner instead as this won’t upset the stone, yet still clean the Grout ready for colouring.
Once the Grout had dried (which is some cases can be several hours), I applied a thin coating of the Grout Colourant, as a thin coat dries quicker and provides a more even finish. A second coat was then added, before polishing off the excess from the edges of the tiles. After about half an hour the Grout Colourant was dry to the touch (at this stage you should be able to walk on the floor). Note that if you are Grout colouring a wall tile in a shower cubicle, it is best to leave the area for 24 hours before using the shower.
As you can see from the photographs, the result was very effective, and needless to say my client was very happy with the rejuvenated appearance of her grout.
Russell Taylor
Lancashire Tile Doctor
 Tile Doctor Ltd
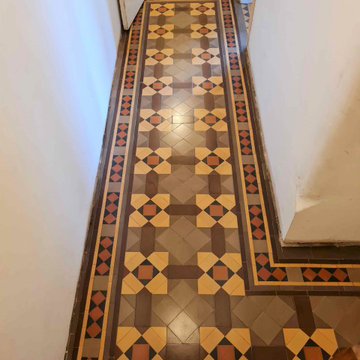
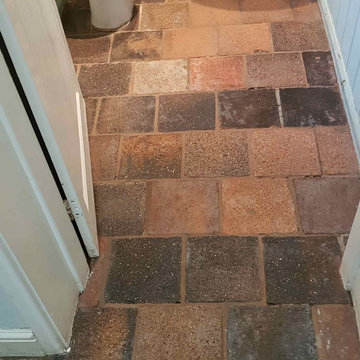
We were contacted by a customer in West Kirby who needed help renovating a Victorian tiled hallway in a house they had just purchased. Kirby is a desirable seaside location North of Heswall that expanded with the arrival of the railway in 1848. The railway brought a demand for property and so it’s not unusual to find housing stock in this area dating back to the Victorian era.
The Victorian tiles at this property appear to have been neglected by the previous owner and were now looking very dull and marked by paint from decorating; all the colours looked washed out and the floor was now looking very unappealing.
The good news however is that this problem is not uncommon and with a deep clean and a fresh sealer applied it can be transformed. I gave the owner a quote which was accepted a date agreed for my return to do the work.
On the first day the floor was sprayed with a neat solution of Tile Doctor Remove and Go which is a powerful alkaline cleaning and stripping agent used to remove old seals and paint. The solution was left to dwell for about twenty minutes so it could soak in and get to work. It was then scrubbed into the tiles using a coarse 200-grit pad fitted to a heavy buffing machine. Water was then added to the floor for lubrication and the soils released from the pores of the tile during scrubbing was removed by with a wet vacuum.
To treat the stubborn paint stains and remains of what I suspect was carpet adhesive a hand scraper and wire brush was used, this was made easier by the Remove and Go which had softened the paint etc.
The next stage was to give the Victorian tiles a mild acid wash using Acid Gel which is applied to the floor, scrubbed in, and rinsed off with a little water then extracted using the wet vacuum. We always recommend an acid wash for old floors like these as it will counter any efflorescent salts resident in the tiles and helps to remove other mineral contaminates and old grout that can mask the true beauty of the tiles.
I left the tiles to dry out for two days before returning to apply the sealer, first checking it was dry by testing for moisture in various places with an electronic damp tester. It’s not a good idea to apply a sealer to a damp floor so we always check first.
Satisfied the floor was dry, I started applying a coat of Tile Doctor Colour Grow which is a colour enhancing impregnating sealer that helps to bring out the true colours in the tile. This was allowed to dry for thirty minutes and then followed up five coats of Tile Doctor Seal and Go Extra which is a breathable sealer that leaves a lovely satin finish and builds on the protection.
Once done the Victorian hallway tiles looked so much cleaner and healthier. It was quite a transformation and the new sealer had given the floor a nice low sheen shine which the customer was very happy with.
For aftercare cleaning I left them with a bottle of Tile Doctor Neutral Cleaner which is specially formulated for cleaning sealed tiles. We don’t recommend tile cleaning products you find on supermarket shelves as the are usually too strong and can strip a sealer off the floor prematurely. If your choosing another product to clean your floor always read the label to make sure its compatible.
Andrew Robb
Merseyside Tile Doctor
 Bothbest Bamboo Flooring
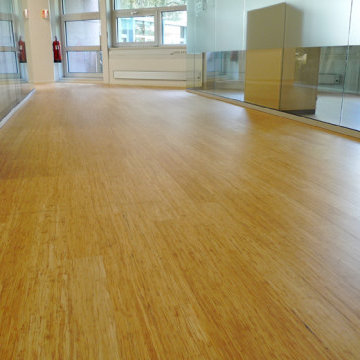
Strand woven bamboo flooring is made by compressing "strands" of the bamboo strips under intense pressure, while using a heat-sensitive low-VOC adhesive. Bamboo poles are split, shredded into individual strands, and fused under a cold press of 2,500 tons of pressure. After the curing process, the block is sliced into flooring with T+G system and coatings applied.
Strand Woven bamboo is conditioned by soaking in Boric acid. We put the cut bamboo in containers of boric acid, live cells will soak the boric acid then make it pest proof in all cells of bamboo. Once boric acid is gone through the cells, they will dry them. Once totally dried, they crash the entire pole and compress the fibers with adhesive.
Find the right local pro for your project
 Paradise Restored Landscaping & Exterior Design
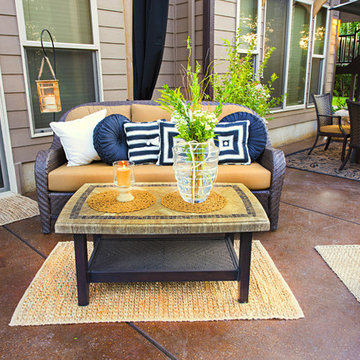
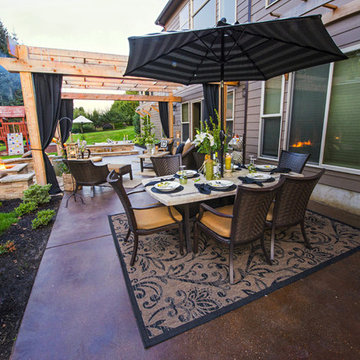
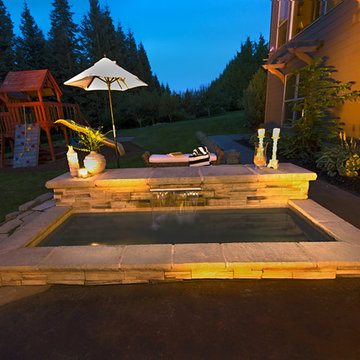
acid etch patio acid etching concrete camp fire camping space camping style curved wood pergola custom water fountain fire pit fire pit with reflection wall flagstone patio log benches outdoor curtains outdoor fire place outdoor tent area pergola Picture frame fire pit seat wall stone wall wood structure dining patio, lounge patio, child's play structure, lawn, boulder steps to campsite
 Paradise Restored Landscaping & Exterior Design
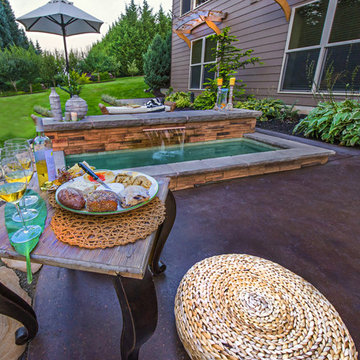
acid etch patio acid etching concrete camp fire camping space camping style curved wood pergola custom water fountain fire pit fire pit with reflection wall flagstone patio log benches outdoor curtains outdoor fire place outdoor tent area pergola Picture frame fire pit seat wall stone wall wood structure dining patio, lounge patio, child's play structure, lawn, boulder steps to campsite
 Tile Doctor Ltd
We were contacted by a client from Formby asking for advice on how to remove a thick layer of floor leveller from her Quarry tiled floor. I suspect at some point in the past a previous owner had decided to cover the tiles with lino and a cement-based levelling compound was applied to level the floor first. My client had tried to remove it herself but found it very hard going and after realising she had quite a project on her hands decided to call us instead and see if we could help with the restoration.
I worked out a quote for the client which would include removing the self-levelling compound, cleaning up the tiles and then sealing them to improve its appearance and protect it going forward. The quote was accepted, and a date agreed for the restoration to be completed which would take two days.
We have a variety of tools that we can use for removing cement but in this case, I decided to use an air operated pin gun. The head of the gun has long pins of different length which are fired at the floor gently chipping away at the floor compound, this made short work of breaking up the cement so it could be swept away. A lot easier than the method the client had previously tried.
With the floor clear of cement, it was given an acid wash with Tile Doctor Acid Gel scrubbed in with a buffing machine fitted with a black pad. The acidic formula cleans up the stone of old cement including fine particles of dust. Afterwards the gel was rinsed off the floor with water and extracted with a wet vacuum.
We let the floor dry out overnight and returned the next morning to apply the sealer. For the best results, the stone needs to be dry so before sealing I always take several moisture readings with a damp meter to make sure. The results were good so the first of what would be three coats of sealer were applied to the floor. I used Tile Doctor Colour Grow for sealing, it is an impregnating sealer that works by occupying the pores in the store thereby protecting it from within, it also brings out the colour in the stone.
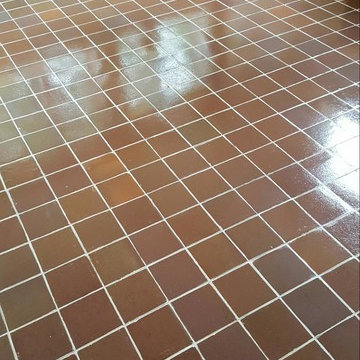
Once done the floor looked great, the old self-levelling compound was gone and the rich colours in the tile had been restored. In fact is was only when finished did we realise these were in fact Baked Clay Quarry Tiles, minerals are added during manufacturing to give then colour, although 95% clay they are very tough like stone. The client was over the moon with the outcome, the floor had been restored to its’ former glory.
For aftercare I recommended the use of Tile Doctor Neutral Tile Cleaner to keep the floor in good condition. It is pH neutral so will ensure the newly applied sealer is not compromised and the floor will continue to look good for a long while to come.
Andrew Robb
Merseyside Tile Doctor
 Tom Ralston Concrete
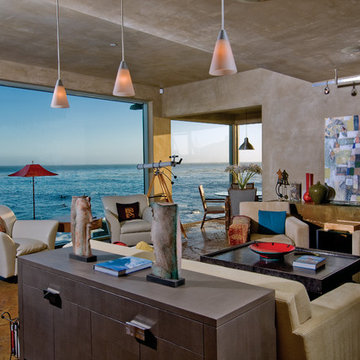
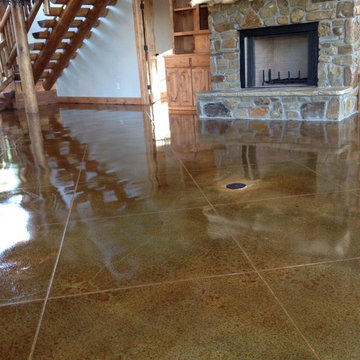
The staining for the floors and stairs involved various blending of 3- acid stains all from Scoffield namely, Fern Green, Antique Amber, Padre Brown. The way in which we wanted these colors radiate started with the small round exposed areas and the veining. For these TRC used the Padre Brown directly in the center and then let the color slowly radiate to the perimeters of where the exposed concrete met the hard troweled or unexposed areas. A really cool effect took place when Tom Ralston Concrete artisans did that and much of the perimeter had this dark shadow line that resulted from the pooling of the acid in the exposed areas and had the effect of a highlight of color around the areas that one could say resembled eye liner. I happened to be in Alabama a while back and saw the same effect when the sun was blocked by a dark cloud and the entire perimeter of the cloud had this bright glow around every edge of the random perimeter…..the pooling of the acid stain produced the same effect.
Dennis Britton
 Tile Doctor Ltd
It’s always a good idea to double-check any tile cleaning advice you receive with a professional. Sometimes advice can be inaccurate and cause more problems than good. Such was the case with this customer, who lives in the small town of Appleton near Warrington. He had been advised by his builder to use brick acid to remove carpet glue from a newly discovered Quarry tiled floor. Taking the advice, he had washed the floor several times with a solution of brick acid diluted with water. But while this seemed to successfully remove the carpet glue, it also severely discoloured the grout lines, leaving the entire floor looking grubby and unappealing.
The customer was just about to go on holiday, and asked me to see what could be done to restore the floor’s appearance while he was gone. With the house to myself, I got to work.
My first job was to strip the floor property to remove old sealers present on the tile using a strong dilution of our high alkaline cleaner, Tile Doctor Pro Clean. We use this cleaner on all types of tile and natural stone due to its versatility and consistency.
I spread the solution onto the floor and left to dwell for twenty minutes before scrubbing with a black pad fitted to a floor rotary machine. This process also removed the years of dirt and dust that had penetrated through the recently removed carpet. I also paid attention to the grout lines giving them a good scrub with a stiff grout brush, but the acid staining proved to be impossible to remove completely.
While I’m not sure exactly how long the floor had been covered by carpet, it’s safe to say a deep clean had been long, long overdue. Once I had cleaned the floor to a high standard, I used a wet-vac to remove the now dirty cleaning solution from the floor, before leaving it to dry off completely overnight.
Upon my return to the property the next day, I tested to make sure the floor was dry enough to seal, which is important as excess moisture can cloud the sealer and damage its performance.
Once satisfied, I applied one coat of Tile Doctor Colour Grow, which is our impregnating sealer designed to really bring out the natural colours in the tile, followed by two coats of Tile Doctor Seal and Go to give the tiles a stain resistant, low-sheen finish.
After this was dry I coloured the grout lines with a matching Tile Doctor Grout Colourant to cover and hide the damage the acid had caused to the grout lines. Finally, I gave the floor three more coats of Seal and Go to add the finishing touches.
My customer returned from holiday to find a completely transformed floor. Looking at the before and after photos, it is easy to see why he was more than happy with the result! Another satisfied customer.
Alastair Robb
West Cheshire Tile Doctor
 Paradise Restored Landscaping & Exterior Design
acid etch patio acid etching concrete camp fire camping space camping style curved wood pergola custom water fountain fire pit fire pit with reflection wall flagstone patio log benches outdoor curtains outdoor fire place outdoor tent area pergola Picture frame fire pit seat wall stone wall wood structure dining patio, lounge patio, child's play structure, lawn, boulder steps to campsite
 Paradise Restored Landscaping & Exterior Design
acid etch patio acid etching concrete camp fire camping space camping style curved wood pergola custom water fountain fire pit fire pit with reflection wall flagstone patio log benches outdoor curtains outdoor fire place outdoor tent area pergola Picture frame fire pit seat wall stone wall wood structure dining patio, lounge patio, child's play structure, lawn, boulder steps to campsite
 Paradise Restored Landscaping & Exterior Design
acid etch patio acid etching concrete camp fire camping space camping style curved wood pergola custom water fountain fire pit fire pit with reflection wall flagstone patio log benches outdoor curtains outdoor fire place outdoor tent area pergola Picture frame fire pit seat wall stone wall wood structure dining patio, lounge patio, child's play structure, lawn, boulder steps to campsite
 Tile Doctor Ltd
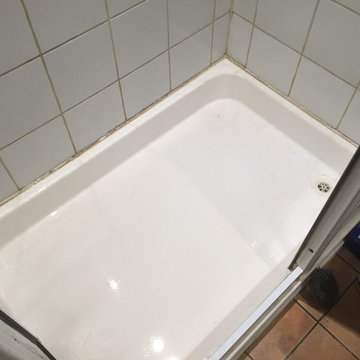
The photographs below are taken from a house in the old market town of Basingstoke which is now the largest town in Hampshire. I was asked to address a very severe case of Limescale build-up in a shower cubicle. The wall tiles were Ceramic and a shocking amount of Limescale had deposited itself on them and the shower tray over the years; the owners were going to have to replace everything if Tile Doctor could not come to the rescue!
The photos below really demonstrate the extent of the problem and needless to say the Gauntlet had been laid down and I was ready for a challenge!
My first task was to provide the Ceramic tiled walls with an initial clean. I did this by firstly mixing a diluted solution of the high alkaline cleaner known as Tile Doctor Pro Clean and then applying this on the tiles and leaving it to dwell for a while before scrubbing it in by hand in order to remove any surface dirt and scum. This was then washed off and I set my mind to the main task at hand: the Limescale removal.
To remove the Limescale it is necessary to apply an acidic product. However, there is an issue for homeowners that most products readily available on the market come in a liquid form, which of course simply drips down the tile, and therefore does not work to the best of its abilities. Fortunately, Tile Doctor recently launched a new product by the name of Acid Gel. Since it’s in a gel form it stays put on the surface and does not evaporate or dry out too quickly. This allows it time to break down the Limescale and other difficult stains.
Acid Gel was thus applied to the affected areas and left to dwell for a short while. I then scrubbed it deeply into the tile and grout lines, and follow up with an application of steam to tackle the stubborn areas and help the Acid Gel to tackle the Limescale.
The results were absolutely fantastic, and even the shower tray – which was in a very poor state indeed – came up very clean. Needless to say, my client was very pleased that they now do not have to replace the shower!
Charles Okwechime
Hampshire Tile Doctor
 Tom Ralston Concrete
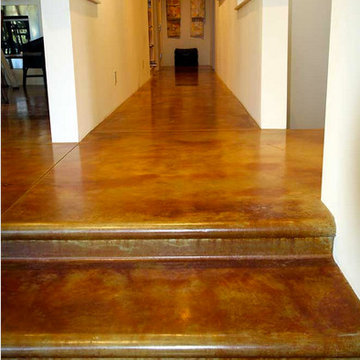
The Richard Zlatunich Residence included lots of concrete including a stout foundation, driveways, porches, stairs and landings; but one of the main features of his house was his interior floors. The floors were cast with a Tom Ralston Concrete proprietary mix design and then acid stained with 3-coats of dark brown acid stain. Richard says, “the floors have held up well to my grandchildren and still maintain a dark and luxurious look; actually they look a lot like aged leather.” Zlatunich who is an architect by trade also said, “we have lived in many different homes with tile, wood and stone floors but we have become fans of concrete.”
 DreamCrete
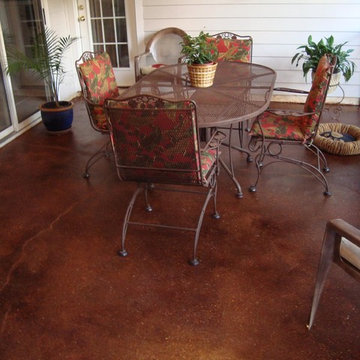
This back porch had nasty indoor/outdoor carpet installed for years. The underlying concrete was rough and uneven. We removed the carpet and ground and smoothed the concrete, exposing the aggregate in the concrete during the process. Adding a unique look to the floor, the customers were overjoyed!
 Magicraftsman Company
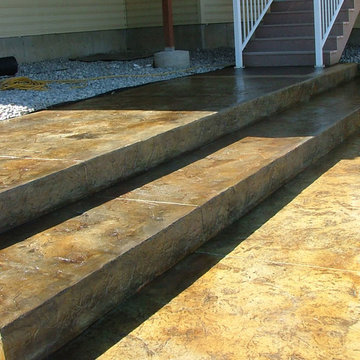
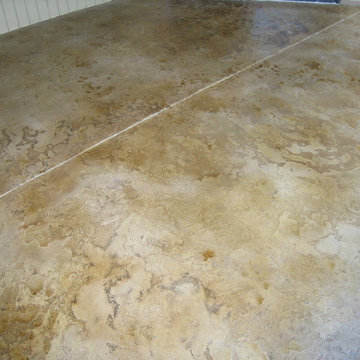
Concrete steps and Patio stamped with a Roman Slate texture and acid stained
Patio - rustic patio idea in Other
Patio - rustic patio idea in Other

 LiveWell Outdoors
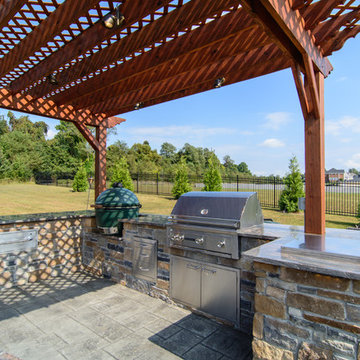
Photo by Matchbook Productions - view of back yard patio and walkways using stamped concrete in a vermont slate pattern in dark charcoal and cool gray color; outdoor kitchen using EP Henry Ledgestone veneer stone; granite counter top; custom presure treated wood pergola; big green egg; built in grill; stainless steel accessories; great entertainment space

 John Marc Lifestyle Group
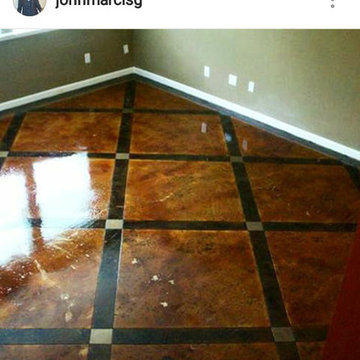
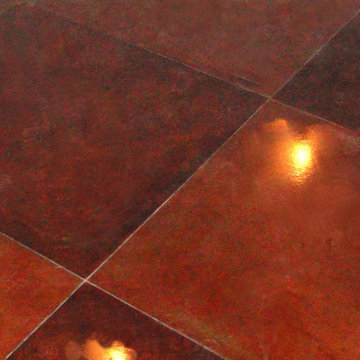
Acid Stain floor done in a family room to give a old-world touch to a contemporary space.
Example of a southwest family room design in Orange County
Example of a southwest family room design in Orange County

12