
Search results for "Acidity" in Home Design Ideas

 Looks to Sell, LLC
Mr. Eddy
Bedroom - mid-sized contemporary master concrete floor bedroom idea in Orlando with white walls and no fireplace
Bedroom - mid-sized contemporary master concrete floor bedroom idea in Orlando with white walls and no fireplace
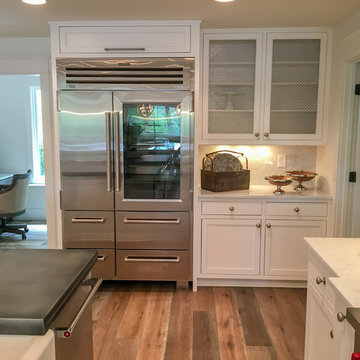
 Standard Kitchen & Bath
This new construction kitchen features Centra and Premier Cabinetry by Mouser, Heartland Door Style, Beaded Inset Construction in Maple Painted White/20-Matte. Also features Acid Washed Zinc Countertop, square edge, all sides Mirror Stainless Steel Edge Banding
Acid Washed Zinc Hood, Mirror Stainless Steel Accent Bands, Square Hammered Zinc Clavos
Stainless Steel 900CFM Blower Insert with Lights and controls included
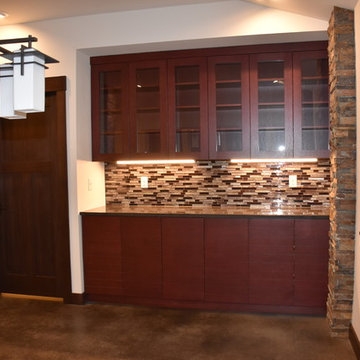
 PEA Builders
By Steve M. Homa
Eat-in kitchen - mid-sized transitional single-wall concrete floor and brown floor eat-in kitchen idea in Milwaukee with a single-bowl sink, flat-panel cabinets, red cabinets, quartz countertops, multicolored backsplash, glass sheet backsplash, stainless steel appliances and an island
Eat-in kitchen - mid-sized transitional single-wall concrete floor and brown floor eat-in kitchen idea in Milwaukee with a single-bowl sink, flat-panel cabinets, red cabinets, quartz countertops, multicolored backsplash, glass sheet backsplash, stainless steel appliances and an island
Find the right local pro for your project
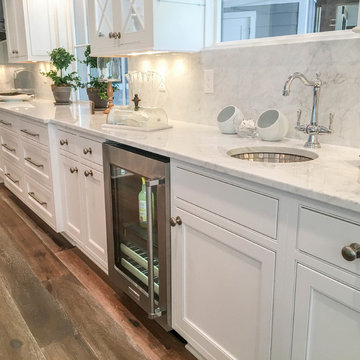 Standard Kitchen & Bath
This new construction kitchen features Centra and Premier Cabinetry by Mouser, Heartland Door Style, Beaded Inset Construction in Maple Painted White/20-Matte. Also features Acid Washed Zinc Countertop, square edge, all sides Mirror Stainless Steel Edge Banding
Acid Washed Zinc Hood, Mirror Stainless Steel Accent Bands, Square Hammered Zinc Clavos
Stainless Steel 900CFM Blower Insert with Lights and controls included
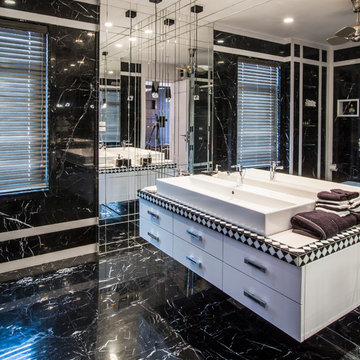
 Moriq
MoriqInspiration for a large contemporary stone tile marble floor bathroom remodel in Hyderabad with white cabinets and a vessel sink
 MXMA Architecture & Design
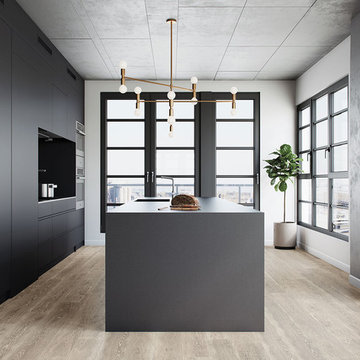
The kitchen has shades of dark grey, charcoal for its countertops, kithchen island, and cabinets. The charcoal glass backsplash completes the dark look. Equipments, devices and food products are ingeniously hidden behind the charcoal lacquered panels. All the appliances are integrated and the fridge is panel-ready. The countertop wraps the kitchen island, creating one distinctive element in the middle of the space.
Image credits: Francis Raymond
 Cranberry Hill Kitchens
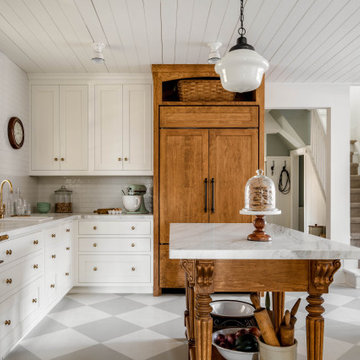
Beautiful eat-in kitchen with a stunning custom baker's island center-kitchen. This kitchen includes paneled appliances, a large custom hood, white framed cabinetry, solid pine island and fridge, glass china cabinetry, brass plumbing fixtures, backsplash to the ceiling, and marble countertops.
 PEA Builders
By Steve M. Homa
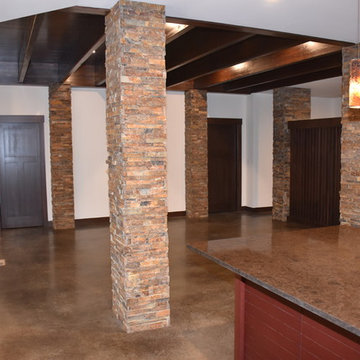
Inspiration for a mid-sized transitional single-wall concrete floor and brown floor eat-in kitchen remodel in Milwaukee with a single-bowl sink, flat-panel cabinets, red cabinets, quartz countertops, multicolored backsplash, glass sheet backsplash, stainless steel appliances and an island
Inspiration for a mid-sized transitional single-wall concrete floor and brown floor eat-in kitchen remodel in Milwaukee with a single-bowl sink, flat-panel cabinets, red cabinets, quartz countertops, multicolored backsplash, glass sheet backsplash, stainless steel appliances and an island
 Standard Kitchen & Bath
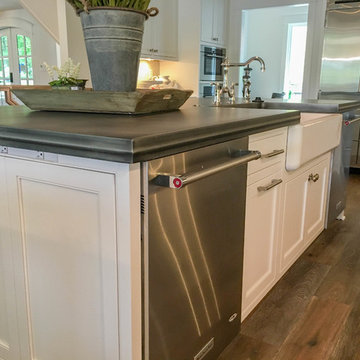
This new construction kitchen features Centra and Premier Cabinetry by Mouser, Heartland Door Style, Beaded Inset Construction in Maple Painted White/20-Matte. Also features Acid Washed Zinc Countertop, square edge, all sides Mirror Stainless Steel Edge Banding
Acid Washed Zinc Hood, Mirror Stainless Steel Accent Bands, Square Hammered Zinc Clavos
Stainless Steel 900CFM Blower Insert with Lights and controls included
 PEA Builders
By Steve M. Homa
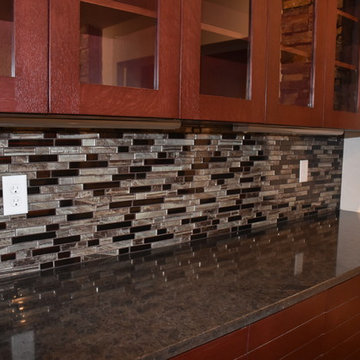
Eat-in kitchen - mid-sized transitional single-wall concrete floor and brown floor eat-in kitchen idea in Milwaukee with a single-bowl sink, flat-panel cabinets, red cabinets, quartz countertops, multicolored backsplash, glass sheet backsplash, stainless steel appliances and an island
Eat-in kitchen - mid-sized transitional single-wall concrete floor and brown floor eat-in kitchen idea in Milwaukee with a single-bowl sink, flat-panel cabinets, red cabinets, quartz countertops, multicolored backsplash, glass sheet backsplash, stainless steel appliances and an island
 Madison|Dunn
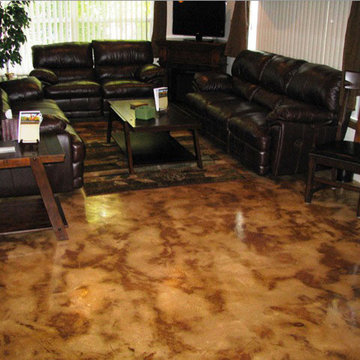
Example of a mid-sized trendy formal and enclosed concrete floor living room design in New York with white walls, no fireplace and a tv stand

 Five Star Tree Care
Oak trees have been a symbol of strength for a long time. They are also known to live for a very long time, given the right conditions. The reason they became a symbol of strength is because they themselves are very strong and are able to survive some of the harshest storms, when healthy. The wood it produces is undoubtedly very strong as well and is commonly used in the making of furniture, homes, and boats.
Oak trees are not only used for their strong wood, but also for their beauty. There are even certain species that produce distinctive lobed leaves, allowing them to stand out. Then, when fall comes around, they become even more majestic when their leaves turn bright and brilliant colours that add texture and a unique spectacle to the changing environment.
The beauty is so amazing that you might even want one for your own yard. Our team here at Five Star Tree Services is going to go over a few different types of oak trees that might be perfect for your landscape! These are guaranteed to have spectacular fall colours, great shade, and amazing texture.
Different Types of Oaks
You might be interested to know that oaks are one of the oldest trees in the world. Archeologists have been able to date them back to around 65 million years ago. A healthy oak can even live to about 200-300 years old. But do you know where these big trees come from? Little tiny acorns. A single oak tree is able to produce roughly 10 million acorns over the course of its lifetime.
Not only are oak trees beneficial to people but they are also great for animals. They are able to support more than 500 moth and butterfly species, which is more than other native trees can do. Insects also like to find homes in oak trees, which helps to feed the birds. Not to mention that small animals like squirrels also can utilize them for things like food, shade, and shelter. They also help larger animals, such as the white-tailed deer, who eats the acorns during the fall and winter season, which is about 75% of their diets.
Around the world, you can find more than 600 species of oak trees. Let’s go over a small handful of our favourites that are great for providing dazzling colourful displays during the fall months, when the leaves change colours. These are going to range from bronzes, to golds, to reds, and everything in between.
Black Oak
It might be apparent that the name comes from the outward appearance from the almost black bark that you see, along with the deep orange or yellow inner bark of the tree. Being quite a statement tree, you can enjoy the green glossy leaves in the summer and then enjoy them again then they turn orange and red in the fall. This tree has a tendency to look very similar to a red oak, but one of the major differences is that black oaks are a little smaller and are able to tolerate drier soil conditions.
Specifications:
-Growing Zones: 3-9
-Sun Tolerance: Full sun, which can equate to 6 hours of uninterrupted sunlight each day
-Soil: Needs slightly acidic, well-drained, and rich soil
-Growing height: 50-60 feet
White Oak
This oak tree is great for shade and can easily be spotted by the light colour of its bark. During the spring, it comes out with pinkish leaves that later on turn to dark green. The leaves of this tree are 4-9 inches long, have 7-9 lobes, and turn reddish-brown in the fall.
Specifications:
-Growing Zone: 3-9
-Sun Tolerance: Full sun, which can equate to 6 hours of uninterrupted sunlight each day
-Soil: Needs to be planted in well drained and slightly acidic soil
-Growing Height: 80 feet
Red Oak
This oak doesn’t have its name for nothing. It offers the brightest red leaves out of all the oak trees. In the fall, the leaves turn a beautiful deep red. During the summer, it has glossy green leaves and an open canopy. This is a widely adaptable tree and it also grows much faster than other oaks.
Specifications:
-Growing Zone: 3-9
-Sun Tolerance: Full sun, which can equate to 6 hours of uninterrupted sunlight each day
-Soil: Needs to be plated in slightly acidic, moist, but well-drained soil
-Growing Height: 50-75 feet
Bur Oak
One of the defining features of this tree is that it has unique acorns. They are larger than other trees and are fringed. It grows in a round shape that is dense with leaves, offering lovely shade and is able to tolerate heat stress and pollution. In the fall the leaves of this oak tree can turn either yellow/green, muted yellow, or yellow/brown.
Specifications:
-Growing Zones: 3-8
-Sun Tolerance: Full sun, which can equate to 6 hours of uninterrupted sunlight each day
-Soil: Needs neutral to alkaline soil
-Growing Height: 60-80 feet
Pin Oak
Typically found along rivers in eastern and central US, this oak tree’s unique feature is its distinctive branching pattern. It has large leaves that are pointed with sweeping U-shaped spaces between lobes. The leaves in the fall turn a scarlet red and eventually become bronze later in the fall.
Specifications:
-Growing Zone: 4-8
-Sun Tolerance: Full sun, which can equate to 6 hours of uninterrupted sunlight each day
-Soil: Needs slightly acidic soil. Can tolerate wet and heavy clay soils
-Growing Height: 60-70 feet
Live Oak
These are not usually super tall but they do have winding and spiraling branches which have the ability to grow into a massive diameter, larger than other oak trees, and this helps to provide a large area of shade. Another special thing about this particular type of tree is that it is the only evergreen, not a deciduous tree like the rest. This specific oak tree is one of the strongest and was used in colonial times for making ships in the US Navy. The glossy leathery leaves on this tree are 1-3 inches long and are dark green with lighter green underneath, which lasts during the entire winter.
Specifications:
-Growing Zone: 8-11
-Sun Tolerance: Full sun, which can equate to 6 hours of uninterrupted sunlight each day
-Soil: Needs to be planted in slightly acidic soil
-Growing Height: 40-80 feet
How Five Star Tree Services Can Help
Whether you are looking for the best oak tree for your yard or any other tree, our professionals here at Five Star Tree Services can help! With our wide variety of services, we can help you with all your tree care services in Richmond Hill! Give us a call today at (416) 990-3355!
 Tile Doctor Ltd
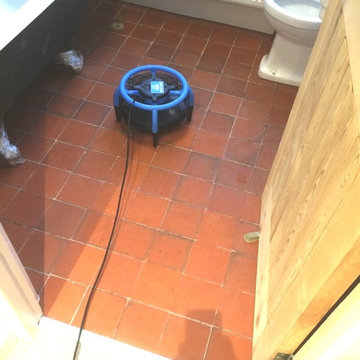
This is a job I recently completed in the small town of Braunstone, which lies just outside the city boundaries of Leicester, Leicestershire. My client wanted a restorative cleaning and sealing service for their very old Quarry tiled bathroom floor, which dates back to the Edwardian period. The floor was suffering from paint and adhesive staining, and was now in dire need of a thorough clean more generally along with a fresh seal to protect it from further damage.
I treated the floor in the first instance Tile Doctor Remove & Go which is a powerful stripper that breaks down old sealers remaining on the floor, as well as inherent paint and adhesive contamination. Remove & Go also contains cleaning properties which allows it to draw out ingrained dirt from the stone, lifting it to the surface. The product was applied to the floor and allowed to dwell for approximately thirty minutes prior to agitation with a hand-held rotary polisher fitted with a small black stripping pad.
The resulting slurry was promptly removed using a wet vacuum machine and our specialist Tile Doctor Acid Gel was then applied to the floor. Acid Gel is a blend of phosphoric and hydrochloric acids in gel form, and is specially formulated to treat grout haze and efflorescence on both wall and floor tiles.
Readers should be aware that this product is not suitable for use on acid-sensitive stone tiles such as Marble, Limestone and Travertine as it can potentially cause severe etching. In this case Acid Gel was left to dwell for ten minutes prior to agitation. This was effective in removing the white efflorescence salt staining that was present in several concentrated areas. Once again, the resulting slurry was vacuumed away, and the entire floor was rinsed with clean water.
The floor was left to dry for roughly twenty four hours before I returned to seal the floor. My choice of sealer in this case was Tile Doctor Colour Grow, a colour enhancing, impregnating sealer. The sealer will help to protect the tiles from soil ingress, and both water and oil based spills.
As you can see from the ‘Before’ and ‘After’ photographs, a marked difference was made to the appearance of this Quarry tiled floor. A professional and carefully thought out approach was taken to tackling the innate problems, particularly relating to efflorescence and paint and adhesive staining, and my client was extremely pleased with the results.
Kay Sylvester
Leicestershire Tile Doctor
 Tile Doctor Ltd
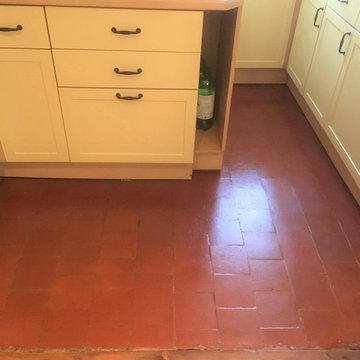
I received a call from this client in Old Marston around two miles north east of the centre of Oxford. They had lifted a lino floor in their kitchen and found an old Quarry Tiled floor underneath and decided to see if they could have it restored.
I went over to survey the floor and could see that the tiles had been covered with a thin layer of levelling screed to ensure the lino didn’t sink into the recesses. I ran some tests to demonstrate how the screed could be removed which worked well and it was apparent that the tiles underneath were intact and could be renovated. I submitted a quotation for removing all the screed, deep cleaning the Quarry tiles and then sealing the tiles to protect them. The client was really pleased that we could restore the floor and the quote was accepted, with a date booked to do the work.
To start the work, I applied undiluted Tile Doctor Grout Clean-up worked in with a small carbide brush attached to a hand-held rotary buffer. The combination of the acid in the Tile Doctor Grout Clean-up combined with the scrubbing action of the brush were effective at removing most of the screed. The small bits of remaining screed were carefully removed by hand, using a floor scraper. The floor was then rinsed with water and the soil removed with a wet vacuum.
For the second phase of the cleaning process I applied Tile Doctor Oxy-Gel which was scrubbed into the floor with a stiff brush rinsing after with water and the soil extracted again using the wet vacuum. After cleaning the floor to remove the dirt I could still see some evidence of the screed on the tiles, so I decided to give the floor an Acid Wash using Tile Doctor Acid Gel which was scrubbed into the floor and rinsed off as before. Tile Doctor Acid Gel is of course an acidic product so once it was removed, I decided to rinse the floor with Tile Doctor Neutral Cleaner to neutralise the pH levels in the floor. The wet vacuum was used again to remove as much moisture from the Quarry tiles as possible before leaving the now clean floor to dry off fully overnight.
I returned to seal this floor the next day. First, I checked the floor was fully dry with the damp meter, it was within the recommended range, so I was ready to complete the sealing process.
The client was not too sure if they wanted a matt or sheen finish, so I first put a coat of Tile Doctor Colour Grow on the floor to show them the matt finish. Colour Grow is an impregnating sealer that enhances natural colour and protects from within by occupying the pores in the tile. After reviewing the floor, they decided it was not for them, so I followed up by applying several coats of Tile Doctor Seal & Go which adds a nice sheen finish and is compatible with Colour Grow.
The combination of sealers worked very well together, and they were very satisfied with the final result and of course that we had been able to restore the Quarry tiles.
Barry Woodward
Oxfordshire Tile Doctor
 Tile Doctor Ltd
Limescale deposits are a big problem in many parts of the UK where hard water is common. To remove it you need to use a strong acidic cleaner however what to do if you have limescale deposits on Limestone? As many may already know, Limestone is an expensive, high-quality stone that like a lot of natural stone is acid sensitive and can be damaged with the application of acid-based products.
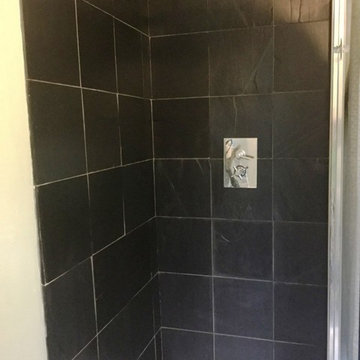
You can use acids on Limestone however if your careful and I demonstrated this recently at a property in this village of Everdon near Daventry in Northamptonshire. My customer had a fantastic black Limestone tiled shower cubicle that had been absolutely ruined by white limescale staining and it had reached the point where the situation simply couldn’t be resolved with standard cleaning products.
As the staining was so severe, I opted to use Tile Doctor Acid Gel to clean the tiles. This is a blend of phosphoric and hydrochloric acids in gel form and is the best product for cleaning vertical services, since water based products just run off and don’t have time to work on the staining.
Working in small areas, I carefully scrubbed the product into the stone and then rinsed it off with plain water. This process was repeated across the whole cubicle, reducing the stains significantly in the process.
Next, I used a handheld polishing machine fitted with 6” diamond encrusted burnishing pads, along with some water for lubrication, to polish and deep clean the stone, removing any stubborn stains remaining on the tiles.
I left the cubicle to dry completely overnight. Upon my return the next day, I proceeded to seal the tiles using two coats of Tile Doctor Colour Grow sealer.
This sealer is impregnating, meaning it fils the pores of stone to protect against ingrained dirt and staining. As well as providing stone protection, Colour Grow also enhances the natural colour in the stone – in this case, the deep black shades in the Limestone.
Having finished the job, I gave the very happy customer some advice on keeping limescale and other staining at bay in future. I explained that proper maintenance can be conducted by simply rinsing the tiles with clean water after each use of the shower, and by using Tile Doctor Aqua-Pro tile aftercare cleaner at least once a week.
Phil Vissian
Northamptonshire Tile Doctor
 PEA Builders
by Steve Homa
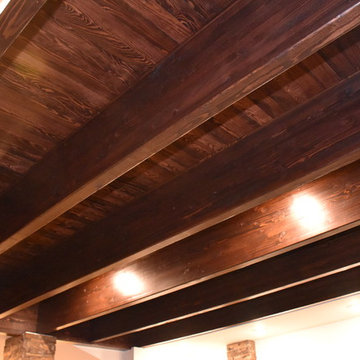
Entryway - mid-sized zen concrete floor and brown floor entryway idea in Milwaukee with white walls and a red front door
Entryway - mid-sized zen concrete floor and brown floor entryway idea in Milwaukee with white walls and a red front door

 Tile Doctor Ltd
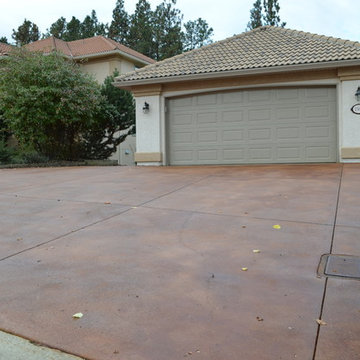
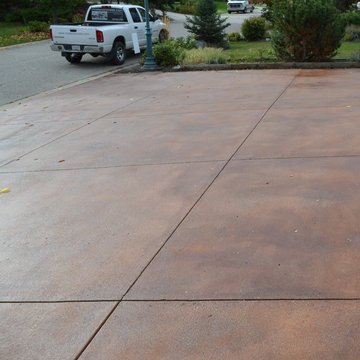
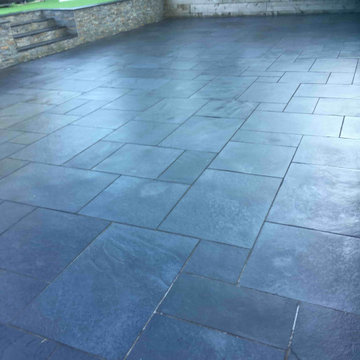
The photographs below are of an 80m2 Black Limestone Patio that was laid in rear garden of a property in Sandbach. All was going well until the installer decided to clean up the stone and remove the excess grout (aka grout haze) using brick acid. This is common practice in the trade after laying a patio however what they failed to realise is that Limestone can be marked by acids and in fact can be dissolved over time. This left the patio looking drained and in quite a state as you can imagine.
In an attempt to restore the black colour of the stone, the tiler painted on a restoration product however with the grout haze still present on the stone all this did was to add to the problems. Frustrated the customer decided to call Tile Doctor and so I went over to see what could be done.
I quickly deducted that the brick acid will have damaged the surface of the stone so to restore it I ran some tests on a small part of the patio that I been badly affected using a series of diamond encrusted burnishing pads of different grits. The pads successfully demonstrated that the appearance could be restored and impressed with the difference I was given the job of renovating all 80m2.
Being outside weather was an issue and I had to reschedule until a dry weather window appeared. Cleaning during damp weather isn’t a problem, it’s the sealer which needs to be applied when the sone is dry to get the right result.
Made with industrial diamonds and available in different sizes and grits, burnishing pads are ideal for restoring the appearance of polished stone floors. The first step was to work on the most badly damaged tiles with a coarse 100 and then 200-grit diamond milling pad fitted to a weighted rotary machine and lubricated with water. This took off the ruined top layer of the limestone bringing up the virgin stone underneath.
Next the patio was worked on with a 400-grit diamond burnishing pad, followed by 800-grit, and then 1500-grit pad. Each pad further renovates the appearance of the stone (Honing) and had to be rinsed after each pad to remove the slurry that is generated.
With 80m2 of Limestone paving to cover it took four days to completely restore all the stone using this method. It was tough work, but it made an incredible difference and naturally was far more cost effective than replacing the patio.
With the stone cleaned up the last step was to restore the natural black colour in the Limestone with an application of Tile Doctor Stone-Oil which restores the deep black colour and adds texture to the stone, it’s also an impregnating sealer in its own right that adds protection and improves mechanical strength once cured.
I allowed this to dry overnight then returned the next day to finish the patio restoration with a further coat of Tile Doctor Ultra-Seal, a no-sheen natural-looking sealer formulated to provide maximum stain protection without altering the colour of the stone.
The customer was delighted with the transformation, what was one an uninviting ugly area now looks fantastic and welcoming. Impressed with the result they left the following glowing feedback:
“Kamila is A M A Z I N G! From discussing our issue over the phone to meeting her in person, her advice and professionalism was second to none. She worked hard to repair our outdoor patio and we are thrilled with her results! We would happily recommend Kamila and wish her every success with her business in the future! Thank you Kamila! X
Kamila Logonzy
East Cheshire Tile Doctor
 Looks to Sell, LLC
Mr. Eddy
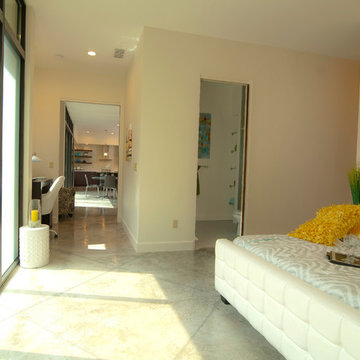
Mid-sized trendy master concrete floor bedroom photo in Orlando with white walls and no fireplace
Mid-sized trendy master concrete floor bedroom photo in Orlando with white walls and no fireplace
9