
Search results for "Adding rings" in Home Design Ideas
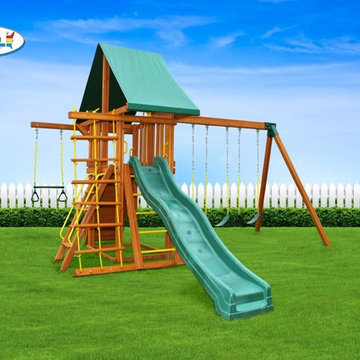
 Eastern Jungle Gym
Foot Print 17' x 14' (allow 6' clearance around set)
Playdeck Height: 5'
Overall Height 11' 6"
Swing Beam Height: 8′
Clubhouse Size: 55″x 39″
Tent Color: Solid Green or Green & Yellow
10′ Wave Slide Color: Green or Yellow Featured Add-Ons: Wooden Step Ladder, Accessory Arm & Additional Sling Swing
The Dreamscape Swing Set #2 is designed in an L-Shape making it the ideal choice for backyards with limited space. This model includes a fourth swing position with an added accessory arm and sling swing. It also features a wooden step ladder for easy access from the side. This cedar swing set comes complete as pictured.features a 10' wave slide, two sling swings, gym ring trapeze bar combo and even comes with a steering wheel, telescope and grab handles. The Dreamscape swing set comes complete with everything pictured and can be added onto later so it can grow with your family.
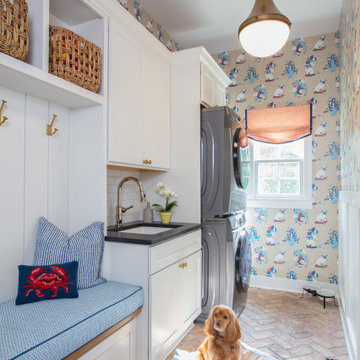
 Sew Beautiful
Custom window treatments balance beauty and function, softening the architecture, enhancing views, and creating a comfortable, polished environment perfect for everyday living — in this collaborative project with Barbara Galgano, of BB Interiors.
Floor-to-ceiling drapery in a soft blue and cream botanical print frames expansive windows, filling the living room with natural light while adding depth and sophistication. The tailored pleated panels, finished with a tassel trim detail and hung from custom French return rod and rings, bring a refined elegance to the space while remaining approachable and inviting.
In the inviting kitchen, custom-tailored Roman shades and seat cushions provide a refined yet welcoming layer of comfort and style. The Roman shades, feature a fabric that complements the room’s palette and coordinates with the adjacent living room draperies. Coordinating seat cushions on the barstools are expertly upholstered for both durability and comfort, adding softness to the sleek seating.
In the cheerful and highly functional laundry and mudroom, custom soft furnishings bring both comfort and personality. The built-in bench features a tailored cushion upholstered in a fresh blue geometric print, edged with piping for a polished finish—perfect for a quick seat while slipping on shoes or folding laundry. The window is dressed with a relaxed Roman shade in a lively coral-and-white pattern, framed with a crisp blue pleated tape trim. These pieces add a playful contrast to the whimsical dog-print wallpaper, creating a space that’s as stylish as it is practical.
Together, these custom elements elevate the home’s design, creating a cohesive, polished look that blends everyday function with a touch of luxury.
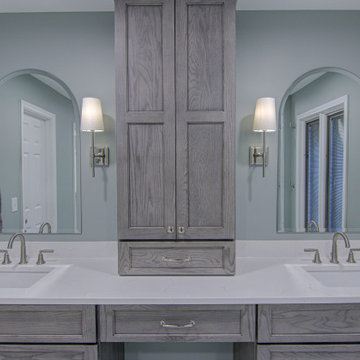
 KCBR Design | Remodel
This project features a stunning blend of modern elegance and timeless design. Polished nickel cabinet handles and satin nickel knobs complement the sleek arched bathroom wall mirror and 3/8 frameless door, creating a clean, minimalist aesthetic. The flooring showcases a mix of Carrara Ultra White and Keystone White hex tiles, adding texture and sophistication. Countertops include Calacatta Matte and Bianco Aspen finishes for a luxurious touch, paired with an undermount sink. Lighting is thoughtfully curated with a triple vanity light and Pearson shade sconces, while Brilliance stainless towel rings and a widespread faucet complete the look with refined functionality.
Find the right local pro for your project
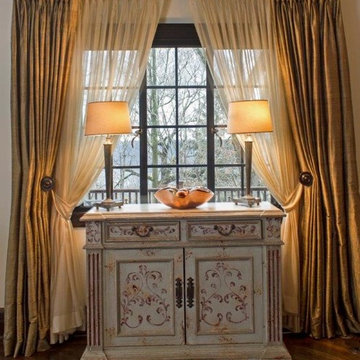
 Archetype Interiors LLC
Sheer drapery panels diffuse the light while adding a soft, warm glow. Drapery is a custom made in Dupioni silk with lining and heavy flannel interlining adding depth and plushness to the window treatment. Finish on the drapery hardware is walnut.
 Brilliant
Are you considering making your house smart? Good thinking! There are many advantages to having a smart home, but before you dive into buying products, make sure you do your research and have a plan. Make sure you have a clear understanding of what it is you want to achieve. The purpose of a smart home is to make your life simple and easy, but without a plan it can have the opposite effect and become over complicated.
Here is a sample layout:
Tip 1: First, buy a smart hub like SmartThings or Wink, from there you can go onto their website and see which devices they are compatible with.
Tip 2: Brilliant allows SmartThings and Wink to control lights, locks and doors. If you are looking for a smart light switch, this is a great option because you have the option of controlling your devices from your Brilliant app, the switch itself, voice, and for lights there are motion sensors. Added bonus, Alexa is built in!
Tip 3: Now that you have Brilliant, see what other devices Brilliant is compatible with. For example, you can create your sound system with Sonos or Bose. For climate you have options like Nest or Honeywell.
Tip 4: Want a video doorbell? Get Ring! Right now our Ring integration displays a notification on the Brilliant screen if someone presses the button, or it will display the video feed if you prefer. If you have a smart lock connected (via a hub), you will the option to open the door directly from the notification.
Tip 5: Start working room to room. To create a uniform look in the kitchen, why not get all Samsung products? Want an awesome movie room? See how the other devices you already have can integrate with your TV before you start buying new things. DO YOUR HOMEWORK! Then, if there is anything extra you need you can go out and buy it!
Photo Credit: Aubrie Pick (Please contact Aubrie for info on other products)
https://www.houzz.com/user/aubrie-pick
 Alair Homes Plano
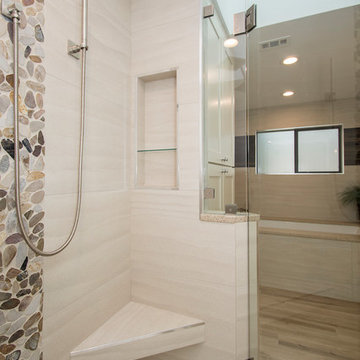
These clients debated moving from their dated 1979 house but decided to remodel since they loved their neighborhood and location of their home. We did a whole house interior and exterior remodel for them and they are so happy with their decision. The homeowners felt that reading floorplans was not so easy, so they loved our ability to provide 3D renderings and our personal touches and suggestions from our in-house designers.
The general layout of the home stayed the same with a few minor changes. We took the 38 year old home down to the studs and transformed it completely. The only thing that remains unchanged is the address. The popcorn texture was removed from the ceiling, removed all soffits, replaced all cabinets, flooring and countertops throughout the home. The wet bar was removed from the living room opening the space. The kitchen layout remained the same, but the cook surface was moved. Unneeded space was removed from the laundry room, giving them a larger pantry.
The master suite remained the same but additional lighting was added for reading. We made major improvements in the master bath by adding a rain shower, more storage and a bench to their new shower and gave them a larger bathtub.
All new cedar siding was replaced on the exterior of the home and a fresh coat of paint makes this 1979 home look brand new!
Design/Remodel by Hatfield Builders & Remodelers | Photography by Versatile Imaging
 Alair Homes Plano
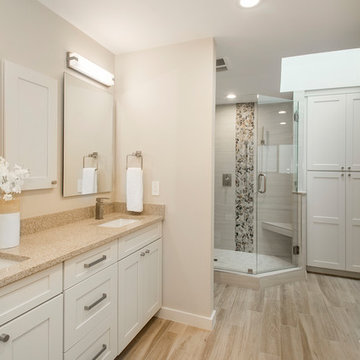
These clients debated moving from their dated 1979 house but decided to remodel since they loved their neighborhood and location of their home. We did a whole house interior and exterior remodel for them and they are so happy with their decision. The homeowners felt that reading floorplans was not so easy, so they loved our ability to provide 3D renderings and our personal touches and suggestions from our in-house designers.
The general layout of the home stayed the same with a few minor changes. We took the 38 year old home down to the studs and transformed it completely. The only thing that remains unchanged is the address. The popcorn texture was removed from the ceiling, removed all soffits, replaced all cabinets, flooring and countertops throughout the home. The wet bar was removed from the living room opening the space. The kitchen layout remained the same, but the cook surface was moved. Unneeded space was removed from the laundry room, giving them a larger pantry.
The master suite remained the same but additional lighting was added for reading. We made major improvements in the master bath by adding a rain shower, more storage and a bench to their new shower and gave them a larger bathtub.
All new cedar siding was replaced on the exterior of the home and a fresh coat of paint makes this 1979 home look brand new!
Design/Remodel by Hatfield Builders & Remodelers | Photography by Versatile Imaging

Sponsored
Columbus, OH

Hope Restoration & General Contracting
Columbus Design-Build, Kitchen & Bath Remodeling, Historic Renovations
 KCBR Design | Remodel
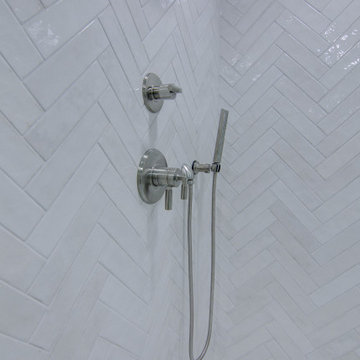
This project features a stunning blend of modern elegance and timeless design. Polished nickel cabinet handles and satin nickel knobs complement the sleek arched bathroom wall mirror and 3/8 frameless door, creating a clean, minimalist aesthetic. The flooring showcases a mix of Carrara Ultra White and Keystone White hex tiles, adding texture and sophistication. Countertops include Calacatta Matte and Bianco Aspen finishes for a luxurious touch, paired with an undermount sink. Lighting is thoughtfully curated with a triple vanity light and Pearson shade sconces, while Brilliance stainless towel rings and a widespread faucet complete the look with refined functionality.
 The Fabric Loft
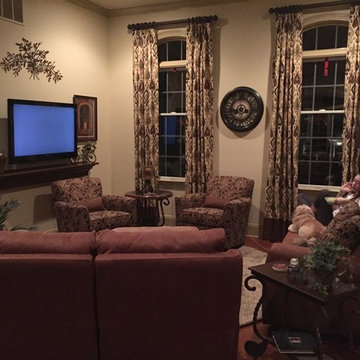
These arched windows in a Newtown, PA sunroom are accented with pleated panels on wood poles with rings. The panels have a coordinating fabric at the bottom for an added touch and small lumbar pillows are placed on the upholstered chairs.
 Sierra Living Concepts Inc
Dimension:
55" L X 23.5" D X 74.5" H
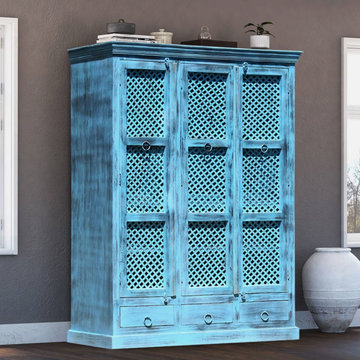
Ideal for adding storage to any room, our Turin Distress Blue Reclaimed Wood Large Armoire Wardrobe With Drawers is certain to help cut down clutter with style and class.
When it comes to your bedroom, or even den or guest bedroom, space to neatly store your essentials seems to always be at a premium. With this large wardrobe armoire, a lack of closet space doesn't have to be a problem. This rustic farmhouse inspired distressed blue finish wardrobe armoire allows you to introduce instant storage space to your bedroom. The armoire unit's unique lattice doors allow you a peek at the interior contents without the upkeep of glass. Double doors on one side of the armoire assure lots of storage, with two shelves topped by a single hanging rod. The single cabinet door reveals a similar layout, but with more cozy dimensions. Tucked beneath it all are three drawers that make a perfect complement to the cabinet storage, providing a room for socks or delicates, among other possibilities. In addition to the metal ring pulls, the rustic wood armoire feature classic wooden latches along the top and rests on a sturdy platform base.
This smart storage system is handmade with solid reclaimed wood, made from the old world style of woodworking. The stunning finish makes it stand out as an example of fine storage and impeccable craftsmanship.
Special Features:
• 100% Handcrafted
• Made from solid reclaimed wood
• Iron latticework on the doors
• 3 door wardrobe armoire
• 2 door cabinet with large wardrobe compartment and shelves
• Single door cabinet with hanging rod and shelves
• Plenty of interior shelving
• Can be custom-made to have removable/adjustable shelves upon request
• Hanging rod
• 3 drawers at the bottom
• Metal ring pulls and wooden latches
• Premium heirloom quality
• Anti-tip kit included
Note: Custom Options such as Size, Shape, Shade & Design are not applicable to this item. Reclaimed Wood Furniture is subjected to have Slight Variations. Real wood is a product of nature, and as such, no two pieces are alike. Variations in solid wood grain patterns are to be expected and make each furniture uniquely beautiful, just like us humans.
 Alair Homes Plano
These clients debated moving from their dated 1979 house but decided to remodel since they loved their neighborhood and location of their home. We did a whole house interior and exterior remodel for them and they are so happy with their decision. The homeowners felt that reading floorplans was not so easy, so they loved our ability to provide 3D renderings and our personal touches and suggestions from our in-house designers.
The general layout of the home stayed the same with a few minor changes. We took the 38 year old home down to the studs and transformed it completely. The only thing that remains unchanged is the address. The popcorn texture was removed from the ceiling, removed all soffits, replaced all cabinets, flooring and countertops throughout the home. The wet bar was removed from the living room opening the space. The kitchen layout remained the same, but the cook surface was moved. Unneeded space was removed from the laundry room, giving them a larger pantry.
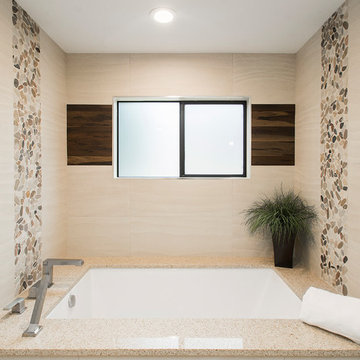
The master suite remained the same but additional lighting was added for reading. We made major improvements in the master bath by adding a rain shower, more storage and a bench to their new shower and gave them a larger bathtub.
All new cedar siding was replaced on the exterior of the home and a fresh coat of paint makes this 1979 home look brand new!
Design/Remodel by Hatfield Builders & Remodelers | Photography by Versatile Imaging
 Flooring & Window Decor
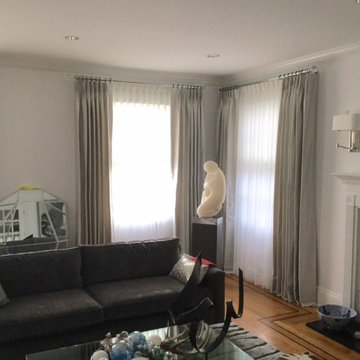
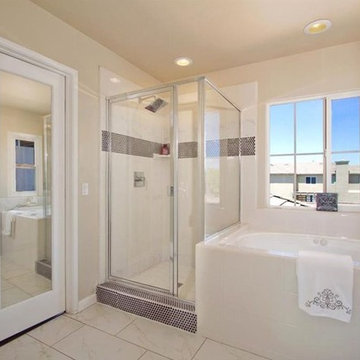
This installation took place in Manhasset, New York. The polished chrome rods with acrylic finials were jewely that the customer splurged for. It added such elegance to the room. Hunter Douglas Motorized Duettes were installed under the sheers. The customer can operate the shades from their ipad or iphone in addition to a remote control. The sheers softened the appearance in the room but maintained essential sunlight. Stretch sheers were installed alongside the front door for privacy.
 Home to Haven Renovations
This designer kitchen went from boring to gorgeous in 30 days! We updated the look with bright white cabinetry, and added quartz countertops. The pendant lighting adds a bit of bling to go with the stainless appliances. A beautiful marble and glass tile backsplash completes the glamorous look. The island was an odd shape, but we added an extended bar which will be a perfect spot for enjoying morning coffee. We also chose a dark, plank wood flooring to update the space, as well as a soft light grey paint color on the walls.
Sponsored
Columbus, OH
Hope Restoration & General Contracting
Columbus Design-Build, Kitchen & Bath Remodeling, Historic Renovations
 KCBR Design | Remodel
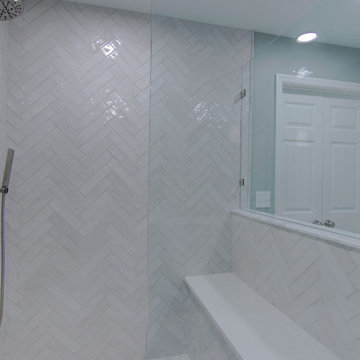
This project features a stunning blend of modern elegance and timeless design. Polished nickel cabinet handles and satin nickel knobs complement the sleek arched bathroom wall mirror and 3/8 frameless door, creating a clean, minimalist aesthetic. The flooring showcases a mix of Carrara Ultra White and Keystone White hex tiles, adding texture and sophistication. Countertops include Calacatta Matte and Bianco Aspen finishes for a luxurious touch, paired with an undermount sink. Lighting is thoughtfully curated with a triple vanity light and Pearson shade sconces, while Brilliance stainless towel rings and a widespread faucet complete the look with refined functionality.
 Versa Style Design
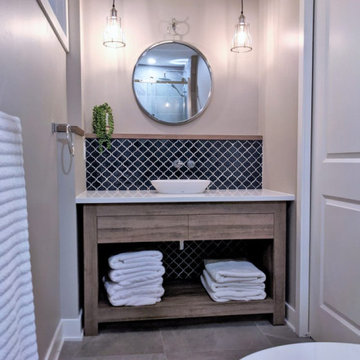
The clients wanted to separate the laundry zone from the bathroom in their basement. They also wanted a larger bathroom with a walk-in glass shower and an added large and functional laundry space across the hallway. While renovating the laundry zone we also created closed storage with sliding doors on both sides of the laundry zone. The bathroom was extended 24’’ into the adjoining family den to allow for a vary large shower. We designed a custom vanity with a rustic wood finish, recommended all the tiles and finishes as well as the ceiling lighting and vanity pendant lights. The floors are heated for greater comfort in this basement bathroom and laundry area. We designed the wall-mounted plumbing with a gorgeous royal blue arabesque wall tile and rustic wood shelf. The revamped basement bathroom is roomy, uncluttered, stylish and very practical for a growing family.
Materials used:
Schluter Ditra-Heat Floor, Uniboard custom vanity and shelving finishes, Quartz counter top, Sherwin Williams paint, Chrome industrial pendant lighting, porcelain vessel sink, Chrome Riobel wall-mounted faucet and shower fixtures, 2’’ x 2’’ grey ceramic shower floor tile, 12 x 24 grey shower wall tile, 24’’ x 24’’ heated floor tile, blue arabesque mosaic vanity backsplash with white grout, chrome 24’’round mirror, chrome Riobel paper-holder and towel ring, white storage cabinets over the washer-dryer with an added pole for air-drying.
 Paradise Found Construction
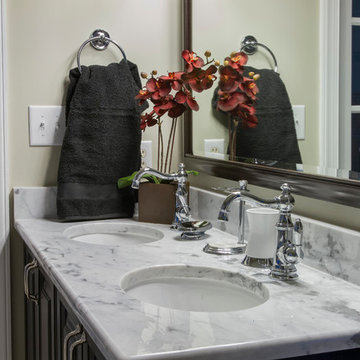
Cecelia and Neil loved their home in Cary, NC, but felt that their Master Bath was outdated and not serving well to provide the space that they wanted. The large garden tub did not appeal to them, and took up too much floor space, making the shower enclosure feel small.
Our solution was to remove the old tub, shower enclosure, vanity, and tile and start over.
The liked the “Retro Look” of a claw foot free-standing tub and bright “Subway Tile” and the warm rich feel of dark wood.
We positioned the claw-foot in a fraction of the space that the old tub took up, allowing us to increase the size of the shower enclosure. We added the bright “Subway tile” to the shower enclosure, and laid octagonal mosaic tile on the floor, with a black accent line running along the perimeter of the bathroom.
We installed a warm rich dark wood “Furniture Style” vanity, with a luxurious Carrara marble top. We crowned the half-wall separating the water closet from the main room with matching Carrara marble, and added a wall hung cabinet for extra storage. As a special touch, we installed Carrara marble on top of the shower curb and installed the shower glass on top of the curb.
All of the design elements came together to create a bright yet inviting “Retro-Style” Master Bath that Cecelia and Neil enjoy using every day!
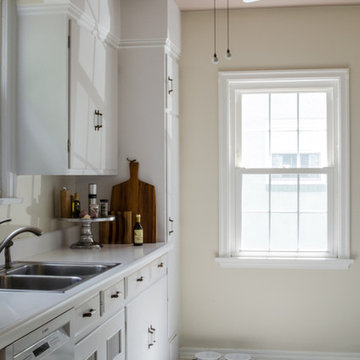
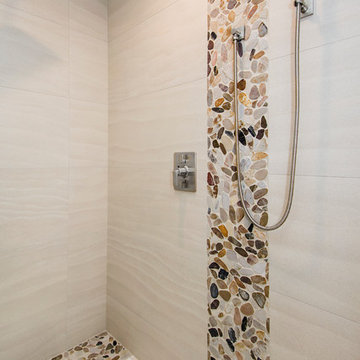 Alair Homes Plano
These clients debated moving from their dated 1979 house but decided to remodel since they loved their neighborhood and location of their home. We did a whole house interior and exterior remodel for them and they are so happy with their decision. The homeowners felt that reading floorplans was not so easy, so they loved our ability to provide 3D renderings and our personal touches and suggestions from our in-house designers.
The general layout of the home stayed the same with a few minor changes. We took the 38 year old home down to the studs and transformed it completely. The only thing that remains unchanged is the address. The popcorn texture was removed from the ceiling, removed all soffits, replaced all cabinets, flooring and countertops throughout the home. The wet bar was removed from the living room opening the space. The kitchen layout remained the same, but the cook surface was moved. Unneeded space was removed from the laundry room, giving them a larger pantry.
The master suite remained the same but additional lighting was added for reading. We made major improvements in the master bath by adding a rain shower, more storage and a bench to their new shower and gave them a larger bathtub.
All new cedar siding was replaced on the exterior of the home and a fresh coat of paint makes this 1979 home look brand new!
Design/Remodel by Hatfield Builders & Remodelers | Photography by Versatile Imaging
Sponsored
Columbus, OH

Wannemacher Interiors
Customized Award-Winning Interior Design Solutions in Franklin Cnty OH
 Solstice Kitchen and Bath
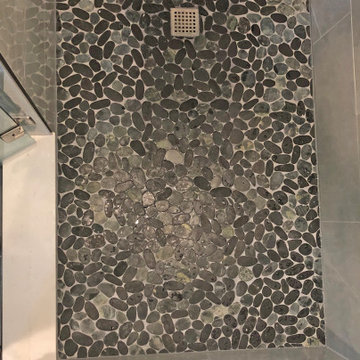
This Odenton, MD master bathroom design fits storage, style, and a highly functional layout into a compact space. The HomeCrest maple Sedona style vanity cabinet in a willow gray finish fits neatly into an alcove and offers ample storage and space for two people to get ready. The vanity is topped by a Calacatta Vicenza Q Quartz countertop with two Kohler Archer sinks, and Mirabelle Provincetown single hole sink faucets. The corner shower has a custom glass shower enclosure with a built in shower bench and three stainless shower shelves that provide storage for key toiletries. The shower has a Delta In2ition 2-in-1 multi-function wall-mounted handheld showerhead and Mirabelle shower valve and thermostatic valve. Tile creates a soothing setting in this shower design with Sande Gray 12 x 24 tile by MSI wall tile and shaved black stone sheet shower floor tile, adding to the soothing spa-style atmosphere in the bath design. The bathroom floor is Dimensions by MSI 12 x 24 graphite tile. Two Kohler Archer single door frameless mirrored medicine cabinets offer additional storage, and Mirabelle Provincetown towel rings provide space to hang up towels.
 Solstice Kitchen and Bath
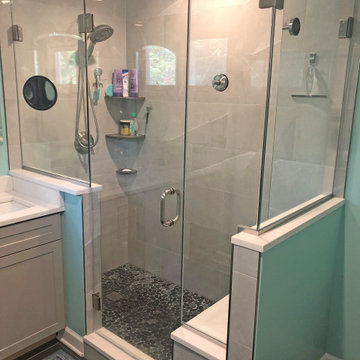
This Odenton, MD master bathroom design fits storage, style, and a highly functional layout into a compact space. The HomeCrest maple Sedona style vanity cabinet in a willow gray finish fits neatly into an alcove and offers ample storage and space for two people to get ready. The vanity is topped by a Calacatta Vicenza Q Quartz countertop with two Kohler Archer sinks, and Mirabelle Provincetown single hole sink faucets. The corner shower has a custom glass shower enclosure with a built in shower bench and three stainless shower shelves that provide storage for key toiletries. The shower has a Delta In2ition 2-in-1 multi-function wall-mounted handheld showerhead and Mirabelle shower valve and thermostatic valve. Tile creates a soothing setting in this shower design with Sande Gray 12 x 24 tile by MSI wall tile and shaved black stone sheet shower floor tile, adding to the soothing spa-style atmosphere in the bath design. The bathroom floor is Dimensions by MSI 12 x 24 graphite tile. Two Kohler Archer single door frameless mirrored medicine cabinets offer additional storage, and Mirabelle Provincetown towel rings provide space to hang up towels.

 Industrial Projects
Creating a comfortable outdoor living space is a priority for many homeowners and DIY enthusiasts. With rising summer temperatures, installing a shade tarp in your backyard offers an affordable and effective solution for sun protection. We’ve developed this detailed, step-by-step guide to help you confidently install a shade tarp that not only shields you from the sun but also adds aesthetic appeal to your outdoor area.
Benefits of Installing a Backyard Shade Tarp
Before diving into the installation process, let’s explore the key benefits of having a backyard shade tarp:
Provides UV Protection: Keeps your family and guests safe from harmful sun exposure.
Reduces Outdoor Temperatures: Creates a cooler, more enjoyable outdoor space.
Protects Outdoor Furniture: Extends the life of patio furniture by reducing sun damage.
Enhances Outdoor Aesthetics: Adds a modern, stylish look to your yard.
Budget-Friendly: More affordable compared to permanent structures like pergolas.
Materials and Tools You’ll Need
To begin your DIY backyard shade project, gather the following materials and tools:
Materials:
Shade tarp (UV-resistant and breathable)
Sturdy posts or existing structures (trees, fences, walls)
Mounting hardware (eye bolts, D-rings, turnbuckles, snap hooks)
Nylon or polyester rope, or stainless-steel wire
Concrete (if installing new posts)
Tools:
Power drill
Measuring tape
Level
Ladder
Wrench or adjustable spanner
Post hole digger (if installing new posts)
Step 1: Plan Your Shade Tarp Layout
The first step in installing your backyard shade tarp is careful planning. Take time to assess your outdoor area and answer these key questions:
Where is the sun’s path throughout the day?
What size and shape of tarp best suits your space?
Will you anchor the tarp to existing structures or install new posts?
What height do you want the tarp to sit at for maximum shade and airflow?
Pro Tip: Use string or garden hoses to visualize the tarp layout on the ground before making permanent decisions.
Step 2: Measure and Mark Anchor Points
Once you’ve determined the tarp’s location and orientation:
Measure the tarp dimensions.
Mark the exact points where each corner of the tarp will be anchored.
Ensure that the anchor points are at least 5–10% longer than the tarp size to allow for tensioning and slight adjustments.
Consider slope angles for water runoff. Aim for at least a 20-degree angle to prevent water pooling on the tarp.
Step 3: Install Support Posts (If Necessary)
If your backyard lacks existing anchor points like trees or fences, you’ll need to install sturdy support posts:
Dig post holes at least 24 inches deep and 8-12 inches wide for stability.
Set posts in concrete, making sure they remain plumb and level.
Allow the concrete to cure for at least 24–48 hours before applying tension from the tarp.
We recommend using pressure-treated wood, galvanized steel poles, or aluminum posts for longevity and strength.
Step 4: Install Mounting Hardware
With your anchor points ready, it’s time to install the necessary hardware:
Attach eye bolts or pad eyes securely into walls, posts, or other fixed structures.
For added flexibility and adjustability, install turnbuckles or tensioners to fine-tune the tarp’s tightness.
Connect snap hooks, D-rings, or carabiners to make assembly and disassembly easier.
Make sure all hardware is rated for outdoor use to prevent rust and corrosion.
Step 5: Attach and Tension the Shade Tarp
Now it’s time for the most satisfying part—mounting the shade tarp:
Begin by attaching one corner of the tarp to an anchor point.
Gradually attach the remaining corners, moving diagonally for even tension.
Adjust each connection point using your turnbuckles, ropes, or cables.
Pull the tarp tight enough to avoid sagging, but not so tight that it risks tearing.
Check that the tarp maintains the desired slope for rainwater runoff and adjust tension as needed.
Step 6: Final Adjustments and Safety Check
Before enjoying your new shaded area:
Inspect all anchor points and hardware for stability.
Test the tarp’s tension and make adjustments for even distribution.
Ensure that no sharp edges or loose connections remain that could damage the tarp or pose a safety hazard.
Confirm that the tarp is secure in windy conditions by giving it a gentle tug.
If you live in an area with frequent high winds, consider removing the tarp during storms to prevent damage.
Step 7: Enjoy Your Shaded Backyard Oasis
Once installed, your backyard shade tarp provides a comfortable and protective space for outdoor gatherings, relaxation, or family activities. You can decorate underneath with outdoor furniture, string lights, or potted plants to create a personalized outdoor retreat.
Maintenance Tips for Long-Lasting Shade Tarp Performance
To extend the life of your shade tarp, follow these maintenance guidelines:
Regularly check for wear and tear, especially around anchor points and seams.
Clean the tarp periodically with mild soap and water to prevent mildew buildup.
Store the tarp indoors during harsh weather seasons if it's not designed for year-round use.
Tighten hardware as needed to maintain proper tension and avoid sagging.
By following these simple care steps, your shade tarp will continue to deliver years of sun protection and outdoor comfort.
Conclusion: Upgrade Your Outdoor Space with a DIY Shade Tarp
Installing a shade tarp in your backyard is a cost-effective and rewarding DIY project. With careful planning, quality materials, and proper installation techniques, you’ll enjoy cool, shaded outdoor living all season long. This step-by-step guide ensures your project goes smoothly from start to finish.
20