
Search results for "Ads patch" in Home Design Ideas
 Western Skies Carpentry
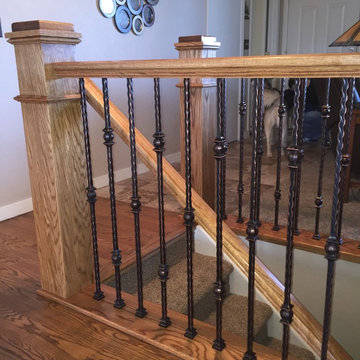
Removed interior half walls, patched drywall, texture and painted, built 2 new sections of handrail with solid oak 6x6 Craftsman style posts and solid steel decorative oil rubbed bronze balusters. Added new wall handrail to match.
Added a hand rubbed oil finish to all wood.
 ALL Renovation & Design LLC
Could a dreadful dishwasher leak be a blessing in disguise?
The Redding kitchen was very odd. The house was a beautiful brick house from the early 1900’s, but the kitchen had been renovated since then with an impractical layout. It worked, but, for as much time as Mr. and Mrs. spend in the kitchen, it left much to be desired. Because they enjoy cooking so much, they dreamed of having a functional kitchen that added to the character of the home and respected the history of it.
So that’s why Mr. and Mrs. went to a Lancaster Home Show where they meet ALL Renovation & Design. They were impressed with our process which guides clients through the design phase in a unique way that guarantees a customized remodel, tailored to their dreams. We really hit it off, but, since they were still in the idea stage, the years passed quickly.
Then one morning they discovered a puddle under the dishwasher. And, as is often the case, the damage had already spread to the surrounding cabinets and a large area of the floor. And upon further inspection, it was discovered that part of the floor was made with asbestos – which would require expert remediation. This was turning into a major rehab project.
That’s when they were faced with a tough call: do they patch it up now and rip it out in a few years when they remodel the entire kitchen, or, do they remodel now? They called ALL Renovation & Design.
First we worked with the insurance company to raise the damage claim to what it would have actually cost to repair the damage done by the leak… several thousand dollars higher than what they had initially appraised it.
Then we guided Mr. and Mrs. through the design process that carefully articulated the goals and vision for the new kitchen. Functionality and complementing the home’s character were top priority. They were extremely pleased with the help we provided in guiding them through the cabinet choices, layout, and color selections.
Communication was key. Especially when we got into the demolition and construction work. One thing you can be sure of when working with older homes is that there are almost always surprises between the walls. For the Redding kitchen it took the form of a steel support beam that we discovered on the second day of demolition. Because it prevented us from opening up the doorway, we had to pivot and adjust the cabinet spacing. Electrical access was also a serious problem that required added creativity to be sure the new space would include all the functionality of a modern kitchen. But all the challenges were overcome through creativity and almost constant communication.
At last, it was complete. Together we transformed the space into a beautiful transitional kitchen that is a joy to work in.
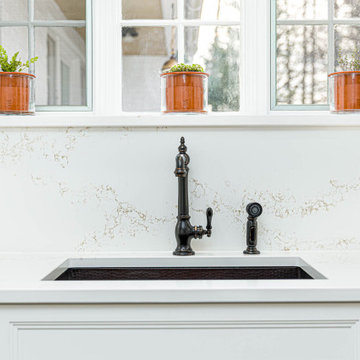
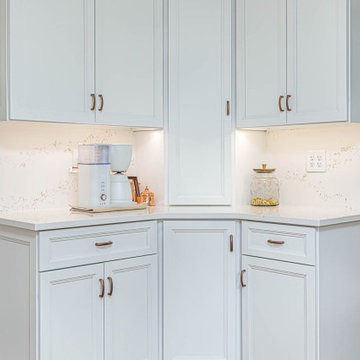
The maple cabinets with full-overlay doors were painted in matte white with copper hardware. The countertop and backsplash were Hanstone Quartz in the Strato color. It included a 30” single-basin sink in 14-gauge hammered copper. For the floor they chose Lauzan Maple Hardwood in the Sahara finish, installed in the herringbone pattern. And to really set off the kitchen, the old appliances were replaced with new GE Café appliances in their classy matte white with brushed copper accents.
Find the right local pro for your project
 SLC Interiors
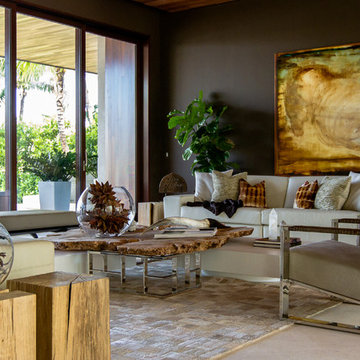
Example of a large trendy formal beige floor living room design in Miami with brown walls
 ALL Renovation & Design LLC
Could a dreadful dishwasher leak be a blessing in disguise?
The Redding kitchen was very odd. The house was a beautiful brick house from the early 1900’s, but the kitchen had been renovated since then with an impractical layout. It worked, but, for as much time as Mr. and Mrs. spend in the kitchen, it left much to be desired. Because they enjoy cooking so much, they dreamed of having a functional kitchen that added to the character of the home and respected the history of it.
So that’s why Mr. and Mrs. went to a Lancaster Home Show where they meet ALL Renovation & Design. They were impressed with our process which guides clients through the design phase in a unique way that guarantees a customized remodel, tailored to their dreams. We really hit it off, but, since they were still in the idea stage, the years passed quickly.
Then one morning they discovered a puddle under the dishwasher. And, as is often the case, the damage had already spread to the surrounding cabinets and a large area of the floor. And upon further inspection, it was discovered that part of the floor was made with asbestos – which would require expert remediation. This was turning into a major rehab project.
That’s when they were faced with a tough call: do they patch it up now and rip it out in a few years when they remodel the entire kitchen, or, do they remodel now? They called ALL Renovation & Design.
First we worked with the insurance company to raise the damage claim to what it would have actually cost to repair the damage done by the leak… several thousand dollars higher than what they had initially appraised it.
Then we guided Mr. and Mrs. through the design process that carefully articulated the goals and vision for the new kitchen. Functionality and complementing the home’s character were top priority. They were extremely pleased with the help we provided in guiding them through the cabinet choices, layout, and color selections.
Communication was key. Especially when we got into the demolition and construction work. One thing you can be sure of when working with older homes is that there are almost always surprises between the walls. For the Redding kitchen it took the form of a steel support beam that we discovered on the second day of demolition. Because it prevented us from opening up the doorway, we had to pivot and adjust the cabinet spacing. Electrical access was also a serious problem that required added creativity to be sure the new space would include all the functionality of a modern kitchen. But all the challenges were overcome through creativity and almost constant communication.
At last, it was complete. Together we transformed the space into a beautiful transitional kitchen that is a joy to work in.
The maple cabinets with full-overlay doors were painted in matte white with copper hardware. The countertop and backsplash were Hanstone Quartz in the Strato color. It included a 30” single-basin sink in 14-gauge hammered copper. For the floor they chose Lauzan Maple Hardwood in the Sahara finish, installed in the herringbone pattern. And to really set off the kitchen, the old appliances were replaced with new GE Café appliances in their classy matte white with brushed copper accents.
 Zieba Builders, Inc.
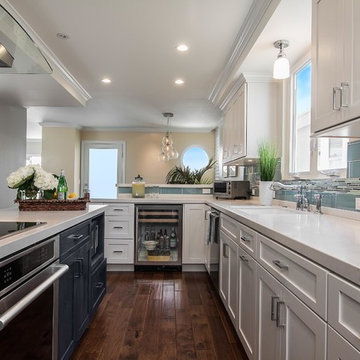
Our clients loved the location of their duplex home with its peak-a-boo ocean view, but their existing kitchen was not suited for their growing family. They wanted a kitchen with a coastal vibe, plenty of storage space, and an eat-in area.
We started by bringing the far wall into the kitchen space to accommodate a large panty and communication center for the family. Doing this allowed us to move the refrigerator out of the main traffic area and doubled the amount of storage space. Several new windows were added to bring in natural light. A half wall was moved to allow more countertop area and open up sight lines. The previously awkwardly shaped island was slimmed down to create better flow.
There were a few venting challenges to overcome; gas lines and plumbing had to be re-routed without disturbing the unit below. To open up sight lines, soffits were eliminated which allowed the extension of cabinets to the ceiling. To stay within the homeowner’s budget, we match existing scraped flooring by lacing in and repairing patches.
The old dining area was too small for table, so we designed and built a custom banquette to maximize the space and take advantage of the outdoor views. The overall space works for family meals as well as entertaining.
A light summer palette was used to reflect the shades of the sand, sea and sky. Even though the new kitchen is actually smaller than the original space, its now far more functional and open.
 Gappsi
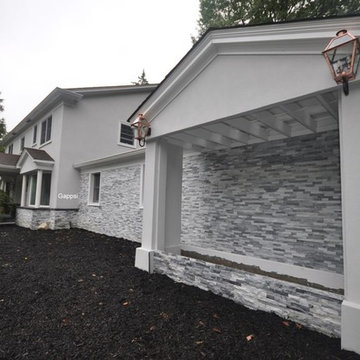
This home remodeling project was completed by Gappsi in Old Brookville, Long island NY. The project was a total renovation of the entire house exterior, including walls and trims. All existing crown moldings and sills were removed, the surface around the window exteriors and doors were adjusted and prepared, and then they were wrapped with decorative PVC/AZEK moldings. All moldings were sealed, nail holes were patched and filled, and all new trim work was painted.
Front stoop platform was enlarged from the original size and extended out with two new steps added. The top of the steps and platform were paved with Pennsylvania Bluestone, the sides and step risers were faced with grey-color split face marble stone veneer. Two columns, three feet tall, were added as a base for the portico columns.
The first floor and the 2-car garage walls were finished with grey & white colored marble split face stone veneer from foundation to the suffits. The front lawn retaining wall was redesigned and wrapped with the same grey color split face stone veneer. Bluestone caps were installed on top of it, and two new lights were installed on the left and right end side wall of the driveway aprons. Gappsi installed a new front entry door. New stucco was applied on all exterior walls of the front, rear, and side of the entire house with a light grey color.
Gappsi provides all types of home remodeling and construction throughout the Incorporated Village of Old Brookville in both zip code areas of 11545 and 11548. This village is located within the Town of Oyster Bay in Nassau County, New York. Gappsi also provides commercial general contractors, dormers, home extensions, and all home improvement services in the Village of Old Brookville on Long Island, NY.

Sponsored
Columbus, OH

Hope Restoration & General Contracting
Columbus Design-Build, Kitchen & Bath Remodeling, Historic Renovations
 Blooming Vistas
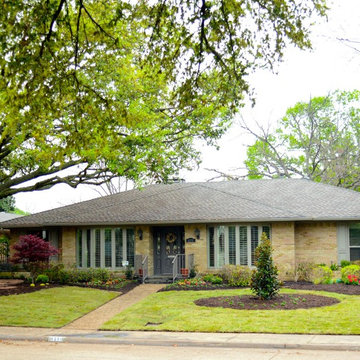
This was the morning after we redesigned the front yard. The owners had been dealing with brown patch for several seasons and it had progressively gotten worse. We replaced the St. Augustine with zoysia grass. It is drought tolerant and disease resistant. We added three varieties of Japanese Maples (bloodgood, coral bark, and fireglow) under the beautiful live oak. The front yard transitions from shade to sun as you walk along the sidewalk and added plants that would be happy in their new home.
 Zieba Builders, Inc.
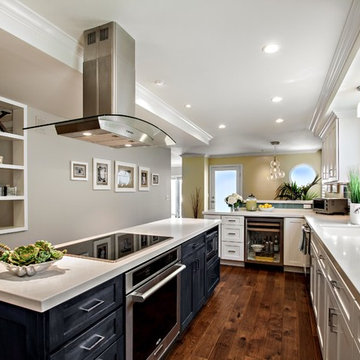
Our clients loved the location of their duplex home with its peak-a-boo ocean view, but their existing kitchen was not suited for their growing family. They wanted a kitchen with a coastal vibe, plenty of storage space, and an eat-in area.
We started by bringing the far wall into the kitchen space to accommodate a large panty and communication center for the family. Doing this allowed us to move the refrigerator out of the main traffic area and doubled the amount of storage space. Several new windows were added to bring in natural light. A half wall was moved to allow more countertop area and open up sight lines. The previously awkwardly shaped island was slimmed down to create better flow.
There were a few venting challenges to overcome; gas lines and plumbing had to be re-routed without disturbing the unit below. To open up sight lines, soffits were eliminated which allowed the extension of cabinets to the ceiling. To stay within the homeowner’s budget, we match existing scraped flooring by lacing in and repairing patches.
The old dining area was too small for table, so we designed and built a custom banquette to maximize the space and take advantage of the outdoor views. The overall space works for family meals as well as entertaining.
A light summer palette was used to reflect the shades of the sand, sea and sky. Even though the new kitchen is actually smaller than the original space, its now far more functional and open.
 Paradise Found Construction
A small pinhole in the coupling of the hot water supply line from the Hot Water Heater developed and began leaking and spraying hot steamy mist. Because of its location in the seldom used Finished Full Basement, it initially went unnoticed.
By the time the homeowners noticed the leaking water, the moisture content in the ceiling sheetrock and well down the walls read 100%. The moist, warm environment proved to be ideal for colonies of mold spores to spread throughout the basement, aided by the HVAC systems return and supply lines circulating the mold spores. It didn’t take long before mold patches eventually covered all of the exposed materials and surfaces, furniture included.
The homeowners’ had protection from their insurance policy and were able to have repairs done after this unfortunate disaster.
Construction ensued. The ceiling, floors, and all of the interior and exterior walls were stripped down to the wood framing and masonry and disposed of. The 1st and 2nd Floor HVAC Ductwork was removed, and the entire existing Full Bath was gutted.
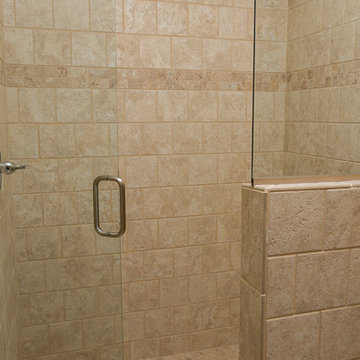
The remodeling included increasing the size of the full bath and removing the shower/tub as well as installing a large and comfortable tile shower. We added a small towel closet, and a separate entry into the adjoining room, which would now be reconfigured into a bedroom. A new EPA Water Sense-rated commode, a vanity cabinet with a natural granite countertop and an under-mount sink, a wall-hung mirror, and new sconce lights rounded out the update.
We turned the adjoining room next to the full bath into a bedroom. We added generous closet storage space and new lighting.
We finally turned our attention to the old kitchenette / wet bar. We took away some of the footprint to add to the full bath and designed an efficient and handsome wet bar / kitchenette.
Porcelain tile, no VOC interior paints, a complete replacement of the basement and 1st Floor HVAC ducting, air handler equipment cleaning, and green-certified carpet and pad combined to create a healthy and light-filled living environment.
 Zieba Builders, Inc.
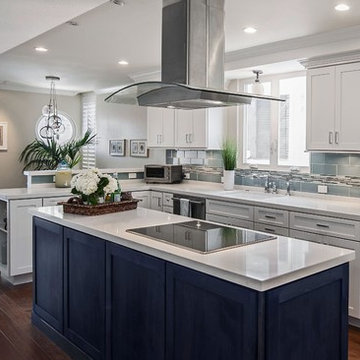
Our clients loved the location of their duplex home with its peak-a-boo ocean view, but their existing kitchen was not suited for their growing family. They wanted a kitchen with a coastal vibe, plenty of storage space, and an eat-in area.
We started by bringing the far wall into the kitchen space to accommodate a large panty and communication center for the family. Doing this allowed us to move the refrigerator out of the main traffic area and doubled the amount of storage space. Several new windows were added to bring in natural light. A half wall was moved to allow more countertop area and open up sight lines. The previously awkwardly shaped island was slimmed down to create better flow.
There were a few venting challenges to overcome; gas lines and plumbing had to be re-routed without disturbing the unit below. To open up sight lines, soffits were eliminated which allowed the extension of cabinets to the ceiling. To stay within the homeowner’s budget, we match existing scraped flooring by lacing in and repairing patches.
The old dining area was too small for table, so we designed and built a custom banquette to maximize the space and take advantage of the outdoor views. The overall space works for family meals as well as entertaining.
A light summer palette was used to reflect the shades of the sand, sea and sky. Even though the new kitchen is actually smaller than the original space, its now far more functional and open.
 Zieba Builders, Inc.
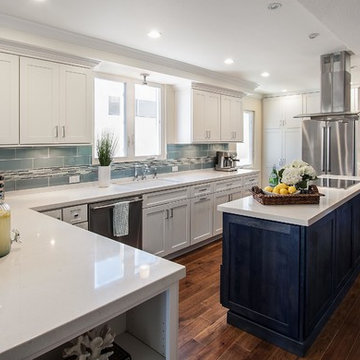
Our clients loved the location of their duplex home with its peak-a-boo ocean view, but their existing kitchen was not suited for their growing family. They wanted a kitchen with a coastal vibe, plenty of storage space, and an eat-in area.
We started by bringing the far wall into the kitchen space to accommodate a large panty and communication center for the family. Doing this allowed us to move the refrigerator out of the main traffic area and doubled the amount of storage space. Several new windows were added to bring in natural light. A half wall was moved to allow more countertop area and open up sight lines. The previously awkwardly shaped island was slimmed down to create better flow.
There were a few venting challenges to overcome; gas lines and plumbing had to be re-routed without disturbing the unit below. To open up sight lines, soffits were eliminated which allowed the extension of cabinets to the ceiling. To stay within the homeowner’s budget, we match existing scraped flooring by lacing in and repairing patches.
The old dining area was too small for table, so we designed and built a custom banquette to maximize the space and take advantage of the outdoor views. The overall space works for family meals as well as entertaining.
A light summer palette was used to reflect the shades of the sand, sea and sky. Even though the new kitchen is actually smaller than the original space, its now far more functional and open.
 EMBASSY CONSTRUCTION, LLC
MAJOR REPAIRS AND EXTERIOR MAKEOVER
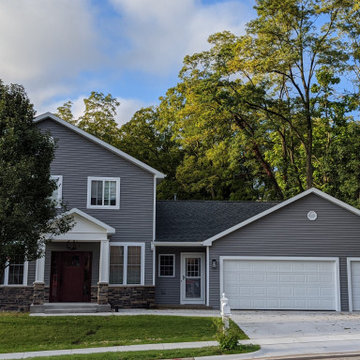
This classic colonial was constructed in 1990 and purchased by our customer in 2014. We were retained to restore, repair, and update the exterior of this property, with all parties anticipating that we were likely to uncover a variety of hidden issues. During the course of this undertaking, we replaced 17 windows. In a number of cases, we rebuilt sills and frames to the floor. All window replacements required new drywall and/or patching with new trim and painting.
Additional work was required to replace the sill across the front of the house and utilize jack studs to support the upper level while working.
The original plan included stripping off the old siding and installing new vinyl siding. We discovered that most exterior walls had never been sheathed with plywood. We sheathed all exterior walls and wrapped them with Tyvek.
As per the plan, we removed the door from the smaller upper deck above the primary deck, replaced rotted rim board and sill, and installed a new 48x48’ window to replace the doorway after resizing the former doorway. Insulating, patching of drywall, and the addition of new trim followed.
Reframed the opening from the kitchen to deck to receive a new 8’ x 6.75’ door and finished the jambs and casing to match existing trim in the rest of the house.
Removed and reconstructed front entry portico and replaced front entry door with sidelights and finished interior jambs and casing to match.
Removed garage door and framed in the opening with plywood and installed new siding over to match. Removed soffit and facia and replaced with new white vented panels and white facia—added stone to front portico with custom columns.
Removed old roof shingles and re-shingle all roofing on the garage and home with 30-year architectural shingles. Added ridge vent to allow the roof to breath better, replaced all flashing, and added lateral bracing to gable ends not previously tied in.
Installed new seamless gutters @ 6 inches (with covers over top) and 5 INCH downspouts to address water drainage. Extended all gable ends to standard 12-inch overhang.
The result is a beautifully restored and properly constructed 4 bedroom/4 bathroom home with an attached car garage.

Sponsored
Columbus, OH
Hope Restoration & General Contracting
Columbus Design-Build, Kitchen & Bath Remodeling, Historic Renovations
 McCabe By Design LLC
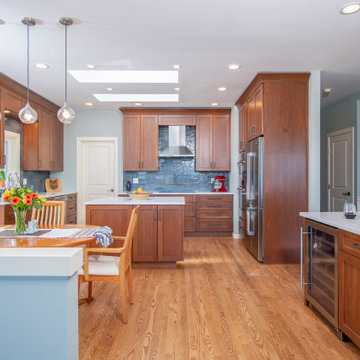
The original island size was reduced to create wider walkways. The smaller more streamlined island enables the owners to have ample room to cook together, and without the bulk of the larger island, the entire Kitchen is more spacious, visually and functionally.
 ALL Renovation & Design LLC
Could a dreadful dishwasher leak be a blessing in disguise?
The Redding kitchen was very odd. The house was a beautiful brick house from the early 1900’s, but the kitchen had been renovated since then with an impractical layout. It worked, but, for as much time as Mr. and Mrs. spend in the kitchen, it left much to be desired. Because they enjoy cooking so much, they dreamed of having a functional kitchen that added to the character of the home and respected the history of it.
So that’s why Mr. and Mrs. went to a Lancaster Home Show where they meet ALL Renovation & Design. They were impressed with our process which guides clients through the design phase in a unique way that guarantees a customized remodel, tailored to their dreams. We really hit it off, but, since they were still in the idea stage, the years passed quickly.
Then one morning they discovered a puddle under the dishwasher. And, as is often the case, the damage had already spread to the surrounding cabinets and a large area of the floor. And upon further inspection, it was discovered that part of the floor was made with asbestos – which would require expert remediation. This was turning into a major rehab project.
That’s when they were faced with a tough call: do they patch it up now and rip it out in a few years when they remodel the entire kitchen, or, do they remodel now? They called ALL Renovation & Design.
First we worked with the insurance company to raise the damage claim to what it would have actually cost to repair the damage done by the leak… several thousand dollars higher than what they had initially appraised it.
Then we guided Mr. and Mrs. through the design process that carefully articulated the goals and vision for the new kitchen. Functionality and complementing the home’s character were top priority. They were extremely pleased with the help we provided in guiding them through the cabinet choices, layout, and color selections.
Communication was key. Especially when we got into the demolition and construction work. One thing you can be sure of when working with older homes is that there are almost always surprises between the walls. For the Redding kitchen it took the form of a steel support beam that we discovered on the second day of demolition. Because it prevented us from opening up the doorway, we had to pivot and adjust the cabinet spacing. Electrical access was also a serious problem that required added creativity to be sure the new space would include all the functionality of a modern kitchen. But all the challenges were overcome through creativity and almost constant communication.
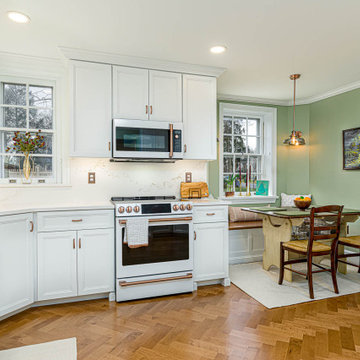
At last, it was complete. Together we transformed the space into a beautiful transitional kitchen that is a joy to work in.
The maple cabinets with full-overlay doors were painted in matte white with copper hardware. The countertop and backsplash were Hanstone Quartz in the Strato color. It included a 30” single-basin sink in 14-gauge hammered copper. For the floor they chose Lauzan Maple Hardwood in the Sahara finish, installed in the herringbone pattern. And to really set off the kitchen, the old appliances were replaced with new GE Café appliances in their classy matte white with brushed copper accents.
 San Luis Kitchen Co.
The owners of a charming home in the hills west of Paso Robles recently decided to remodel their not-so-charming kitchen. Referred to San Luis Kitchen by several of their friends, the homeowners visited our showroom and soon decided we were the best people to design a kitchen fitting the style of their home. We were delighted to get to work on the project right away.
When we arrived at the house, we found a small, cramped and out-dated kitchen. The ceiling was low, the cabinets old fashioned and painted a stark dead white, and the best view in the house was neglected in a seldom-used breakfast nook (sequestered behind the kitchen peninsula). This kitchen was also handicapped by white tile counters with dark grout, odd-sized and cluttered cabinets, and small ‘desk’ tacked on to the side of the oven cabinet. Due to a marked lack of counter space & inadequate storage the homeowner had resorted to keeping her small appliances on a little cart parked in the corner and the garbage was just sitting by the wall in full view of everything! On the plus side, the kitchen opened into a nice dining room and had beautiful saltillo tile floors.
Mrs. Homeowner loves to entertain and often hosts dinner parties for her friends. She enjoys visiting with her guests in the kitchen while putting the finishing touches on the evening’s meal. Sadly, her small kitchen really limited her interactions with her guests – she often felt left out of the mix at her own parties! This savvy homeowner dreamed big – a new kitchen that would accommodate multiple workstations, have space for guests to gather but not be in the way, and maybe a prettier transition from the kitchen to the dining (wine service area or hutch?) – while managing the remodel budget by reusing some of her major appliances and keeping (patching as needed) her existing floors.
Responding to the homeowner’s stated wish list and the opportunities presented by the home's setting and existing architecture, the designers at San Luis Kitchen decided to expand the kitchen into the breakfast nook using Wood-Mode cabinetry. This change allowed the work area to be reoriented to take advantage of the great view – we replaced the existing window and added another while moving the door to gain space. A second sink and set of refrigerator drawers (housing fresh fruits & veggies) were included for the convenience of this mainly vegetarian cook – her prep station. The clean-up area now boasts a farmhouse style single bowl sink – adding to the ‘cottage’ charm. We located a new gas cook-top between the two workstations for easy access from each. Also tucked in here is a pullout trash/recycle cabinet for convenience and additional drawers for storage.
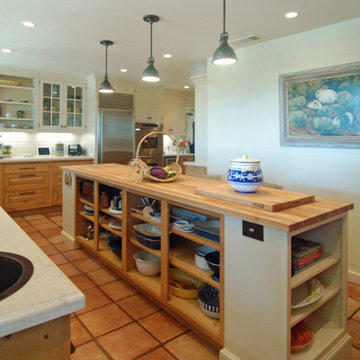
Running parallel to the work counter we added a long butcher-block island with easy-to-access open shelves for the avid cook and seating for friendly guests placed just right to take in the view. A counter-top garage is used to hide excess small appliances. Glass door cabinets and open shelves are now available to display the owners beautiful dishware. The microwave was placed inconspicuously on the end of the island facing the refrigerator – easy access for guests (and extraneous family members) to help themselves to drinks and snacks while staying out of the cook’s way.
We also moved the pantry storage away from the dining room (putting it on the far wall and closer to the work triangle) and added a furniture-like hutch in its place allowing the more formal dining area to flow seamlessly into the up-beat work area of the kitchen. This space is now also home (opposite wall) to an under counter wine refrigerator, a liquor cabinet and pretty glass door wall cabinet for stemware storage – meeting Mr. Homeowner’s desire for a bar service area.
And then the aesthetic: an old-world style country cottage theme. The homeowners wanted the kitchen to have a warm feel while still loving the look of white cabinetry. San Luis Kitchen melded country-casual knotty pine base cabinets with vintage hand-brushed creamy white wall cabinets to create the desired cottage look. We also added bead board and mullioned glass doors for charm, used an inset doorstyle on the cabinets for authenticity, and mixed stone and wood counters to create an eclectic nuance in the space. All in all, the happy homeowners now boast a charming county cottage kitchen with plenty of space for entertaining their guests while creating gourmet meals to feed them.
 Gappsi
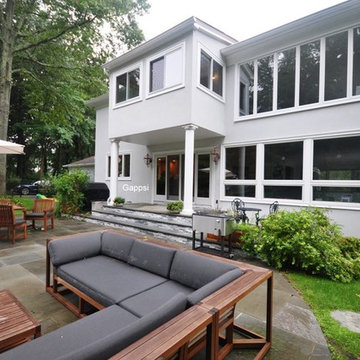
This home remodeling project was completed by Gappsi in Old Brookville, Long island NY. The project was a total renovation of the entire house exterior, including walls and trims. All existing crown moldings and sills were removed, the surface around the window exteriors and doors were adjusted and prepared, and then they were wrapped with decorative PVC/AZEK moldings. All moldings were sealed, nail holes were patched and filled, and all new trim work was painted.
Front stoop platform was enlarged from the original size and extended out with two new steps added. The top of the steps and platform were paved with Pennsylvania Bluestone, the sides and step risers were faced with grey-color split face marble stone veneer. Two columns, three feet tall, were added as a base for the portico columns.
The first floor and the 2-car garage walls were finished with grey & white colored marble split face stone veneer from foundation to the suffits. The front lawn retaining wall was redesigned and wrapped with the same grey color split face stone veneer. Bluestone caps were installed on top of it, and two new lights were installed on the left and right end side wall of the driveway aprons. Gappsi installed a new front entry door. New stucco was applied on all exterior walls of the front, rear, and side of the entire house with a light grey color.
Gappsi provides all types of home remodeling and construction throughout the Incorporated Village of Old Brookville in both zip code areas of 11545 and 11548. This village is located within the Town of Oyster Bay in Nassau County, New York. Gappsi also provides commercial general contractors, dormers, home extensions, and all home improvement services in the Village of Old Brookville on Long Island, NY.
Sponsored
Columbus, OH

Structural Remodeling
Franklin County's Heavy Timber Specialists | Best of Houzz 2020!

 Oran Remodeling Inc.
We began this project by having the client meet with our kitchen designer and coming up with the best use of their galley/wall style kitchen and bathroom. We ended on a layout that relocated some of the appliances and installed a new kitchen island and vanity for the bathroom. We also added electrical and gas lines for an oven, cook-top, outlets and hood vent.
In addition we also:
Demo all heater, cap, patch, and repair wall.
Replace 6 cans in small office space- customer to provide cans and lightbulbs.
Install new light fixture in the hall.
Move hall receptacle down.
Remove door, molding hinges between kitchen and front room. (NOT MAIN STUDIO. Enlarge opening/ move light switch and Recep. Remove molding around bath door and main studio door (one side), no patching needed- painters will do.
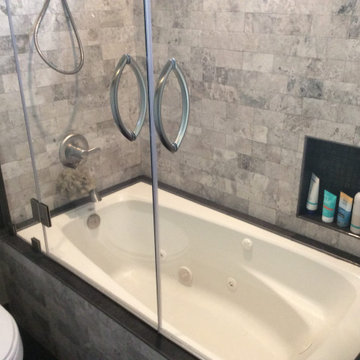
Demo all tile on walls and in shower in the bathroom, hand bars, soap dispenser, medicine cabinet, mirror, 4 light fixtures, paper towel holder, the cabinet on the wall over toilet, shelf over toilet, toilet paper holder, towel holder on door and walls.
Enlarge opening of the shower,- Ok to demo shower for all glass enclosure- If the cost is the same- as just enlarging opening with new glass door.
Install new tile on walls in bathroom from top to bottom (exclude floor and ceiling).
Create a place in the shower for shower niche and install niche.
Install tile on shower walls and floor.
Install shower door – customer to supply.
Install bath hardware- TP holder, towel rod, bath hooks, tower shelf.
Replace shower head and knobs (like for like).
New hot mop, new wood stud as necessary, replace fan to code install new shower door (customer will supply).
Install new toilet, vanity, mirrored medicine cabinet, replace 2 light fixtures.
Install in the kitchen faucet and sink.
Replace current light with chandelier light (like for like).
Replace kitchen track light with new track light.
Install 9 LED fluorescent lights in loft space (above small office)- customer to supply.
Build and install a 8’x10’ wall, drywall both sides. Reduced size of the wall- Revise Bid (was 12’x12).
Move 2 track lights in the main workspace.
Replace (4) fluorescents lights in the studio.
Install Polycarbonate cover over bath skylight.
Replace dimmer switches and timers (4).
Install vinyl cove base under kitchen cabinets.
Remove black cabinet conversing fire sprinkler pipes- install modify existing bookcase cabinets.
Bury electrical flexible conduit and box (next to back door).
 Judy Mozen
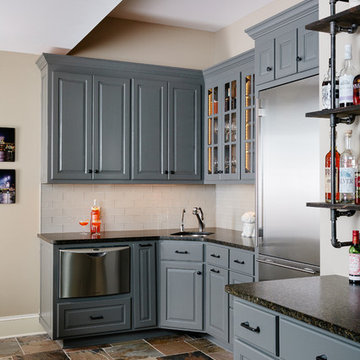
We added LED lighting inside the kitchen cabinets during the remodel of this cozy kitchen and bar. A tile backsplash was added, and the cabinets were patched and painted. Gregg Willett Photography
5