
Search results for "Ani pole" in Home Design Ideas

 Cuckooland
This awesome Kids Tent Cabin Bed (in green, but other colours are available!) is the perfect centre piece in any kids bedroom and will create a wonderful adventure scene. It can be used as an enclosed bed or the cloth side wall can open up into a canopy which is held up by 2 poles. And the canopy can just as easily be taken down again, the cloth rolled up and fastened with strips.... perfect for keeping out mum and dad or annoying brothers and sisters at playtime. For more childrens bed inspiration click here.
We also deliver to the United States & Countries outside the UK! Please contact us for an overseas shipping quote. Email us at customerservice@cuckooland.com or call +44 (0) 1305 231 231 Mon-Fri 9-6pm UK time.
This unique & unusual children's bed has a second sliding second bed underneath, so it's great for sleep overs (please note, mattresses not included but can be bought separately).
2 Beds - perfect for sleepovers.
Mattress sold separately,mattress size required: 90cm x 190cm.
Dimensions: Width 208cm x Depth 110cm x Height 146cm.
This product is handmade to order in France and will take 4-5 weeks for delivery.
Optional 2 man installation at time of delivery £150
We also offer you the option to have the bed fully installed by our professional 2 man delivery team at a cost of £150. Our team will arrive on time, discuss your requirements, unpack and fully install your bed and take away all the packing materials so all the hassle is taken care of.
 Cuckooland
This awesome Kids Tent Cabin Bed is the perfect centrepiece in any kids bedroom and will create a wonderful adventure scene. It can be used as an enclosed bed or the cloth side wall can open up into a canopy which is held up by 2 poles. And the canopy can just as easily be taken down again, the cloth rolled up and fastened with strips.... perfect for keeping out mum and dad or annoying brothers and sisters at playtime. For more childrens bed inspiration click here.
We also deliver to the United States & Countries outside the UK! Please contact us for an overseas shipping quote. Email us at customerservice@cuckooland.com or call +44 (0) 1305 231 231 Mon-Fri 9-6pm UK time.
This unique & unusual children's bed has a second sliding second bed underneath, so it's great for sleep overs (please note, mattresses not included but can be bought separately).
2 Beds - perfect for sleepovers.
Mattress sold separately,mattress size required: 90cm x 190cm.
Dimensions: Width 208cm x Depth 110cm x Height 146cm.
This product is handmade to order in France and will take 4-5 weeks for delivery.
Optional 2 man installation at time of delivery £150
We also offer you the option to have the bed fully installed by our professional 2 man delivery team at a cost of £150. Our team will arrive on time, discuss your requirements, unpack and fully install your bed and take away all the packing materials so all the hassle is taken care of. See our installation video below...

 User
Mirror strips accentuate the New York skyline directly out the window. A small cafe setup for intimate dining in the studio apartment. Photo by Samantha Goh for Homepolish
Find the right local pro for your project

 Dianne Davant and Associates
Master Bedroom with Red Bed Frame and custom drapery and bedding.
Bedroom - traditional master light wood floor bedroom idea in Charlotte
Bedroom - traditional master light wood floor bedroom idea in Charlotte

 Pro Dunk Hoops
Marietta, GA knows how to make your front yard driveway a a basketball port for the neighborhood. All you have to do is buy and install the Pro Dunk Gold Basketball System. It's not all that difficult. This is a Pro Dunk Gold Basketball System that was purchased in February of 2012. It was installed on a 48 ft wide by a 33 ft deep playing area in Marietta, GA. Browse all of Russ H's photos navigate to: http://www.produnkhoops.com/photos/albums/russ-48x33-pro-dunk-gold-basketball-system-223/

 Totally Home Totally Kids Furniture
Our Brenton Twin over Twin Bunk Bed gets its inspiration from the essence of modern danish designs. This collection works well for any age child who is looking for a more sophisticated style trend and will easily transition with your child as they grow. It is made from solid Acacia and veneers, and it features rounded corners with brushed drawer fronts and panels. The optional underbed storage drawers as shown offer an easy storage solution, or you can add a twin trundle for additional sleeping space. Both are priced separately, see below.
Includes: both top and bottom twin beds, 2 guardrails, angled ladder, and Euro-slats. Shown in a white/taupe finish and also available in a grey/grey finish. At a later date, this bunk will separate into 2 charming twin size beds. 41"W x 79-1/2"L x 69"H


Sponsored
Sunbury, OH

J.Holderby - Renovations
Franklin County's Leading General Contractors - 2X Best of Houzz!
 Cuckooland
This awesome Kids Tent Cabin Bed is the perfect centrepiece in any kids bedroom and will create a wonderful adventure scene. It can be used as an enclosed bed or the cloth side wall can open up into a canopy which is held up by 2 poles. And the canopy can just as easily be taken down again, the cloth rolled up and fastened with strips.... perfect for keeping out mum and dad or annoying brothers and sisters at playtime. For more childrens bed inspiration click here.
We also deliver to the United States & Countries outside the UK! Please contact us for an overseas shipping quote. Email us at customerservice@cuckooland.com or call +44 (0) 1305 231 231 Mon-Fri 9-6pm UK time.
This unique & unusual children's bed has a second sliding second bed underneath, so it's great for sleep overs (please note, mattresses not included but can be bought separately).
2 Beds - perfect for sleepovers.
Mattress sold separately,mattress size required: 90cm x 190cm.
Dimensions: Width 208cm x Depth 110cm x Height 146cm.
This product is handmade to order in France and will take 4-5 weeks for delivery.
Optional 2 man installation at time of delivery £150
We also offer you the option to have the bed fully installed by our professional 2 man delivery team at a cost of £150. Our team will arrive on time, discuss your requirements, unpack and fully install your bed and take away all the packing materials so all the hassle is taken care of. See our installation video below...

 CoverMyPatio.com
The Arcadia Louvered Roof enhances the beauty of any style home and provides the flexibility of having an open roof when the weather is good or a solid roof to keep the rain off your patio when the weather turns bad.
Eco-friendly Construction
The Arcadia system is made up of recycled aluminum making it an extremely Green product. It is also eco-friendly, helping consumers save on passive solar heating and cooling.
We Think Green
Arcadia is proud to continue the company's tradition with its approach to Environmental Innovation. From the choice of lightweight materials and lean production methods to the efficiency of its drive system and designs, Arcadia is committed to operating as a more sustainable business and reducing its overall environmental impact.
High-quality Building Materials
Each Arcadia system is a work of art, constructed with care and attention to every little detail.
Our system is powered coated, extruded aluminum with stainless steel components giving us the most durable louvered roof on the market today. From our superior drive system, which is UL & CE certified, down to the stainless steel tex screws that secures the system together. Nothing but the best!
Our low-maintenance components eliminate painting, staining, and waterproofing of traditional shading structures. Using powder-coated aluminum construction prevents warping, cracking, and corrosion.
Photographed by: Roger Chafin
 User
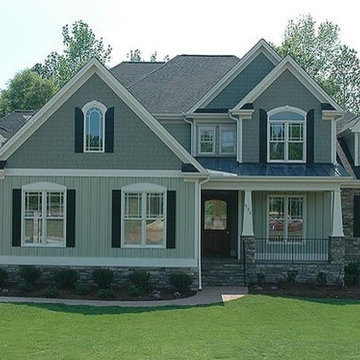
House Plan #20-1825 : Houseplans.com
Questions? Call us at 1-800-913-2350
Photographs may show modified designs. All images are copyrighted.
Plan 20-1825
3124 sq ft
4 beds
4.50 baths
68' wide
63' deep
×
Plans
Main Floor Plan
Reverse
Upper Floor Plan
Reverse
Specifications
Plan Styles
Craftsman
European
Area
Garage Sq Ft
930 sq ft
Main Floor Sq Ft
1988 sq ft
Bonus Sq Ft
499 sq ft
Total Sq Ft
3124 sq ft
Upper Floor Sq Ft
1136 sq ft
Porch Sq Ft
144 sq ft
Basic Features
Bedrooms
4
Baths
4.50
Potential Bedrooms
0
Garage Stalls
3
Stories
2
Dimension
Width
68'
Depth
63'
Height
33'
Ceiling
Upper Ceiling Ft
8'
Main Ceiling Ft
9'
Plan Feature
Unlimited Use
Designer Notes
Included
COVER PAGE: Plan features the rendered elevation and informative reference sections including general notes and design criteria, abbreviations and symbols.
ELEVATIONS: Drafted at 1/4" scale for the front and 1/8" scale for the rear and sides.
All elevations are detailed and an aerial view of the roof is provided, showing all hips, valleys and ridges.
FOUNDATIONS: Drafted at 1/4" scale.
Block foundations and basements are standard.
The foundation plan also shows the HVAC equipment, structural information, steel beam and pole locations and the direction and spacing of the floor system above.
MAIN LEVEL FLOOR PLAN: 1/4" scale.
Fully dimensioned from stud to stud for ease of framing.
2x4 walls are standard unless noted otherwise.
The detailed drawings include such things as structural header locations, framing layout and kitchen layout.
SECOND LEVEL FLOOR PLAN: (if applicable) 1/4" scale.
Dimensioned from stud to stud and drafted to the same degree of detail as the main level floor plan.
INTERIOR ELEVATIONS: Useful for the cabinet and bidding process, this page shows all kitchen and bathroom cabinets as well as any other cabinet elevations.
ELECTRICAL AND SECTIONS: Illustrated on a separate page for clarity, the electrical plan shows suggested electrical layout for the foundation, main and second level
 Five Star Tree Care
There are a few reasons why it is critical that your trees have a regular schedule for pruning and maintenance. Pruning helps trees to maintain a tree’s health as well as form it to a pleasing aesthetic shape. Furthermore, pests and diseases are also controlled by regular pruning and care. When pruning is properly performed, your trees will be healthy and attractive all year long. Five Star Tree Services has put together a list of seven things you should keep in mind regarding your tree pruning.
Tree Inspection
Before any tree pruning job, the tree should be properly inspected. This will allow you or our tree care service team to determine which branches should be cut. It will also allow any diseases or pests to be identified and dealt with.
Remove Dead, Weak & Crossed Branches
Dead and weak branches are a hazard to your property and those who happen to walk or lounge under the tree. They also suck vital nutrients away from healthy branches and the tree trunk. Removing them will prevent accidents and allow your tree to thrive. Crossed branches can also cause problems later down the line. They affect the airflow to the crown and can also prevent sunlight from passing through the tree.
Pay Attention to Spacing
It’s important to pay attention to branch spacing when pruning your tree. Lateral branches should be spaced evenly, especially when pruning trees that have yet to mature.
Follow the Basic Pruning Rules
It’s important that the 1/4th and 1/3rd rules of pruning are followed. This means that you should never cut more than a third of the total height of the tree. This length is measured from the bottom up. You should also only cut 1/4th or less of a tree’s crown when you prune at any one time.
Get Your Tools Ready
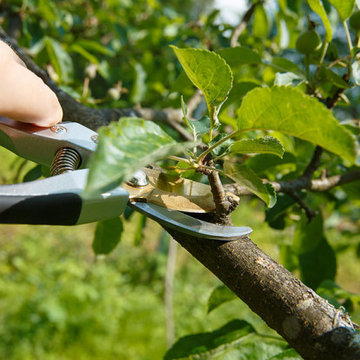
The tools you use to prune should be ready well before you make the first cut. You should start your project equipped with a pole pruner, pruning saws, hedge shears, loppers, and pruning shears. They also need to be properly sharpened before you start your pruning project. Each of these tools will allow you to reach different parts of the tree and prune them in a safe manner. If your tools are dull, they can damage the tree or even cause accidents when you attempt to cut.
Prune on Schedule
There are schedules for pruning that should be followed according to the type of tree you are caring for. Summer blooming trees should be pruned in early spring while evergreens and hedges should be taken care of in the early part of summer. Fruit-bearing trees should be pruned late in winter ahead of the frost. If there is damage to your tree, it doesn’t matter what time of year it may be, correct the problem as soon as possible.
Avoid Protecting Post-Pruning
Pruning leaves behind wounds, but they will heal. Though they may be unsightly for a while, the marks will heal and return back to its natural beauty. Don’t paint the pruning wounds to protect the tree, it actually has no effect on decay prevention. Painting may even trigger diseases or encourage pests to take up residence.
How We Can Help
Tree pruning is a complication job, but with our tips, you can do it right. It is always a good idea to leave the job to the professionals here at Five Star Tree Services instead. Our Toronto tree care experts have the tools, experience, and skills to get the job done right the first time. Get in touch with us at (416) 990-3355 today for more information.
 User
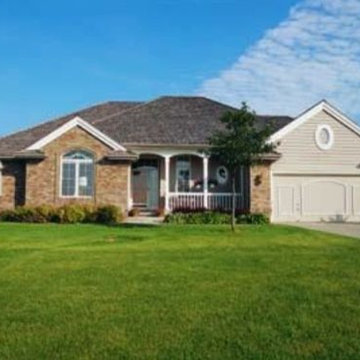
House Plan 20-560 - Houseplans.com
Questions? Call us at 1-800-913-2350
Photographs may show modified designs. All images are copyrighted.
Plan 20-560
1808 sq ft
3 beds
2.50 baths
64' wide
44' deep
×
Plans
Main Floor Plan
Reverse
Specifications
Plan Styles
Traditional
Kitchen Features
Nook Breakfast Area Dining
Peninsula Eating Bar
Outdoor Spaces
Covered Front Porch
Area
Main Floor Sq Ft
1808 sq ft
Total Sq Ft
1808 sq ft
Plan Feature
Unlimited Use
Teen Suite Jack Jill Bath
Basic Features
Garage Stalls
2
Potential Bedrooms
0
Bedrooms
3
Stories
1
Baths
2.50
Additional Rooms
Great Room Living Room
Bedroom Features
Walk In Closet
Dimension
Width
64'
Depth
44'
Designer Notes
Included
COVER PAGE: Plan features the rendered elevation and informative reference sections including general notes and design criteria, abbreviations and symbols.
ELEVATIONS: Drafted at 1/4" scale for the front and 1/8" scale for the rear and sides.
All elevations are detailed and an aerial view of the roof is provided, showing all hips, valleys and ridges.
FOUNDATIONS: Drafted at 1/4" scale.
Block foundations and basements are standard.
The foundation plan also shows the HVAC equipment, structural information, steel beam and pole locations and the direction and spacing of the floor system above.
MAIN LEVEL FLOOR PLAN: 1/4" scale.
Fully dimensioned from stud to stud for ease of framing.
2x4 walls are standard unless noted otherwise.
The detailed drawings include such things as structural header locations, framing layout and kitchen layout.
SECOND LEVEL FLOOR PLAN: (if applicable) 1/4" scale.
Dimensioned from stud to stud and drafted to the same degree of detail as the main level floor plan.
INTERIOR ELEVATIONS: Useful for the cabinet and bidding process, this page shows all kitchen and bathroom cabinets as well as any other cabinet elevations.
ELECTRICAL AND SECTIONS: Illustrated on a separate page for clarity, the electrical plan shows suggested electrical layout for the foundation, main and seco

 Advance Design Studio, Ltd.
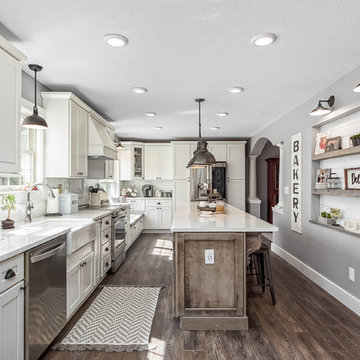
After six years of living in their Huntley IL home, Chris and Meghan were tired of their dark, dingy, outdated kitchen and it was finally time for a long-anticipated change. “The kitchen is the place where we live, it’s where we do everything,” Meghan said. “It was important that it be a space where we wanted to be.” Meghan loves cooking and enjoys including their girls in healthy meal prepping, this led them to want a brighter, more enjoyable kitchen with increased functionality and improved storage.
For Chris especially, the laundry room was an entirely dysfunctional eyesore. “We had a washer and a dryer, but it was all kind-of cobbled together!” Chris said. “There were always laundry piles everywhere, we weren’t really sure what we wanted to do in there, but it was time for us to make a change.” The mess of the space was stressful every time they walked in the door from the garage each day. Kids’ backpacks and shoes piled up haphazardly in the makeshift boot-bench closet left the family feeling disorganized and stressed. They needed space for folding clothes and locker cubbies to help keep the family organized.
Having known Christine and Todd in the Huntley community for years, Chris and Meghan were familiar with their work. “We already trusted them personally and having seen their projects for years we knew they did top notch work. After we reviewed the initial round of designs, we knew that hiring them was definitely the right choice,” Meghan and Chris said. Although Chris had done a lot of work in their home himself, the kitchen and laundry room renovation was such a large undertaking that he didn’t want to steal time away from his family to spend what would surely be many long weekends doing the job himself. “That would not have been a wise choice for us,” Chris laughed.
“Our designer, Michelle was very, very, easy to work with; anything we wanted to see or weren’t sure about, she went above and beyond to make this easy for us. She was easy to get hold of and always quick to respond,” the couple said. Michelle pulled ideas that mirrored the couple’s taste and style and was adept at directing the couple to limited choices that didn’t overwhelm them and kept the process moving. “I have a hard time making decisions. Michelle made the decision-making process so easy. I loved how she listened to what I liked and then presented three great options for me to choose from,” Meghan said.
The main objectives for the kitchen were better storage solutions, they wanted the space to reflect their lifestyle and taste, and they wanted it to last for years with low maintenance. One of the first steps in creating a more functional kitchen was relocating the refrigerator, creating an improved workflow for the busy family.
“We didn’t know that we could even move the refrigerator to a new location where it is now, that was something that we never would have thought of,” Chris said. “The new refrigerator location makes the kitchen feel so much bigger. We didn’t add any space, but our whole kitchen with the new design just seems like it’s so much larger than before!” Meghan said.
The perimeter mist colored cabinets helped warm and brighten the entire room, while the graphite colored cabinets on the island added contrast. Using this fresh, clean color palette satisfied the couple’s desire for a bright space that was the exact opposite of what they had before. Organization accessories were also added to the cabinets such as a spice drawer tray and roll outs to create hidden convenience.
“I absolutely love the hidden spices – it makes cooking so much more enjoyable!” Chris said. “And all the pull outs, and the double trash bin, who would think you could get so excited about organization!” the couple said in unison.
One thing they hated in their original kitchen was how dark the space felt. Added lighting on the ceiling with the new light fixtures combined with the lighter cabinetry colors throughout solved this problem. “Our new kitchen has this warm, almost cozy feeling that our old kitchen never had, it’s just a space that I love spending my time in now,” Meghan said. The light airy feeling was accentuated with the use of floating white shelves on either side of the decorative range hood. “We have so much cabinetry space, the new design is amazing we actually have more storage space than we will ever need,” Meghan said.
The island was extended to create more work surface and added space for stool seating. “The new island changes how we live. Now the kids can be in the kitchen with us, doing homework, eating breakfast, and the three of us have special dinners there when Chris is working late,” Meghan said.
The Carrara Marmi Quartz countertops were chosen because they are, not only beautiful, but are made from hard-working material that doesn’t require maintenance. The white subway tile backsplash that wraps to the ceiling behind the focal point cooktop range/hood compliments the crisp white countertops perfectly, while brushed brass hardware and light fixtures keep the design fresh and new.
The couple had a few fears at the beginning of the project, as most homeowners do. Their biggest fear was being out of their kitchen and laundry room for an extended time. The crew made it very easy for the family to work in a limited space keeping the washer and dryer hooked up the majority of the time, and also getting appliances working with minimal downtime.
“They above and beyond accommodated us to get us through the process,” Meghan said. “They did a great job making sure we were as comfortable as possible throughout the process,” Chris added.
“Our project manager DJ did a great job. He was very good at updating us on schedule changes, getting guys in as quickly as possible. Everyone that stepped in the house was nice and did great work,” said Chris. They thought Advance’s carpenter was phenomenal and were impressed when he took a conceptual idea from a photograph and worked with designer Michelle to create a one of a kind range/hood that has become the topic of conversation with friends and family who visit the new kitchen. “He was in our house literally every day for several weeks. He was easy to work with and good at what he did,” Meghan and Chris said.
The focal point of the kitchen; a hand-crafted, custom-built ventilation hood was clad with handpicked reclaimed barnwood. Advance Design’s carpenter built the framework and the cladding to create a one-of-a-kind design element that the couple loves.
“I think it was especially fun for him to create something unique from scratch, showcasing his talent in this area,” Meghan said. “I love that my kitchen is not like everyone else’s. I got to pick out the wood on my hood and watch it being built and was able to choose what pieces of wood went where on it. It’s totally unique.”
Red Oak flooring was toothed-in throughout the kitchen and the rest of the first floor anywhere changes were made. Then the whole floor was refinished to tone down the orange undertones in the existing floor stain, ultimately changing the color complexion of the entire first floor. The result is a completely new feeling to the entire home.
Renovating the laundry room was extremely important to Meghan and Chris, but they had trouble visualizing what the possibilities were for the seemingly small space. Michelle produced beautiful 3D illustrations that helped them envision the space in a whole new way.
“I must have told Michelle 100 times that I am a visual person, seeing the designs in 3D made it so easy to make decisions and see what we could really do with our space,” Meghan said.
A dividing wall and doorway were removed between the existing laundry room and hallway formerly containing a coat closet, providing space to design specialized graphite colored cabinetry matching the kitchen island to house custom storage cubbies for each family member. Adding the tall utility cabinetry in the new laundry area helped solve the storage issue, tucking away cleaning supplies, household items, and even the cat got its own cubby.
“I love how everything is now hidden in its own space. I can’t tell you how much I hated coming home and seeing everything sitting around on counters,” Chris said.
Electrical outlets were planned for the inside of utility cabinets, so devices could charge in hidden locations. Stacking the washer and dryer allowed for wider countertop space to provide a folding area and a special space for clothes to hang. “The way I do laundry has been completely transformed! I can actually fold clothes and hang them now right out of the washer and dryer,” Meghan said.
“The end result in the kitchen and the laundry/mud room was an updated light and bright space, with a smarter work flow that better meets the needs of this family,” Michelle said.
“I would totally recommend Advance Design,” Meghan said. “Sometimes I sit and just look at my kitchen and laundry room and think ‘Wow, I can’t believe I get to live here!’ It’s an understatement to say we love our new space.”
Sponsored
Sunbury, OH
J.Holderby - Renovations
Franklin County's Leading General Contractors - 2X Best of Houzz!

 Moderne Builders
Gorgeous master bath with dramatic retro "wave" tile. Peak Photography
Example of a 1950s bathroom design in Los Angeles
Example of a 1950s bathroom design in Los Angeles

 Olamar Interiors
This client had this gorgeous deck and patio installed and wanted to them designed to provide her family with a lot of usable options. She wanted a space that her large family could enjoy on a daily basis during warm weather months. She also wanted a space elegant and functional enough to allow her husband to host get-togethers for colleagues and clients. The main challenges were the two columns that were incorporated into the deck in order to hold up the pergola and the long narrow space that is lower patio. We used the columns on the deck to our advantage, placing an outdoor sectional against it to create formal division between the lounging and dining area. We also created multiple small conversations areas by adding four stools/accent tables that could be moved around and adding the ottoman to create a bench style sectional facing an additional sofa to the side of the deck. On the patio we created one large seating area but added ottomans and a bench as coffee tables for larger gatherings and additional seating for smaller conversation areas. The client wanted to take full advantage of the beautiful new fire-pit so we found three rounded sofas to accentuate the shape of the fire-pit and the patio area. We added console tables and accessorized them the way we would accessorize any indoor room. Durable but sophisticated indoor/outdoor art on the walls, vases, plants, outdoor lamps and additional accessories give this space a very finished, living space feel.
Photography by Tinius Photography
 Amazing Spaces
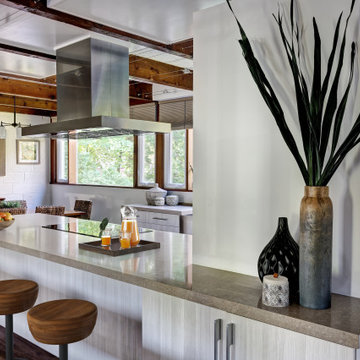
The existing kitchen was separated from the family room by a 17’ long bookcase. It was the first thing you saw upon entering and it hid much of the light and views to the backyard making the space feel claustrophobic. The laundry room was part of the kitchen space without any attempt to conceal the washer and dryer. Removing the long bookcase opened the opportunity to add counter stools in the kitchen and decided to align a target wall opposite the front door to help maintain some division within the main space while creating a space for the refrigerator. This also allowed us to create an open laundry room concept that would be hidden from view from all other areas.
We kept the industrial feel of the exposed building materials, which we complimented with textured melamine slab doors for the new kitchen cabinets. We maintained the galley set up but defined the kitchen from the utility area by changing both thickness and color of the countertop materials. Because the back of the house is mainly windows, there was very little wall space for upper cabinets and everyday dish storage. We designed a custom ceiling hung shelf system that floats in front of the windows, and is mostly out of view from the sitting area. Tall cabinets are installed along the only available wall to support both kitchen and laundry room functions. We used cable lighting threaded through the beams which really punctuates the industrial aesthetic.
 Sweet Smiling Landscape Design
This very social couple were tying the knot and looking to create a space to host their friends and community, while also adding much needed living space to their 900 square foot cottage. The couple had a strong emphasis on growing edible and medicinal plants. With many friends from a community garden project they were involved in and years of learning about permaculture, they wanted to incorporate many of the elements that the permaculture movement advocates for.
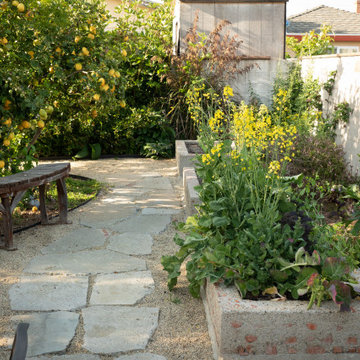
We came up with a California native and edible garden that incorporates three composting systems, a gray water system, rain water harvesting, a cob pizza oven, and outdoor kitchen. A majority of the materials incorporated into the hardscape were found on site or salvaged within 20-mile of the property. The garden also had amenities like an outhouse and shower for guests they would put up in the converted garage.
Coming into this project there was and An old clawfoot bathtub on site was used as a worm composting bin, and for no other reason than the cuteness factor, the bath tub composter had to stay. Added to that was a compost tumbler, and last but not least we erected an outhouse with a composting toilet system (The Nature's Head Composting Toilet).
We developed a gray water system incorporating the water that came out of the washing machine and from the outdoor shower to help water bananas, gingers, and canailles. All the down spouts coming off the roof were sent into depressions in the front yard. The depressions were planted with carex grass, which can withstand, and even thrive on, submersion in water that rain events bring to the swaled-out area. Aesthetically, carex reads as a lawn space in keeping with the cottage feeling of the home.
As with any full-fledged permaculture garden, an element of natural building needed to be incorporated. So, the heart and hearth of the garden is a cob pizza oven going into an outdoor kitchen with a built-in bench. Cob is a natural building technique that involves sculpting a mixture of sand, soil, and straw around an internal structure. In this case, the internal structure is comprised of an old built-in brick incinerator, and rubble collected on site.
Besides using the collected rubble as a base for the cob structure, other salvaged elements comprise major features of the project: the front fence was reconstructed from the preexisting fence; a majority of the stone edging was created by stones found while clearing the landscape in preparation for construction; the arbor was constructed from old wash line poles found on site; broken bricks pulled from another project were mixed with concrete and cast into vegetable beds, creating durable insulated planters while reducing the amount of concrete used ( and they also just have a unique effect); pathways and patio areas were laid using concrete broken out of the driveway and previous pathways. (When a little more broken concrete was needed, we busted out an old pad at another project a few blocks away.)
Far from a perfectly polished garden, this landscape now serves as a lush and inviting space for my clients, their friends and family to gather and enjoy each other’s company. Days after construction was finished the couple hosted their wedding reception in the garden—everyone danced, drank and celebrated, christening the garden and the union!
Sponsored
Columbus, OH

Hope Restoration & General Contracting
Columbus Design-Build, Kitchen & Bath Remodeling, Historic Renovations
 Sweet Smiling Landscape Design
This very social couple were tying the knot and looking to create a space to host their friends and community, while also adding much needed living space to their 900 square foot cottage. The couple had a strong emphasis on growing edible and medicinal plants. With many friends from a community garden project they were involved in and years of learning about permaculture, they wanted to incorporate many of the elements that the permaculture movement advocates for.
We came up with a California native and edible garden that incorporates three composting systems, a gray water system, rain water harvesting, a cob pizza oven, and outdoor kitchen. A majority of the materials incorporated into the hardscape were found on site or salvaged within 20-mile of the property. The garden also had amenities like an outhouse and shower for guests they would put up in the converted garage.
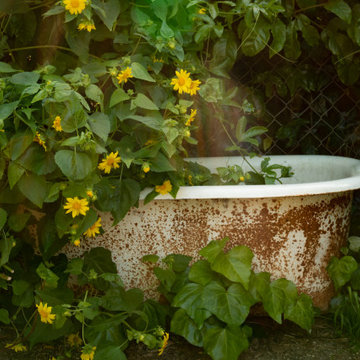
Coming into this project there was and An old clawfoot bathtub on site was used as a worm composting bin, and for no other reason than the cuteness factor, the bath tub composter had to stay. Added to that was a compost tumbler, and last but not least we erected an outhouse with a composting toilet system (The Nature's Head Composting Toilet).
We developed a gray water system incorporating the water that came out of the washing machine and from the outdoor shower to help water bananas, gingers, and canailles. All the down spouts coming off the roof were sent into depressions in the front yard. The depressions were planted with carex grass, which can withstand, and even thrive on, submersion in water that rain events bring to the swaled-out area. Aesthetically, carex reads as a lawn space in keeping with the cottage feeling of the home.
As with any full-fledged permaculture garden, an element of natural building needed to be incorporated. So, the heart and hearth of the garden is a cob pizza oven going into an outdoor kitchen with a built-in bench. Cob is a natural building technique that involves sculpting a mixture of sand, soil, and straw around an internal structure. In this case, the internal structure is comprised of an old built-in brick incinerator, and rubble collected on site.
Besides using the collected rubble as a base for the cob structure, other salvaged elements comprise major features of the project: the front fence was reconstructed from the preexisting fence; a majority of the stone edging was created by stones found while clearing the landscape in preparation for construction; the arbor was constructed from old wash line poles found on site; broken bricks pulled from another project were mixed with concrete and cast into vegetable beds, creating durable insulated planters while reducing the amount of concrete used ( and they also just have a unique effect); pathways and patio areas were laid using concrete broken out of the driveway and previous pathways. (When a little more broken concrete was needed, we busted out an old pad at another project a few blocks away.)
Far from a perfectly polished garden, this landscape now serves as a lush and inviting space for my clients, their friends and family to gather and enjoy each other’s company. Days after construction was finished the couple hosted their wedding reception in the garden—everyone danced, drank and celebrated, christening the garden and the union!
 Sweet Smiling Landscape Design
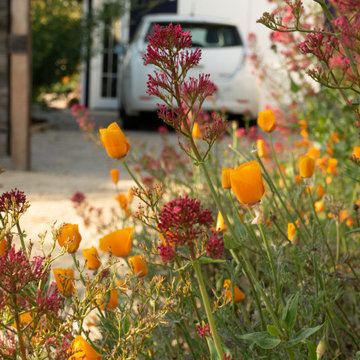
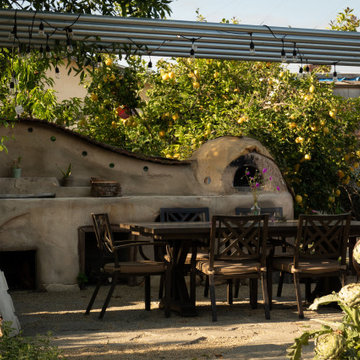
This very social couple were tying the knot and looking to create a space to host their friends and community, while also adding much needed living space to their 900 square foot cottage. The couple had a strong emphasis on growing edible and medicinal plants. With many friends from a community garden project they were involved in and years of learning about permaculture, they wanted to incorporate many of the elements that the permaculture movement advocates for.
We came up with a California native and edible garden that incorporates three composting systems, a gray water system, rain water harvesting, a cob pizza oven, and outdoor kitchen. A majority of the materials incorporated into the hardscape were found on site or salvaged within 20-mile of the property. The garden also had amenities like an outhouse and shower for guests they would put up in the converted garage.
Coming into this project there was and An old clawfoot bathtub on site was used as a worm composting bin, and for no other reason than the cuteness factor, the bath tub composter had to stay. Added to that was a compost tumbler, and last but not least we erected an outhouse with a composting toilet system (The Nature's Head Composting Toilet).
We developed a gray water system incorporating the water that came out of the washing machine and from the outdoor shower to help water bananas, gingers, and canailles. All the down spouts coming off the roof were sent into depressions in the front yard. The depressions were planted with carex grass, which can withstand, and even thrive on, submersion in water that rain events bring to the swaled-out area. Aesthetically, carex reads as a lawn space in keeping with the cottage feeling of the home.
As with any full-fledged permaculture garden, an element of natural building needed to be incorporated. So, the heart and hearth of the garden is a cob pizza oven going into an outdoor kitchen with a built-in bench. Cob is a natural building technique that involves sculpting a mixture of sand, soil, and straw around an internal structure. In this case, the internal structure is comprised of an old built-in brick incinerator, and rubble collected on site.
Besides using the collected rubble as a base for the cob structure, other salvaged elements comprise major features of the project: the front fence was reconstructed from the preexisting fence; a majority of the stone edging was created by stones found while clearing the landscape in preparation for construction; the arbor was constructed from old wash line poles found on site; broken bricks pulled from another project were mixed with concrete and cast into vegetable beds, creating durable insulated planters while reducing the amount of concrete used ( and they also just have a unique effect); pathways and patio areas were laid using concrete broken out of the driveway and previous pathways. (When a little more broken concrete was needed, we busted out an old pad at another project a few blocks away.)
Far from a perfectly polished garden, this landscape now serves as a lush and inviting space for my clients, their friends and family to gather and enjoy each other’s company. Days after construction was finished the couple hosted their wedding reception in the garden—everyone danced, drank and celebrated, christening the garden and the union!
 Sweet Smiling Landscape Design
This very social couple were tying the knot and looking to create a space to host their friends and community, while also adding much needed living space to their 900 square foot cottage. The couple had a strong emphasis on growing edible and medicinal plants. With many friends from a community garden project they were involved in and years of learning about permaculture, they wanted to incorporate many of the elements that the permaculture movement advocates for.
We came up with a California native and edible garden that incorporates three composting systems, a gray water system, rain water harvesting, a cob pizza oven, and outdoor kitchen. A majority of the materials incorporated into the hardscape were found on site or salvaged within 20-mile of the property. The garden also had amenities like an outhouse and shower for guests they would put up in the converted garage.
Coming into this project there was and An old clawfoot bathtub on site was used as a worm composting bin, and for no other reason than the cuteness factor, the bath tub composter had to stay. Added to that was a compost tumbler, and last but not least we erected an outhouse with a composting toilet system (The Nature's Head Composting Toilet).
We developed a gray water system incorporating the water that came out of the washing machine and from the outdoor shower to help water bananas, gingers, and canailles. All the down spouts coming off the roof were sent into depressions in the front yard. The depressions were planted with carex grass, which can withstand, and even thrive on, submersion in water that rain events bring to the swaled-out area. Aesthetically, carex reads as a lawn space in keeping with the cottage feeling of the home.
As with any full-fledged permaculture garden, an element of natural building needed to be incorporated. So, the heart and hearth of the garden is a cob pizza oven going into an outdoor kitchen with a built-in bench. Cob is a natural building technique that involves sculpting a mixture of sand, soil, and straw around an internal structure. In this case, the internal structure is comprised of an old built-in brick incinerator, and rubble collected on site.
Besides using the collected rubble as a base for the cob structure, other salvaged elements comprise major features of the project: the front fence was reconstructed from the preexisting fence; a majority of the stone edging was created by stones found while clearing the landscape in preparation for construction; the arbor was constructed from old wash line poles found on site; broken bricks pulled from another project were mixed with concrete and cast into vegetable beds, creating durable insulated planters while reducing the amount of concrete used ( and they also just have a unique effect); pathways and patio areas were laid using concrete broken out of the driveway and previous pathways. (When a little more broken concrete was needed, we busted out an old pad at another project a few blocks away.)
Far from a perfectly polished garden, this landscape now serves as a lush and inviting space for my clients, their friends and family to gather and enjoy each other’s company. Days after construction was finished the couple hosted their wedding reception in the garden—everyone danced, drank and celebrated, christening the garden and the union!
23