
Search results for "Appears" in Home Design Ideas
 Adrienne DeRosa
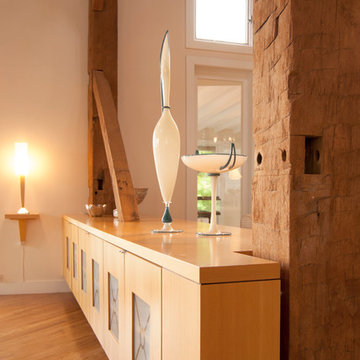
Made from pear wood, a storage unit takes advantage of barn posts for support. Minimal in design, it appears to float effortlessly above the floor, and provides ample room for storing extra plates and displaying artwork.
Adrienne DeRosa Photography


Find the right local pro for your project


 Miriam's River House Designs, LLC
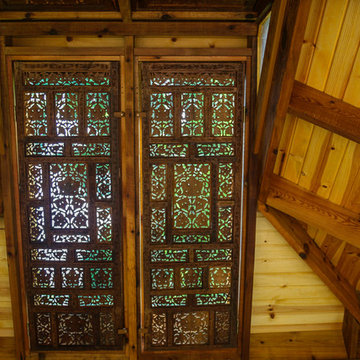
The four skylights in the Japanese tea House have hand carved overlay screens. The beauty of these overlays is that sunlight shinning through appears to dance on the walls and floor as the sun moves across the sky. The two small top roof windows are art glass embedded with tiny crystals.
Photo credits: Dan Drobnick

 BROOK LANDSCAPE
This is an example of a mid-sized contemporary full sun rooftop landscaping in New York with decking for summer.
 ID.ology Interiors & Design
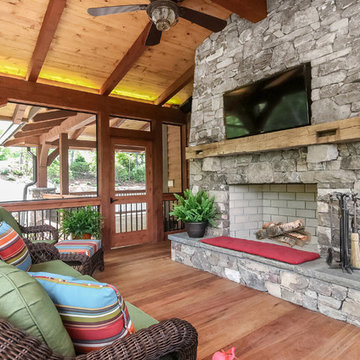
Mid-sized arts and crafts light wood floor sunroom photo with a standard fireplace, a stone fireplace and a standard ceiling

 Bushnell Gardens & Landscape
Hen and Chicks 'Carmen', Sempervivum, Photo Credit: Bushnell Gardens Nursery, Granite Bay, CA
Photo of a mid-sized eclectic drought-tolerant and partial sun backyard landscaping in Sacramento for summer.
Photo of a mid-sized eclectic drought-tolerant and partial sun backyard landscaping in Sacramento for summer.
 Designtra
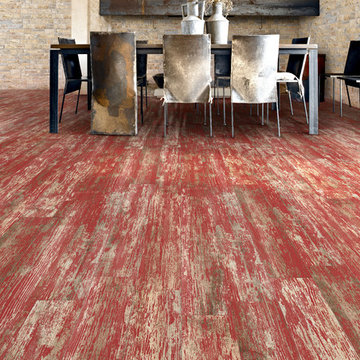
These elegant porcelain tiles simulate the warm look of a European barn which through age, wear and environment have naturally pealed back layers of it’s colorful paint, and have a near perfect wood appearance. They are formatted in common wood plank dimensions to complete the overall appearance. The combination of the colors in this series transmits both sophisticated and comfortable atmospheres thanks to their aged look and warm tactile feel. These tiles are resistant to scratch, wear, and temperature changes and are suitable for both walls and floors.
 Techo-Bloc
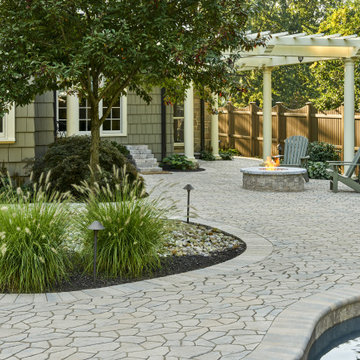
This backyard patio design is inspired by our Flagstone 60mm patio slab. The Flagstone slab is a mosaic of carefully sculpted stone which appears to be the work of a highly skilled stonework mason. Its natural stone look comes from its random pattern where no two stones seem to be alike. By manipulating the carvings on the surface of each unit, we have created a multitude of shapes and sizes without affecting the productivity of installation; granting you with all the glory of a natural-stone look without the exorbitant installation costs. Flagstone is part of the dry cast collection. Check out our website to shop the look! https://www.techo-bloc.com/shop/slabs/flagstone-60/
 Frontera Furniture
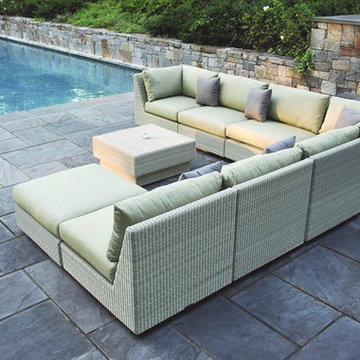
The Westport sectional is elegant in its simplicity and versatility. A limitless range of seating configurations can be made using varying combinations of the armless chair and corner/side units. A large ottoman and square coffee table complete the collection. Recessed teak plinths give the unit a floating appearance, and the piece is hand-woven with the finest all-weather wicker around a powder coated aluminum frame, ensuring years of enjoyment. Stainless steel clips are provided to secure seating units together.
 NV Kitchen and Bath (D.M.V)
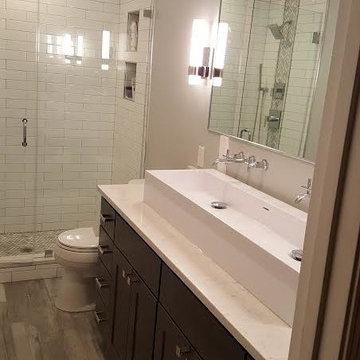
Example of a mid-sized trendy 3/4 white tile and porcelain tile light wood floor and beige floor alcove shower design in DC Metro with shaker cabinets, dark wood cabinets, a two-piece toilet, gray walls, a trough sink, limestone countertops and a hinged shower door
 Seattle Cabinets
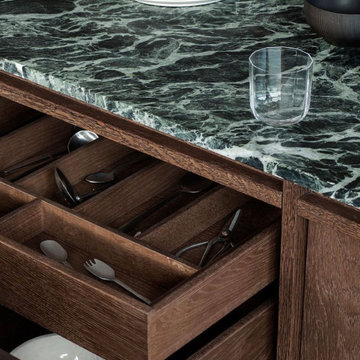
Solid wood drawers can be crafted from various types of wood, each with its own characteristics, appearance, and suitability for different purposes. Here's a description of drawers made from Maple, Walnut, Oak, Alder, and Birch:
Maple Drawers:
Maple wood is known for its durability and smooth texture.
It has a light, creamy color with subtle grain patterns.
Maple drawers are often used in contemporary and modern furniture designs.
They can be stained or left natural to showcase the wood's natural beauty.
Walnut Drawers:
Walnut wood is prized for its rich, dark brown color and swirling grain patterns.
It has a luxurious appearance and is often used in high-end furniture pieces.
Walnut drawers add warmth and sophistication to any space.
They are relatively durable and can withstand years of use with proper care.
Oak Drawers:
Oak is a popular choice for furniture due to its strength and prominent grain patterns.
It comes in two main varieties: red oak and white oak. Red oak tends to have a pinkish hue, while white oak has a more golden tone.
Oak drawers are sturdy and resistant to wear and tear.
They can be finished in various stains or left natural for a rustic look.
Alder Drawers:
Alder wood is a softer hardwood known for its light brown color and straight grain.
It has a smooth texture and is relatively easy to work with, making it a popular choice for furniture makers.
Alder drawers are lightweight yet sturdy, making them suitable for a variety of furniture styles.
They can be stained to mimic the appearance of more expensive hardwoods like cherry or walnut.
Birch Drawers:
Birch wood is light in color with a fine, even grain pattern.
It has a smooth surface and is easy to sand and finish.
Birch drawers are often used in contemporary and Scandinavian-style furniture due to their clean, minimalist appearance.
They can be stained to enhance the wood's natural color or painted for a more modern look.
Each type of wood offers unique characteristics and aesthetics, allowing furniture makers and homeowners to choose the best option based on their preferences and the desired style of the piece.
 Cavalier Homes Inc
Kitchen Remodeling
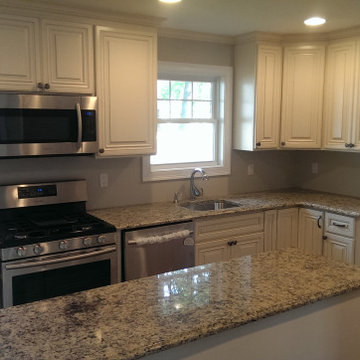
Do you believe that when someone looks at your kitchen, they should exclaim “WOW”? It is quite possible with our kitchen remodeling service. Cavalier Homes Inc. believes that the kitchen is the powerhouse of your family. Therefore, top-quality products combined with our impeccable craftsmanship have resulted in some of the most stunning kitchens in West Islip, Long Island, New York since 1985.
The kitchen of your dreams is well within your budget. If you’ve been envisioning something unique in terms of design, we can bring it to life. Kitchen remodeling is not always as simple as it appears. The upgrades must be finished, depending on the size of your kitchen. All you need is a team of experts to guide you through the entire kitchen remodeling process, from design to completion.
From project planning and design to sourcing materials and installation, Cavalier Homes is equipped to undertake every aspect of your kitchen remodel. We take on all of the responsibilities required to complete the kitchen remodeling work on time. Our home remodeling team is dedicated to making your kitchen as spectacular as you have imagined.
Important factors to consider before remodeling your kitchen:
As previously stated, a kitchen renovation can appear to be a massive undertaking. When you choose Cavalier Homes, you’ll be working with a Long Island home remodeling company that has been in business for nearly 40 years. Not only do we have four decades of design and craftsmanship experience, but we also have a professional team that will guide you through the entire kitchen remodeling process.
Here are some crucial factors to take into account in order to maximize the value of your kitchen remodeling service:
#1 Budget:
This is quite an important factor as every home renovation project starts here. Think about the aspects that are important to you before deciding on the overall remodeling budget. If it’s flooring, you should probably spend more money there and perhaps spend less on appliances and lighting.
#2 Design:
Keeping the existing design of your kitchen definitely keeps your budget low, but it may not be possible to realize what you have envisioned. However, walking through our ideas will yield the best results.
Take some time to consider your workflow when remodeling your kitchen. What would work best for your cooking style? Is it easy to move around your kitchen? What happens if your family grows?
#3 Appliances:
Upgrading their current appliances is one of the main reasons homeowners think about remodeling their kitchens. The adjustments that may be necessary to make room for the new appliances must possibly be taken into consideration. We will assist you in preparing the extra wiring, plumbing, and cabinetry.
#4 Countertops and Cabinets:
For a more elegant appearance, choose countertops made of wood, marble, or granite. Wooden surfaces add character and charm while not costing a lot. Solid wood cabinets and slabs of granite, marble, or quartz are classic choices that will never go out of style.
#5 Lighting and Flooring:
These elements can make a significant difference in your kitchen’s appearance, giving it a stunning and unique look.
In addition to the above, you’ll have to compare the costs and benefits of upgrading to current trends versus classic designs. Kitchen renovations remain one of the most popular home improvement projects among the majority of homeowners. Contact us to discuss the design of your new kitchen and how we can assist you in providing the best kitchen remodeling service possible.
 Cavalier Homes Inc
Do you believe that when someone looks at your kitchen, they should exclaim “WOW”? It is quite possible with our kitchen remodeling service. Cavalier Homes Inc. believes that the kitchen is the powerhouse of your family. Therefore, top-quality products combined with our impeccable craftsmanship have resulted in some of the most stunning kitchens in West Islip, Long Island, New York since 1985.
The kitchen of your dreams is well within your budget. If you’ve been envisioning something unique in terms of design, we can bring it to life. Kitchen remodeling is not always as simple as it appears. The upgrades must be finished, depending on the size of your kitchen. All you need is a team of experts to guide you through the entire kitchen remodeling process, from design to completion.
From project planning and design to sourcing materials and installation, Cavalier Homes is equipped to undertake every aspect of your kitchen remodel. We take on all of the responsibilities required to complete the kitchen remodeling work on time. Our home remodeling team is dedicated to making your kitchen as spectacular as you have imagined.
Important factors to consider before remodeling your kitchen:
As previously stated, a kitchen renovation can appear to be a massive undertaking. When you choose Cavalier Homes, you’ll be working with a Long Island home remodeling company that has been in business for nearly 40 years. Not only do we have four decades of design and craftsmanship experience, but we also have a professional team that will guide you through the entire kitchen remodeling process.
Here are some crucial factors to take into account in order to maximize the value of your kitchen remodeling service:
#1 Budget:
This is quite an important factor as every home renovation project starts here. Think about the aspects that are important to you before deciding on the overall remodeling budget. If it’s flooring, you should probably spend more money there and perhaps spend less on appliances and lighting.
#2 Design:
Keeping the existing design of your kitchen definitely keeps your budget low, but it may not be possible to realize what you have envisioned. However, walking through our ideas will yield the best results.
Take some time to consider your workflow when remodeling your kitchen. What would work best for your cooking style? Is it easy to move around your kitchen? What happens if your family grows?
#3 Appliances:
Upgrading their current appliances is one of the main reasons homeowners think about remodeling their kitchens. The adjustments that may be necessary to make room for the new appliances must possibly be taken into consideration. We will assist you in preparing the extra wiring, plumbing, and cabinetry.
#4 Countertops and Cabinets:
For a more elegant appearance, choose countertops made of wood, marble, or granite. Wooden surfaces add character and charm while not costing a lot. Solid wood cabinets and slabs of granite, marble, or quartz are classic choices that will never go out of style.
#5 Lighting and Flooring:
These elements can make a significant difference in your kitchen’s appearance, giving it a stunning and unique look.
In addition to the above, you’ll have to compare the costs and benefits of upgrading to current trends versus classic designs. Kitchen renovations remain one of the most popular home improvement projects among the majority of homeowners. Contact us to discuss the design of your new kitchen and how we can assist you in providing the best kitchen remodeling service possible.
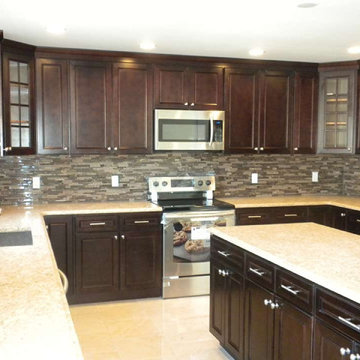 Cavalier Homes Inc
Do you believe that when someone looks at your kitchen, they should exclaim “WOW”? It is quite possible with our kitchen remodeling service. Cavalier Homes Inc. believes that the kitchen is the powerhouse of your family. Therefore, top-quality products combined with our impeccable craftsmanship have resulted in some of the most stunning kitchens in West Islip, Long Island, New York since 1985.
The kitchen of your dreams is well within your budget. If you’ve been envisioning something unique in terms of design, we can bring it to life. Kitchen remodeling is not always as simple as it appears. The upgrades must be finished, depending on the size of your kitchen. All you need is a team of experts to guide you through the entire kitchen remodeling process, from design to completion.
From project planning and design to sourcing materials and installation, Cavalier Homes is equipped to undertake every aspect of your kitchen remodel. We take on all of the responsibilities required to complete the kitchen remodeling work on time. Our home remodeling team is dedicated to making your kitchen as spectacular as you have imagined.
Important factors to consider before remodeling your kitchen:
As previously stated, a kitchen renovation can appear to be a massive undertaking. When you choose Cavalier Homes, you’ll be working with a Long Island home remodeling company that has been in business for nearly 40 years. Not only do we have four decades of design and craftsmanship experience, but we also have a professional team that will guide you through the entire kitchen remodeling process.
Here are some crucial factors to take into account in order to maximize the value of your kitchen remodeling service:
#1 Budget:
This is quite an important factor as every home renovation project starts here. Think about the aspects that are important to you before deciding on the overall remodeling budget. If it’s flooring, you should probably spend more money there and perhaps spend less on appliances and lighting.
#2 Design:
Keeping the existing design of your kitchen definitely keeps your budget low, but it may not be possible to realize what you have envisioned. However, walking through our ideas will yield the best results.
Take some time to consider your workflow when remodeling your kitchen. What would work best for your cooking style? Is it easy to move around your kitchen? What happens if your family grows?
#3 Appliances:
Upgrading their current appliances is one of the main reasons homeowners think about remodeling their kitchens. The adjustments that may be necessary to make room for the new appliances must possibly be taken into consideration. We will assist you in preparing the extra wiring, plumbing, and cabinetry.
#4 Countertops and Cabinets:
For a more elegant appearance, choose countertops made of wood, marble, or granite. Wooden surfaces add character and charm while not costing a lot. Solid wood cabinets and slabs of granite, marble, or quartz are classic choices that will never go out of style.
#5 Lighting and Flooring:
These elements can make a significant difference in your kitchen’s appearance, giving it a stunning and unique look.
In addition to the above, you’ll have to compare the costs and benefits of upgrading to current trends versus classic designs. Kitchen renovations remain one of the most popular home improvement projects among the majority of homeowners. Contact us to discuss the design of your new kitchen and how we can assist you in providing the best kitchen remodeling service possible.
 Tile Doctor Ltd
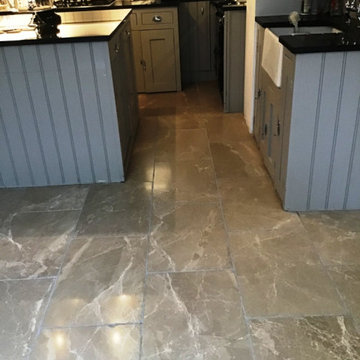
This Limestone tiled floor installed in a kitchen and family room at a property in Wellingborough is a great example of how this material can lose its appearance without a regular maintenance plan in place.
The customer called me as not only was she concerned that the floor had lost its lustre the grey grout had become very stained and almost black in heavy traffic areas, in fact my customer had originally asked about re-grouting but I was confident it could be cleaned.
I provided a quote which they were happy to accept.
The area was a nice wide 6 metre by 5 metre space and except for a few items of furniture that would need moving around there were relatively few obstacles. I reasoned the most efficient way to restore the polished appearance of the Limestone would be to use a set of diamond encrusted Burnishing Pads. These are fitted to a rotary machine and applied to the stone in sequence from coarse to smooth. It’s an effective process that cuts back the layer of dirt on the floor and then we build back up the polish.
We started burnishing the Limestone with a coarse 400-grit pad fitted to a rotary machine and applied with a little water for lubrication. The coarse pad is very good at removing dirt and old sealers from stone and once completed the resultant surface water and loose dirt is removed using a wet vacuum.
At this point I turned my attention to the badly stained grout lines, and applied a strong solution of Tile Doctor Pro-Clean which was scrubbed in along the grout lines using a stiff grout brush, this is necessary as the recessed nature of the grout makes it difficult for the rotary pads to reach it.
I then repeated the burnishing process with the medium 800-grit pad and fine 1500-grit pad, the 800-grit pad removes any small surface scratches and the 1500-grit further refines the look of the Limestone slowly restoring its polished appearance.
After the whole floor had been burnished in this way it was given a further rinse with water and the soil extracted as before. I then inspected the floor to see if more work would be needed.
I was not fully happy with how some of the grout lines had responded, some were still slightly stained, and some marks were visible in the high traffic areas. I had already discussed on my initial visit with the client that this might be the case and it was agreed between us that should this be the case I would apply a Tile Doctor Grout Colourant in Light Grey to recolour all the grout lines and achieve a uniform finish.
The stone and grout was still damp from cleaning and polishing, so I decided to leave the grout colouring until the following day.
On day two I started by grout recolouring all the grout lines, it’s a straight forward process but can be a little tedious where there is a lot of grout to cover. Once complete I allowed the grout colour to dry for a couple of hours before moving onto the next step.
The last pad to be applied in the stone burnishing process is the very fine 3000-grit polishing pad which is applied dry to the tiles using a small amount of water sprayed onto the floor and leaves the stone dry and with a polished silk finish.
The floor was then sealed using two coats of Tile Doctor Ultra Seal Sealant allowing the first coat to dry before applying the second. Ultra-Seal is an impregnating sealer that works by occupying the pores in the stone thereby preventing dirt from becoming ingrained there. It’s also a natural look sealer that doesn’t affect the appearance of the stone.
My customer was very happy with the transformation of her floor and provided the feedback copies below. In-fact she was so impressed with the results that she also used our services to restore the grout and silicon in one of her bathrooms.
“Phil was on time & easy to deal with and did an amazing job on my kitchen and bathroom floors and the carpets & sofa. No fuss, just a great job. Liz O.”
Phil Vissian
Northamptonshire Tile Doctor
 Tile Doctor Ltd
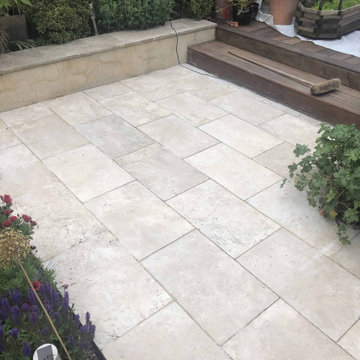
The picture shows an Travertine patio that was installed at a property in Hackney E5 around ten years ago and it had never been sealed. Over the year’s pollution and weather etc had taken its toll on the stone leaving the travertine stained with lichen, dull and grey as opposed to their original white/cream colour. Had the patio been sealed it would have provided some protection from the elements.
I conducted an initial visit where I tested several products to see what would be the most effective and establish what was required. Using that knowledge, I followed up with a written quote which was accepted, and a date arranged to complete the work.
We have adopted new working practices since the COVID-19 epidemic so we can work safely inside or outside but given the excellent weather this year this was an ideal and much easier to maintain social distancing.
During day 1 on site I started by sweeping away loose stones and other debris you typically find on patios. Then Tile Doctor Patio and Brick Driveway cleaner was applied neat to the stone and left for two hours. This is a very strong product designed for use by professionals which cuts through the dirt and was ideal for this situation. There are certain precautions you do need to take when using it such as wearing PPE and you must keep it away from ponds etc.
Using water to lubricate, the solution was then scrubbed into the stone using a coarse 200-grit pad fitted to a rotary machine and followed up with a lot of rinsing and extracting with water and a wet vacuum.
To refine the surface after the coarse Travertine the 200-grit pad I followed with 400, 800 and then 1500-grit burnishing pads in sequence rinsing with water and extracting after each pad was applied. This process is known as burnishing and closes the pores in the stone giving it a polished appearance. By this point the Travertine looked way better and we were starting to get the smooth finish back.
The weather held so the following morning a 3000-grit polishing pad was applied dry to the stone using only a little water. This brings up the appearance of the stone even further and has the added advantage of leaving it dry and ready for sealing.
The client wanted a natural appearance so two coats of Tile Doctor Ultra Seal were applied to seal the stone. Ultra-Seal is an impregnating sealer that soaks into the stone, protecting it from within yet without changing the appearance of the stone leaving a completely natural look.
The client very happy with job and now proud so show off her revamped patio. They hadn’t realised that the patio should have looked like this from the start. For aftercare I recommended they use Tile Doctor Stone Soap, many day to day cleaning products you find in supermarkets can strip off a sealer so if your using something else do check the label first.
Jackson Davis
East London Tile Doctor
 Tile Doctor Ltd
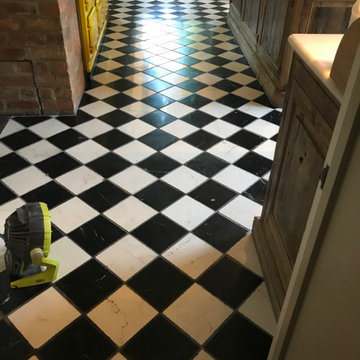
The tiles shown in the photographs below are classic distressed Black and White Italian Marble installed in the kitchen of a property in Bamber Bridge which is South of Preston. Some of the tiles had an issue with loose grout which I suspect was due to the suspended wooden floor and a small amount of movement had resulted in the grout cracking.
Ideally more support would be needed under the floor to prevent this, in the meantime however I recommended removing the grout and replacing with a flexible grout product that could cope with the movement. The tiles also needed a clean, polish and reseal so it made sense to address the issue with the grout as part of the work.
Working as a two-man team we started by cleaning the floor with a set of diamond burnishing pads starting with a coarse 400-grit, followed by 800 and 1500 grit. Water was used to lubricate the process and the floor was rinsed with water between pads with the fine slurry generated by the process extracted using a wet vacuum. These pads remove ingrained dirt and then slowly refine the appearance of the Marble building up its polished appearance in the process.
The next step was to rake out all the grout which as discussed was compromised and needed replacing. We had to be very careful when removing the grout due to the electric heating mat under the floor, any damage to that would require ripping the floor up. With the old grout removed and the floor cleaned the floor was then grouted using Mapei Ultra-colour which is a flexible and fully waterproof grout more than suitable for this situation.
Between us we managed to pack a lot into day one which was tough, however with the hardest tasks out of the way day two should be a lot easier.
Day two started with an initial clean making sure to remove any excess grout smeared on the surface that can affect the look of the tile if not removed. This was followed by the application of the last of the set of burnishing pads which is a 3,000-grit pad that really brings up the polish on the marble. You only need a small amount of water sprayed onto the floor when applying this last pad so by late morning the floor was dry and ready for sealing. The customer wanted a better sheen appearance than they previously had, fortunately we find the Diamond burnishing pads do this well, they also tighten up the pores of the stone as well which means less sealer is needed.
The floor was then sealed with Tile Doctor Colour Grow which is an impregnating sealer that improves colour and soaks into the stone occupying the pores and thereby preventing dirt from becoming ingrained. Once complete the floor looked great and the client was very happy.
Sealers and Polish do wear down with use over time so before leaving I discussed our annual maintenance plan option which will ensure the appearance of the Marble floor always looks good. The plan involves returning once a year to further polish the floor with a high-grade burnishing pad and to add more sealer if required. We also discussed the use of Tile Doctor Stone Soap for regular cleaning, it is a pH neutral cleaner which is ideal for stone floors like Marble which are acid sensitive.
Russell Taylor
Lancashire Tile Doctor
 Stefano Marinaz Landscape Architecture
19 July 2016 -
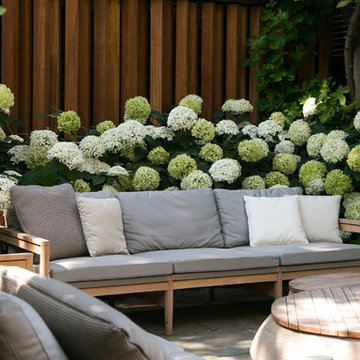
Plants: Hydrangea arborescens 'Annabelle', Ficus carica
- Stefano Marinaz Landscape Architecture
21