
Search results for "Apply believing" in Home Design Ideas
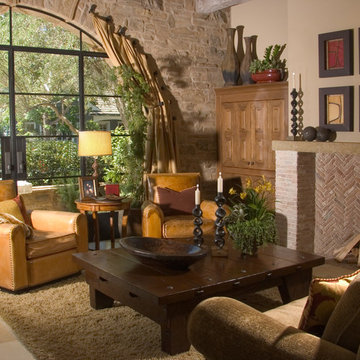
 Eldorado Stone
It was a mutual love of Italy, specifically the Tuscan countryside, that inspired renowned architect Mark Scheurer and his wife, Jane, to build their dream home in a simplistic, but elegant style reminiscent of a centuries old Italian farmhouse. Scheurer’s aim was to bring light, air, and an indoor/outdoor feeling into the home while preserving privacy throughout this rustic Southern California home, all of which was achieved a lot in part due to the implementation of Eldorado Stone.
The use of stone was a predominant element throughout the design. Scheurer used 2,800 square feet of a custom blend of Eldorado’s Veneto Fieldledge and Hillstone profiles, both of which were applied with an overgrout technique, creating a sense of ageless authenticity and textural beauty. Another 500 square feet was used in the interior to create a dramatic focal point of exposed stone in the living room and boast large, arching windows that open up the living room and filter in light. Upstairs, the master bedroom continues the home’s rustic Italian design with exposed stone walls that reach to the beamed ceiling above.
Although Scheurer is in a neighborhood that request for real products to be used in home construction, he had no problem obtaining approval to use Eldorado Stone, which speaks volumes about Eldorado’s beauty and believability. No one doubted the authenticity of the product. In fact, Scheurer believes that Eldorado is even better than natural stone in that the color palette is easily controlled as well as consistent.
Eldorado Stone Profile Featured: Veneto Fieldledge and Custom Hillstone with an overgrout technique
Architect: Scheurer Architects, Newport Beach, CA
Website: www.msa-arch.com
Builder: RS Construction Company, Corona del Mar, CA
 mackmiller design+build
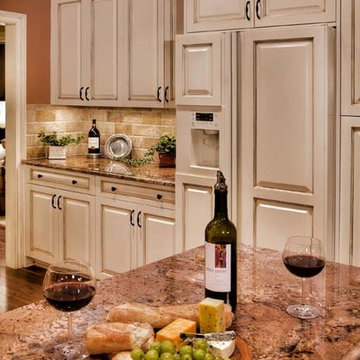
The flooring is #3 American Black walnut character grade. The backsplash is made of stone tile and the countertops are Typhoon Bordeaux with an ogee edge. The walls are painted a deep shade of terra cotta. There is 3-1/2" white casing around the doors, base The flooring is #3 American Black walnut character grade. The backsplash is made of stone tile and the countertops are granite. The walls are painted a deep shade of terra cotta. There is white 3-1/2" casing around the doors, base shoe, and 1/4 round molding.
 Village Home Stores
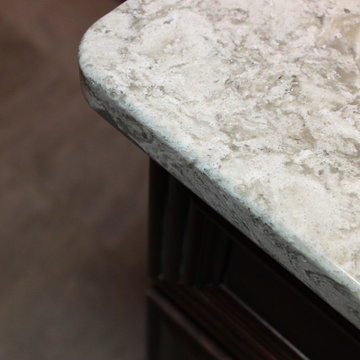
Cambris Quartz in the "New Quay" design and standard "Eased" edge applied.
Inspiration for a mid-sized timeless home design remodel in Chicago
Inspiration for a mid-sized timeless home design remodel in Chicago
Find the right local pro for your project
 Village Home Stores
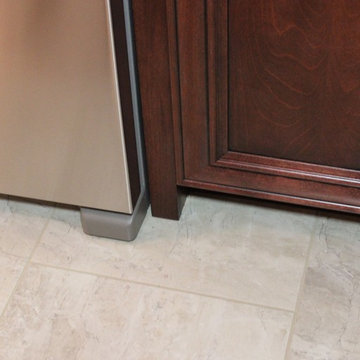
A refrigerator end panel extend all the way to the floor. The counter-depth refrigerator model from KitchenAid looks nearly flush with the cabinetry depth.
 Tile Doctor Ltd
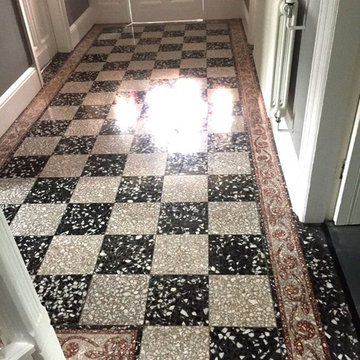
For this job, I paid a visit to the bustling town of Windermere in South Cumbria. My client asked me to refinish a black and white Terrazzo tiled entrance and hallway floor. Terrazzo if you’re not familiar is a very interesting and beautiful stone of Italian origin, which has been used for flooring in houses for centuries.
We had previously quoted to do the work on this floor however the customer has also received a quote from another firm in Glasgow and had chosen to go with them solely because they were more expensive. However, it stands to reason that the most expensive companies are not always the best quality and Tile Doctor prides itself on the amount of customer feedback we display on our websites which we believe is a far better indicator.
On the arranged day no one from the Glasgow firm showed up and after following up with the firm a young man in his early 20s arrived five hours late and began work on the floor. According to the customer he spent three days attempting to complete the job, but ran out of time and asked the client to apply the sealer themselves. The client applied the sealer, but as she had never done it before the floor turned out blotchy in appearance and she was far from happy.
To cut a long story short, my client complained to the Glaswegian company, after all she had paid for a full service and not received it. Unable to get a satisfactory conclusion from them she decided to call in Tile Doctor to put the matter right. I must point out that although I have included before and after photos one this post it’s really difficult to appreciate the extent of the problem without seeing the floor in real life.
To resolve the sealer, and to provide my client with the polished finish she had originally wanted, I burnished the floor using a set of four Tile Doctor Diamond encrusted burnishing pads. Each of the four pads has a different grit: I first applied the coarse pad and worked my way through medium, fine and eventually very fine using a little water to lubricate and rinsing the floor between each pad to remove any residue; after the burnishing process was complete I gave the entire floor a final, thorough wash.
I then used a wet-vac machine to extract the water and get the floor as dry as possible before leaving for the day and allowing it to fully dry completely overnight, it’s very important that the floor is as moisture free as possible before being sealed as it can affect the final result.
The next day I returned to the house and sealed the floor with two coats of Tile Doctor Colour Grow, an impregnating, colour-enhancing sealer that really accentuates the look of the black and white tiles.
Now that the problem has been resolved, my client is very happy with the condition of her Terrazzo tiled entrance and hallway floor.
Heidi Taylor
South Cumbria Tile Doctor
 Village Home Stores
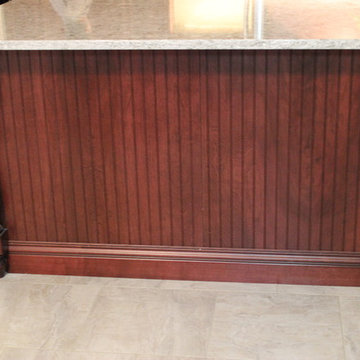
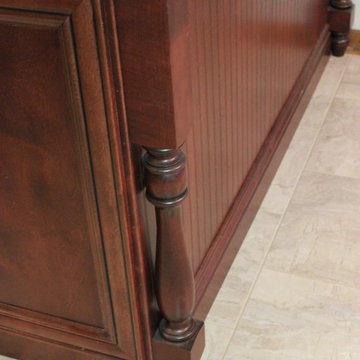
Matching turned posts are installed flush to the beaded back panel of the kitchen peninsula.
Mid-sized elegant home design photo in Chicago
Mid-sized elegant home design photo in Chicago
 Ballack Design + Architecture, LLC
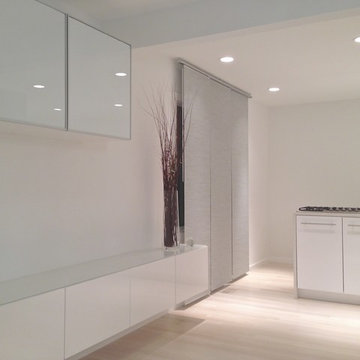
View from dining room looking into the kitchen. The linear storage cabinetry serves as a buffet for the dining room and draws the eye towards the kitchen thus connecting the two related spaces visually. The architectural elements create a dynamic interplay between surface and light.

Sponsored
Columbus, OH

Hope Restoration & General Contracting
Columbus Design-Build, Kitchen & Bath Remodeling, Historic Renovations
 Tile Doctor Ltd
Having an effective sealer in place is essential for ensuring the long term condition of tiled floors in fact a lack of sealer can make cleaning the tiles exceptionally difficult as the sealer prevents dirt becoming ingrained in the tile.
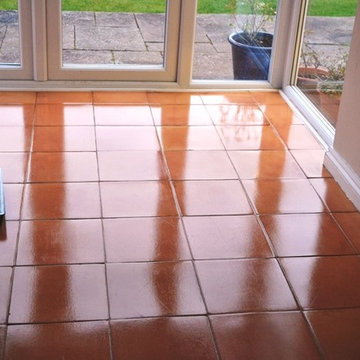
This property owner, living in the former spa town of Matlock in Derbyshire, was experiencing problems with their Terracotta tiled kitchen floor since they had applied some kind of wax to act as a sealer, and this had worn off within a few weeks. After this happened the tiles were not sealed again, making cleaning a big problem. Terracotta is a highly porous stone and thus easily soaks in spillages and stains, and allows dirt to become very easily trapped.
In this situation, the property owner resolved to contact me about some professional maintenance. I suggested that the tiles would need a deep clean followed by the application of a fresh, high quality sealer. The work was agreed on and I made my way down to the property the following week.
When I arrived at the property and saw the tiles first hand it became clear that a professional clean had been in need for a long time: greasy looking stains were particularly prevalent and covered large areas of the kitchen floor.
To remove I mixed a strong solution of Tile Doctor Pro Clean, which is a multi-purpose, high-alkaline cleaner, stripper and degreaser, and, working in small areas, applied it to the floor. Working in small sections was important because the stone is very porous and quickly soaked in any product laid down. I scrubbed the cleaner into the stone using a rotary machine fitted with a black scrubbing pad, with the dirt and stains coming away nicely. Pro Clean is highly versatile and can be used for similar cleaning purposes on most types of natural stone floor.
After cleaning each section, I quickly removed the excess dirty water and chemicals with my wet vax machine. Once the whole floor had been cleaned I rinsed it several times with fresh water just to make sure all cleaning chemicals were gone. I then left the floor to dry completely for 36 hours.
When I returned to the property, I conducted several damp tests to check for any areas of the floor that needed further drying. As is almost always the case, there were a few areas that remained slightly damp, and I set about speeding the drying process along using my heat gun. In fact, it actually took me more than three hours to get the floor completely dry, but this was worth the effort as even the slightest excess moisture can damage the performance of the sealer.
Once the floor was finally dried I began sealing the floor with one coat of Tile a Doctor Colour Grow sealer. Colour Grow is an impregnating sealer that penetrates deep into the pores of the stone, thus acting as a shield against ingrained dirt, and also raises the colour of the tiles to provide an aesthetically appealing appearance. sealer. After sealing with Colour Grow, I left the floor to dry for couple of hours and then applied six coats of Tile Doctor Seal & Go, which is a topical sealer that builds up durable protection on the surface of the tiles.
The combination of through cleaning and the application of not one, but two high quality sealers really did wonders for the appearance of these Terracotta tiles. Looking at the final results you wouldn’t have believed they had been without a proper clean and seal for so long! Needless to say the customer was exceptionally pleased and will surely be able to keep her floor looking great for a long time to come.
Tony Olmet
Derbyshire Tile Doctor
 Village Home Stores
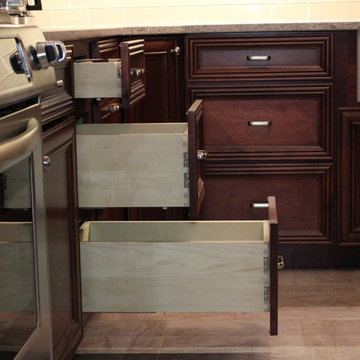
A kitchen can never have enough drawers!
Inspiration for a mid-sized timeless home design remodel in Chicago
Inspiration for a mid-sized timeless home design remodel in Chicago
 Tile Doctor Ltd
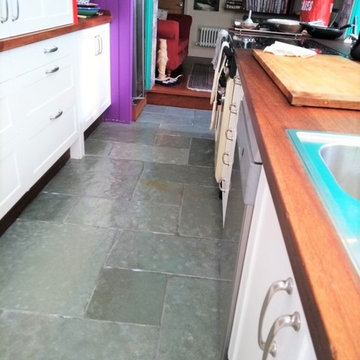
I recently helped a homeowner from my home town of Dursley who got in touch about her kitchen Flagstone floor. The problem revolved around an accident she had with raspberries which had stained the flagstones and the problem became compounded when a house hold clearing product was applied neat to clean up the mess. If you follow any of our Tile Doctor blogs, you will know that using strong household cleaning products can damage the sealer and, in this case, it had left white marks on the floor.
I called round to the property to survey the floor as was surprised to find out that the floor had been cleaned and sealed only four months prior by another company. I don’t like to comment on other people’s work, but I found the grout lines and flagstones were still badly ingrained with dirt, so it wasn’t a through job.
I completed by survey and demonstrated the process I would follow to resolve the issues on one of the flagstone tiles. She could not believe the difference I was able to make and booked me in straight away to restore the entire floor.
My first task was to protect the wooden kitchen units from splashing that can happen when cleaning the floor. Once that was done, I set about stripping the sealer from the floor and deep cleaning the tile and grout with a strong dilution of Tile Doctor Pro-Clean. Pro-Clean is a concentrated, multi-purpose high-alkaline cleaner, stripper and degreaser which is safe to use on all types of tile, stone and grout including natural stone.
Working in sections across the Kitchen and adjacent dining room I diluted one part Pro-Clean to two parts water and mopped it onto the flagstones and grout where I left it to soak in for roughly fifteen minutes. Then using a rotary floor buffer fitted with a black scrubbing pad I scrubbed the solution into the floor into the old sealer and trapped dirt came away turning the cleaning fluid black in the process. The soil was then rinsed off with water and then extracted with a powerful 3,000 watt wet and dry vacuum. This process was repeated until I was satisfied the floor was clean and I ran a stiff grout brush along the grout lines to ensure they also received a good scrub. After I was satisfied the section was clean it was rinsed thoroughly with water to neutralise the floor and remove any trace of product and then dried with the wet and dry vacuum.
The cleaning process took up the whole day, but the flagstones would need to be dry before sealing so after giving the owner an update I left the floor for two days, so it could dry out thoroughly.
On my return I tested the floor was dry in multiple places with a damp meter to ensure it was ready to be sealed. The readings showed that the wet and dry vacuum had done a good job in removing the moisture, so all was well. To seal I applied several coats of Tile Doctor Seal and Go allowing each coat to dry before applying the next however with such a large area to cover I was able to work in sections around the floor.
Seal and Go works really well on Flagstones and leaves a very appealing sheen finish, also being water based it doesn’t leave a smell as it dries.
The results were amazing, and the customer thanked me for making such a massive improvement on her floor. Before leaving I made sure to discuss after-care and to avoid the use of hash cleaning products.
Malcolm Crowther
Gloucester Tile Doctor
 Village Home Stores
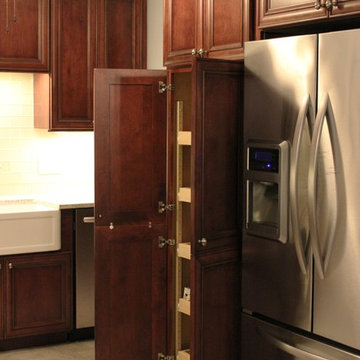
A tall pantry to the left of the refrigerator includes slideout shelves for easy access to pantry items.
Inspiration for a mid-sized timeless home design remodel in Chicago
Inspiration for a mid-sized timeless home design remodel in Chicago
 Tile Doctor Ltd
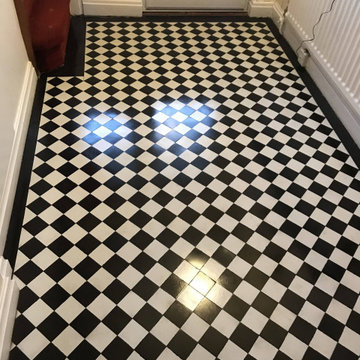
This is a great example of a Victorian Tiled floor refurbishment which I recently completed at a property in Stoke-on-Trent. If you look closely at the photographs below you will see the white tiles are looking grubby and paint splash staining from decorating. The owner was unhappy with how the floor now looked and wanted it refurbished.
Black and White Victorian tiles laid in a chequered diamond pattern is a classic style and a very popular choice for hallways at the turn of the 20th century. Over the years many have been replaced or covered up with carpet and those that survived are now a sought-after period feature that adds value to your property.
I initially cleaned the floor by applying a strong dilution of Tile Doctor Pro-Clean which was sprayed onto the floor and then left to soak in for ten minutes. Pro-Clean is our goto tile and grout cleaning product that is designed to break down dirt and remove old sealers. After ten minutes the solution was scrubbed in with a rotary machine fitted with a coarse 200-grit pad. The soil generated was rinsed off the tiles and extracted with a wet vacuum and the floor inspected.
I would see more work was needed to get the floor clean and free of staining, so I spot treated the problem areas with Tile Doctor Remove and Go which is a coatings remover. I worked in small sections leaving the product to dwell as before for 10 minutes, I then used a wallpaper steamer with handheld diamond blocks to get the ingrained dirt out of the floor. After a final rinse and extraction, the floor looked clean so, so much better than when I started.
I then left the floor to dry off overnight and came back the second day to seal the tiles first checking the moisture levels with a damp meter. Applying sealer to a damp floor will result in the floor looking patchy when it dries so I always check first. The readings were good, so I started to apply the first of five coats of sealer which for this floor I chose Tile Doctor Seal and Go Extra.
Old Victorian floors do not have a damp-proof membrane installed under the floor so its important to select a sealer that will allow moisture to rise through the tiles and evaporate on the surface, Seal and Go Extra allows for this. Choosing a non-breathable sealer can result in moisture being trapped under the floor where it can reach out to the walls leading to rising damp.
Once the floor dried it looked fantastic. In fact, my customer was so happy with the transformation she was taking pictures and sending them to her daughters as I worked; she couldn’t believe how well it was turning out.
Trevor Preece
Staffordshire Tile Doctor
 Village Home Stores
Matching turned posts installed right up to the beaded back panel of the kitchen peninsula.
Home design - mid-sized traditional home design idea in Chicago
Home design - mid-sized traditional home design idea in Chicago
Sponsored
Columbus, OH

Snider & Metcalf Interior Design, LTD
Leading Interior Designers in Columbus, Ohio & Ponte Vedra, Florida
 Ballack Design + Architecture, LLC
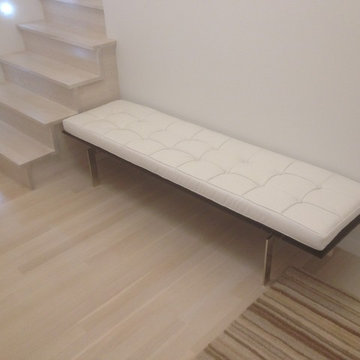
Mid-century modern foyer with white leather bench. The earth-toned wool floor rug creates a nice contrast to the predominantly white material palette. The main staircase seems to "fold" and ascend from the white washed oak floors. LED step lights are used to light up the pathway during evening hours.
 Village Home Stores
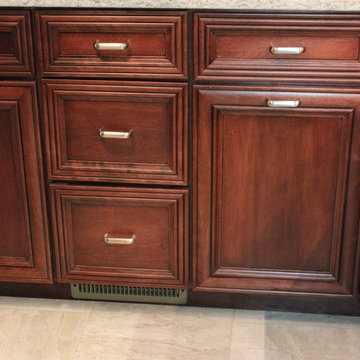
A vent was installed through the toespace of this drawerbase cabinet.
Mid-sized elegant home design photo in Chicago
Mid-sized elegant home design photo in Chicago
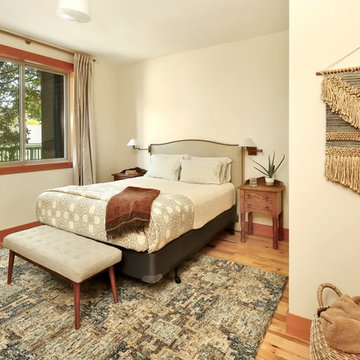
 Bellingham Bay Builders
The owners of this home came to us with a plan to build a new high-performance home that physically and aesthetically fit on an infill lot in an old well-established neighborhood in Bellingham. The Craftsman exterior detailing, Scandinavian exterior color palette, and timber details help it blend into the older neighborhood. At the same time the clean modern interior allowed their artistic details and displayed artwork take center stage.
We started working with the owners and the design team in the later stages of design, sharing our expertise with high-performance building strategies, custom timber details, and construction cost planning. Our team then seamlessly rolled into the construction phase of the project, working with the owners and Michelle, the interior designer until the home was complete.
The owners can hardly believe the way it all came together to create a bright, comfortable, and friendly space that highlights their applied details and favorite pieces of art.
Photography by Radley Muller Photography
Design by Deborah Todd Building Design Services
Interior Design by Spiral Studios
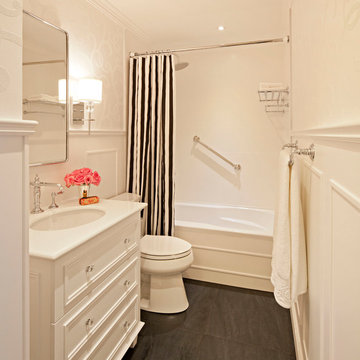
 David Crosson Design Collective
The client decided that she was in her "forever home" and wanted to create a space that felt clean and fresh but referenced elements of a vintage aesthetic. Panel molding, gently swooping paintable wallpaper, a high-contrast palette and gleaming fixtures from Kohler's Artifacts line all contributed to the look. "I'm never leaving this room," she said when we were done--and somehow I believe that might just be true!
Image shot by John Bilodeau

Sponsored
Delaware, OH

Buckeye Basements, Inc.
Central Ohio's Basement Finishing ExpertsBest Of Houzz '13-'21
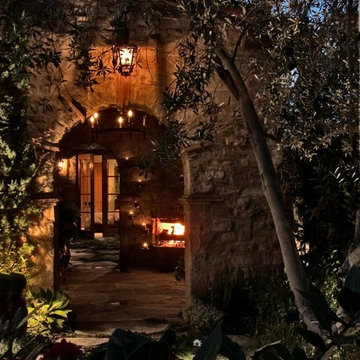 Eldorado Stone
It was a mutual love of Italy, specifically the Tuscan countryside, that inspired renowned architect Mark Scheurer and his wife, Jane, to build their dream home in a simplistic, but elegant style reminiscent of a centuries old Italian farmhouse. Scheurer’s aim was to bring light, air, and an indoor/outdoor feeling into the home while preserving privacy throughout this rustic Southern California home, all of which was achieved a lot in part due to the implementation of Eldorado Stone.
The use of stone was a predominant element throughout the design. Scheurer used 2,800 square feet of a custom blend of Eldorado’s Veneto Fieldledge and Hillstone profiles, both of which were applied with an overgrout technique, creating a sense of ageless authenticity and textural beauty. Another 500 square feet was used in the interior to create a dramatic focal point of exposed stone in the living room and boast large, arching windows that open up the living room and filter in light. Upstairs, the master bedroom continues the home’s rustic Italian design with exposed stone walls that reach to the beamed ceiling above.
Although Scheurer is in a neighborhood that request for real products to be used in home construction, he had no problem obtaining approval to use Eldorado Stone, which speaks volumes about Eldorado’s beauty and believability. No one doubted the authenticity of the product. In fact, Scheurer believes that Eldorado is even better than natural stone in that the color palette is easily controlled as well as consistent.
Eldorado Stone Profile Featured: Veneto Fieldledge and Custom Hillstone with an overgrout technique
Architect: Scheurer Architects, Newport Beach, CA
Website: www.msa-arch.com
Builder: RS Construction Company, Corona del Mar, CA
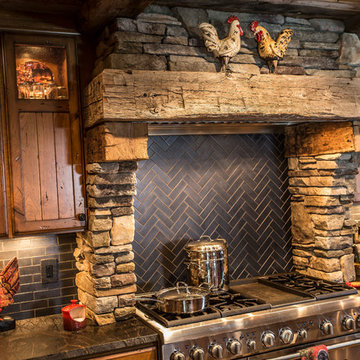
 Echelon Builders, Inc.
Completely custom hand-hewn reclaimed timber & stone veneer hood surrounding Thermador 48" professional range and hood insert. Custom distressed rustic cherry cabinetry and honed granite counter tops. Herringbone back splash.
Photo by: Tom Martineau (Martineau Design)
 Gilley Kitchen + Bath
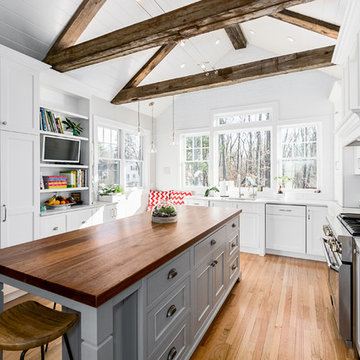
The perimeter cabinetry is full-access with full overlay doors and drawer fronts. The island is beaded inset construction with a hand-applied glazed finish done in the field by a local craftsperson.
10