
Search results for "Applying" in Home Design Ideas
 Classic Muskoka Homes
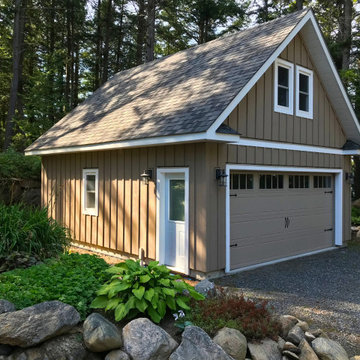
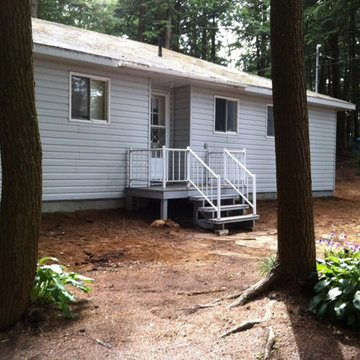
The new Owners of this cottage on Dickie Lake in the Township of Lake of Bays approached us to design a substantial “face-lift” renovation of the existing cottage, and to design a new garage for secure storage.
A scrapbook collection of architectural style reference photos that the Owners had collected set the starting point for an integrated & consistent design style between the cottage and the new garage.
A gable roof feature was added to “celebrate the entry” to the existing cottage.
Windows, doors & siding were installed to the newly constructed garage. Windows & doors in the existing cottage were integrated with the new board & batten siding applied to both the cottage and the garage.
A high-quality exterior siding stain was applied by hand-brushing for enhanced penetration & protection. A durable exterior deck stain was applied to the new cedar deck.
 Intrinsic Studio Co.
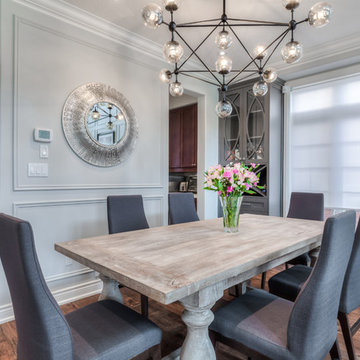
Inspiration for a mid-sized eclectic medium tone wood floor dining room remodel in Toronto with gray walls
 Heritage Painting and Resinous Flooring
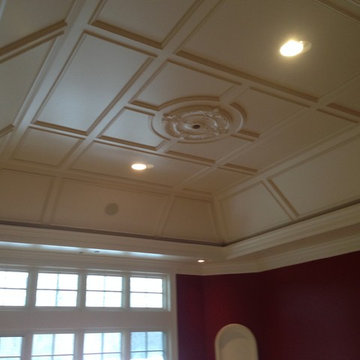
Thanks to Benjamin Moore this dining room turned out amazing!
Find the right local pro for your project
 Baru Decor
Please send us a message or contact us for custom orders - barudecor.com/custom-order/ Please include the dimensions, wood preference, and delivery location. For reference, this countertop was made of solid black walnut, butcher block style.
Made from solid premium wood, our countertops are a perfect complement to your homes and businesses. Whether you’re looking to revamp your kitchen, bars, and restaurants to give a luxurious vibe, our custom countertops are made with natural material and give a rich appearance. They add value to your space and create a more inviting space.
We only work with premium-grade woods like Teak, Walnut, White Oak, Ash, and Maple. Our pieces are completely customizable in terms of dimensions, edge designs, and finishes. We also have a CNC machine for making any cutouts precisely.
Every statement piece is handcrafted in our shop based in San Diego using only the finest quality hardwood. We place a lot of care and experience into each one of our pieces for years of memories to come. Our slabs are sustainably sourced from different regions in the US, Central & South America and we work closely with our clients to select them.
**Handmade item - Each piece is Custom Built To Order and finishes can vary, hence your piece will have a slight variation from the item shown in the photo as every piece of wood is different.
We ship to all US via truck freight and all our tables are wrapped carefully and placed inside a wooden crate with high-quality insulation to ensure safe arrival.
LEAD TIME: Our lead time varies from time to time but it is approximately 3-5 weeks plus 7-10 transit. We will let you know prior to placing the order. Rush orders are available for an additional fee depending on the project.
FINISH: We work with different options for Residential and Commercial use such as Rubio Monocoat, Osmo Polix Hardwax oil, and Commercial Grade Conversion Varnish. Our finish maintains the natural look and feel of the wood, all while offering protection and durability.
Here are some recommendations for keeping your countertop beautiful for a good time. Like every wood, maintenance depends a lot on how it is used. No matter what kind of sealant we apply liquids always win (with only one exception, an epoxy coating that looks like plastic, not very attractive).
- I recommend always using coasters, keeping hot pans away from the surface, and never letting water sits on them.
- For cleaning just a light mixture of soap and water and NEVER use harsh products like comet or Scotch Bright pads.
If you follow the recommendations the countertop will look fresh and clean for at least 2 years and then you may want to consider re-sanding and coating again which is super easy with Rubio Monocoat oil finish.
There is also a great maintenance oil developed by Rubio Monocoat - “Rubio Monocoat Renew” that refreshes, restores, and protects surfaces treated with Rubio Monocoat Oil Plus 2C (the one we use for all our furniture).
It’s recommended whenever the surface feels too dry or rough and it is super easy to apply in 3 steps:
1- Clean and dry the surface
2- Apply the oil using cloth rags, brush, or sponge
3- With kitchen tissue or cotton cloth remove all the excess oil within 10-15 min.
The surface should be dry after 6-8 hours.
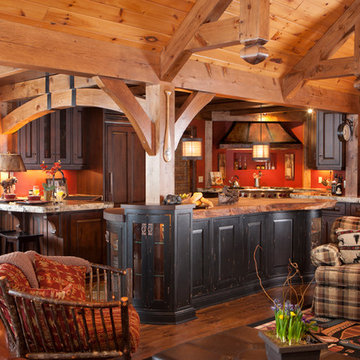
 Chervin Kitchen & Bath Inc.
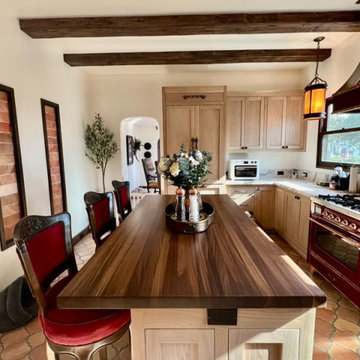
It's hard to fathom, but not long ago this was just a framed cottage. After installing beams to make it look like a post-and-beam structure, the home owners wanted their new kitchen design to compliment the style.
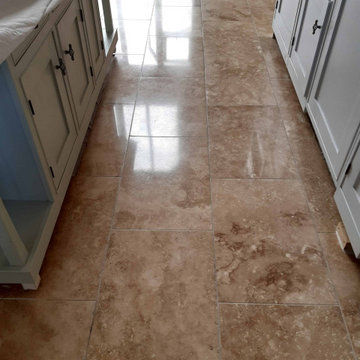
 Tile Doctor Ltd
Located in Burgh Castle West of Great Yarmouth, this Travertine stone floor was a classic example of an incomplete installation. By incomplete I mean the tiler had done a fine job of laying and grouting the tiles but had left it at that and not sealed the stone. Natural stone like Travertine is porous and needs a sealer to stop dirt becoming ingrained in its pores, a sealer will also improve its appearance.
Without a sealer this floor now looked very dull, pale, rather damaged with pitting and heavily soiled with ingrained dirt. Pitting in stone like this is a natural feature of Travertine however it can be exacerbated with the use of acid cleaning products. This was a floor in urgent need of a face lift, and I was confident it could be transformed into a very beautiful floor.
I think it is true to say that most tilers will skilfully lay a floor for you but usually don’t have the knowledge, experience or equipment to finish the surface properly and when it comes to sealing many will recommend a product and suggest you take care of it yourself. Naturally if your find yourself in that position don’t insist the tiler does it, better to give us a call and have it done properly.
Our first job was to backfill the larger pits in the stone which as I mentioned are a natural feature of travertine material, but they can trap dirt and so its best if they are plugged with a suitably rigid filler. Also, if left alone the larger holes can quickly become larger as their edges crumble and break up leading to the entire tile becoming unstable. Replacing a tile in a floor like this is possible however its an extremely awkward job to do and it can be difficult to find an exact match for replacement.
Filling was done using a two-part, neutral cream-coloured polyester compound which gels in about fifteen minutes after addition of the catalyst. After this initial period, the excess product is trimmed off level with the surface of the tile before it sets harder than the stone itself in around sixty minutes. The fully cured compound can then be cut and machined as though it were part of the stone structure.
Our second job was to remove deep scratches caused by the unprotected feet of workmen’s ladders. This was done using Tile Doctor 50-grit and 100-grit diamond hand burnishing pads with a little water as a cutting medium. Shallower scratching present across the rest of the floor was removed using a Tile Doctor 200-grit soft milling pad driven by our Klindex 17″ rotary machine.
This abrasive action produces a fine slurry which was then rinsed with water and extracted using our 400psi Ninja machine in preparation for the next stage of the refinishing process. These machines were an expensive investment for our business however they are very robust and effective producing a good result that saves time.
Next task was to restore the polished appearance of the Travertine which was done using the application of a set of Tile Doctor burnishing pads. The process starts by applying a coarse 400-grit diamond pad, again fitted to the Klindex rotary machine. This cleans the tile and improves the matt finish left by the milling pad; again, the slurry was rinse-extracted before moving on to the next pad in the set. Next came the finer diamond polishing stages of 800 grit and 1500 grit, slurry being removed as before between the grades. By this time, all the scratches had been removed and the Travertine floor had visually pleasing even sheen across the whole surface. The last pad in the set is applied dry with a little water sprayed onto the tile so we left the area to dry out thoroughly overnight with the assistance of our large capacity dehumidifier.
Returning the following morning, we found that the floor had dried out perfectly and was ready to be vacuumed and spray burnished with the last pad in the set which is a 3000-grit very fine pad applied using a small amount of water sprayed from a trigger bottle resulting in a deep, rich shine across the floor surface.
Last step in the face lift was to seal the floor with a generous coat of Tile Doctor Ultra-Seal, a premium grade penetrating sealer recommended for use in Kitchens and food preparation areas. Having left the floor to soak up as much of the Tile Doctor Ultra-Seal as it could, the excess product was removed and the whole area allowed to dry completely with the assistance of our industrial air moving fan. Finally, the floor was spray buffed to a deep shine using a white maintenance pad.
The client was extremely pleased with our results and was amazed at the variation of colours within the stone which had never been visible previously.
Nick White
Norfolk Tile Doctor
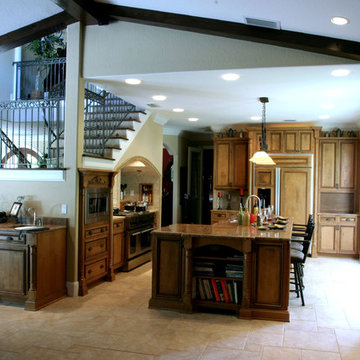

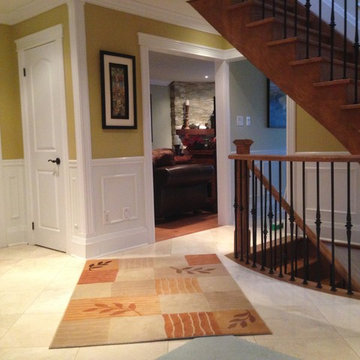
 PreteInteriors
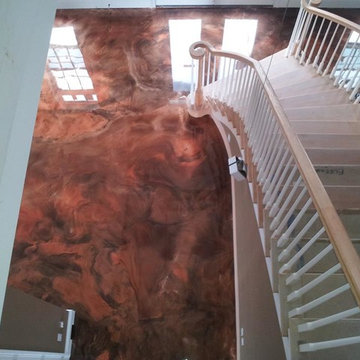
Example of a large classic wooden curved metal railing staircase design in Toronto with wooden risers
 Classic Muskoka Homes
The new Owners of this cottage on Dickie Lake in the Township of Lake of Bays approached us to design a substantial “face-lift” renovation of the existing cottage, and to design a new garage for secure storage.
A scrapbook collection of architectural style reference photos that the Owners had collected set the starting point for an integrated & consistent design style between the cottage and the new garage.
A gable roof feature was added to “celebrate the entry” to the existing cottage.
Windows, doors & siding were installed to the newly constructed garage. Windows & doors in the existing cottage were integrated with the new board & batten siding applied to both the cottage and the garage.
A high-quality exterior siding stain was applied by hand-brushing for enhanced penetration & protection. A durable exterior deck stain was applied to the new cedar deck.

 K & Y Carpet One
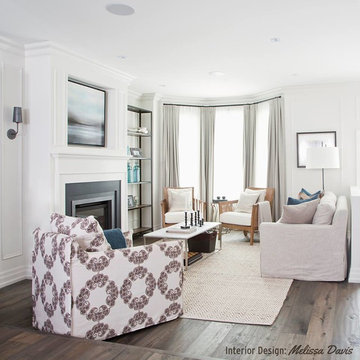
Example of a mid-sized minimalist formal and open concept medium tone wood floor living room design in Orlando with white walls, no tv, a standard fireplace and a plaster fireplace

 Scott's Lumber
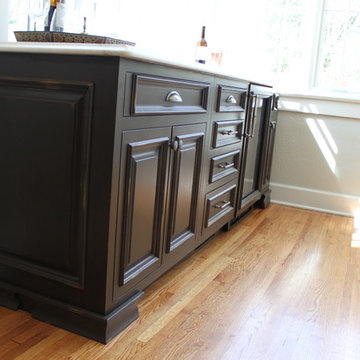
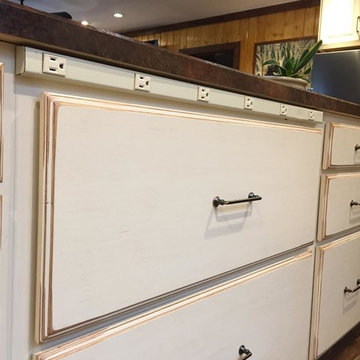
Outlet strip mounted on face of cabinets
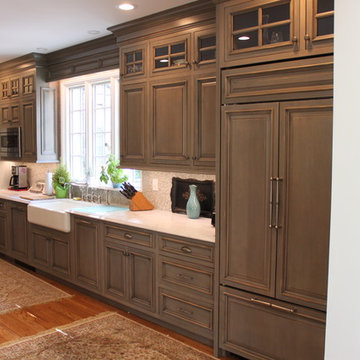
Inspiration for a mid-sized rustic l-shaped laminate floor and brown floor open concept kitchen remodel in Other with an undermount sink, raised-panel cabinets, laminate countertops, stainless steel appliances, an island and distressed cabinets
Inspiration for a mid-sized rustic l-shaped laminate floor and brown floor open concept kitchen remodel in Other with an undermount sink, raised-panel cabinets, laminate countertops, stainless steel appliances, an island and distressed cabinets

 Richmond Commercial Painting
Richmond Commercial Painting provides full-service Milwaukee commercial interior painting for commercial buildings.We are skilled at applying all types of floor and wall coverings. We perform electrostatic painting for heat registers, bathroom stalls, or elevator doors and frames.
There is a lot more to commercial interior painting than just brushing, rolling or spraying a coating on a substrate. Preparation for painting, particularly on rehabilitation jobs, can be very involved and require elaborate equipment and technical expertise. In commercial painting and repaints there is usually production and office equipment and furniture to protect. There is a need for project coordination to assure the smooth, non-disruptive flow of the work.
Milwaukee commercial interior painting often calls for specialized coatings because of environmental and high traffic concerns. The right equipment and expertise are required for the proper application of highly technical coatings. Unlike some of the other painting companies in the area, these production elements are readily available at Richmond Painting. The highly experienced staff of project coordinators and applicators is familiar with the equipment and coatings materials to assure owners of the best possible experience in any commercial interior painting project.
Our commercial painting pros apply coatings to ceilings, walls and floors with attention to detail and care for the surrounding elements of the room. They apply acrylic ceiling and wall textures as well as latex paints. They finish floors in a wide variety of materials formulated to provide attractive, durable, high-traffic surfaces. Richmond Painting is a one-stop source of all commercial interior painting projects, large or small.
Our successfully completed projects list includes schools, hospitals, hotels, nursing homes, office complexes, warehouses, factories, high-rise apartment buildings and a host of others. We have experience in every type of commercial structure between Racine and Milwaukee.
commercial interior painting in milwaukeeRichmond Painting is in Racine, WI and from this central point we dispatch crews to projects throughout the Milwaukee area, including the northern suburbs of Washington Mequon, Grafton, Cedarburg, and southern areas like Pleasant Prairie, Sommers , Racine, Oak creek, and even as far south as Libertyville, IL in some cases. We serve any professional commercial coatings needs within Racine, Kenosha, Milwaukee, Waukesha , Walworth, Washington and Ozaukee counties.
The estimating and project coordination experts at Richmond Painting and Decorating are available to assist in every step of a Milwaukee commercial interior painting project. We work with owners on budgeting, with general contractors on the critical flow chart for the coatings part of their contracts and with designers on materials and color selections. Where coatings are the majority of a contract, we assume the overall project coordination and completion responsibilities. We take pride in our work and do everything humanly possible to assure a successful completion of the job.
When a project is done right the first time, the proper material is used by highly qualified applicators and the job is done with a minimum of disruption to an active business, it is well worth the money spent. It really costs no more to get the very best.
Again, we provide commercial painting services to a wide local area including; but not limited to: Bethesda, Alexandria, Potomac, Arlington, Great Falls, Vienna, Silver Spring, Fairfax, McLean, Rockville, and Woodbridge.
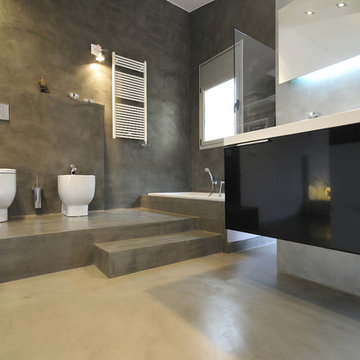
 Topcret Microcement USA
Bathroom - concrete floor and beige floor bathroom idea in Miami with multicolored walls
 Tile Doctor Ltd
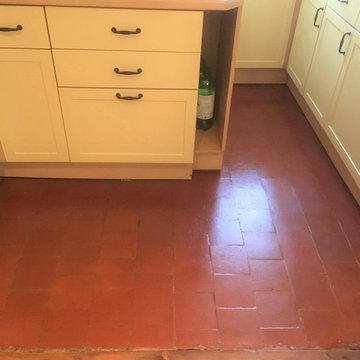
I received a call from this client in Old Marston around two miles north east of the centre of Oxford. They had lifted a lino floor in their kitchen and found an old Quarry Tiled floor underneath and decided to see if they could have it restored.
I went over to survey the floor and could see that the tiles had been covered with a thin layer of levelling screed to ensure the lino didn’t sink into the recesses. I ran some tests to demonstrate how the screed could be removed which worked well and it was apparent that the tiles underneath were intact and could be renovated. I submitted a quotation for removing all the screed, deep cleaning the Quarry tiles and then sealing the tiles to protect them. The client was really pleased that we could restore the floor and the quote was accepted, with a date booked to do the work.
To start the work, I applied undiluted Tile Doctor Grout Clean-up worked in with a small carbide brush attached to a hand-held rotary buffer. The combination of the acid in the Tile Doctor Grout Clean-up combined with the scrubbing action of the brush were effective at removing most of the screed. The small bits of remaining screed were carefully removed by hand, using a floor scraper. The floor was then rinsed with water and the soil removed with a wet vacuum.
For the second phase of the cleaning process I applied Tile Doctor Oxy-Gel which was scrubbed into the floor with a stiff brush rinsing after with water and the soil extracted again using the wet vacuum. After cleaning the floor to remove the dirt I could still see some evidence of the screed on the tiles, so I decided to give the floor an Acid Wash using Tile Doctor Acid Gel which was scrubbed into the floor and rinsed off as before. Tile Doctor Acid Gel is of course an acidic product so once it was removed, I decided to rinse the floor with Tile Doctor Neutral Cleaner to neutralise the pH levels in the floor. The wet vacuum was used again to remove as much moisture from the Quarry tiles as possible before leaving the now clean floor to dry off fully overnight.
I returned to seal this floor the next day. First, I checked the floor was fully dry with the damp meter, it was within the recommended range, so I was ready to complete the sealing process.
The client was not too sure if they wanted a matt or sheen finish, so I first put a coat of Tile Doctor Colour Grow on the floor to show them the matt finish. Colour Grow is an impregnating sealer that enhances natural colour and protects from within by occupying the pores in the tile. After reviewing the floor, they decided it was not for them, so I followed up by applying several coats of Tile Doctor Seal & Go which adds a nice sheen finish and is compatible with Colour Grow.
The combination of sealers worked very well together, and they were very satisfied with the final result and of course that we had been able to restore the Quarry tiles.
Barry Woodward
Oxfordshire Tile Doctor

 ELISABETTA MARIOTTI Italian Interiors
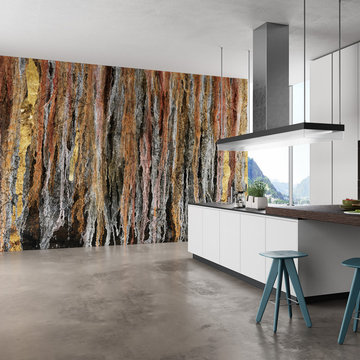
Inkiostro Bianco designer wallpaper is the creative wallcovering that confers personality to the home.
Huge trendy single-wall concrete floor and gray floor open concept kitchen photo in Other with white cabinets, wood countertops and brown countertops
Huge trendy single-wall concrete floor and gray floor open concept kitchen photo in Other with white cabinets, wood countertops and brown countertops
50