
Search results for "Applying" in Home Design Ideas
 Tile Doctor Ltd
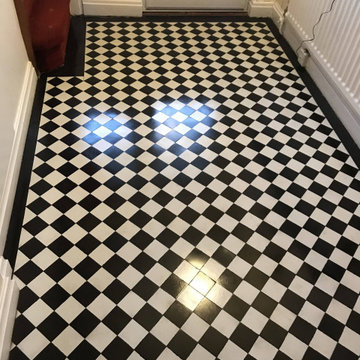
This is a great example of a Victorian Tiled floor refurbishment which I recently completed at a property in Stoke-on-Trent. If you look closely at the photographs below you will see the white tiles are looking grubby and paint splash staining from decorating. The owner was unhappy with how the floor now looked and wanted it refurbished.
Black and White Victorian tiles laid in a chequered diamond pattern is a classic style and a very popular choice for hallways at the turn of the 20th century. Over the years many have been replaced or covered up with carpet and those that survived are now a sought-after period feature that adds value to your property.
I initially cleaned the floor by applying a strong dilution of Tile Doctor Pro-Clean which was sprayed onto the floor and then left to soak in for ten minutes. Pro-Clean is our goto tile and grout cleaning product that is designed to break down dirt and remove old sealers. After ten minutes the solution was scrubbed in with a rotary machine fitted with a coarse 200-grit pad. The soil generated was rinsed off the tiles and extracted with a wet vacuum and the floor inspected.
I would see more work was needed to get the floor clean and free of staining, so I spot treated the problem areas with Tile Doctor Remove and Go which is a coatings remover. I worked in small sections leaving the product to dwell as before for 10 minutes, I then used a wallpaper steamer with handheld diamond blocks to get the ingrained dirt out of the floor. After a final rinse and extraction, the floor looked clean so, so much better than when I started.
I then left the floor to dry off overnight and came back the second day to seal the tiles first checking the moisture levels with a damp meter. Applying sealer to a damp floor will result in the floor looking patchy when it dries so I always check first. The readings were good, so I started to apply the first of five coats of sealer which for this floor I chose Tile Doctor Seal and Go Extra.
Old Victorian floors do not have a damp-proof membrane installed under the floor so its important to select a sealer that will allow moisture to rise through the tiles and evaporate on the surface, Seal and Go Extra allows for this. Choosing a non-breathable sealer can result in moisture being trapped under the floor where it can reach out to the walls leading to rising damp.
Once the floor dried it looked fantastic. In fact, my customer was so happy with the transformation she was taking pictures and sending them to her daughters as I worked; she couldn’t believe how well it was turning out.
Trevor Preece
Staffordshire Tile Doctor
 Liberty Door Series
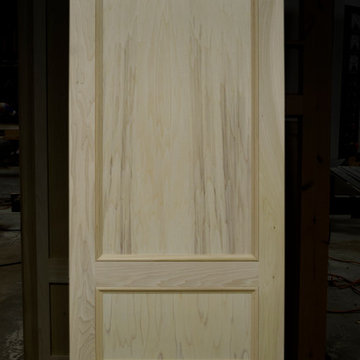
L-202F with applied moulding
Various applied moulding can be added to your Liberty door to add another dimension to every room in your home.
Bedroom - transitional bedroom idea in Cleveland
Bedroom - transitional bedroom idea in Cleveland

Find the right local pro for your project
 Modern Kitchen Design
Mark Karrer
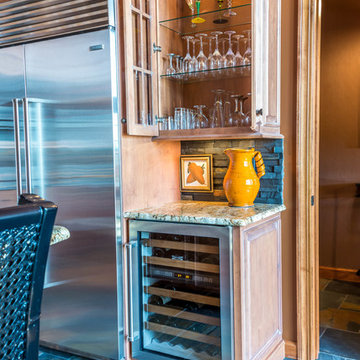
Small eclectic l-shaped slate floor open concept kitchen photo in Other with an undermount sink, glass-front cabinets, light wood cabinets, granite countertops, black backsplash, stone tile backsplash, stainless steel appliances and an island
Small eclectic l-shaped slate floor open concept kitchen photo in Other with an undermount sink, glass-front cabinets, light wood cabinets, granite countertops, black backsplash, stone tile backsplash, stainless steel appliances and an island

 Tile Doctor Ltd
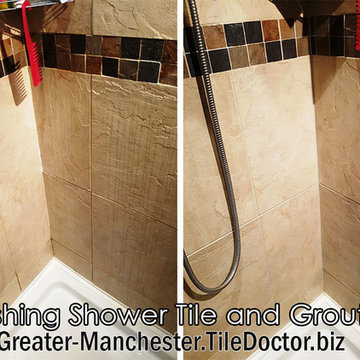
Shower and bathroom mould and soap scum growth are probably the most common, annoying and frustrating tile-related problems. Wet and high humidity areas with poor ventilation provide the perfect breeding ground for mould and stains. Soap residue and body oils also create a food source for soap scum, mould to grow.
My customer in Dane Bank had the exact problem with dirty and mouldy grout lines in her shower cubicle. She had tried scrubbing the grout lines herself with a toothbrush and standard supermarket cleaners but never got the result she wanted.
Fortunately she was lucky to find Tile Doctor from the internet and I was asked to pop over and take a look to see what could be done. I was confident we could make a big difference so I went through the options with her and give her price for the job. She was happy with the price and we agreed a date for me to return and complete the work.
For grout lines cleaning I used Tile Doctor Grout Colorant Pre-Treat Cleaner, which successfully removes dirt, soil, soap scum and hard water deposits from grout joints. The product was sprayed on to the grout and left to dwell and seep into the pores for approximately five minutes to break down the soap scum and dirt before being scrubbed in using a stiff grout brush. The cleaning was successful but there were still few mouldy spots left. On these spots I used Tile Doctor Mould Away Spray that is meant for quick removal of mould from grout and silicone. One again product got sprayed on grout lines and left to dwell for five minutes and then scrubbed with stiff grout brush and then rinsed with clean water. After I had finished cleaning I express dried the tile and grout using high power heat gun.
With the area nice and dry, I had to choose the matching colour for the existing grout. There are ten colours to choose from the Tile Doctor range of Grout Colourant and on this occasion we chose Limestone as the best colour to match the tile.
The colourant is easily applied directly to the grout and in this case I applied two coats. The product is epoxy based and completely seals and rejuvenates the appearance of the grout, which not only drastically improves appearance it also makes it much easier to clean in the future. After applying the re-colourant I buffed all grout colorant excess off the tiles and the shower cubicle was ready.
My customer was very satisfied with the work and left the following comment on the Tile Doctor Feedback system
“Really, really happy with the service Tony provided and the recommendations he suggested. The work was carried out in a highly professional manner, to a high standard. I have already recommended him to friends. Thank you”
Tony Olmet
Greater Manchester Tile Doctor
 Myk's Woodworking
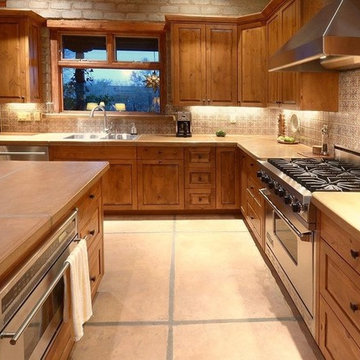
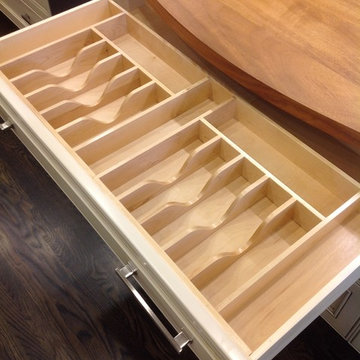
I design and manufacture custom cabinets for kitchens, bathrooms, entertainment centers and offices. The cabinets are built locally using quality materials and the most up-to date manufacturing processes available . I also have the Tucson dealership for The Pullout Shelf Company where we build to order pullout shelves for kitchens and bathrooms.

 Chervin Kitchen & Bath Inc.
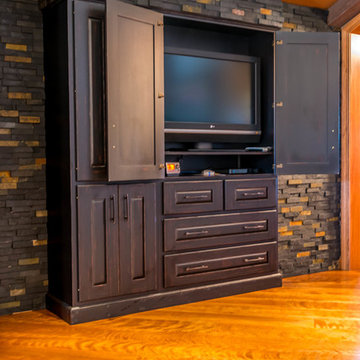
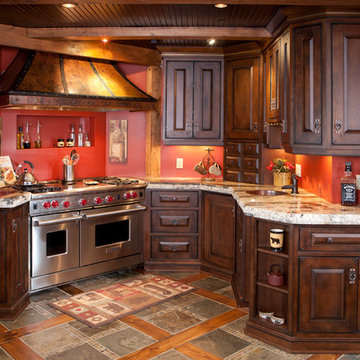
Example of a mid-sized mountain style u-shaped medium tone wood floor eat-in kitchen design in Toronto with raised-panel cabinets, distressed cabinets, granite countertops, paneled appliances and an island
 Chervin Kitchen & Bath Inc.
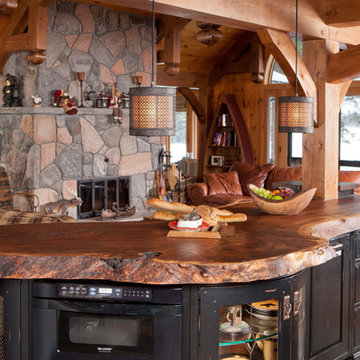
Eat-in kitchen - mid-sized rustic u-shaped medium tone wood floor eat-in kitchen idea in Toronto with raised-panel cabinets, distressed cabinets, granite countertops, paneled appliances and an island

 Myk's Woodworking
I design and manufacture custom cabinets for kitchens, bathrooms, entertainment centers and offices. The cabinets are built locally using quality materials and the most up-to date manufacturing processes available . I also have the Tucson dealership for The Pullout Shelf Company where we build to order pullout shelves for kitchens and bathrooms.


 Builder Boy
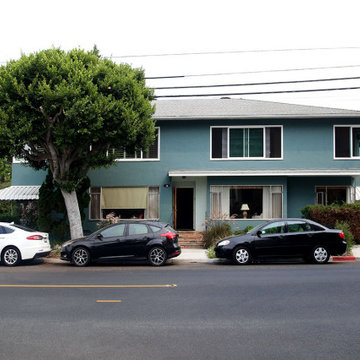
For this Project we were contracted to give this charming apartment building a exterior stucco paint lift. We started this project, as we do many just like this, by water blasting the stucco surface and treating mildew. Any surface not scheduled to receive paint was masked off and covered up. Next, any large holes in the stucco was patched with poly prep and fiberglass mesh. All cracked were filled with elastomeric caulking and applied color coat to all patches and where it was needed. Afterwards, one coat of exterior primer and two coats of premium grade exterior paint was applied to the stucco. Lastly, the wrought iron used on exterior of the building was sanded, prepped ,and primed, as well as applying two coats of metal paint
 Tile Doctor Ltd
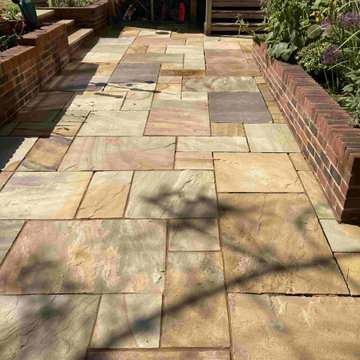
A customer from the Tunbridge Wells borough of Southborough got in touch with me regarding the renovation of their Sandstone Paved Drive and Patio. The paving surrounded the property and since all the facias had recently been renewed on the house the stone was letting the overall appearance of the property down.
It had been sometime since the Sandstone had been cleaned and as you can see from the photos what was once a beautiful stone had now darkened and lost much of its natural colour. I went to the property to do a quick site visit to check what needed to be done. I worked out a quote for cleaning to the stone which was accepted and a convenient time to carry out the work was agreed.
I have a very powerful high pressure cleaning system installed in my van which makes short work of cleaning stone and brick. Not only is it very effective at cleaning its designed as a closed system, so all the waste is extracted back to a large grey water tank in the van. Now you can use an everyday power washer to clean up external stone however they are not as powerful and so take much longer, also the result does not tend to be as good.
It was a large area, so I approached the job in sections and started by pre-wetting the stone with water. Then I applied Tile Doctor Patio & Brick Driveway Cleaner which is a powerful outdoor cleaning solution formulated to power through patio blackspots, lichen, moss, and stains. This is a commercial product designed for professional use so if you are looking at using it yourself, please take care and use the right protection.
The cleaner was left to soak into the really dirty areas whilst I focused on the cleaning the other parts of the drive and patio with the van mounted pressure washer. I was then able to return to the deeper stains later. Using a combination of the Tile Doctor Brick and Patio Cleaner along with our van mounted pressure cleaning system we were able to completely transform the properties kerb appeal.
Applying a sealer now the Sandstone was clean would have improved the look of the stone further and made the patio easier to keep clean going forward; however, it was a very large area which would require a lot of sealer. Keen to keep the cost down it was agreed not to apply a sealer and instead they intend to do more regular cleaning. The patio did look in great condition following the deep cleaning and so difficult to justify at this stage.
My customer was very happy with the transformed patio and the look of delight was clearly visible. It’s a great feeling when you have a happy customer and this was one of those jobs where their satisfaction was so uplifting, especially during these times.
Michael Conlon
South Kent TIle Doctor
 Peter C. Schiffer Decorative Painting
First step : Stain.
Inspiration for a cottage kitchen remodel in Boston
Inspiration for a cottage kitchen remodel in Boston
 Tile Doctor Ltd
It’s not often that we get called abroad for a job, but when we do, it’s always a fantastic experience. We have done a few jobs abroad in the past, including the restoration of Terracotta tiled restaurant floor at a hotel in Addis Ababa, Ethiopia. This job was closer to home at a chateau in the town of Arcis-le-Ponsart near Reims, located in the Champagne-Ardenne region of North Eastern France. As its name suggests, the Champagne-Ardenne region is famous for its champagne.
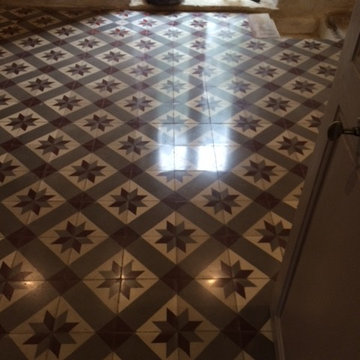
The owner of the chateau was, in fact, an English property developer. He asked us to work on two floors: a Terracotta tiled hallway, and a French Victorian tiled floor. The French style of Victorian tiles are actually made of encaustic cement rather than clay, so we were excited to have the chance to work on something a bit out of the ordinary.
It was going to be a long trip, so after packing the van with the necessary equipment and Tile Doctor products Heidi and I set off to France via the Channel Tunnel. Fortunately, we avoided any disruptions both on the way there and the way back!
On arrival at the chateau, we immediately spent two hours running tests on the two floors to determine the most effective processes. We had four days in which to complete the job, so it was essential to make sure our methods were correct before beginning to avoid any unwelcome surprises later on!
After running the tests, we set about cleaning the Victorian tiles using a combination of clean water and diamond burnishing pads. No damage was done to the tiles, and they polished up well. Following the cleaning process, we began sealing the floor using Tile Doctor Colour Grow, a sealer which helps to bring out the colour in the stone while also providing durable surface protection. We were only able to apply one coat of sealer, however, as the second coat kept smearing, preventing the shine from settling in – this was despite testing the process earlier. Nonetheless, we resolved to polish off the one coat we could apply with a fine burnishing pad. Thankfully, the results were still very good.
The Terracotta tiled hallway had no sealer, and so it had, over time, become very dirty. We cleaned the tiles using a solution of one part Tile Doctor Pro Clean to five parts clean water, in combination with a couple of black burnishing pads.
As you can see from the pictures, the combination really helped to lift out the ingrained dirt, leaving the tiles looking at their best again. The floor took three days to dry completely before we could begin the sealing process. Once the floor was dry enough to seal, we applied eight coats of Tile Doctor Seal & Go, which is suitable for use on a variety of internal, unsealed porous surfaces.
It was a long and exhausting week but the client was delighted with the results on both floors and left the following comments, he also mentioned using Tile Doctor in the future to work on the other properties he is developing.
“Thanks for yours and Heidi’s work in renovating our floors. It was also great to meet you guys and I hope you have enjoyed your visit to champagne and will come back some time. “
52