
Search results for "Assessing non compliance" in Home Design Ideas

 Nakamoto Forestry
Project Overview:
The owner of this project is a financial analyst turned realtor turned landlord, and the goal was to increase rental income on one of his properties as effectively as possible. The design was developed to minimize construction costs, minimize City of Portland building compliance costs and restrictions, and to avoid a county tax assessment increase based on site improvements.
The owner started with a large backyard at one of his properties, had a custom tiny home built as “personal property”, then added two ancillary sheds each under a 200SF compliance threshold to increase the habitable floor plan. Compliant navigation of laws and code ended up with an out-of-the-box design that only needed mechanical permitting and inspections by the city, but no building permits that would trigger a county value re-assessment. The owner’s final construction costs were $50k less than a standard ADU, rental income almost doubled for the property, and there was no resultant tax increase.
Product: Gendai 1×6 select grade shiplap
Prefinish: Unoiled
Application: Residential – Exterior
SF: 900SF
Designer:
Builder:
Date: March 2019
Location: Portland, OR
 Nakamoto Forestry
Project Overview:
The owner of this project is a financial analyst turned realtor turned landlord, and the goal was to increase rental income on one of his properties as effectively as possible. The design was developed to minimize construction costs, minimize City of Portland building compliance costs and restrictions, and to avoid a county tax assessment increase based on site improvements.
The owner started with a large backyard at one of his properties, had a custom tiny home built as “personal property”, then added two ancillary sheds each under a 200SF compliance threshold to increase the habitable floor plan. Compliant navigation of laws and code ended up with an out-of-the-box design that only needed mechanical permitting and inspections by the city, but no building permits that would trigger a county value re-assessment. The owner’s final construction costs were $50k less than a standard ADU, rental income almost doubled for the property, and there was no resultant tax increase.
Product: Gendai 1×6 select grade shiplap
Prefinish: Unoiled
Application: Residential – Exterior
SF: 900SF
Designer:
Builder:
Date: March 2019
Location: Portland, OR

 Neubauer Ennis Architects
Designed for a waterfront site overlooking Cape Cod Bay, this modern house takes advantage of stunning views while negotiating steep terrain. Designed for LEED compliance, the house is constructed with sustainable and non-toxic materials, and powered with alternative energy systems, including geothermal heating and cooling, photovoltaic (solar) electricity and a residential scale wind turbine.
Builder: Cape Associates
Interior Design: Forehand + Lake
Photography: Durston Saylor
Find the right local pro for your project
 Neubauer Ennis Architects
Designed for a waterfront site overlooking Cape Cod Bay, this modern house takes advantage of stunning views while negotiating steep terrain. Designed for LEED compliance, the house is constructed with sustainable and non-toxic materials, and powered with alternative energy systems, including geothermal heating and cooling, photovoltaic (solar) electricity and a residential scale wind turbine.
Builder: Cape Associates
Interior Design: Forehand + Lake
Photography: Durston Saylor


Bathroom - traditional beige tile and blue tile bathroom idea in Houston with white cabinets, gray walls, an undermount sink and recessed-panel cabinets

Sponsored
Columbus, OH

Structural Remodeling
Franklin County's Heavy Timber Specialists | Best of Houzz 2020!

 Platt Builders
Kitchen pantry - traditional medium tone wood floor kitchen pantry idea in Boston with open cabinets, white cabinets and granite countertops

 Springhouse Architects, LLC
Kelly Ann Photos
Inspiration for a large modern gray two-story stone house exterior remodel in Columbus with a hip roof and a shingle roof
Inspiration for a large modern gray two-story stone house exterior remodel in Columbus with a hip roof and a shingle roof


 User
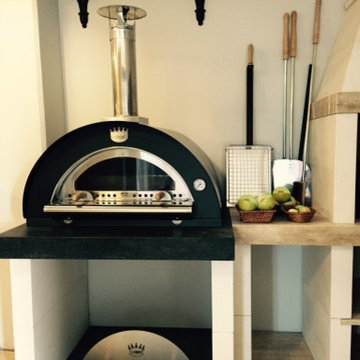
As a result of their true love for traditional cooking, the Clementi company was founded in 1975. This passion has led the Clementi team to focus their attention on its customers and their needs.
Their continuous research and development has resulted in the manufacturing of top quality, high performance and user-friendly products. Clementi’s Pizza Ovens allow you to enjoy the aromas and taste of firewood cooked foods in the comfort of your own backyard.
Working towards a clean future Clementi only uses exclusively certified and non-toxic raw materials, which does not put your health at risk over time. Also, they only accept materials from suppliers who handle waste in compliance with the environment.
 Mayflower Construction Group
How Planning Leads to Successful Construction
Construction projects, whether small residential jobs or large commercial builds, require more than just skilled labor and high-quality materials. The foundation of a successful project lies in effective planning. Proper planning ensures efficiency, minimizes risks, and keeps the project within budget and on schedule. Here’s how thorough planning leads to successful construction:
1. Clear Project Scope and Objectives
Defining the project scope early on helps prevent scope creep and miscommunication. Establishing clear goals, deliverables, and timelines ensures that everyone involved understands the expectations. This prevents delays and unnecessary changes during construction.
2. Accurate Budgeting and Cost Control
A well-planned project includes a detailed cost estimation. This accounts for labor, materials, permits, and unexpected contingencies. Without proper budgeting, costs can spiral out of control, leading to financial strain and potential project failure.
3. Efficient Resource Management
Proper planning helps allocate resources effectively, including manpower, equipment, and materials. Scheduling workers and ordering materials at the right time avoids delays caused by shortages or logistical issues.
4. Risk Identification and Mitigation
Every construction project comes with risks—weather delays, supply chain issues, safety hazards, or regulatory compliance concerns. Planning ahead allows for risk assessment and the implementation of strategies to mitigate potential problems before they occur.
5. Compliance with Regulations and Permits
Failing to secure the necessary permits or adhere to building codes can halt a project indefinitely. Planning ensures that all legal requirements are met in advance, avoiding costly fines and legal complications.
6. Seamless Communication and Coordination
A structured plan includes clear communication protocols between contractors, architects, engineers, and clients. When everyone is on the same page, mistakes are reduced, and the workflow remains smooth.
7. Improved Project Scheduling
A construction schedule outlines each phase of the project, from site preparation to finishing touches. A well-planned schedule helps keep tasks on track, prevents unnecessary delays, and ensures timely project completion.
8. Higher Quality Workmanship
Planning allows for a structured approach to quality control. By setting benchmarks, conducting inspections, and using the right materials, projects meet industry standards and client expectations.
9. Better Client Satisfaction
When a project is completed on time, within budget, and meets quality expectations, client satisfaction increases. A satisfied client is more likely to recommend your services and return for future projects.
Conclusion
In construction, planning isn’t just a step—it’s the backbone of success. From budgeting and resource management to compliance and scheduling, thorough planning prevents costly errors, improves efficiency, and ensures a high-quality outcome. Whether you're working on a small driveway installation or a large-scale commercial project, investing time in planning will always pay off in the long run.
Do you need expert concrete construction services that prioritize planning and quality? Contact us today!

 Zelaya Properties LLC
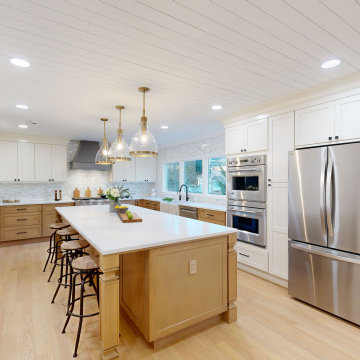
We used: Custom cherry cabinetry in Arts & Crafts Shaker style by Kabinart in Boulder and Espresso stains. Liberty Hardware Venetian bronze 1-1/2" cabinet knobs. KitchenAid Architect II Series 22 CF counter-depth French door refrigerator. KitchenAid Architect Series II 27" convection single wall oven. KitchenAid 36" 6-burner dual fuel freestanding commercial-style range. KitchenAid Architect II Series 24" dishwasher. Sharp Insight Pro Series 24" built-in microwave drawer (Model #KB6524PS). Crystorama Solaris 12" wide pendant lights in English bronze. Granite countertops in Brown Fantasy. 3"x6" polished marble backsplash.
Paint colors:
Walls: Glidden Silver Cloud 30YY 63/024
Ceilings/Trims/Doors: Glidden Swan White GLC23
Robert B. Narod Photography

 Glickman Design Build
Wheelchair accessible renovation
Wheelchair accessible bathroom
Curbless accessible shower
Barrier free bathroom remodel
Fully wheelchair accessible shower
Handicap accessible bathroom and shower, Bethesda, MD
Accessible shower
Barrier free bathroom
ADA bathroom
Accessible design bathroom
Non-slip bathroom flooring
Accessible bathroom ideas
ADA ideas

 D-Trac Construction Inc.
D-Trac Construction was contracted to address install issues from a previous contractor related to the workmanship and install of the exterior hardie board package. Because of the issues, the local county would not pass building permit inspection due to non-compliance with the Alberta Building Code and the Safety Codes Act.
Issues and corrective actions included:
1. Aluminum J and corner trim does not allow for the plank to be sealed (caulked at termination).
Corrective Action: Install 5/4" Smart Trim and color match caulk at all terminations.
2. Flashing detail on primary head flashings are cut and bent, creating point of entry on each end dam at the back side of drip.
Corrective Action: Install new primary head flashings using the fold method to create end dam.
3: Incorrect stagger on plank install, Not enough distance between butt joints on stagger, no slip plates at butt joints.
Corrective Action: Install new plank using a either a 24" or 32" stagger pattern, with aluminum slip plates behind all butt joints.
4: Many terminations through plank siding have no trim block, not sealed correctly.
Corrective Action: Install 5/4" trim blocks to allow plank to be sealed(caulked to termination.
At the end of the project, a final inspection was completed and the local county passed the building permit inspection.
 D-Trac Construction Inc.
D-Trac Construction was contracted to address install issues from a previous contractor related to the workmanship and install of the exterior hardie board package. Because of the issues, the local county would not pass building permit inspection due to non-compliance with the Alberta Building Code and the Safety Codes Act.
Issues and corrective actions included:
1. Aluminum J and corner trim does not allow for the plank to be sealed (caulked at termination).
Corrective Action: Install 5/4" Smart Trim and color match caulk at all terminations.
2. Flashing detail on primary head flashings are cut and bent, creating point of entry on each end dam at the back side of drip.
Corrective Action: Install new primary head flashings using the fold method to create end dam.
3: Incorrect stagger on plank install, Not enough distance between butt joints on stagger, no slip plates at butt joints.
Corrective Action: Install new plank using a either a 24" or 32" stagger pattern, with aluminum slip plates behind all butt joints.
4: Many terminations through plank siding have no trim block, not sealed correctly.
Corrective Action: Install 5/4" trim blocks to allow plank to be sealed(caulked to termination.
At the end of the project, a final inspection was completed and the local county passed the building permit inspection.
 D-Trac Construction Inc.
D-Trac Construction was contracted to address install issues from a previous contractor related to the workmanship and install of the exterior hardie board package. Because of the issues, the local county would not pass building permit inspection due to non-compliance with the Alberta Building Code and the Safety Codes Act.
Issues and corrective actions included:
1. Aluminum J and corner trim does not allow for the plank to be sealed (caulked at termination).
Corrective Action: Install 5/4" Smart Trim and color match caulk at all terminations.
2. Flashing detail on primary head flashings are cut and bent, creating point of entry on each end dam at the back side of drip.
Corrective Action: Install new primary head flashings using the fold method to create end dam.
3: Incorrect stagger on plank install, Not enough distance between butt joints on stagger, no slip plates at butt joints.
Corrective Action: Install new plank using a either a 24" or 32" stagger pattern, with aluminum slip plates behind all butt joints.
4: Many terminations through plank siding have no trim block, not sealed correctly.
Corrective Action: Install 5/4" trim blocks to allow plank to be sealed(caulked to termination.
At the end of the project, a final inspection was completed and the local county passed the building permit inspection.
 D-Trac Construction Inc.
D-Trac Construction was contracted to address install issues from a previous contractor related to the workmanship and install of the exterior hardie board package. Because of the issues, the local county would not pass building permit inspection due to non-compliance with the Alberta Building Code and the Safety Codes Act.
Issues and corrective actions included:
1. Aluminum J and corner trim does not allow for the plank to be sealed (caulked at termination).
Corrective Action: Install 5/4" Smart Trim and color match caulk at all terminations.
2. Flashing detail on primary head flashings are cut and bent, creating point of entry on each end dam at the back side of drip.
Corrective Action: Install new primary head flashings using the fold method to create end dam.
3: Incorrect stagger on plank install, Not enough distance between butt joints on stagger, no slip plates at butt joints.
Corrective Action: Install new plank using a either a 24" or 32" stagger pattern, with aluminum slip plates behind all butt joints.
4: Many terminations through plank siding have no trim block, not sealed correctly.
Corrective Action: Install 5/4" trim blocks to allow plank to be sealed(caulked to termination.
At the end of the project, a final inspection was completed and the local county passed the building permit inspection.
 D-Trac Construction Inc.
D-Trac Construction was contracted to address install issues from a previous contractor related to the workmanship and install of the exterior hardie board package. Because of the issues, the local county would not pass building permit inspection due to non-compliance with the Alberta Building Code and the Safety Codes Act.
Issues and corrective actions included:
1. Aluminum J and corner trim does not allow for the plank to be sealed (caulked at termination).
Corrective Action: Install 5/4" Smart Trim and color match caulk at all terminations.
2. Flashing detail on primary head flashings are cut and bent, creating point of entry on each end dam at the back side of drip.
Corrective Action: Install new primary head flashings using the fold method to create end dam.
3: Incorrect stagger on plank install, Not enough distance between butt joints on stagger, no slip plates at butt joints.
Corrective Action: Install new plank using a either a 24" or 32" stagger pattern, with aluminum slip plates behind all butt joints.
4: Many terminations through plank siding have no trim block, not sealed correctly.
Corrective Action: Install 5/4" trim blocks to allow plank to be sealed(caulked to termination.
At the end of the project, a final inspection was completed and the local county passed the building permit inspection.

 Moderne Builders
Gorgeous master bath with dramatic retro "wave" tile. Peak Photography
Example of a 1950s bathroom design in Los Angeles
Example of a 1950s bathroom design in Los Angeles
2