
Search results for "Attach effectively" in Home Design Ideas
 Garage Floor Coating Great Lakes
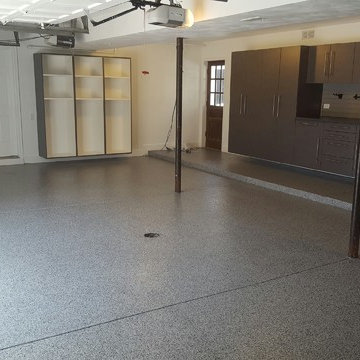
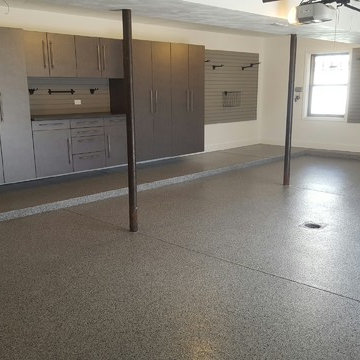
Here is one of our latest turn key garage makeovers. This particular garage had our "Earth Effects" flooring system installed with the color being Silver Spirits. As for the cabinets, we installed a customized storage solution with our 3D software. There are multiple cabinets tall and short, a counter top, and even some slat wall with hooks to hang equipment, or other accessories!
 Nor-Son Custom Builders
Scott Amundson Photography
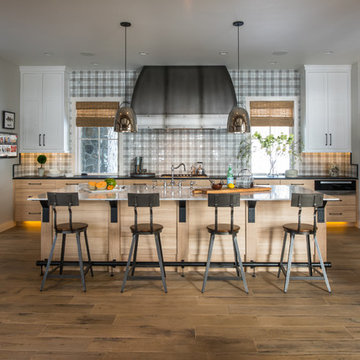
Kitchen - transitional medium tone wood floor kitchen idea in Minneapolis with shaker cabinets, white cabinets, multicolored backsplash, stainless steel appliances and an island
Kitchen - transitional medium tone wood floor kitchen idea in Minneapolis with shaker cabinets, white cabinets, multicolored backsplash, stainless steel appliances and an island
 Koncept Garage
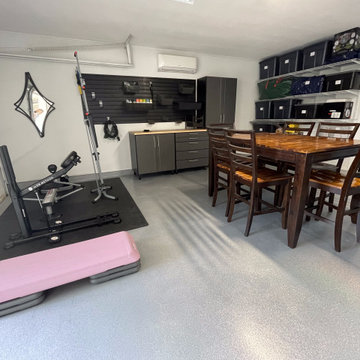
Out with the old & In with epoxy floors! You'll get an amazing dazzling effect, and impress your friends & family. Epoxy flooring is the perfect addition to your garage guaranteed to last for years!
Find the right local pro for your project
 Garage Floor Coating Great Lakes
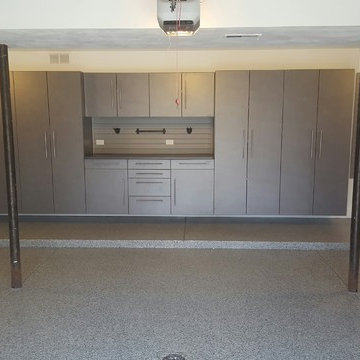
Here is one of our latest turn key garage makeovers. This particular garage had our "Earth Effects" flooring system installed with the color being Silver Spirits. As for the cabinets, we installed a customized storage solution with our 3D software. There are multiple cabinets tall and short, a counter top, and even some slat wall with hooks to hang equipment, or other accessories!
 Garage Floor Coating Great Lakes
Here is one of our latest turn key garage makeovers. This particular garage had our "Earth Effects" flooring system installed with the color being Silver Spirits. As for the cabinets, we installed a customized storage solution with our 3D software. There are multiple cabinets tall and short, a counter top, and even some slat wall with hooks to hang equipment, or other accessories!
 Exteriors By Chad Robert
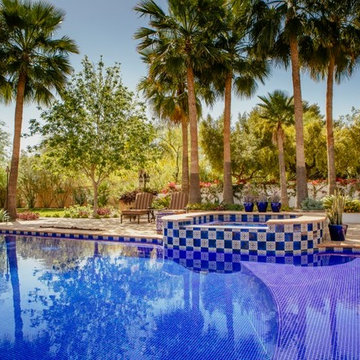
Bold splashes of cobalt tile add a dramatic effect to the raised spa.
Inspiration for a mediterranean pool remodel in Phoenix
Inspiration for a mediterranean pool remodel in Phoenix


Sponsored
Sunbury, OH

J.Holderby - Renovations
Franklin County's Leading General Contractors - 2X Best of Houzz!
 User
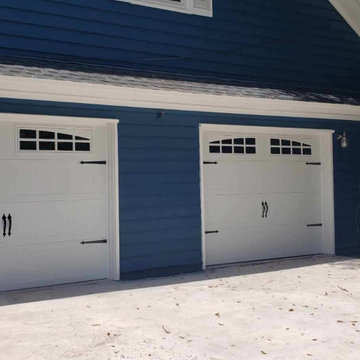
UserWhether your home is a traditional ranch, modern farmhouse or Craftsman architecture, a carriage house garage door might be ideal. Shown here, two single low maintenance garage doors with a stamped panel design, decorative hardware and arched windows for the full carriage house door effect. Attractive, durable, easy to maintain, budget-friendly. | Project and Photo Credits: ProLift Garage Doors of Savannah

 Industrial Projects
Creating a comfortable outdoor living space is a priority for many homeowners and DIY enthusiasts. With rising summer temperatures, installing a shade tarp in your backyard offers an affordable and effective solution for sun protection. We’ve developed this detailed, step-by-step guide to help you confidently install a shade tarp that not only shields you from the sun but also adds aesthetic appeal to your outdoor area.
Benefits of Installing a Backyard Shade Tarp
Before diving into the installation process, let’s explore the key benefits of having a backyard shade tarp:
Provides UV Protection: Keeps your family and guests safe from harmful sun exposure.
Reduces Outdoor Temperatures: Creates a cooler, more enjoyable outdoor space.
Protects Outdoor Furniture: Extends the life of patio furniture by reducing sun damage.
Enhances Outdoor Aesthetics: Adds a modern, stylish look to your yard.
Budget-Friendly: More affordable compared to permanent structures like pergolas.
Materials and Tools You’ll Need
To begin your DIY backyard shade project, gather the following materials and tools:
Materials:
Shade tarp (UV-resistant and breathable)
Sturdy posts or existing structures (trees, fences, walls)
Mounting hardware (eye bolts, D-rings, turnbuckles, snap hooks)
Nylon or polyester rope, or stainless-steel wire
Concrete (if installing new posts)
Tools:
Power drill
Measuring tape
Level
Ladder
Wrench or adjustable spanner
Post hole digger (if installing new posts)
Step 1: Plan Your Shade Tarp Layout
The first step in installing your backyard shade tarp is careful planning. Take time to assess your outdoor area and answer these key questions:
Where is the sun’s path throughout the day?
What size and shape of tarp best suits your space?
Will you anchor the tarp to existing structures or install new posts?
What height do you want the tarp to sit at for maximum shade and airflow?
Pro Tip: Use string or garden hoses to visualize the tarp layout on the ground before making permanent decisions.
Step 2: Measure and Mark Anchor Points
Once you’ve determined the tarp’s location and orientation:
Measure the tarp dimensions.
Mark the exact points where each corner of the tarp will be anchored.
Ensure that the anchor points are at least 5–10% longer than the tarp size to allow for tensioning and slight adjustments.
Consider slope angles for water runoff. Aim for at least a 20-degree angle to prevent water pooling on the tarp.
Step 3: Install Support Posts (If Necessary)
If your backyard lacks existing anchor points like trees or fences, you’ll need to install sturdy support posts:
Dig post holes at least 24 inches deep and 8-12 inches wide for stability.
Set posts in concrete, making sure they remain plumb and level.
Allow the concrete to cure for at least 24–48 hours before applying tension from the tarp.
We recommend using pressure-treated wood, galvanized steel poles, or aluminum posts for longevity and strength.
Step 4: Install Mounting Hardware
With your anchor points ready, it’s time to install the necessary hardware:
Attach eye bolts or pad eyes securely into walls, posts, or other fixed structures.
For added flexibility and adjustability, install turnbuckles or tensioners to fine-tune the tarp’s tightness.
Connect snap hooks, D-rings, or carabiners to make assembly and disassembly easier.
Make sure all hardware is rated for outdoor use to prevent rust and corrosion.
Step 5: Attach and Tension the Shade Tarp
Now it’s time for the most satisfying part—mounting the shade tarp:
Begin by attaching one corner of the tarp to an anchor point.
Gradually attach the remaining corners, moving diagonally for even tension.
Adjust each connection point using your turnbuckles, ropes, or cables.
Pull the tarp tight enough to avoid sagging, but not so tight that it risks tearing.
Check that the tarp maintains the desired slope for rainwater runoff and adjust tension as needed.
Step 6: Final Adjustments and Safety Check
Before enjoying your new shaded area:
Inspect all anchor points and hardware for stability.
Test the tarp’s tension and make adjustments for even distribution.
Ensure that no sharp edges or loose connections remain that could damage the tarp or pose a safety hazard.
Confirm that the tarp is secure in windy conditions by giving it a gentle tug.
If you live in an area with frequent high winds, consider removing the tarp during storms to prevent damage.
Step 7: Enjoy Your Shaded Backyard Oasis
Once installed, your backyard shade tarp provides a comfortable and protective space for outdoor gatherings, relaxation, or family activities. You can decorate underneath with outdoor furniture, string lights, or potted plants to create a personalized outdoor retreat.
Maintenance Tips for Long-Lasting Shade Tarp Performance
To extend the life of your shade tarp, follow these maintenance guidelines:
Regularly check for wear and tear, especially around anchor points and seams.
Clean the tarp periodically with mild soap and water to prevent mildew buildup.
Store the tarp indoors during harsh weather seasons if it's not designed for year-round use.
Tighten hardware as needed to maintain proper tension and avoid sagging.
By following these simple care steps, your shade tarp will continue to deliver years of sun protection and outdoor comfort.
Conclusion: Upgrade Your Outdoor Space with a DIY Shade Tarp
Installing a shade tarp in your backyard is a cost-effective and rewarding DIY project. With careful planning, quality materials, and proper installation techniques, you’ll enjoy cool, shaded outdoor living all season long. This step-by-step guide ensures your project goes smoothly from start to finish.
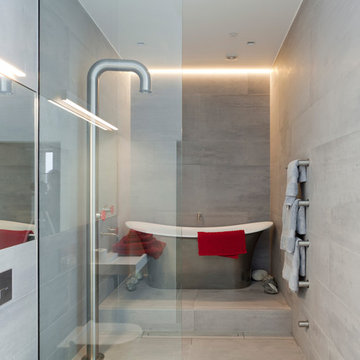
 LeichtUSA
Attractive living as an architectural experiment: a 136-year-old water tower, a listed building with a spectacular 360-degree panorama view over the City of London. The task, to transform it into a superior residence, initially seemed an absolute impossibility. But when the owners came across architect Mike Collier, they had found a partner who was to make the impossible possible. The tower, which had been empty for decades, underwent radical renovation work and was extended by a four-storey cube containing kitchen, dining and living room - connected by glazed tunnels and a lift shaft. The kitchen, realised by Enclosure Interiors in Tunbridge Wells, Kent, with furniture from LEICHT is the very heart of living in this new building.
Shiny white matt-lacquered kitchen fronts (AVANCE-LR), tone-on-tone with the worktops, reflect the light in the room and thus create expanse and openness. The surface of the handle-less kitchen fronts has a horizontal relief embossing; depending on the light incidence, this results in a vitally structured surface. The free-standing preparation isle with its vertical side panels with a seamlessly integrated sink represents the transition between kitchen and living room. The fronts of the floor units facing the dining table were extended to the floor to do away with the plinth typical of most kitchens. Ceiling-high tall units on the wall provide plenty of storage space; the electrical appliances are integrated here invisible to the eye. Floor units on a high plinth which thus appear to be floating form the actual cooking centre within the kitchen, attached to the wall. A range of handle-less wall units concludes the glazed niche at the top.
LEICHT international: “Architecture and kitchen” in the centre of London. www.LeichtUSA.com
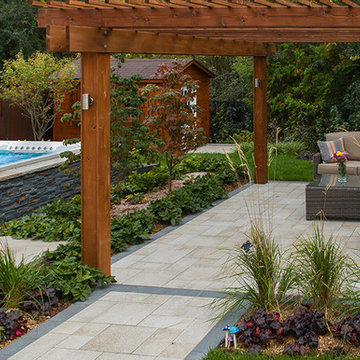
 Land Effects Outdoor Living Spaces Ltd.
Example of a mid-sized trendy backyard stone patio fountain design in Toronto with a pergola
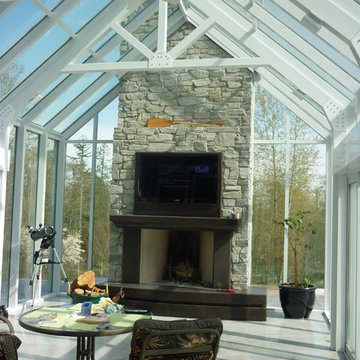
 Meridian Estate Greenhouses
Custom Gable attached conservatory. Double sliding glass doors open onto pool deck.
Inspiration for a large contemporary greenhouse remodel in Vancouver
Inspiration for a large contemporary greenhouse remodel in Vancouver


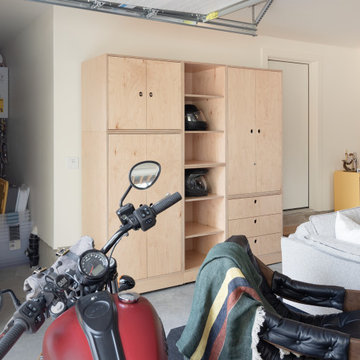
 Doolittle Design Co.
We recently completed a project in Bend, OR, for a client’s man cave, which he affectionately calls his motorcycle café. We used one of our modular cabinetry designs to accommodate his changing needs, making it the perfect solution as he navigated a recent life change. Additionally, if he decides to move, he can take the cabinetry with him to use in his new space, making this solution very versatile and cost-effective over the long term.
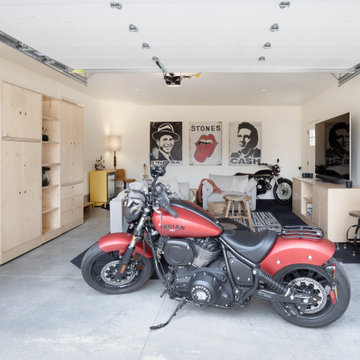 Doolittle Design Co.
We recently completed a project in Bend, OR, for a client’s man cave, which he affectionately calls his motorcycle café. We used one of our modular cabinetry designs to accommodate his changing needs, making it the perfect solution as he navigated a recent life change. Additionally, if he decides to move, he can take the cabinetry with him to use in his new space, making this solution very versatile and cost-effective over the long term.
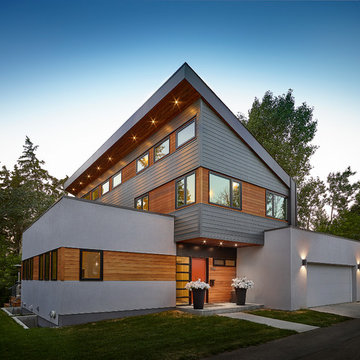
 Effect Home Builders Ltd.
Merle Prosofsky
Large trendy white two-story mixed siding house exterior photo in Edmonton with a shed roof
Large trendy white two-story mixed siding house exterior photo in Edmonton with a shed roof
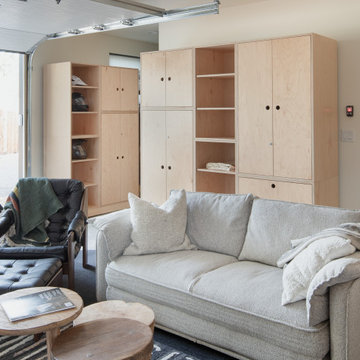 Doolittle Design Co.
We recently completed a project in Bend, OR, for a client’s man cave, which he affectionately calls his motorcycle café. We used one of our modular cabinetry designs to accommodate his changing needs, making it the perfect solution as he navigated a recent life change. Additionally, if he decides to move, he can take the cabinetry with him to use in his new space, making this solution very versatile and cost-effective over the long term.
Sponsored
Sunbury, OH
J.Holderby - Renovations
Franklin County's Leading General Contractors - 2X Best of Houzz!
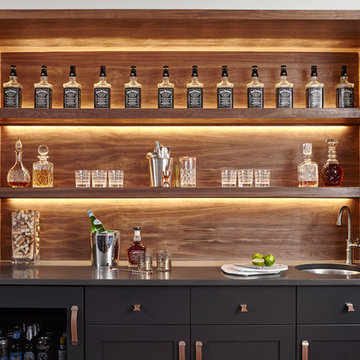
 Square Footage Inc.
Photos by Valerie Wilcox
Transitional single-wall wet bar photo in Toronto with an undermount sink, wood backsplash and shaker cabinets
Transitional single-wall wet bar photo in Toronto with an undermount sink, wood backsplash and shaker cabinets
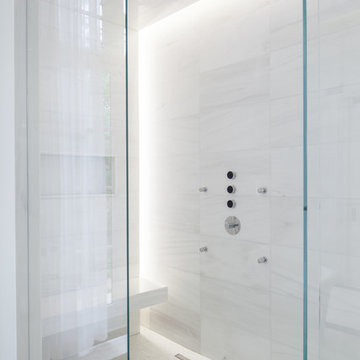
 Two Fold Interiors
www.veronicamartindesignstudio.com
Photo credit: Scott Norsworthy
Inspiration for a large modern master white tile and stone tile marble floor bathroom remodel in Toronto with white walls and a niche
Inspiration for a large modern master white tile and stone tile marble floor bathroom remodel in Toronto with white walls and a niche
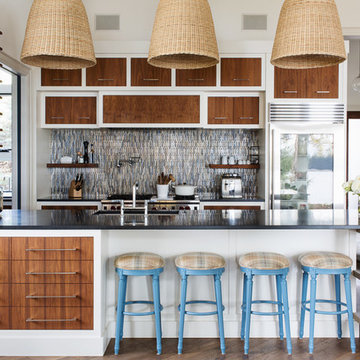 User
UserMichelle Peek Photography
Large trendy galley medium tone wood floor and brown floor open concept kitchen photo in Toronto with an undermount sink, flat-panel cabinets, medium tone wood cabinets, granite countertops, multicolored backsplash, ceramic backsplash, stainless steel appliances and a peninsula
Large trendy galley medium tone wood floor and brown floor open concept kitchen photo in Toronto with an undermount sink, flat-panel cabinets, medium tone wood cabinets, granite countertops, multicolored backsplash, ceramic backsplash, stainless steel appliances and a peninsula
8