
Search results for "Attaining" in Home Design Ideas

 ornamental land design
A close-up view of a creekside restoration featuring healthy native plants with delicate purple flowers in bloom. The original natural rocks remain in place, thoughtfully integrated with drought-tolerant vegetation to create a sustainable habitat that supports soil stabilization and local wildlife.



Find the right local pro for your project
 Genevieve Ratheau
LavArte - MGO Stone Classics
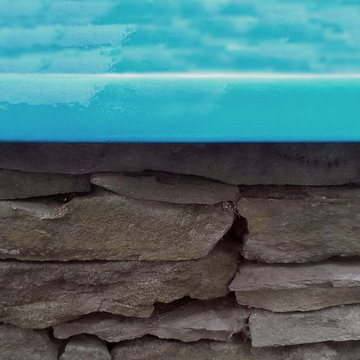
Enameled lava stone counter tops are perfect for outdoor kitchens. 36 standard colors to chose from. Please call for info and details.
 Tile Doctor Ltd
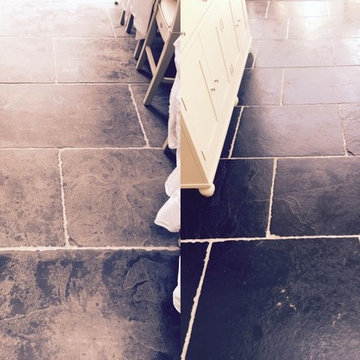
I was recently asked to this property in Wimbledon in to see if there was anything we could do to resolve the problem with a recently laid Black Limestone tiled floor. The builders that had laid the Limestone did not cover or clean the tiles prior to sealing with an impregnating seal thereby trapping in all the dirt from the building works. They then grouted the tiles but didn’t clean the grout off the surface before putting on another two coats of sealer all of which resulted in a very poor finish.
Naturally the customer was not happy so called them back to rectify the problem and so they came back and tried to strip the sealer off with cloths and a chemical stripper. Then without rinsing the stone to remove the chemicals they added another two coats of sealer; in desperation the lady gave up with them and called me in.
To resolve I tried all the sealant strippers available to me but couldn’t budge the mess effectively. The only other option available was to diamond grind the surface so I discussed this with the customer and she agreed to this and left me to carry on.
Initially I started with a coarse 400 grit diamond pad but even that wasn’t having much effect so in the end I had to cut back the surface using a 100 grit pad moving up to 200 grit, then 400 before finally stopping at 800. To lubricate the process you need to use a little water and then rinse away the resultant soil after each pad. If this was a polished stone surface I would have continued with finer and finer grits to restore the surface polish however these tiles were rough limestone and I needed to leave it as near to how it should be.
Once all the Limestone had been stripped back the stone turned an uninviting grey colour, so to bring it back to black I applied two coats of Tile Doctor Stone Oil which enhanced the colour.
I left the floor overnight to allow the Stone Oil to dry out and then returned to seal the Limestone using two coats of Tile Doctor Colour Grow which is an impregnating sealer that enhances the colour in the stone and will protect it from staining going forward.
When the customer saw the final result she was overwhelmed and said she felt like crying with relief, because the floor now looked how she had imagined it to be. It was a great feeling for me to know that I had solved the problems for her.


 Cachet Wine Cellars
Janina Pazdan recently discovered a passion for dancing. This painting is of ballet, and captures the distinct motion and feeling of it beautifully.
To learn more about Janina Pazdan and her work, click here: http://www.winecellarsbycoastal.com/custom-wine-cellar-design-wine-cellar-art-painting-for-home-wine-cellars-by-janina-pazdan.aspx
 Bertram Blondina Handrail & Stair Inc.
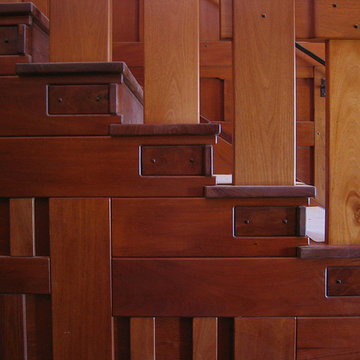
Side view of architecture on staircase.
Large arts and crafts wooden straight staircase photo in San Francisco with wooden risers
Large arts and crafts wooden straight staircase photo in San Francisco with wooden risers
 Bella Stairs, LLC
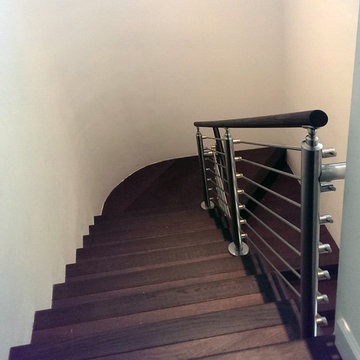
View descending from the second floor
Staircase - mid-sized transitional wooden u-shaped cable railing staircase idea in Tampa with wooden risers
Staircase - mid-sized transitional wooden u-shaped cable railing staircase idea in Tampa with wooden risers
 Deborah Kipp's Decorative Painting (Austin Texas)
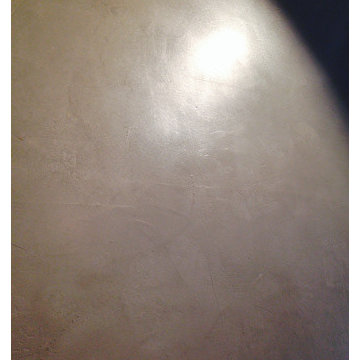
CLOSE-UP VIEW
This master bath makeover starts with bare walls that have been floated out smooth over the sheetrock. Then we hand applied a beautiful custom tinted, soft grey Venetian plaster. After two coats of plaster, the walls were waxed and buffed. This process seals the plaster, leaving a long-lasting finish. The finished product is subtle and undeniably beautiful! I’ve included a close-up view of the finish below.

 Modern House Numbers
6" Backbay Black Powder Coat Aluminum Modern House Numbers
(modernhousenumbers.com)
Available in 4”, 6”, 8”, 12” or 15” high. Aluminum numbers are 3/8” thick, black powder coat finish and a ½” standoff providing a subtle shadow.



 Newschool Builders LLC
For this project, our client came to us looking for a full-service company to build a custom, high-efficient new home with minimal exterior maintenance. In order to achieve this, we used a different medium of product, including split-faced concrete block to natural cedar siding, both of which require zero maintenance.
The design throughout was congruent with the contemporary farmhouse aesthetic and highly-efficient goal of the client and adhering to the energy standards of Efficiency Vermont. A few of the features included a finished concrete floor, a cutting-edge wood-fired boiler system to efficiently heat the home.
 Three Roses Interiors
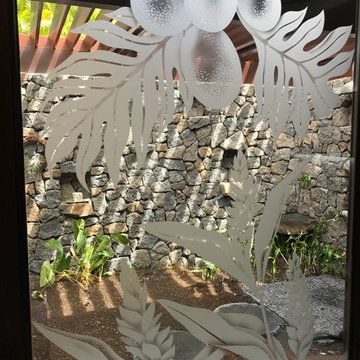
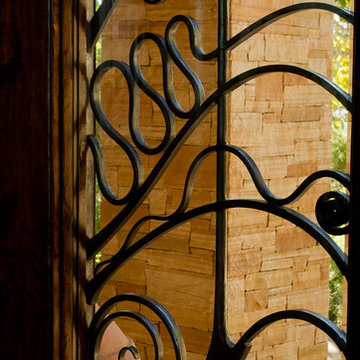
Master bath custom design by the client. Etched glass insert for mahogany exterior door to outdoor lava rock shower and orchid garden.
Large island style master beige tile and marble tile ceramic tile and beige floor doorless shower photo in Hawaii with flat-panel cabinets, brown cabinets, an undermount tub, a one-piece toilet, beige walls, an undermount sink, marble countertops and brown countertops
Large island style master beige tile and marble tile ceramic tile and beige floor doorless shower photo in Hawaii with flat-panel cabinets, brown cabinets, an undermount tub, a one-piece toilet, beige walls, an undermount sink, marble countertops and brown countertops


 Drury Design
THE SETUP
Client Background: Our clients, a couple who have transitioned into the empty nest phase, have cherished their home for over three decades without undergoing any significant renovations. With a newfound desire to adapt their living space to better suit their current lifestyle, they’ve embarked on a journey to reimagine their kitchen — the heart of their home. Their aspiration is to cultivate a serene, neutral-toned sanctuary on the first floor that seamlessly merges with their family room, ensuring a harmonious and inviting environment.
Design Inspiration: The renovation is inspired by the couple’s penchant for soft, calming neutrals, using their cherished family room and the kitchen’s existing tile flooring as the cornerstone for the color scheme. This approach aims to foster a sense of warmth and tranquility throughout.
Design Objectives:
Harmonize the kitchen with the family room by adopting a soothing, neutral color scheme, ensuring a seamless flow across the first floor.
Enhance kitchen functionality with thoughtfully designed cabinetry, providing a designated place for every item and maximizing storage efficiency.
Cultivate an inviting and comfortable atmosphere that reflects the homeowners’ desire for a calm and relaxing space.
Design Challenges:
The homeowners wish to retain the existing kitchen tile flooring and integrate it into a refreshed, modern design.
Accommodating a dining area spacious enough for family visits without compromising the kitchen’s open feel or functional layout.
Despite liking the current placement of plumbing and appliances, the homeowners aspire for a more open floor plan to facilitate better movement and interaction.
The need to amplify natural light in the kitchen, especially around the sink area, where existing lighting is insufficient.
Preserving the half-wall between the kitchen and family room, a feature the homeowners want to keep, while ensuring it complements the new design.
THE RENEWED SPACE
Design Solutions:
By choosing a neutral color palette that complements the existing tile, the design unifies the kitchen with the adjacent spaces. The tile’s grout was cleaned and restored, enhancing the floor’s appearance and integrating it seamlessly with the new kitchen aesthetic.
The inclusion of a larger island with seating for two, alongside maintaining a substantial dining table, was achieved by optimizing the spatial layout. This allowed for a sociable yet functional kitchen, accommodating large family gatherings without feeling crowded.
Minor adjustments to the kitchen’s layout maintained the preferred locations for plumbing and appliances while introducing an ‘open’ design concept. Strategic modifications, such as angling the pantry wall, improved the flow and accessibility within the space.
Replacing the garden window with a broader, standard window significantly increased natural light, transforming the sink area into a bright, welcoming space with enhanced views of the outdoors.
The decision to keep the half-wall was ingeniously leveraged to define the dining area while maintaining an open connection to the family room. This feature not only serves as a visual separator but also ties the two spaces together through the shared color scheme and design elements.
The homeowners are thrilled with their newly remodeled kitchen, which has become a hub of warmth and hospitality. Hosting a wedding shower and a birthday party, they have shared their renewed space with friends and family, who have been equally enamored. This remodel has not only met their functional and aesthetic desires but has also enriched their home with a fresh sense of serenity and joy.
The upstairs part of the home is shaping up nicely. Here’s their newly remodeled primary bathroom.
 Contempo Studio
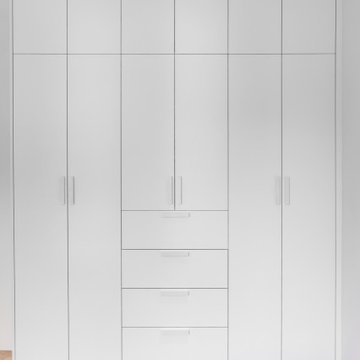
Inspiration for a mid-sized transitional gender-neutral light wood floor and white floor built-in closet remodel in Toronto with flat-panel cabinets and white cabinets



59