
Search results for "Attempt" in Home Design Ideas
 Progressive Design Build
It was in 2012 when Mike Spreckelmeier first met Roy and Patti. They had been despondent after meeting with multiple contractors in an attempt to start their kitchen remodel. The contractors lacked follow through, came tardy to meetings and even failed to show up at others.
Determined to leave nothing to chance in the pursuit of their dream, Roy and Patti followed up on a recommendation after overhearing a conversation that was taking place while they were standing in a gallingly long line waiting to cast a vote on Election Day.
With a solid recommendation to pursue, Roy and Patti contacted Progressive Design Build. The rest is history.
Mike showed up on time. For a small retainer, he provided preliminary sketches, ideas for maximizing space and storage, and solutions for a sunken family room that created a safety hazard and a problem with traffic flow. More importantly, he designed the project to the homeowners’ budget.
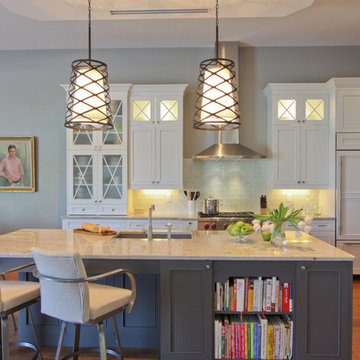
Progressive Design Build shot some different elevations and designed a plan to raise the floor, allowing all finished floors to be on the same level. Upon completion, the kitchen was stunning. Features included LED backlit fire glass shelving, white recessed panel cabinets, a subway tile backsplash, Granite countertop, integrated refrigerator, undermount sink, and more.
The living room was designed with complimentary finishes and included a natural stone fireplace wall with open cabinets flanked on both sides. The 12’ fireplace was made with a floor-to-ceiling white pebble finish.
This Bonita Bay project completed on time and on budget—allowing this fabulous family a wonderful opportunity to create lasting memories for many years to come.
 Tile Doctor Ltd
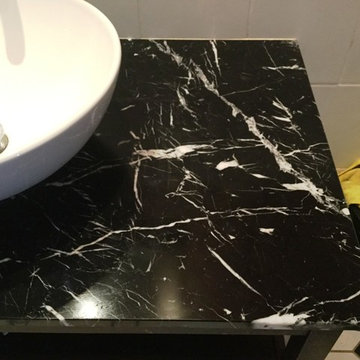
Marble is known for its premium quality, toughness and aesthetic, making it a very popular choice for bathroom countertops, such as this one at a house in Northampton. However just because it’s tough doesn’t mean that Marble can be cleaned with the usual household cleaners. Like all natural stone, Marble is acid sensitive and unsuitable products can have a very damaging effect on its appearance.
In this situation, the property owner had used a limescale remover to remove some unsightly marks from the countertop. Unfortunately, the product was acid-based and instead of making an improvement it just made it worse and caused severe etching.
The first photo above shows the limescale marks from where toiletries have been placed on the side whilst wet. Since Northampton is a hard water area, the limescale deposits over time caused these marks to appear.
The only way to effectively remove the Limestone deposits – while at the same time rectifying the damaged caused by the botched cleaning attempt – was to use a system of hand-held diamond encrusted pads and hand help blocks of various grits to cut back the stone and re-polish it, a process we call burnishing.
Before officially beginning the burnishing process, I ran a few tests to determine the type of pad I would need to use to achieve the best results. I found that, in most areas, I would need to use the Tile Doctor 400 Grit (Coarse) pad to resurface the tile and remove the damaged layer of stone, but in some areas where the etching was worse, I would need to use the 200 Grit (Very Coarse) pad.
After burnishing the affected areas with the Coarse and Very Coarse grit pads, I started to incrementally polish the stone to achieve a high-quality shine, working my up through the Medium, Fine and Very grit pads.
No chemicals were used during this process – only water for lubrication, combined with the six-inch diamond encrusted burnishing pads fitted to a hand-held buffing machine.
The final part of the restoration was to seal the stone to maintain a long-lasting, deep polished appearance. To do this, I used Tile Doctor Shine Powder, which is a crystallising sealer in powder form. The powder is applied directly and combined with water, before being worked into the stone to seal it.
The customer was very happy with the results and the level of shine achieved. I gave the customer a complimentary bottle of Tile Doctor Stone Soap, which is our aftercare cleaner for polished natural stone, along with instructions on periodic maintenance to help maintain the finish we had achieved for as long as possible.
Phil Vissian
Northamptonshire Tile Doctor

 VMI architecture
The project site is a three story apartment building with a full basement, which had recently been subject to an apartment fire. Four separate residential units were contained in the structure, including one two bedroom unit and three single bedroom units. A laundry room/basement and a pair of lofts were also housed within the building. The result of the blaze and the subsequent water damage from attempts to extinguish it left the interior of the building primarily gutted. All interior finishes, fixtures, stairways, mechanical and electrical systems were destroyed beyond repair. The exterior of the building was charred in some places, and destroyed completely in others.
The project location, the City of San Rafael, determined that due to the extent of the damage to the structure, the resulting project would be considered a “new building”. Our first task was to review the current building code and apply the current regulations to the existing structure (originally built in the early 1900’s) and bring it up to current code. We performed occupant load calculations, a code summary, square footage calculations and egress code analysis for each floor/use. This information was then compiled in order to determine how the project could legally be designed within the current code, all while minimizing modifications to the existing structure.
Once all data had been analyzed, the new floor plans were organized and laid out in a manner which retained the heritage of the original building while remaining true to current code. The site was revised to allow for code compliant parking areas while retaining the family friendly outdoor spaces inherent in the original design. The foundation was reinforced, and the building structure as a whole was strengthened to cope with modern seismic loads. Spray foam insulation, low E glazing, skylights, ceiling fans, high efficiency HVAC, etc…were all added to make the building more efficient and environmentally friendly. The use of Class “A” materials, fire separations (both vertical and horizontal) and a commercial sprinkler system were employed in order to avoid any future fires. Reconstruction of the project was recently completed in the summer of 2014.
Photos by B. James
Find the right local pro for your project
 HandsOn Design
HandsOn Design
Location: Jackson, WY, USA
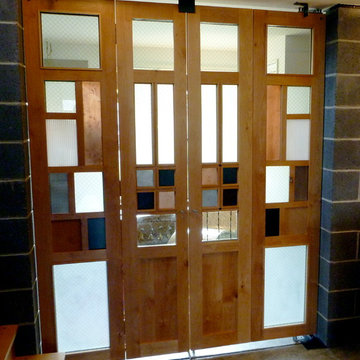
1,900 sq.ft custom home, garage and workshop constructed using prefabricated SIP's panels, with custom interior cabinets, doors and finishes. The design of this house is an attempt to develop an architectural iconography which celebrates the history and uniqueness of the land upon which it’s built. The house sits in an irrigated hayfield along with some of the original machinery that used to work here, and reflects the design sensibilities of a common sense agricultural outbuilding as seen through contemporary eyes.
Photographed by: Paul Duncker

 California Deluxe Windows
For more information visit http://www.cdwindows.com.com or call (800) 639-9463.
This curved window sunroom we made for our client David E. in Downtown Los Angeles, California was our most challenging and proudest project yet. We had to perfectly design a never-before-attempted template to remove the ugly grids his older, aluminum window frames had made. His majestic view of Los Angeles was replaced by 16 ugly aluminum windows which were deteriorating right before his eyes. His exact comments were, "Thank you for reminding me why I moved in here and purchased this home in the first place. You guys gave me my view back." We could not be happier.

 Nella Vetrina Showroom
Gaia luxury chandelier shown in Nickel with Swarovski Elements. In Greek mythology, the earth was created out of chaos. The Goddess overseeing all, was called Gaia, the Goddess of Earth. Designing is also an attempt to bring order into the chaos of lines, materials and possible combinations. The organically formed branches of Gaia, dance around the crystals, protecting them in a playful yet harmonious embrace. The sublime Swarovski crystals, no longer mere pieces of decoration but by now the very heart of the lighting sculpture, radiate a phenomenal array of reflection and colour.
 Terra Seco Gardens
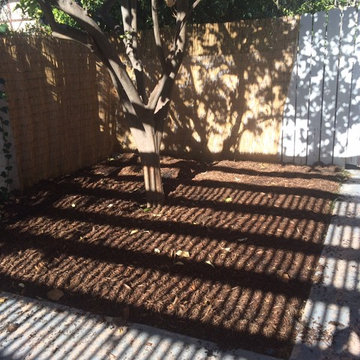
a 'lasagna mulch' method to enrich the soil in preparation for spring planting around a lemon tree which has been affected by the ongoing drought in an attempt to gather more water thru the winter el nino rainy season
TERRA SECO GARDENS
 CITYDESKSTUDIO, Inc.
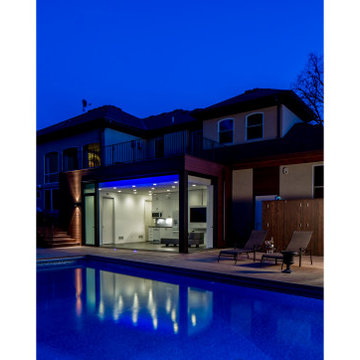
A family that spends a lot of time in and around their beautiful saltwater pool, did not have a place in their home that provided them a visual or physical connection. They also lacked any storage for all their pool “stuff”. With small children and a love for entertaining, they needed a room that served and supported their watery lifestyle. We took over an empty and unused notch along the back of the house adjacent to the pool patio to create a new bright and airy pool house.
The new out building attempts to unify 4 areas; an existing deck, an upper master bedroom balcony, a lower lawn, and the pool itself, and provide the missing storage. By locating the pool house at the juxtaposition of these areas, the new room was able to provide a new expanded rooftop balcony for the master, anchor and define the dining and barbeque deck, extend and connect to the pool and patio, and create a new access to integrate the lower lawn – and carve out the much needed storage for the variety of pool toys and equipment.
The building itself is 400 sf with bath, laundry, storage, mechanical, kitchen, and living. A single new secure connection is made into the house through the existing mudroom. Clad with crisply detailed ship lap cedar, it draws on the existing material palate of the house and nods to the boat aesthetic in expression and efficiency. With pocketing glass walls the pool house is both the utility building needed, and an expansion of the vibrant pool scene itself, inside and outside, along the poolside.
Photographer: Brandon Stengelwww.farmkidstudios.com
Location: Edina, MN
Completed: 2013
Project Team:
Ben Awes AIA, Principal-In-Charge
Bob Ganser AIA
Christian Dean AIA
Nate Dodge
 Excelsior Design Group & Danberry Building Corp
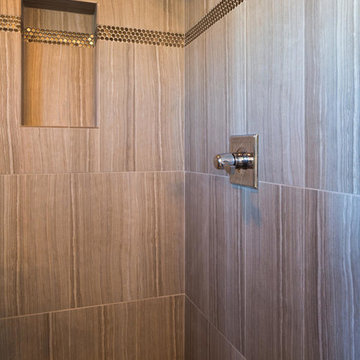
At the end of 2012, Danberry came across what was then a rundown home in the Casco Point neighborhood of Orono, in desperate need of some design help. A failed attempt by the previous owner to remodel it as an investment had left it abandoned for years. But when the Danberry’s got a glimpse of this diamond in the rough, they knew it had potential. The project included a completely remodeled kitchen, bathroom, basement and living room.
 HandsOn Design
HandsOn Design
Location: Jackson, WY, USA
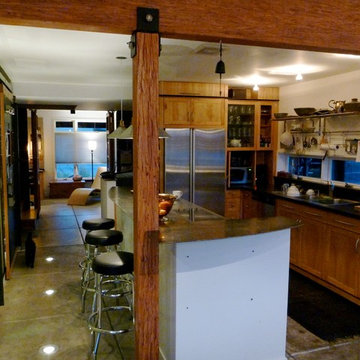
1,900 sq.ft custom home, garage and workshop constructed using prefabricated SIP's panels, with custom interior cabinets, doors and finishes. The design of this house is an attempt to develop an architectural iconography which celebrates the history and uniqueness of the land upon which it’s built. The house sits in an irrigated hayfield along with some of the original machinery that used to work here, and reflects the design sensibilities of a common sense agricultural outbuilding as seen through contemporary eyes.
Photographed by: Paul Duncker
 Tile Doctor Ltd
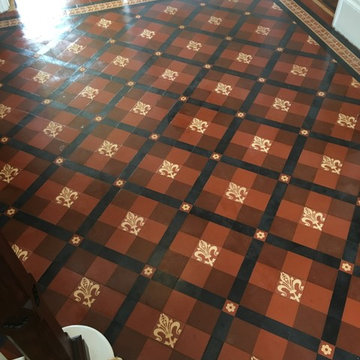
It’s always a great surprise to find old tiled flooring hidden underneath carpet or linoleum which appears especially common with 19th century properties where it’s not unusual for the owners to uncover fantastically patterned, original Victorian tiled floors and, naturally, they want to restore them to their former glory. If you have a property of this type you might want to look under the carpets.
The majority of the time, however, these tiles have been covered up for decades, allowing for thick layers of muck to build-up and are invariably damaged carpet grippers, surface glue and adhesive tape.
This was pretty much the case with this customer who lives in the town of Warminster and was keen to have her own newly discovered Victorian hallway brought back to life, and called me down to see what could be done. Upon arrival at the property, I determined that the tiles would definitely require a very deep clean, including the remove of numerous glue stains, followed by the application of a new seal.
Before I could begin the deep cleaning process, I needed to remove the carpet grippers and surface glue, attempting to remove as much as possible by hand using a scraper.
For the particularly stubborn areas, I applied Tile Doctor Remove & Go, a powerful stripper specially designed to break down adhesives and solvents, and left it to dwell for 20 minutes to eat through the glue deposits. I then attached a black pad to a rotary machine and scrubbed the area thoroughly to clean the affected areas, before removing the resulting slurry using a wet vacuum and rinsed with clean water.
Once I was satisfied that all of the glue had been removed, I proceeded to soak the floor using a solution of the high alkaline cleaner known as Tile Doctor Pro Clean. This is a versatile product that can be used on a wide range of natural stone floors to deal with heavy soil build-up.
I left the Pro-Clean to dwell for ten minutes, and then scrubbed it into the tiles to remove the ingrained dirt and also to break down any old and ineffectual seals. The floor was then once again rinsed thoroughly with clean water which was then extracted using a wet vacuum before being left to dry for a couple of days.
Upon our return to the property I immediately tested the floor for damp using a damp meter. This is an extremely important test to carry out before sealing any kind of tiled flooring, due to the fact that excess moisture left over from cleaning can cloud the sealer and damage its ability to protect against dirt and stains.
Thankfully, the damp test revealed no excess moisture, and I was able to proceed with sealing the tiles. My choice of sealer was Tile Doctor Seal and Go, a water-based topical sealer that simultaneously provides both a stain resistant surface seal and a durable and aesthetically pleasing low sheen finish, also being water based it doesn’t give off a smell as it dries.
This is a very cost effective product that is highly suitable for use on Victorian and Quarry tiles, I applied five costs to achieve the desired finish.
The customer was very pleased with the final results. It’s always satisfying to restore original Victorian tiled floors to looking their best once again – and this one was no exception.
Stuart Ford
Wiltshire Tile Doctor
 Brendan McHugh, Architect, Manasquan, NJ
VISION AND NEEDS:
Our client came to us with a vision for their dream house for their growing family with three young children. This was their second attempt at getting the right design. The first time around, after working with an out-of-state online architect, they could not achieve the level of quality they wanted. McHugh delivered a home with higher quality design.
MCHUGH SOLUTION:
The Shingle/Dutch Colonial Design was our client's dream home style. Their priorities were to have a home office for both parents. Ample living space for kids and friends, along with outdoor space and a pool. Double sink bathroom for the kids and a master bedroom with bath for the parents. Despite being close a flood zone, clients could have a fully finished basement with 9ft ceilings and a full attic. Because of the higher water table, the first floor was considerably above grade. To soften the ascent of the front walkway, we designed planters around the stairs, leading up to the porch.
 Axis Mundi Design
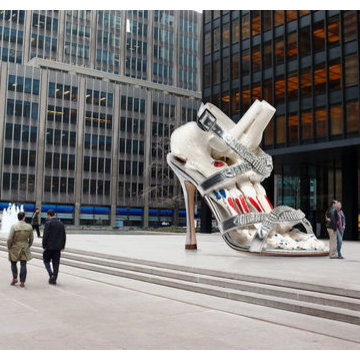
What started as a humorous riff on a podiatrist client’s plastic anatomical foot model becomes a contemporary contemplation on the theme of vanity, which has occupied artists from the Netherlandish painters of the 16th and 17th centuries right through to Marilyn Minter, whose work revels in the seamy, dirty underbelly of the fashion world. The flayed rawness of bones exposes the transience and vulnerability of human existence, which is emphasized by the fact that it is also a cheap plastic simulacrum of the real thing. Slipping this ugliness into a glamorous stiletto with rhinestone-encrusted silver straps spotlights how futile—and in this case painfully deforming—are our attempts to dress up the inescapable truth. This glitz-over-guts sculpture is as barbed as it is humorous.
Concept: John Beckmann
Image: Jessica Marvin
Photography: Jeffrey Hornstein
© 2012 Axis Mundi Design LLC
 Architectural Resource LLC
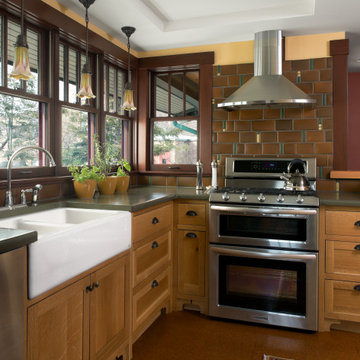
The Brooke Residence ‘Addi- tion by Subtraction’ remodeling project was recognized with numerous regional and national awards and was selected for Fine Homebuilding’s Annual Issue on Houses.
This 1920’s Craftsman Bungalow had been poorly modified in the 70’s in an attempt to address poor energy performance with a scabbed on solarium. The design solution removed the solarium and completely reimagined the floor plan: The kitchen was relocated to the rear; the stairway was relocated to enhance function, and a better connection to the family room was created.
50