
Search results for "Avoiding closing" in Home Design Ideas

 Bilotta Kitchen & Home
Designer Janet Villafane of Villafane Design, LLC of Chester, New Jersey designed and executed this contemporary kitchen with Aston Smith of Bilotta Kitchens of New York. According to Villafane, “from the moment you meet this family you understand their priority in life is family and friends. We were looking for a design that, first and foremost, emphasized the occupants’ request to have a home that was inviting to all that entered. We continued to focus on that request throughout the design phase.” In addition, the design team needed to satisfy the needs of a disabled family member. They wanted him to be able to flow through all areas of the space and feel as if he could comfortably use the open kitchen and family room without any hindrance.
The clients were inspired by clean lines and simplicity. When they spoke about their modern Florida home, one could hear and see their enthusiasm and excitement to bring that simplicity into their new home. It became evident early on that their new space should be contemporary but the home’s exterior, as well as the neighboring community, had an old world, traditional charm. The goal was to avoid competing aesthetics while respecting both looks. The resulting interior design incorporated slab doors with both semi-gloss white lacquer and grey stain on horizontal grained oak. The rich dark oak base cabinets perfectly balanced the ceiling beams. The use of a stainless channel system, in place of traditional hardware, and the stainless toe kick completed the design. The Bertazzoni cooktop and wall ovens in stainless steel, Sub-Zero refrigeration paneled in white semi-gloss, and a stainless steel chimney hood enhanced the clean, uninterrupted lines. The island countertop is Thunder White granite in a leathered finish; the perimeter is Super White Quartz; and the nook table is Virginia Mist honed granite. The backsplash is a frosted glass tile.
The clients hope for quality, simplicity and functionality were beautifully achieved by the designers. Closed, solid front cabinets provide a “home” for everything in the kitchen. A seating nook with a large screen TV, as well as additional TVs visible throughout the kitchen and family room, satisfied the demand of watching multiple sporting events at one time. To finish it all off decorative lighting was carefully selected to make a “wow” statement.
Designer: Janet Villafane of Villafane Design LLC
Bilotta Designer: Aston Smith
Photo Credit: Peter Krupenye

 TVL Creative Ltd.
Our clients had just recently closed on their new house in Stapleton and were excited to transform it into their perfect forever home. They wanted to remodel the entire first floor to create a more open floor plan and develop a smoother flow through the house that better fit the needs of their family. The original layout consisted of several small rooms that just weren’t very functional, so we decided to remove the walls that were breaking up the space and restructure the first floor to create a wonderfully open feel.
After removing the existing walls, we rearranged their spaces to give them an office at the front of the house, a large living room, and a large dining room that connects seamlessly with the kitchen. We also wanted to center the foyer in the home and allow more light to travel through the first floor, so we replaced their existing doors with beautiful custom sliding doors to the back yard and a gorgeous walnut door with side lights to greet guests at the front of their home.
Living Room
Our clients wanted a living room that could accommodate an inviting sectional, a baby grand piano, and plenty of space for family game nights. So, we transformed what had been a small office and sitting room into a large open living room with custom wood columns. We wanted to avoid making the home feel too vast and monumental, so we designed custom beams and columns to define spaces and to make the house feel like a home. Aesthetically we wanted their home to be soft and inviting, so we utilized a neutral color palette with occasional accents of muted blues and greens.
Dining Room
Our clients were also looking for a large dining room that was open to the rest of the home and perfect for big family gatherings. So, we removed what had been a small family room and eat-in dining area to create a spacious dining room with a fireplace and bar. We added custom cabinetry to the bar area with open shelving for displaying and designed a custom surround for their fireplace that ties in with the wood work we designed for their living room. We brought in the tones and materiality from the kitchen to unite the spaces and added a mixed metal light fixture to bring the space together
Kitchen
We wanted the kitchen to be a real show stopper and carry through the calm muted tones we were utilizing throughout their home. We reoriented the kitchen to allow for a big beautiful custom island and to give us the opportunity for a focal wall with cooktop and range hood. Their custom island was perfectly complimented with a dramatic quartz counter top and oversized pendants making it the real center of their home. Since they enter the kitchen first when coming from their detached garage, we included a small mud-room area right by the back door to catch everyone’s coats and shoes as they come in. We also created a new walk-in pantry with plenty of open storage and a fun chalkboard door for writing notes, recipes, and grocery lists.
Office
We transformed the original dining room into a handsome office at the front of the house. We designed custom walnut built-ins to house all of their books, and added glass french doors to give them a bit of privacy without making the space too closed off. We painted the room a deep muted blue to create a glimpse of rich color through the french doors
Powder Room
The powder room is a wonderful play on textures. We used a neutral palette with contrasting tones to create dramatic moments in this little space with accents of brushed gold.
Master Bathroom
The existing master bathroom had an awkward layout and outdated finishes, so we redesigned the space to create a clean layout with a dream worthy shower. We continued to use neutral tones that tie in with the rest of the home, but had fun playing with tile textures and patterns to create an eye-catching vanity. The wood-look tile planks along the floor provide a soft backdrop for their new free-standing bathtub and contrast beautifully with the deep ash finish on the cabinetry.
 Talon Construction Inc.
An open floor plan kitchen renovation transforms your kitchen from a closed-off space into a sociable and airy heart of the home.
The Walls Come Down: The biggest change is removing walls (or widening doorways) that separate the kitchen from the living room or dining room. This creates a continuous living area bathed in more natural light.
Island Paradise: A kitchen island becomes the centerpiece. It can house your sink, cooktop, offer seating, and provide much-needed prep space. You can choose a large island for entertaining or a smaller one to define the space.
Work Zones Take Shape: Imagine designated areas for specific tasks. A sink area with a dishwasher nearby, a prep zone with ample countertop, and a cooking zone with the oven and cooktop grouped together. This promotes efficiency and a smooth workflow in your kitchen.
Light and Bright: Natural light is key. Large windows or skylights can be incorporated during the renovation to bathe the space in sunshine. Light, reflective surfaces like white cabinets or light-colored countertops also enhance the feeling of openness.
Designing the Flow: Flooring plays a big role in tying the open concept space together. Opt for continuous flooring throughout the kitchen and living area to create a seamless flow. Area rugs can be used later to define separate zones within the open plan.
Don't Forget the Details: Open concept kitchens need clever storage solutions to avoid clutter. Built-in cabinets, pantries, and even hidden storage drawers in the island can keep things organized. To distinguish the kitchen from the living area, consider using a different colored paint scheme on the island or backsplash.
Find the right local pro for your project
 Sosna Inc
Our clients approached us to renovate their loved family home. The Main Floor needed a fresh update, and better functionality and storage to fit the needs of their growing family.
The existing Kitchen felt closed off from the rest of the Main Floor, and the layout did not allow for enough countertop or storage space. Each of their Bathrooms also needed an update and better storage.
Due to a previously bad experience with another contractor previously, it was important for our clients to work with a contractor who they could build trust with, and feel respected by and comfortable with.
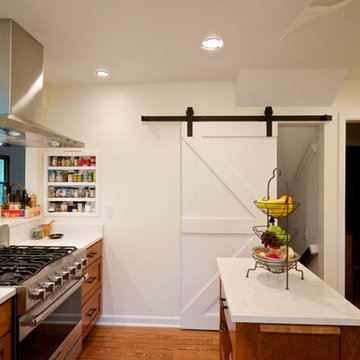
Using space from an extra stairway in the side entry of the house, we were able to create a spacious mudroom, perfect for taking a seat to put on or take off coats and boots, and unique, hidden storage for seasonal and outdoor items.
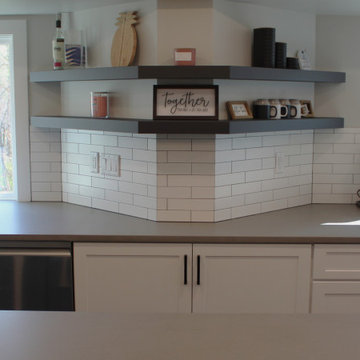
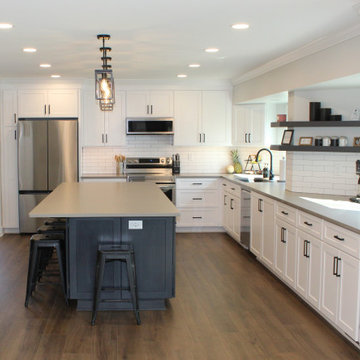
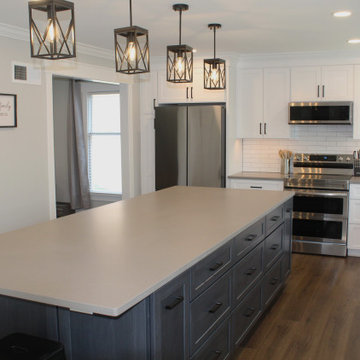
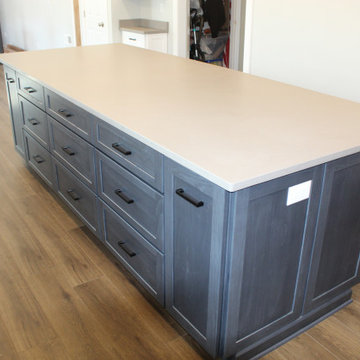
We were able to create a more open concept Main Floor, by removing the walls between the Kitchen and Family Room. This allowed for a larger, more functional Kitchen. The new Kitchen is bright and welcoming with white quartz countertops that run seamlessly into a matching backsplash. Beautiful white cabinetry is complemented by brushed bronze pulls and faucets, and durable, contemporary flooring.
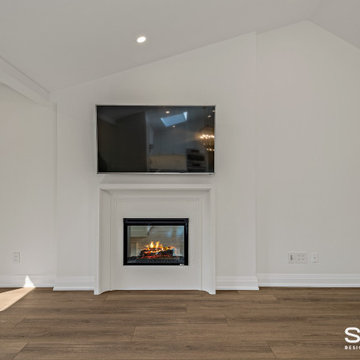
We transformed the Kitchen and Family Room areas with a vaulted ceiling, and a repaired and modernized Kitchen skylight. We also integrated a patio door entrance, which combined with both sloped and flat sections of the vaulted ceiling, proved to be quite a challenge!
This project involved skilled welding, roofing, and structural work, and it was important to maintain the structural integrity of the ceiling. As any mistakes could result in serious issues, communication between everyone involved was key! Regular team meetings, updates on progress, and addressing concerns promptly kept everyone on the same page and avoided misunderstandings. In the end, the raised ceiling, skylight, and patio door were well worth the work, as together they enhanced the airiness and visual spaciousness of the space.
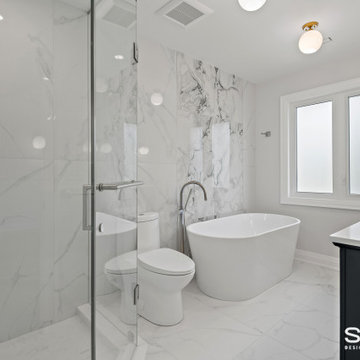
On the Second Floor, we created a larger Master Ensuite by borrowing room from existing closet space. This allowed for a spacious walk-in shower, and separate bathtub. A prefabricated stylish vanity not only adds a pop of colour, but also provides plenty of useful storage. New marble tiling on the floor extends to the wall behind the bathtub, creating a luxurious accent wall.
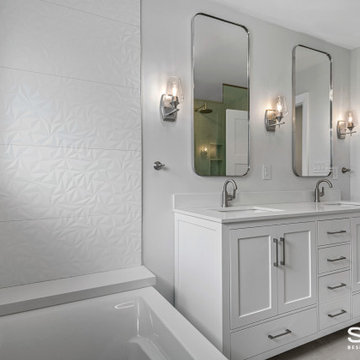
The Shared Bathroom was updated to include a new walk-in shower, and a separate bathtub, surrounded by modern geometric wall tiles.
The removal of popcorn ceilings, an updated the Front Door, and a refinished Main Staircase with metal railings completed tying the home together, creating a fresh, updated space that this family can enjoy for years to come.
 Sosna Inc
Our clients approached us to renovate their loved family home. The Main Floor needed a fresh update, and better functionality and storage to fit the needs of their growing family.
The existing Kitchen felt closed off from the rest of the Main Floor, and the layout did not allow for enough countertop or storage space. Each of their Bathrooms also needed an update and better storage.
Due to a previously bad experience with another contractor previously, it was important for our clients to work with a contractor who they could build trust with, and feel respected by and comfortable with.
Using space from an extra stairway in the side entry of the house, we were able to create a spacious mudroom, perfect for taking a seat to put on or take off coats and boots, and unique, hidden storage for seasonal and outdoor items.
We were able to create a more open concept Main Floor, by removing the walls between the Kitchen and Family Room. This allowed for a larger, more functional Kitchen. The new Kitchen is bright and welcoming with white quartz countertops that run seamlessly into a matching backsplash. Beautiful white cabinetry is complemented by brushed bronze pulls and faucets, and durable, contemporary flooring.
We transformed the Kitchen and Family Room areas with a vaulted ceiling, and a repaired and modernized Kitchen skylight. We also integrated a patio door entrance, which combined with both sloped and flat sections of the vaulted ceiling, proved to be quite a challenge!
This project involved skilled welding, roofing, and structural work, and it was important to maintain the structural integrity of the ceiling. As any mistakes could result in serious issues, communication between everyone involved was key! Regular team meetings, updates on progress, and addressing concerns promptly kept everyone on the same page and avoided misunderstandings. In the end, the raised ceiling, skylight, and patio door were well worth the work, as together they enhanced the airiness and visual spaciousness of the space.
On the Second Floor, we created a larger Master Ensuite by borrowing room from existing closet space. This allowed for a spacious walk-in shower, and separate bathtub. A prefabricated stylish vanity not only adds a pop of colour, but also provides plenty of useful storage. New marble tiling on the floor extends to the wall behind the bathtub, creating a luxurious accent wall.
The Shared Bathroom was updated to include a new walk-in shower, and a separate bathtub, surrounded by modern geometric wall tiles.
The removal of popcorn ceilings, an updated the Front Door, and a refinished Main Staircase with metal railings completed tying the home together, creating a fresh, updated space that this family can enjoy for years to come.
 Talon Construction Inc.
An open floor plan kitchen renovation transforms your kitchen from a closed-off space into a sociable and airy heart of the home.
The Walls Come Down: The biggest change is removing walls (or widening doorways) that separate the kitchen from the living room or dining room. This creates a continuous living area bathed in more natural light.
Island Paradise: A kitchen island becomes the centerpiece. It can house your sink, cooktop, offer seating, and provide much-needed prep space. You can choose a large island for entertaining or a smaller one to define the space.
Work Zones Take Shape: Imagine designated areas for specific tasks. A sink area with a dishwasher nearby, a prep zone with ample countertop, and a cooking zone with the oven and cooktop grouped together. This promotes efficiency and a smooth workflow in your kitchen.
Light and Bright: Natural light is key. Large windows or skylights can be incorporated during the renovation to bathe the space in sunshine. Light, reflective surfaces like white cabinets or light-colored countertops also enhance the feeling of openness.
Designing the Flow: Flooring plays a big role in tying the open concept space together. Opt for continuous flooring throughout the kitchen and living area to create a seamless flow. Area rugs can be used later to define separate zones within the open plan.
Don't Forget the Details: Open concept kitchens need clever storage solutions to avoid clutter. Built-in cabinets, pantries, and even hidden storage drawers in the island can keep things organized. To distinguish the kitchen from the living area, consider using a different colored paint scheme on the island or backsplash.
 Sosna Inc
Our clients approached us to renovate their loved family home. The Main Floor needed a fresh update, and better functionality and storage to fit the needs of their growing family.
The existing Kitchen felt closed off from the rest of the Main Floor, and the layout did not allow for enough countertop or storage space. Each of their Bathrooms also needed an update and better storage.
Due to a previously bad experience with another contractor previously, it was important for our clients to work with a contractor who they could build trust with, and feel respected by and comfortable with.
Using space from an extra stairway in the side entry of the house, we were able to create a spacious mudroom, perfect for taking a seat to put on or take off coats and boots, and unique, hidden storage for seasonal and outdoor items.
We were able to create a more open concept Main Floor, by removing the walls between the Kitchen and Family Room. This allowed for a larger, more functional Kitchen. The new Kitchen is bright and welcoming with white quartz countertops that run seamlessly into a matching backsplash. Beautiful white cabinetry is complemented by brushed bronze pulls and faucets, and durable, contemporary flooring.
We transformed the Kitchen and Family Room areas with a vaulted ceiling, and a repaired and modernized Kitchen skylight. We also integrated a patio door entrance, which combined with both sloped and flat sections of the vaulted ceiling, proved to be quite a challenge!
This project involved skilled welding, roofing, and structural work, and it was important to maintain the structural integrity of the ceiling. As any mistakes could result in serious issues, communication between everyone involved was key! Regular team meetings, updates on progress, and addressing concerns promptly kept everyone on the same page and avoided misunderstandings. In the end, the raised ceiling, skylight, and patio door were well worth the work, as together they enhanced the airiness and visual spaciousness of the space.
On the Second Floor, we created a larger Master Ensuite by borrowing room from existing closet space. This allowed for a spacious walk-in shower, and separate bathtub. A prefabricated stylish vanity not only adds a pop of colour, but also provides plenty of useful storage. New marble tiling on the floor extends to the wall behind the bathtub, creating a luxurious accent wall.
The Shared Bathroom was updated to include a new walk-in shower, and a separate bathtub, surrounded by modern geometric wall tiles.
The removal of popcorn ceilings, an updated the Front Door, and a refinished Main Staircase with metal railings completed tying the home together, creating a fresh, updated space that this family can enjoy for years to come.
Sponsored
Plain City, OH

Kuhns Contracting, Inc.
Central Ohio's Trusted Home Remodeler Specializing in Kitchens & Baths
 Talon Construction Inc.
An open floor plan kitchen renovation transforms your kitchen from a closed-off space into a sociable and airy heart of the home.
The Walls Come Down: The biggest change is removing walls (or widening doorways) that separate the kitchen from the living room or dining room. This creates a continuous living area bathed in more natural light.
Island Paradise: A kitchen island becomes the centerpiece. It can house your sink, cooktop, offer seating, and provide much-needed prep space. You can choose a large island for entertaining or a smaller one to define the space.
Work Zones Take Shape: Imagine designated areas for specific tasks. A sink area with a dishwasher nearby, a prep zone with ample countertop, and a cooking zone with the oven and cooktop grouped together. This promotes efficiency and a smooth workflow in your kitchen.
Light and Bright: Natural light is key. Large windows or skylights can be incorporated during the renovation to bathe the space in sunshine. Light, reflective surfaces like white cabinets or light-colored countertops also enhance the feeling of openness.
Designing the Flow: Flooring plays a big role in tying the open concept space together. Opt for continuous flooring throughout the kitchen and living area to create a seamless flow. Area rugs can be used later to define separate zones within the open plan.
Don't Forget the Details: Open concept kitchens need clever storage solutions to avoid clutter. Built-in cabinets, pantries, and even hidden storage drawers in the island can keep things organized. To distinguish the kitchen from the living area, consider using a different colored paint scheme on the island or backsplash.
 Talon Construction Inc.
An open floor plan kitchen renovation transforms your kitchen from a closed-off space into a sociable and airy heart of the home.
The Walls Come Down: The biggest change is removing walls (or widening doorways) that separate the kitchen from the living room or dining room. This creates a continuous living area bathed in more natural light.
Island Paradise: A kitchen island becomes the centerpiece. It can house your sink, cooktop, offer seating, and provide much-needed prep space. You can choose a large island for entertaining or a smaller one to define the space.
Work Zones Take Shape: Imagine designated areas for specific tasks. A sink area with a dishwasher nearby, a prep zone with ample countertop, and a cooking zone with the oven and cooktop grouped together. This promotes efficiency and a smooth workflow in your kitchen.
Light and Bright: Natural light is key. Large windows or skylights can be incorporated during the renovation to bathe the space in sunshine. Light, reflective surfaces like white cabinets or light-colored countertops also enhance the feeling of openness.
Designing the Flow: Flooring plays a big role in tying the open concept space together. Opt for continuous flooring throughout the kitchen and living area to create a seamless flow. Area rugs can be used later to define separate zones within the open plan.
Don't Forget the Details: Open concept kitchens need clever storage solutions to avoid clutter. Built-in cabinets, pantries, and even hidden storage drawers in the island can keep things organized. To distinguish the kitchen from the living area, consider using a different colored paint scheme on the island or backsplash.
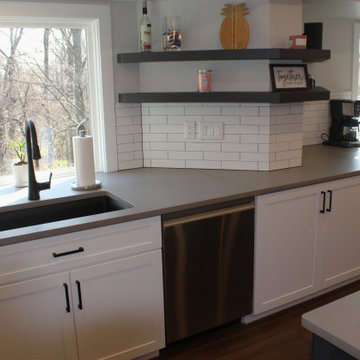 Talon Construction Inc.
An open floor plan kitchen renovation transforms your kitchen from a closed-off space into a sociable and airy heart of the home.
The Walls Come Down: The biggest change is removing walls (or widening doorways) that separate the kitchen from the living room or dining room. This creates a continuous living area bathed in more natural light.
Island Paradise: A kitchen island becomes the centerpiece. It can house your sink, cooktop, offer seating, and provide much-needed prep space. You can choose a large island for entertaining or a smaller one to define the space.
Work Zones Take Shape: Imagine designated areas for specific tasks. A sink area with a dishwasher nearby, a prep zone with ample countertop, and a cooking zone with the oven and cooktop grouped together. This promotes efficiency and a smooth workflow in your kitchen.
Light and Bright: Natural light is key. Large windows or skylights can be incorporated during the renovation to bathe the space in sunshine. Light, reflective surfaces like white cabinets or light-colored countertops also enhance the feeling of openness.
Designing the Flow: Flooring plays a big role in tying the open concept space together. Opt for continuous flooring throughout the kitchen and living area to create a seamless flow. Area rugs can be used later to define separate zones within the open plan.
Don't Forget the Details: Open concept kitchens need clever storage solutions to avoid clutter. Built-in cabinets, pantries, and even hidden storage drawers in the island can keep things organized. To distinguish the kitchen from the living area, consider using a different colored paint scheme on the island or backsplash.
 Architect
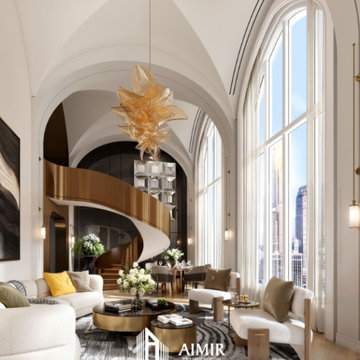
Not all architectural imagery is created equal. Some renderings look obviously computer-generated, with flat lighting and plastic-looking materials that fail to convince viewers. Others are so precise that they are indistinguishable from photographs. That second category, realistic architectural visualization rendering, has become the standard expectation for architects, developers, and marketers who need imagery capable of withstanding close scrutiny from investors, buyers, and planning authorities. As audiences grow more visually literate, the tolerance for obviously artificial, video-game-like imagery in professional presentations continues to shrink.
What Sets Realistic Visualization Apart
Realistic architectural visualization goes beyond simply modeling a building in three dimensions. It requires physically accurate lighting simulation, true-to-life material properties, and careful attention to the small imperfections that make real-world photography convincing, such as subtle reflections, ambient occlusion in corners, and natural depth of field. The goal is an image that a viewer would believe was captured by a camera on-site rather than generated by software. Achieving that level of believability typically means dozens of small adjustments layered on top of one another rather than any single dramatic setting.
Realistic Versus Stylized Rendering Approaches
Stylized or conceptual renderings still have their place, particularly in early design phases when a looser, more artistic representation helps convey mood without locking in every detail. But once a project moves toward marketing, investment, or permitting, stakeholders need to see exactly what they are getting. Realistic visualization removes ambiguity, showing true material colors, accurate proportions, and honest lighting conditions rather than idealized abstractions. Understanding which approach a project actually needs at each stage helps clients avoid paying for a level of polish that a given milestone does not yet require.
Why Realism Builds Client and Buyer Confidence
Buyers and investors are understandably skeptical of overly polished or unrealistic marketing images. When a rendering looks convincingly real, it builds trust rather than raising doubts about what the finished project will actually look like. This is especially important in real estate presales, where buyers are committing significant sums based largely on visual material rather than a finished physical space. A rendering that later turns out to have misrepresented the finished product can also create legal and reputational exposure for developers, making accuracy a genuine business risk rather than just an aesthetic preference.
The Technical Pillars Behind Every Realistic Scene
Achieving true realism depends on several technical disciplines working together: physically based rendering engines that simulate how light actually behaves, high-resolution texture libraries that replicate real materials like stone, wood, and glass, and careful camera work that mimics real photographic lenses and exposure. Post-production adds a final layer of color grading and atmospheric effects that ties everything together into a cohesive, believable image. Each of these pillars depends on the others; even flawless material work can be undermined by lighting that behaves in a physically implausible way.
Applications Across Residential, Commercial, and Institutional Projects
Realistic visualization serves a wide range of building types, from single-family homes and luxury condominiums to office towers, hotels, schools, and healthcare facilities. Each typology has its own material palette and lighting expectations, and an experienced studio adjusts its approach accordingly, whether that means warm, inviting tones for a residential lobby or crisp, professional lighting for a corporate headquarters. Institutional clients such as universities and hospitals often have additional requirements around accessibility signage and wayfinding, which need to be represented accurately alongside the architecture itself.
How AIMIR CG Delivers Photorealistic Accuracy
Our studio specializes in realistic architectural visualization rendering that holds up under close inspection. Every project moves through a disciplined pipeline of modeling, texturing, lighting, and post-production review, with artists cross-checking material references and lighting studies against real-world photography. This attention to detail is why clients consistently describe our end product as impressive and our process as easy to work with. A dedicated quality review stage before delivery catches inconsistencies that might otherwise slip through a faster, less structured pipeline.
Common Challenges in Achieving True Realism
Realistic rendering is technically demanding. Common obstacles include accurately simulating how light bounces between surfaces, matching material reflectivity to real product specifications, and avoiding the uncanny, slightly artificial look that comes from over-processed images. Overcoming these challenges requires experienced artists who understand both the science of light and the craft of photography, not just software proficiency. Rushed production schedules are often the real culprit behind unconvincing renderings, since realism typically requires several iterative passes rather than a single render.
What to Look for in a Realism-Focused Rendering Studio
When evaluating a rendering partner, review their portfolio critically. Do the images include convincing shadow detail and material variation, or do surfaces look uniformly smooth and artificial? Ask about their revision process and how closely they work with architects to source accurate material and lighting references, since realism is ultimately the product of disciplined collaboration, not a single software setting. It also helps to ask for examples of past projects in a similar building type, since a studio's strengths can vary across typologies.
Ready for Renderings That Look Real
If your project deserves imagery that can stand up to the scrutiny of investors, buyers, and planning boards, AIMIR CG is ready to help. Our team combines technical precision with artistic judgment to deliver visualization that looks and feels genuinely real. Contact us to discuss how photorealistic rendering can strengthen your next presentation or marketing campaign, and let us show you examples from projects similar to your own.

 Frank's Home Maintenance and General Contracting
 Sheri Oneal Photography (sheri@sherioneal.com)
Inspiration for a timeless beige tile and stone tile walk-in shower remodel in Nashville with an undermount sink, recessed-panel cabinets, dark wood cabinets, granite countertops and a two-piece toilet
Inspiration for a timeless beige tile and stone tile walk-in shower remodel in Nashville with an undermount sink, recessed-panel cabinets, dark wood cabinets, granite countertops and a two-piece toilet

 Paradise Found Construction
Melissa and Steve purchased our National Award Winning Green Certified Remodeled Home. They had moved to Colorado previously to expand Business opportunities, but found that they missed being near their extended family members and Melissa’s native city and state. They wanted a home in a quiet neighborhood that suited their needs and had been updated to current design trends and amenities. With 2 young children a single-story home appealed to them.
Steve primarily worked from home, using the formal Living Room as his home office which was central to the Kitchen and main living areas. As their children grew, it became increasingly difficult to With 4 children, their daily activities were split between the 1st and second floors, making it difficult to coordinate activities amongst them. Also, with a large extended family close-by, get-togethers were cramped and uncomfortable.
With the added 1st floor living space, they are now able to all comfortably gather together and spend more quality time with their family and friends.
Design Features
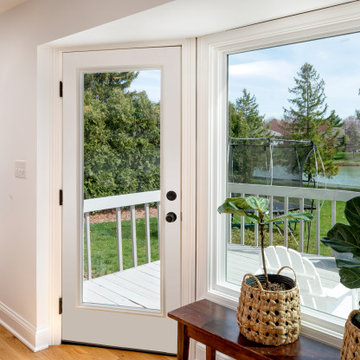
Seamless Transition into the adjoining Kitchen and Living Room, separating the two with a light and bright 15-Lite Double French Door.
Light and bright natural hardwood flooring.
A bright and open floor plan achieved by introducing a double 15-Lite French door in the Kitchen and generous amount of double-hung low-e windows.
Window Well in the Roof to accommodate required foot-print placement.
Avoidance of installing a Pull-Down Attic Access.
No-VOC Paints and Finishes.
Durable Exterior Construction
No-Maintenance Composite and PVC Low-E Windows and Doors
Cement Fiber Siding
Cement Fiber and PVC Trim
Life-time Architectural Shingles
Metal Roof Flashing with Gutter Kick-Outs
Superior Window Flashing and Water Intrusion Sealing measures
Energy Efficient and Green Features
1st floor HVAC Compressor and Air Handler replaced with a more efficient 15 Seer unit.
Floor penetrations and perimeter bottom plates caulked and air sealed.
No-VOC Paints and Finishes.
Durable Exterior Construction
No-Maintenance Composite and PVC Low-E Windows
Cement Fiber Siding
Cement Fiber and PVC Trim
Life-time Architectural Shingles
Metal Roof Flashing with Gutter Kick-Outs
Superior Window Flashing and Water Intrusion sealing measures
Sponsored
Plain City, OH
Kuhns Contracting, Inc.
Central Ohio's Trusted Home Remodeler Specializing in Kitchens & Baths
 TVL Creative Ltd.
Our clients had just recently closed on their new house in Stapleton and were excited to transform it into their perfect forever home. They wanted to remodel the entire first floor to create a more open floor plan and develop a smoother flow through the house that better fit the needs of their family. The original layout consisted of several small rooms that just weren’t very functional, so we decided to remove the walls that were breaking up the space and restructure the first floor to create a wonderfully open feel.
After removing the existing walls, we rearranged their spaces to give them an office at the front of the house, a large living room, and a large dining room that connects seamlessly with the kitchen. We also wanted to center the foyer in the home and allow more light to travel through the first floor, so we replaced their existing doors with beautiful custom sliding doors to the back yard and a gorgeous walnut door with side lights to greet guests at the front of their home.
Living Room
Our clients wanted a living room that could accommodate an inviting sectional, a baby grand piano, and plenty of space for family game nights. So, we transformed what had been a small office and sitting room into a large open living room with custom wood columns. We wanted to avoid making the home feel too vast and monumental, so we designed custom beams and columns to define spaces and to make the house feel like a home. Aesthetically we wanted their home to be soft and inviting, so we utilized a neutral color palette with occasional accents of muted blues and greens.
Dining Room
Our clients were also looking for a large dining room that was open to the rest of the home and perfect for big family gatherings. So, we removed what had been a small family room and eat-in dining area to create a spacious dining room with a fireplace and bar. We added custom cabinetry to the bar area with open shelving for displaying and designed a custom surround for their fireplace that ties in with the wood work we designed for their living room. We brought in the tones and materiality from the kitchen to unite the spaces and added a mixed metal light fixture to bring the space together
Kitchen
We wanted the kitchen to be a real show stopper and carry through the calm muted tones we were utilizing throughout their home. We reoriented the kitchen to allow for a big beautiful custom island and to give us the opportunity for a focal wall with cooktop and range hood. Their custom island was perfectly complimented with a dramatic quartz counter top and oversized pendants making it the real center of their home. Since they enter the kitchen first when coming from their detached garage, we included a small mud-room area right by the back door to catch everyone’s coats and shoes as they come in. We also created a new walk-in pantry with plenty of open storage and a fun chalkboard door for writing notes, recipes, and grocery lists.
Office
We transformed the original dining room into a handsome office at the front of the house. We designed custom walnut built-ins to house all of their books, and added glass french doors to give them a bit of privacy without making the space too closed off. We painted the room a deep muted blue to create a glimpse of rich color through the french doors
Powder Room
The powder room is a wonderful play on textures. We used a neutral palette with contrasting tones to create dramatic moments in this little space with accents of brushed gold.
Master Bathroom
The existing master bathroom had an awkward layout and outdated finishes, so we redesigned the space to create a clean layout with a dream worthy shower. We continued to use neutral tones that tie in with the rest of the home, but had fun playing with tile textures and patterns to create an eye-catching vanity. The wood-look tile planks along the floor provide a soft backdrop for their new free-standing bathtub and contrast beautifully with the deep ash finish on the cabinetry.
 TVL Creative Ltd.
Our clients had just recently closed on their new house in Stapleton and were excited to transform it into their perfect forever home. They wanted to remodel the entire first floor to create a more open floor plan and develop a smoother flow through the house that better fit the needs of their family. The original layout consisted of several small rooms that just weren’t very functional, so we decided to remove the walls that were breaking up the space and restructure the first floor to create a wonderfully open feel.
After removing the existing walls, we rearranged their spaces to give them an office at the front of the house, a large living room, and a large dining room that connects seamlessly with the kitchen. We also wanted to center the foyer in the home and allow more light to travel through the first floor, so we replaced their existing doors with beautiful custom sliding doors to the back yard and a gorgeous walnut door with side lights to greet guests at the front of their home.
Living Room
Our clients wanted a living room that could accommodate an inviting sectional, a baby grand piano, and plenty of space for family game nights. So, we transformed what had been a small office and sitting room into a large open living room with custom wood columns. We wanted to avoid making the home feel too vast and monumental, so we designed custom beams and columns to define spaces and to make the house feel like a home. Aesthetically we wanted their home to be soft and inviting, so we utilized a neutral color palette with occasional accents of muted blues and greens.
Dining Room
Our clients were also looking for a large dining room that was open to the rest of the home and perfect for big family gatherings. So, we removed what had been a small family room and eat-in dining area to create a spacious dining room with a fireplace and bar. We added custom cabinetry to the bar area with open shelving for displaying and designed a custom surround for their fireplace that ties in with the wood work we designed for their living room. We brought in the tones and materiality from the kitchen to unite the spaces and added a mixed metal light fixture to bring the space together
Kitchen
We wanted the kitchen to be a real show stopper and carry through the calm muted tones we were utilizing throughout their home. We reoriented the kitchen to allow for a big beautiful custom island and to give us the opportunity for a focal wall with cooktop and range hood. Their custom island was perfectly complimented with a dramatic quartz counter top and oversized pendants making it the real center of their home. Since they enter the kitchen first when coming from their detached garage, we included a small mud-room area right by the back door to catch everyone’s coats and shoes as they come in. We also created a new walk-in pantry with plenty of open storage and a fun chalkboard door for writing notes, recipes, and grocery lists.
Office
We transformed the original dining room into a handsome office at the front of the house. We designed custom walnut built-ins to house all of their books, and added glass french doors to give them a bit of privacy without making the space too closed off. We painted the room a deep muted blue to create a glimpse of rich color through the french doors
Powder Room
The powder room is a wonderful play on textures. We used a neutral palette with contrasting tones to create dramatic moments in this little space with accents of brushed gold.
Master Bathroom
The existing master bathroom had an awkward layout and outdated finishes, so we redesigned the space to create a clean layout with a dream worthy shower. We continued to use neutral tones that tie in with the rest of the home, but had fun playing with tile textures and patterns to create an eye-catching vanity. The wood-look tile planks along the floor provide a soft backdrop for their new free-standing bathtub and contrast beautifully with the deep ash finish on the cabinetry.
 TVL Creative Ltd.
Our clients had just recently closed on their new house in Stapleton and were excited to transform it into their perfect forever home. They wanted to remodel the entire first floor to create a more open floor plan and develop a smoother flow through the house that better fit the needs of their family. The original layout consisted of several small rooms that just weren’t very functional, so we decided to remove the walls that were breaking up the space and restructure the first floor to create a wonderfully open feel.
After removing the existing walls, we rearranged their spaces to give them an office at the front of the house, a large living room, and a large dining room that connects seamlessly with the kitchen. We also wanted to center the foyer in the home and allow more light to travel through the first floor, so we replaced their existing doors with beautiful custom sliding doors to the back yard and a gorgeous walnut door with side lights to greet guests at the front of their home.
Living Room
Our clients wanted a living room that could accommodate an inviting sectional, a baby grand piano, and plenty of space for family game nights. So, we transformed what had been a small office and sitting room into a large open living room with custom wood columns. We wanted to avoid making the home feel too vast and monumental, so we designed custom beams and columns to define spaces and to make the house feel like a home. Aesthetically we wanted their home to be soft and inviting, so we utilized a neutral color palette with occasional accents of muted blues and greens.
Dining Room
Our clients were also looking for a large dining room that was open to the rest of the home and perfect for big family gatherings. So, we removed what had been a small family room and eat-in dining area to create a spacious dining room with a fireplace and bar. We added custom cabinetry to the bar area with open shelving for displaying and designed a custom surround for their fireplace that ties in with the wood work we designed for their living room. We brought in the tones and materiality from the kitchen to unite the spaces and added a mixed metal light fixture to bring the space together
Kitchen
We wanted the kitchen to be a real show stopper and carry through the calm muted tones we were utilizing throughout their home. We reoriented the kitchen to allow for a big beautiful custom island and to give us the opportunity for a focal wall with cooktop and range hood. Their custom island was perfectly complimented with a dramatic quartz counter top and oversized pendants making it the real center of their home. Since they enter the kitchen first when coming from their detached garage, we included a small mud-room area right by the back door to catch everyone’s coats and shoes as they come in. We also created a new walk-in pantry with plenty of open storage and a fun chalkboard door for writing notes, recipes, and grocery lists.
Office
We transformed the original dining room into a handsome office at the front of the house. We designed custom walnut built-ins to house all of their books, and added glass french doors to give them a bit of privacy without making the space too closed off. We painted the room a deep muted blue to create a glimpse of rich color through the french doors
Powder Room
The powder room is a wonderful play on textures. We used a neutral palette with contrasting tones to create dramatic moments in this little space with accents of brushed gold.
Master Bathroom
The existing master bathroom had an awkward layout and outdated finishes, so we redesigned the space to create a clean layout with a dream worthy shower. We continued to use neutral tones that tie in with the rest of the home, but had fun playing with tile textures and patterns to create an eye-catching vanity. The wood-look tile planks along the floor provide a soft backdrop for their new free-standing bathtub and contrast beautifully with the deep ash finish on the cabinetry.
 TVL Creative Ltd.
Our clients had just recently closed on their new house in Stapleton and were excited to transform it into their perfect forever home. They wanted to remodel the entire first floor to create a more open floor plan and develop a smoother flow through the house that better fit the needs of their family. The original layout consisted of several small rooms that just weren’t very functional, so we decided to remove the walls that were breaking up the space and restructure the first floor to create a wonderfully open feel.
After removing the existing walls, we rearranged their spaces to give them an office at the front of the house, a large living room, and a large dining room that connects seamlessly with the kitchen. We also wanted to center the foyer in the home and allow more light to travel through the first floor, so we replaced their existing doors with beautiful custom sliding doors to the back yard and a gorgeous walnut door with side lights to greet guests at the front of their home.
Living Room
Our clients wanted a living room that could accommodate an inviting sectional, a baby grand piano, and plenty of space for family game nights. So, we transformed what had been a small office and sitting room into a large open living room with custom wood columns. We wanted to avoid making the home feel too vast and monumental, so we designed custom beams and columns to define spaces and to make the house feel like a home. Aesthetically we wanted their home to be soft and inviting, so we utilized a neutral color palette with occasional accents of muted blues and greens.
Dining Room
Our clients were also looking for a large dining room that was open to the rest of the home and perfect for big family gatherings. So, we removed what had been a small family room and eat-in dining area to create a spacious dining room with a fireplace and bar. We added custom cabinetry to the bar area with open shelving for displaying and designed a custom surround for their fireplace that ties in with the wood work we designed for their living room. We brought in the tones and materiality from the kitchen to unite the spaces and added a mixed metal light fixture to bring the space together
Kitchen
We wanted the kitchen to be a real show stopper and carry through the calm muted tones we were utilizing throughout their home. We reoriented the kitchen to allow for a big beautiful custom island and to give us the opportunity for a focal wall with cooktop and range hood. Their custom island was perfectly complimented with a dramatic quartz counter top and oversized pendants making it the real center of their home. Since they enter the kitchen first when coming from their detached garage, we included a small mud-room area right by the back door to catch everyone’s coats and shoes as they come in. We also created a new walk-in pantry with plenty of open storage and a fun chalkboard door for writing notes, recipes, and grocery lists.
Office
We transformed the original dining room into a handsome office at the front of the house. We designed custom walnut built-ins to house all of their books, and added glass french doors to give them a bit of privacy without making the space too closed off. We painted the room a deep muted blue to create a glimpse of rich color through the french doors
Powder Room
The powder room is a wonderful play on textures. We used a neutral palette with contrasting tones to create dramatic moments in this little space with accents of brushed gold.
Master Bathroom
The existing master bathroom had an awkward layout and outdated finishes, so we redesigned the space to create a clean layout with a dream worthy shower. We continued to use neutral tones that tie in with the rest of the home, but had fun playing with tile textures and patterns to create an eye-catching vanity. The wood-look tile planks along the floor provide a soft backdrop for their new free-standing bathtub and contrast beautifully with the deep ash finish on the cabinetry.
Sponsored
Plain City, OH
Kuhns Contracting, Inc.
Central Ohio's Trusted Home Remodeler Specializing in Kitchens & Baths

 BathGems
The crisp Antique White finish of the Peruga Double Bath Vanity offers a light, airy feel to your bathroom. Featuring antique-style handles for each of the cabinet doors and 3 central drawers, this vanity screams Old World class in every direction. You'll love how sophisticated it will look in your home, especially when paired with any of the 5 beautiful top options to choose from. Add the beautiful matching linen cabinet to your bedroom decor and you'll never complain about not having enough space again. Made from the same top quality solid oak, this linen cabinet boasts a glass paneled top cabinet with frosted glass on each side, a middle drawer, and a lower cabinet with a gorgeous frame-like design. Each door is equipped with soft-close European hinges and the finish is made to match your vanity with a 12-step hand glazed finishing process.
Please note: the triple panel mirror in the main image is no longer available. Instead, a matching 47.25" Single panel mirror (see detailed images) is available from the drop-down menus.
Dimensions
Vanity
60"W x 23.5"D x 35.5"H
Optional Accessories
Large Mirror
47.25"W x 3.7"D x 41.5"H
Linen Cabinet
20.5"W x 16.25"D x 65"H
Features
Quality materials are important to the longevity of your bathroom vanity. Cheap vanities made with particle board or MDF tend to sag, warp, split, discolor, and expand over time. This is especially true in humid climates, such as the environment found in a normal bathroom. Since bathroom humidity is so common, bathroom vanities need to be extremely durable. They also need to be strong enough to endure lots of usage-based wear and tear. Vanities are typically made of MDF, birch, rubberwood, or natural oak. Generally, MDF is approximately 30 % the quality of oak, birch is 50% the quality of oak, and rubberwood is typically 90% the quality of oak, where "quality" is defined as the strength, integrity, and durability of the material. Solid oak is without question the strongest, most durable, and most resilient of all vanity materials. Only the highest-quality and best made vanities are manufactured from natural oak. Premier Collection
Vanities that are marked as Premier Collection are the best vanities in the industry where no expense has been spared. These are the best vanities money can buy made from small quantities of handpicked solid hard woods that are hand finished to perfection. To be considered part of the Premium Collection the vanity must get A+++ grades in: Wood used, Interior Construction, Counter Top, and Finish.
Wood Used:
Premier Collections uses Kiln dried wood in small batches to insure proper drying to prevent cracking and warping. All wood is cared for in great detail to prevent cracking and warping so that your vanity looks as good as they day it arrived for many years.
Vanity Tops:
Premier Collections vanities that have stone tops use a thicker stone, up to 3cm (1cm more than industry average), providing a more luxurious look. All of the vanities with stone tops are sealed to prevent watermarks and minor stains.
Construction:
Premium Collection vanities use hard wood box framed construction that provides strength and durability for decades. All vanities have working drawers with able storage made with slide ball bearing drawers and or soft close mounts. Center drawers are boxed and fitted around plumbing for additional storage.
Finish:
Premium Collection vanities are all hand stained, hand painted, using up to a 15 layer sealing and finishing process to avoid future fading, cracking, or peeling.
- 100% handmade and finished
- Grade A, solid kiln-dried oak construction
- Single-door cabinet on each side with antique-style handles
- Frame type construction with an Old World style joinery
- Full extension drawers with ball-bearing glides
- Hand-applied varnish in 3 layers to prevent warping
- Multi-layered hand glazed finish for a cabinet that is resistant to peeling, cracking and fading
- 5 Beautiful finishes to choose from!
- Choose from Cream Marble, Black Granite, Tropical Brown Granite, Carrera White Marble, or Travertine tops
- Pre-drilled for 8" faucet spread
- **Faucets Not Included**
Quality materials are important to the longevity of your bathroom vanity. Cheap vanities made with particle board or MDF tend to sag, warp, split, discolor, and expand over time. This is especially true in humid climates, such as the environment found in a normal bathroom. Since bathroom humidity is so common, bathroom vanities need to be extremely durable. They also need to be strong enough to endure lots of usage-based wear and tear. Vanities are typically made of MDF, birch, rubberwood, or natural oak. Generally, MDF is approximately 30 % the quality of oak, birch is 50% the quality of oak, and rubberwood is typically 90% the quality of oak, where "quality" is defined as the strength, integrity, and durability of the material. Solid oak is without question the strongest, most durable, and most resilient of all vanity materials. Only the highest-quality and best made vanities are manufactured from natural oak. Premier Collection
Vanities that are marked as Premier Collection are the best vanities in the industry where no expense has been spared. These are the best vanities money can buy made from small quantities of handpicked solid hard woods that are hand finished to perfection. To be considered part of the Premium Collection the vanity must get A+++ grades in: Wood used, Interior Construction, Counter Top, and Finish.
Wood Used:
Premier Collections uses Kiln dried wood in small batches to insure proper drying to prevent cracking and warping. All wood is cared for in great detail to prevent cracking and warping so that your vanity looks as good as they day it arrived for many years.
Vanity Tops:
Premier Collections vanities that have stone tops use a thicker stone, up to 3cm (1cm more than industry average), providing a more luxurious look. All of the vanities with stone tops are sealed to prevent watermarks and minor stains.
Construction:
Premium Collection vanities use hard wood box framed construction that provides strength and durability for decades. All vanities have working drawers with able storage made with slide ball bearing drawers and or soft close mounts. Center drawers are boxed and fitted around plumbing for additional storage.
Finish:
Premium Collection vanities are all hand stained, hand painted, using up to a 15 layer sealing and finishing process to avoid future fading, cracking, or peeling.

 Painting in Partnership, Inc.
We just repainted a Victorian house, Circa 1885, for a new client in Chicago. When you see a house of this size and this level of detail, a question comes to mind: How often do you want to have to repaint a house like this? The answer is simple: The least often possible! The related question is: What can you do to extend the life of a paint job?
Depending on its size, its level of detail and the condition of its coatings and substrates, a Painted Lady’s paint job can cost between $20,000 and $50,000, sometimes even more. Because of its clapboard and extensive trim and millwork, a Victorian house is especially vulnerable to deterioration. Before having us start the painting project, the owners spent about $8,000 on carpentry repair work to the house. To minimize the future cost of carpentry repairs and prolong the longevity of the paint job, we recommend what we call “Maintenance Painting” to our clients. What does maintenance painting entail?
Maintenance painting consists of doing a close inspection of the coatings of a house, every couple of years. What do we look for: signs of failure in the caulking and coatings. When the coating or caulking starts to crack, it is an entry point to moisture, which gets trapped, rots the wood and causes paint failure. Once caulk starts to fail, the deterioration of the substrate and coatings accelerates rapidly. This is why early detection is critical to maintain the integrity of the paint job. We then do caulk and coating maintenance on those spots we detected. When we notice the beginning signs of wood rot, we also do epoxy restoration in those areas.
A homeowner needs the assistance of a dedicated painting and decorating contractor in order execute this periodic maintenance. The challenge is two-fold. One, owners are typically unaware of the importance of coating maintenance. Two, painting contractors do not seem to recognize the opportunity of offering this service to their clients. So, these expensive paint jobs are allowed to deteriorate, which adds to the future cost of the repaints.
The kind of coating maintenance we are talking about can cost between $500 and $1,500 every two years. The money saved in avoiding expensive carpentry repairs alone more than justifies coating maintenance. Our clients who own historic Victorian home or other “Period” homes in the Chicago area really appreciate this additional service we offer them.
 TVL Creative Ltd.
Our clients had just recently closed on their new house in Stapleton and were excited to transform it into their perfect forever home. They wanted to remodel the entire first floor to create a more open floor plan and develop a smoother flow through the house that better fit the needs of their family. The original layout consisted of several small rooms that just weren’t very functional, so we decided to remove the walls that were breaking up the space and restructure the first floor to create a wonderfully open feel.
After removing the existing walls, we rearranged their spaces to give them an office at the front of the house, a large living room, and a large dining room that connects seamlessly with the kitchen. We also wanted to center the foyer in the home and allow more light to travel through the first floor, so we replaced their existing doors with beautiful custom sliding doors to the back yard and a gorgeous walnut door with side lights to greet guests at the front of their home.
Living Room
Our clients wanted a living room that could accommodate an inviting sectional, a baby grand piano, and plenty of space for family game nights. So, we transformed what had been a small office and sitting room into a large open living room with custom wood columns. We wanted to avoid making the home feel too vast and monumental, so we designed custom beams and columns to define spaces and to make the house feel like a home. Aesthetically we wanted their home to be soft and inviting, so we utilized a neutral color palette with occasional accents of muted blues and greens.
Dining Room
Our clients were also looking for a large dining room that was open to the rest of the home and perfect for big family gatherings. So, we removed what had been a small family room and eat-in dining area to create a spacious dining room with a fireplace and bar. We added custom cabinetry to the bar area with open shelving for displaying and designed a custom surround for their fireplace that ties in with the wood work we designed for their living room. We brought in the tones and materiality from the kitchen to unite the spaces and added a mixed metal light fixture to bring the space together
Kitchen
We wanted the kitchen to be a real show stopper and carry through the calm muted tones we were utilizing throughout their home. We reoriented the kitchen to allow for a big beautiful custom island and to give us the opportunity for a focal wall with cooktop and range hood. Their custom island was perfectly complimented with a dramatic quartz counter top and oversized pendants making it the real center of their home. Since they enter the kitchen first when coming from their detached garage, we included a small mud-room area right by the back door to catch everyone’s coats and shoes as they come in. We also created a new walk-in pantry with plenty of open storage and a fun chalkboard door for writing notes, recipes, and grocery lists.
Office
We transformed the original dining room into a handsome office at the front of the house. We designed custom walnut built-ins to house all of their books, and added glass french doors to give them a bit of privacy without making the space too closed off. We painted the room a deep muted blue to create a glimpse of rich color through the french doors
Powder Room
The powder room is a wonderful play on textures. We used a neutral palette with contrasting tones to create dramatic moments in this little space with accents of brushed gold.
Master Bathroom
The existing master bathroom had an awkward layout and outdated finishes, so we redesigned the space to create a clean layout with a dream worthy shower. We continued to use neutral tones that tie in with the rest of the home, but had fun playing with tile textures and patterns to create an eye-catching vanity. The wood-look tile planks along the floor provide a soft backdrop for their new free-standing bathtub and contrast beautifully with the deep ash finish on the cabinetry.
48