
Search results for "Avoiding costly" in Home Design Ideas
 Aslan Design & Build
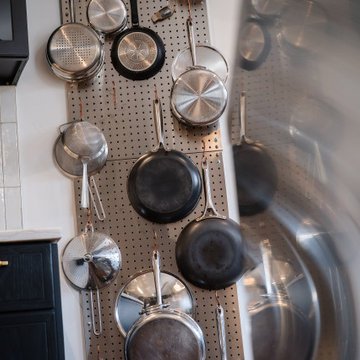
The homeowners wanted to transform an outdated kitchen into a modern, high-performance space designed for a serious home cook. Their goal was to integrate premium appliances—specifically a Wolf range and a high-capacity hood system—while avoiding the cost and disruption of a full kitchen replacement.
This project focused on thoughtful design, strategic reuse of existing elements, and custom solutions that delivered a refined contemporary aesthetic without compromising functionality or efficiency.
 Aslan Design & Build
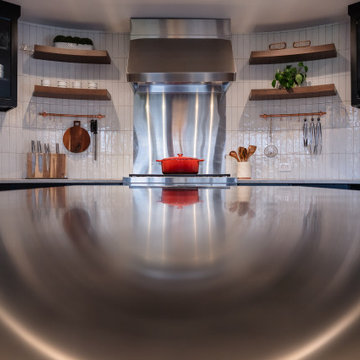
The homeowners wanted to transform an outdated kitchen into a modern, high-performance space designed for a serious home cook. Their goal was to integrate premium appliances—specifically a Wolf range and a high-capacity hood system—while avoiding the cost and disruption of a full kitchen replacement.
This project focused on thoughtful design, strategic reuse of existing elements, and custom solutions that delivered a refined contemporary aesthetic without compromising functionality or efficiency.

 Five Star Tree Care
It’s important to make sure that all trees on your property are healthy and in good condition. This means hiring professional tree trimming services to maintain your trees yearly in order to keep them looking beautiful and healthy. In late winter or early spring is the best time to trim your trees. Doing so will help to improve the new growth that happens later in the spring. But fruit bearing trees and damaged trees can benefit from careful pruning in the summer. It takes an expert to skillfully trim trees during the summer without damaging them or causing harm and our team at Five Star Tree Services is just a call away to help you with your tree trimming needs!
Why Trim Your Trees?
By trimming your trees annually, this will not only open up your landscaping, which allows more sunlight to get to your property, but there are many other benefits.
These can include:
-Keep Trees Healthy and Promote Growth
When you trim your trees in the spring, before they start producing buds, this helps to stimulate more new growth, which helps to keep trees in excellent condition. This can be especially important for saplings as it encourages them to fill out nicely and in a controlled and structurally sound way. If you are not maintaining your trees properly, they can become too dense, which causes a bunch of problems. One being that it restricts the amount of sunlight getting to all the leaves and it reduces the amount of nutrient circulation needed to support the tree.
Professional tree pruning properly aids in tree growth and its overall aesthetic. Cutting off unneeded or unwanted branches allows other parts of the tree to grow easier. Ridding the tree of these extra branches also stimulates more leaf and fruit production.
-Increased Safety
Your landscape is affected when you neglect to take care of your trees, along with everything else on your property. If you have any dead trees remaining on your property, not only are you putting yourself at risk of injury, but you are putting your family, neighbours, pedestrians, and guests at risk as well. Dead or damaged branches can also be a hazard as they could fall at any time and impact with anyone standing too close to it, or it can fall on your house, which is another issue altogether, if it causes damage. Luckily, you are able to avoid all of this by simply having regular trimmings that will keep your trees healthy. You also need to make sure that all branches close to power lines are cut. This especially, should only be done by a trained professional in order to avoid potential electrocution.
-Increase Production of Fruit
If you are lucky enough to have a fruit bearing tree, it is especially important to have it professionally trimmed before and after it fruits. Doing so helps to improve its overall health and ability to bear fruit by getting rid of unhealthy branches. New fruit also develops and spurs for bearing fruit for the following year.
-Manage Spreading Diseases
Tree branches that are damaged tend to be prone to diseases which are able to spread to other plants and trees in your yard. Branches that are dead also have the potential to easily fall with any wind and especially during a storm. Severely damaged branches can even fall without reason. When you get your trees trimmed and pruned regularly, this prevents these things from happening. It also prevents spreading disease to other trees. Any disease branches should especially be trimmed if they are close to where kids play, people walk, or by doors.
-Increase the Value of Your Property and Overall Appearance
Continuous maintenance and trilling will improve the aesthetic of your property. It controls clutter and opens up the space of the landscaping. Meaning that the curbside appeal to your property increases. This is especially important if you are planning to sell your house, which will actually raise the value of your property. The first step in enhancing the appearance of your property is properly taking care of your trees. The first thing people see when they pull up to or go past your house is the trees. By simply pruning your trees you can make a good impression on potential buyers and your neighbours as well.
-Safeguarding Your Property
Owning a house is the biggest investment you will probably ever make. Making the effort to maintain and increase its value by keeping it in good condition should be your first priority. By trimming your trees regularly, you will be protecting your investment. Not to mention this also allows you to enjoy a nicely manicured property.
Why Professionals Are Essential
Professionals help to improve the health and overall condition of your trees. Trying to trim or prune your trees when you don’t know how can be detrimental. This is why hiring a professional, who has the right knowledge and tools, is better than trying to do it yourself.
-Cost-Effective
Think of it as a short-term expense for a long-term return on your investment. Allowing professional arborists to do your tree maintenance can potentially help to negate the costs of injuries attained from DIY home improvements related to trees, replacements and repairs.
-Skilled and Experienced
Real tools required for trimming a tree need to be handled properly and by the appropriate people. If a regular person were to try and use these tools, the end result could be injury and property damage. This is especially true for any trimming required around power lines. All professionals will have the right experience and skills required to wield these tools in a safe way. This minimizes the likelihood of hazards, injuries, and life-threatening incidents.
-Proper Tools
Heavy-duty chainsaws, ladders, and protective gear are all needed to safely and properly trim a tree. When you hire a professional, they have all the required tools and more. Meaning that you won’t have to go out and buy these tools yourself. As a professional, they also make sure that their tools are reliable and well-maintained in order to efficiently get the job done well.
-Insured
Professionals are also always insured with liability insurance when doing jobs to cover any damages or injuries attained while working. They are able to also provide a guarantee for the safety of your property and belongings while they are doing a job for you.
How Five Star Tree Services Can Help
Although trimming your tree might seem like an easy job, it’s always best to trust the professionals. Proper execution of the task requires the right skills, experience, and knowledge. Our team at Five Star Tree Services have all of this and more! Give us a call at (416) 990-3355 to enlist us for all your Toronto Tree Trimming needs!
Find the right local pro for your project
 Aslan Design & Build
The homeowners wanted to transform an outdated kitchen into a modern, high-performance space designed for a serious home cook. Their goal was to integrate premium appliances—specifically a Wolf range and a high-capacity hood system—while avoiding the cost and disruption of a full kitchen replacement.
This project focused on thoughtful design, strategic reuse of existing elements, and custom solutions that delivered a refined contemporary aesthetic without compromising functionality or efficiency.
 One Stop Quality Construction LLC
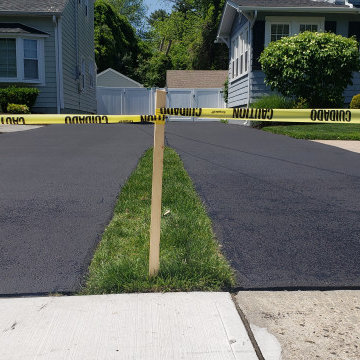
Want to avoid a costly re-paving project? You may want to look into getting your asphalt sealed to help combat erosion.
Seal coating a driveway will not only give your asphalt the rich, black color it had when it was new, but it can also make your existing asphalt last up to 4 years longer.
Give us a call at 908-249-3519 for a free quote or to find out more about our expertise in construction services we offer.

 William Hoffman Architect
4 Steps to Achieving a Rewarding Cost Effective Home Renovation
1 Home Renovation an Introduction
A home renovation due to changes in family needs and space requirements can be a challenging, but also a rewarding experience. As a homeowner, gathering and coordinating resources and possibly help from professional consultants are required. Once the construction phase has started, patience, endurance and commitment to follow through are necessary. Despite the challenges, the rewards of a well-planned and successfully completed project are meaningful, adding aesthetic and economic value, also providing the opportunity to personalize a home, encompassing the function, comfort and aesthetics to accommodate individual taste and lifestyle.
A renovation of an existing home is a viable alternative to moving or building a new home, assuming that a home is structurally sound, the expenditure to enlarge or improve can be a cost effective alternative. A home possessing charm, style, historical significance, established landscaping or an exceptional location could be a significant motivation to consider purchasing another home with the intent to renovate.
The complexity of a project could be relatively simple, changing the use of a room, consolidating two rooms into one, or opening up a room to the outdoors. It could also be a more involved task requiring planning, design and construction documents to build a second floor addition, the addition of a new wing or completely gutting the interior. Some projects could be completed in a weekend’s work or more complex projects, using a “Master Plan”, a plan which provides overall guidance; a renovation can be accomplished all at once or divided into manageable projects over a period of time. With the home evolving gradually allowing the renovation to be planned, timed and tailored to meet individual needs and circumstances.
The due diligence phase should precede the decision to renovate whether it’s an existing home or a home that is purchased with the intent to renovate. The due diligence phase will reveal the factors affecting the nature and scope of the project or if a renovation makes sense.
Every renovation project is unique relative to personal requirements, architectural style & construction type. This guide will be helpful in developing an understanding of the preliminary groundwork required to realize a successful project. If properly planned, a home renovation project can be a positive and rewarding experience resulting in a comfortable, practical and an attractive living environment.
The first step of the planning process is documenting the goals and long-range plans referred to as the “Project Program”. This will dictate the nature, scope and feasibility of the project. Providing a guide to achieving defined goals, the timing or phasing of the project and budget required to achieve the desired end result.
2 Documenting Existing Conditions
Once the “Project Program”, has been established, the next step is to determine what there is to work with. This requires documenting the home’s floor plan and site elements which includes drawing an “as built” floor & site plan consisting of the existing exterior walls, interior rooms, doors, windows, etc. and surrounding site elements, landscape and other significant exterior features. Additionally understanding and noting on the “as built” plan, the structural, mechanical and electrical systems as necessary. Gathering the “existing condition” information defines what there is to work with, creating the framework from which to facilitate and organize the decision making process and develop effective “project program” solutions.
3 Evaluating Existing Conditions
The goals and long-range plans have been established, and the existing floor plan and site elements have been documented. Before developing design solutions, the next step is to evaluate existing conditions. The evaluation includes: a detailed analysis of the structural, mechanical and electrical systems, determining the condition of the house, noting functional and aesthetic deficiencies. At the same time recognizing the home’s strengths, assets and evaluating its relationship to its site. The remaining parameters will be defined by the local jurisdiction’s zoning regulations, these regulations will define the “envelope”, within which the proposed project will be required to fit:
•required front, side & rear yard setbacks
•maximum allowable lot coverage & height
The previous three steps have provided the necessary foundation to start the design phase. The goals and long range plans have been established, existing conditions have been documented and the evaluation of what there is to work with are now in place. This will provide the framework from which to facilitate and organize design solutions. The consolidation of this information is manifested in the development of the “Master Plan” which will become the road map by which sound decision-making can be made as a home renovation evolves. Keeping the project, on a linear path, avoiding redundancies and back tracking, on time, within budget, concluding with a well crafted finished product. After all the “up front” research and documentation has been completed, the design phase of the project can now precede, with the creation of diagrammatic design drawings. Organizing interior spaces, taking into account the external elements, prevailing breezes, solar orientation, view, existing outdoor features, etc. Through the development of schematic sketches themes will emerge followed by design development drawings. Wise planning and renovation decisions can save money and time at the same time provide a well crafted finished project. The “Master Plan” provides a strategic path in the planning and decision making process leading to a successful and rewarding home renovation, which will add value and considerable enjoyment, for many years, living in a newly renovated home.
By virtue of having gone through these steps, frustrations sometimes encountered during a home renovation will be minimized, allowing the renovation to be a gratifying and rewarding experience. Being aware of the process allows one to become an “Educated Client,” which is worth quite a bit more than one might realize. The uneducated client may not realize the benefit of going through the planning, evaluation and documentation groundwork. He will only realize its benefits after having completed a prior renovation project. This rational approach keeps the design process on a direct path to achieving prescribed goals.
4 Exploring Design Solutions & Developing a Master Plan
The previous three steps have provided the necessary foundation to start the design phase. The goals and long range plans have been established, existing conditions have been documented and the evaluation of what there is to work with are now in place. This will provide the framework from which to facilitate and organize design solutions. The consolidation of this information is manifested in the development of the “Master Plan” which will become the road map by which sound decision-making can be made as a home renovation evolves. Keeping the project, on a linear path, avoiding redundancies and back tracking, on time, within budget, concluding with a well crafted finished product.
By virtue of having gone through these steps, frustrations sometimes encountered during a home renovation will be minimized, allowing the renovation to be a gratifying and rewarding experience. Being aware of the process allows one to become an “Educated Client,” which is worth quite a bit more than one might realize. The uneducated client may not realize the benefit of going through the planning, evaluation and documentation groundwork. He will only realize its benefits after having completed a prior renovation project. This rational approach keeps the design process on a direct path to achieving prescribed goals.
After all the “up front” research and documentation has been completed, the design phase of the project can now precede, with the creation of diagrammatic design drawings. Organizing interior spaces, taking into account the external elements, prevailing breezes, solar orientation, view, existing outdoor features, etc. Through the development of schematic sketches themes will emerge followed by design development drawings. Wise planning and renovation decisions can save money and time at the same time provide a well crafted finished project. The “Master Plan” provides a strategic path in the planning and decision making process leading to a successful and rewarding home renovation, which will add value and considerable enjoyment, for many years, living in a newly renovated home.
 Aslan Design & Build
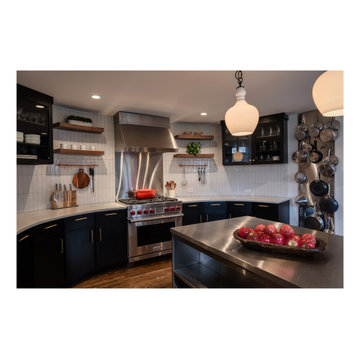
The homeowners wanted to transform an outdated kitchen into a modern, high-performance space designed for a serious home cook. Their goal was to integrate premium appliances—specifically a Wolf range and a high-capacity hood system—while avoiding the cost and disruption of a full kitchen replacement.
This project focused on thoughtful design, strategic reuse of existing elements, and custom solutions that delivered a refined contemporary aesthetic without compromising functionality or efficiency.

Sponsored
Delaware, OH

Buckeye Basements, Inc.
Central Ohio's Basement Finishing ExpertsBest Of Houzz '13-'21
 One Stop Quality Construction LLC
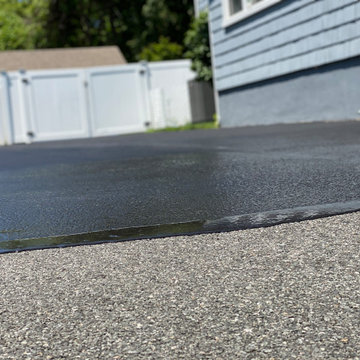
Want to avoid a costly re-paving project? You may want to look into getting your asphalt sealed to help combat erosion.
Seal coating a driveway will not only give your asphalt the rich, black color it had when it was new, but it can also make your existing asphalt last up to 4 years longer.
Give us a call at 908-249-3519 for a free quote or to find out more about our expertise in construction services we offer.
 Aslan Design & Build
The homeowners wanted to transform an outdated kitchen into a modern, high-performance space designed for a serious home cook. Their goal was to integrate premium appliances—specifically a Wolf range and a high-capacity hood system—while avoiding the cost and disruption of a full kitchen replacement.
This project focused on thoughtful design, strategic reuse of existing elements, and custom solutions that delivered a refined contemporary aesthetic without compromising functionality or efficiency.
 Aslan Design & Build
The homeowners wanted to transform an outdated kitchen into a modern, high-performance space designed for a serious home cook. Their goal was to integrate premium appliances—specifically a Wolf range and a high-capacity hood system—while avoiding the cost and disruption of a full kitchen replacement.
This project focused on thoughtful design, strategic reuse of existing elements, and custom solutions that delivered a refined contemporary aesthetic without compromising functionality or efficiency.
 M Atelier
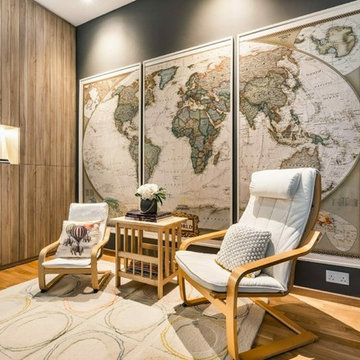
If there is one big mistake that homeowners make when carrying out the decoration tasks of their interior design project, that would be over-accessorising. Indeed, experts in interior design in Singapore agree that there are styles where “more is more,” and there are also those where “less is more.”
While as a homeowner you may choose either of these two style directions, you should first think about the different aspects of interior design and make sure that your style choice fits with these elements. Not doing so may not only result to a poorly executed renovation, but a home that you will find uncomfortable to live in.
So how do you avoid the tendency of over-accessorising? You may want to follow these pieces of advice coming from professionals in interior design in Singapore:
Mistake #1: Using the same fabric on almost all surfaces.
It is common practice among most homeowners to use almost the same fabric on all table surfaces, and sometimes even on sofa covers and drapes. Indeed, this can be cost effective, but it does not contribute to the development of the home’s overall design.
This is because there are fabrics are created to meet specific purposes. For example, lace is often used as table runners, as they give more definition and style to these specific furniture pieces. However, they do not do your windows any favours when used as curtains.
Opaque and heavy fabrics are often intended for curtains and drapes for rooms that require more privacy; in contrast, sheer and fabric materials are more suited for living room windows as they allow natural light and ventilation to move around the house.
Mistake #2: Placing more accents than you actually need.
Another mistake which homeowners are prone to make when decorating their home is placing more accents than needed. There are homes you can see side tables that are overpopulated with picture frames, trinkets, and fancy souvenirs that do not have any connection to each other. Sometimes, you can find numerous throw pillows occupying almost the entire sofa, to the point that all the seats are already occupied.
These are classic examples of “fear of empty spaces,” which is prevalent in most Asian societies, and even in some Western countries. But while it is common practice to occupy empty spaces, you may also want to think about what to do with the space first.
Instead of piling up all your memorabilia in the side tables of your bedroom or living room, why not use a tiered stand so that they can be presented in an organised manner? You may also want to choose a designated area for your trinkets, such as a wall or an unoccupied corner in your room.
Mistake #3: Overdoing the lighting fixtures.
Some homeowners want to imitate the homes of the celebrities they see on TV, and apart from following the same colour schemes and choice of furniture, they also choose to add more lights in their rooms than necessary.
Well, you should understand that the purpose of lighting fixtures is to illuminate the rooms of the house, but this doesn’t mean that you have to brighten up your home all the time. You may want to use lamps that spread the light across the room, rather than several smaller bulbs. The latter only lights up specific parts of the room, and when all these bulbs are lit simultaneously, they only spike up your electric bill.
It would be better to choose lighting fixtures according to your need and the function of the room. Doing so not only illuminates your home properly, but also creates an ambiance that gives you the comfort you are looking for in a dwelling space.


 Outwater Industries Inc
Ideally suited for use on balconies, porches and decking, Outwater has augmented its offering of contractor's grade balusters, baluster rails, newel and porch posts with the introduction of new motifs to accommodate a range of decorative applications.
Comprising lightweight, durable, high-density polyurethane and non-corrosive structural materials, Outwater's Balustrade System is easy to install using traditional woodworking tools and is internally fortified with large diameter, high strength steel or PVC pipes (varies by model) for enhanced structural integrity as well as to meet stringent building codes.
Furthermore, unlike wood balusters, which require fastidious maintenance in order to avoid possible rotting or splitting, consequently diminishing their strength, Outwater's Balustrade System comes factory primed and is impervious to adverse weather conditions, ensuring its uncompromising dimensional stability and steadfast, enduring safety.
Also, in contrast to cement balustrading, which is unwieldy and necessitates laborious installation by masons, not to mention, being highly susceptible to breaking, crumbling and cracking, Outwater's Balustrade System weighs just a portion of cement balustrading, thus significantly reducing its comparative shipping cost.
Offered in approximate heights from 28-in. to 40-in. with 5-in. to 12-in. rail widths, installations can be further customized with the addition of corner and center newel posts, a variety of post tops, accent moldings and ball ornaments.
Product Features:
• Offered with numerous complementary Balusters, Baluster Rails, Newel and Porch Posts from which to choose
• Easy to install without the need of a mason
• Internally fortified with large diameter, high strength steel or PVC pipes for enhanced structural integrity to meet stringent building codes
• Comes factory primed and is impervious to adverse weather conditions
• Weighs just a portion of cement balustrading, thus significantly reducing its comparative shipping cost
• Offered in approximate heights from 28-in. to 40-in. with 5-in. to 12-in. rail widths
• Complementary accessories allow for further customization as desired
Contact:
Architectural Products by Outwater
Sales & Product Information (USA & Canada):
1-800-631-8375 / 1-201-498-8750
Fax (USA & Canada): 1-800-888-3315 / 1-201-498-8751
Sales & Product Information (Outside of the USA & Canada):
1-201-498-8750
Fax (Outside of the USA & Canada): 1-201-498-8751
Email: info@outwaterplastics.com
Web: www.outwater.com
Visit us!
East Coast:
24 River Road
Bogota, NJ 07603
1-201-498-8750
West Coast:
4720 West Van Buren
Phoenix, AZ 85043
1-602-447-0936
About Architectural Products by Outwater:
It really is easy to shop with us!
Relied upon by more than 1,000,000 builders, renovators, architects designers, woodworkers, cabinet and furniture manufacturers, OEM's and retail consumers since 1972, Architectural Products by Outwater is an international manufacturer and distributor of more than 65,000 innovative and traditional Decorative Building Products that you possibly never knew existed or for which you simply could not find a reliable source. This is where Outwater truly shines!
“Now you can design, buy, build and dream like the Pros…”
Outwater’s products are, to say the least, very competitively priced and include interior and exterior architectural mouldings and millwork; columns and capitals; LED lighting and lighting accessories; balustrading; faux stone panels; faux wood beams; genuine stone tiles; decorative wood carvings; wrought iron components; stamped steel and polymer ceiling panels and backsplashes; wainscoting; wall coverings; fireplace surrounds and mantels; plastic "glass" block; period and contemporary hardware; home organization systems; kitchen and bath accessories; kitchen and bath cabinetry; bath vanities; furniture & cabinet components; knobs & pulls; casters; laminates; brass tubing & fittings; surfacing materials… and so much more!
In addition, with warehouse and distribution facilities in New Jersey and Arizona totaling over 300,000 square feet, Outwater facilitates purchases with reduced lead times and shipping costs, enabling us to fulfill and ship over 98% of our orders from stock within one to two business days!
At a time when many companies appear to have rapidly transitioned away from personalized customer service, having replaced their knowledgeable and immensely valuable human sales representatives with inanimate online marketing channels, which can be helpful to you if you were to know exactly what you might need and were not to encounter difficulties in placing your order, here at Outwater, we still believe that human interaction with a live, well versed, non-commissioned sales representative will undoubtedly better serve your needs in the long run. Even though you can always shop with us at www.outwater.com, you can also always deal directly with our extremely well versed and friendly sales and customer service representatives for their unparalleled support and assistance, most of whom have worked at Outwater for more than 15 years.
Whether you have been one of our loyal customers over the years or this is your first time in doing business with us, we would like to thank you for your expressed interest in our company and the products that we carry.
Please feel free to contact us with any questions at 1-800-631-8375 or visit us online at www.outwater.com
We look forward to serving you in the near future.
 safe ZOnea
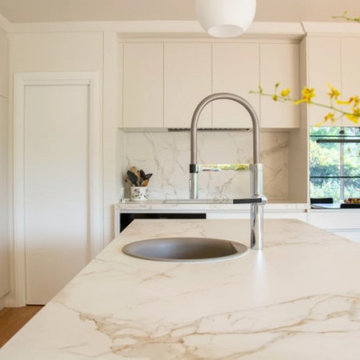
Ask a kitchen designer in Chicago which countertop question comes up most and you will hear the same answer: white or off-white quartz, and which shade. Homeowners walk into showrooms with a photo saved on their phone, usually a bright, veined slab from a magazine spread, and leave an hour later realizing there are a dozen versions of that same look. The confusion is not about taste. It is about the fact that "white quartz" covers a huge range of patterns, undertones, and price points, and nobody explains the differences before the sale.
Older bungalows and newer builds alike are getting stripped of their dated laminate and butcher block in favor of quartz, and the reasons are practical rather than trendy. Quartz does not need sealing, resists the kind of staining that granite can suffer over decades, and holds up to the freeze-thaw humidity swings that Chicago basements and kitchens go through every year. Once a homeowner commits to quartz, though, the real decision starts: which white, and does the pattern justify the difference in cost.
This piece walks through three specific slabs that keep showing up in Chicago renovation projects, why designers reach for them in different rooms, and what actually separates a flat white surface from one with real depth. None of this requires a design background to follow. It is mostly about paying attention to how a slab behaves under kitchen lighting, how busy the vending gets, and how it photographs versus how it looks in person.
Why White Quartz Took Over Chicago Kitchens
Ten years ago, granite dominated Chicago kitchen remodels almost by default. It was durable, it looked expensive, and every fabricator in the metro area carried a wide range of colors. Quartz has since taken over that position, and the shift happened faster than most contractors expected. Engineered stone gave homeowners a more predictable surface, since natural granite varies slab to slab while quartz is manufactured to a consistent pattern batch after batch.
The other driver is light. Chicago winters are long and gray, and a lot of kitchens, especially in older two-flats and courtyard buildings, do not get much direct sun. A dark granite countertop in a dim kitchen can make the whole room feel smaller. White and light-toned quartz reflects what little natural light comes through the windows, and it makes a galley kitchen or a north-facing space feel noticeably brighter without touching the cabinetry or the layout.
There is also a resale argument that local real estate agents bring up constantly. White quartz photographs well for listings, reads as updated and low-maintenance to buyers touring in person, and does not compete visually with whatever cabinet color the next owner might prefer. It is a safer bet than a bold veined marble look or a colored quartz that might feel dated in five years.
Arctic White and the Cost Question
Among the flatter, more uniform whites, arctic white quartz price comes up constantly in budget conversations because the slab sits at a more approachable point than the heavily veined Italian-marble-inspired patterns. It reads as clean and bright without the busy movement that some homeowners find overwhelming in a small kitchen. Fabricators in the Chicago area tend to keep it in stock precisely because demand stays steady across both new construction and remodel projects.
Part of what keeps this slab affordable relative to its heavily patterned cousins comes down to manufacturing complexity. A quartz surface with minimal veining and a consistent white base is simpler to produce at scale than one that mimics the irregular, high-contrast movement of natural Calacatta marble. That production difference shows up directly in what a homeowner pays per square foot, and it is worth asking a fabricator to walk through that pricing before assuming every white quartz costs the same.
Homeowners planning a full kitchen, including an island, backsplash, and perimeter counters, often use a flatter white like this specifically because it lets other elements carry the visual interest. A patterned tile backsplash or a bold cabinet color reads more clearly against a calm countertop than against one already fighting for attention with heavy veining. Designers frequently pair simpler whites with statement lighting fixtures for exactly this reason.
What Makes Calacatta Patterns Different
Calacatta refers to a family of marble originally quarried in Italy, known for a bright white background broken up by bold, often gold-toned veining that moves in thick, dramatic streaks rather than thin gray lines. Natural Calacatta marble is soft, porous, and expensive to maintain, which is exactly why quartz manufacturers spent years developing engineered versions that replicate the look without the upkeep headaches.
The challenge with any Calacatta-style quartz is getting the veining to look organic instead of printed. Early generations of engineered stone struggled with repetitive patterns that gave away the fact the slab was manufactured rather than cut from actual marble. Modern digital printing and layering techniques have closed that gap considerably, and the better Calacatta-inspired quartz lines now vary the veining across each slab batch so two counters in the same kitchen do not look identical.
Chicago designers gravitate toward Calacatta patterns for kitchens that function as the visual centerpiece of an open floor plan, which describes a large share of the gut renovations happening in neighborhoods like Lincoln Park, Roscoe Village, and the North Shore suburbs. When the kitchen island is visible from the living room and dining area, a dramatic veined surface becomes part of the home's overall design language rather than a purely functional work surface.
Calacatta Arno Under Kitchen Lighting
One of the more popular options in this category, calacatta arno quartz, balances a warm white base with soft gray and gold veining that avoids looking too stark under the cooler LED lighting common in newer Chicago builds. Homeowners touring showrooms sometimes make the mistake of judging a slab entirely under warm incandescent lighting, then get surprised when the same surface looks slightly different once installed under their kitchen's actual fixtures.
What separates this particular pattern from flatter competitors is how the veining clusters rather than spreading evenly across the slab. That clustering mimics the way real quarried marble forms, with denser mineral deposits in some sections and cleaner stretches in others. Fabricators cutting a large island slab from a single piece will often orient the pattern intentionally so the busiest veining lands somewhere visually interesting rather than getting cut off at an edge.
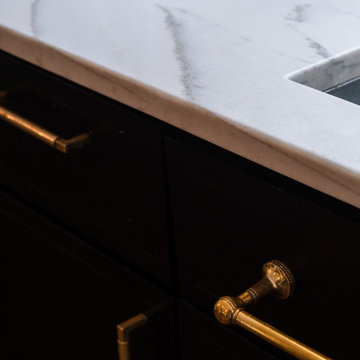
Because the background reads warmer than a stark white, this pattern tends to pair well with brass or matte gold hardware, a combination that has been showing up repeatedly in Chicago kitchen remodels over the past few renovation seasons. Cabinet painters report a similar trend, with more clients requesting warm white or greige cabinet colors specifically because they complement this kind of veined quartz better than a cooler, blue-toned white would.
Silestone's Version of the Calacatta Look
Manufacturers compete directly in this Calacatta-inspired category, and silestone eternal calacatta gold represents one brand's specific take on the pattern, distinguished by richer gold veining set against a brighter white base than some competing slabs in the same family. Silestone has built a reputation around anti-bacterial surface treatments in addition to the standard quartz durability, a detail some homeowners specifically ask about for kitchens used heavily by families with young children.
The veining in this particular slab tends to run in longer, more continuous lines compared to the clustered pattern found in some other Calacatta-style options, which gives large island surfaces a sense of visual flow from one end to the other. Fabricators working with bigger islands, the kind increasingly common in open-concept Chicago remodels, often favor patterns like this because there is less need to worry about seams interrupting a busy, disconnected pattern.
Price positioning for this slab tends to sit toward the upper end of the engineered quartz category, reflecting both the brand's manufacturing process and the complexity of replicating that continuous gold veining consistently across production batches. Homeowners weighing this option against other Calacatta-style quartz should ask their fabricator directly about batch availability, since premium patterns sometimes have longer lead times than standard stock colors.
Living With Quartz Day to Day
Beyond how a slab looks in a showroom or a listing photo, the daily experience of owning quartz countertops matters more once the renovation dust settles. Quartz resists scratching far better than laminate and holds up to the acidic spills, hot pans, and general abuse of an active kitchen without the sealing maintenance that natural stone requires every year or two. That low-maintenance reputation is a large part of why quartz overtook granite in the first place.
Heat resistance is a detail that gets less attention than it should. While quartz handles moderate heat well, manufacturers generally recommend using a trivet or pad for very hot pots straight off the stove, since sudden temperature shock can occasionally cause stress marks in the resin binder that holds the engineered stone together. This is a minor precaution rather than a major limitation, but it is worth mentioning to anyone assuming quartz is entirely indestructible.
Cleaning routines stay simple across almost every pattern in this category. A damp cloth and mild soap handle daily messes, and the nonporous surface means wine, coffee, and tomato-based sauces do not soak in the way they can with unsealed granite or marble. Homeowners moving from an older stone counter often mention how much less they worry about everyday spills once quartz is installed, which is a quality-of-life change that rarely makes it into the initial design conversation.
Choosing Between the Three
There is no single correct answer among these three slabs, and that is exactly why they keep coming up together in the same design conversations across Chicago renovation projects. A flatter white with minimal veining suits kitchens where other elements need to carry the visual interest, while a bolder Calacatta-inspired pattern makes sense when the countertop itself is meant to be the centerpiece of an open floor plan.
Budget matters too, and it is worth having a direct conversation with a fabricator about where each option lands before falling in love with a specific slab in a showroom. Lighting, cabinet color, and how the kitchen connects to the rest of the home all play into which pattern will actually look right once installation is finished rather than just in a photo.
Whatever direction a homeowner leans, seeing a full slab in person under actual kitchen lighting remains the single most useful step before signing off. Photos only go so far once the countertop is sitting in the room it will live in for years.
 Nakamoto Forestry
Project Overview:
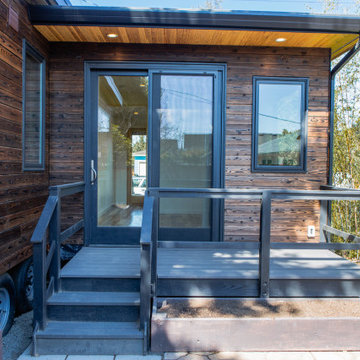
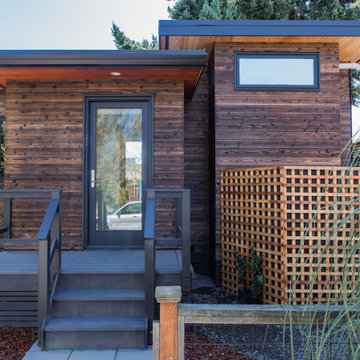
The owner of this project is a financial analyst turned realtor turned landlord, and the goal was to increase rental income on one of his properties as effectively as possible. The design was developed to minimize construction costs, minimize City of Portland building compliance costs and restrictions, and to avoid a county tax assessment increase based on site improvements.
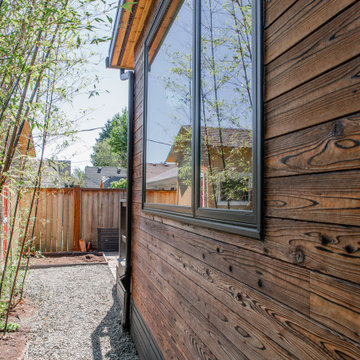
The owner started with a large backyard at one of his properties, had a custom tiny home built as “personal property”, then added two ancillary sheds each under a 200SF compliance threshold to increase the habitable floor plan. Compliant navigation of laws and code ended up with an out-of-the-box design that only needed mechanical permitting and inspections by the city, but no building permits that would trigger a county value re-assessment. The owner’s final construction costs were $50k less than a standard ADU, rental income almost doubled for the property, and there was no resultant tax increase.
Product: Gendai 1×6 select grade shiplap
Prefinish: Unoiled
Application: Residential – Exterior
SF: 900SF
Designer:
Builder:
Date: March 2019
Location: Portland, OR
 Nakamoto Forestry
Project Overview:
The owner of this project is a financial analyst turned realtor turned landlord, and the goal was to increase rental income on one of his properties as effectively as possible. The design was developed to minimize construction costs, minimize City of Portland building compliance costs and restrictions, and to avoid a county tax assessment increase based on site improvements.
The owner started with a large backyard at one of his properties, had a custom tiny home built as “personal property”, then added two ancillary sheds each under a 200SF compliance threshold to increase the habitable floor plan. Compliant navigation of laws and code ended up with an out-of-the-box design that only needed mechanical permitting and inspections by the city, but no building permits that would trigger a county value re-assessment. The owner’s final construction costs were $50k less than a standard ADU, rental income almost doubled for the property, and there was no resultant tax increase.
Product: Gendai 1×6 select grade shiplap
Prefinish: Unoiled
Application: Residential – Exterior
SF: 900SF
Designer:
Builder:
Date: March 2019
Location: Portland, OR
 Nakamoto Forestry
Project Overview:
The owner of this project is a financial analyst turned realtor turned landlord, and the goal was to increase rental income on one of his properties as effectively as possible. The design was developed to minimize construction costs, minimize City of Portland building compliance costs and restrictions, and to avoid a county tax assessment increase based on site improvements.
The owner started with a large backyard at one of his properties, had a custom tiny home built as “personal property”, then added two ancillary sheds each under a 200SF compliance threshold to increase the habitable floor plan. Compliant navigation of laws and code ended up with an out-of-the-box design that only needed mechanical permitting and inspections by the city, but no building permits that would trigger a county value re-assessment. The owner’s final construction costs were $50k less than a standard ADU, rental income almost doubled for the property, and there was no resultant tax increase.
Product: Gendai 1×6 select grade shiplap
Prefinish: Unoiled
Application: Residential – Exterior
SF: 900SF
Designer:
Builder:
Date: March 2019
Location: Portland, OR
 Nakamoto Forestry
Project Overview:
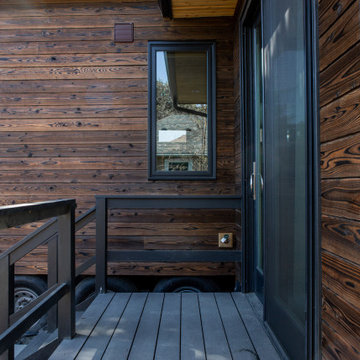
The owner of this project is a financial analyst turned realtor turned landlord, and the goal was to increase rental income on one of his properties as effectively as possible. The design was developed to minimize construction costs, minimize City of Portland building compliance costs and restrictions, and to avoid a county tax assessment increase based on site improvements.
The owner started with a large backyard at one of his properties, had a custom tiny home built as “personal property”, then added two ancillary sheds each under a 200SF compliance threshold to increase the habitable floor plan. Compliant navigation of laws and code ended up with an out-of-the-box design that only needed mechanical permitting and inspections by the city, but no building permits that would trigger a county value re-assessment. The owner’s final construction costs were $50k less than a standard ADU, rental income almost doubled for the property, and there was no resultant tax increase.
Product: Gendai 1×6 select grade shiplap
Prefinish: Unoiled
Application: Residential – Exterior
SF: 900SF
Designer:
Builder:
Date: March 2019
Location: Portland, OR
 Nakamoto Forestry
Project Overview:
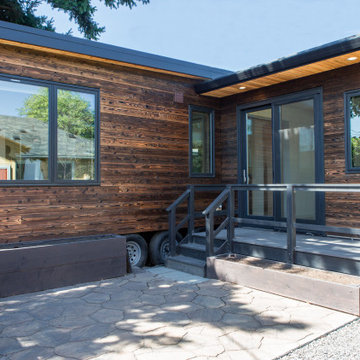
The owner of this project is a financial analyst turned realtor turned landlord, and the goal was to increase rental income on one of his properties as effectively as possible. The design was developed to minimize construction costs, minimize City of Portland building compliance costs and restrictions, and to avoid a county tax assessment increase based on site improvements.
The owner started with a large backyard at one of his properties, had a custom tiny home built as “personal property”, then added two ancillary sheds each under a 200SF compliance threshold to increase the habitable floor plan. Compliant navigation of laws and code ended up with an out-of-the-box design that only needed mechanical permitting and inspections by the city, but no building permits that would trigger a county value re-assessment. The owner’s final construction costs were $50k less than a standard ADU, rental income almost doubled for the property, and there was no resultant tax increase.
Product: Gendai 1×6 select grade shiplap
Prefinish: Unoiled
Application: Residential – Exterior
SF: 900SF
Designer:
Builder:
Date: March 2019
Location: Portland, OR
 safe ZOnea
In 2026, DIY home design and renovation will become easier than ever. Free mobile apps like Houzz, Homestyler, and Planner 5D will put professional tools in everyone’s pocket, letting users visualize layouts, test colors, and estimate costs before buying materials. Experts predict that over 50% of homeowners will use apps to plan upgrades. It will save money and reduce costly mistakes. Even now, about 54% prefer mobile tools.
Why Mobile Apps are Changing Home Renovation
DIY renovation has changed a lot in recent years. Homeowners don’t have to rely on sketches or guesswork anymore. Thanks to AR, AI, and 3D renderings, apps can show exactly how furniture and cabinets will fit. By 2026, many of these tools will be free - and packed with features that rival expensive software. With just a smartphone, anyone can try out layouts, test colors, and even create detailed floor plans.
The Tech Behind Modern Design Apps
Most renovation apps now leverage AI to generate design suggestions. They are based on your space and preferences. Upload a photo of your room. The algorithms will check the sizes, lighting, and features. Then, they’ll suggest furniture layouts or color schemes. Some apps use your phone’s camera and sensor. They make accurate measurements, so you won’t need tape measures or notepads.
Top Free Apps Transforming DIY Projects
Houzz continues to lead the pack with its massive photo library and ability to connect users with local contractors. The platform now gives AI design suggestions. It looks at your style preferences across millions of professional spaces.
For anyone serious about planning their next project, exploring comprehensive resources helps narrow down what works. It’s just like in iGaming, where review platforms like Slotzilla help gamblers to find casinos with user-friendly tools, bonus rounds, and progressive jackpots that will work for them.
Planner 5D shines with realistic 3D renderings and a huge furniture catalog, letting you switch between 2D plans and 3D walkthroughs - even in VR. Room Planner helps you design practical layouts. You can easily arrange furniture and check dimensions. It offers real-time 3D views and features items from real brands.
Apps for Specific Renovation Tasks
Not every project needs full 3D renderings - sometimes you just want to try paint colors or test tile patterns. ColorSnap by Sherwin-Williams uses AR to show colors on your actual walls and even matches shades from photos. Magicplan makes creating floor plans easy by measuring rooms with your phone as you walk around. Both apps help plan renovations and communicate ideas without the guesswork.
Budget Tracking and Project Management
Renovation apps do more than make spaces look good - managing budgets and timelines is just as important. HomeZada even uses AI to predict your budget and track material prices, so DIYers don’t get hit with surprise costs. Trello is a lifesaver - set deadlines, track progress, and share updates with anyone helping on the project.
How Apps Reflect 2026 Design Trends
This year’s popular apps reflect the largest home design trends. Colorful rooms are on the rise. Zillow shows a 149% increase in listings. Plus, apps like Houzz let users test bold shades before making a choice. Cozy reading nooks are also on the rise, showing up in nearly half of listings. Renovation apps now provide templates. They include tips for shelves and lighting. This helps create cozy, thoughtful spaces.
Here’s a quick comparison of what different free apps offer:
App name
Best feature
Learning curve
Platform
Houzz
25M+ inspiration photos
Easy
iOS, Android
Planner 5D
Photorealistic 3D renders
Moderate
iOS, Android, Web
Room Planner
Accurate measurements
Easy
iOS, Android
Magicplan
Auto floor plan creation
Easy
iOS, Android
Natural materials and earthy tones will lead design trends in 2026. Warm neutrals will take over from the grey-and-white minimalism of the last ten years.
The AI Revolution in Home Design
AI is no longer just a gimmick in renovation apps. Chat features can suggest furniture layouts, color palettes, and materials for your budget. It’s like having a designer on call. Renovate AI turns photos of your room into multiple style ideas in seconds, from mid-century to rustic farmhouse. It’s great for brainstorming and getting past the “I don’t know what I want” stage.
Practical Tips for Using Renovation Apps
Getting the most from design apps requires a strategic approach. Here are essential steps every DIYer should follow:
Start by gathering inspiration. Look through photo libraries on Houzz or Pinterest. Then, dive into detailed planning.
Don’t rely solely on screen colors; get actual paint chips and fabric swatches.
Save multiple design versions. Create variations of your plan to compare options side-by-side.
This workflow helps you avoid common mistakes. It leads to better design choices before you buy anything.
When Apps Aren’t Enough
Digital tools can’t do everything. Big structural changes, electrical work, or plumbing always need a pro. Apps are great for planning and talking with contractors, but they can’t replace expertise. And always check textures in real life - that sofa might look perfect on screen, but feel different.
The Future of DIY Renovation
In 2026, renovation apps will become smarter. They’ll have voice control and better AR. Improved AI will make DIY design feel more like professional services. Creating beautiful, functional spaces is easier than ever. For homeowners, it’s important to use apps that match local materials and building codes. The biggest benefit is confidence - seeing your design in 3D makes projects far less intimidating.
15