
Search results for "Caused damage" in Home Design Ideas
 Kitchen Solvers of the Gulf Coast
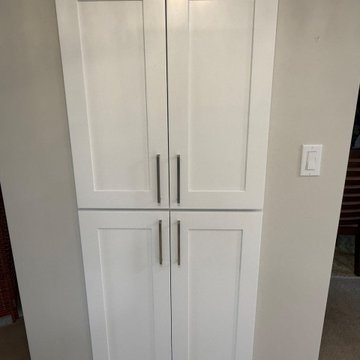
This kitchen remodel began sooner than expected when a broken pipe caused significant water damage to the homeowners' existing cabinets. What started as an unexpected repair quickly became an opportunity to create the kitchen they had been envisioning.
We installed beautiful new Polar white cabinetry paired with elegant Berwyn quartz countertops, giving the space a bright and timeless feel. By removing the wall oven, we were able to add valuable cabinet storage and improve the kitchen's overall functionality. A gray tile backsplash ties the design together beautifully, complementing the new cabinetry and countertops while working seamlessly with the existing flooring.
The result is a fresh, functional kitchen that better suits the homeowners' lifestyle, and they couldn't be happier with the transformation.

 GB General Contractors
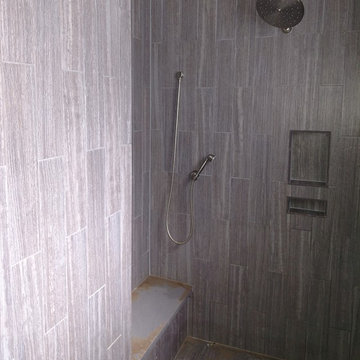
Hurricane Harvey caused extensive flooding (38-40”) damage to home 08/2017. Complete demolition from 4 foot down to stud wall including all flooring and lower cabinets in every room. Restored home matching original material pre-flood was performed.
 GB General Contractors
Hurricane Harvey caused extensive flooding (38-40”) damage to home 08/2017. Complete demolition from 4 foot down to stud wall including all flooring and lower cabinets in every room. Restored home matching original material pre-flood was performed.
Find the right local pro for your project
 Kitchen Solvers of the Gulf Coast
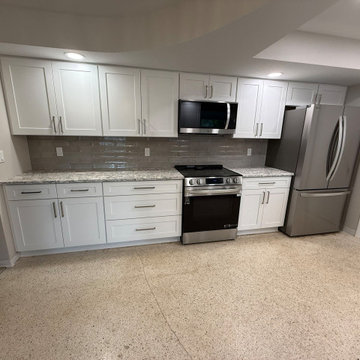
This kitchen remodel began sooner than expected when a broken pipe caused significant water damage to the homeowners' existing cabinets. What started as an unexpected repair quickly became an opportunity to create the kitchen they had been envisioning.
We installed beautiful new Polar white cabinetry paired with elegant Berwyn quartz countertops, giving the space a bright and timeless feel. By removing the wall oven, we were able to add valuable cabinet storage and improve the kitchen's overall functionality. A gray tile backsplash ties the design together beautifully, complementing the new cabinetry and countertops while working seamlessly with the existing flooring.
The result is a fresh, functional kitchen that better suits the homeowners' lifestyle, and they couldn't be happier with the transformation.
 Tile Doctor Ltd
Pontcanna is a popular residential area in the western district of Cardiff, in South East Wales. Known for its rather large houses and spectacular foliage, interestingly enough roughly a quarter of the population are English folk.
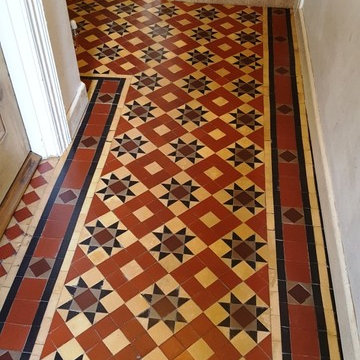
I was called down to a property in the area to take a look at a Victorian tiled floor which was in quite poor condition. Along with the typical amount of dirt and muck seen on poorly maintained tiles, there were a number of missing tiles and a fair bit of cement caked on the surface of the floor.
It would require a robust clean, fresh seal, and several repairs to get this floor back into optimum condition.
To begin, I checked for excess moisture problems using a damp meter in various places of the hallway floor and, thankfully, it was showing dry results. Any dampness could have potentially caused problems later on in the restoration process, so it was s good idea to run tests before starting.
Next, I manually scraped as much of the dry paint and cement off the tiles as possible, with no lubrication necessary. I then proceeded to clean the floor with a solution I mixed early, consisting of equal parts Tile Doctor NanoTech HBU and Tile Doctor Pro Clean, rinsing as I went. Both products are designed to tackle heavy soil build-up, with the former uniquely using nano-sized particles (as the product name suggests) to penetrate deep into difficult to reach areas in the tiles in order to lift out ingrained muck.
Following the initial clean, I removed all of the loose tiles and those heavily affected by cement, before retiling as necessary with fresh Victorian tiles, and grouting the whole floor. Of course, these replacement tiles were carefully sourced to ensure consistency, as far as possible, with the original pattern of the floor.
The next day, I went over the whole floor with an application of the acid-based Tile Doctor Grout Clean Up, diluted with a little alkaline Pro Clean to form a cleaning solution. I then used a black pad to scrub the cleaner into the tiles, similarly to the previous day’s cleaning. This was followed by a through rinse with water to neutralise the floor.
It was at this point that I noticed some stubborn cement stains remained so I set about breaking them down using a 60 grade hand held diamond polishing block, and this technique proved successful.
After completing the clean, I left the floor to dry out for roughly 24 hours. Upon my return to the property to seal the tiles, I tested again for moisture. It is recommended to run damp tests before sealing, as excess moisture can cloud the sealer, affecting its performance in the long run.
Fortunately, no dampness was detected and I was proceeded to seal the floor with seven coats of Tile Doctor Seal & Go, which enhances the natural colours in the stone and provides a nice satin gloss appearance, as requested by the customer.
I was extremely pleased with the results of this restoration, as was the customer. The extent of the soil build up and damage was such before the restoration that, after completion, the floor looked like it had been newly laid!
Julian Iancono
South East Wales Tile Doctor

 Sewer Solutions NW
Damaged sewer lines can cause significant property damage and be expensive to repair. Early detection and working with professional sewer contractors can help minimize damage and costs.
Learn more: https://www.sewersolutions.com/services/sewer-repair/
 Vanguard Termite Control Inc
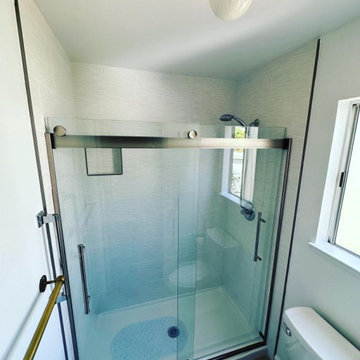
Photo shows our bathroom construction/repair project (AFTER)
At Vanguard Termite Control, we understand that construction repairs require a careful blend of expertise, precision, and craftsmanship. Whether it’s repairing damage caused by termites or addressing structural issues, we provide comprehensive construction repair services to restore your property to its original condition.
Contact us to get a quote or schedule a service: 510-557-4918 | office@vanguardtermite.com | 3102 Rolison Rd, Redwood City, CA 94063
 Driftwood Builders Roofing
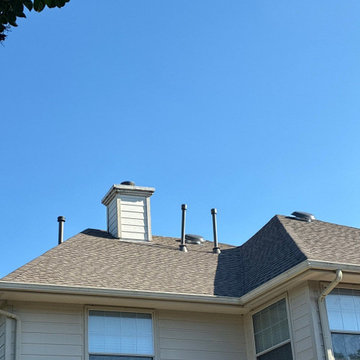
Recently completed a full roof replacement in North Austin after the homeowner’s insurance claim was approved following severe hail and wind damage. After a thorough inspection, our team documented the storm-related impacts, assisted throughout the claims process, and installed a completely new roofing system built for long-term performance in the Texas climate.
This project included a full tear-off of the existing roof, upgraded synthetic underlayment, new flashing, proper attic ventilation improvements, and premium architectural shingles selected for durability, energy efficiency, and curb appeal. Our crew maintained a clean and organized job site throughout the installation and completed a detailed final walkthrough to ensure everything met both manufacturer specifications and local building codes.
Storm damage is one of the leading causes of roof replacement in North Austin, especially after hail events and strong seasonal winds. Warning signs can include missing shingles, bruising, granule loss, water stains, active leaks, lifted flashing, and aging roofing materials.
For homeowners searching for North Austin roof replacement, hail damage roofing contractor, insurance claim roof replacement, roof inspection near me, or storm restoration services in Austin, Driftwood Builders Roofing provides expert inspections, transparent communication, and high-quality workmanship from start to finish.
 Tile Doctor Ltd
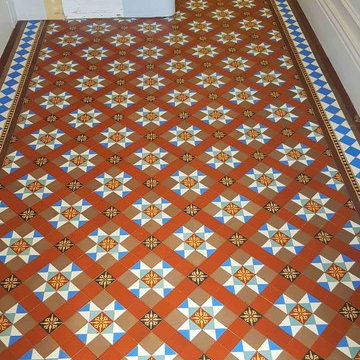
This beautiful Victorian tiled hallway was in desperate need of some TLC. The house had recently changed hands and the new owners of the house were having the entire property renovated. The last part of the renovation plan was to have the Victorian hallway tiles restoring back to their former glory. Floors are always best left until last, especially hallways as last as workmen don’t usually take a lot of care in my experience.
The house was built in the early 1900’s and was situated close to Doncaster town centre a couple of streets away in fact from the famous Doncaster Racecourse which dates to the late 1500’s.
There were a few areas of damage to the floor that would need dealing with first. This is not surprising given the age of the floor which must have seen a lot of comings and goings over the years. Our first task therefore was to repair the damage using replica tiles sourced to be as close a match to the originals as possible. We usually find any slight differences disappear once the floor has been deep cleaned and sealed. Once removing the damaged tile and cleaning the base we use a fast setting adhesive to fix the replacement tiles in place so we can get on with the cleaning as soon as possible.
Once the replacement tiles had set, we unloaded our slow speed rotary floor machine and large wet vacuum which would be used during the cleaning. To start the cleaning the floor was sprayed with Tile Doctor Remove & Go and this was left to dwell on the tiles for twenty minutes. This gives time for the product to break down old floor coatings and grime, this was followed by scrubbing the tiles with a 200-grit diamond pad fitted to the floor machine and assisted with the addition of more water to help lubricate the process. This process generates a lot of slurry as the dirt and old sealers etc are released from the tiles and this is extracted from the surface of the floor using the wet vacuum.
The next step was to give the floor an acid wash using Tile Doctor Acid Gel which is applied to the tiles and left to dwell for fifteen minutes and scrubbed in again with the floor buffer and 200-grit diamond pad. Once done the floor was rinsed with water and then dried using the wet vacuum to extract as much moisture as possible. This last process is designed to counter any alkaline salts that may be present in the floor which may cause efflorescence to appear later. It also removes old mineral deposits and generally get the tiles looking much brighter. Once complete the floor was left to dry off naturally overnight.
I came back the next day to seal the tiles first checking the floor was dry using a moisture meter. Satisfied that the floor was ready for sealing I started to seal the tiles using multiple coats of Tile Doctor Seal and Go Extra which is a fully breathable sealer which is important for old floors like this. Seal and Go Extra also leaves a lovely satin finish which works well on Victorian tiles and brings the floor alive.
This was the last step in this properties renovation, and I think you will agree that the floor responded really well to the restoration process and the colours in the tiles are now very vibrant.
Matthew Lovett
South Yorkshire Tile Doctor
 Largo Green Inc
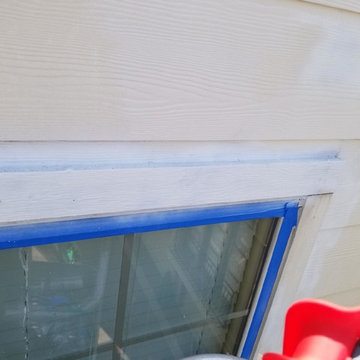
Now the damaged Hardie boards, repairing, cleaning, and painting
Inspiration for a large contemporary multicolored three-story mixed siding townhouse exterior remodel in Houston
Inspiration for a large contemporary multicolored three-story mixed siding townhouse exterior remodel in Houston

 Tile Doctor Ltd
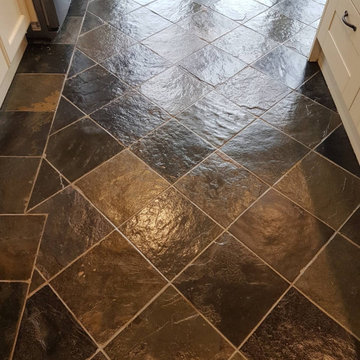
Pictured below is a Slate tiled kitchen floor that had been installed in the kitchen of a property in Harrogate around fifteen years prior. I discovered that the tiles had never been cleaned and resealed since installation and this explained why they were now looking dull and un-interesting. They had lost all character and it wasn’t until I started cleaning them that I realised the must be of the multicoloured Brazilian Slate variety.
As well as looking dull and unattractive, there was also some water damage to some tiles caused by a leak, this had resulted in some shaling and efflorescence staining. This had occurred some time ago and the floor had now dried out fully, so I was not expecting any further efflorescence issues going forward.
Brazil, I understand is the world’s 2nd biggest producer of Slate, it is also exceptionally durable and reasonably priced so its not surprising you see a lot of it over in the UK. Like any natural stone however it is porous and without a sealer to protect it and bring out those natural colours it soon ends up like the example on this pad.
I cleaned the floor with a strong dilution of Tile Doctor Pro-Clean using my usual method of spraying the cleaning solution onto the Slate and grout and then leaving it for a ten minutes to soak in and get to work breaking down the dirt and old sealers. Although I doubted there was much sealer left on the floor after all this time you need to be sure to remove all of it to get the best result. The floor was then scrubbed with a rotary floor buffer fitted with a black scrubbing pad, then after rinsing with water and extracting the soil I inspected the floor.
I detected there was still some sort of sealer present in some of less used parts of the floor, it was proving stubborn to remove so I suspect it may have been an old fashioned wax based product that was used. Not a problem though we Tile Doctors have a solution to every problem, so I spot treated the stubborn areas with Tile Doctor Wax Away to see if I was right. After scrubbing that in followed by another rinse and extraction with the wet vacuum I was pleased to see I was right and was happy all the old seal had now been removed. I gave the floor another rinse at the end of the day and dried it as much as possible with the wet vacuum, then left it to dry off fully overnight.
I came back the next day and checked the floor was dry with a damp meter. The readings were good, so I was able to crack on and seal the tiles using several coats of Tile Doctor Seal and Go. Each coat was applied leaving time to dry between each layer. This gave the floor a uniform appearance which disguised the damaged tiles. It will also help to stop more cracking and reduce the appearance of the efflorescence. The sealer really brought out the natural colours in the Brazilian Slate and the floor looked transformed.
I’m sure you will agree it was a vast improvement, certainly my client was very happy and couldn’t believe the difference I had managed to achieve. Before leaving I recommended, they should invest in some Tile Doctor Neutral Tile Cleaner which would ensure the newly applied seal was prematurely eroded away which is a problem with many of the stronger products you find in supermarkets.
Nigel Stoker
North West Yorkshire Tile Doctor

 Contract Exteriors
The existing roof on this home received extensive storm damage causing leaking & interior damage of the home. We replaced the roof with CertainTeed Landmark Pro shingles in Moire Black. Not only does the homeowner now have a safe & beautiful new roof on their home but they received a 50 year non-prorated material warranty as well as a 25 year non-prorated workmanship warranty.
 Five Star Tree Care
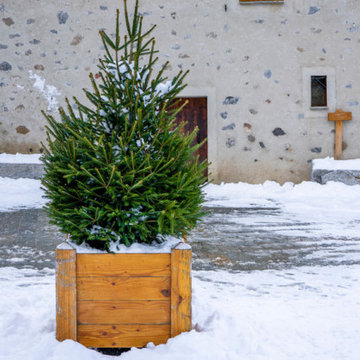
Winter has arrived and this means many months of snow and ice are ahead. When trees shed their leaves and go dormant for the winter, this is like how bears hibernate; they are both sleeping through the cold and waiting until the warm spring weather comes back. But unlike hibernating bears, who are safe and snuggled up in a warm cave somewhere, trees are left to withstand the harsh, cold elements throughout the entire winter. This means that they are more impacted than you might believe.
It is easier for mature trees to be able to handle the long winter months due to their extensive root system and thick bark. But saplings and other newly planted trees are not yet fully equipped with these natural defenses to handle the cold. No matter if you have new or older trees, following our tips will help them prosper during the cold Canadian winter ahead. Our team at Five Star Tree Services has come up with some winter maintenance essentials for your trees that will give them an extra hand over the winter.
One Last Water
Getting one last good watering in before the ground freezes is helpful to newly planted and young trees. Always make sure to water your tree slowly and gently. This allows the water to seep down into the root system as opposed to it running off the top and freezing.
Apply Mulch
When you use mulch, it acts like a barrier between the tree roots and the cold snow, it helps to insulate it. When you are applying mulch, make sure you spread it around the base of the tree so that it is no more than 3 inches deep. You also need to make sure to spread the mulch all the way to the drip line surrounding the tree. Make sure to not exceed 3 inches around your entire tree and keep the mulch away from the trunk of the tree.
Wrap Tree Trunks
There is a condition called sunscalding that can occur during the winter months. This happens when there is a temperature change that happens quickly. You might notice it when the sun warms the trees, which thaws the bark but during the night, when it gets cold again, it causes the melted water in the bark to rupture, causing cracks in the tree’s trunk. Young trees are especially susceptible to this happening. To help stop this from happening, it is best to wrap your trees with tree wraps or a plastic guard. It is advisable to wrap the trunk from the ground up and stop just below the first branch.
Shelter Your Trees
Young or newly planted trees are fairly defenseless for the first handful of years. Older and more mature trees have had time to develop a strong root system and hardy bark that help to protect them against things like animals and the freezing cold. If you want to help your little sapling along this winter, you can build a shelter that can handle having snow piled on it. You can also periodically use a broom to brush off the snow that accumulates on a tree’s branches. But try to avoid breaking off any ice that has formed on the branches, as this can actually end up hurting the tree if you accidentally break one of its branches instead.
Keep Road Salt Away
It’s no big secret that the use of road salt is detrimental to trees. When it gets on them, the end result come springtime is a dead tree, or at least, a severely damaged one. As much as you can, protect your trees and limit their exposure to salt over the winter.
Protect Your Trees
Winter is not only limiting for trees, but for a lot of other animals as well. This includes rabbits, mice, moles, squirrels, and other furry little creatures, who like to use trees as a food source during the summer months. During the winter, this food is now cut off when the trees go dormant. This only leaves the tree’s bark as an alternative food source for these critters. They seem to especially like young tree bark to chew on over the winter. In order to stop this from happening, you need to protect the bark with things like a fence surrounding your tree, wrapping the trunk with a plastic guard or hardware cloth.
Winter Pruning
The best time to prune any tree is during the winter months when the tree is dormant. Pruning allows you to rid the tree of any excess branches and control disease. Winter pruning is highly beneficial and lets your tree improve branch development in the spring.
Don’t Use
Always make sure to avoid products that are known to hurt trees, especially ones containing sodium chloride. Products like that cause negative reactions in trees or any plants, as it hinders their water intake. Instead, look for products that have potassium, calcium, and magnesium chloride.
How Five Star Tree Services Can Help
For newly planted and young trees, it is especially important to help them through the winter as best you can. We here at Five Star Tree Services are here to help you get your trees through the winter. If you require Toronto Tree Care, make sure to give us a call at (416) 990-3355.
 Contract Exteriors
The existing roof on this home received extensive storm damage causing leaking & interior damage of the home. We replaced the roof with CertainTeed Landmark Pro shingles in Moire Black. Not only does the homeowner now have a safe & beautiful new roof on their home but they received a 50 year non-prorated material warranty as well as a 25 year non-prorated workmanship warranty.
 Contract Exteriors
The existing roof on this home received extensive storm damage causing leaking & interior damage of the home. We replaced the roof with CertainTeed Landmark Pro shingles in Moire Black. Not only does the homeowner now have a safe & beautiful new roof on their home but they received a 50 year non-prorated material warranty as well as a 25 year non-prorated workmanship warranty.

 Concrete Designs Inc
Example of a large tuscan beige two-story stucco house exterior design in San Diego with a hip roof and a tile roof

 Lindsay Chambers Design
Lindsay Chambers Design, Roger Davies Photography
Bathroom - mid-sized transitional master white tile and marble tile bathroom idea in Los Angeles with shaker cabinets, purple cabinets, a two-piece toilet, an undermount sink, marble countertops and a hinged shower door
Bathroom - mid-sized transitional master white tile and marble tile bathroom idea in Los Angeles with shaker cabinets, purple cabinets, a two-piece toilet, an undermount sink, marble countertops and a hinged shower door
 Hoi Ning Wong
Photo: Hoi Ning Wong © 2014 Houzz
Design: Sarah Warto, Boxleaf Design
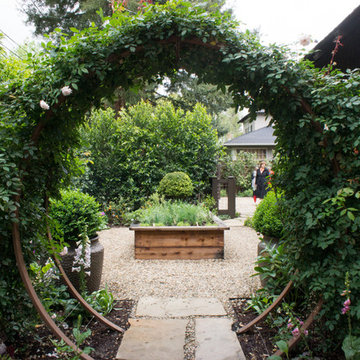
Inspiration for a craftsman landscaping in San Francisco.
Inspiration for a craftsman landscaping in San Francisco.
 Timeless Kitchen Cabinetry
Gridley+Graves Photographers
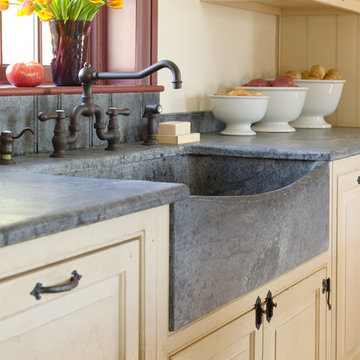
Example of a mid-sized country single-wall brick floor and red floor eat-in kitchen design in Philadelphia with a farmhouse sink, raised-panel cabinets, beige cabinets, concrete countertops, paneled appliances, an island and gray countertops
Example of a mid-sized country single-wall brick floor and red floor eat-in kitchen design in Philadelphia with a farmhouse sink, raised-panel cabinets, beige cabinets, concrete countertops, paneled appliances, an island and gray countertops
23