
Search results for "Causing reduced" in Home Design Ideas

 TVL Creative Ltd.
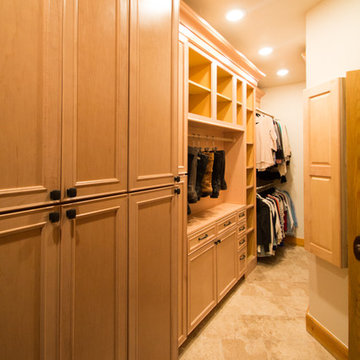
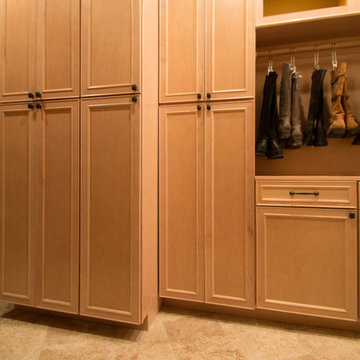
This closet project cleaned up a tight (but lengthy) closet space with gorgeous new cabinetry and maximized organization. The original space is housed inside of a true log home (same house as the gorgeous Evergreen Kitchen remodel we completed last year) and so the same challenges were present. Moreso than the kitchen, dealing with the logs was very difficult. The original closet had shelves and storage pieces attached to the logs, but over time the logs shifted and expanded, causing these shelving units to detach and break. Our plan for the new closet was to construct an independent framing structure to which the new cabinetry could be attached, preventing shifting and breaking over time. This reduced the overall depth of the clear closet space, but allowed for a multitude of gorgeous cabinet boxes to be integrated into the space where there was never true storage before. We shifted the depths of each cabinet moving down through the space to allow for as much walkable space as possible while still providing storage. With a mix of drawers, hanging bars, roll out trays, and open shelving, this closet is a true beauty with lots of storage opportunity!
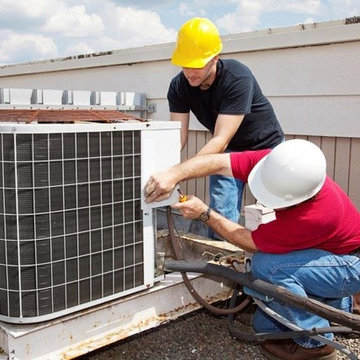
 Total System Service
As a manager of a building or property, you quickly learn the art of mediation. One minute you may be working with a vendor to keep the building’s operating system running efficient and smooth; the next moment you may be calming a tenant down after finding the change in the system disrupted his office’s workflow. Give and take; it’s the only way to make sure every day runs perfectly.
Overall, you have two goals to strive for in everything you do.
1. Keep the building running properly, upgrading systems as appropriate, and striving to do all you can on a pre-established budget.
2. Keep the building occupants happy, with as little disruption as possible.
While some changes are minor, barely registering on a building occupant’s mind, with HVAC challenges, that’s rarely the case. If a HVAC contractor is replacing an air handler, for instance, and disconnects one and moves to the next unit, it may cause major disruptions to sensitive areas of a building. And if the occupant wasn’t prepared for the disruption, you can have a mighty unhappy customer on your hand.
Anytime you are working on HVAC projects throughout your building, there are strategies you can put into place to keep things running smooth.
Communicate with occupants
Communication is key to any good relationship, and as a property manager, this rule is a great place to start. If you will be working with the HVAC equipment, block out the timeframe for work to be done, and understand the potential consequences of the process. Then communicate this process with every point of contact you have throughout the building. The more detail you can provide, the less surprises you’ll have throughout the process. You can also work with your building’s occupants before the process begins, finding out if there are better timeframes than others.
Establish a realistic schedule
As a property manager, its easy to provide your expectations for the HVAC project at hand, and request that the proposal be written in such a way that work is completed on your timeframe. Unfortunately, many contractors want your business and will agree to anything upfront in order to win the bid, knowing full well the work will take longer than specified. Instead of projecting your timeframes into the proposal process, ask for HVAC project bids to establish realistic schedules of how long the process will take, and what areas of your property will be most effected throughout the schedule. This will help you avoid crises between you and the contractor, and you and your tenants.
Plan for the whole system
If one small piece of your HVAC system is weak, its easy to fix that one small piece. But how will that impact your overall system? Will it cause weak spots in different parts of the building – maybe a corner office will have reduced air flow, and therefore be colder in the winter and warmer in the summer? When retrofitting new pieces with older existing systems, its easy to reduce the efficiency of your entire system. Before agreeing to certain repairs, make sure you understand how it will impact your entire system overall. An easy way of handling this problem is by working with the same HVAC contractor again and again, He will understand your system’s potential, and know when to make repairs, and when to replace.
Have points of contact available for immediate assistance
In many cases, problems arise because connections can’t be made. Can the HVAC contractor get a hold or you or another person that can make decisions at a moments notice if a problem arises? Do you have access to decision makers throughout the building that may be impacted by this change? Many projects have been put on hold simply because a person in authority can’t be found to give the go-ahead to move forward. If you have access to these people during the time of the project, you’ll be able to complete the project in record time.
Test
Finally, if you can test things in stages, or test when the potential for problems is the smallest, you reduce the chances of bigger emergency issues falling into your lap. If you’ll be installing a new terminal unit, can you make the switch on a Saturday morning when the building is largely unoccupied? If you’re replacing a large system, can you replace and test in phases so the entire project isn’t released at once?
Most issues can be avoided with just a little strategy from the beginning. If you’ve never had a HVAC maintenance team to help you stay on track with your building’s heating and cooling, now may be the time to find out how easy a team approach makes the process.
 TVL Creative Ltd.
This closet project cleaned up a tight (but lengthy) closet space with gorgeous new cabinetry and maximized organization. The original space is housed inside of a true log home (same house as the gorgeous Evergreen Kitchen remodel we completed last year) and so the same challenges were present. Moreso than the kitchen, dealing with the logs was very difficult. The original closet had shelves and storage pieces attached to the logs, but over time the logs shifted and expanded, causing these shelving units to detach and break. Our plan for the new closet was to construct an independent framing structure to which the new cabinetry could be attached, preventing shifting and breaking over time. This reduced the overall depth of the clear closet space, but allowed for a multitude of gorgeous cabinet boxes to be integrated into the space where there was never true storage before. We shifted the depths of each cabinet moving down through the space to allow for as much walkable space as possible while still providing storage. With a mix of drawers, hanging bars, roll out trays, and open shelving, this closet is a true beauty with lots of storage opportunity!
Find the right local pro for your project
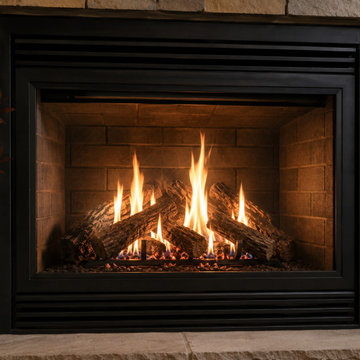
 SUPERIOR CHIMNEY SERVICES CORPORATION
Standard annual or mechanical Chimney cleaning for gas and wood burning fireplaces typically works to remove any type of buildup as well as checking for the structural integrity of the chimney. Maintaining an annual chimney cleaning will meet the national safety standard set by the NFPA, CSIA, IRC and NCSG, helping homeowners avoid chimney fires and blockages.
Why does safety matter? Did you know that there was a chimney fire in Marengo in January? Or a chimney fire at a Peotone home at the end of March? Or a log cabin fire caused by the chimney in June? That’s just a few that happened in the past 7 months.
Why Does a Chimney Cleaning Matter?
Chimney sweeps also known as chimney cleanings, fireplace cleanings, or fireplace sweeps. Regardless of what you call it, it still means the same thing.
Chimney cleaning for gas and wood burning fireplaces serve 3 key purposes:
confirming structural integrity
removing flammable deposits and
obstruction-free assurance.
Homeowners with gas or wood burning fireplaces benefit from each of these safeguards.
The National Fire Protection Association addresses this directly through NFPA 211, a widely recognized fire safety code. The standard states that chimneys, fireplaces, and vents require inspection at least once a year for soundness, free from deposits, and correct clearances, with cleaning, maintenance, and repairs to be done whenever needed.
This annual requirement applies equally to gas and wood burning fireplaces. Organizations including the Chimney Safety Institute of America, the National Chimney Sweep Guild, International Residential code and the National Fire Protection Association each reference this standard as the requirement for home fire safety.
Free 14-Point Certified Written Inspection
Every chimney sweep completed through Superior Chimney includes a complimentary 14-point certified written inspection along with photo documentation delivered to you by email. This documentation gives homeowners a clear visual record of their chimney system.
The written report covers the condition of the flue liner, smoke chamber, smoke shelf, damper, firebox, chimney crown, and chimney cap, among other components examined during a standard visit. Photo documentation captures each area so homeowners can review the findings independently of the technician’s verbal summary. Written inspection reports allow families to track the condition of their fireplace chimney system over time.
Chimney Cleaning and Structural Integrity
A CSIA Certified Chimney Sweep technician, such as Superior Chimney technicians, visually examines the chimney from the top opening to the firebox below, gaining a full evaluation of the interior.
When chimney rods and brushes pass through the chimney system, loose pieces of fire clay tile, damaged tile joints, or crumbling brick sometimes fall down into the fireplace. This debris can mean there is an integrity problem. By knowing this is a problem, will protect families and their homes. Now it’s time to take care of it and call in a certified chimney technician.
Fireplace Cleaning and Creosote Removal
Creosote, is the technical name for soot. Soot forms as a natural byproduct of burning wood. Smoke traveling upward through the chimney and leaves deposits of creosote along the interior walls. With every fire, a little more gets built up.
The issue with creosote is that it is highly flammable and is the leading cause of chimney fires nationwide. Removing the buildup through regular chimney cleanings keeps a fireplace serviceable for continuous use throughout the spring, fall and winter seasons.
Standard and mechanical chimney cleanings pay close attention to the flue liner, smoke chamber, smoke shelf, damper, and firebox in a single service visit. Superior Chimney performs each fireplace chimney inspection using a no-mess process that protects the home during service. This keeps soot contained within specialized equipment rather than the living room.
An Obstruction Free Chimney
Several conditions create blockages within a chimney system. Bird, squirrel, bat and raccoon nesting material, feces, and debris frequently accumulate inside an unprotected flue, especially during spring and summer months when the fireplace sits unused.
Excessive creosote accumulation or a collapsed chimney liner can restrict proper airflow. Homeowners that address obstructions with a chimney inspection will be able to maintain proper draft and ventilation with their gas or wood burning fireplace. This will reduce the risk of smoke backing into the home.
Gas Chimney Cleaning Compared to Wood burning Chimney Cleaning
Gas and wood burning fireplaces share the same annual chimney inspection requirement. Whether you are burning wood, gas or a “pile of shirts” there is still heat and flame that requires worthy firewalls to protect the home from heat transfer. Fire worthiness and checking the firewall integrity is priority.
Wood burning fireplaces generate creosote that builds along the flue liner with every fire. Gas fireplace systems accumulate lighter deposits along with potential venting obstructions, since gas appliances rely heavily on venting for safe combustion byproduct release. Each system accumulates different residues that need attention.
A CSIA Certified Chimney Sweep technician from Superior Chimney adjusts the specific cleaning approach based on fuel type. However, the same core safety elements apply: structural integrity, deposit removal, and clear airflow.
What Happens During a Chimney Cleaning?
A typical chimney inspection begins with a walkthrough of the fireplace and the chimney on top of the roof, allowing the technician to record any visible concerns the homeowner reported in advance as well as any new findings.
The certified technician then covers the immediate hearth area with protective material before setting up specialized equipment designed to contain creosote throughout the cleaning and inspection.
Chimney rods and brushes pass through the flue liner to loosen and remove creosote deposits along the smoke chamber, smoke shelf, and damper. The certified technician inspects each section closely for loose or crumbling firewall, cracked joints, or other signs of weak structural damage.
A final walkthrough of the firebox and chimney completes the visual inspection. Photo documentation captures each component, and the certified written report is sent to the homeowner by email. This consistent process gives homeowners the documentation they need to compare year to year.
Chimney Cleaning Safety Standards
The table below summarizes the organizations that set national chimney safety standards, along with their specific requirements for fireplace chimney sweeps.
NFPA211
National Fire Protection Association
Annual inspection for soundness, deposit buildup, and correct clearances; cleaning and repairs completed as needed
CSIA
Chimney Safety Institute of America
Certifies technicians through testing on chimney and venting system knowledge
NCSG
National Chimney Sweep Guild
Establishes trade standards and best practices for chimney sweep professionals
How Often Should You Schedule a Chimney Cleaning and Inspection?
CSIA recommends scheduling chimney cleaning and inspection annually by CSIA Certified Chimney Sweeps. This recommendation applies to gas and wood burning fireplaces, regardless of how frequently a household uses the fireplace and especially in freeze/thaw geographic areas.
Regular chimney sweeps save lives, since a clean fireplace chimney rarely catches fire. CSIA encourages homeowners to rely on Certified Chimney Sweeps, as these technicians undergo regular testing on the complexities of chimney and venting systems throughout their careers.
Frequently Asked Questions
What is included in a chimney sweep? A chimney sweep includes the flue liner, smoke chamber, smoke shelf, damper, and firebox, removing creosote while checking for obstructions and structural concerns throughout the chimney system (NOT the ashpit).
How often should gas and wood burning fireplaces receive chimney sweeps? CSIA, NFPA, IRC and NCSG guidelines each call for chimney sweeps at least once a year for gas and wood burning fireplace systems.
Why does creosote removal matter for fireplace safety? Creosote is highly flammable and builds along the interior walls of a fireplace chimney with every fire, creating conditions that lead directly to chimney fires when left in place over time. Creosote is unburned particles from the combustion chamber.
Who should perform a fireplace chimney sweep? CSIA Certified Chimney Sweep technicians complete fireplace chimney sweeps after passing regular testing on chimney and venting system knowledge, meeting the certification standard recognized across the industry.
Does a fireplace chimney sweep remove animal nests and debris? No, a fireplace chimney sweep addresses soot and creosote, while significant nesting material, feces, or collapsed liner debris often calls for dedicated obstruction removal alongside the standard service.
What does the free 14-point inspection include? The complimentary 14-point certified written inspection documents the flue liner, smoke chamber, smoke shelf, damper, firebox, crown, and cap through photo evidence delivered directly by email for homeowner records.
Choose Superior Chimney for Your Certified Chimney Inspection
All service technicians completing chimney sweeps through Superior Chimney hold National Certification through the Chimney Safety Institute of America (CSIA), reflecting the training standard recommended by fire safety organizations nationwide.
Scheduling regular chimney sweeps to clean gas and wood burning fireplace systems protects a home from fire risk, preserves the structural integrity of the chimney, and keeps airflow clear for proper, continuous use throughout the year. Contact us today to schedule a chimney inspection at 877-244-6349.
 EasyHeat
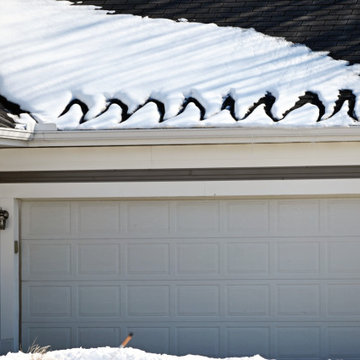
Our roof and gutter de-icing products are built to protect properties from the damage caused by ice dam formations. EasyHeat™ electric heating cables economically and efficiently reduce ice formation along roof edges, in gutters, drains and downspouts by providing a path for meltwater to flow off the roof. We offer the highest quality cables and controls for virtually every roof and gutter de-icing application to protect your home and business.

 Atlas Roofing - Shingles
A roof is a very important, as well as expensive, feature of your home. Maintaining your roof is one of the best ways to protect you, your family and all you keep under that roof. Atlas Protects™ is more than a slogan as the company, with decades of experience, has the products and advice to help you reduce roof maintenance.
Atlas Roofing StormMaster® Slate and Shake shingles have high performance features that can help resist the many hazards that a roof can face each year. This strength means you, the homeowner, may face fewer maintenance issues.
Master The Storms
Underwriter’s Laboratory, UL 2218 is a national standard rating system for impact resistance that rates roofing materials from Class 1 through 4. A Class 4 rating indicates the highest level of impact resistance. Atlas StormMaster® Shake and StormMaster® Slate shingles have both earned Class 4 ratings. These shingles are strong enough to earn the Class 4 rating because they are manufactured with Styrene Butadiene Styrene (SBS), a rubberized polymer that gives them incredible flexibility and durability. The rubber-like quality gives StormMaster® shingles the highest protection against impact from hail, which can fracture shingles.
StormMaster® shingles are also high wind-rated which helps resist blown off shingles. Loss of shingles due to high velocity wind could lead to wind-driven rain flooding a house. StormMaster® Slate and Shake come with a Limited Wind Warranty that protects a roof up to 130 mph.
Black streaks on a roof not only look dirty, but also make a house appear old and reduce its curb appeal. Black streaks are the result of algae growth. Atlas StormMaster® shingles are built with the power of Scotchgard™ Protector, which helps a roof retain its color for years by resisting those black streaks. Atlas certifies this by having regular third-party laboratory testing to ensure an even spread of the Scotchgard™ protective copper granules. Both lines of StormMaster® are backed by an Atlas Lifetime Limited Warranty against the black streaks caused by algae.
The Final Word In Warranties
StormMaster® shingles are warranted against manufacturing defects with the exclusive Atlas Lifetime Limited Warranty for 20 years. That is the length of the Premium Protection Period for the initial non-prorated labor and material coverage of every new StormMaster® Slate roof installed with the Atlas Signature Select® System.
StormMaster® shingles give a house what it needs most; an incredibly impressive appearance and security that shelters everything and everyone under the roof. Read more about the full line of StormMaster® shingles.

 Free Lancing
Effective residential construction project management is crucial in today’s fast-moving building industry. It means overseeing every step of building a home, from planning to finishing, to ensure projects are completed time, within budget, and with high quality. Unlike commercial projects, residential projects require special attention to meet homeowners' unique needs and wishes, requiring a customized approach from the beginning to the end.
In 2025, the construction sector will use advanced technologies like AI and integrated project delivery (IPD) to streamline processes and improve stakeholder collaboration. However, project managers face significant challenges, including managing risks, maintaining quality control, and ensuring effective communication among team members.
A WIP Report (Work-in-Progress Report) is a key tool that helps track a project's budget, progress, and resource use. It provides clear insights, making managing costs easier, avoiding delays, and making informed decisions.
By adopting best practices and using modern construction management tools, project managers can overcome these challenges and deliver successful residential construction projects that meet client expectations and contribute to a sustainable future.
This article provides a brief overview of residential construction project management, highlights its importance, and touches on the challenges faced by project managers while incorporating the latest trends and technologies in the field.
Types of Residential Construction Management
Here are the different types of Residential Construction Management:
Single-Family Homes: These are standalone houses built for individual families. Managing these projects involves overseeing construction from planning to completion, ensuring that the home meets the owner's preferences and budget.
Multi-Family Housing: This includes apartments, condominiums, and townhouses. Projects of this type require managing multiple units, often with shared facilities, and ensuring compliance with local building codes.
Custom Home Building: This involves constructing homes tailored to specific client needs. Close collaboration with architects and designers is required to ensure the house reflects the owner's personality and preferences.
Home Renovation and Remodeling: These projects focus on updating or expanding existing homes. They often involve working with subcontractors for specialized tasks like electrical or plumbing work.
Components of Residential Construction Project Management
Managing a residential construction project requires carefully coordinating people, materials, and timelines. A well-structured approach ensures efficiency, cost control, and high-quality results.
Roles and Responsibilities
A project manager plays a vital role in residential construction. They oversee every step from planning to completion and ensure the project stays on schedule, within budget, and meets quality standards.
Project Manager’s Role in Home Construction
The project manager is responsible for organizing tasks, managing resources, and solving problems that arise during construction. They coordinate between different teams, track progress, and ensure safety regulations are followed.
Collaboration with Contractors, Architects, and Stakeholders
Successful residential construction requires teamwork. Project managers work closely with architects to bring designs to new heights, coordinate with contractors to manage labor and materials, and keep stakeholders (such as homeowners and investors) informed about project updates.
Client Communication and Expectations Management
Clear communication with clients is essential. The project manager keeps homeowners updated on timelines, changes, and challenges. Setting realistic expectations and providing regular updates, they help avoid misunderstandings and keep the project running smoothly.
Project Scope & Planning
Practical project planning sets the foundation for a successful residential construction project. It ensures clear goals, minimizes risks, and keeps the project on track.
Defining Project Objectives and Deliverables:
Clearly outlining what needs to be done and what the final result should look like is essential. This involves setting specific, measurable goals that align with the homeowner's vision and budget.
Managing Homeowner Expectations and Scope Creep:
Homeowners often have changing needs or ideas. Effective project managers must manage these expectations to prevent "scope creep," which can delay projects and increase costs. This involves open communication and setting clear boundaries.
Ensuring Compliance with Zoning Laws and Permits:
Before construction begins, it's crucial to ensure that all necessary permits are obtained and that the project complies with local zoning laws. This step avoids costly fines and delays, ensuring the project moves forward smoothly.
Budgeting & Cost Control
Proper budgeting is essential for keeping residential construction projects financially viable. Effective cost management prevents overspending and ensures profitability.
Accurate Cost Estimation for Residential Projects
A precise cost estimate considers labor, materials, permits, and unexpected expenses. Using historical data and Sage 300 CRE for financial management improves accuracy and helps set realistic budgets.
Budget Allocation and Tracking
Allocating funds efficiently ensures that each phase of the project receives the necessary resources. Tracking expenses through Construction & Financial Dashboards allows for real-time monitoring and early detection of budget deviations.
Preventing Budget Overruns
Uncontrolled costs can derail a project. Regular financial reviews, automated alerts for overspending, and contingency planning help keep expenses in check and prevent financial strain.
Scheduling & Timeline Management
Timely project completion is crucial in residential construction. Effective scheduling minimizes delays and ensures a smooth workflow.
Creating Detailed Project Schedules
A structured schedule outlines all tasks, deadlines, and dependencies. Breaking down the project into phases, planning, execution, and finishing, helps maintain order and clarity.
Preventing Delays & Meeting Deadlines
Delays can result from labor shortages, weather conditions, or supply chain issues. To avoid problems, it’s good to check for risks ahead of time, add extra time to schedules, and keep everyone on the same page.
Using Gantt Charts and Critical Path Methods
CPM for Construction helps identify critical activities that directly impact project completion, while Gantt charts provide a visual timeline of tasks. Both tools optimize scheduling and improve efficiency.
Residential Construction Project Management Phases
Managing a residential construction project effectively requires a structured approach through various phases. Each phase plays a critical role in ensuring the project's success, from initial planning to completion.
Pre-Construction Phase
The pre-construction phase sets the foundation for a smooth and efficient building process. Proper planning at this stage helps prevent costly changes and delays later.
Site Analysis & Approvals: A thorough site analysis assesses soil conditions, topography, and environmental factors. Feasibility studies evaluate project viability, including costs and regulatory compliance. Obtaining zoning approvals, permits, and other legal clearances is crucial before breaking ground.
Selecting Materials and Procurement Strategies: Choosing the right materials impacts durability, sustainability, and cost efficiency. A well-planned procurement strategy, including bulk purchasing and reliable supplier partnerships, ensures timely delivery and cost savings. Using Sage 300 CRE for procurement management helps streamline material sourcing and financial planning.
Construction Phase
The construction phase transforms plans into reality. Effective coordination and strict quality control ensure a successful build.
Resource Allocation and Workflow Coordination: Efficiently managing labor, equipment, and materials is key to maintaining progress. Using CPM for Construction, project managers can allocate resources strategically, prevent bottlenecks, and optimize workflows for timely completion.
Quality Control and Ensuring Compliance with Safety Regulations: Strict adherence to building codes and safety standards is non-negotiable. Regular inspections, worker training, and real-time quality monitoring ensure a structurally sound and legally compliant project. Proactive safety measures prevent accidents and project disruptions.
Project Closeout & Handover
The final phase of residential construction project management is crucial for ensuring a smooth transition from construction to occupancy. Proper closeout procedures guarantee quality, client satisfaction, and long-term project success.
Final Inspections and Quality Assurance: Before finishing the project, a final inspection checks that everything meets safety rules and quality standards. Any problems need to be fixed quickly. Using Procore helps make inspections and tracking issues easier, ensuring a high-quality final product.
Client Walkthrough and Support: A final check helps homeowners see the finished work, ask questions, and make sure it meets their expectations. This is also a chance to explain important home features and maintenance tips. Good communication here builds trust and strengthens relationships.
Warranty Management and Feedback: Efficient warranty management ensures clients get quick help for any issues after construction. A clear process for tracking requests and keeping in touch with homeowners boosts satisfaction. Collecting feedback helps improve future projects. Using S-Curve Forecasting tracks performance trends and refines management strategies.
Software for Residential Construction Project Management
The integration of technology in residential construction project management has revolutionized the way projects are planned, executed, and monitored. Digital tools streamline operations, reduce costs, and improve communication, making them essential for modern construction firms.
Importance of Digital Tools
Investing in digital tools is crucial for construction firms as it transforms the industry by enhancing efficiency, accuracy, and collaboration across the entire project lifecycle. They also improve project management by streamlining processes, automating tasks, and facilitating real-time stakeholder communication.
Top Construction Management Software for Residential Projects
Several software solutions are available for managing residential construction projects:
Procore: Known for its comprehensive project management features, including document management and collaboration tools.
Sage 300 CRE: Offers robust accounting and financial management capabilities, ideal for large-scale construction projects.
Buildertrend: Specializes in residential construction, providing tools for project scheduling, budgeting, and client communication.
CoConstruct: Focuses on custom home building and remodeling, offering features for estimating, scheduling, and project management.
WIP Reports: Useful for tracking work-in-progress and managing project finances effectively.
Features Comparison and Best Use Cases:
Procore: Best for large projects requiring extensive collaboration and document management.
Sage 300 CRE: Ideal for firms needing robust financial management.
Buildertrend: Suitable for residential builders focusing on client communication and project scheduling.
CoConstruct: Perfect for custom home builders who need detailed estimating and scheduling tools.
WIP Reports: Useful for firms needing to track project finances closely.
How Software Improves Project Efficiency
Construction management software significantly enhances project efficiency in several ways:
Automating Accounting and Job Costing: Software like Sage 300 CRE automates financial tasks, reducing manual errors and improving budget tracking.
Streamlining Document Management and Communication: Tools like Procore centralize documents and facilitate real-time communication among team members, reducing misunderstandings and delays.
Mobile-Friendly Solutions for Real-Time Tracking: Mobile apps from platforms like Buildertrend allow for on-site access to project data, enabling real-time tracking and decision-making.
These digital tools and software solutions are essential for modern residential construction project management, offering benefits such as improved efficiency, enhanced collaboration, and better financial control.
Challenges in Residential Construction Project Management
Residential construction projects face a variety of challenges that can impact their success. Here are some of the key issues project managers encounter:
Managing Subcontractors and Labor Shortages
One of the biggest challenges in residential construction is managing subcontractors and dealing with labor shortages. Subcontractors often have their own schedules and priorities, which can lead to delays if not coordinated properly. Additionally, labor shortages can slow down projects and increase costs due to the need for overtime or hiring temporary workers.
Budget Overruns and Unexpected Costs
Budget overruns are common in residential construction due to factors like material price fluctuations, unexpected site conditions, or changes in project scope. Effective budget management involves regularly monitoring expenses and having contingency plans for unexpected costs.
Changing Construction and Eco Rules
Construction and Eco Rules are always changing, so project managers need to keep up with the latest regulations. This involves following guidelines for saving energy, protecting the environment, and ensuring safety. Ignoring these rules can lead to fines, delays, or even stopping the project.
Best Practices
To ensure your residential construction projects run smoothly and successfully, follow these essential best practices:
Setting Clear Project Goals and Milestones
Clearly defining what you want to achieve is the first step to success. Set specific, measurable, achievable, relevant, and time-bound (SMART) goals. This helps everyone involved understand what needs to be done and by when. For example, instead of saying "build a house," say "build a house with three bedrooms and two bathrooms within the next nine months."
Stakeholder Collaboration
Good communication is key to keeping everyone on the same page. Regular meetings with contractors, suppliers, and homeowners help prevent misunderstandings and ensure that everyone knows what's happening and what's next. This open dialogue also helps resolve issues quickly, preventing small problems from becoming big delays.
Using Data-Driven Insights for Decision-Making
Making decisions based on facts rather than guesses is crucial. Use data and analytics to understand project progress, identify potential issues early, and make informed decisions. For instance, if data shows that a particular material is consistently causing delays, you can plan ahead to avoid those delays in the future.
Proactive Risk Management Strategies
Things don't always go as planned, so being prepared is essential. Identify potential risks early and have a plan to manage them. This might include having backup suppliers, planning for weather conditions, or setting aside extra funds for unexpected expenses. Being proactive can prevent small issues from turning into major problems.
Conclusion
Effective residential construction project management requires careful planning, clear communication, and the right digital tools. From single-family homes to multi-family housing and custom projects, managing timelines, budgets, and quality is essential for success.
By following best practices, using project management software, and staying ahead of industry trends, project managers can ensure smooth execution and client satisfaction despite challenges like labor shortages, budget overruns, and regulatory compliance; modern technology and strategic planning help mitigate risks.
Construction firms can improve efficiency, enhance collaboration, and maintain financial control by adopting advanced tools like Procore, Sage 300 CRE, and Buildertrend. A well-managed project delivers a quality home and builds trust and long-term success in the industry.
FAQs
What is residential construction project management?
It involves overseeing all aspects of building residential properties, from initial planning and design to construction and completion, ensuring projects are completed on time, within budget, and to the desired quality standards.
How can I prevent budget overruns in my construction project?
Accurate cost estimation, continuous budget tracking, and having contingency plans for unexpected expenses are key strategies to prevent budget overruns.
What are the main stages of a residential construction project?
The primary stages include design, pre-construction, procurement, and construction.
How does construction management software improve project efficiency?
It streamlines processes like scheduling, budgeting, and communication, providing real-time data access and collaboration among stakeholders, which enhances overall project efficiency.
How can I ensure my project complies with local building codes and regulations?
Engage professionals familiar with local laws, obtain all necessary permits before starting, and conduct regular inspections to ensure adherence to building codes and regulations.
 TVL Creative Ltd.
This closet project cleaned up a tight (but lengthy) closet space with gorgeous new cabinetry and maximized organization. The original space is housed inside of a true log home (same house as the gorgeous Evergreen Kitchen remodel we completed last year) and so the same challenges were present. Moreso than the kitchen, dealing with the logs was very difficult. The original closet had shelves and storage pieces attached to the logs, but over time the logs shifted and expanded, causing these shelving units to detach and break. Our plan for the new closet was to construct an independent framing structure to which the new cabinetry could be attached, preventing shifting and breaking over time. This reduced the overall depth of the clear closet space, but allowed for a multitude of gorgeous cabinet boxes to be integrated into the space where there was never true storage before. We shifted the depths of each cabinet moving down through the space to allow for as much walkable space as possible while still providing storage. With a mix of drawers, hanging bars, roll out trays, and open shelving, this closet is a true beauty with lots of storage opportunity!
 Pennsylvania Landscape & Nursery Association
Terren Landscapes http://www.terrenlandscapes.com
2014 PLNA Awards for Landscape Excellence Winner
Category: Residential $60,000-$120,000
Award Level: Silver
Project Description:
We were contracted by the family to create a master plan for the property. They
were experiencing extreme drainage and erosion problems due to the surrounding properties’
drastic grade changes. Erosion had caused the rear lawn to sink in various areas and the existing
rear patio spaces were failing. The client wanted to rebuild their patios and walkways, repave
their driveway and give their home more visual appeal. Most importantly, they wanted an
environmentally friendly solution.
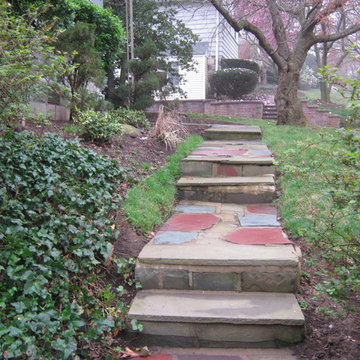
Our design solution was to create a rain garden that would slow storm water runoff, allow
for percolation, and promote infiltration, while permitting excess clean water to enter the storm
drain at the street with slower velocity. The rain garden acts as a temporary holding space that
allows the earth to slowly absorb water, rather than overwhelm the nearby storm drain. Our first
objective was to conduct a percolation test to determine the amount of clay soil that needed to be
removed before reaching the sandy loam layer. A percolation test and storm water calculations
were generated to accommodate a 1” rain event. Based on our calculations and the small size of
the property, we determined a depth of 18” was necessary for optimal holding capacity. We
removed 18” of clay soil until a layer of sandy loam was encountered. Next, the soil was amended
with compost and sand to create a highly porous planting media for the basin of the garden. We
piped the three existing rear downspouts to the rain garden area to capture for infiltration and
alleviate runoff throughout the rear lawn and patio space. We installed an 18” wide over-flow
standpipe at a 24” depth into the ground that outlets to a stone swale that carries the water to the
property edge. As an added means of holding the maximum amount of water, we designed the
standpipe to sit 14” above grade. The height of this standpipe allows this rain garden to capture
14” of water before reaching the overflow capacity. We placed geotextile fabric to help reduce
migration of the stones into the soil and aid in the prevention of weeds and erosion. We heavily
planted the rain garden to further aid in absorption and to attract local wildlife. A native plant
palette of butterfly weed, Panicum, Joe-Pye weed, and asters form a colorful backdrop while the
basin was filled with obligate wetland plants such as royal ferns, irises and cardinal flowers. The
upper edges in the foreground are planted with Echinacea, Rudbeckia and Monarda, satisfying
the local bird community and adding bright seasonal colors. This garden effectively collects and
cleanses rainwater while creating a habitat for birds, frogs, and butterflies.
Our next challenge was to redesign the existing patios and walkways without increasing
impervious surfaces. According to township regulations this property was currently at its
maximum capacity, therefore we designed the front and rear patios with a slightly smaller
footprint to decrease their existing impervious surfaces.
New planting beds were designed throughout the entire property. Plants were chosen that
were tolerant of specific site conditions. For the rear yard, we choose a backdrop of witch hazel
and hollies to provide an evergreen screen as well as early spring color. We placed hydrangea
throughout to add summer color. We planted ostrich fern under the existing spruce tree to create
a lush floor. This area became an additional backdrop for the rain garden as well as a screen for
the neighboring property. We choose a combination of ‘Blue Star’ juniper and creeping jenny to
soften the existing rear wall with creepers. Around the rear patio areas we choose a combination
of Liatris, Rudbeckia and ‘Lo and Behold’ butterfly bush. This combination of plants works in
harmony with the rain garden and attracts additional butterflies.
For the front of the property we worked with an existing Japanese maple that provided
dense shade. We choose a shade-tolerant combination of Heuchera, Astilbe, ferns and hostas for
this area. We added more hydrangeas to the front foundation of the house to provide lush
layering of plant material and visual interest with additional summer blooms.
Overall, we were able to exceed the client’s needs and expectations in transforming their
property into a colorful paradise that attracts wildlife from season to season. The plant palette
provides seasonal interest and the rain garden has successfully decreased storm water runoff.
The new hardscape surfaces were designed and built with a slightly smaller footprint to decrease
impervious surfaces. This project is a positive example of how all properties, regardless of size,
can make an ecological difference by decreasing impervious surfaces and maintaining proper
storm water management.
Photo Credit:
Terren Landscapes
 TVL Creative Ltd.
This closet project cleaned up a tight (but lengthy) closet space with gorgeous new cabinetry and maximized organization. The original space is housed inside of a true log home (same house as the gorgeous Evergreen Kitchen remodel we completed last year) and so the same challenges were present. Moreso than the kitchen, dealing with the logs was very difficult. The original closet had shelves and storage pieces attached to the logs, but over time the logs shifted and expanded, causing these shelving units to detach and break. Our plan for the new closet was to construct an independent framing structure to which the new cabinetry could be attached, preventing shifting and breaking over time. This reduced the overall depth of the clear closet space, but allowed for a multitude of gorgeous cabinet boxes to be integrated into the space where there was never true storage before. We shifted the depths of each cabinet moving down through the space to allow for as much walkable space as possible while still providing storage. With a mix of drawers, hanging bars, roll out trays, and open shelving, this closet is a true beauty with lots of storage opportunity!
 TVL Creative Ltd.
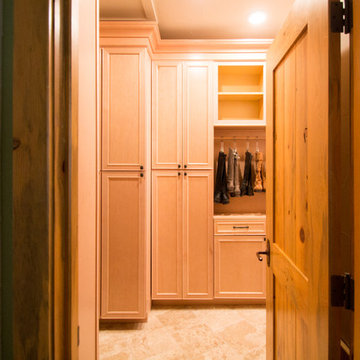
This closet project cleaned up a tight (but lengthy) closet space with gorgeous new cabinetry and maximized organization. The original space is housed inside of a true log home (same house as the gorgeous Evergreen Kitchen remodel we completed last year) and so the same challenges were present. Moreso than the kitchen, dealing with the logs was very difficult. The original closet had shelves and storage pieces attached to the logs, but over time the logs shifted and expanded, causing these shelving units to detach and break. Our plan for the new closet was to construct an independent framing structure to which the new cabinetry could be attached, preventing shifting and breaking over time. This reduced the overall depth of the clear closet space, but allowed for a multitude of gorgeous cabinet boxes to be integrated into the space where there was never true storage before. We shifted the depths of each cabinet moving down through the space to allow for as much walkable space as possible while still providing storage. With a mix of drawers, hanging bars, roll out trays, and open shelving, this closet is a true beauty with lots of storage opportunity!
 EasyHeat
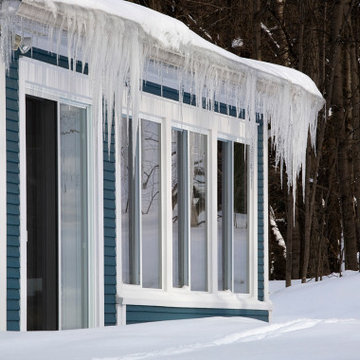
Our roof and gutter de-icing products are built to protect properties from the damage caused by ice dam formations. EasyHeat™ electric heating cables economically and efficiently reduce ice formation along roof edges, in gutters, drains and downspouts by providing a path for meltwater to flow off the roof. We offer the highest quality cables and controls for virtually every roof and gutter de-icing application to protect your home and business.
 TVL Creative Ltd.
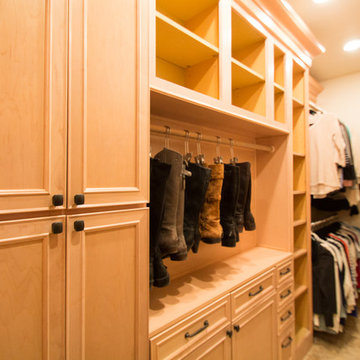
This closet project cleaned up a tight (but lengthy) closet space with gorgeous new cabinetry and maximized organization. The original space is housed inside of a true log home (same house as the gorgeous Evergreen Kitchen remodel we completed last year) and so the same challenges were present. Moreso than the kitchen, dealing with the logs was very difficult. The original closet had shelves and storage pieces attached to the logs, but over time the logs shifted and expanded, causing these shelving units to detach and break. Our plan for the new closet was to construct an independent framing structure to which the new cabinetry could be attached, preventing shifting and breaking over time. This reduced the overall depth of the clear closet space, but allowed for a multitude of gorgeous cabinet boxes to be integrated into the space where there was never true storage before. We shifted the depths of each cabinet moving down through the space to allow for as much walkable space as possible while still providing storage. With a mix of drawers, hanging bars, roll out trays, and open shelving, this closet is a true beauty with lots of storage opportunity!
 TVL Creative Ltd.
This closet project cleaned up a tight (but lengthy) closet space with gorgeous new cabinetry and maximized organization. The original space is housed inside of a true log home (same house as the gorgeous Evergreen Kitchen remodel we completed last year) and so the same challenges were present. Moreso than the kitchen, dealing with the logs was very difficult. The original closet had shelves and storage pieces attached to the logs, but over time the logs shifted and expanded, causing these shelving units to detach and break. Our plan for the new closet was to construct an independent framing structure to which the new cabinetry could be attached, preventing shifting and breaking over time. This reduced the overall depth of the clear closet space, but allowed for a multitude of gorgeous cabinet boxes to be integrated into the space where there was never true storage before. We shifted the depths of each cabinet moving down through the space to allow for as much walkable space as possible while still providing storage. With a mix of drawers, hanging bars, roll out trays, and open shelving, this closet is a true beauty with lots of storage opportunity!
 EasyHeat
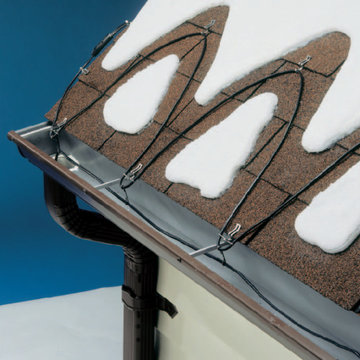
Our roof and gutter de-icing products are built to protect properties from the damage caused by ice dam formations. EasyHeat™ electric heating cables economically and efficiently reduce ice formation along roof edges, in gutters, drains and downspouts by providing a path for meltwater to flow off the roof. We offer the highest quality cables and controls for virtually every roof and gutter de-icing application to protect your home and business.
 Renovisions
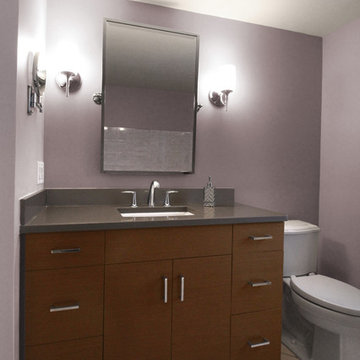
One of the hottest trends in bath design is open, clean-line spaces. This serene look is accomplished by reducing distractions caused by too many ornate details. This client approached Renovisions to remodel her outdated master bath and create a clean and uncluttered space with a contemporary flair. The bathtub and tile floor remains in the new design adding a small challenge to coordinate the right color selection for shower and tub surround tile. The existing bath’s fiberglass shower was cramped, under utilized and under styled, so Renovisions first enlarged the depth of the shower with a complete water proof system, hand-held shower and soap dish, corner shelf and safety grab bar.
A teak veneer vanity was designed to compliment the client’s master bedroom teak furniture. A beautiful combination of sleek grey quartz countertop, rectangular under-mount sink, modern plumbing fixtures, stylish hardware and a simple yet elegant tilt mirror completed the contemporary look.
This renewed master bath combines functionality and aesthetics in perfect harmony.
 AJM Construction & Repairs
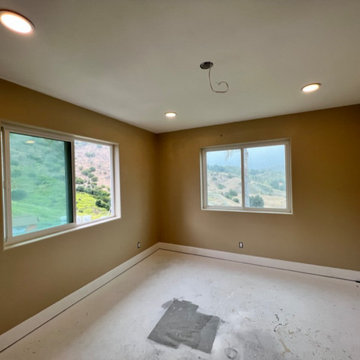
We started as a kitchen remodel but discovered there was mold in the majority of the exterior walls as well as the attic. The mold was caused by a number of problems but namely because the waterproof paper wrap on the house had deteriorated and was moisture to pass through the stucco and into the wood framing. In addition there was a leaking air conditioner condenser in the attic that was draining saturating the wood above the master bedroom. The mold was causing health problems it became clear we needed to replace a large majority of the framing and prevent future problems.
So we went from a kitchen addition/remodel to rebuilding the majority of the home and adding 800sqft; including a new bedroom, expanding the master bedroom and bath as well as a walk-in closet.
In anticipating for aging in place, we installed a walk-in shower with a bench and grab bars to allow for future wheelchair access and reduce trip hazards.
 TVL Creative Ltd.
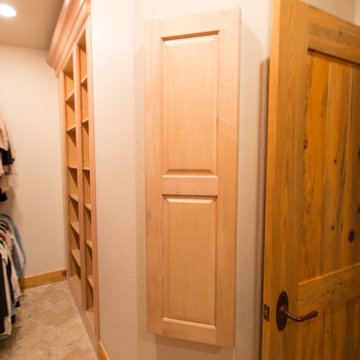
This closet project cleaned up a tight (but lengthy) closet space with gorgeous new cabinetry and maximized organization. The original space is housed inside of a true log home (same house as the gorgeous Evergreen Kitchen remodel we completed last year) and so the same challenges were present. Moreso than the kitchen, dealing with the logs was very difficult. The original closet had shelves and storage pieces attached to the logs, but over time the logs shifted and expanded, causing these shelving units to detach and break. Our plan for the new closet was to construct an independent framing structure to which the new cabinetry could be attached, preventing shifting and breaking over time. This reduced the overall depth of the clear closet space, but allowed for a multitude of gorgeous cabinet boxes to be integrated into the space where there was never true storage before. We shifted the depths of each cabinet moving down through the space to allow for as much walkable space as possible while still providing storage. With a mix of drawers, hanging bars, roll out trays, and open shelving, this closet is a true beauty with lots of storage opportunity!
 EasyHeat
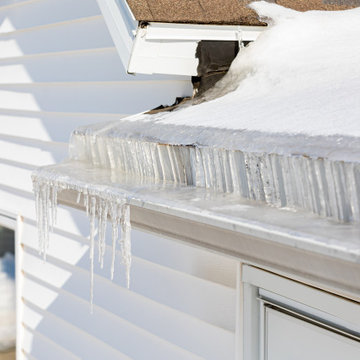
Our roof and gutter de-icing products are built to protect properties from the damage caused by ice dam formations. EasyHeat™ electric heating cables economically and efficiently reduce ice formation along roof edges, in gutters, drains and downspouts by providing a path for meltwater to flow off the roof. We offer the highest quality cables and controls for virtually every roof and gutter de-icing application to protect your home and business.
 AJM Construction & Repairs
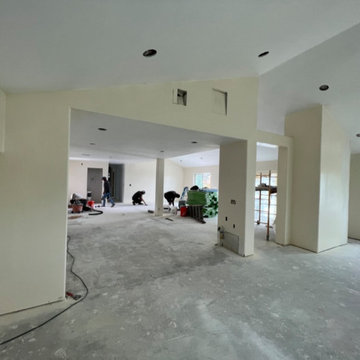
We started as a kitchen remodel but discovered there was mold in the majority of the exterior walls as well as the attic. The mold was caused by a number of problems but namely because the waterproof paper wrap on the house had deteriorated and was moisture to pass through the stucco and into the wood framing. In addition there was a leaking air conditioner condenser in the attic that was draining saturating the wood above the master bedroom. The mold was causing health problems it became clear we needed to replace a large majority of the framing and prevent future problems.
So we went from a kitchen addition/remodel to rebuilding the majority of the home and adding 800sqft; including a new bedroom, expanding the master bedroom and bath as well as a walk-in closet.
In anticipating for aging in place, we installed a walk-in shower with a bench and grab bars to allow for future wheelchair access and reduce trip hazards.
6