
Search results for "Cleaning process" in Home Design Ideas
 Bertazzoni
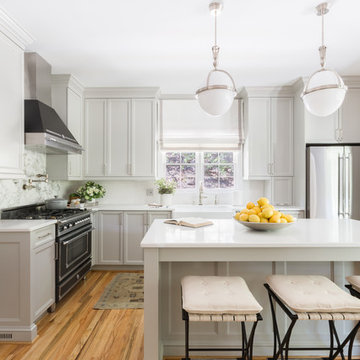
Kitchen - transitional l-shaped medium tone wood floor and brown floor kitchen idea in Other with a farmhouse sink, recessed-panel cabinets, gray cabinets, stainless steel appliances, an island and white countertops
 Urbanology Designs
A captivating transformation in the coveted neighborhood of University Park, Dallas
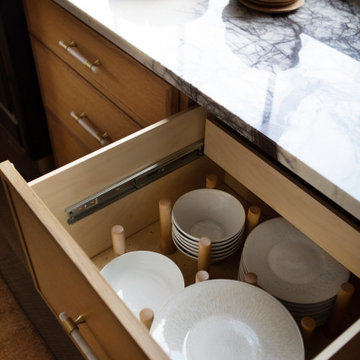
The heart of this home lies in the kitchen, where we embarked on a design endeavor that would leave anyone speechless. By opening up the main kitchen wall, we created a magnificent window system that floods the space with natural light and offers a breathtaking view of the picturesque surroundings. Suspended from the ceiling, a steel-framed marble vent hood floats a few inches from the window, showcasing a mesmerizing Lilac Marble. The same marble is skillfully applied to the backsplash and island, featuring a bold combination of color and pattern that exudes elegance.
Adding to the kitchen's allure is the Italian range, which not only serves as a showstopper but offers robust culinary features for even the savviest of cooks. However, the true masterpiece of the kitchen lies in the honed reeded marble-faced island. Each marble strip was meticulously cut and crafted by artisans to achieve a half-rounded profile, resulting in an island that is nothing short of breathtaking. This intricate process took several months, but the end result speaks for itself.
To complement the grandeur of the kitchen, we designed a combination of stain-grade and paint-grade cabinets in a thin raised panel door style. This choice adds an elegant yet simple look to the overall design. Inside each cabinet and drawer, custom interiors were meticulously designed to provide maximum functionality and organization for the day-to-day cooking activities. A vintage Turkish runner dating back to the 1960s, evokes a sense of history and character.
The breakfast nook boasts a stunning, vivid, and colorful artwork created by one of Dallas' top artist, Kyle Steed, who is revered for his mastery of his craft. Some of our favorite art pieces from the inspiring Haylee Yale grace the coffee station and media console, adding the perfect moment to pause and loose yourself in the story of her art.
The project extends beyond the kitchen into the living room, where the family's changing needs and growing children demanded a new design approach. Accommodating their new lifestyle, we incorporated a large sectional for family bonding moments while watching TV. The living room now boasts bolder colors, striking artwork a coffered accent wall, and cayenne velvet curtains that create an inviting atmosphere. Completing the room is a custom 22' x 15' rug, adding warmth and comfort to the space. A hidden coat closet door integrated into the feature wall adds an element of surprise and functionality.
This project is not just about aesthetics; it's about pushing the boundaries of design and showcasing the possibilities. By curating an out-of-the-box approach, we bring texture and depth to the space, employing different materials and original applications. The layered design achieved through repeated use of the same material in various forms, shapes, and locations demonstrates that unexpected elements can create breathtaking results.
The reason behind this redesign and remodel was the homeowners' desire to have a kitchen that not only provided functionality but also served as a beautiful backdrop to their cherished family moments. The previous kitchen lacked the "wow" factor they desired, prompting them to seek our expertise in creating a space that would be a source of joy and inspiration.
Inspired by well-curated European vignettes, sculptural elements, clean lines, and a natural color scheme with pops of color, this design reflects an elegant organic modern style. Mixing metals, contrasting textures, and utilizing clean lines were key elements in achieving the desired aesthetic. The living room introduces bolder moments and a carefully chosen color scheme that adds character and personality.
The client's must-haves were clear: they wanted a show stopping centerpiece for their home, enhanced natural light in the kitchen, and a design that reflected their family's dynamic. With the transformation of the range wall into a wall of windows, we fulfilled their desire for abundant natural light and breathtaking views of the surrounding landscape.
Our favorite rooms and design elements are numerous, but the kitchen remains a standout feature. The painstaking process of hand-cutting and crafting each reeded panel in the island to match the marble's veining resulted in a labor of love that emanates warmth and hospitality to all who enter.
In conclusion, this tastefully lux project in University Park, Dallas is an extraordinary example of a full gut remodel that has surpassed all expectations. The meticulous attention to detail, the masterful use of materials, and the seamless blend of functionality and aesthetics create an unforgettable space. It serves as a testament to the power of design and the transformative impact it can have on a home and its inhabitants.
Project by Texas' Urbanology Designs. Their North Richland Hills-based interior design studio serves Dallas, Highland Park, University Park, Fort Worth, and upscale clients nationwide.


Find the right local pro for your project
 Ehrlich Yanai Rhee Chaney Architects
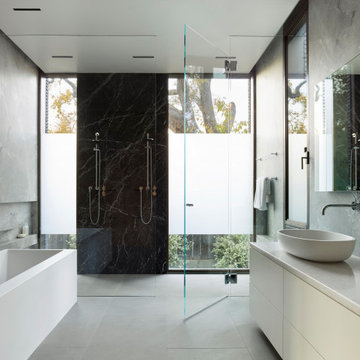
View of master bath.
(Photography by: Matthew Millman)
Minimalist gray floor freestanding bathtub photo in San Francisco with flat-panel cabinets, white cabinets, a vessel sink and white countertops
Minimalist gray floor freestanding bathtub photo in San Francisco with flat-panel cabinets, white cabinets, a vessel sink and white countertops
 Modern Architecture Services
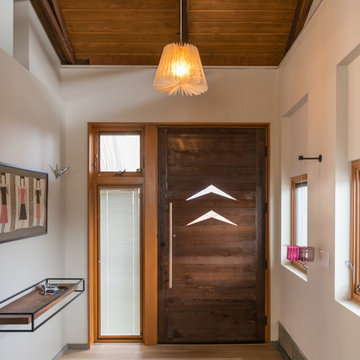
Entryway - contemporary light wood floor entryway idea in San Diego with white walls and a dark wood front door
 Prime Renovations, Inc.
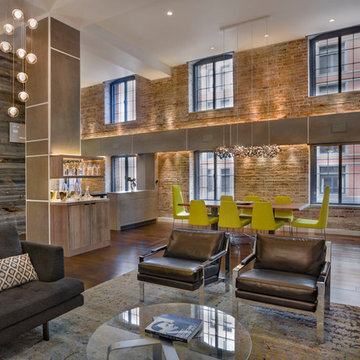
Lighting: Shakuff - Kadur Custom Blown Glass Multi-Pendant Chandelier
Learn more: www.shakuff.com
Large trendy open concept and formal medium tone wood floor and brown floor living room photo in New York with white walls, a ribbon fireplace, a plaster fireplace and no tv
Large trendy open concept and formal medium tone wood floor and brown floor living room photo in New York with white walls, a ribbon fireplace, a plaster fireplace and no tv
 Urbanology Designs
A captivating transformation in the coveted neighborhood of University Park, Dallas
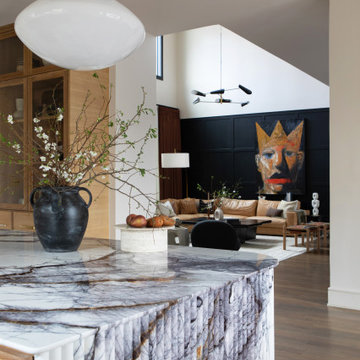
The heart of this home lies in the kitchen, where we embarked on a design endeavor that would leave anyone speechless. By opening up the main kitchen wall, we created a magnificent window system that floods the space with natural light and offers a breathtaking view of the picturesque surroundings. Suspended from the ceiling, a steel-framed marble vent hood floats a few inches from the window, showcasing a mesmerizing Lilac Marble. The same marble is skillfully applied to the backsplash and island, featuring a bold combination of color and pattern that exudes elegance.
Adding to the kitchen's allure is the Italian range, which not only serves as a showstopper but offers robust culinary features for even the savviest of cooks. However, the true masterpiece of the kitchen lies in the honed reeded marble-faced island. Each marble strip was meticulously cut and crafted by artisans to achieve a half-rounded profile, resulting in an island that is nothing short of breathtaking. This intricate process took several months, but the end result speaks for itself.
To complement the grandeur of the kitchen, we designed a combination of stain-grade and paint-grade cabinets in a thin raised panel door style. This choice adds an elegant yet simple look to the overall design. Inside each cabinet and drawer, custom interiors were meticulously designed to provide maximum functionality and organization for the day-to-day cooking activities. A vintage Turkish runner dating back to the 1960s, evokes a sense of history and character.
The breakfast nook boasts a stunning, vivid, and colorful artwork created by one of Dallas' top artist, Kyle Steed, who is revered for his mastery of his craft. Some of our favorite art pieces from the inspiring Haylee Yale grace the coffee station and media console, adding the perfect moment to pause and loose yourself in the story of her art.
The project extends beyond the kitchen into the living room, where the family's changing needs and growing children demanded a new design approach. Accommodating their new lifestyle, we incorporated a large sectional for family bonding moments while watching TV. The living room now boasts bolder colors, striking artwork a coffered accent wall, and cayenne velvet curtains that create an inviting atmosphere. Completing the room is a custom 22' x 15' rug, adding warmth and comfort to the space. A hidden coat closet door integrated into the feature wall adds an element of surprise and functionality.
This project is not just about aesthetics; it's about pushing the boundaries of design and showcasing the possibilities. By curating an out-of-the-box approach, we bring texture and depth to the space, employing different materials and original applications. The layered design achieved through repeated use of the same material in various forms, shapes, and locations demonstrates that unexpected elements can create breathtaking results.
The reason behind this redesign and remodel was the homeowners' desire to have a kitchen that not only provided functionality but also served as a beautiful backdrop to their cherished family moments. The previous kitchen lacked the "wow" factor they desired, prompting them to seek our expertise in creating a space that would be a source of joy and inspiration.
Inspired by well-curated European vignettes, sculptural elements, clean lines, and a natural color scheme with pops of color, this design reflects an elegant organic modern style. Mixing metals, contrasting textures, and utilizing clean lines were key elements in achieving the desired aesthetic. The living room introduces bolder moments and a carefully chosen color scheme that adds character and personality.
The client's must-haves were clear: they wanted a show stopping centerpiece for their home, enhanced natural light in the kitchen, and a design that reflected their family's dynamic. With the transformation of the range wall into a wall of windows, we fulfilled their desire for abundant natural light and breathtaking views of the surrounding landscape.
Our favorite rooms and design elements are numerous, but the kitchen remains a standout feature. The painstaking process of hand-cutting and crafting each reeded panel in the island to match the marble's veining resulted in a labor of love that emanates warmth and hospitality to all who enter.
In conclusion, this tastefully lux project in University Park, Dallas is an extraordinary example of a full gut remodel that has surpassed all expectations. The meticulous attention to detail, the masterful use of materials, and the seamless blend of functionality and aesthetics create an unforgettable space. It serves as a testament to the power of design and the transformative impact it can have on a home and its inhabitants.
Project by Texas' Urbanology Designs. Their North Richland Hills-based interior design studio serves Dallas, Highland Park, University Park, Fort Worth, and upscale clients nationwide.



 Tricia Fortin Interiors
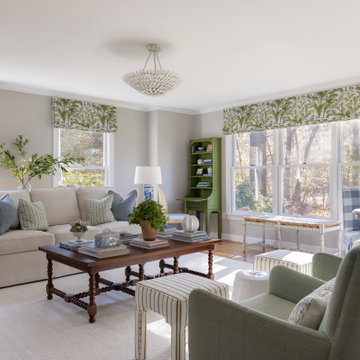
Layered in timeless blues, soft greens, and warm creams, this space balances tradition with everyday comfort. Thoughtfully designed with family in mind, the room invites both connection and quiet moments—ample seating encourages gathering, while a dedicated game table sets the stage for friendly competition and shared memories. A traditional secretary desk adds a functional, collected touch, perfect for homework, correspondence, or simply keeping life organized.
Comfortable, classic, and meant to be lived in—this is a living room where style and family life coexist beautifully.
 Shaw Coates
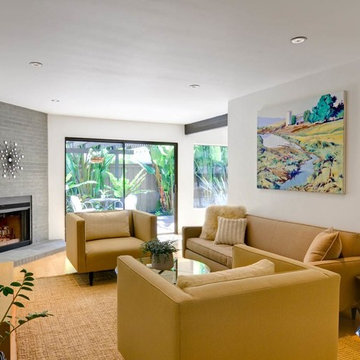
Example of a trendy living room design in San Diego with white walls and a corner fireplace
 Tile Doctor Ltd
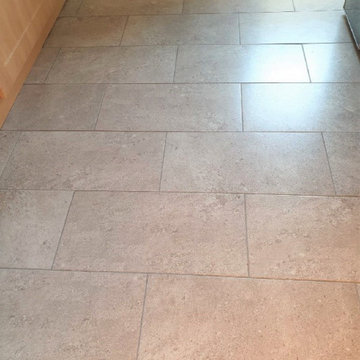
The owners of this house in Adwick Le Street, which is North of Doncaster, were fed up with the appearance of the Grout in their Ceramic tiled kitchen floor. They had not been able to keep the grout clean and it was now patchy, discoloured, darker and consequently always looked dirty.
I visited the property, to survey the floor and could see the Ceramic tiles and where in good condition, but the grout lines were really letting the kitchen down. I discussed with my client the option of re-colouring the grout, which they agreed was sensible, anything to keep the impossible grout clean. The alternative of scraping out the grout and replacing would be a messy and time-consuming option which we both agreed was not the choice they wanted to go for. I gave them a price to complete the work which they were happy to go ahead with.
Before any grout colouring could be done the grout first needed to be prepared, this was done using Tile Doctors Grout Colourant Pre-Treater which is an acid-based cleaner specially made for the job. This product cleans and prepares the grout for the colourant to ensure a better contact with the colourant later. It’s very simple to apply and is simply sprayed onto the grout lines, left to dwell for five minutes and then scrubbed into the grout by hand. Once done the soiled pre-treater is rinsed off with water and removed with a wet vacuum.
Once the grout lines are dry, they are ready to be coloured, unfortunately this is a manual process which take a lot of attention to detail and can be quite tedious. The best way of doing it I have found is go get down on your hands and knees with a toothbrush and gently scrub the colourant into each grout line, any colourant that seeps over onto the tiles needs to be quicky wiped away before it dries. The one upside however is observing the highly satisfying transformation of the grout as the result is instant and you can see the improvement as you go along.
There are ten grout colours of Tile Doctor Grout Colourant to choose from and in this case the owners had chosen Natural Grey. If you want to save a few points they also sell a Grout Colourant kit that contains both the colourant and the pre-treater. The grout colourant is epoxy based so it remains water and stain proof and will last for years.
I’m not sure the pictures I took do the transformation justice, but my client was over the moon with the difference it had made to the floor. The patchy grout was gone and then whole room seemed brighter.
For regular cleaning I recommended the use of Tile Doctor Neutral Tile Cleaner which will keep the floor looking good but is gentle enough to use every day and won’t compromise the colourant.
Matthew Lovett
South Yorkshire Tile Doctor
 Dixie Belle Paint Company
Materials Needed:
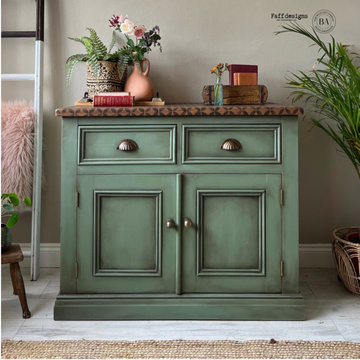
Side Console
Dixie Belle White Lightning Cleaner
Dixie Belle Weeping Willow Chalk Paint
Dixie Belle Best Dang Wax (Clear)
Dixie Belle Chocolate Chalk Mineral Paint
Dixie Belle Retro Lattice Stencil
Dixie Belle Coffee Bean Chalk Mineral Paint
Dixie Belle Synthetic Paintbrush
Clean, lint-free cloths
Before You Begin:
Ensure that your side console is clean and free from any dust, dirt, or grease. If necessary, sand the surface lightly to create a smooth painting surface.
Step 1: Clean with White Lightning
Use Dixie Belle White Lightning Cleaner to thoroughly clean the side console. This will remove any lingering residues and prepare the surface for painting. Follow the instructions on the cleaner, and make sure the surface is completely dry before proceeding.
Step 2: Paint with Weeping Willow
Stir the Weeping Willow Chalk Paint well before use. Apply an even coat of Weeping Willow paint to the entire side console using a paintbrush or foam roller. Allow the first coat to dry completely before applying a second coat if needed. The chalk paint dries relatively quickly, but follow the recommended drying time on the product.
Step 3: Apply Best Dang Wax with Chocolate Chalk Paint
After the Weeping Willow paint has dried, use a clean cloth or brush to apply a layer of Best Dang Wax (Clear) over the painted surface. For added depth and dimension, mix a small amount of Chocolate Chalk Mineral Paint into the wax. Apply the wax mixture evenly, focusing on details and edges. Allow the wax to dry and buff it to a desired sheen using a clean, lint-free cloth.
Step 4: Stencil the Top with Retro Lattice
Secure the Retro Lattice Stencil to the top of the side console using painter's tape to prevent it from moving during the stenciling process. Using a brush or foam roller, apply Coffee Bean Chalk Mineral Paint over the stencil, ensuring even coverage. Carefully remove the stencil while the paint is still wet to reveal the pattern. Allow the painted design to dry completely.
Step 5: Finishing Touches
Inspect the entire side console for any touch-ups or additional detailing. If needed, apply extra coats of paint or wax to achieve the desired finish. Once satisfied with the results, allow the piece to cure fully according to the paint manufacturer's recommendations.
Step 6: Enjoy Your Upcycled Side Console
Place your revamped side console in its designated space and revel in the transformation. The combination of Weeping Willow, Best Dang Wax, and the Retro Lattice stencil has turned a simple side console into a unique and visually appealing piece of upcycled furniture, adding charm and character to your living space.


 Tile Doctor Ltd
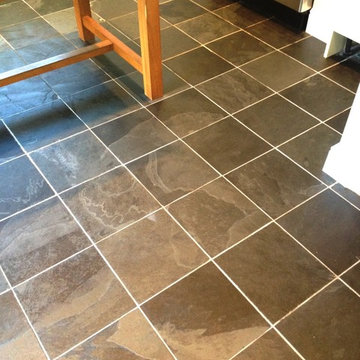
Slate is a popular choice for tiled kitchen floors and when properly maintained looks fantastic, however like all natural stone products without an effective cleaning plan dirt will become ingrained in the stone and will start to lose its appearance.
This was the case with this fantastic Slate tiled kitchen floor in Twickenham which had the potential to look really nice, but hadn’t received the proper maintenance for a long while, leaving it looking very tired. It now needed what was left of its old surface sealer stripped off, followed by a deep cleaning of the tile and grout before having a fresh seal applied.
To begin the restoration, I mixed a 50:50 solution of Tile Doctor Remove and Go and Tile Doctor Pro Clean. This was applied to the floor and allowed to dwell. Remove and Go functions as a stripper that breaks down the old sealer, while Pro Clean is a versatile, high alkaline cleaner that is safe to use on all types of natural stone flooring.
To use it to full effect, I machine scrubbed this solution into the floor to completely remove all dirt, stains, and old sealer. I also ran a stiff brush along the grout lines to remove the particularly stubborn dirt ingrained in the grout. The resulting cleaning slurry was then rinsed with water and extracted using a wet vacuum and the floor checked for stubborn marks which were retreated using the same process.
The floor was left to dry overnight and I came back the next day to apply a new seal. It’s important to leave a tiled floor to dry completely before sealing and at this time of year 24 hours is usually enough. This is necessary to ensures there is no excess moisture in the tile as this has the potential to cloud the sealer and affect its effectiveness.
The customer required a low sheen finish and a floor that was easy to maintain. I opted to use Seal & Go, which provides exactly that. It is a water-based with a high sheen blend of acrylic polymers that offers a both a stain resistant surface seal and a durable low sheen finish, also being water based it doesn’t leave a smell as it dries. Seal and Go is also a breathable sealer that will allow moisture to rise up through the tile and allow the floor to breathe.
As you can see from the pictures, the lustre has been completely restored to the Slate tiles and the sealer will allow for easy maintenance for the customer in the future.
Jonathan Oldham
South Middlesex Tile Doctor
 Tile Doctor Ltd
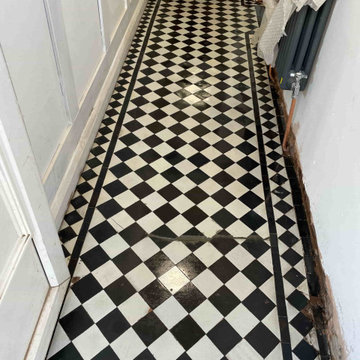
This 1920s single bay house in Earlsdon had been restored by the builder from top to bottom. The hallway floor had been covered in laminate flooring which had been removed, revealing an Edwardian tiled floor beneath. Unfortunately, the plasterer had not covered the floor when working on the walls, so the tiles were now covered in plaster!
The client was keen to keep as many original features as possible and called me in to see if the original 100-year-old floor could be renovated in keeping with the rest of the house. I visited the property to survey the tiles and explained that it certainly could be and having worked on hundreds of these renovations before I was confident of getting a good result. They were happy to go with my quotation and we arranged a time to carry out the work.
The floor tiles themselves were in good condition, but I had to hand carefully scrape the plaster off the tiles before starting on the deep clean. With the plaster removed from the floor I applied Tile Doctor Acid Gel and worked it into the tiles with a coarse 100-grit pad. The floor was then rinsed, and the waste extracted from the floor using a wet vacuum. The process was then repeated with a 200-Grit and then a 400-grit pad until I was happy.
The floor was then speed dried with fans whilst I worked on a repair around the threshold of one of the doors. The repair was relatively straight forward, and I managed to restore the tiling, so the repair was unnoticeable.
The floor was then left overnight to completely dry out. Floors of this age don’t have a damp proof membrane so moisture can build up if they have been covered as in this case. The next stage in the restoration would be to apply a sealer and the floor needs to be dry before you do this otherwise the result can be patchy.
Returning the following day, I first tested the floor with a damp meter to check the moisture levels in different parts of the floor to ensure it was dry enough to seal. The fans had done a good job and I was pleased to find that the floor was dry.
To seal this floor, I used Tile Doctor Seal and Go Extra, it’s a breathable acrylic based sealer that allows for moisture vapour to rise through the tile and evaporate at the surface. This makes it ideal for situations where no damp proof membrane has been installed and there is a low risk of mineral salt deposits being formed (efflorescence).
Once completed the transformation was huge and he Victorian tiles looked well suited to the hallway. Feedback from my client was they were over the moon with the newly restored floor!
For regular cleaning, I recommended Tile Doctor Neutral Tile Cleaner, this is a gentle pH neutral cleaner that will ensure the newly applied seal is retained and not eroded prematurely. This can be the problem with most household cleaning products which contain strong chemicals like bleach which can break down the sealer over time. Without a sealer dirt gets back into the pores of the tile which will mean the homeowner will need to get the floor cleaned and sealed again – a vicious circle!
Mick Gayton
Warwickshire Tile Doctor
 Tile Doctor Ltd
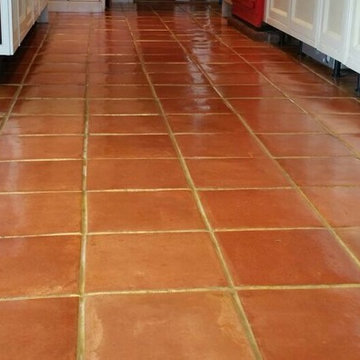
Here’s an interesting job I completed recently in the town of Lymington which is a lovely costal town within the New Forest and on the west side of the Solent. This Terracotta tiled floor was installed in the kitchen and was suffering from an efflorescence issue due to an ongoing leak which resulted in the salts in the water becoming deposited on the surface of the tiles as the water evaporated leaving a white bloom on the surface.
This process is more commonly known as efflorescence and is particularly common in old properties which have no damp proof membrane under the floor and white staining by the cupboards is especially visible in the below photograph.
My client was eager to have the problem fixed, and so enlisted Tile Doctor to get the job done.
To remove the efflorescence, the Terracotta tiled floor was acid washed using a mild dilution of Tile Doctor Grout Clean-Up which is primarily sold to remove grout smears but is equally effective at removing mineral deposits such as the white salts left behind by efflorescence.
The solution was scrubbed into the tiles using a stiff scrubbing brush and was successful at removing the white staining. Naturally it’s not advised to leave acid too long on any surface so the floor was treated in sections and then rinsed off with water and the residue removed using a wet-vacuum.
Following this, the floor was power-scrubbed in combination with a diluted solution of Tile Doctor Pro-Clean. Pro-Clean is a versatile cleaner that also contains stripping properties, allowing it to break down and remove old sealers, it also does a nice job getting the grout clean.
With the efflorescence treated and the floor now clean I was now happy with the condition of the tiles and give them a final rinse under pressure to ensure the floor was neutralised and any trace of products removed.
The Terracotta tiled floor was then left to dry overnight and I came back to seal the floor the next day. To seal the tiles I used three coats of Tile Doctor Seal & Go Extra, which provides a robust surface seal, and is recommended for internal floors with the damp issues.
Hopefully this quick report has offered some useful advice on how to treat efflorescence which is quite a common problem; naturally if you have further questions Tile Doctor does offer a free advice service so do get in touch.
Charles Okwechime
Hampshire Tile Doctor
 Tile Doctor Ltd
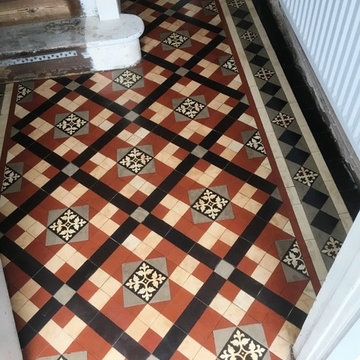
The owner of this house in Chaplefields near Coventry had bought this property as an investment and was keen to improve its appearance. As part of this work he had lifted the vinyl tiles in the hallway and discovered a lovely Edwardian tiled floor. Unfortunately, whoever had laid the Vinyl tiles had decided to use Tar as an adhesive and this had left a black mess all over the floor.
Realising the potential value an original feature such as this could add to the property he was keen to restore the tiles but not so keen to deal with the Tar, so we were asked to deal with the problem and restore the floor as close to its original condition as possible.
To get the tiles clean and remove the horrible tar I applied a strong dilution of Tile Doctor Remove and Go, which as its name suggest is great for removing coverings from tiles. I applied the Remove and Go with a mop, left it to soak in for a few minutes and then worked it in using a rotary machine fitted with a black scrubbing pad. The soil was extracted off the floor using a wet and dry vacuum and then the process repeated until I was happy all the tar was gone.
I then gave the tiles an acid wash using Tile Doctor Acid Gel; this serves to break down alkaline mineral deposits such as cement and grout smears, it also counters any efflorescence problems which can be an issue with these old floors where no damp proof membrane has been installed.
Finally, the floor was given a rinse with clean water and a steam clean to remove any trace of cleaning products and to neutralise the tiles in preparation for sealing.
I left the floor to dry off overnight and returned to the property to seal the tiles the next day. To seal the tiles, I used three coats of Tile Doctor Seal and Go which is a water based sealer that leaves a subtle sheen finish and being water based doesn’t leave a smell as it dries. The sealer will provide durable protection going forward preventing dirt from becoming ingrained into the pores of the tile and ensuring it remains easy to clean and keeping its appearance for some time to come.
The floor now looks fantastic and gives a great impression when you come into the property which is exactly what the owner wanted.
Mick Gayton
Warwickshire Tile Doctor

Sponsored
Columbus, OH

Hope Restoration & General Contracting
Columbus Design-Build, Kitchen & Bath Remodeling, Historic Renovations
 Get My Rugs LLC
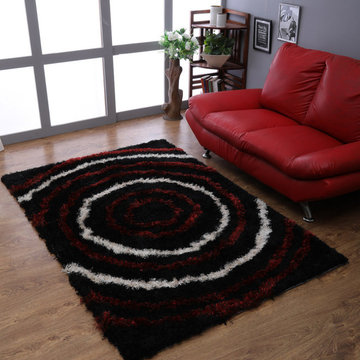
Introducing our hand-tufted shag polyester Geometric area rug a luxurious addition to any space, meticulously crafted to elevate your home decor to new heights. Handmade with precision and care, this Geometric area rugs boasts a sumptuously soft shag texture that invites you to sink your toes into its plush depths. In a captivating blend of Black Multicolor hues, this rug effortlessly complements a range of interior styles, adding a touch of modern elegance to your living space. The high-pile construction not only provides a furry look but also ensures exceptional comfort and warmth underfoot. Crafted with polyester fibers, this rug is both affordable and durable, making it a conscientious choice for the budget friendly conscious homeowner. The anti-slip backing ensures stability, offering peace of mind in high-traffic areas.
[FEATURES]
*PATTERN - Geometric
*COLOR - Black Multicolor
*MATERIAL - Polyester
*MATERIAL COMPOSITION - 70% Polyester; 30% Cotton
*CONSTRUCTION - Handmade
*WEAVE - Hand Tufted Shag
*COUNTRY OF ORIGIN - India
*BRAND - RUGSOTIC CARPETS
*MANUFACTURER - GET MY RUGS LLC
*SHIPPING - Free Shipping
*OCCASION - All
*ROOM TYPE - Living Room, Bed Room, Study Room, Guest Room, Kids Room, Office
*CARE INSTRUCTION - Vacuum Cleaning
*ECO-FRIENDLY - Yes
*NATURAL FIBRE - Yes
*PILE - High Pile
*PILE HEIGHT - 0.75 Inches
*BACK MATERIAL - Cotton
*USAGE - Indoor
*DURABLE - Yes
*ANTI-SKID - Yes
*Order Handling Time - 2 Business days
*Washable - No
*RUG PAD NEEEDED - No
*ITEM CONDITION - New
*REVERSIBLE - No
*[WEAVE / CONSTRUCTION] Handmade by adept artisans skilled in the art of rug weaving, who dedicate countless hours to perfecting this artistic area rug. Under this weaving the design is first sketched onto a canvas, and then the material with high pile is meticulously crafted to match the design with furry appearance. These rugs are not only aesthetically pleasing but also soft, providing excellent underfoot comfort.
*[MATERIAL] Polyester, an artificial fabric, is the material of choice for weaving this area rug, gaining significant popularity in the rug-making industry. Polyester area rugs are highly durable and have garnered acceptance for their qualities such as shine, wear and fade resistance, comfort, non-allergenic properties, moisture resistance, ease of cleaning, and moth-proof nature.
*[PATTERN] This modern area rugs with Geometric design elevates the elegance of your living space and complement various home décor styles including transitional, modern, contemporary, and bohemian.
*[ECO-FRIENDLY] By selecting this handmade area rug, which is eco-friendly and crafted without the use of harmful chemicals, you demonstrate your commitment to a healthier environment and your support for traditional craftsmanship.
*[DURABLE & EASY CARE] Crafted with meticulous precision and using top-quality materials, these area rugs boast unparalleled durability, making them suitable for high-traffic areas while providing exceptional underfoot comfort. Moreover, they require minimal maintenance, needing only occasional vacuuming to keep them looking their best.
*[USAGE AREA] Area rugs are versatile decor elements that can elevate the ambiance and functionality of any room in your home. From the living room to the bedroom, and even outdoor spaces, study rooms, runway, dining room and office room here's how you can make the most of area rugs throughout your home.
*[SHAPE & SIZE] This Rectangle area rug is of 8'x10' size. Ensure that the rug is the appropriate size and shape for the space, considering the furniture arrangement and the room's dimensions.
*[SERVICES] Free Shipping | Quick Order Dispatch | Easy Return | Accessible Customer Support - With quality product we deliver exceptional services to customers.
*[BRAND] RUGSOTIC CARPETS is a name synonymous with quality area rugs, rooted in decades of manufacturing expertise. Our commitment to excellence extends beyond product quality to supporting thousands of skilled weavers and artisans. We prioritize environmental friendliness and climate sustainability in our weaving processes, while also fostering the continuous skill development of our weavers through training initiatives. From spinning and dyeing yarn with natural ingredients in our in-house units to the meticulous weaving of our area rugs, quality checks at every stage ensure the delivery of products that uphold high moral values and exceed customer expectations.
* [SHIPPING & RETURN POLICY] Free shipping across USA (except Puerto Rico, Alaska & Hawaii). Easy 30 days free returns. In case of damaged or wrong product delivered, the return shipment cost will be borne by us, in any other case, it will be paid by the customer.
*[WEAVE DESCRIPTION] Weaving of a hand tufted shag rug is relatively easier than compared to other weaving techniques. The design is first sketched on a canvas and then material is made into it as per the design. The pile is kept very high to give it a furry look. Hand tufted rugs are very soft on face and are great for underfoot comfort. The rugs are very eye pleasing and the cost is very economical.
*[MATERIAL DESCRIPTION] Polyester, an artificial fabric, have gained much popularity as rug weaving material. The polyester material rugs are highly sturdy and have gain acceptance due to its qualities like shine, wear & fade resistance, comfort, non-allergenic, moisture resistance, ease of cleaning, moth-proof, etc.
*[PILE DESCRIPTION] Enjoy the high pile of this rug and place it at high footfall areas in your home, providing great underfoot comfort. This high pile rug is ideal one for the buyers who wants to place it on the flooring for the soft and cozy feel.
*[PROPER SET UP & CARE] Hand Tufted rugs are heavy rugs and fits well with any kind of flooring. Unlike rugs of other weave the hand tufted rugs have a cotton backing which makes it anti-skid. With regular use and proper care, including avoiding damp conditions, ensure that hand-tufted rugs maintain their durability and longevity.
*[FLOOR PROTECTION] Though hand tufted rugs have cotton backing which makes it anti-skid and harmless to the floor but you can always use a high quality rug pad to provide an extra level for floor protection.
*[CLEANING METHODS] For hand tufted shag rugs we recommend to go for gentle vacuum cleaning. For any stain, the users can opt for professional dry cleaning method.
 Tile Doctor Ltd
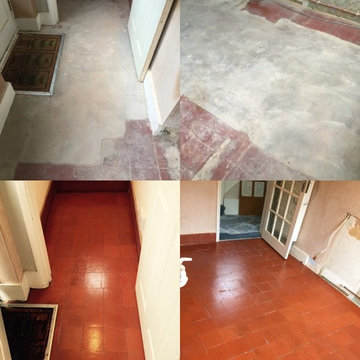
This customer from Woking had a Quarry tiled kitchen floor that she simply didn’t think could be restored. The floor had been unearthed after many years of being covered by a layer of levelling compound cement and then linoleum. Indeed, the situation certainly looked dire, but I carried out a successful test clean on a patch of the floor where the cement was at its thickest to show that it would be possible to conduct a full restoration. Having seen the results, the customer was more than happy for me to get the work underway.
To begin the restoration, I soaked small sections with water and Tile Doctor Remove and Go our heavy duty coatings remover. The solution was left to dwell for a short period to soften the cement, before I used the heat from a steamer in combination with a hand scraper to begin lifting away the muck. As you can probably imagine, this was an arduous and intensive process which took a full four days to fully complete.
Next, I cleaned the cement-free tiles using our high alkaline tile cleaning product Tile Doctor Pro Clean diluted 1 part cleaner with 3 parts water. This helped to eradicate the leftover muck once I had removed the bulk of the cement. I then sprayed Tile Doctor Grout Clean Up onto the grout lines and tiles to fully neutralise them and also remove any cement residue. Finally, I steamed the floor and left it for a week to dry out completely.
Upon my return to the property I sealed the floor with two coats of Tile Doctor Colour Grow, an impregnating sealer which really enhances the natural colours stone, and four coats of Tile Doctor Seal and Go, a topical sealer which provides a high quality sheen finish and durable protection against stains.
The customer was over the moon with the results and left some great feedback:
“Wayne did a really superb job. It was a very tough task, hot and exhausting, but he was fantastically good-humoured throughout, and kept me really well-informed. He was 100% reliable and very good at communicating between visits. I’m absolutely thrilled with the results! Thank you Wayne and thank you Tile Doctor! Would definitely recommend, and use your services again.”
 User
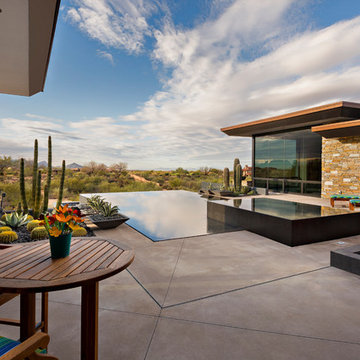
UserA large infinity-edge pool serves as the focal point for the patio area / Builder - Platinum Custom Homes / Photo by ©Thompson Photographic.com 2018 / Tate Studio Architects / Desert Foothills Landscaping
35