
Search results for "Cleaning process" in Home Design Ideas
 Tile Doctor Ltd
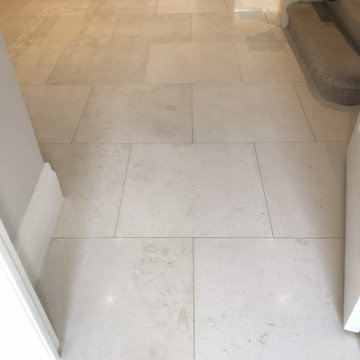
This client from Highgate in North London, N6 contacted us about their large honed Limestone tiled floor that was installed throughout the ground floor. It had been laid seven years prior and was now grubby and in need of a deep clean and seal including the grout which had turned black with dirt.
I visited the property to survey and assess what was required and provided the owner with a quotation for the renovation. The hallway pictured was in the worst condition, it was a busy house with young children and dogs and over the years the sealer had worn down leaving it vulnerable to ingrained dirt. Without a sealer to protect the stone it had become heavily soiled and lost its original polished appearance.
Happy with the quote we scheduled a date for the work to go ahead. The quote included deep cleaning and burnishing the stone to bring back the polish, grout cleaning and re-sealing the Limestone to protect it.
We arrived on the first day and prepared the area by taping up the skirting and woodwork to protect them from potential splashing. Next step was to burnish the floor using a set of Tile Doctor Diamond Burnishing Pads, specifically the 400, 800 and 1500 grit pads fitted to a rotary machine, these were used in sequence running each pad over the tiles several times with water to lubricate the process. The water turns into a fine slurry as pores in the stone are opened and the dirt is released, the slurry is rinsed off with more water and extracted using an industrial wet vacuum after each pad. The finer 800 and 1500-grit pads slowly close the pores and refine the appearance of the stone building up the polish in the process.
A strong dilution of Tile Doctor Pro-Clean was then applied to the grout lines, leaving it for a short while to soak in and then hand scrubbing with a grout brush. The dirty cleaning solution and were then removed from the floor with the wet vacuum.
This process was repeated across the different sections of the Limestone floor until I was satisfied with its appearance. Before leaving for the day, I rinsed the floor again using a buffing machine fitted with a brush fitted to give it a final clean. The floor was dried as much as possible using the wet vacuum and then allowed it to dry off fully overnight.
The following day the final 3000-grit pad in the four-pad set was applied to the floor to bring up the polish even further. The pad is applied dry with only a little water sprayed onto the tile. We call this process a “Spray Burnish” and as well as leaving the floor nice and dry ready for sealing it adds a nice subtle shine to the stone.
The floor was then sealed with two coats of Tile Doctor Colour Grow sealer. This is a colour intensifying impregnating sealer that works by occupying the pores in the stone so dirt cannot become ingrained there. It will provide durable protection and make the floor much easier to keep clean. It worked well on the pale Limestone and beautifully enhanced the colour and features in stone. Once complete the floor looked brand new again.
I left a complimentary bottle of Tile Doctor Stone Soap with the client and gave them some information about how best to maintain the floor. This product is pH neutral and cleans whilst maintaining the patina on the stone helping to keep the floor in great condition.
The client was delighted with the result and left us a great review.
“Andrew is excellent and gets on with the job and we got a fantastic result. Highly recommend. By Aaron S, Highgate, 15 March 2021”
Andrew Newstead
North London Tile Doctor
 Tile Doctor Ltd
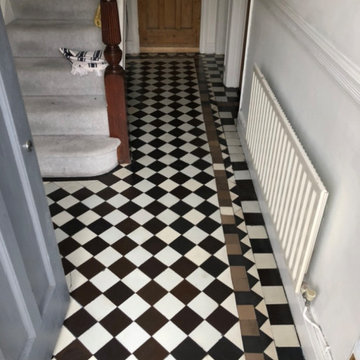
This job was carried out in a terraced property in Llanelli which had a Victorian Tiled Hallway laid in a diamond pattern that looking worse for wear and in need of some attention. The clients were a young couple who had moved in two years previously and had only recently decided they wanted the floor renovated. This was earlier in the year, so I was able to pop over to the property and take a detailed look at the floor before recommending a course of action to renovate the tiles.
Upon arrival the first thing we noticed was that the border had been laid with an inconsistent pattern, non- matching tiles had been patched in essentially filling voids as you can see in the images. The floor wasn’t terribly dirty however it wasn’t very clean either.
I discussed with the client replacing the non-matching tiles, so the floor pattern was uniform however they decided against it and were happy to just to have it cleaned and sealed. We can usually source either reclaimed original tiles or some great reproduction ones, so most floors can be restored if needed. I worked out a quote for the work and they were happy to go ahead.
If you have never been you should know that Llanelli is the largest town in the county of Carmarthenshire and famous for Rugby and the production of Tin. It is located on the Loughor Estuary, some 10 miles from Swansea and 12 miles from Carmarthen.
With no tiling to do the first job was to protect the woodwork such as skirting and staircase with tape. Once done the process of cleaning began with the application of a 400-grit burnishing pad fitted to a buffing machine. The process is lubricated with water and the pad run over the whole floor two to three times to remove dirt and refine the appearance of the tile. Even after the first application of the pad we could see a massive improvement to the appearance of the tiles. To get right into the edges of the tiled floor we use a 400-grit handheld diamond block, this proved especially useful under the stairs where our buffer machine could not reach.
During this process, the water turns into a fine slurry which is rinsed off with more water and extracted with a wet vacuum. On this occasion the floor was not dirty enough to require any chemicals, the use of water and the machine was enough to get the floor cleaned up.
This job was very straight forward, and we did not run into any problems at all. After allowing the floor to dry out for 24 hours we returned to seal the tiles checking first that the floor was sufficiently dry first using a damp meter. Fortunately, the burnishing method uses a lot less water than a chemical clean, so I was able to get straight on with sealing.
The client wanted a satin sheen finish, so I applied four coats of Tile Doctors Seal and Go which works well on Victorian tiles. The sealer really put the life back into the tiles and will protect them from staining going forward. It will also make the floor much easier to maintain and keep it looking good for much longer.
I’m pleased to say the owners were very happy with the floor and recommended us to one of their friends who we also did some work for. For aftercare I recommended the use of Tile Doctor Neutral Tile Cleaner. This is an everyday tile cleaning product that is sealer friendly and not prematurely reduce the life of the sealer which can happen with many household cleaning products which are simply too strong.
Adrian Iacono
Swansea Tile Doctor
 Tile Doctor Ltd
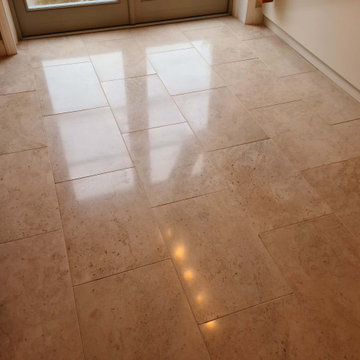
I recently went to survey a floor in Harrogate which I immediately recognised as beige Moleanos Limestone which comes from Portugal. If you have been reading my previous posts you will remember I am not a fan of this type of stone as it is very difficult to clean, polish or seal. This particular floor was laid around 5 years prior and was now looking quite dull and was in need of reviving.
The client didn’t want to spend much so l suggested l could spray burnish the floor to get her shine back again and remove the splash marks. We do this a lot for owners of polished stone floors as part of an annual maintenance package, it is a low cost option that uses a very fine 3,000 grit burnishing pad to renovate the stone and bring up the shine. However, I pointed out to her that this process wouldn’t clean her grout which was making her floor look scruffy.
I priced up the different options and after weighing up the quotes I’m pleased to say she decided to go for a full clean and seal. The full process involves the use of different grades of diamond encrusted burnishing pads from low to very fine grits to renovate the Limestone and also a chemical clean of the grout followed by a fresh seal.
I returned on the scheduled date and after preparing the floor I started cleaning the Limestone by running over the tiles with a 400-grit coarse burnishing pad lubricated with water. The soil was rinsed off with more water and extracted with a wet vacuum. This process was repeated with the 800 and 1500-grit pads which starts to build-up the polish on the stone.
I then turned my attention to the grout with a strong dilution of Tile Doctor Pro-Clean which was left to soak into the grout for ten minutes before scrubbing it by hand with a stiff brush. After a final rinse and extraction with the wet vacuum the tile and grout were looking much cleaner and was left to dry off overnight.
On Day 2 I stated with the application of the 3,000-grit pad which is the last step in the polishing processed and builds up a lovely satin finish on the stone floor. This is done using only a little water and is basically the spray burnish technique I referred to earlier. This process has the added advantage of leaving the floor dry.
With the stone tiles looking lovely and the grout clean the last step was to seal it all in and protect it from dirt and future staining with the application of a sealer. For this I used two coats of Tile Doctor Ultra Seal.
My client was very pleased she had spent the extra money to achieve the floor she had always wanted, apparently it had never looked this good even when new. We discussed the annual maintenance plan to ensure the floor remained looking this good.
Nigel Stoker
North West Yorkshire TIle Doctor
Find the right local pro for your project
 Tile Doctor Ltd
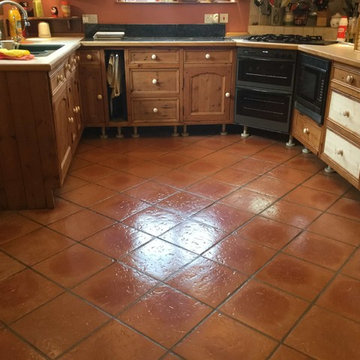
This Terracotta tiled floor was installed in the kitchen of a cottage in the small village of Maidford near Towcester. The tiles were not looking their best and the owner of the property realised it was time to do something about it and contacted Tile Doctor to have the floor stripped and resealed. Stripping and Sealing tile and stone floors is our bread and butter so I was more than happy to pop round and survey the floor which was approximately 9m2.
The grout had darkened with dirt and the previous tile sealer was failing so dirt was now getting ingrained in the Terracotta making it difficult to clean in places and leading to a patchy appearance. We discussed the work involved, my quote was accepted, and a date agreed for me to return and complete the work which would take two days, one to clean and one to seal.
After tidying up the Kitchen and removing the kickboards from underneath the kitchen units I set about working on cleaning and stripping the Terracotta floor of old sealers. To start I tested a small area with a strong dilution of Tile Doctor Wax Away. Wax was quite often used on Terracotta so I figured this product would be a good place to start. My suspicions were proved correct, and I found this to be the best product for removing the many layers of sealant on the floor. Wax Away is a new alkaline product by Tile Doctor and ideal for cleaning clay-based tiles such as Terracotta.
With my sights set on the rest of the floor Wax Away was scrubbed into the tile using a 17” rotary floor scrubbing machine and a black scrubbing pad running on a slow speed which helps to reduce splashing. This activity soon brought the dirt off the floor and the soiled cleaning solution was removed using a wet vacuum and the floor was rinsed down with clean water. The cleaning process was repeated a couple of times until I was happy with the floor, a stiff hand brush was then used along the grout lines with a dilution of Tile Doctor Pro-Clean to clean up the grout.
After rinsing and extracting the floor again the floor was inspected, and I noticed there were a few stubborn paint splashes on the tiles. I managed to remove these and these by spot treating the affected area with Tile Doctor Remove and Go and a steamer to lift the stain out of the clay tile. Once happy the floor was clean it was given a thorough rinse to neutralise it and remove any trace of cleaning products and then left it to dry.
I allowed the floor to dry for several days before returning to seal the Terracotta using numerous coats of Tile Doctor Seal and Go which is an ideal sealer for Terracotta and provides durable stain protection together with a low sheen finish. Terracotta is by its nature very porous and so it’s not unknown for it to take up to nine coats of sealer, which can take some time to apply as like paint you have to wait until it’s dry before it will take the next coat.
The customer was so impressed by the results I achieved in their kitchen they decided to go ahead and book me in to carry out this process throughout the whole of the ground floor which included lounge, study and hallway.
Phil Vissian
Northamptonshire Tile Doctor
 Tile Doctor Ltd
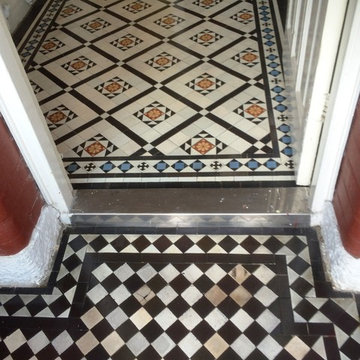
Recently I travelled down to the village of Prestwood in the Chiltern Hills of southern Buckinghamshire, to work on a Victorian tiled porch and hallway. Victorian tiles are commonly found in the entrance areas of older houses and unfortunately in this case the tiles had become heavily ingrained with dirt over time, and had suffered from additional paint and plaster spillages. The result was an unsightly mess; my client was considering covering the floor with lino after several unsuccessful attempts at cleaning it. I was called upon to provide a professional clean and seal, restoring these great Victorian tiles back to looking their best again.
On my first day at the house, I mixed up a solution of 50 per cent Tile Doctor Pro-Clean, a high alkaline cleaner, and NanoTech HBU (formerly known as Ultra Clean), which is a cleaning product that contains nano-sized abrasive particles that penetrate deep into the stone to lift ingrained dirt to the surface. This solution was worked into the tiles using abrasive scrubbing pads fitted to one of my commercial rotary machines.
The cleaning process left over a slurry of residue which I rinsed away with clean water and extracted with a wet vacuum. I was still left with the issue of stubborn paint spillages, so I applied a layer of Tile Doctor Remove & Go, a stripper with cleaning properties which is very effective at breaking down paint and adhesive stains.
Once the paint spillages had been dealt with I gave the area another rinse with clean water. I then left the house, allowing the floor enough time to dry overnight.
Upon my return the day I set about sealing the newly cleaned Victorian tiles. Before starting the sealing process I inspected the floor to check for any dampness, knowing that any excess moisture could potentially damage the performance of the sealer.
When I was satisfied that the tiles were fully dried, I applied Tile Doctor Seal & Go, a sealer which offers durable surface protection, along with an aesthetically pleasing, low-sheen finish which brings out the colour in the stone. This product can be used to seal internal, porous surfaces including Victorian, Slate, textured Quarry and Sandstone tiles.
The process made an amazing difference to the floor as you can see from the photographs; additionally the restoration of such an original feature adds a lot of value and looks so much better than lino!
Colin Ford
South Buckinghamshire Tile Doctor
 Qudsia Fatima
Putting up a sign in the yard and waiting for the right buyer to come along isn't always the easiest way to sell a house. The traditional process of selling your home can be slow, expensive and frustrating for many Springfield, OH homeowners. You may have to fix the house up, clean it out, show it, negotiate with buyers, wait for inspections, and hope the buyer's financing doesn't fall through. That can be a lot to manage, especially if you need to move quickly or work with a property that is no longer working for your situation.
That’s why many homeowners now look for a faster option. If you want to sell your house fast for cash in Springfield, OH, then working with a local cash home buyer like Sell House Now Columbus can be a practical solution. The company works with homeowners in Columbus, Springfield and other parts of Ohio, providing a direct cash-buying process that helps sellers avoid repairs, agent commissions, closing delays and unnecessary stress. They buy houses as-is, and offer a simple selling process and possibly help with closing costs, according to the company’s website.
Why Springfield, OH Homeowners Choose to Sell for Cash
Every homeowner has their own reason for desiring a quick sale. Some are relocating for jobs and don’t have months to wait for a buyer.” Others may have inherited a property they don’t want to keep up. Some houses need a lot of work and the owner may not have the time, money or energy to do it all before listing. There are also situations of divorce, concerns about foreclosure, bad tenants, unpaid taxes, or simply a desire to move on without the hassle of a traditional sale.
It makes sense to do a cash sale because it takes away a lot of the common roadblocks. Rather than waiting for mortgage approvals, appraisals, repair requests and lengthy negotiations, homeowners can receive a direct offer from a buyer who is ready, willing and able to purchase the property. At Sell House Now Columbus, sellers can request a fair cash offer and pick a closing timeline that suits them. The firm says homeowners can sell without agents, fees, repairs or cleaning, which can be a huge relief for anyone going through a stressful property situation.
Selling as is No repairs or cleaning
One of the biggest advantages of selling to a cash home buyer is the fact that you can sell the property as-is. This is good news because you don’t have to spend thousands of dollars on fixing the roof, replacing flooring, repainting walls, updating the kitchen, repairing plumbing or improving kerb appeal to attract buyers. Buyers expect the home to look clean, updated and move-in ready in traditional sales. Issues discovered during the inspection can force the seller to lower the price or pay for repairs prior to closing.
An as-is cash sale is a different process. The purchaser is taking the property “as is” and is offering based on the current condition. Sell House Now, Columbus, states that sellers are spared the hassle of repairs, daily showings and cleaning. They also say that unwanted items can be left behind and dealt with after purchase. This can save time and money for Springfield homeowners confronted with an older house, damaged property, rental cleanup or inherited home full of belongings.
No Real Estate Agent Fees or Hidden Commissions
When you sell your home, conventional real estate agents eat up a huge portion of your final proceeds through commission fees. You might have closing costs, staging costs, repair costs, inspection-related costs, photography fees and other costs that eat into what you actually walk away with. After deducting all expenses the final number is much lower than expected for some sellers.
A direct cash sale makes the numbers simple. “Sell House Now, Columbus says they don’t charge commissions and their process is designed to help homeowners avoid listing fees and agent-related expenses.” This provides sellers more clarity up front. Instead of guessing what the final payout might be after months of negotiations and deductions, you can review a cash offer and decide if it meets your needs.
Faster Closing Timeline for Springfield Homeowners
When you need to sell fast, time is of the essence. A traditional home sale can take weeks or even months, depending on market conditions, buyer financing, inspections, appraisals and negotiations. Once you’ve accepted an offer, there is always the risk that the buyer’s loan may be delayed or denied. Delays can add additional pressure to a homeowner who needs cash fast, who needs to stop paying taxes or utilities, or who needs to relocate soon.
Cash buyers are often faster than traditional buyers because they don’t rely on bank financing. Sell House Now Columbus says their process offers a competitive cash offer, a simple experience and Sellers can pick their closing day. That flexibility can be helpful if you need to close quickly or if you need extra time to make your next move. You don’t have to follow someone else’s schedule but can choose a plan that works better for your circumstances.
Who Can Use Selling For Cash?
Is your property stressing you out? Is it costing you money every month? If so then selling your House for cash in Springfield OH may be a good option. It can help homeowners who are behind on payments, tired of being landlords, dealing with code violations, handling probate property, in need of costly repairs, or just ready for a clean break. It can also be a benefit to those who do not live near the property and do not want to travel back and forth to manage repairs, contractors, cleaning and showings.
And the best part is you don’t need to have a perfect house. Cash buyers often see the property as an investment and are willing to do repairs after the sale. This makes it easier for sellers who are stuck with a dated, vacant, damaged, or otherwise hard-to-list property.
How it works
Generally, the process begins with a call to discuss the property in general terms. After reviewing those details, Sell House Now Columbus can assess the home and make a cash offer. If the offer interests you, you can pick a closing date that suits you. You don’t have to accept and the offer can help you explore your options before making a final decision.
This approach gives control to homeowners. You don’t have to go through months of listings, open houses, questionable buyers or last-minute repair demands. You can look at the cash offer and see if it solves your problem.
Summary
If you need to Sell your House fast for cash in Springfield, OH then a direct cash sale might be the easiest path forward. It gives homeowners a way to avoid repairs, agent commissions, delays and stress. Whether you’re looking to sell an inherited property, a damaged home, a rental you no longer want, or a life change that requires a quick sale, Sell House Now Columbus provides a simple option for homeowners that want speed and convenience.
Selling a house should be no more difficult than dragging a heavy box up hill. A good cash buyer can make the process a lot lighter, faster and easier to manage. If you are a homeowner in Springfield and want to get a fair cash offer and an easy solution, Sell House Now Columbus can make the next step a lot easier.
 Vincent Designs, Inc.
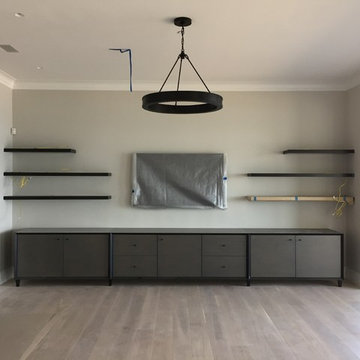
All installed and cleaning process has begun
Family room - contemporary family room idea in New York
Family room - contemporary family room idea in New York

Sponsored
Columbus, OH

Hope Restoration & General Contracting
Columbus Design-Build, Kitchen & Bath Remodeling, Historic Renovations
 O'LYN Roofing
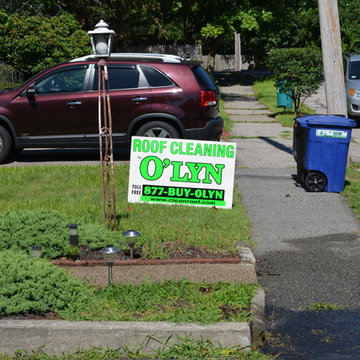
As many as 50% of homeowners choose to replace their roof because of cosmetic repairs alone. A roof cleaning costs a fraction of the cost at 3–5% of an actual strip and re-shingle job. Roof cleaning is much more affordable than most people think. At O’LYN Roofing roofing we provide our customers with the option of roof cleaning as an alternative and to protect roofs from deterioration caused by organic elements. Our roof cleaning services are performed by trained technicians using professional grade equipment and cleaners that are specifically designed for cleaning roofs. We use a low pressure wash that is environmentally safe to ensure that your shingles are not damaged during the cleaning process.
 Tile Doctor Ltd
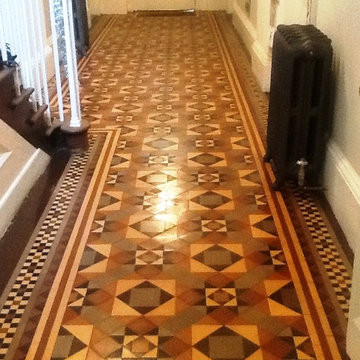
This hallway floor was actually at a house in the town of Stamford which is just over the northern border of Northamptonshire and slightly out of my area; however I was recommended to the owner by another client which is always welcome and a testimonial in itself. I work right across the county so it wasn’t long before I was in the general area and arranged a visit to carry out an inspection of the Victorian Quarry tiled floor and provide a quote for a full restoration.
The owner of the house had just moved in recently and although the floor was in good overall physical, it was in need of a thorough clean and new seal to bring back some life to the tiles. Additionally she was having lots of other building work done to the house and she wanted to retain this as an original feature of the property. My quote was accepted and I was able to book the work in for the following week.
These first photos show how dull the floor looked due to a build-up of builder’s dust and general wear and tear. They also show some of the equipment needed to undertake the following cleaning process.
I used a brush and vacuum to remove as much loose debris and dust from the surface of the floor as possible. I then applied a strong dilution of Tile Doctor Pro Clean to the floor which is a strong alkaline cleaner which can also be used to remove sealers; the solution was left it to dwell for roughly ten minutes before agitating it with scrubbing pads and brushes to remove the muck that was lifted to the surface. This was then wet-vacuumed twice to remove all the slurry and neutralise any chemicals.
As it was such an old property I then used a steamer to heat up the tiles and draw up any contaminants and assist with the drying process. I also chose to install two fans and a dehumidifier to dry the floor even further.
With the cleaning process complete – and achieving a marked difference to the appearance of the floor – I left the tiles to finish drying for 24 hours.
Upon my return to the house, I checked for any excess moisture by running damp tests as this has the potential to affect the performance of the sealer. Once satisfied with the results, I sealed the floor with two coats of Tile Doctor Colour Grow, a colour enhancing sealant which offers both a robust surface seal and an aesthetically pleasing finish.
I also carried out water repellency tests to ensure the sealer was working as expected and the floor had sufficient protection and will be hard-wearing for a hallway which is a high traffic area.
On my client’s return to the house she was very happy with the final results – in fact, she was also in contact about some further work in the New Year!
Phil Vissian
Northamptonshire Tile Doctor
 Home support
Carpet Cleaning Methods in Singapore
Is your house full of rugs made of different fabrics? And, are you confused about its cleaning methods? This confusion is easy to happen when there are several rugs in your home. In those situations, consulting carpet cleaning services in Singapore is the best solution for you.
Different carpet fabrics require different cleaning methods to be applied, as applying a single method can damage the texture and appearance of the carpet. So, here in this blog, we will discuss the different types of carpet fabrics and the cleaning methods used by the best carpet cleaning company.
Different carpet fabrics require different cleaning methods to be applied
Different carpet fabrics require different cleaning methods to be applied
4 Types of carpets and best cleaning method
Synthetic Carpets: Synthetic carpets are found in most households as they are abundant in the market. They are easy to maintain and need to be cleaned regularly because dusting is quick on such fabrics. For cleaning of synthetic carpets, you can contact cheap carpet cleaning in Singapore, as the frequency of cleaning is high. Also, the method adopted for cleaning synthetic carpets usually involves dry-chem cleaning or soap-free cleaning methods.
Wool Carpets: Wool carpets can stain and collect dust easily, but you shouldn’t clean them with soap and water. Wool has excellent water absorption and takes a long time to dry completely. Therefore, to clean wool carpets, it is better to consult a professional carpet cleaner, as they have a better knowledge of applying the right cleaning method. Usually, the dry cleaning method is applied to make the carpet faster and cleaner.
Polyester Carpets: Polyester is one of the forms of synthetic fabric that has been one of the most popular carpet fabrics for a long time. This fabric is known for its luxurious feel and comes in a variety of colors. These mats are hydrophobic and stain resistant, however, they are not very durable, especially when exposed to the sun. Therefore, you should not apply the usual soap and water cleaning method to this fabric but entrust the task to professionals.
Berber Carpets: Berber carpets give you a soft, comfortable feeling when you step on them, and with this carpet fabric you need to wash it often because the dust treatment process happens quickly. Weekly vacuuming is recommended along with professional deep cleaning every three months. To clean Berber carpets, you can choose the regular soap and water method, but be careful with rubbing as it can damage the fabric texture.
Conclusion
Ocean Cleans Singapore we provide the best cleaning service in Singapore. With our 20 years of experience, you’ll enjoy the luxury of deep-cleaned rugs at an incredible price. We have extensive knowledge of different carpet fabrics and use the most appropriate and advanced cleaning technology and methods. So, to enjoy the pleasure of having clean carpets at your residence, feel free in availing our excellent services!
 Tile Doctor Ltd
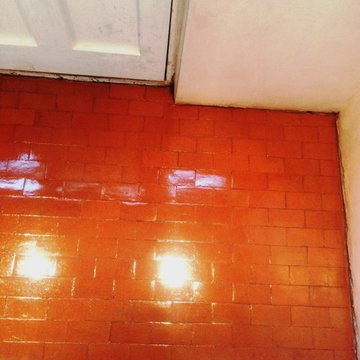
Here’s a quick job I completed in the coastal town of Eastbourne in East Sussex. While more commonly I am asked to work on entire floors, this customer was specifically interested in restoring a small doorway-like area with Quarry tiled flooring, the reason being that it had been covered for a long time by an old wardrobe and dog basket. As a result, the area had not been properly cared for, becoming very dusty and dirty. Also revealed were some unsightly splashes of white paint from previous decoration work.
The customer was keen to finally give this area of the floor the attention it needed, and so asked me to come in to provide a thorough clean and lay down some fresh sealer.
My first task was actually to relocate the old wardrobe and dog basket to the garage to get the area ready for cleaning. Then, to begin the cleaning process, I stripped away any old existing sealer and the white paint splashes by using Tile Doctor Remove & Go stripper in combination with a wire brush. Remove & Go is a versatile product that can also be used to break down glues and other adhesives.
I then washed the area down with water and promptly vacuumed up any moisture, before sitting down with a heat gun for an hour to dry the tiles. Usually a floor should be left for up to 48 hours to dry completely before sealing, but in this case the area was so small that I was able to dry it in the space of an hour.
Nonetheless, I opted to install a fan and leave the floor for an extra hour over lunch to ensure any excess moisture was removed. This is really important to do before sealing, as any remaining moisture can cloud the sealer and damage its performance.
To complete the restoration, I sealed the tiles using nine coats of the topical, water-based sealer Seal & Go, which is suitable for building up surface protection against dirt and stains on internal unsealed porous surfaces such as Victorian, Quarry and Sandstone tiles. The Quarry tiles were quite porous, which is not uncommon for Quarry Tiles and really soaked up the sealer.
As the photographs show, the results of the restoration were very good, with smiles all round – including from the slightly bemused family dog!
Rupert Mcleod
East Sussex Tile Doctor
 Tile Doctor Ltd
Shower cubicles can be the most difficult of tiled features to keep clean. Most are exposed to various acid-based soaps and shampoos on a daily basis, allowing mould and general muck to quickly build up along the grout lines and silicone. This leaves the entire area looking quite unappealing. In some cases, the grout lines become stained beyond a point where they can be restored to their original condition, so property owners will typically request to have the grout cut out and replaced however a faster and cheaper method is to have the grout completely recoloured.
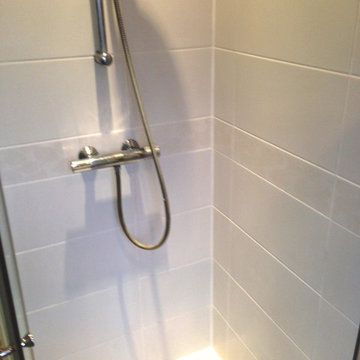
Such was the case with this Ceramic tiled shower cubicle at a house in Wigan. It would take a lot to get the cubicle looking great again, having not been cleaned properly for a long time. The property owner decided to contact me for a professional refresh, including cleaning, new silicone sealer and recolouring of the grout.
I started the refresh by applying Tile Doctor Mould Away spray to the tiles and grout, and leaving it to dwell for an hour. As the name of the product suggests, Mould Away is a fast and effective cleaner for the removal of mould from silicone and grout, making it ideal for use on shower cubicles similar to this one. I then rinsed the entire area down with water before scrubbing the grout lines and tiles with a stiff grout brush to remove any remaining mould and lime scale, leaving them looking a lot cleaner.
The cleaning process made a big improvement however the grout was still too stained so after removing the silicone strip from around the base of the shower I proceeded to recolour with our white Grout Colourant. The colourant is painted onto the grout and any excess is wiped of the tile before it dries which both improves the appearance of the grout and seals it in to protect it from further staining. The last step was to apply fresh white silicone along the base of the shower.
The customer was very pleased with the refreshed appearance of their shower and you must admit it looks much more inviting now.
Steve Keary
Greater Manchester Tile Doctor
 Tile Doctor Ltd
My client had recently moved into a bungalow in Godalming where they inherited the Limestone tiled kitchen floor pictured below. The previous owner had not looked after the floor very well and by the time they moved in it was pretty filthy. Limestone is a natural but porous stone where, unless sealed, attracts dirt into its tiny holes and as you would expect Cream Limestone shows the dirt easily. The protective seal had long since worn off this floor and was now ingrained with dirt it was now looking permanently dirty.
Before quoting I conducted a small test clean to work out the best method to renovate the stone and this also gives the client a good idea of how the floor will look after its finished. They were delighted with the initial result and happy with my quote gave me the go ahead.
On arrival first I helped the customer remove his tables and chairs and I then set about tapping up the plinths in the kitchen and the skirtings to protect them from cleaning solutions and equipment. The cleaning equipment I have invested in works more efficiently in open spaces, so it’s worth spending time at the beginning preparing the area first.
Next, I used a deck brush to apply a mixture of water and Tile Doctor Pro-Clean to the dirtiest tiles. Tile Doctor Pro-Clean works well when left to dwell for ten minutes or so. I also applied the same product to the grout over half the room so it could get a head start breaking down the dirt. Then using a stiff brush, I scrubbed the grout clean. Once it was worked loose, I extracted the now dirty solution with a wet vacuum.
With the grout clean I turned my attention back to the tiles with where the Pro-Clean had been left to soak in. Giving them a quick brush, I noted that what appeared to be permanently ingrained dirt had now come loose. To get the tiles really clean I used a 17″ rotary machine fitted with diamond encrusted buffer pads. This removes the tiny dots of dirt on the stone and with it comes any existing sealer and dirt.
A set of four burnishing pads were used, starting with a 400-grit, and finishing with a 3000-grit pad. The first 400-grit pad is coarse, and the grits become smoother as you work through the set. Water is used to lubricate the process and the released dirt is extracted in-between using the wet vacuum mentioned earlier. This process does take time but by the end of day one the floor was looking a lot better.
The next step is sealing however the floor needs to be bone dry for that, so I left a couple of industrial fans in place and left the Limestone to dry off overnight.
Returning the following day my first job was to ensure the floor was dry by taking multiple moisture readings with a damp meter. The readings were good, so I was able to make a start applying the sealer which for this floor was Tile Doctor Ultra Seal.
Ultra-Seal is an impregnating sealer that soaks into those small holes in the stone I mentioned earlier, I occupies the pores thus preventing dirt from becoming ingrained. The other feature of this sealer is it doesn’t change the appearance or colour of the stone leaving it with a very natural finish. Two coats of sealer were applied, leaving the seal to dry between each coat.
After the final coat was dried, I gave it a final polish with a soft nylon pad and the floor was finished. Before leaving we discussed after care which for this floor, I recommended Tile Doctor Stone Soap and I requested that the customer to stay out of the kitchen for a couple of hours while the sealer cured. They were over the moon with the new floor and could not believe the difference it had made to their kitchen.
Rupert Mcleod
West Surrey Tile Doctor


 Tile Doctor Ltd
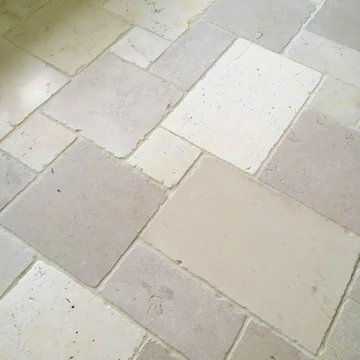
This Limestone tiled floor had been installed in the kitchen of a property in Teddington three years before and due to the use of the wrong cleaning product was now stripped of its protective sealer. Limestone like any natural stone is porous and without a sealer in place dirt becomes trapped in the stone making it very difficult to keep clean. The property was close to Bushy Park situated in South West London on the North bank of the Thames which is only about seven miles from my base in Shepperton.
I discovered all of this after visiting the property to quote for deep cleaning and resealing the floor. It turns out they have been using Flash multi-surface & floor cleaner which has an acidic pH of 10.3, compare this to Tile Doctor Remove and Go which we use to strip sealers off floors and has a pH of 12. Needless to say, this was not the right product to use and the old sealer had been completely stripped off the floor and probably within the first few months.
On top of this our customer had 3 children and a dog running in and out of the garden and was therefore transferring quite a lot of dirt into the stone. After surveying the floor, I discussed the renovation process with the customer which would take two days and include a deep clean of the Limestone followed by the application of a sealer to ensure it did not hold onto the dirt. They were after a sheen finish for the floor and were keen to have natural brown and cream variations in the stone highlighted. We agreed a price for the work and booked a date for the work to start.
To start with, we machine scrubbed the floor with Tile Doctor Pro-Clean to break down the dirt and release it from the stone. We find the best process is to spray the Pro-Clean onto the floor first and then leave to dwell for ten minutes before scrubbing. It’s not long before the cleaning solution turns dark with the dirt released from the pores of the stone and this soil is then rinsed with water and vacuumed off the floor with a low-pressure hard floor cleaning machine.
Following the cleaning, we honed the Limestone using a sequence of 800, 1500 and finally 3000-grit Tile Doctor Burnishing Pads. The pads are applied with water to lubricate and the slurry generated is rinsed off the floor as before. This burnishing process brings up the natural sheen of the stone and tightens up its pores prior to sealing. I left the floor overnight to allow it to dry out.
The next day I returned to the property and checked the floor for moisture using a damp meter. The readings were fine, so I proceeded with the application of the sealer for which I used two coats of Tile Doctor Colour Grow. This is an impregnating sealer that enhances the colours and contrast on the stone while protecting it against future soiling and spillages. It gave a lovely sheen finish to the floor as requested by the customer.
As you can see from the pictures the process made a huge difference to the floor which now looks lighter and brighter, certainly the customer was more than happy. Before leaving I recommended, they should clean the floor using Tile Doctor Stone Soap, this is a pH neutral product that will ensure the seal does not get broken down like it previously had using the household cleaners. It is gentle enough to use every day if you wish is designed to help maintain the patina of the burnished stone.
Jonathan Oldham
South Middlesex Tile Doctor
 Tile Doctor Ltd
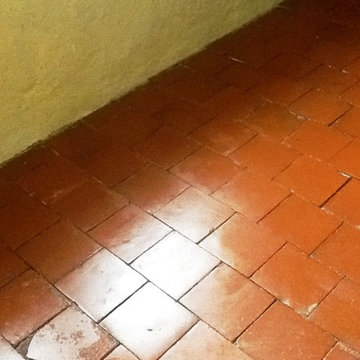
Here’s an interesting work I recently completed on a red Quarry tiled floor at a house in the town of Abington, Northampton. In post-war Britain (more specifically in the 1940s and 1950s), many new homes were built with Quarry tiled hallways and kitchens, so quite a popular feature back then. These floors are typically quite hard wearing and therefore ideal for such high traffic areas; additionally they don’t need a great deal of maintenance but their appearance will degrade over time.
In this particular house, the Quarry tiled floor had been covered with linoleum for many years, causing significant patches of visible black mould. The floor also had a loose tile (which I promptly reset to mitigate the potential tripping hazard) and splashes of paint due to a lack of precaution while the house was being renovated. Needless to say, the floor needed a lot of work.
Before beginning the cleaning I made sure to vacuum up all of the loose debris from the floor. I then applied Tile Doctor Remove & Go to the tiles, left it to dwell for a short period, and then agitated the area with a black stripping pad, adding water to aid the process. This helped to break down any old and ineffectual sealer, along with the paint splashes marking the tiles, leaving a much cleaner and more refined appearance.
I followed this up with Tile Doctor Grout Clean-Up to eliminate the odd speck of cement and grout haze dating back to when the floor was first installed; Gout Clean-up has an acid base so it’s not advised to leave it on the tiles for too long, consequently as soon as I was happy it had done the job I rinsed it off with water and give the floor a thorough wash down.
I used a wet-vacuum machine to extract as much water as possible and gave the floor a once over with steam cleaner which improves the evaporation of any remaining moisture by heating up the tiles.
After completing the cleaning process, I left the house to allow time for the floor to dry completely. Upon my return, I conducted a damp test which showed the floor needed to dry further before sealing so I left an industrial fan in place for a couple of hours to help speed things up.
Once I was satisfied that the floor was dry enough to take the sealant, I sealed the floor using Tile Doctor Colour Grow which is an interesting product that will not only provide durable stain protection but also improves the natural colours of the tile.
While the floor required a lot of time and work to restore, I think you will agree the results were certainly worth waiting for.
Phil Vissian
Northamptonshire Tile Doctor
 Tile Doctor Ltd
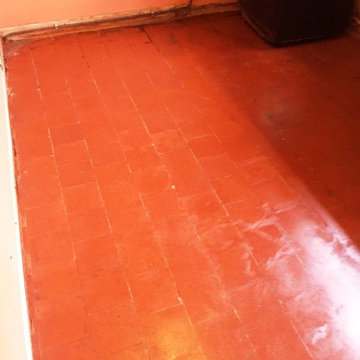
It’s been my experience that it’s not un-common to discover fantastic tiled floors hidden underneath an additional layer of flooring usually carpet or linoleum. This was the case with this property, situated in the town of Canley, Coventry, where the owner had found a Quarry tiled floor underneath Vinyl tiles which had been stuck down using an adhesive.
Quarry tiles are typically hard wearing and very durable and a sensible choice for flooring in high traffic areas of both residential and commercial properties, a tiled floor is of course a difficult to remove so it’s not surprising that tiles do get covered over rather than replaced during redecoration.
Taste’s change and like most property owners who unearth hidden tiled floors, my client was keen to restore them as an original feature. Despite the amount of adhesive and the poor state of the Quarry tiles, I was confident that the floor could be restored to new, so we agreed a date for me to come back to the property and complete the work.
The process of cleaning the Quarry tiled floor – including remove large amounts of adhesive – took a total of two days to complete.
I started by carefully removing the Vinyl tiles using a hand scraper which as you can imagine was a lot of manual effort and the adhesive proved quite difficult to remove. In the end I had to use a combination of a very coarse 50 grit pad fitted to a heavy rotary machine lubricated with water, to clear the area completely of the substance.
The resulting slurry was rinsed away, and the floor was then given a thorough acid rinse with Tile Doctor Grout Clean-Up. Grout Clean-Up is a cleaner which contains concentrated phosphoric acid, and is designed to dissolve minerals such as salts and cement left on the surface of the tile.
This was followed by a final thorough rinse with water, and the excess moisture was soaked up with a wet-vac machine.
After the cleaning process was complete, I left the floor to dry off completely for 24 hours. Upon my return to the house the next day, I checked for any dampness that could have damaged the performance of the sealer, thankfully, the floor was dry and ready to seal, and so I proceeded to apply several coats of Tile Doctor Seal & Go Extra.
Seal & Go Extra is a fully breathable sealer that provides for effective moisture transmission. It provides durable surface protection against dirt and stains, and is suitable for most kinds of internal, natural stone tiled floors, including Quarry, Victorian and Flagstone.
As you can see from the photographs the Quarry tiles came out really well and it’s hard to believe that this is the same floor.
Mick Gayton
Warwickshire Tile Doctor
 O'LYN Roofing
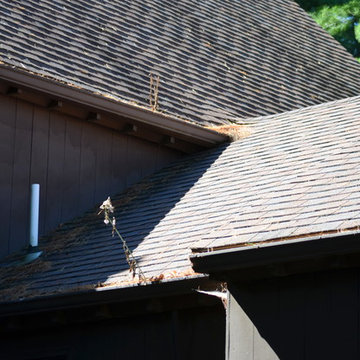
BEFORE PICTURE: As many as 50% of homeowners choose to replace their roof because of cosmetic repairs alone. A roof cleaning costs a fraction of the cost at 3–5% of an actual strip and re-shingle job. Roof cleaning is much more affordable than most people think. At O’LYN Roofing roofing we provide our customers with the option of roof cleaning as an alternative and to protect roofs from deterioration caused by organic elements. Our roof cleaning services are performed by trained technicians using professional grade equipment and cleaners that are specifically designed for cleaning roofs. We use a low pressure wash that is environmentally safe to ensure that your shingles are not damaged during the cleaning process.
Sponsored
Columbus, OH
Hope Restoration & General Contracting
Columbus Design-Build, Kitchen & Bath Remodeling, Historic Renovations
 Soda Pop Design Inc.
Stephani Buchman Photography
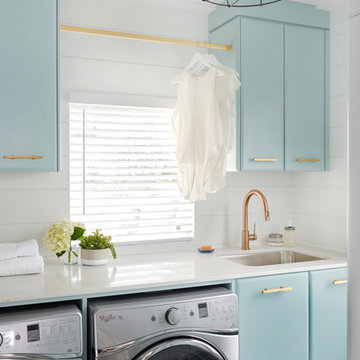
Transitional single-wall dedicated laundry room photo in Toronto with an undermount sink, blue cabinets, white walls and a side-by-side washer/dryer
Transitional single-wall dedicated laundry room photo in Toronto with an undermount sink, blue cabinets, white walls and a side-by-side washer/dryer
 Tile Doctor Ltd
This ground floor flat in the City of Oxford had been converted from a shop which as you can imagine, was quite complex. One significant element involved in the conversation was the restoration of an old Quarry tiled floor which ran through the main hallway and had for many years been covered in a commercial linoleum covering.
When the linoleum covering was removed, the sheer amount of glue which had been used to affix it had completely ruined the appearance and condition of the Quarry tiles. There was also a lot of concrete in the bathroom, and our client was keen to have this removed in the hope that the tiles beneath were salvageable.
My first task at the property was to deal with the adhesive. I covered the entire floor area with Tile Doctor Remove and Go and then covered it with a plastic sheet and leaving it to soak into the glue and break it down overnight. Remove and Go is powerful stripper with a long-dwell time, formulated to break down adhesives and paint stains, amongst other coatings.
I returned the next day and, removing the plastic sheeting, I scrubbed the floor with a carbon brush attached to a rotary floor scrubber to remove the huge glue deposits. I worked in sections, rinsing each area of the floor with water after it had been scrubbed. Once I had finished the entire floor there was still some glue remaining, so I covered it again with a solution of Remove and Go combined with Tile Doctor HBU Nanotech, which utilises nano-sized particles to get underneath tough stains, dissolve them, and lift them out. I left this solution on the floor for about two hours to dwell and scrubbed it again.
During the next day of work, I used a very coarse 100 grit diamond burnishing pad to manually grind away the remaining stubborn bits of glue. Paying attention to the bathroom, I used a 50-grit coarse milling pad followed up with a 100-grit diamond burnishing pad to do the same to the area of concrete.
The next part of the process was to use Tile Doctor Grout Clean Up to acid wash the floor. This was successful in removing the last bits of cement and the remaining residue of the glue. To complete the cleaning process, I then rinsed the floor with plenty of water and vacuumed up any soiled solution.
I opted to leave the floor alone for a couple of days to fully dry off so that it could be sealed upon my return. This is crucial as any moisture or damp issues can damage the performance of the sealer and expose the floor to further ingrained dirt and staining.
To seal the floor, I used Tile Doctor Colour Grow. This is an impregnating sealer that also enhances the natural reddish shades in the Quarry. I applied two coats of the sealer, giving the floor the natural look matte finish the customer desired.
The customer was very impressed with the results of this thorough restoration. She even left the following feedback:
“I cannot recommend this service enough. The Oxford Tile Doctor (Barry) was a superstar: he cleaned up the tiles in my hallway, which were covered in a very thick layer of glue, and removed concrete from the tiles. They now look superb and I’m really happy with the outcome. Barry was always on time, considerate, and kept me up to date. The quote for the job was exactly right. I would not hesitate to recommend him.”
 Tile Doctor Ltd
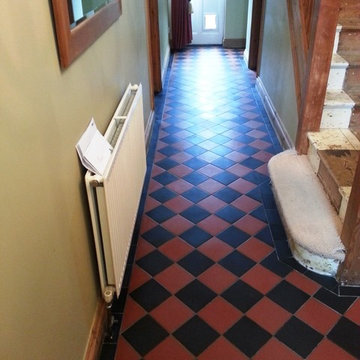
Here are the details of a job I recently completed in the town of Biggleswade, which lies on the River Ivel in Bedfordshire. My client had a fantastic red and black Victorian tiled floor with a topical seal. However, she also had a new addition to the family in the form of a new puppy and, as I’m sure most of you reading will know, puppies can be very messy and additionally urine contains Uric acid which can eat away at sealers. Therefore, my client asked me to strip off the old topical seal, before replacing with an impregnating sealer better suited to protect the tiles against an untrained puppy.
My client had been replenishing the topical seal for many years, but after discussing this decided that Tile Doctor Colour Grow, an impregnating and colour enhancing sealer, would be better suited.
My first task was, of course, to remove the old topical sealer. I did this using a strong dilution of Tile Doctor Pro-Clean, which is a high alkaline cleaner that when used in a concentrated form can remove sealers. The alkaline helps to break down the sealer while also lifting out any ingrained dirt suffered by the stone. The solution was left to dwell for approximately twenty minutes before being scrubbing it into the tiles using a rotary machine fitted with a scrubbing pad.
Nonetheless, after giving the tiles a rinse, I discovered evidence of an old impregnating sealer in the tiles that was also need to be removed before resealing. To do this I applied Tile Doctor Remove & Go which is a powerful, dedicated coatings remover which did the job although the use of a steamer and several scrubbing brushes helped with the task.
After completing the stripping, I still felt that I could improve the appearance of the tiles further, so I ran over the tiles with a small six inch Tile Doctor Diamond encrusted burnishing pad fitted to a hand-held buffer to finish the cleaning process.
After completely the stripping process, I gave the entire floor a rinse and left it to dry for several days. Upon my return I sealed the tiles using two coats of Tile Doctor Colour Grow. This is an impregnating, colour enhancing sealer that really brought out the shades of red and black in these Victorian tiles. Along with Victorian tiles, Colour Grow is also suitable for use of Flagstone, Limestone, Quarry, Sandstone and Marble tiles, amongst others.
I think you will agree the floor looks transformed with the new sealer applied.
Andrew Evans
Bedfordshire Tile Doctor
8