
Search results for "Cloud based solutions" in Home Design Ideas
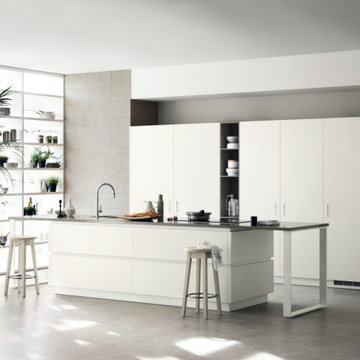
 The Design Gallery
Foodshelf is the innovative response to contemporary home design solutions in which the kitchen and living area become more "fluid" and multifunctional and their characteristics tend to merge.
Like a latest-generation bookshelf, the Foodshelf kitchen - in which the French designer’s creativity of genius and Scavolini’s vast experience combine to perfection - features a "new horizontal linearity". It is centered on a series of wood look shelves that run the entire kitchen and living area length, acquiring different functions at various points (worktop, strip underneath the base units, or as shelves fitted below and above the wall units.)
This design concept also combines base and wall units of different colors, subdividing the kitchen into "graphic" blocks while retaining its modular structure.
For creating innovative compositions, with unusual, attractive chromatic and architectural effects every time.
#designerkitchenexperience #scavolinifoodshelf #creativity #designerkitchens #scavolinikitchens #madeinitaly #availableinkenya #custommade
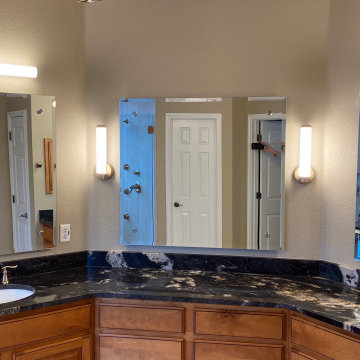
 Custom Surface Solutions
Custom Surface Solutions (www.css-tile.com) - Owner Craig Thompson (512) 966-8296. This project shows a complete master bathroom remodel with before and after pictures including large 9' 6" shower replacing tub / shower combo with dual shower heads, body spray, rail mounted hand-held shower head and 3-shelf shower niches. Titanium granite seat, curb cap with flat pebble shower floor and linear drains. 12" x 48" porcelain tile with aligned layout pattern on shower end walls and 12" x 24" textured tile on back wall. Dual glass doors with center glass curb-to-ceiling. 12" x 8" bathroom floor with matching tile wall base. Titanium granite vanity countertop and backsplash.
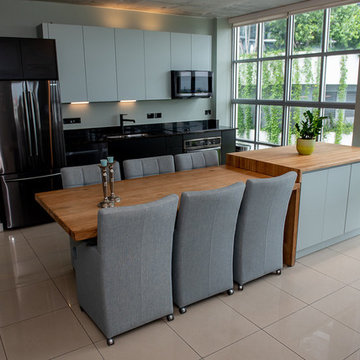
 Kitchen Solvers of Miami
For this project we had the challenge of adding more countertop space and storage within a small kitchen-living room area. The solution was to add an island with 3 new base cabinet drawers and a butcher block that would match the existing teak dining table, placing them one next to the other. For a sleek look we custom made a small waterfall that would reach the surface of the table to have a fully integrated and modern look. The cabinets were done in Northern Contours Elegantee II doors with finger pull done in black and aloe super matte. All new black appliances for a contemporary look that would perfectly blend with the all black matte doors.
Find the right local pro for your project
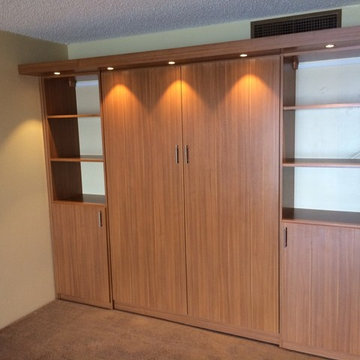
 California Closets
This vertical murphy bed folds up to allow for ample use of the space. Open shelving and two base cabinets on either side of the bed provides storage and display space, which is accented by recessed lighting above.
 Germano Creative Interior Contracting Ltd
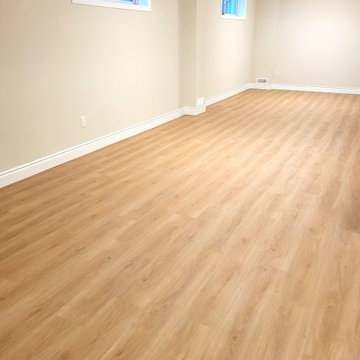
This renovation included work on both the main floor and basement. We started in the basement, where we replaced the floors with a luxury vinyl plank, replaced the baseboards and door casing, and installed wall sconces. We also added an additional 3 piece washroom in the basement, which included a vanity and top, toilet, shower base with sliding glass door system and shower faucet kit.
On the main floor, the kitchen was fully gutted, and the dividing wall between the dining room and kitchen was moved back, to expand the kitchen further; this was a load bearing wall. Due to this, we also enclosed the doorway to the dining room from the kitchen. An entirely new kitchen was installed in an MDF finish with a Michigan door style, featuring brushed nickel accents. The flooring throughout the main floor, including the kitchen was replaced with a luxury vinyl plank. A beautiful porcelain tile was installed for the kitchen backsplash with a quartz countertop. The client opted for a hooded fan with tile going up the surrounding walls, with decorative pendant lights and pot lights to brighten the space. The kitchen includes multiple storage solutions, including: 2 magic corners, a garbage/recycling system, and pull out drawer systems in the pantry. On the main floor, we also updated the powder room with a new vanity and top and toilet and installed a new laundry sink base unit in the laundry room. The railings and treads on the stairs were repainted, as well as all of the walls on the main floor. Due to the height of the new floor, the casing also had to be replaced on all of the doors on the main floor, and additional doorstop had to be added to each door.
 Custom Surface Solutions
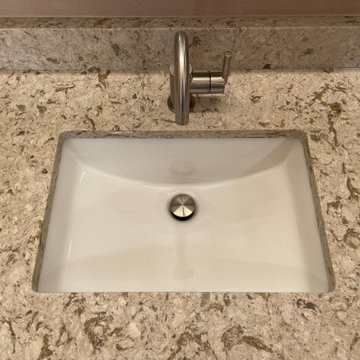
Custom Surface Solutions (www.css-tile.com) - Owner Craig Thompson (512) 966-8296. This project shows an master bath and bedroom remodel moving shower to tub area and converting shower to walki-n closet, new frameless vanities, LED mirrors, electronic toilet, and miseno plumbing fixtures and sinks.
Shower is 65 x 35 using 12 x 24 porcelain travertine wall tile installed horizontally with aligned tiled and is accented with 9' x 18" herringbone glass accent stripe on the back wall. Walls and shower box are trimmed with Schluter Systems Jolly brushed nickle profile edging. Shower floor is white flat pebble tile. Shower storage consists of a custom 3-shelf shower box with herringbone glass accent. Shelving consists of two Schluter Systems Shelf-N shelves and two Schluter Systems Shelf-E corner shelves.
Bathroom floor is 24 x 24 porcelain travvertine installed using aligned joint pattern. 3 1/2" floor tile wall base with Schluter Jolly brushed nickel profile edge also installed.
Vanity cabinets are Dura Supreme with white gloss finish and soft-close drawers. A matching 30" x 12" over toilet cabint was installed plus a Endura electronic toilet.
Plumbing consists of Misenobrushed nickel shower system with rain shower head and sliding hand-held. Vanity plumbing consists of Miseno brushed nickel single handle faucets and undermount sinks.
Vanity Mirrors are Miseno LED 52 x 36 and 32 x 32.
24" barn door was installed at the bathroom entry and bedroom flooring is 7 x 24 LVP.
 Kitchen Solvers of Grayslake
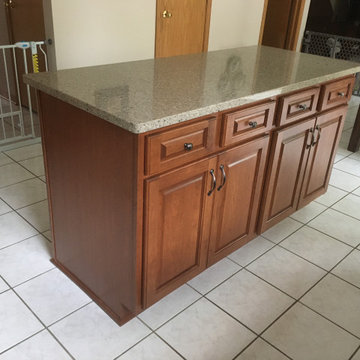
For this kitchen remodel, the homeowner wanted a refresh to their kitchen but liked the current layout. Cabinet refacing was the perfect solution for them. We removed the cabinet above the stove and continued the tile to the soffit. A new hood was also installed. We then refaced the existing cabinets with real Cherry wood veneer, installed cherry crown molding, and replace doors with raised panel Cherry doors in a Nutmeg stain. For added storage, we installed rollouts in 2 of the base cabinets. Under cabinet lighting was also installed. To finish the new look we replaced the existing laminate countertops with Quartz in Toasted Almond and removed the existing wall splash and replaced it with Zen Ease Mosaic.

Sponsored
Columbus, OH

Hope Restoration & General Contracting
Columbus Design-Build, Kitchen & Bath Remodeling, Historic Renovations
 Custom Surface Solutions
Custom Surface Solutions (www.css-tile.com) - Owner Craig Thompson (512) 966-8296. This project shows an master bath and bedroom remodel moving shower to tub area and converting shower to walki-n closet, new frameless vanities, LED mirrors, electronic toilet, and miseno plumbing fixtures and sinks.
Shower is 65 x 35 using 12 x 24 porcelain travertine wall tile installed horizontally with aligned tiled and is accented with 9' x 18" herringbone glass accent stripe on the back wall. Walls and shower box are trimmed with Schluter Systems Jolly brushed nickle profile edging. Shower floor is white flat pebble tile. Shower storage consists of a custom 3-shelf shower box with herringbone glass accent. Shelving consists of two Schluter Systems Shelf-N shelves and two Schluter Systems Shelf-E corner shelves.
Bathroom floor is 24 x 24 porcelain travvertine installed using aligned joint pattern. 3 1/2" floor tile wall base with Schluter Jolly brushed nickel profile edge also installed.
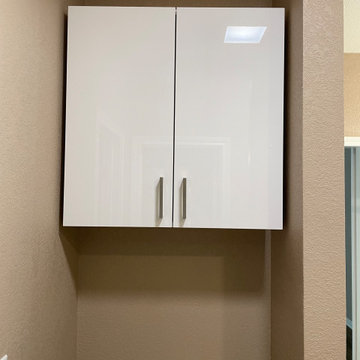
Vanity cabinets are Dura Supreme with white gloss finish and soft-close drawers. A matching 30" x 12" over toilet cabint was installed plus a Endura electronic toilet.
Plumbing consists of Misenobrushed nickel shower system with rain shower head and sliding hand-held. Vanity plumbing consists of Miseno brushed nickel single handle faucets and undermount sinks.
Vanity Mirrors are Miseno LED 52 x 36 and 32 x 32.
24" barn door was installed at the bathroom entry and bedroom flooring is 7 x 24 LVP.
 China Marmoglass Co.,Limited
Home > Products
Crystallized Glass,Crystallized stone 6
Crystallized Glass,Crystallized stone,Crystallized glass panel
Marmoglass,Nanoglass,Marmoglass Composite Collectively referred to as Crystallized Glass
Crystallized Glass Application:
1). Interior & external wall cladding
2). Flooring Tile, Stair, Column cladding
3). Basin, Countertop, Table, Bar
4). bath, Kitchen, any tops, round pillar and furniture decoration etc .
Crystal white is a kind of artificial stone . It is made of glass ,which should be burned in the oven for two days under the more than 1000C temperature . It is much different from natural stone from all sides.
1. Natural and soft texture,
2. Varied colors such white, beige, carrara white
3. Good weather resisting property and durability
4. Zero percent of water absorption , not be polluted easily
5. Green environmental building material
6. High-intensity, light weight
7. Bending formation, economical, time saving
8. scratch resistant ,withstand high-heat .
More details about it :
1. There are more than 10 colors of crystallized glass panel products available: Pure white, yellow, silver yellow, silver grey, grey in white, grey spot white, USA grey spot white, yellow in white….
2. Panel thickness: 10-30MM
3. Normal specifications (mm):
1800*3000*18 1200*2400*18 600*600*18 1200*1200*18
1600*2400*18 1800*3000*30 800*800*18 1000*1000*18
Thin tiles:
305*305*12mm, 450*450*12mm
457*457*12mm, 400*400*12mm
600*600*12mm 1200*2400*12mm
4. Material: crystal quartz sand
5. Packaging: Fumigated wooden crates, Bundles,foam
6. Brand name: China Marmoglass / Nanoglass
7. Place of origin: Xiamen, Fujian ,China
8. Model NO.: GS001, SN002, NANO2009, NNAO2011
9. Supply ability: 20000M2/MONTH, 30TON/DAY
10. Delivery time: generally within 10 days, after the order confirmed and the deposit received
11. Arc panel specifications (mm):
Thickness: 18-30mm
Diameter : 30cm-120cm
1.What is crystallized glass stone(Marmoglass SN002 )?
The micro crystal stone is an innovative product designed as a substitute for the rare natural white marble. It is superior to the natural white marble in terms of characteristics, where the micro crystal stone possesses extreme density making it anti-breakage, giving it zero water absorption qualities, and making it resistant to acidic and alkaline substances. at the pace that mankind is consuming the natural resources in today’s world, the micro crystal stone is the ultimate solution, the superior alternative for the external and internal applications. It is certainly a revolutionary product and the finest construction material of the 21st century.
2.Why choose crystallized glass stone(Marmoglass SN002)?
The micro-crystal stone, also known as the micro-crystal glass, Marmoglass, is a new type of high-level decoration material. It is derived from natural inorganic material through a high temperature process, and it possesses excellent characteristics including the followings:
1. High Performance
The micro-crystal stone has even texture and high density, which makes it crush resistant, anti-bending and high resistant resulting its performance being higher than natural stone. It can be used for long period with minimal damage.
2. Acid-proof alkalinity and anti-corrosion
Not only does the micro-crystal stone posses special micro-crystal characteristics, it also has special glass features such as a fine texture, shiny surface and light reflection effect.
3. Fine Texture
We have the flexibility to manufacture any colors as per customer requirements while also making up the defect of color differences, which exists in natural stone. While the product is widely used for interior and interior decoration of star-level hotels, subways, local landmark buildings, airports, and office building etc, it is more suitable for high-level home decoration.
4. Pollution-resistance and easy maintenance
The micro-crystal is a kind of inorganic crystalline material with stable chemical characteristics. Its acid proof alkalinity and anti-corrosion nature are superior to nature stone, specifically its anti-weather characteristics whereby it is unaffected by the wind or sunlight.
5.A wide application range
The water absorption rare of micro-crystal is quite low, close to zero. Several types of dirty pulps and dyed solution have difficulty in penetrating it. Any dirt on the surface is easily cleaned and it is convenient to mankind.
6. Heat-bend reformation
With the heating method, the micro-crystal can be made into various arched profiles and arched slabs. the process is simple and it allows us to save time, cost, material and resources.
7. No radioactive elements
In the process of manufacturing the micro-crystal stone, we have integrated the elimination of all the harmful radioactive elements that are found in natural stone from its components. It is therefore the safest and most environmentally friendly building material in our modern world.
Crystallized glass can be processed into slab, tile, countertop, column and vanity top, wash basin and etc. It is applicable for flooring, interior and exterior wall cladding, stairs and table. Contributed to the character of no color difference, so it is widely used for top grade hotel, business building shopping mall and such great construction.
Physical Parameter
Density
2.70 g/cm
Water Absorption
0.01%
Compressive Strength
126 Mpa
Radioactive
Class A (Suitable for indoor and outdoor)
Size
Slabs
2400/2600/2800/3000 x 1800/1600/1400/1500mm
Cut-to-size Tiles
30 / 40 / 50 / 60 / 80 / 100cm X 30 /40/50 /60/80 /100cm
12"x12", 24"X12", 24"x24" or customized size
Thickness
1.2cm,1.8cm (3/4'), 2.0cm, 2.5cm, 3.0cm,
Finishing
Polished, honed
Usage
Flooring, Walls, Stairs / Steps, Counter tops, Vanity, Paving / Curbstone, Pillar, Column, Border, Skirting, Window Sills
Quality Control
Thickness Tolerance
+- 1mm;
Polishing Grade
above 100 degree
Crack / Spot
EU / US Standard: zero
QC Standard
AQL2.5/4.0 ITS
Certificate
CE, ISO, GB/T19001-2008
Advantage
1. Own factory with stable supply;
2. Factory direct with good price and prompt delivery;
3. Good Management System for good quality;
4. Value-added service.
large glass white artificial stone of Packing
Inner Packing
Cover with foam and plastic film, corner paper board protection
Individual Carton
Individual carton packing with trademark is available upon request
Outer Packing
Plastic tapes in 6 sides, further strengthened with iron sheet in the corner
Shipping Mark
OEM
Port of Loading
Xiamen Port of China
Delivery Lead Time
Normally 10-15 days for one 20’ GP, faster delivery is available upon confirmation
Trade Term
FOB, CFR, CIF, etc.
Loading Info.
Thickness
Qty per pallet
Pallets per 20ft container
QTY per 20ft container
Square Meter per 20ft container
Weight per 20ft container
Big slab size
3000*1200mm
12mm
25pcs
7
175pcs
600-900 m2
21000kgs
3000*1400mm
15mm
20pcs
7
175pcs
500-700 m2
21000kgs
3000*1600mm
20mm
15pcs
7
105pcs
350-500 m2
21000kgs
3200*1600mm
30mm
10pcs
7
70pcs
250-358 m2
21000kgs
Installation Recommendations
Wall Cladding
1.Wall should be leveled and cleaned,
2.Fix the panel on the wall with wire and expansion screw tightly,
3.Fill the space between the panel and the wall with cement mortar of ratio 1:3,
4.Clean the extra mortar and dirt on the surface.
Floor Installation
1.Mark out the baseline of gound level,
2.Mix the mortar with ratio of 1 cement to 4 sand to have semi-day mortar,
3.Lay the mixed mortar in level with a layer of 3-4cm thickness,place the tile over the mortar and adjust the height properly to be leveled,
4.Remove the tile after level adjustment.Put a thin layer of cement powder on the mortar and add water on it to become wet,
5.Put the tile on top and gently knock with rubber hammer until it sealed with the mortar properly. Make sure the tile is leveled and has the same space between each other. Those tiles which are not leveled with others should be removed and repeat the leveling procedure in step 4.Genetally,the space between two tiles should be 2mm for water evaporation and normal expansion.
Daily maintenance of Micro Crystal Stone
1.The laying area of micro crystal stone can only be opened for use or stacking any item on top after at least 24 hours of filling the gap,
2.The ground must be covered with plywood or carpet for protection in case of doing other decoration work after the installation of micro crystal stone floor,
3.In areas like exit and entrance, the surface of micro crystal stone floor should be covered by carpet or plywood to protect it from the damage of abrasion of sand or other hard material.
4.Do not use general floor wax on micro crystal stone,General floor wax is an oil-based wax which is easily stuck to dust.
5.Please use rubber wheels for shopping cart and trolley on micro crystal stone floor, for the hard wheel may scratch and damage the surface,
6.Regular care and maintenance is the key for long lasting of micro crystal stone’s high glossy and reflection.
Important Notice
1.Make sure the ground of laying area is dry and clean before laying mortar. The ratio 1:3(volume ratio) must be strictly followed and no extra water added during the installation progress
2.In the choice of using white cement as the filling material, the strength and quality of the cement must be checked properly.
3.It is not recommended to store micro crystal stone outdoor for long time. It should be covered with rock wool in winter and moved into indoor 2 hours in advance before installation. It also needs to be covered with waterproof cloth when installing during the rainy days outdoor,
4.When using micro crystal stone as ground floor,2mm wild gap must be left between the joints for the benefit of the water vaporization and physical expansion. In the case of large-scale installation, it is recommended to leave an 8mm expansion joint,
5.It is recommended that the area of micro crystal stone to remain-not used-for at least 24 hours and kept 2-3 days before passing or storing items on top.
Marmoglass Polished Edge, Shining !
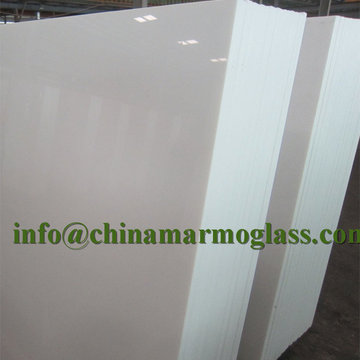
China Marmoglass SN002 Slabs Packing and Ready for ship
We not only make Slabs, we also can make:
- Project Tiles
- Countertop
- Tabletop
- Vanitytop
- Column
Tags: Marmoglass, Crystallized glass panel, nano crystallized glass panel, pore marmoglass, pore crystallized glass panel, Artificial Stone, Hole-Free Micro Crystal Stone, Pure white stone, Crystallized glass tile, Crystal glass tile, pure white artificial white marble, Marmo Glass, Glass Marble, White Marble, Marmoglass, nano marmoglass, no pore marmoglass, non-pore crystallized glass panel, glass marble, white marble, crystal white marble, white stone, white marble tile, Micro-crystal stone, Crystallized glass, Crystallized White Stone, Crystallized White Stone, Micro-crystallized composite tile, Hole-Free Micro Crystal Stone, Micro-crystallized composite tile, White Marble Tiles, pure white marble
China Marmoglass SN002 Strong Packing Crates
China Marmoglass SN002 and Nanoglass NANO3 Container Loading
Welcome to our product page of China Marmoglass, in which you can find detailed information of Marmoglass. China Marmoglass Co.,Limited offer Crystallized White Marmoglass is good in quality and competitive in price. China Marmoglass Co.,Limited is the manufacturer and supplier of Marmoglass,White Crystallized Glass Panel,Nanoglass. Crystallized Glass Stone,Crystallized Glass Panel,Crystallized Glass Stone Tile,Crystallized Glass Stone Countertop,Marmoglass also known as Nanoglass and White Crystallized Glass,Marmoglass, Crystallized Glasss is the popular materials for interior and exterior applications, including kitchen countertops, bathroom vanities, commercial foyer wall claddings, etc. China Marmoglass Co.,Limited is the Manufacturer and export Crystallized Glass and Crystallized Glass products. Crystallized Glass can be used Interior & external wall cladding, Flooring Tile, Stair, Column cladding, Basin, Countertop, Table, Bar, bath, Kitchen, any tops, round pillar and furniture decoration etc. Super White Nanoglass Slab, You Can Buy Various High Quality Super White Nanoglass Slab Products from Super White Nanoglass Slab Suppliers and Super White Nanoglass Slab Manufacturers at Chinamarmoglass.comcomposite tile, White Marble Tiles, pure white marble
 Kitchen Solvers of Coastal Connecticut
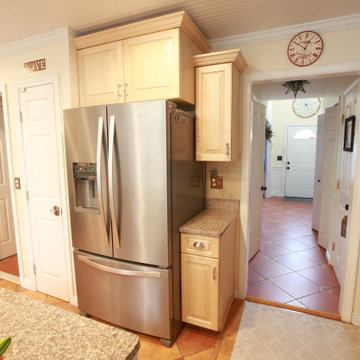
We helped our clients make some gorgeous upgrades to the hub of their daily lives – their kitchen. They wanted a more modern, lighter finish, and enhanced visual interest. We met those goals with these gorgeous clear-coated maple wood cabinets. The varied heights and depths of the wall cabinets create an inviting visual complexity, which is emphasized by the crown moldings. The glass-front feature cabinet really draws the eye, as the sparkling obscured glass complements the beauty and natural brightness of their space. All of this combines to bring a comforting, airy spaciousness and interesting feel to the whole kitchen. The wall cabinets are new frameless cabinets, and the base cabinets are re-used, re-surfaced with a veneer of the same clear-coat-conversion-varnished maple wood as the doors. We added rollout storage drawers to the base cabinets to make it easier to get to their items. These clients made fantastic upgrade choices to maximize beauty and function for a more comfortable and satisfying daily life in and around their kitchen.
 Drury Design
THE SETUP
Multiple ovens, multiple workspaces, multiple sinks – when you think about it, non-jewish kitchens have been adapting the criteria of kosher kitchens for years.
Gladys’ clients in West Rogers Park are Orthodox Jewish. The house they bought already had a kosher kitchen – it just wasn’t done that well. It needed some more things to be duplicated for the dairy side and the meat side. Plus, it was dark and the configuration wasn’t very conducive for a family of eight.
It was time for a remodel.
Design Objectives
Improve kosher kitchen
Add more storage in the island
Better lighting
More open, lighter feel
Change the wood floor in the kitchen to tile
THE REMODEL
Design Challenges
- We had originally planned on removing a wing wall by the breakfast area. During demolition, we learned it contained a support beam.
- The kitchen is a substantial size, but having two sinks, dishwashers, and ovens presented a challenge – how do we fit it all in and make it flow with the storage still accessible near the work areas?
Where do you stop the materials for the new space? - -- The right tile, paint, lighting, etc. would be needed to make the remodeled area cohesive with the rest of the main floor.
- An existing column limited cabinet options and thus, storage capacity. Could we conceal it without disrupting the cabinetry flow?
Design Solutions
- We had to keep the wing wall, but decided to continue the tile on the sides of the cabinets and maintain the height of the tile to line up with the rest of the backsplash. This actually presented a very nice and cohesive look, especially since the opposite side has a wing wall to the left of the refrigerator.
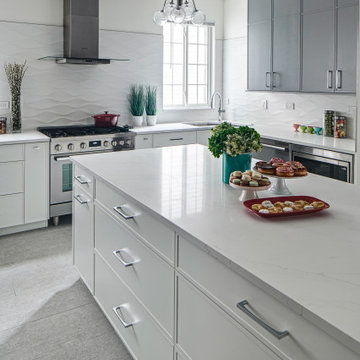
- We used “L-shaped” corner sinks instead of the rectangular ones set on an angle. This gave us more of the legs of the triangles versus the hypotenuse, which allowed for the two dishwashers, and the pullout utensil canisters and spice pullouts while still keeping the 3-drawer cabinets on either side of the range (by the sinks). The old island had the recess for stools which the family never used. By extending the width of the island 6” and utilizing this leg space, we were able to fit 18”-deep cabinets on this side – adding lots of accessible storage. The family can now work simultaneously on the dairy side (the side with the fridge) and the meat side (opposite) without getting in each other’s way. We separated the cooking by using the range oven for the meat and a built-in microwave in the base cabinet. The wall oven with built-in microwave on top is for dairy.
- Corner sinks opened up the middle area for a wider range – we went from a 30” to a 36”. Removing all the wall cabinets (on the range wall) made a big difference. That opened up the entire space while adding some visual impact. (Not pictured: We also made the cabinets directly opposite the range wall tall and removed the countertop, resulting in more room for rollouts and even more storage!) The kitchen now has more storage than it did before.
- We ended up painting the ceiling of the kitchen into the hallway that leads to the foyer. The living and dining rooms were separated by a soffit, so that became a natural boundary. We kept the tile in the kitchen by stopping it short of the hallway and lining it up with the pantry wall. This creates a border between the breakfast area and family room. The rest of the existing wood floors were refinished to refresh and make the hue darker. We also painted a dark accent wall and carried it into the breakfast area to make the rooms look deeper.
- The in-the-way column housed plumbing and couldn’t be moved. We still built cabinets in that spot – we just had to build a chase inside it to conceal the pipes. There was still plenty of room for new storage. We also took the cabinets all the way to the ceiling. The continuous tall cabinets added a functional elegance to the space.
THE RENEWED SPACE
The client’s long-awaited dream of a better kosher kitchen has finally been achieved, beautifully combining enhanced storage solutions with adherence to the family’s orthodox dietary laws. The kitchen’s standout feature, an expanded island, now offers a spacious and efficient workspace. This allows several family members to cook together comfortably, without the inconvenience of bumping into each other, ensuring a harmonious and productive cooking environment.
 MD Flooring Solutions, LLC
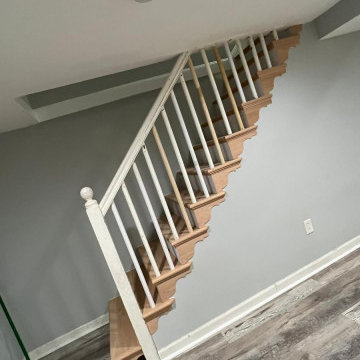
Basement steps project:
1x coat of Minwax or DuraSeal Stain: Stain to best match LVP in basement —1 color included
1x coat of ZINSSER®SealCoat™ Universal Sanding Sealer.
1x coat of Water-Based Oil-Modified polyurethane by default.
1x final coat of SamSeal or Masterline Oil-based polyurethane.
Finish: to best match LVP in basement
- To sand and refinish Unfinished hardwood 11x Treads only
 Drury Design
THE SETUP
Multiple ovens, multiple workspaces, multiple sinks – when you think about it, non-jewish kitchens have been adapting the criteria of kosher kitchens for years.
Gladys’ clients in West Rogers Park are Orthodox Jewish. The house they bought already had a kosher kitchen – it just wasn’t done that well. It needed some more things to be duplicated for the dairy side and the meat side. Plus, it was dark and the configuration wasn’t very conducive for a family of eight.
It was time for a remodel.
Design Objectives
Improve kosher kitchen
Add more storage in the island
Better lighting
More open, lighter feel
Change the wood floor in the kitchen to tile
THE REMODEL
Design Challenges
- We had originally planned on removing a wing wall by the breakfast area. During demolition, we learned it contained a support beam.
- The kitchen is a substantial size, but having two sinks, dishwashers, and ovens presented a challenge – how do we fit it all in and make it flow with the storage still accessible near the work areas?
Where do you stop the materials for the new space? - -- The right tile, paint, lighting, etc. would be needed to make the remodeled area cohesive with the rest of the main floor.
- An existing column limited cabinet options and thus, storage capacity. Could we conceal it without disrupting the cabinetry flow?
Design Solutions
- We had to keep the wing wall, but decided to continue the tile on the sides of the cabinets and maintain the height of the tile to line up with the rest of the backsplash. This actually presented a very nice and cohesive look, especially since the opposite side has a wing wall to the left of the refrigerator.
- We used “L-shaped” corner sinks instead of the rectangular ones set on an angle. This gave us more of the legs of the triangles versus the hypotenuse, which allowed for the two dishwashers, and the pullout utensil canisters and spice pullouts while still keeping the 3-drawer cabinets on either side of the range (by the sinks). The old island had the recess for stools which the family never used. By extending the width of the island 6” and utilizing this leg space, we were able to fit 18”-deep cabinets on this side – adding lots of accessible storage. The family can now work simultaneously on the dairy side (the side with the fridge) and the meat side (opposite) without getting in each other’s way. We separated the cooking by using the range oven for the meat and a built-in microwave in the base cabinet. The wall oven with built-in microwave on top is for dairy.
- Corner sinks opened up the middle area for a wider range – we went from a 30” to a 36”. Removing all the wall cabinets (on the range wall) made a big difference. That opened up the entire space while adding some visual impact. (Not pictured: We also made the cabinets directly opposite the range wall tall and removed the countertop, resulting in more room for rollouts and even more storage!) The kitchen now has more storage than it did before.
- We ended up painting the ceiling of the kitchen into the hallway that leads to the foyer. The living and dining rooms were separated by a soffit, so that became a natural boundary. We kept the tile in the kitchen by stopping it short of the hallway and lining it up with the pantry wall. This creates a border between the breakfast area and family room. The rest of the existing wood floors were refinished to refresh and make the hue darker. We also painted a dark accent wall and carried it into the breakfast area to make the rooms look deeper.
- The in-the-way column housed plumbing and couldn’t be moved. We still built cabinets in that spot – we just had to build a chase inside it to conceal the pipes. There was still plenty of room for new storage. We also took the cabinets all the way to the ceiling. The continuous tall cabinets added a functional elegance to the space.
THE RENEWED SPACE
The client’s long-awaited dream of a better kosher kitchen has finally been achieved, beautifully combining enhanced storage solutions with adherence to the family’s orthodox dietary laws. The kitchen’s standout feature, an expanded island, now offers a spacious and efficient workspace. This allows several family members to cook together comfortably, without the inconvenience of bumping into each other, ensuring a harmonious and productive cooking environment.

 Accent Woodworking Inc.
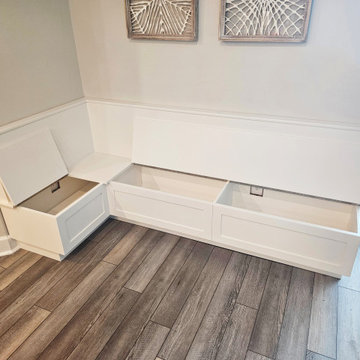
1 Custom Banquette Base Cabinet with Lift-Up Hinge and 2 Shaker Panels on Bottom Face, Flat Trim and 5" Toe Kick - 81"w x 15"h x 18"d
1 Custom Small Banquette Base Cabinet with Lift-Up Hinge and 1 Shaker Panel on Bottom Face, Flat Trim and 5" Toe Kick - 36"w x 15"h x 18"d
Custom Banquette Wall Backing Panels - 81"w x 16"h x 2" to 3/4" thickness.
Shown in Solid Pure White on Maple
Contact us to find out more or if you would like to schedule an in-person FREE CONSULTATION either in your home or our showroom in Largo, Florida.
Visit our showroom, give us a call or send us an email to discuss your next furniture or cabinet project.
2233 34th Way N. Largo, Florida 33771
727-522-2700
sales@accentwoodworking.com
https://www.accentwoodworking.com/custom-furniture/
https://www.accentwoodworking.com/photo-gallery/custom/seating/
 Custom Surface Solutions
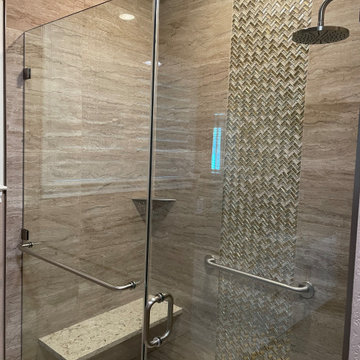
Custom Surface Solutions (www.css-tile.com) - Owner Craig Thompson (512) 966-8296. This project shows an master bath and bedroom remodel moving shower to tub area and converting shower to walki-n closet, new frameless vanities, LED mirrors, electronic toilet, and miseno plumbing fixtures and sinks.
Shower is 65 x 35 using 12 x 24 porcelain travertine wall tile installed horizontally with aligned tiled and is accented with 9' x 18" herringbone glass accent stripe on the back wall. Walls and shower box are trimmed with Schluter Systems Jolly brushed nickle profile edging. Shower floor is white flat pebble tile. Shower storage consists of a custom 3-shelf shower box with herringbone glass accent. Shelving consists of two Schluter Systems Shelf-N shelves and two Schluter Systems Shelf-E corner shelves.
Bathroom floor is 24 x 24 porcelain travvertine installed using aligned joint pattern. 3 1/2" floor tile wall base with Schluter Jolly brushed nickel profile edge also installed.
Vanity cabinets are Dura Supreme with white gloss finish and soft-close drawers. A matching 30" x 12" over toilet cabint was installed plus a Endura electronic toilet.
Plumbing consists of Misenobrushed nickel shower system with rain shower head and sliding hand-held. Vanity plumbing consists of Miseno brushed nickel single handle faucets and undermount sinks.
Vanity Mirrors are Miseno LED 52 x 36 and 32 x 32.
24" barn door was installed at the bathroom entry and bedroom flooring is 7 x 24 LVP.
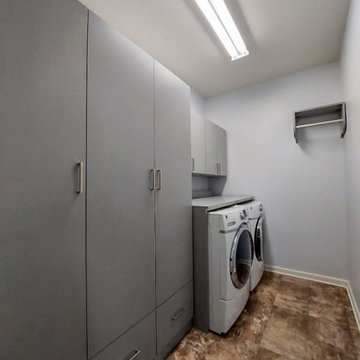
 CLOSET FURNISHINGS & CABINETRY
Beautiful laundry room cabinets and full storage solution in Rain Cloud material, includes a counter top with back splash for sorting laundry and to conceal hoses, and hanging space for air drying.
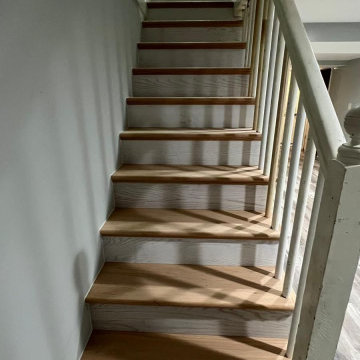 MD Flooring Solutions, LLC
Basement steps project:
1x coat of Minwax or DuraSeal Stain: Stain to best match LVP in basement —1 color included
1x coat of ZINSSER®SealCoat™ Universal Sanding Sealer.
1x coat of Water-Based Oil-Modified polyurethane by default.
1x final coat of SamSeal or Masterline Oil-based polyurethane.
Finish: to best match LVP in basement
- To sand and refinish Unfinished hardwood 11x Treads only

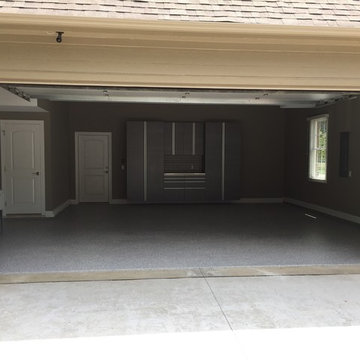
 Custom Storage Solutions
New garage makeover with one of our newest colors, pewter. Custom garage cabinets are 8 foot tall with one inch thick shelves made to support very heavy items. Aluminum handles offer a contemporary look, with our stainless steel tops. Drawers with full drawer runners, slatwall storage and epoxy flooring with a full broadcast and two coats of uv resistant clear. Designed and installed by Shawn Leach of Custom Storage Solutions.
 Kitchen Solvers of Spring Hill
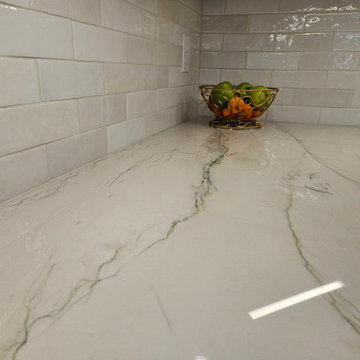
These homeowners didn’t feel the need for a whole remodel and liked the color of their cabinets but really wanted a few upgrades… and then ended up doing a little more once we showed them how we can improve efficiency and storage in their kitchen!
Their biggest issue is having a microwave over their stove since they tend to an elderly parent and that the exhaust is not vented outside. Andy figured out the perfect solution to vent out their new matching range hood and since they never liked their countertops or backsplash, they added that to the mix. With standard cabinet that have deep or half shelves it is hard to maximize storage and accessibility so Marty suggested roll-out trays in 3 cabinets, a pull-out trash so they don’t have to walk around the one at the end of their island, a blind corner pull-out so they don’t have to get down on their hands and knees to access things, and then their favorite… hinge out spice rack! Let’s be honest, it’s EVERYONE’s favorite!
Needless to say, we more than solved this kitchen for these homeowners. Where is the microwave now? Well, he is a handy guy so he decided to tackle a simple cabinet modification and is installing it himself in a base cabinet!
 Crafted Custom Homes + Renovations
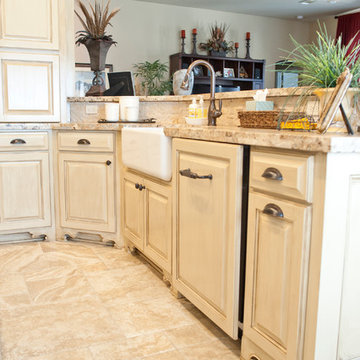
This home is a typical suburban home in a planned community in Katy, Texas (outside of Houston). We took the existing pre-fab builder-grade stained cabinets and refaced them with poplar raised panel doors and drawer fronts. We extended the island and added the spindles. We added decorative feet to the cabinet bases. We installed custom panels on the new Jenn-Air appliances. We added decorative corbels under the bar and in the butler's pantry. The cabinets were painted with a base color of Sherwin Williams Macadamia (SW 6142) and then glazed with Van Dyke Brown (SW 70471). A clear sealer coat was then applied. The island was painted Storm Cloud (SW 6249) and then faux-finished with the same technique. The backsplash tile is from Arizona Tile and is called San Mateo Split Face.
92