
Search results for "Cloud first" in Home Design Ideas
 Tile Doctor Ltd
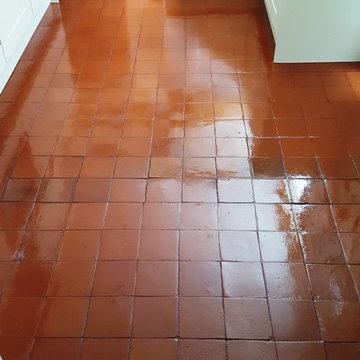
If you’re a first time buyer in the process of renovating or redecorating your new property, you may well discover some fantastic tiled floors hidden under your carpets. Certainly in my experience this happens quite often, so it came as no surprise when I got a call from a couple who had pulled up the carpet in the kitchen of their new house in Chester to find Quarry tiles, along with some fantastic Victorian tiles in the hallway.
While the Quarry tiles were in relatively good condition – having been shielded by carpet for many years – the couple were still understandably keen to get them back to looking their very best. I was more than happy to help them do just that.
Before beginning the restoration, I removed the kick boards from the kitchen cupboards so as not to damage them. I then applied a solution of our versatile, high alkaline cleaner, Tile Doctor Pro Clean, and let it soak into the tiles for a short period before scrubbing it in using a rotary machine fitted with a black scrubbing pad. Pro Clean is suitable for use on most natural stone tiles, including Quarry, Victorian and Slate, doing the trick to break down medium to heavy soil buildup.
The floor was then rinsed off with clean water, and the resulting slurry was promptly removed using a wet vac. I then left the floor dry out overnight.
I returned to the property the next morning, and started out by taking a couple of damp meter readings to make sure the floor was dry enough to seal. This is an essential task before sealing any tiled floor as even the smallest amount of excess moisture can cloud the sealer and damage its performance.
To seal the floor, I firstly applied one coat of Tile Doctor Colour Grow, which really brought out the natural reddish shades in the Quarry. As an impregnating sealer, Colour Colour fills the pores in the stone and prevents dirt from becoming ingrained. I followed the application of Colour Grow by applying three coats of Tile Doctor Seal and Go Extra. As a topical sealer, Seal and Go Extra forms an additional stain resistant seal on the surface of the tiles to protect against dirt and stains. It also gave the tiles a quality sheen finish as requested by the customer.
The customers were very happy with their newly restored Quarry tiled floor. They left the following feedback:
“We were both thrilled to bits with how nice the Quarry tiled kitchen floor looked, after being cleaned and sealed. Alastair was a pleasure to deal with and we would highly recommend him to anyone considering having their floor done.”
Alastair Robb
West Cheshire Tile Doctor
 Tile Doctor Ltd
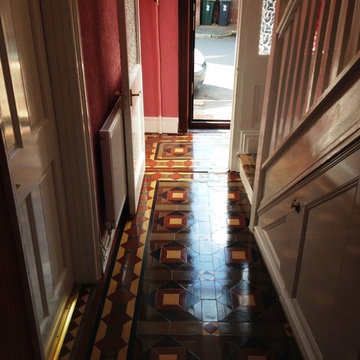
This Victorian tiled hallway at a house in the Forest of Dean had a very interesting pattern, consisting of an array of different colours, including shades of red, yellow and blue. Unfortunately, as you can see from the first photograph below, the tiles had lost all life, with the colours largely masked by months’ – or maybe even years’ – worth of ingrained dirt and muck. The floor as a whole was also suffering from a number of loose tiles that needed to be reset before it could be cleaned.
The property owner was keen to employ some professional assistance to restore the appearance of the floor and prevent it from getting in an even wrote state, and so contacted Tile Doctor who have a lot of experience working with Victorian tiled floors.
As mentioned, the loose tiles had to be repaired before the cleaning process could be started. I removed the tiles and extracted excess grout and old adhesive from the exposed concrete substrate using a vacuum, before putting the original tiles back into place and fixing them back into position carefully using fresh adhesive and matching grout.
Once happy the replaced tiles had set, I started the process of cleaning the entire area of hallway tiles using a combination of Tile Doctor Remove and Go to strip away the old sealer and Tile Doctor NanoTech HBU (formerly Ultra Clean) remover to get the tiles as clean as possible. The latter product contains nano-sized cleaning particles (hence the name) to reach difficult areas of trapped dirt, making it more effective than your run-of-the-mill tile cleaner. These two products were scrubbed into the tiles using a rotary machine fitted with a black scrubbing pad. The floor was then rinsed with water and the soiled residue was extracted with a wet vacuum.
I then paid particular attention to the grout, applying our alkaline-based multi-purpose cleaner Tile Doctor Pro-Clean to the grout lines, before scrubbing them with a narrow grout brush. This quickly had the grout looking clean again: I’d even go as far as to say that it matched it seamlessly with the fresh grout that had just been laid.
With the tile and grout as clean as it was possible to get it, I gave the whole floor a final rinse to neutralise the excess chemicals. I extracted as much water as possible with a wet vacuum and left the floor to dry overnight.
My first task upon returning to the property the next day was to check for any dampness. If you neglect to remove all excess moisture from the surface of the tiles before sealing it is more than likely going to cloud the sealer, rendering it less effective I’m protecting the stone against ingrained dirt and stains.
Once satisfied that the floor was completely dry, I proceeded to seal the tiles using multiple costs of Tile Doctor Seal and Go. Seal and Go is what we would classify as a topical sealer, meaning it rests on the surface of the tiles to act as a durable layer of protection against all kinds of muck. While providing surface protection, Seal and Go also adds a nice subtle sheen to the tiles, as per the customer’s request.
The customer was quite amazed at how quickly the appearance of the tiles had been restored. It was fantastic to see the colours we both knew were hidden in the tiles come to life once again. Another satisfied customer for sure!
Paul Wales
Monmouthshire Tile Doctor
 South Cypress
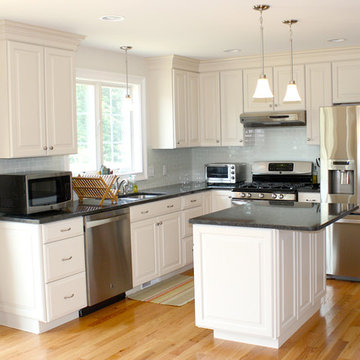
Lastly, do you have any design tips or things learned through your project? “Looking at photos was very helpful to us. It allowed us to better visualize the final project. Additionally, whenever possible, we tried to hold actual samples side-by-side (for example, holding up the granite sample to the cabinet sample to the paint sample). We are so happy we ordered samples of the backsplash tiles first. We loved the way the “Cloud” tile has the slightest bluish/turquoise tint to it — it was not a pure white as some might expect. By seeing it in person, we knew it would add subtle color and interest to our kitchen.”
Find the right local pro for your project
 PLANT Architect Inc.
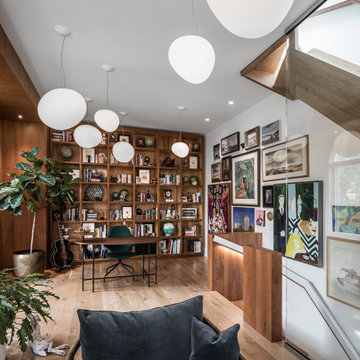
The open-plan second floor now provides efficient gallery space for a portion of the owners' contemporary art collection. Bubble lights – the Gregg Pendant, designed by Ludovica +Roberto Palomba for Foscarini – provide even lighting throughout this tall, narrow space.
 Create Construction
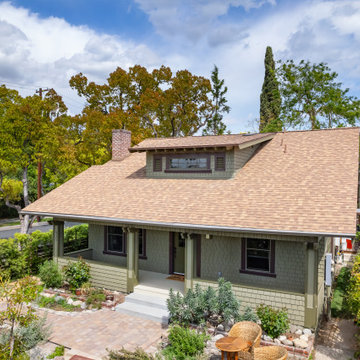
This extensive project showcases a remarkable transformation of a 1920s Craftsman home, combining a thoughtfully designed second-story addition with a full custom remodel of the first floor. The new upper level adds a spacious primary suite, complete with a bedroom, walk-in closet, laundry room, and a stunning bathroom with a drop-in tub, custom vanity, Caesarstone quartz countertops, and a walk-in shower wrapped in green subway tile, medallion accents, and natural stone.
The first floor was reimagined with a new layout to better suit modern living. The kitchen features custom cabinetry, a seamless Corian countertop with integrated sink, and copper hardware. A cozy built-in banquette and natural stone backsplash with medallion inserts bring both elegance and personality to the space. The formal dining room boasts wraparound custom millwork and hidden LED strip lighting within the crown to create ambient mood lighting.
Throughout the home, you’ll find true Craftsman detailing—from solid red oak floors and Marvin wood windows to picture railing trim, cloud corbel detailing, and stained wood baseboards and casings. Skylights with concealed LED strips flood the second floor with natural light while creating atmosphere. The original fireplace was preserved and enhanced with hand-stained brick, a unique custom drywall design, and Zia handmade tile on the hearth.
On the exterior, wood shingle siding and custom-built columns enclose the redesigned front porch, which features a pony wall and decorative wood corbels. The original 1920s dormer was meticulously restored, including custom rafter tail and window detailing that ties into the home’s timeless architecture.
This project is a true homage to Craftsman design—blending historic charm with modern luxury and handcrafted finishes in every room.
 LB Design
Ryan Fung Photography
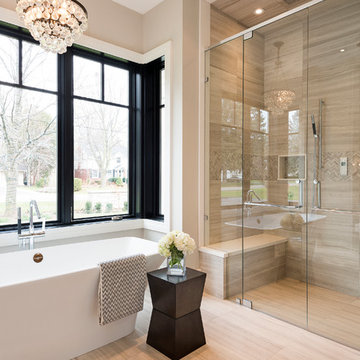
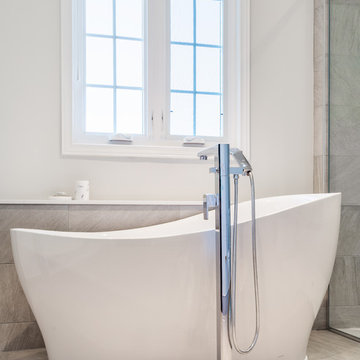
Large transitional master beige tile and limestone tile porcelain tile bathroom photo in Toronto with beige walls
Large transitional master beige tile and limestone tile porcelain tile bathroom photo in Toronto with beige walls
 Renwick Tiles
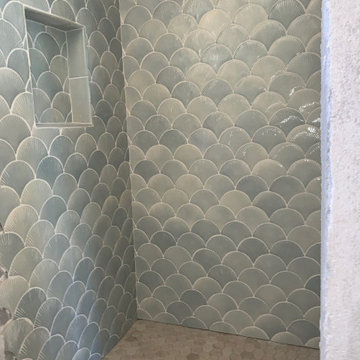
Scale tiles with texture used in a shower in Laguna Beach. This shower was done with a very light blue that we call First Dawn. It is a good example of hand glazing as the color is never flat. The client decided to lay the tiles in this way, which makes it look like clouds. All Renwick Tiles are hand made in Dana Point California. We source all our materials in the United States.
Sponsored
Columbus, OH

Trish Takacs Design
Award Winning & Highly Skilled Kitchen & Bath Designer in Columbus
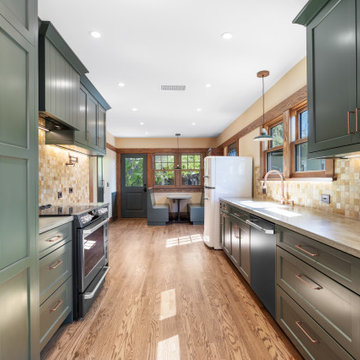 Create Construction
This extensive project showcases a remarkable transformation of a 1920s Craftsman home, combining a thoughtfully designed second-story addition with a full custom remodel of the first floor. The new upper level adds a spacious primary suite, complete with a bedroom, walk-in closet, laundry room, and a stunning bathroom with a drop-in tub, custom vanity, Caesarstone quartz countertops, and a walk-in shower wrapped in green subway tile, medallion accents, and natural stone.
The first floor was reimagined with a new layout to better suit modern living. The kitchen features custom cabinetry, a seamless Corian countertop with integrated sink, and copper hardware. A cozy built-in banquette and natural stone backsplash with medallion inserts bring both elegance and personality to the space. The formal dining room boasts wraparound custom millwork and hidden LED strip lighting within the crown to create ambient mood lighting.
Throughout the home, you’ll find true Craftsman detailing—from solid red oak floors and Marvin wood windows to picture railing trim, cloud corbel detailing, and stained wood baseboards and casings. Skylights with concealed LED strips flood the second floor with natural light while creating atmosphere. The original fireplace was preserved and enhanced with hand-stained brick, a unique custom drywall design, and Zia handmade tile on the hearth.
On the exterior, wood shingle siding and custom-built columns enclose the redesigned front porch, which features a pony wall and decorative wood corbels. The original 1920s dormer was meticulously restored, including custom rafter tail and window detailing that ties into the home’s timeless architecture.
This project is a true homage to Craftsman design—blending historic charm with modern luxury and handcrafted finishes in every room.
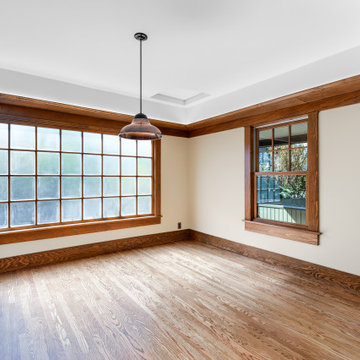 Create Construction
This extensive project showcases a remarkable transformation of a 1920s Craftsman home, combining a thoughtfully designed second-story addition with a full custom remodel of the first floor. The new upper level adds a spacious primary suite, complete with a bedroom, walk-in closet, laundry room, and a stunning bathroom with a drop-in tub, custom vanity, Caesarstone quartz countertops, and a walk-in shower wrapped in green subway tile, medallion accents, and natural stone.
The first floor was reimagined with a new layout to better suit modern living. The kitchen features custom cabinetry, a seamless Corian countertop with integrated sink, and copper hardware. A cozy built-in banquette and natural stone backsplash with medallion inserts bring both elegance and personality to the space. The formal dining room boasts wraparound custom millwork and hidden LED strip lighting within the crown to create ambient mood lighting.
Throughout the home, you’ll find true Craftsman detailing—from solid red oak floors and Marvin wood windows to picture railing trim, cloud corbel detailing, and stained wood baseboards and casings. Skylights with concealed LED strips flood the second floor with natural light while creating atmosphere. The original fireplace was preserved and enhanced with hand-stained brick, a unique custom drywall design, and Zia handmade tile on the hearth.
On the exterior, wood shingle siding and custom-built columns enclose the redesigned front porch, which features a pony wall and decorative wood corbels. The original 1920s dormer was meticulously restored, including custom rafter tail and window detailing that ties into the home’s timeless architecture.
This project is a true homage to Craftsman design—blending historic charm with modern luxury and handcrafted finishes in every room.
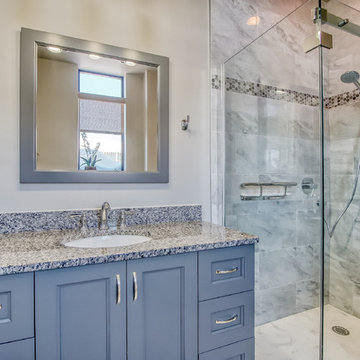
 Kitchens & Bathrooms First
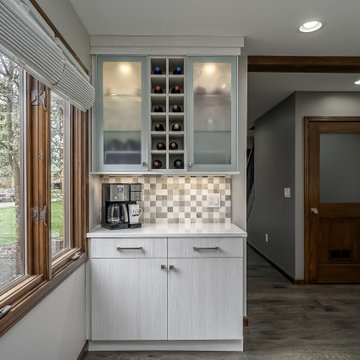
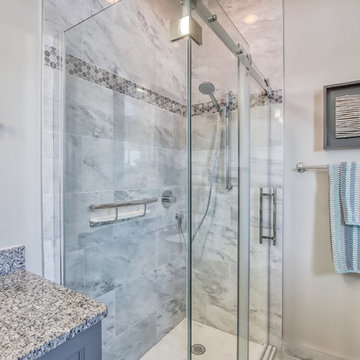
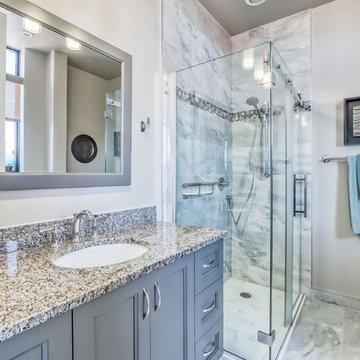
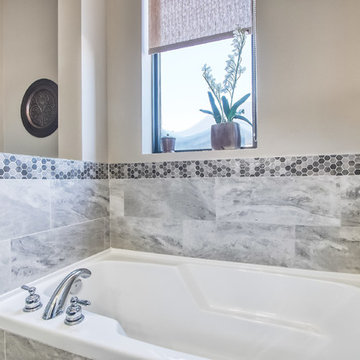
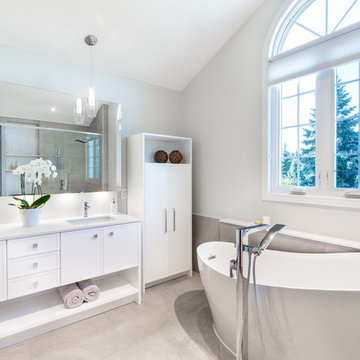
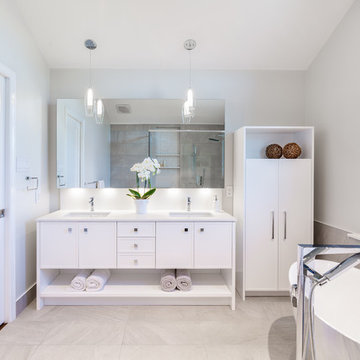
Inspiration for a transitional white floor bathroom remodel in Ottawa with beaded inset cabinets, gray cabinets, white walls, an undermount sink and gray countertops
Sponsored
Columbus, OH
Trish Takacs Design
Award Winning & Highly Skilled Kitchen & Bath Designer in Columbus

 Kitchens & Bathrooms First
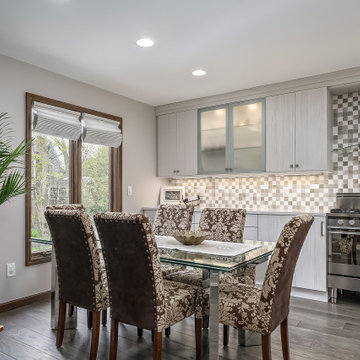
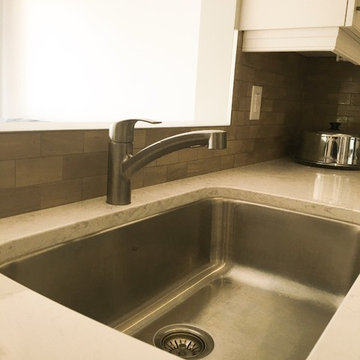
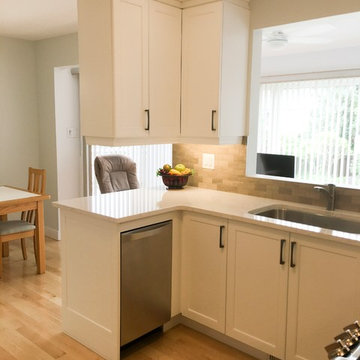
Inspiration for a mid-sized contemporary u-shaped light wood floor and brown floor eat-in kitchen remodel in Other with a single-bowl sink, shaker cabinets, white cabinets, quartz countertops, beige backsplash, marble backsplash, stainless steel appliances and no island
 Kitchens & Bathrooms First
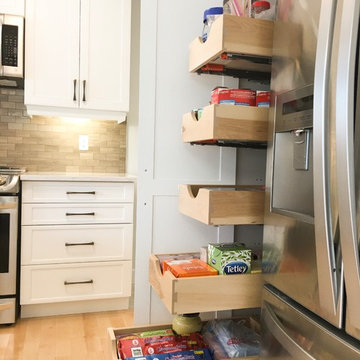
Inspiration for a mid-sized contemporary u-shaped light wood floor and brown floor eat-in kitchen remodel in Other with a single-bowl sink, shaker cabinets, white cabinets, quartz countertops, beige backsplash, marble backsplash, stainless steel appliances and no island
Sponsored
Columbus, OH
Trish Takacs Design
Award Winning & Highly Skilled Kitchen & Bath Designer in Columbus
 Kitchens & Bathrooms First
Eat-in kitchen - mid-sized contemporary u-shaped light wood floor and brown floor eat-in kitchen idea in Other with a single-bowl sink, shaker cabinets, white cabinets, quartz countertops, beige backsplash, marble backsplash, stainless steel appliances and no island

7