
Search results for "Common issues" in Home Design Ideas

 Whitwell Landscaping
Transform Your Yard with Expert Landscaping by Whitwell Landscaping Inc.
At Whitwell Landscaping Inc., we specialize in turning ordinary yards into extraordinary outdoor living spaces. Our recent project showcases our craftsmanship and creativity—featuring a stunning Fieldstone Veneer Retaining Wall, a durable and stylish Paver Patio, Custom Steps with integrated Landscape Lighting, and a beautifully crafted River Rock Dry Creek Bed.
Create an Outdoor Oasis That Reflects Your Style
Our expert landscape designers will work closely with you to create a personalized outdoor space that blends functionality with aesthetic appeal. Whether you're looking to enhance curb appeal, entertain guests, or create a relaxing retreat, we bring your vision to life with thoughtful design and top-quality workmanship.
Why Choose Our Custom River Rock Dry Creek Beds?
Add a natural, tranquil element to your landscape while solving common drainage issues. Our custom river rock dry creek beds not only improve water flow but also add beauty and depth to your yard—perfect for both form and function.
Let Us Bring Your Dream Landscape to Life
From elegant retaining walls and ambient lighting to expertly laid paver patios, we provide comprehensive landscaping solutions designed to elevate your outdoor environment.
? Whitwell Landscaping Inc. – Your Partner in Outdoor Living
? Call Us Today! 770-519-5400
? www.whitwelllandscaping.com
 Mottram Architecture
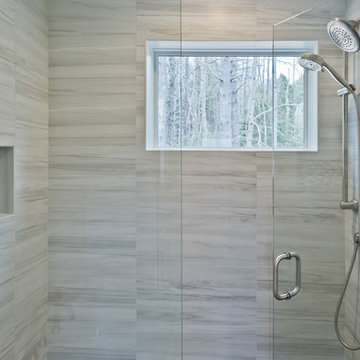
Timber frame homes offer unique challenges during a remodel. What often makes them beautiful and attractive to most homeowners, also makes them challenging for space requirements.
Context: The lovely couple that owned this home were struggling with some interesting floor plan challenges that just didn't work for their family. The loved the beautiful timbers and woodwork of their home, but the dramatically sloping ceilings on the second floor, particularly in the bathroom, just didn't work for this 1 1/2 bath home. Needing to use the skylight to approach the toilet was a less then ideal scenario. Although the bathroom footprint was more then adequate, the sloped ceiling only made half of the space useable. Check out the Before/After post on our blog to see the photos of the house pre-renovation. As much as they loved all the wood features in their home, another challenge they had was light. The wood ceiling made everything inside the house darker, even with a fantastic array of south facing windows, there were spaces in the home that felt dark and small. When they contacted us they wanted to know how could they make their brighter and more inviting, were there solutions to the 2nd floor sloped ceiling issues, and if they were going to do all of this work, how could they make their home more comfortable and efficient. A nagging water leak in the upstairs bathroom spurred them into action and here is how we solved their dilemma.
Conclusion: First, we added a little dormer to the rear of the house so we could get full headroom in nearly all of the upstairs bathroom! Then we decided to extend that dormer one more timber bay over to create a walk in closet with natural light and plenty of space. Since we were contemplating energy efficiency, we resolved a nagging issue that is present in a lot of timber frame construction, air tightness. Commonly found in timber frame construction, fiberglass insulation is installed in the rafter bays and board ceilings are installed over top. Unfortunately, board ceilings are anything but air tight, and fiberglass insulation needs to be in an airtight cavity for maximum effectiveness. So we were able to solve two issues at the same time for this homeowner. We removed the board ceiling and fiberglass insulation, we dense packed the rafter bays with cellulose insulation, and installed sheetrock in place of the boards. The boards were salvaged for re-use by the homeowner, and the space and light quality was dramatically improved. Some may think that losing the board ceiling took something away from the space, but what you'll see in the pictures is that it highly accentuates the heavy timbers and really makes them stand out in a beautiful way. Now with this added airtightness, better insulation, and brighter space, the homeowner hardly runs their wood stove, and it's so quiet in the space, an added bonus from changing the insulation. It became necessary to also add a sheetrock ceiling to the living room to hide the plumbing from the new bathroom layout above. Changing this ceiling gave the homeowner some real quality lighting that was lacking in the living room before. The brighter ceiling and new lighting layout completely transforms the living room into a space you want to hang out, even though the layout didn't change at all. When the homeowner saw the finished spaces she said "I can't believe this is my house, I want to live in this house"
Energy Efficiency: I touched a little on the efficiency above, but like all projects done with Mottram Architecture, we always want to leave you with a little extra. Timber frame construction with board ceilings and fiberglass insulation are notoriously leaky! If you want to know what we think about fiberglass insulation, check our our blog post on Why Fiberglass Insulation Sucks. By installing cellulose insulation and covering it with sheetrock we were able to greatly reduce the heat flowing out of this home. It not only improves cashflow it improves the comfort level in the space. Who wants to sit in their living room and feel a draft? Let us remind you, we are not saying cellulose insulation is an air barrier, we use the sheetrock to help with that, but it does significantly reduce the air flow over fiberglass insulation. And when we reduce the airflow, we reduce the heat flow. And when we reduce the heat flow, we reduce the need to re-heat that drafty air from outside. When it comes to energy efficiency the first and best place to start is air infiltration. We greatly reduced the air infiltration with the new insulation, but we also added a hat and warm boots. What I mean by that is, we improved the insulation in the roof, and we installed insulation in the basement. Maybe it's a silly analogy, but when you think about keeping warm, we always start with the hat and boots! With sustainability in mind, the next project will be to add a deck to the front of this house with rain catchment barrels from the metal roof. They are planning to plant a garden in the spring and the rain catchment system will help to irrigate the new garden.
Builder: East Shore Builders
Photographer: Michael Eric Berube
 DekTek Tile
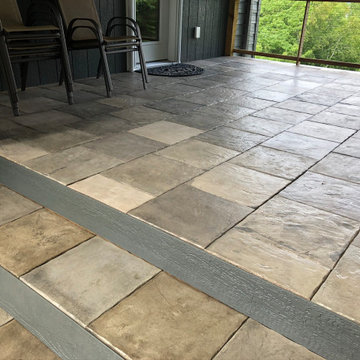
This Minnesota covered porch was built using DekTek Tile's Cobblestone Gray tile decking from the Elevate Collection. DekTek Tile is ultra low maintenance only requiring that the deck be resealed once every 3 years for the maximum beauty. No need to worry about sanding, staining, scrubbing off algae, & all other common decking issues with wood or composite decks.
Find the right local pro for your project
 Wake Remodeling
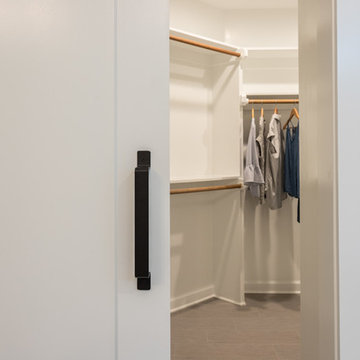
They had the common issue of multiple doors in their bathroom. To address this, we flipped the bathroom entry door to open into the bedroom instead of the bathroom and we installed a stylish barn door to cover the closet and the water closet.
 Mottram Architecture
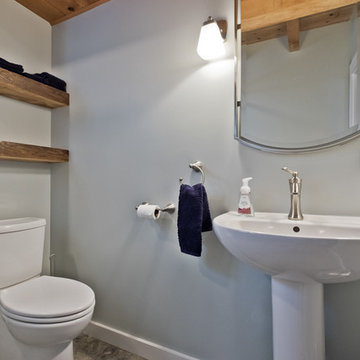
Timber frame homes offer unique challenges during a remodel. What often makes them beautiful and attractive to most homeowners, also makes them challenging for space requirements.
Context: The lovely couple that owned this home were struggling with some interesting floor plan challenges that just didn't work for their family. The loved the beautiful timbers and woodwork of their home, but the dramatically sloping ceilings on the second floor, particularly in the bathroom, just didn't work for this 1 1/2 bath home. Needing to use the skylight to approach the toilet was a less then ideal scenario. Although the bathroom footprint was more then adequate, the sloped ceiling only made half of the space useable. Check out the Before/After post on our blog to see the photos of the house pre-renovation. As much as they loved all the wood features in their home, another challenge they had was light. The wood ceiling made everything inside the house darker, even with a fantastic array of south facing windows, there were spaces in the home that felt dark and small. When they contacted us they wanted to know how could they make their brighter and more inviting, were there solutions to the 2nd floor sloped ceiling issues, and if they were going to do all of this work, how could they make their home more comfortable and efficient. A nagging water leak in the upstairs bathroom spurred them into action and here is how we solved their dilemma.
Conclusion: First, we added a little dormer to the rear of the house so we could get full headroom in nearly all of the upstairs bathroom! Then we decided to extend that dormer one more timber bay over to create a walk in closet with natural light and plenty of space. Since we were contemplating energy efficiency, we resolved a nagging issue that is present in a lot of timber frame construction, air tightness. Commonly found in timber frame construction, fiberglass insulation is installed in the rafter bays and board ceilings are installed over top. Unfortunately, board ceilings are anything but air tight, and fiberglass insulation needs to be in an airtight cavity for maximum effectiveness. So we were able to solve two issues at the same time for this homeowner. We removed the board ceiling and fiberglass insulation, we dense packed the rafter bays with cellulose insulation, and installed sheetrock in place of the boards. The boards were salvaged for re-use by the homeowner, and the space and light quality was dramatically improved. Some may think that losing the board ceiling took something away from the space, but what you'll see in the pictures is that it highly accentuates the heavy timbers and really makes them stand out in a beautiful way. Now with this added airtightness, better insulation, and brighter space, the homeowner hardly runs their wood stove, and it's so quiet in the space, an added bonus from changing the insulation. It became necessary to also add a sheetrock ceiling to the living room to hide the plumbing from the new bathroom layout above. Changing this ceiling gave the homeowner some real quality lighting that was lacking in the living room before. The brighter ceiling and new lighting layout completely transforms the living room into a space you want to hang out, even though the layout didn't change at all. When the homeowner saw the finished spaces she said "I can't believe this is my house, I want to live in this house"
Energy Efficiency: I touched a little on the efficiency above, but like all projects done with Mottram Architecture, we always want to leave you with a little extra. Timber frame construction with board ceilings and fiberglass insulation are notoriously leaky! If you want to know what we think about fiberglass insulation, check our our blog post on Why Fiberglass Insulation Sucks. By installing cellulose insulation and covering it with sheetrock we were able to greatly reduce the heat flowing out of this home. It not only improves cashflow it improves the comfort level in the space. Who wants to sit in their living room and feel a draft? Let us remind you, we are not saying cellulose insulation is an air barrier, we use the sheetrock to help with that, but it does significantly reduce the air flow over fiberglass insulation. And when we reduce the airflow, we reduce the heat flow. And when we reduce the heat flow, we reduce the need to re-heat that drafty air from outside. When it comes to energy efficiency the first and best place to start is air infiltration. We greatly reduced the air infiltration with the new insulation, but we also added a hat and warm boots. What I mean by that is, we improved the insulation in the roof, and we installed insulation in the basement. Maybe it's a silly analogy, but when you think about keeping warm, we always start with the hat and boots! With sustainability in mind, the next project will be to add a deck to the front of this house with rain catchment barrels from the metal roof. They are planning to plant a garden in the spring and the rain catchment system will help to irrigate the new garden.
Builder: East Shore Builders
Photographer: Michael Eric Berube
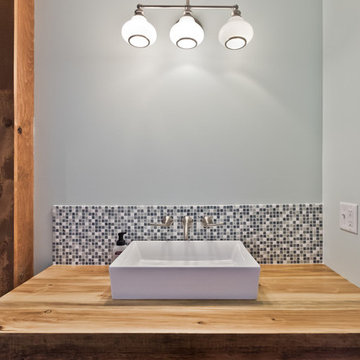 Mottram Architecture
Timber frame homes offer unique challenges during a remodel. What often makes them beautiful and attractive to most homeowners, also makes them challenging for space requirements.
Context: The lovely couple that owned this home were struggling with some interesting floor plan challenges that just didn't work for their family. The loved the beautiful timbers and woodwork of their home, but the dramatically sloping ceilings on the second floor, particularly in the bathroom, just didn't work for this 1 1/2 bath home. Needing to use the skylight to approach the toilet was a less then ideal scenario. Although the bathroom footprint was more then adequate, the sloped ceiling only made half of the space useable. Check out the Before/After post on our blog to see the photos of the house pre-renovation. As much as they loved all the wood features in their home, another challenge they had was light. The wood ceiling made everything inside the house darker, even with a fantastic array of south facing windows, there were spaces in the home that felt dark and small. When they contacted us they wanted to know how could they make their brighter and more inviting, were there solutions to the 2nd floor sloped ceiling issues, and if they were going to do all of this work, how could they make their home more comfortable and efficient. A nagging water leak in the upstairs bathroom spurred them into action and here is how we solved their dilemma.
Conclusion: First, we added a little dormer to the rear of the house so we could get full headroom in nearly all of the upstairs bathroom! Then we decided to extend that dormer one more timber bay over to create a walk in closet with natural light and plenty of space. Since we were contemplating energy efficiency, we resolved a nagging issue that is present in a lot of timber frame construction, air tightness. Commonly found in timber frame construction, fiberglass insulation is installed in the rafter bays and board ceilings are installed over top. Unfortunately, board ceilings are anything but air tight, and fiberglass insulation needs to be in an airtight cavity for maximum effectiveness. So we were able to solve two issues at the same time for this homeowner. We removed the board ceiling and fiberglass insulation, we dense packed the rafter bays with cellulose insulation, and installed sheetrock in place of the boards. The boards were salvaged for re-use by the homeowner, and the space and light quality was dramatically improved. Some may think that losing the board ceiling took something away from the space, but what you'll see in the pictures is that it highly accentuates the heavy timbers and really makes them stand out in a beautiful way. Now with this added airtightness, better insulation, and brighter space, the homeowner hardly runs their wood stove, and it's so quiet in the space, an added bonus from changing the insulation. It became necessary to also add a sheetrock ceiling to the living room to hide the plumbing from the new bathroom layout above. Changing this ceiling gave the homeowner some real quality lighting that was lacking in the living room before. The brighter ceiling and new lighting layout completely transforms the living room into a space you want to hang out, even though the layout didn't change at all. When the homeowner saw the finished spaces she said "I can't believe this is my house, I want to live in this house"
Energy Efficiency: I touched a little on the efficiency above, but like all projects done with Mottram Architecture, we always want to leave you with a little extra. Timber frame construction with board ceilings and fiberglass insulation are notoriously leaky! If you want to know what we think about fiberglass insulation, check our our blog post on Why Fiberglass Insulation Sucks. By installing cellulose insulation and covering it with sheetrock we were able to greatly reduce the heat flowing out of this home. It not only improves cashflow it improves the comfort level in the space. Who wants to sit in their living room and feel a draft? Let us remind you, we are not saying cellulose insulation is an air barrier, we use the sheetrock to help with that, but it does significantly reduce the air flow over fiberglass insulation. And when we reduce the airflow, we reduce the heat flow. And when we reduce the heat flow, we reduce the need to re-heat that drafty air from outside. When it comes to energy efficiency the first and best place to start is air infiltration. We greatly reduced the air infiltration with the new insulation, but we also added a hat and warm boots. What I mean by that is, we improved the insulation in the roof, and we installed insulation in the basement. Maybe it's a silly analogy, but when you think about keeping warm, we always start with the hat and boots! With sustainability in mind, the next project will be to add a deck to the front of this house with rain catchment barrels from the metal roof. They are planning to plant a garden in the spring and the rain catchment system will help to irrigate the new garden.
Builder: East Shore Builders
Photographer: Michael Eric Berube
Michael Eric Berube, Maine Virtual Home Tours
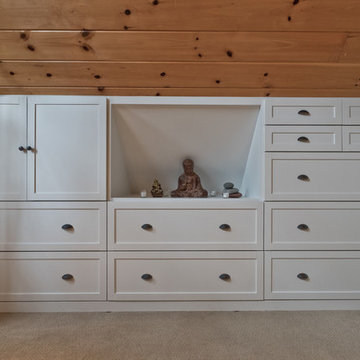 Mottram Architecture
Timber frame homes offer unique challenges during a remodel. What often makes them beautiful and attractive to most homeowners, also makes them challenging for space requirements.
Context: The lovely couple that owned this home were struggling with some interesting floor plan challenges that just didn't work for their family. The loved the beautiful timbers and woodwork of their home, but the dramatically sloping ceilings on the second floor, particularly in the bathroom, just didn't work for this 1 1/2 bath home. Needing to use the skylight to approach the toilet was a less then ideal scenario. Although the bathroom footprint was more then adequate, the sloped ceiling only made half of the space useable. Check out the Before/After post on our blog to see the photos of the house pre-renovation. As much as they loved all the wood features in their home, another challenge they had was light. The wood ceiling made everything inside the house darker, even with a fantastic array of south facing windows, there were spaces in the home that felt dark and small. When they contacted us they wanted to know how could they make their brighter and more inviting, were there solutions to the 2nd floor sloped ceiling issues, and if they were going to do all of this work, how could they make their home more comfortable and efficient. A nagging water leak in the upstairs bathroom spurred them into action and here is how we solved their dilemma.
Conclusion: First, we added a little dormer to the rear of the house so we could get full headroom in nearly all of the upstairs bathroom! Then we decided to extend that dormer one more timber bay over to create a walk in closet with natural light and plenty of space. Since we were contemplating energy efficiency, we resolved a nagging issue that is present in a lot of timber frame construction, air tightness. Commonly found in timber frame construction, fiberglass insulation is installed in the rafter bays and board ceilings are installed over top. Unfortunately, board ceilings are anything but air tight, and fiberglass insulation needs to be in an airtight cavity for maximum effectiveness. So we were able to solve two issues at the same time for this homeowner. We removed the board ceiling and fiberglass insulation, we dense packed the rafter bays with cellulose insulation, and installed sheetrock in place of the boards. The boards were salvaged for re-use by the homeowner, and the space and light quality was dramatically improved. Some may think that losing the board ceiling took something away from the space, but what you'll see in the pictures is that it highly accentuates the heavy timbers and really makes them stand out in a beautiful way. Now with this added airtightness, better insulation, and brighter space, the homeowner hardly runs their wood stove, and it's so quiet in the space, an added bonus from changing the insulation. It became necessary to also add a sheetrock ceiling to the living room to hide the plumbing from the new bathroom layout above. Changing this ceiling gave the homeowner some real quality lighting that was lacking in the living room before. The brighter ceiling and new lighting layout completely transforms the living room into a space you want to hang out, even though the layout didn't change at all. When the homeowner saw the finished spaces she said "I can't believe this is my house, I want to live in this house"
Energy Efficiency: I touched a little on the efficiency above, but like all projects done with Mottram Architecture, we always want to leave you with a little extra. Timber frame construction with board ceilings and fiberglass insulation are notoriously leaky! If you want to know what we think about fiberglass insulation, check our our blog post on Why Fiberglass Insulation Sucks. By installing cellulose insulation and covering it with sheetrock we were able to greatly reduce the heat flowing out of this home. It not only improves cashflow it improves the comfort level in the space. Who wants to sit in their living room and feel a draft? Let us remind you, we are not saying cellulose insulation is an air barrier, we use the sheetrock to help with that, but it does significantly reduce the air flow over fiberglass insulation. And when we reduce the airflow, we reduce the heat flow. And when we reduce the heat flow, we reduce the need to re-heat that drafty air from outside. When it comes to energy efficiency the first and best place to start is air infiltration. We greatly reduced the air infiltration with the new insulation, but we also added a hat and warm boots. What I mean by that is, we improved the insulation in the roof, and we installed insulation in the basement. Maybe it's a silly analogy, but when you think about keeping warm, we always start with the hat and boots! With sustainability in mind, the next project will be to add a deck to the front of this house with rain catchment barrels from the metal roof. They are planning to plant a garden in the spring and the rain catchment system will help to irrigate the new garden.
Builder: East Shore Builders
Photographer: Michael Eric Berube

 Specialty Air Inc
Air Conditioner may have issues when switched on after a long time. Be alert, Read the latest blog that describes most common issues occur when switched on your AC and save your precious time and enjoy un-interrupted cooling.
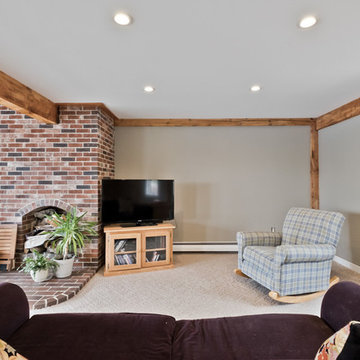 Mottram Architecture
Timber frame homes offer unique challenges during a remodel. What often makes them beautiful and attractive to most homeowners, also makes them challenging for space requirements.
Context: The lovely couple that owned this home were struggling with some interesting floor plan challenges that just didn't work for their family. The loved the beautiful timbers and woodwork of their home, but the dramatically sloping ceilings on the second floor, particularly in the bathroom, just didn't work for this 1 1/2 bath home. Needing to use the skylight to approach the toilet was a less then ideal scenario. Although the bathroom footprint was more then adequate, the sloped ceiling only made half of the space useable. Check out the Before/After post on our blog to see the photos of the house pre-renovation. As much as they loved all the wood features in their home, another challenge they had was light. The wood ceiling made everything inside the house darker, even with a fantastic array of south facing windows, there were spaces in the home that felt dark and small. When they contacted us they wanted to know how could they make their brighter and more inviting, were there solutions to the 2nd floor sloped ceiling issues, and if they were going to do all of this work, how could they make their home more comfortable and efficient. A nagging water leak in the upstairs bathroom spurred them into action and here is how we solved their dilemma.
Conclusion: First, we added a little dormer to the rear of the house so we could get full headroom in nearly all of the upstairs bathroom! Then we decided to extend that dormer one more timber bay over to create a walk in closet with natural light and plenty of space. Since we were contemplating energy efficiency, we resolved a nagging issue that is present in a lot of timber frame construction, air tightness. Commonly found in timber frame construction, fiberglass insulation is installed in the rafter bays and board ceilings are installed over top. Unfortunately, board ceilings are anything but air tight, and fiberglass insulation needs to be in an airtight cavity for maximum effectiveness. So we were able to solve two issues at the same time for this homeowner. We removed the board ceiling and fiberglass insulation, we dense packed the rafter bays with cellulose insulation, and installed sheetrock in place of the boards. The boards were salvaged for re-use by the homeowner, and the space and light quality was dramatically improved. Some may think that losing the board ceiling took something away from the space, but what you'll see in the pictures is that it highly accentuates the heavy timbers and really makes them stand out in a beautiful way. Now with this added airtightness, better insulation, and brighter space, the homeowner hardly runs their wood stove, and it's so quiet in the space, an added bonus from changing the insulation. It became necessary to also add a sheetrock ceiling to the living room to hide the plumbing from the new bathroom layout above. Changing this ceiling gave the homeowner some real quality lighting that was lacking in the living room before. The brighter ceiling and new lighting layout completely transforms the living room into a space you want to hang out, even though the layout didn't change at all. When the homeowner saw the finished spaces she said "I can't believe this is my house, I want to live in this house"
Energy Efficiency: I touched a little on the efficiency above, but like all projects done with Mottram Architecture, we always want to leave you with a little extra. Timber frame construction with board ceilings and fiberglass insulation are notoriously leaky! If you want to know what we think about fiberglass insulation, check our our blog post on Why Fiberglass Insulation Sucks. By installing cellulose insulation and covering it with sheetrock we were able to greatly reduce the heat flowing out of this home. It not only improves cashflow it improves the comfort level in the space. Who wants to sit in their living room and feel a draft? Let us remind you, we are not saying cellulose insulation is an air barrier, we use the sheetrock to help with that, but it does significantly reduce the air flow over fiberglass insulation. And when we reduce the airflow, we reduce the heat flow. And when we reduce the heat flow, we reduce the need to re-heat that drafty air from outside. When it comes to energy efficiency the first and best place to start is air infiltration. We greatly reduced the air infiltration with the new insulation, but we also added a hat and warm boots. What I mean by that is, we improved the insulation in the roof, and we installed insulation in the basement. Maybe it's a silly analogy, but when you think about keeping warm, we always start with the hat and boots! With sustainability in mind, the next project will be to add a deck to the front of this house with rain catchment barrels from the metal roof. They are planning to plant a garden in the spring and the rain catchment system will help to irrigate the new garden.
Builder: East Shore Builders
Photographer: Michael Eric Berube
 highland
Selling your home can be stressful, particularly if you’re short on time. Many homeowners in Springfield, OH find themselves in situations when the traditional real estate process is too slow, too expensive, or too uncertain. Repairs, showings, agent commissions, buyer financing delays and inspection issues can make a simple sale a long and frustrating experience.
That’s why more homeowners are looking for a faster and easier way to sell. If you need a quick home sale in Springfield, OH, Sell House Now Columbus offers a practical solution for people who want to sell their house fast for cash without the usual problems of listing on the market.
A Quicker Way to Sell Your Springfield, OH Home
The old way of selling takes weeks or months. First, you may need to clean, repair and stage the home. Then you have to wait for buyers, schedule showings, negotiate offers and hope the buyer’s loan gets approved. Even after you’ve accepted an offer, the deal can still fall apart due to inspection results, appraisal problems, or financing issues. This process may not be ideal for homeowners who need speed and certainty. Sell House Now Columbus offers cash for homes in Springfield and the surrounding Ohio areas so homeowners can avoid these delays. Don't have to wait for the perfect buyer; you can work directly with a local cash home buyer who understands your situation and can close on your timeline.
Why Homeowners Prefer to Sell Their Homes for Cash
There are a number of reasons why someone might need to sell fast. Some homeowners are going through foreclosure, divorce, relocation, inherited property, problem tenants, expensive repairs or just a house they don’t want to sit vacant. Other people don’t want to spend money fixing up a property before they sell it; A cash sale can be helpful because it eliminates many common roadblocks. You don't have to wait for bank financing. You do not need to prep your home for open houses. You don’t have to keep paying for repairs, utilities, taxes or maintenance while your home is sitting on the market. Sell House Now Columbus allows homeowners to sell their house as-is. This means that you don’t have to repair the roof, update the kitchen, repaint the walls, replace the flooring or clean out every room before closing. The company buys homes as they are, saving time and money.
Sell Your House As-Is Springfield, OH
One of the biggest advantages to working with a cash buyer is the ability to sell as-is. Many houses need work, and that work can cost a lot of money. A typical buyer may seek repair credits, price reductions, or major upgrades before closing. Sometimes lenders won’t finance a home with serious issues in its condition. Selling as-is provides a simpler path for homeowners. You can still ask for a cash offer whether the property has old plumbing, roof damage, outdated rooms, foundation concerns, fire damage, water damage, or years of deferred maintenance. This is particularly helpful for homeowners who have inherited a property or own a house they no longer live in. Rather than sinking thousands of dollars into a property you don’t want to hold on to, you can sell it directly and move on.
No Listing or Agent Commissions Hassles
When you list a house with a real estate agent, commissions and fees can eat into the amount you take home. You’ll also have to pay for repairs, cleaning, staging, photography, inspections, and closing costs. These costs can add up quickly. Selling it for cash makes the math easier. Sell House Now, Columbus lets homeowners bypass the traditional listing process. No open houses, no weekend showings, no need to keep the place spotless for buyers. Skip the uncertainty of waiting for offers and the stress of strangers walking through your home. Privacy is another important advantage for many sellers. A direct sale might be more discreet than putting a house on the open market.
How It Works
Sell House Now, Columbus makes it easy. First you talk about your house. Next the company reviews the property and puts together a fair cash offer. If the offer sounds good to you, you can choose a completion date to suit your needs. This simple process is helpful for home owners that need to make decisions quickly. There is no pressure of a traditional sale and you don’t have to accept an offer. The goal is to provide you a clear choice to determine what works best for you.
When a Quick Sale is Beneficial
Often a quick home sale in Springfield, OH can come in handy. If you are behind on your mortgage, selling quickly can help you avoid more financial stress. If you’re relocating for work, you probably won’t have months to wait for a buyer. If you are going through a divorce, a quick sale can help both parties move on. A direct cash sale can also be a win for landlords. If you’re tired of working around the tenants, the late rent, the damage, and the constant maintenance calls, selling the property may be a better option than continuing to manage it. Another popular reason people search for cash buyers is inherited homes. Many inherited properties require repairs, have multiple decision-makers or come with emotional stress. A fast cash sale can make the process easier and help families close on the property faster.
Go ahead confidently
Selling a home doesn’t have to be hard. If you want to avoid uncertainty, repairs, commissions and delays, working with a local cash home buyer is a smart move. Selling a House Is Easy With Sell House Now Columbus for homeowners Springfield, OH who want a faster, easier way to sell.
If your house is vacant, old, damaged, rented, inherited or you just don’t need it anymore, you can ask for a fair cash offer and choose the closing timeline that best suits you. Sell House Now Columbus is a convenient solution for homeowners who want speed, convenience, and peace of mind. Selling your house fast in Springfield, OH can be a great way to save time, avoid stress, and move on without the headache of the traditional real estate market.
A Quicker Way to Sell Your Springfield, OH Home
The old way of selling takes weeks or months. First, you may need to clean, repair and stage the home. Then you have to wait for buyers, schedule showings, negotiate offers and hope the buyer’s loan gets approved. Even after you’ve accepted an offer, the deal can still fall apart due to inspection results, appraisal problems, or financing issues. This process may not be ideal for homeowners who need speed and certainty. Sell House Now Columbus offers cash for homes in Springfield and the surrounding Ohio areas so homeowners can avoid these delays. Don't have to wait for the perfect buyer; you can work directly with a local cash home buyer who understands your situation and can close on your timeline.
Why Homeowners Prefer to Sell Their Homes for Cash
There are a number of reasons why someone might need to sell fast. Some homeowners are going through foreclosure, divorce, relocation, inherited property, problem tenants, expensive repairs or just a house they don’t want to sit vacant. Other people don’t want to spend money fixing up a property before they sell it; A cash sale can be helpful because it eliminates many common roadblocks. You don't have to wait for bank financing. You do not need to prep your home for open houses. You don’t have to keep paying for repairs, utilities, taxes or maintenance while your home is sitting on the market. Sell House Now Columbus allows homeowners to sell their house as-is. This means that you don’t have to repair the roof, update the kitchen, repaint the walls, replace the flooring or clean out every room before closing. The company buys homes as they are, saving time and money.
Sell Your House As-Is Springfield, OH
One of the biggest advantages to working with a cash buyer is the ability to sell as-is. Many houses need work, and that work can cost a lot of money. A typical buyer may seek repair credits, price reductions, or major upgrades before closing. Sometimes lenders won’t finance a home with serious issues in its condition. Selling as-is provides a simpler path for homeowners. You can still ask for a cash offer whether the property has old plumbing, roof damage, outdated rooms, foundation concerns, fire damage, water damage, or years of deferred maintenance. This is particularly helpful for homeowners who have inherited a property or own a house they no longer live in. Rather than sinking thousands of dollars into a property you don’t want to hold on to, you can sell it directly and move on.
No Listing or Agent Commissions Hassles
When you list a house with a real estate agent, commissions and fees can eat into the amount you take home. You’ll also have to pay for repairs, cleaning, staging, photography, inspections, and closing costs. These costs can add up quickly. Selling it for cash makes the math easier. Sell House Now, Columbus lets homeowners bypass the traditional listing process. No open houses, no weekend showings, no need to keep the place spotless for buyers. Skip the uncertainty of waiting for offers and the stress of strangers walking through your home. Privacy is another important advantage for many sellers. A direct sale might be more discreet than putting a house on the open market.
How It Works
Sell House Now, Columbus makes it easy. First you talk about your house. Next the company reviews the property and puts together a fair cash offer. If the offer sounds good to you, you can choose a completion date to suit your needs. This simple process is helpful for home owners that need to make decisions quickly. There is no pressure of a traditional sale and you don’t have to accept an offer. The goal is to provide you a clear choice to determine what works best for you.
When a Quick Sale is Beneficial
Often a quick home sale in Springfield, OH can come in handy. If you are behind on your mortgage, selling quickly can help you avoid more financial stress. If you’re relocating for work, you probably won’t have months to wait for a buyer. If you are going through a divorce, a quick sale can help both parties move on. A direct cash sale can also be a win for landlords. If you’re tired of working around the tenants, the late rent, the damage, and the constant maintenance calls, selling the property may be a better option than continuing to manage it. Another popular reason people search for cash buyers is inherited homes. Many inherited properties require repairs, have multiple decision-makers or come with emotional stress. A fast cash sale can make the process easier and help families close on the property faster.
Go ahead confidently
Selling a home doesn’t have to be hard. If you want to avoid uncertainty, repairs, commissions and delays, working with a local cash home buyer is a smart move. Selling a House Is Easy With Sell House Now Columbus for homeowners Springfield, OH who want a faster, easier way to sell.
If your house is vacant, old, damaged, rented, inherited or you just don’t need it anymore, you can ask for a fair cash offer and choose the closing timeline that best suits you. Sell House Now Columbus is a convenient solution for homeowners who want speed, convenience, and peace of mind. Selling your house fast in Springfield, OH can be a great way to save time, avoid stress, and move on without the headache of the traditional real estate market.
 Advance Design Studio, Ltd.
Jennifer and Dan have lived in their Deer Park Illinois home for 15 years, slowly making minor fixes like painting and decorating; but they had a new plan for their kitchen the entire time. An awkwardly placed garage door, and an island cooktop with a terrible downdraft made a full-scale kitchen remodel an absolute must. Jennifer had many ideas in mind and wanted to work with a company that could provide high-end work, while partnering with a designer that would tailor the kitchen to her ideas.
She was intrigued by the phrase “Common Sense Remodeling” in Advance Design’s feature she discovered while perusing an issue of the community’s Quintessential Barrington Magazine. Doing further research on the company’s website, as she looked through project profiles and read about Advance Design’s “Common Sense Remodeling” philosophy, she promptly scheduled an appointment to see if the people and ideas she read about were truly who they said they were. The more she read, the more she knew that the “Common Sense” approach to remodeling they described was exactly the type of company she was looking for.
The partnership was sealed after an initial consultation with Owner Todd Jurs and Project Designer Michelle Lecinski. They displayed a combination of friendliness, professionalism and respect that was unmatched by any of the other companies Jennifer talked to. She knew that with Advance Design, she would be able to retain the vision that she had in mind with high-quality craftsmanship.
“I reached out to Advance Design because of the ‘Common Sense Remodeling’ tagline,” Jennifer said. “That’s what lingered for me”. “Advance Design was the most respectful- of the house and of my design ideas, and the most professional of the handful of companies that looked at my project”.
Soon after the meeting Jennifer began working with Michelle on the project design. They quickly developed chemistry. Jennifer loved how Michelle researched and located every detail that Jennifer wanted for the kitchen. Between the two of them, every concept and idea was worked through and perfected. “Jennifer had definite ideas about what she wanted the new kitchen to look like, she just didn’t know how to bring it all together. We worked together really well to make her ideas into the practical reality necessary for a well-functioning kitchen, with the look and feel that she had envisioned”, says Michelle.
“Michelle was wonderful in using the CAD system she would show me new drawings every time we changed the layout while working through the design,” Jennifer said. “She was a really wonderful partner in execution, she made sure everything happened quickly and easily.”
The finished design drew out elements of Jennifer’s style and personality. The pair call the look “sophisticated farmhouse” to describe the kitchen renovation to family and friends. The result was a beautifully crafted, authentic-feeling space that satisfied Jennifer’s dreams 15 years in the making. The whole project consisted of a kitchen remodel, mudroom upgrade with powder room, and garage entry relocation. “The projects I personally like the best, are the ones that put the client’s dreams on display,” Project Designer Michelle said. “And this is one of those projects.”
The main focal point of the kitchen is custom zinc and brass ventilation hood with a vintage sheen, which was hand made to order by a small company in Indiana named Vogler Metalworking. “It’s like sculpture, a true work of art”, says Jennifer. Your eye is immediately drawn towards this elegant yet practical hood that eliminated the home’s downdraft problem and added a striking conversation piece at the same time. The carpenters had to use special gloves when transporting and installing it, so they didn’t smudge it with fingerprints. The beautiful hood centers proudly over the stunning black enamel and brass LaCornue Range. “I had a friend who had a LaCornue range and after learning how easy it was to cook perfect meals, I was convinced I wanted to have one”, says Jennifer. This unique, breathtaking combination anchors the entire kitchen and is apparent immediately as you walk into the great room the surrounds the space.
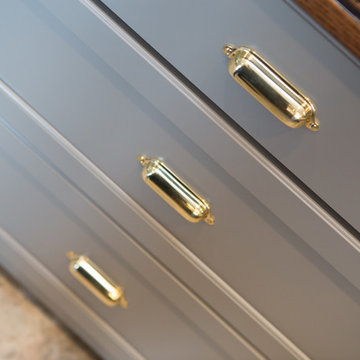
DuraSupreme Crestwood cabinets with a Kendall Panel add function and sophistication. A custom gray paint color paired with a storm blue was developed so that the new kitchen looked like it belonged to the existing space. Unlacquered brass faucets and hardware were important to Jennifer because she wanted the living finishes to age over time. Remarkable brass diamond mesh cabinet door inserts imported from the UK continue to add this one-of-a-kind kitchen renovation; giving it a “you won’t see this everywhere” quality. The use of old railcar flooring for the coffee bar countertop and reclaimed oak for the open shelving gives an authenticity to the space uncommon in kitchens today.
Jennifer and Michelle fell in love with the Limestone Grey Stone while they were investigating unique island countertop ideas. They liked the fact that the limestone as a living finish will age and change over time. Calcutta Miel Quartz countertops made for an excellent pairing around the perimeter, as it’s durable and perfect for cooking preparations. A textured white subway tile backsplash that runs to the ceiling keeps your eye moving towards the open shelving, and to the main focal point of the stunning range hood combination.
“The kitchen functions beautifully, and it’s gorgeous,” beams Jennifer as she gestures with both hands while smiling ear to ear. “The most important thing was I wanted a kitchen that had a wonderful flow, cooked beautiful meals and was a great gathering place for family and friends, and this space does that perfectly! Beauty wise, it turned out exactly how I had envisioned. I felt the function part was the hardest part, and that was nailed”!
Relocating the garage entry to the new mudroom was a huge priority and has finally separated the family’s arriving home functions from their kitchen. Now coats and shoes and bags have their own area for dropping once members arrive home. Matching gray DuraSupreme cabinetry helped create gorgeous, purposeful lockers for the family. A reclaimed vintage sink and custom wall paper were added to the tiny powder room to beautify the once previously only functional space. Advance Design was even able to create a custom space for their dog to sleep while the family is away.
“It was unbelievable that a project of this size was completed in such a short time, and I think that’s because of the large amount of planning and preparation that went into it,” Jennifer marveled, “When we started, we were ready, and everything was prepared”.
When it came to execution, Project Manager Justin Davis and his crew were quick, accessible, and organized. Projects like this kitchen are typically completed in as little as 8-10 weeks. Jennifer’s kitchen however despite the relocation of some challenging HVAC in a soffit and moving of an exterior door was completed remarkably fast in part because the team was working with an existing tile floor that ran throughout the first floor that the client really loved.
“You get to know these people really well because they’re living in your house while you’re living in your house. They were so fast and really good, it didn’t take as long as even planned” reported Jennifer. “I would text Justin and he always responded almost immediately. I got to know all the guys who were working in our house and they were all wonderful people”.
Details in a customized kitchen like this one require skill and care from the people who install it. “All the guys on the job were skilled at what the did. I wanted small details like little feet to look like furniture, that is where their carpentry skill came in to make these all perfect”, said Jennifer. “The tile guys were wonderful. They even let me determine how I wanted the texture with the grout to appear for a salt and pepper look; now that is a very skilled trade person making it custom”.
In Jennifer’s interview, she continued to reference Advance Design’s “Common Sense Remodeling”, so I took a minute to ask her exactly what that phrase meant to her and how it played out in her experience with her project and the Advance Design team. Here is what she said: “I was intrigued about Common Sense Remodeling and in my head that there would be clear costs and prices, great communication between the design team, the execution team and me”, said Jennifer. They did deliver on that, it was so clear about the cost breakdown, what I could expect from everyone who came to my house, and everything that we had ordered. That to me is the Common Sense”!
It’s great to see a client take literally our assertion that a well-planned remodeling project is simply “Common Sense”! She anticipated each step of the way would be clear, concise, and predictable, all the while protecting the outcome due to the careful upfront planning. “Advance Design delivered on their ‘Common Sense Remodeling’ promise,” Jennifer said. “From the design team, to the execution team - everything was straight forward like I imagined. The project turned out exactly how I envisioned, I enjoyed this process and absolutely would recommend Advance Design Studio to anyone.”
 ECustomFinishes
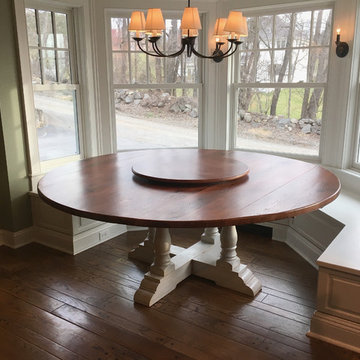
The Van Scotts had a solution to a very common issue. What if you need a large round but can't fit it thru the doorway? A drop leaf! This is exactly what we did for this lovely 80" round old oak pedestal table. Ingenious way to get it inside without compromising on the diameter!
 DekTek Tile
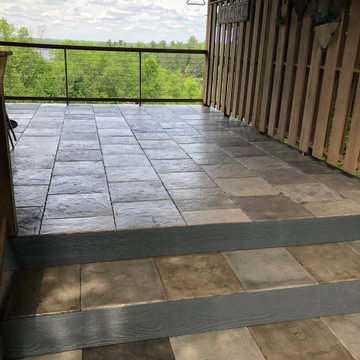
This Minnesota covered porch was built using DekTek Tile's Cobblestone Gray tile decking from the Elevate Collection. DekTek Tile is ultra low maintenance only requiring that the deck be resealed once every 3 years for the maximum beauty. No need to worry about sanding, staining, scrubbing off algae, & all other common decking issues with wood or composite decks.
 ETO Doors
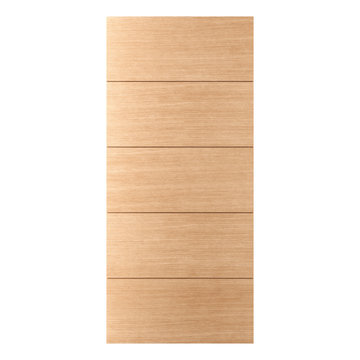
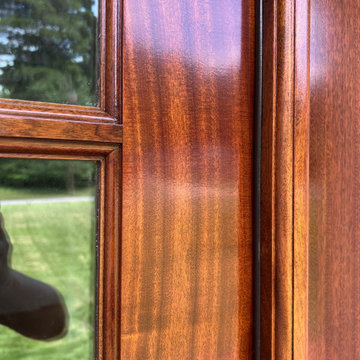
Please note: Doors are unfinished (the pictures may depict a finished door)
Request a Free Corner Sample to See the ETO Quality Difference
Elevate your home or office entrance with the Chelsea Exterior White Oak Door, designed with a sleek flush profile, horizontal grain, and grooved detailing for a refined, contemporary look. Built with solid-core construction, this door provides exceptional durability and strength, making it ideal for front entryways, patio doors, back entrances, and garage side access.
Featuring a 3mm thick clear face veneer over a reinforced core, this white oak exterior door is engineered to resist warping, cracking, and splitting, ensuring long-term structural integrity. Its integral panel design eliminates common separation issues found in stile and rail doors, offering reliable performance in various climates.
Designed for both residential and commercial applications, this flush white oak door seamlessly blends modern style with enhanced security and premium craftsmanship, making it a standout choice for contemporary architectural spaces.
Free Samples: Request a Free White Oak Exterior Flush door with horizontal grain and grooves Door Corner Sample to See the ETO Quality Difference.
PRO Discounts: Pro discount program trade pricing available for contractors, architects, and designers on all our exterior white oak doors.
Lowest Prices Nationwide: At ETO Doors, we leverage our mass production to manufacture these high-quality exterior white oak doors at the lowest prices in the country, passing significant savings directly to you.
Versatile Usage: Our white oak doors are perfect for residential and commercial settings, including new construction and remodeling projects. Our flush door with horizontal grain and grooves interior doors are installed in places with high traffic volumes such as multifamily homes, office buildings, and hotels.
Customization Available: We understand that every project is unique. Our wood flush door with horizontal grain and grooves doors can be customized to fit your specific size and design requirements, ensuring a perfect fit and look for any application.
Optional Features (at an additional cost)
20-Minute Fire Rating for Wood Doors Available: Exterior flush door with horizontal grain and grooves white oak doors fire rated to withstand fire for 20 minutes, certified by UL or Warnock Hersey.
Exterior Pre-hanging: Our solid core white oak exterior doors can be pre-hung with matching engineered white oak jambs or exterior white primed jambs as pre-hung single doors or pre-hung double doors units.
Impact Hurricane Certification: Our Exterior White Oak doors are available with a Miami Dade hurricane impact wood door approval in both in-swing and out-swing configurations. Our wood Exterior White Oak storm doors certifications are equivalent to a "Miami-Dade NOA" which has the highest hurricane approval standard for wood doors in the country. Each of our flush door with horizontal grain and grooves white oak exterior doors can be assembled with the appropriate components to be Florida Building Code Compliant.

 1st Choice Heating & Air Conditioning, Inc.
Existing 2-Ton Lennox Air Conditioner
Patio - small backyard patio idea in Orange County
Patio - small backyard patio idea in Orange County

 Cavalier Bremworth
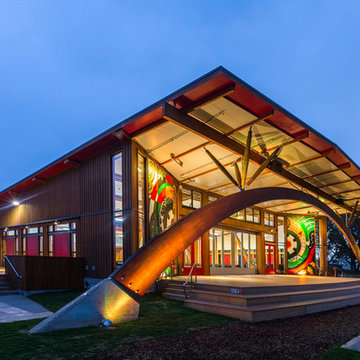
Located in Taneatua, south of Whakatane, the Tuhoe building has been designed by Jasmax and built by Arrow International for the local iwi, Tuhoe, as part of a Living Building Challenge. Their iconic new headquarters is now one of New Zealand’s most advanced sustainable buildings – built to have virtually no environmental impact.

 Five Star Tree Care
One frustrating thing about tree infections and diseases is that they are virtually completely unpredictable. It is essential to understand all the different types of risks and causes that can contribute to these issues in an attempt to understand how you can try and prevent and manage these things when they happen. Five Star Tree Services is going to go over the reasons as to how and why your trees can develop these certain issues.
Since there are so many different causes behind why a tree’s development might be interrupted, first think of them as two different categories you can split them into; non-living factors or abiotic, and living factors or biotic. We also want to note that it is possible for more than one factor to affect a tree’s health and development at any given time.
You can also make a distinction between primary pests and secondary pests. The primary pests exert a serious influence on the tree’s immediate survival. Whereas secondary pests have a less significant influence on the survival of the tree. The only time they will jeopardize a tree’s survival is if the tree has a previous debilitating issue from another risk factor.
For an individual tree’s circumstances, this will distinct the chances of an infestation, especially if it has any past debilitating issues. Which can be seen from any compromising management practices or pre-existing issues which affect the tree’s development as well as lower its resistance to infections.
Poor management in planting is a very common predisposed factor that compromises a tree’s infection defense. For instance, any saplings that are pot-bound will not get to develop solid root systems which doesn’t allow them to develop properly when they eventually get planted. Another example is when a tree gets stressed, along with other outer factors, will have significant effects on the overall wellbeing of the tree and its condition. Other factors to consider are bad soil quality as well as bad drainage.
Abiotic Non-Living Influences
The overall health of a tree can be linked to impacts such as bad growing conditions and bad soil quality. These things will put trees at a higher risk for catching a number of different biotic issues. Sickness, infections, and infestation can all be linked to ineffective nutrient absorption when a tree has insufficiently developed its natural resistances and defenses. One of the worst factors for this is fire damage. It is so debilitating that it makes trees hopeless at defending themselves against biotic attacks.
To uncover what circumstantial predispositions your tree might have due to poor developmental conditions, arborists can use the growth rings as a means of assessment for the long-term effects, wellbeing, and growth of a tree.
There are many outer and non-living variables that will influence the health of a tree and if it will be predisposed to biotic infestations. Such variables can include things like extensive cold winters and long dry spells.
Abiotic Common Influences Include:
-Water
-Chemicals
-Soil Conditions
-Weather
-Mechanical Agents
Biotic Living Influences
Sometimes, you are able to notice certain infestations easily, while others can be hard to tell. For instance, seeing an insect on a tree is no cause for alarm. A lot of them are harmless to the tree and do not cause harm while they regularly feed. However, some insects are actually harmful to a tree’s survival and knowing the difference between harmless and harmful ones is what you need to notice.
You might also see fungi on rotting matter or a dead tree. Fungi are not usually the immediate influence of a negative manifestation found in a tree’s development. There are other growths that can be seen living on trees. These include saprobic and pathogenic organisms. Saprobic growths are mostly found on rotting or dead tissues and pathogenic growths are less common. Some other living infestations include lichens, epiphytes, and mosses. But these don’t usually have any effect on a tree’s wellbeing. They live symbiotically together.
Biotic Common Influences Include:
-Mites
-Deer and Rodents
-Fungi
-Weeds
-Viruses
-Parasitic Plants
-Bacteria
-Phytoplasmas
-Insects
How Five Star Tree Service Can Help
It is important to know the basics to look out for when trying to prevent developmental issues or help a tree that is developing. There are a lot of factors to take into consideration when helping a tree grow, flourish, and live a healthy long life. If you have any questions or concerns about your trees, contact us at Five Star Tree Services today at (416) 990-3355. We will be able to help you with all your tree related needs. Check out our website for a full list of our Tree Services in Toronto!

 Free Lancing
Effective residential construction project management is crucial in today’s fast-moving building industry. It means overseeing every step of building a home, from planning to finishing, to ensure projects are completed time, within budget, and with high quality. Unlike commercial projects, residential projects require special attention to meet homeowners' unique needs and wishes, requiring a customized approach from the beginning to the end.
In 2025, the construction sector will use advanced technologies like AI and integrated project delivery (IPD) to streamline processes and improve stakeholder collaboration. However, project managers face significant challenges, including managing risks, maintaining quality control, and ensuring effective communication among team members.
A WIP Report (Work-in-Progress Report) is a key tool that helps track a project's budget, progress, and resource use. It provides clear insights, making managing costs easier, avoiding delays, and making informed decisions.
By adopting best practices and using modern construction management tools, project managers can overcome these challenges and deliver successful residential construction projects that meet client expectations and contribute to a sustainable future.
This article provides a brief overview of residential construction project management, highlights its importance, and touches on the challenges faced by project managers while incorporating the latest trends and technologies in the field.
Types of Residential Construction Management
Here are the different types of Residential Construction Management:
Single-Family Homes: These are standalone houses built for individual families. Managing these projects involves overseeing construction from planning to completion, ensuring that the home meets the owner's preferences and budget.
Multi-Family Housing: This includes apartments, condominiums, and townhouses. Projects of this type require managing multiple units, often with shared facilities, and ensuring compliance with local building codes.
Custom Home Building: This involves constructing homes tailored to specific client needs. Close collaboration with architects and designers is required to ensure the house reflects the owner's personality and preferences.
Home Renovation and Remodeling: These projects focus on updating or expanding existing homes. They often involve working with subcontractors for specialized tasks like electrical or plumbing work.
Components of Residential Construction Project Management
Managing a residential construction project requires carefully coordinating people, materials, and timelines. A well-structured approach ensures efficiency, cost control, and high-quality results.
Roles and Responsibilities
A project manager plays a vital role in residential construction. They oversee every step from planning to completion and ensure the project stays on schedule, within budget, and meets quality standards.
Project Manager’s Role in Home Construction
The project manager is responsible for organizing tasks, managing resources, and solving problems that arise during construction. They coordinate between different teams, track progress, and ensure safety regulations are followed.
Collaboration with Contractors, Architects, and Stakeholders
Successful residential construction requires teamwork. Project managers work closely with architects to bring designs to new heights, coordinate with contractors to manage labor and materials, and keep stakeholders (such as homeowners and investors) informed about project updates.
Client Communication and Expectations Management
Clear communication with clients is essential. The project manager keeps homeowners updated on timelines, changes, and challenges. Setting realistic expectations and providing regular updates, they help avoid misunderstandings and keep the project running smoothly.
Project Scope & Planning
Practical project planning sets the foundation for a successful residential construction project. It ensures clear goals, minimizes risks, and keeps the project on track.
Defining Project Objectives and Deliverables:
Clearly outlining what needs to be done and what the final result should look like is essential. This involves setting specific, measurable goals that align with the homeowner's vision and budget.
Managing Homeowner Expectations and Scope Creep:
Homeowners often have changing needs or ideas. Effective project managers must manage these expectations to prevent "scope creep," which can delay projects and increase costs. This involves open communication and setting clear boundaries.
Ensuring Compliance with Zoning Laws and Permits:
Before construction begins, it's crucial to ensure that all necessary permits are obtained and that the project complies with local zoning laws. This step avoids costly fines and delays, ensuring the project moves forward smoothly.
Budgeting & Cost Control
Proper budgeting is essential for keeping residential construction projects financially viable. Effective cost management prevents overspending and ensures profitability.
Accurate Cost Estimation for Residential Projects
A precise cost estimate considers labor, materials, permits, and unexpected expenses. Using historical data and Sage 300 CRE for financial management improves accuracy and helps set realistic budgets.
Budget Allocation and Tracking
Allocating funds efficiently ensures that each phase of the project receives the necessary resources. Tracking expenses through Construction & Financial Dashboards allows for real-time monitoring and early detection of budget deviations.
Preventing Budget Overruns
Uncontrolled costs can derail a project. Regular financial reviews, automated alerts for overspending, and contingency planning help keep expenses in check and prevent financial strain.
Scheduling & Timeline Management
Timely project completion is crucial in residential construction. Effective scheduling minimizes delays and ensures a smooth workflow.
Creating Detailed Project Schedules
A structured schedule outlines all tasks, deadlines, and dependencies. Breaking down the project into phases, planning, execution, and finishing, helps maintain order and clarity.
Preventing Delays & Meeting Deadlines
Delays can result from labor shortages, weather conditions, or supply chain issues. To avoid problems, it’s good to check for risks ahead of time, add extra time to schedules, and keep everyone on the same page.
Using Gantt Charts and Critical Path Methods
CPM for Construction helps identify critical activities that directly impact project completion, while Gantt charts provide a visual timeline of tasks. Both tools optimize scheduling and improve efficiency.
Residential Construction Project Management Phases
Managing a residential construction project effectively requires a structured approach through various phases. Each phase plays a critical role in ensuring the project's success, from initial planning to completion.
Pre-Construction Phase
The pre-construction phase sets the foundation for a smooth and efficient building process. Proper planning at this stage helps prevent costly changes and delays later.
Site Analysis & Approvals: A thorough site analysis assesses soil conditions, topography, and environmental factors. Feasibility studies evaluate project viability, including costs and regulatory compliance. Obtaining zoning approvals, permits, and other legal clearances is crucial before breaking ground.
Selecting Materials and Procurement Strategies: Choosing the right materials impacts durability, sustainability, and cost efficiency. A well-planned procurement strategy, including bulk purchasing and reliable supplier partnerships, ensures timely delivery and cost savings. Using Sage 300 CRE for procurement management helps streamline material sourcing and financial planning.
Construction Phase
The construction phase transforms plans into reality. Effective coordination and strict quality control ensure a successful build.
Resource Allocation and Workflow Coordination: Efficiently managing labor, equipment, and materials is key to maintaining progress. Using CPM for Construction, project managers can allocate resources strategically, prevent bottlenecks, and optimize workflows for timely completion.
Project Closeout & Handover
The final phase of residential construction project management is crucial for ensuring a smooth transition from construction to occupancy. Proper closeout procedures guarantee quality, client satisfaction, and long-term project success.
Final Inspections and Quality Assurance: Before finishing the project, a final inspection checks that everything meets safety rules and quality standards. Any problems need to be fixed quickly. Using Procore helps make inspections and tracking issues easier, ensuring a high-quality final product.
Client Walkthrough and Support: A final check helps homeowners see the finished work, ask questions, and make sure it meets their expectations. This is also a chance to explain important home features and maintenance tips. Good communication here builds trust and strengthens relationships.
Warranty Management and Feedback: Efficient warranty management ensures clients get quick help for any issues after construction. A clear process for tracking requests and keeping in touch with homeowners boosts satisfaction. Collecting feedback helps improve future projects. Using S-Curve Forecasting tracks performance trends and refines management strategies.
Software for Residential Construction Project Management
The integration of technology in residential construction project management has revolutionized the way projects are planned, executed, and monitored. Digital tools streamline operations, reduce costs, and improve communication, making them essential for modern construction firms.
Importance of Digital Tools
Investing in digital tools is crucial for construction firms as it transforms the industry by enhancing efficiency, accuracy, and collaboration across the entire project lifecycle. They also improve project management by streamlining processes, automating tasks, and facilitating real-time stakeholder communication.
Top Construction Management Software for Residential Projects
Several software solutions are available for managing residential construction projects:
Procore: Known for its comprehensive project management features, including document management and collaboration tools.
Sage 300 CRE: Offers robust accounting and financial management capabilities, ideal for large-scale construction projects.
Buildertrend: Specializes in residential construction, providing tools for project scheduling, budgeting, and client communication.
CoConstruct: Focuses on custom home building and remodeling, offering features for estimating, scheduling, and project management.
WIP Reports: Useful for tracking work-in-progress and managing project finances effectively.
Features Comparison and Best Use Cases:
Procore: Best for large projects requiring extensive collaboration and document management.
Sage 300 CRE: Ideal for firms needing robust financial management.
Buildertrend: Suitable for residential builders focusing on client communication and project scheduling.
CoConstruct: Perfect for custom home builders who need detailed estimating and scheduling tools.
WIP Reports: Useful for firms needing to track project finances closely.
How Software Improves Project Efficiency
Construction management software significantly enhances project efficiency in several ways:
Automating Accounting and Job Costing: Software like Sage 300 CRE automates financial tasks, reducing manual errors and improving budget tracking.
Streamlining Document Management and Communication: Tools like Procore centralize documents and facilitate real-time communication among team members, reducing misunderstandings and delays.
Mobile-Friendly Solutions for Real-Time Tracking: Mobile apps from platforms like Buildertrend allow for on-site access to project data, enabling real-time tracking and decision-making.
These digital tools and software solutions are essential for modern residential construction project management, offering benefits such as improved efficiency, enhanced collaboration, and better financial control.
Challenges in Residential Construction Project Management
Residential construction projects face a variety of challenges that can impact their success. Here are some of the key issues project managers encounter:
Managing Subcontractors and Labor Shortages
One of the biggest challenges in residential construction is managing subcontractors and dealing with labor shortages. Subcontractors often have their own schedules and priorities, which can lead to delays if not coordinated properly. Additionally, labor shortages can slow down projects and increase costs due to the need for overtime or hiring temporary workers.
Budget Overruns and Unexpected Costs
Budget overruns are common in residential construction due to factors like material price fluctuations, unexpected site conditions, or changes in project scope. Effective budget management involves regularly monitoring expenses and having contingency plans for unexpected costs.
Changing Construction and Eco Rules
Construction and Eco Rules are always changing, so project managers need to keep up with the latest regulations. This involves following guidelines for saving energy, protecting the environment, and ensuring safety. Ignoring these rules can lead to fines, delays, or even stopping the project.
Best Practices
To ensure your residential construction projects run smoothly and successfully, follow these essential best practices:
Setting Clear Project Goals and Milestones
Clearly defining what you want to achieve is the first step to success. Set specific, measurable, achievable, relevant, and time-bound (SMART) goals. This helps everyone involved understand what needs to be done and by when. For example, instead of saying "build a house," say "build a house with three bedrooms and two bathrooms within the next nine months."
Stakeholder Collaboration
Good communication is key to keeping everyone on the same page. Regular meetings with contractors, suppliers, and homeowners help prevent misunderstandings and ensure that everyone knows what's happening and what's next. This open dialogue also helps resolve issues quickly, preventing small problems from becoming big delays.
Using Data-Driven Insights for Decision-Making
Making decisions based on facts rather than guesses is crucial. Use data and analytics to understand project progress, identify potential issues early, and make informed decisions. For instance, if data shows that a particular material is consistently causing delays, you can plan ahead to avoid those delays in the future.
Proactive Risk Management Strategies
Things don't always go as planned, so being prepared is essential. Identify potential risks early and have a plan to manage them. This might include having backup suppliers, planning for weather conditions, or setting aside extra funds for unexpected expenses. Being proactive can prevent small issues from turning into major problems.
Conclusion
Effective residential construction project management requires careful planning, clear communication, and the right digital tools. From single-family homes to multi-family housing and custom projects, managing timelines, budgets, and quality is essential for success.
By following best practices, using project management software, and staying ahead of industry trends, project managers can ensure smooth execution and client satisfaction despite challenges like labor shortages, budget overruns, and regulatory compliance; modern technology and strategic planning help mitigate risks.
Construction firms can improve efficiency, enhance collaboration, and maintain financial control by adopting advanced tools like Procore, Sage 300 CRE, and Buildertrend. A well-managed project delivers a quality home and builds trust and long-term success in the industry.
FAQs
What is residential construction project management?
It involves overseeing all aspects of building residential properties, from initial planning and design to construction and completion, ensuring projects are completed on time, within budget, and to the desired quality standards.
How can I prevent budget overruns in my construction project?
Accurate cost estimation, continuous budget tracking, and having contingency plans for unexpected expenses are key strategies to prevent budget overruns.
What are the main stages of a residential construction project?
The primary stages include design, pre-construction, procurement, and construction.
How does construction management software improve project efficiency?
It streamlines processes like scheduling, budgeting, and communication, providing real-time data access and collaboration among stakeholders, which enhances overall project efficiency.
How can I ensure my project complies with local building codes and regulations?
Engage professionals familiar with local laws, obtain all necessary permits before starting, and conduct regular inspections to ensure adherence to building codes and regulations.

 kmjee
kmjeePepper plants are a delightful addition to any garden, offering a vibrant burst of color and spice to your culinary creations. However, even experienced gardeners can encounter challenges when growing pepper plants. In this blog, we'll explore some common issues you might face and provide practical solutions to help your pepper plants thrive.
1. Slow or Stunted Growth
Issue: Slow or stunted growth in pepper plants can be discouraging, but there are specific steps you can take to address this issue effectively.
Solution:
a. Soil Health:
- Well-Draining Soil: Ensure your pepper plants are in well-draining soil to prevent waterlogged roots, which can inhibit growth.
- Organic Matter: Incorporate plenty of organic matter, such as compost or well-rotted manure, into the soil to improve its texture and nutrient content.
- pH Level: Test the soil pH and adjust it to the ideal range between 6.0 and 6.8 using lime or sulfur as needed.
b. Fertilization:
- Balanced Fertilizer: Use a balanced, slow-release fertilizer designed for vegetables to provide essential nutrients steadily throughout the growing season.
- Compost: Amend the soil with compost to enhance nutrient availability and soil structure. This can promote healthier growth.
c. Watering:
- Consistent Moisture: Maintain consistent soil moisture levels by watering your pepper plants regularly but avoid waterlogging. Aim for 1-2 inches of water per week, adjusting based on your local climate and weather conditions.
- Mulching: Apply mulch around the base of the plants to retain soil moisture and regulate temperature.
2. Yellowing Leaves
Issue: Yellowing leaves can be a sign of various underlying problems, but addressing them promptly can restore the vibrancy of your pepper plants.
Solution:
a. Nutrient Deficiencies:
- Balanced Fertilization: Use a well-balanced fertilizer that includes micronutrients to address nutrient deficiencies.
- Specific Nutrients: If you suspect a particular deficiency, such as magnesium, iron, or nitrogen, apply the appropriate nutrient supplement following package instructions.
b. Pest and Disease Control:
- Pest Inspection: Regularly inspect the leaves and stems for common pests like aphids and mites. Remove affected leaves and treat with organic pesticides if necessary.
- Disease Management: Look out for signs of diseases like bacterial leaf spot or fungal issues. Apply organic fungicides or bactericides as recommended.
3. Blossom Drop
Issue: When pepper plants drop their blossoms prematurely, it can hinder fruit development and lead to disappointment.
Solution:
a. Temperature Control:
- Stable Temperatures: Ensure your pepper plants are exposed to consistent temperatures between 70°F and 80°F (21°C to 27°C) during flowering. Avoid sudden temperature fluctuations by providing shelter or using row covers.
b. Pollination:
- Assist with Pollination: If growing peppers indoors or in a greenhouse, help with pollination by gently shaking the plants or using a small brush to transfer pollen between flowers. Outdoor pepper plants are usually pollinated by insects.
4. Wilting Plants
Issue: Wilting or drooping pepper plants can be a sign of various problems, but proper care can revive them.
Solution:
a. Watering:
- Consistent Moisture: Adjust your watering routine to keep the soil consistently moist but not waterlogged. Water early in the day to prevent fungal issues.
- Drainage: Ensure proper soil drainage by amending the soil or using raised beds to prevent waterlogged roots.
b. Pest Control:
- Pest Inspection: Examine the undersides of leaves for signs of pests like aphids, spider mites, or whiteflies. Treat infestations promptly with biological insecticides.
5. Curling Leaves
Issue: Curling or misshapen leaves indicate stress in pepper plants, which can be caused by various factors.
Solution:
a. Environmental Stress:
- Stable Conditions: Ensure your pepper plants are in an environment with stable humidity, temperature, and adequate air circulation. Avoid sudden changes in conditions.
- Proper Ventilation: Adequate air circulation can reduce humidity and prevent fungal issues.
b. Pest and Disease Management:
- Pest Inspection: Regularly inspect your plants for pests and diseases, addressing them promptly with organic remedies as needed.
6. Sunscald
Issue: Sunscald can lead to discolored, leathery patches on pepper fruits when exposed to intense sunlight.
Solution:
a. Shade Cloth:
- Sun Protection: Shield your pepper plants from harsh sunlight during the hottest part of the day using shade cloth or by planting them where they receive some filtered sunlight.
b. Pruning:
- Fruit Shading: Prune excess foliage to allow better fruit shading, reducing the risk of sunscald. Ensure that there's a balance between foliage and fruit.
7. Pepper Plant Pests and Diseases
Issue: Aphids, mites, whiteflies, and various diseases can affect pepper plants, but you can manage them effectively.
Solution:
a. Regular Inspection:
- Vigilant Monitoring: Regularly inspect your pepper plants for signs of pests or diseases, paying close attention to the undersides of leaves and stems.
b. Organic Remedies:
- Pest Control: Use organic remedies like neem oil, insecticidal soap, or diatomaceous earth for pest control.
- Disease Management: Apply organic fungicides or bactericides as recommended to manage diseases like powdery mildew or bacterial spot.
While growing pepper plants can present various challenges, these common issues are manageable with the right knowledge and care. Regular monitoring, proper soil preparation, and timely intervention can help you enjoy a bountiful harvest of vibrant, spicy peppers. Remember that gardening is a learning experience, and each challenge you face is an opportunity to improve your skills and enjoy the rewards of homegrown peppers in your favorite dishes.
7