
Search results for "Complex concepts" in Home Design Ideas

 Unique Home Solutions Inc.
This studio apartment is 380 square feet. Basically one room for the living room, dining room and bedroom. It was challenging as walkways needed to be created and the colours within each living area needed to match to obtain a peaceful feeling as you walked into the unit.
If you are trying to sell or rent out units in your building, give us a call. We can provide furniture within your budget or you can rent it from us. Call Joanne Vroom 514-222-5553.
Unique Home Solutions Inc. has been in business since 2006.
 Unique Home Solutions Inc.
This studio apartment is 380 square feet. Basically one room for the living room, dining room and bedroom. It was challenging as walkways needed to be created and the colours within each living area needed to match to obtain a peaceful feeling as you walked into the unit.
If you are trying to sell or rent out units in your building, give us a call. We can provide furniture within your budget or you can rent it from us. Call Joanne Vroom 514-222-5553.
Unique Home Solutions Inc. has been in business since 2006.
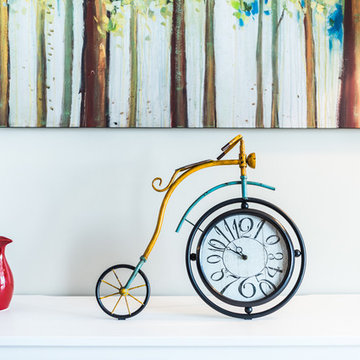 Unique Home Solutions Inc.
This studio apartment is 380 square feet. Basically one room for the living room, dining room and bedroom. It was challenging as walkways needed to be created and the colours within each living area needed to match to obtain a peaceful feeling as you walked into the unit.
If you are trying to sell or rent out units in your building, give us a call. We can provide furniture within your budget or you can rent it from us. Call Joanne Vroom 514-222-5553.
Unique Home Solutions Inc. has been in business since 2006.
Find the right local pro for your project
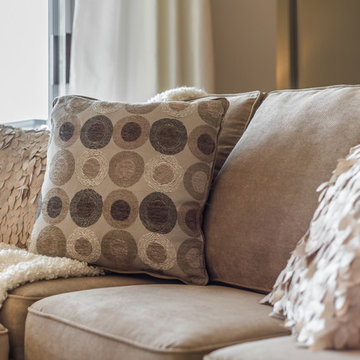 Unique Home Solutions Inc.
This studio apartment is 380 square feet. Basically one room for the living room, dining room and bedroom. It was challenging as walkways needed to be created and the colours within each living area needed to match to obtain a peaceful feeling as you walked into the unit.
If you are trying to sell or rent out units in your building, give us a call. We can provide furniture within your budget or you can rent it from us. Call Joanne Vroom 514-222-5553.
Unique Home Solutions Inc. has been in business since 2006.

 Lisa Batson Goldberg Design
Betty Wang
Example of a mid-sized trendy freestanding desk study room design in Toronto with multicolored walls
Example of a mid-sized trendy freestanding desk study room design in Toronto with multicolored walls
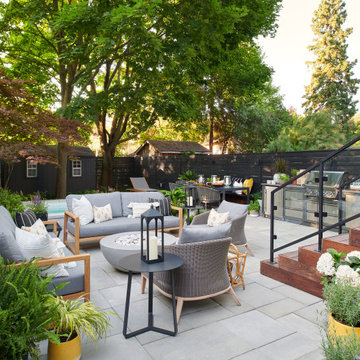



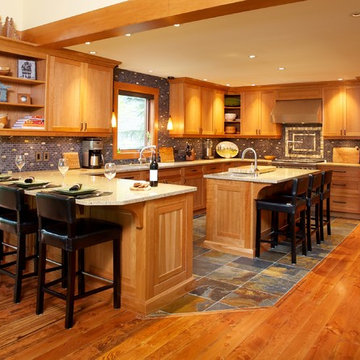
 Whistler Builder
Our client planned to spend more time in this home and wanted to increase its livability. The project was complicated by the strata-specified deadline for exterior work, the logistics of working in an occupied strata complex, and the need to minimize the impact on surrounding neighbours.
By reducing the deck space, removing the hot tub, and moving out the dining room wall, we were able to add important livable space inside. Our homeowners were thrilled to have a larger kitchen. The additional 500 square feet of living space integrated seamlessly into the existing architecture.
This award-winning home features reclaimed fir flooring (from the Stanley Park storm), and wood-cased sliding doors in the dining room, that allow full access to the outdoor balcony with its exquisite views.
Green building products and processes were used extensively throughout the renovation, which resulted in a modern, highly-efficient, and beautiful home.
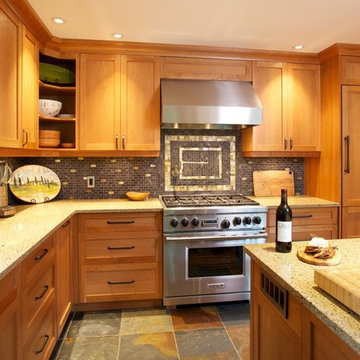 Whistler Builder
Our client planned to spend more time in this home and wanted to increase its livability. The project was complicated by the strata-specified deadline for exterior work, the logistics of working in an occupied strata complex, and the need to minimize the impact on surrounding neighbours.
By reducing the deck space, removing the hot tub, and moving out the dining room wall, we were able to add important livable space inside. Our homeowners were thrilled to have a larger kitchen. The additional 500 square feet of living space integrated seamlessly into the existing architecture.
This award-winning home features reclaimed fir flooring (from the Stanley Park storm), and wood-cased sliding doors in the dining room, that allow full access to the outdoor balcony with its exquisite views.
Green building products and processes were used extensively throughout the renovation, which resulted in a modern, highly-efficient, and beautiful home.
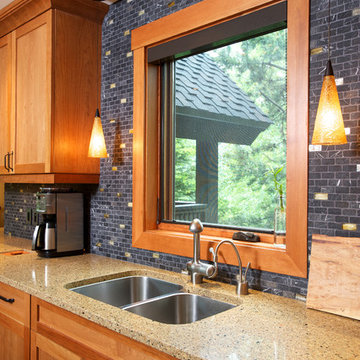 Whistler Builder
Our client planned to spend more time in this home and wanted to increase its livability. The project was complicated by the strata-specified deadline for exterior work, the logistics of working in an occupied strata complex, and the need to minimize the impact on surrounding neighbours.
By reducing the deck space, removing the hot tub, and moving out the dining room wall, we were able to add important livable space inside. Our homeowners were thrilled to have a larger kitchen. The additional 500 square feet of living space integrated seamlessly into the existing architecture.
This award-winning home features reclaimed fir flooring (from the Stanley Park storm), and wood-cased sliding doors in the dining room, that allow full access to the outdoor balcony with its exquisite views.
Green building products and processes were used extensively throughout the renovation, which resulted in a modern, highly-efficient, and beautiful home.
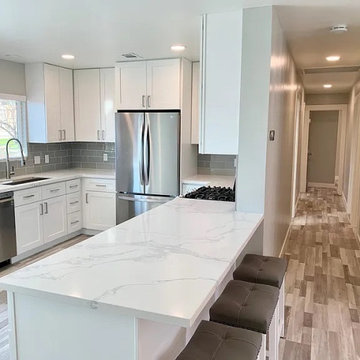
 Central Coast Renovations
This view highlights the open-concept kitchen layout and seamless connection to the rest of the home. A large quartz island provides generous workspace and comfortable seating, while white cabinetry and a modern tile backsplash keep the space clean and bright.
Stainless steel appliances and recessed lighting enhance functionality, and the wide-plank flooring continues through the hallway, creating visual continuity and improving flow throughout the home. The layout was designed to be practical, efficient, and easy to live in—perfect for everyday use and entertaining.
This kitchen remodel showcases a simple, turnkey approach, delivering a modern, move-in-ready result with no unnecessary complexity.
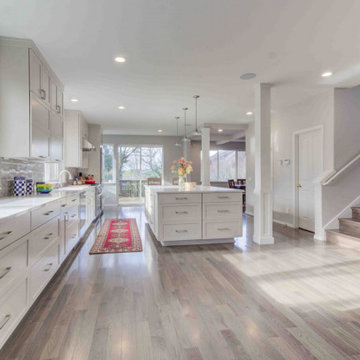
 Better Builders
These clients enjoy cooking and entertaining, so their vision was to open and connect three separate rooms—the kitchen, sitting, and formal dining rooms—to create a single open and modern space where everyone could engage and participate in the activities.
Opening these spaces required complex structural engineering. The wall removals required supporting the loads from the second floor and meeting the engineering requirements for shear wall and lateral support. These beams and their connections to the posts they sit on were a challenge to install because of the complex nature of the home's original framed. All these loads had to be carried through the finished basement below and rest on new footings below the basement floor.
The center kitchen island was expansive, with a single slab countertop that would provide both workspace and counter seating. This slab, at 64x120 and 789 lbs., required careful planning for on-site labor, transfer routing, and precision installation. Natural daylight now floods the space from all directions. Recessed can lighting runs throughout the space, all on dimmers for maximum control of ambiance.
The Better Builders design team guided the selection of hardwoods, staircase details, cabinetry, countertops, tile, and color. The muted palette and clean lines work well with our couple’s eclectic furnishings and artworks. Now, traffic and activities flow better, and every inch of the previously divided space is utilized and enjoyed. The outcome is exactly as our homeowners envisioned…and as we intended.
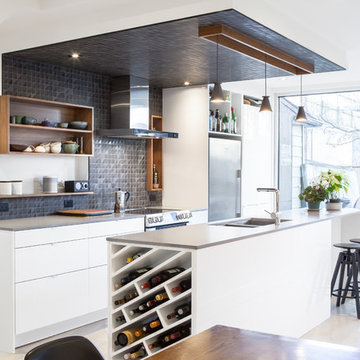
 Wanda Ely Architect Inc.
A bold, black basalt tile backsplash folds up the wall and onto the ceiling, and is punctuated by three walnut boxes that house pendant lights over the island and store kitchenware near the main prep space. Bar seating at the end of the island is perfect for quick morning breakfasts, and snacks after school.
Photo by Scott Norsworthy
Sponsored
Sunbury, OH

J.Holderby - Renovations
Franklin County's Leading General Contractors - 2X Best of Houzz!
 Toronto Interior Design Group
Gillian Jackson
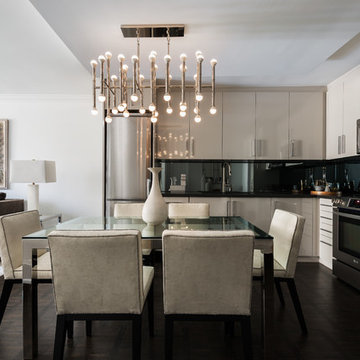
Inspiration for a small contemporary l-shaped dark wood floor and brown floor open concept kitchen remodel in Toronto with an undermount sink, flat-panel cabinets, gray cabinets, quartz countertops, stainless steel appliances, no island and black backsplash
Inspiration for a small contemporary l-shaped dark wood floor and brown floor open concept kitchen remodel in Toronto with an undermount sink, flat-panel cabinets, gray cabinets, quartz countertops, stainless steel appliances, no island and black backsplash

 Talon Construction Inc.
Designing and building a kitchen addition is a complex process that involves multiple steps and considerations. Here is a general outline to help you get started on your kitchen addition project:
Define Your Goals and Budget:
• Determine the purpose of the kitchen addition. Is it for more cooking space, a dining area, or a combination of both?
• Establish a realistic budget for your project. Consider all costs, including construction, permits, materials, and furnishings.
Hire a Design Professional:
• Seek the services of a design build company who specializes in kitchen additions.
• Discuss your vision, needs, and budget with the design professional to create a design concept.
Site Evaluation:
• Assess the existing space and structural condition of your home to ensure it can support the addition.
• Consider factors like zoning regulations, setbacks, and building codes.
Design Development:
• Collaborate with your design professional to refine the concept, including the layout, size, and architectural style.
• Choose materials, finishes, and fixtures that fit your design and budget.
Obtain Permits:
• Consult with your local design build contractor to determine the necessary permits and approvals.
• Prepare and submit all required documents, including architectural drawings and engineering plans.
Create Construction Documents:
• Work with your design build professional to develop detailed construction drawings and specifications.
• These documents will serve as a guide for contractors during construction.
Hire a design build contractor:
• Check references, credentials, and licenses before selecting a contractor.
• Sign a detailed contract that outlines the scope of work, timeline, and payment schedule.
Construction Phase:
• Demolition: If needed, remove any existing structures or walls.
• Foundation: Construct the foundation for the addition.
• Framing: Build the structural framework of the addition.
• Plumbing, Electrical, and HVAC: Install or update utilities as required.
• Insulation: Ensure proper insulation for energy efficiency.
• Drywall and Finish Work: Complete the walls and ceilings.
• Flooring and Cabinetry: Install flooring and kitchen cabinets.
• Appliances and Fixtures: Add appliances, plumbing fixtures, and lighting.
• Paint and Finish: Apply paint and finishes to achieve the desired look.
• Final Inspection: Schedule inspections to ensure compliance with building codes.
Final Inspections and Approvals:
• Arrange for final inspections to ensure the addition meets all safety and code requirements.
• Obtain any necessary certificates of occupancy or compliance.
Move In and Enjoy:
• Once all inspections and approvals are received, you can move into your new kitchen addition and start enjoying it.
Remember that every kitchen addition project is unique, so adapt this outline to your specific needs and circumstances. Consulting with professionals and obtaining the required permits and inspections is crucial to a successful and safe project.

 RWH Architect PLLC
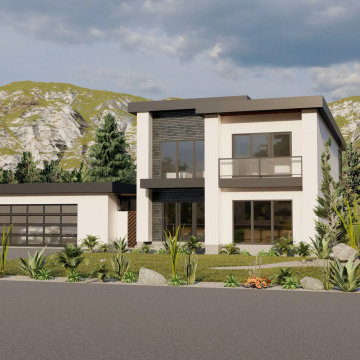
RWH Architect presents the Whistle Hill Lot 8 Residence, a statement home that reflects a bold shift toward modern, refined design. This contemporary residence is defined by its clean lines, dramatic vertical expressions, and a sophisticated mix of architectural forms that culminate in a truly forward-thinking home. From the moment visitors step into the central courtyard that connects the detached garage to the main house, the project introduces a new level of architectural intention rarely seen in the region.
The detached garage, featuring an expansive 18' x 8' door, creates a strong street presence and anchors the courtyard entry sequence. Passing through the courtyard leads to a welcoming entry foyer designed with built-in hooks and a bench, creating a comfortable—and functional—moment of arrival. Just beyond the entry is a private study with custom built-in bookshelves, a space tailored for work, reading, or quiet focus. The main floor unfolds into a sophisticated open-concept layout where the kitchen, great room, and dining areas flow effortlessly together. The kitchen includes a walk-in pantry, a pot filler for convenience, and a dedicated dog-feeding station that integrates seamlessly into the cabinetry. The great room stands as the heart of the home, featuring a built-in wood-burning fireplace and oversized sliding doors that extend the living space out to a covered patio. A centrally located half bath near the kitchen completes the first-floor program.
All bedrooms are located on the second floor to preserve privacy and capitalize on natural light. The master suite is designed as a luxurious retreat, offering a screened-in porch, a spacious walk-in closet, and a unique bathroom where the walk-in shower wraps around a freestanding tub, creating a spa-like environment that blends innovation with comfort. The laundry room is conveniently positioned on the same floor. Two additional bedrooms share a well-appointed bathroom, completing the second-floor layout.
Several design challenges shaped the evolution of this project and ultimately elevated its architectural clarity. One of the primary challenges was organizing the home around a detached garage while maintaining a cohesive architectural experience. RWH resolved this by creating a courtyard that acts as a transitional outdoor room, visually linking the structures and providing a dramatic yet functional entry sequence. Another challenge involved balancing large modern window systems with the bold vertical elements that define the façade. By carefully proportioning the glazing and framing it within thoughtful material changes, RWH maintained a strong contemporary identity while ensuring visual harmony. Integrating the built-in fireplace, open-concept layout, and large patio openings required complex structural solutions; RWH overcame this by using discreetly integrated structural steel that allowed for wide spans without compromising the home’s clean, minimalist interior aesthetic. Designing the master bathroom’s combined shower-and-tub layout also presented a unique challenge, requiring careful grading, waterproofing, and spatial planning. Through strategic detailing and 3D modeling, RWH delivered a seamless spa-like experience that feels both inventive and intuitively functional.
The Whistle Hill Lot 8 Residence stands as a testament to a new architectural direction in the area—one that embraces innovative forms, curated materials, and a lifestyle-driven floor plan. With its modern massing, intentional interior flow, and elevated details, this home reflects RWH Architect’s commitment to pushing residential design into its next era.
 DENALI BUILDERS & Design
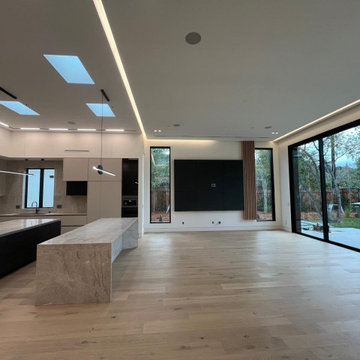
This complete home remodel showcases a masterclass in modern, high-end design, where every detail has been refined to create a clean and sophisticated sanctuary. The open-concept living area and kitchen serve as the heart of the home, featuring expansive oak flooring and massive, double waterfall-edge stone islands that provide a sleek, functional centerpiece for the space. Our commitment to "doing it all" is visible in the seamless integration of professional-grade appliances and the flawless transition between the bright, airy kitchen and the ultra-modern, high-contrast bathroom suites.
The highlight of this renovation is the architectural ceiling and lighting design, which adds incredible depth and atmosphere to the home. We crafted a custom two-tier ceiling featuring hidden LED tracks tucked within the architectural layers; this "reveal" lighting spills softly from the sides to illuminate the space without the clutter of visible bulbs. Combined with the geometric blue-tinted skylights and linear minimalist pendants, the lighting transforms the home into a luminous, gallery-like environment. From the precision tile work in the showers to the complex electrical engineering in the ceilings, this project proves that we deliver a polished, magazine-ready finish every time.
 Talon Construction Inc.
Designing and building a kitchen addition is a complex process that involves multiple steps and considerations. Here is a general outline to help you get started on your kitchen addition project:
Define Your Goals and Budget:
• Determine the purpose of the kitchen addition. Is it for more cooking space, a dining area, or a combination of both?
• Establish a realistic budget for your project. Consider all costs, including construction, permits, materials, and furnishings.
Hire a Design Professional:
• Seek the services of a design build company who specializes in kitchen additions.
• Discuss your vision, needs, and budget with the design professional to create a design concept.
Site Evaluation:
• Assess the existing space and structural condition of your home to ensure it can support the addition.
• Consider factors like zoning regulations, setbacks, and building codes.
Design Development:
• Collaborate with your design professional to refine the concept, including the layout, size, and architectural style.
• Choose materials, finishes, and fixtures that fit your design and budget.
Obtain Permits:
• Consult with your local design build contractor to determine the necessary permits and approvals.
• Prepare and submit all required documents, including architectural drawings and engineering plans.
Create Construction Documents:
• Work with your design build professional to develop detailed construction drawings and specifications.
• These documents will serve as a guide for contractors during construction.
Hire a design build contractor:
• Check references, credentials, and licenses before selecting a contractor.
• Sign a detailed contract that outlines the scope of work, timeline, and payment schedule.
Construction Phase:
• Demolition: If needed, remove any existing structures or walls.
• Foundation: Construct the foundation for the addition.
• Framing: Build the structural framework of the addition.
• Plumbing, Electrical, and HVAC: Install or update utilities as required.
• Insulation: Ensure proper insulation for energy efficiency.
• Drywall and Finish Work: Complete the walls and ceilings.
• Flooring and Cabinetry: Install flooring and kitchen cabinets.
• Appliances and Fixtures: Add appliances, plumbing fixtures, and lighting.
• Paint and Finish: Apply paint and finishes to achieve the desired look.
• Final Inspection: Schedule inspections to ensure compliance with building codes.
Final Inspections and Approvals:
• Arrange for final inspections to ensure the addition meets all safety and code requirements.
• Obtain any necessary certificates of occupancy or compliance.
Move In and Enjoy:
• Once all inspections and approvals are received, you can move into your new kitchen addition and start enjoying it.
Remember that every kitchen addition project is unique, so adapt this outline to your specific needs and circumstances. Consulting with professionals and obtaining the required permits and inspections is crucial to a successful and safe project.
9