Search results for "Consistency" in Home Design Ideas
Photo: Steven Paul Whitsitt.
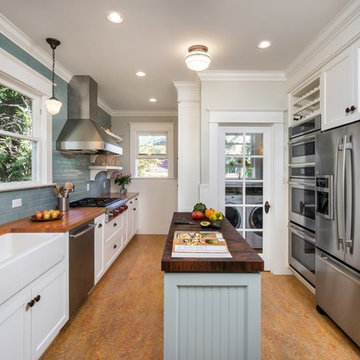
ALLENTOWN CHARMER - Designed by George Siwy of Artisan Kitchens and Baths
This unique home located in the historical Allentown area of Buffalo, was purchased by two busy professionals who had a dream to bring back this historical mansion to its original glory and add a modernized kitchen to its design. The owners with their passion for Architecture and their love of cooking and entertaining hired George Siwy of Artisan Kitchens & Baths at Appliance Associates to make this dream a reality.
The project started with the removal of a load bearing wall that structurally supported two stories above. The project called for a structural engineer to design the right size beam that can be supported by two columns that were built flush into the walls to give the space a more open feel.
George Suggested in bringing in the homes architectural elements by choosing materials and details that were historic to the era of the home. Such details consist of the inset cabinet doors and its recessed panel and molding details, which relate to the quarter sawn oak stair case existing and wainscoting panel details found throughout the first floor of the home. The perimeter cabinetry in the kitchen consist of a maple wood species with a reversed raised panel door style painted white. The island and bar cabinetry consist of a wood species quarter sawn oak stained in an onyx color to relate to a historic cast iron stove inserted into a fireplace which is all original to the home. The imperfect glass seen on either side of the mullion glass windows, which are original to the home, is repeated within the design of the hutch and bar areas with a “seeded glass” material.
The natural countertop materials chosen for this project were seen in the early 20th century era homes, such as Carrera marble which was used in the island and bar areas as well as the Soapstone material used for the perimeter cabinetry.
The well thought out design has made the homeowners dreams a reality, with a kitchen that relates well to its existing architectural elements and brought up to date with modern conveniences of today.
Designer: George Siwy
Special Features: Glass hutch cabinetry with wainscoting, large bar area with beverage center and prep sink, expanded island with seating for four.
Cabinetry: Medallion Gold / Door Style: Bayside
Countertop: Soapstone and Carrera Marble
Kohler: Stages Sink
Elkay: Avado Bar Sink
Wolf: Range top, Wall Oven, and Microwave Drawers
Thermador: Refrigerator / Freezer

Photography by William Quarles
Designed by Red Element
cabinets built by Robert Paige Cabinetry
Mid-sized beach style eat-in kitchen photo in Charleston with shaker cabinets, white cabinets, stainless steel appliances and granite countertops

Custom Surface Solutions (www.css-tile.com) - Owner Craig Thompson (512) 966-8296. This project shows an master bath and bedroom remodel moving shower to tub area and converting shower to walki-n closet, new frameless vanities, LED mirrors, electronic toilet, and miseno plumbing fixtures and sinks.
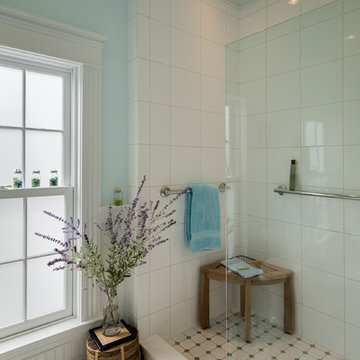
Shower is 65 x 35 using 12 x 24 porcelain travertine wall tile installed horizontally with aligned tiled and is accented with 9' x 18" herringbone glass accent stripe on the back wall. Walls and shower box are trimmed with Schluter Systems Jolly brushed nickle profile edging. Shower floor is white flat pebble tile. Shower storage consists of a custom 3-shelf shower box with herringbone glass accent. Shelving consists of two Schluter Systems Shelf-N shelves and two Schluter Systems Shelf-E corner shelves.
Bathroom floor is 24 x 24 porcelain travvertine installed using aligned joint pattern. 3 1/2" floor tile wall base with Schluter Jolly brushed nickel profile edge also installed.
Vanity cabinets are Dura Supreme with white gloss finish and soft-close drawers. A matching 30" x 12" over toilet cabint was installed plus a Endura electronic toilet.
Plumbing consists of Misenobrushed nickel shower system with rain shower head and sliding hand-held. Vanity plumbing consists of Miseno brushed nickel single handle faucets and undermount sinks.
Vanity Mirrors are Miseno LED 52 x 36 and 32 x 32.
24" barn door was installed at the bathroom entry and bedroom flooring is 7 x 24 LVP.
Find the right local pro for your project
Custom Surface Solutions (www.css-tile.com) - Owner Craig Thompson (512) 966-8296. This project shows an master bath and bedroom remodel moving shower to tub area and converting shower to walki-n closet, new frameless vanities, LED mirrors, electronic toilet, and miseno plumbing fixtures and sinks.
Shower is 65 x 35 using 12 x 24 porcelain travertine wall tile installed horizontally with aligned tiled and is accented with 9' x 18" herringbone glass accent stripe on the back wall. Walls and shower box are trimmed with Schluter Systems Jolly brushed nickle profile edging. Shower floor is white flat pebble tile. Shower storage consists of a custom 3-shelf shower box with herringbone glass accent. Shelving consists of two Schluter Systems Shelf-N shelves and two Schluter Systems Shelf-E corner shelves.
Bathroom floor is 24 x 24 porcelain travvertine installed using aligned joint pattern. 3 1/2" floor tile wall base with Schluter Jolly brushed nickel profile edge also installed.
Vanity cabinets are Dura Supreme with white gloss finish and soft-close drawers. A matching 30" x 12" over toilet cabint was installed plus a Endura electronic toilet.
Plumbing consists of Misenobrushed nickel shower system with rain shower head and sliding hand-held. Vanity plumbing consists of Miseno brushed nickel single handle faucets and undermount sinks.
Vanity Mirrors are Miseno LED 52 x 36 and 32 x 32.
24" barn door was installed at the bathroom entry and bedroom flooring is 7 x 24 LVP.

This 'Yellow Pair' tomato is underplanted with Melampodium. It is supported with an iron obelisk. Learn how to grow easy vegetables that look great on your patio from the book "Easy Container Combos: Vegetables & Flowers." See a free, 24 page sample of the book at www.pamela-crawford.com. in the 'Books' section. Pamela Crawford designed and photographed the planter. Pamela designs landscapes throughout Palm Beach County, FL, including Boca Raton, Delray Beach, the town of Palm Beach, Palm Beach Gardens, Jupiter, and Wellington.

Custom Surface Solutions (www.css-tile.com) - Owner Craig Thompson (512) 966-8296. This project shows an master bath and bedroom remodel moving shower to tub area and converting shower to walki-n closet, new frameless vanities, LED mirrors, electronic toilet, and miseno plumbing fixtures and sinks.
Shower is 65 x 35 using 12 x 24 porcelain travertine wall tile installed horizontally with aligned tiled and is accented with 9' x 18" herringbone glass accent stripe on the back wall. Walls and shower box are trimmed with Schluter Systems Jolly brushed nickle profile edging. Shower floor is white flat pebble tile. Shower storage consists of a custom 3-shelf shower box with herringbone glass accent. Shelving consists of two Schluter Systems Shelf-N shelves and two Schluter Systems Shelf-E corner shelves.
Bathroom floor is 24 x 24 porcelain travvertine installed using aligned joint pattern. 3 1/2" floor tile wall base with Schluter Jolly brushed nickel profile edge also installed.
Vanity cabinets are Dura Supreme with white gloss finish and soft-close drawers. A matching 30" x 12" over toilet cabint was installed plus a Endura electronic toilet.
Plumbing consists of Misenobrushed nickel shower system with rain shower head and sliding hand-held. Vanity plumbing consists of Miseno brushed nickel single handle faucets and undermount sinks.
Vanity Mirrors are Miseno LED 52 x 36 and 32 x 32.
24" barn door was installed at the bathroom entry and bedroom flooring is 7 x 24 LVP.

Custom Surface Solutions (www.css-tile.com) - Owner Craig Thompson (512) 966-8296. This project shows an master bath and bedroom remodel moving shower to tub area and converting shower to walki-n closet, new frameless vanities, LED mirrors, electronic toilet, and miseno plumbing fixtures and sinks.
Shower is 65 x 35 using 12 x 24 porcelain travertine wall tile installed horizontally with aligned tiled and is accented with 9' x 18" herringbone glass accent stripe on the back wall. Walls and shower box are trimmed with Schluter Systems Jolly brushed nickle profile edging. Shower floor is white flat pebble tile. Shower storage consists of a custom 3-shelf shower box with herringbone glass accent. Shelving consists of two Schluter Systems Shelf-N shelves and two Schluter Systems Shelf-E corner shelves.
Bathroom floor is 24 x 24 porcelain travvertine installed using aligned joint pattern. 3 1/2" floor tile wall base with Schluter Jolly brushed nickel profile edge also installed.
Vanity cabinets are Dura Supreme with white gloss finish and soft-close drawers. A matching 30" x 12" over toilet cabint was installed plus a Endura electronic toilet.
Plumbing consists of Misenobrushed nickel shower system with rain shower head and sliding hand-held. Vanity plumbing consists of Miseno brushed nickel single handle faucets and undermount sinks.
Vanity Mirrors are Miseno LED 52 x 36 and 32 x 32.
24" barn door was installed at the bathroom entry and bedroom flooring is 7 x 24 LVP.

Custom Surface Solutions (www.css-tile.com) - Owner Craig Thompson (512) 966-8296. This project shows an master bath and bedroom remodel moving shower to tub area and converting shower to walki-n closet, new frameless vanities, LED mirrors, electronic toilet, and miseno plumbing fixtures and sinks.
Shower is 65 x 35 using 12 x 24 porcelain travertine wall tile installed horizontally with aligned tiled and is accented with 9' x 18" herringbone glass accent stripe on the back wall. Walls and shower box are trimmed with Schluter Systems Jolly brushed nickle profile edging. Shower floor is white flat pebble tile. Shower storage consists of a custom 3-shelf shower box with herringbone glass accent. Shelving consists of two Schluter Systems Shelf-N shelves and two Schluter Systems Shelf-E corner shelves.
Bathroom floor is 24 x 24 porcelain travvertine installed using aligned joint pattern. 3 1/2" floor tile wall base with Schluter Jolly brushed nickel profile edge also installed.
Vanity cabinets are Dura Supreme with white gloss finish and soft-close drawers. A matching 30" x 12" over toilet cabint was installed plus a Endura electronic toilet.
Plumbing consists of Misenobrushed nickel shower system with rain shower head and sliding hand-held. Vanity plumbing consists of Miseno brushed nickel single handle faucets and undermount sinks.
Vanity Mirrors are Miseno LED 52 x 36 and 32 x 32.
24" barn door was installed at the bathroom entry and bedroom flooring is 7 x 24 LVP.

Example of a trendy medium tone wood floor and brown floor great room design in New York with white walls

Custom Surface Solutions (www.css-tile.com) - Owner Craig Thompson (512) 966-8296. This project shows an master bath and bedroom remodel moving shower to tub area and converting shower to walki-n closet, new frameless vanities, LED mirrors, electronic toilet, and miseno plumbing fixtures and sinks.
Shower is 65 x 35 using 12 x 24 porcelain travertine wall tile installed horizontally with aligned tiled and is accented with 9' x 18" herringbone glass accent stripe on the back wall. Walls and shower box are trimmed with Schluter Systems Jolly brushed nickle profile edging. Shower floor is white flat pebble tile. Shower storage consists of a custom 3-shelf shower box with herringbone glass accent. Shelving consists of two Schluter Systems Shelf-N shelves and two Schluter Systems Shelf-E corner shelves.
Bathroom floor is 24 x 24 porcelain travvertine installed using aligned joint pattern. 3 1/2" floor tile wall base with Schluter Jolly brushed nickel profile edge also installed.
Vanity cabinets are Dura Supreme with white gloss finish and soft-close drawers. A matching 30" x 12" over toilet cabint was installed plus a Endura electronic toilet.
Plumbing consists of Misenobrushed nickel shower system with rain shower head and sliding hand-held. Vanity plumbing consists of Miseno brushed nickel single handle faucets and undermount sinks.
Vanity Mirrors are Miseno LED 52 x 36 and 32 x 32.
24" barn door was installed at the bathroom entry and bedroom flooring is 7 x 24 LVP.

This 1990's home, located in North Vancouver's Lynn Valley neighbourhood, had high ceilings and a great open plan layout but the decor was straight out of the 90's complete with sponge painted walls in dark earth tones. The owners, a young professional couple, enlisted our help to take it from dated and dreary to modern and bright. We started by removing details like chair rails and crown mouldings, that did not suit the modern architectural lines of the home. We replaced the heavily worn wood floors with a new high end, light coloured, wood-look laminate that will withstand the wear and tear from their two energetic golden retrievers. Since the main living space is completely open plan it was important that we work with simple consistent finishes for a clean modern look. The all white kitchen features flat doors with minimal hardware and a solid surface marble-look countertop and backsplash. We modernized all of the lighting and updated the bathrooms and master bedroom as well. The only departure from our clean modern scheme is found in the dressing room where the client was looking for a more dressed up feminine feel but we kept a thread of grey consistent even in this more vivid colour scheme. This transformation, featuring the clients' gorgeous original artwork and new custom designed furnishings is admittedly one of our favourite projects to date!

Gillian Jackson
Alcove shower - mid-sized contemporary beige tile and porcelain tile porcelain tile alcove shower idea in Toronto with a vessel sink, flat-panel cabinets, medium tone wood cabinets, wood countertops, a two-piece toilet and beige walls

This whole home interior painting and trim upgrade project in Lancaster highlights how a professionally executed finish can completely transform the look, feel, and flow of an entire living space. The project began with a dated interior featuring worn paint, visible wall imperfections, and aging trim that no longer reflected a clean, modern aesthetic. While the home’s structure remained solid, the overall appearance felt dull and lacked the brightness, consistency, and refinement homeowners are looking for today.
Our team began with a comprehensive preparation process across the entire home, which is one of the most critical steps in achieving a high-quality and long-lasting paint finish. Every surface was carefully cleaned, patched, and sanded to create a smooth and uniform base. All floors, fixtures, and furnishings were fully protected using professional-grade coverings, and trim lines throughout the home were precisely taped to ensure sharp, clean edges. This level of preparation not only enhances the final appearance but also ensures durability and consistency from room to room.
As the project progressed, premium-quality paints were applied using a combination of rolling and precision cutting techniques to achieve a smooth, even finish across all wall and ceiling surfaces. The selected color palette focused on modern, neutral tones designed to maximize natural light and create a cohesive, open feel throughout the home. At the same time, all trim, baseboards, and interior details were upgraded with a crisp white finish, adding contrast, depth, and a polished look that ties every space together.
During the final stages, detailed touch-ups and trim refinements were completed in every room to achieve a flawless, professional-grade result. Each edge, corner, and transition was carefully inspected and perfected, ensuring consistency and craftsmanship at every level. The transformation is especially noticeable when comparing the before and after, as the home evolves from a worn, outdated environment into a bright, modern, and refreshed living space.
Once completed, the home was staged to highlight its full potential and demonstrate how a whole home painting upgrade can dramatically improve both aesthetics and functionality. The final result is a clean, cohesive, and welcoming interior that feels updated, spacious, and move-in ready.
Projects like this showcase the value of expert craftsmanship and attention to detail in full-home interior renovations. Whether you are preparing your property for sale or looking to modernize your living space, a whole home interior painting and trim upgrade remains one of the most effective ways to increase both visual appeal and overall property value in Lancaster, MA and surrounding areas.
Our team started with a detailed preparation process, which is one of the most critical steps in achieving a high-quality paint finish. All surfaces were carefully cleaned, patched, and sanded to ensure a smooth and even base. Floors and furniture were fully protected using professional-grade coverings, and trim areas were precisely taped to guarantee clean, sharp lines. This level of preparation ensures that the final result is not only visually appealing but also long-lasting.
As the painting phase progressed, high-quality paints were applied using a combination of rolling and cutting techniques to create a consistent, smooth finish across all wall surfaces. The color selection focused on modern, neutral tones that enhance natural light and create a more open, inviting atmosphere. At the same time, the trim and baseboards were upgraded with a crisp, clean white finish, adding contrast and definition throughout the space.
During the final stages, detailed touch-ups and trim work were completed to achieve a flawless result. Every corner, edge, and transition was carefully inspected and refined, ensuring a professional-grade finish that stands out. The transformation is most noticeable when comparing the before and after stages, where the room evolves from a dated and worn environment into a bright, modern living area.
The completed space was then staged to showcase its full potential, demonstrating how a simple upgrade like interior painting and trim work can dramatically improve both aesthetics and functionality. The result is a clean, polished, and welcoming environment that feels refreshed and ready for everyday living.
Projects like this demonstrate the impact of expert craftsmanship and attention to detail in interior renovations. Whether you are preparing your home for sale or simply looking to update your living space, professional painting and trim upgrades offer one of the most effective ways to enhance your home’s value and appearance.

This whole home interior painting and trim upgrade project in Lancaster highlights how a professionally executed finish can completely transform the look, feel, and flow of an entire living space. The project began with a dated interior featuring worn paint, visible wall imperfections, and aging trim that no longer reflected a clean, modern aesthetic. While the home’s structure remained solid, the overall appearance felt dull and lacked the brightness, consistency, and refinement homeowners are looking for today.
Our team began with a comprehensive preparation process across the entire home, which is one of the most critical steps in achieving a high-quality and long-lasting paint finish. Every surface was carefully cleaned, patched, and sanded to create a smooth and uniform base. All floors, fixtures, and furnishings were fully protected using professional-grade coverings, and trim lines throughout the home were precisely taped to ensure sharp, clean edges. This level of preparation not only enhances the final appearance but also ensures durability and consistency from room to room.
As the project progressed, premium-quality paints were applied using a combination of rolling and precision cutting techniques to achieve a smooth, even finish across all wall and ceiling surfaces. The selected color palette focused on modern, neutral tones designed to maximize natural light and create a cohesive, open feel throughout the home. At the same time, all trim, baseboards, and interior details were upgraded with a crisp white finish, adding contrast, depth, and a polished look that ties every space together.
During the final stages, detailed touch-ups and trim refinements were completed in every room to achieve a flawless, professional-grade result. Each edge, corner, and transition was carefully inspected and perfected, ensuring consistency and craftsmanship at every level. The transformation is especially noticeable when comparing the before and after, as the home evolves from a worn, outdated environment into a bright, modern, and refreshed living space.
Once completed, the home was staged to highlight its full potential and demonstrate how a whole home painting upgrade can dramatically improve both aesthetics and functionality. The final result is a clean, cohesive, and welcoming interior that feels updated, spacious, and move-in ready.
Projects like this showcase the value of expert craftsmanship and attention to detail in full-home interior renovations. Whether you are preparing your property for sale or looking to modernize your living space, a whole home interior painting and trim upgrade remains one of the most effective ways to increase both visual appeal and overall property value in Lancaster, MA and surrounding areas.
Our team started with a detailed preparation process, which is one of the most critical steps in achieving a high-quality paint finish. All surfaces were carefully cleaned, patched, and sanded to ensure a smooth and even base. Floors and furniture were fully protected using professional-grade coverings, and trim areas were precisely taped to guarantee clean, sharp lines. This level of preparation ensures that the final result is not only visually appealing but also long-lasting.
As the painting phase progressed, high-quality paints were applied using a combination of rolling and cutting techniques to create a consistent, smooth finish across all wall surfaces. The color selection focused on modern, neutral tones that enhance natural light and create a more open, inviting atmosphere. At the same time, the trim and baseboards were upgraded with a crisp, clean white finish, adding contrast and definition throughout the space.
During the final stages, detailed touch-ups and trim work were completed to achieve a flawless result. Every corner, edge, and transition was carefully inspected and refined, ensuring a professional-grade finish that stands out. The transformation is most noticeable when comparing the before and after stages, where the room evolves from a dated and worn environment into a bright, modern living area.
The completed space was then staged to showcase its full potential, demonstrating how a simple upgrade like interior painting and trim work can dramatically improve both aesthetics and functionality. The result is a clean, polished, and welcoming environment that feels refreshed and ready for everyday living.
Projects like this demonstrate the impact of expert craftsmanship and attention to detail in interior renovations. Whether you are preparing your home for sale or simply looking to update your living space, professional painting and trim upgrades offer one of the most effective ways to enhance your home’s value and appearance.

Photo: Margot Hartford © 2015 Houzz
Home design - contemporary home design idea in Amsterdam

This whole home interior painting and trim upgrade project in Lancaster highlights how a professionally executed finish can completely transform the look, feel, and flow of an entire living space. The project began with a dated interior featuring worn paint, visible wall imperfections, and aging trim that no longer reflected a clean, modern aesthetic. While the home’s structure remained solid, the overall appearance felt dull and lacked the brightness, consistency, and refinement homeowners are looking for today.
Our team began with a comprehensive preparation process across the entire home, which is one of the most critical steps in achieving a high-quality and long-lasting paint finish. Every surface was carefully cleaned, patched, and sanded to create a smooth and uniform base. All floors, fixtures, and furnishings were fully protected using professional-grade coverings, and trim lines throughout the home were precisely taped to ensure sharp, clean edges. This level of preparation not only enhances the final appearance but also ensures durability and consistency from room to room.
As the project progressed, premium-quality paints were applied using a combination of rolling and precision cutting techniques to achieve a smooth, even finish across all wall and ceiling surfaces. The selected color palette focused on modern, neutral tones designed to maximize natural light and create a cohesive, open feel throughout the home. At the same time, all trim, baseboards, and interior details were upgraded with a crisp white finish, adding contrast, depth, and a polished look that ties every space together.
During the final stages, detailed touch-ups and trim refinements were completed in every room to achieve a flawless, professional-grade result. Each edge, corner, and transition was carefully inspected and perfected, ensuring consistency and craftsmanship at every level. The transformation is especially noticeable when comparing the before and after, as the home evolves from a worn, outdated environment into a bright, modern, and refreshed living space.
Once completed, the home was staged to highlight its full potential and demonstrate how a whole home painting upgrade can dramatically improve both aesthetics and functionality. The final result is a clean, cohesive, and welcoming interior that feels updated, spacious, and move-in ready.
Projects like this showcase the value of expert craftsmanship and attention to detail in full-home interior renovations. Whether you are preparing your property for sale or looking to modernize your living space, a whole home interior painting and trim upgrade remains one of the most effective ways to increase both visual appeal and overall property value in Lancaster, MA and surrounding areas.
Our team started with a detailed preparation process, which is one of the most critical steps in achieving a high-quality paint finish. All surfaces were carefully cleaned, patched, and sanded to ensure a smooth and even base. Floors and furniture were fully protected using professional-grade coverings, and trim areas were precisely taped to guarantee clean, sharp lines. This level of preparation ensures that the final result is not only visually appealing but also long-lasting.
As the painting phase progressed, high-quality paints were applied using a combination of rolling and cutting techniques to create a consistent, smooth finish across all wall surfaces. The color selection focused on modern, neutral tones that enhance natural light and create a more open, inviting atmosphere. At the same time, the trim and baseboards were upgraded with a crisp, clean white finish, adding contrast and definition throughout the space.
During the final stages, detailed touch-ups and trim work were completed to achieve a flawless result. Every corner, edge, and transition was carefully inspected and refined, ensuring a professional-grade finish that stands out. The transformation is most noticeable when comparing the before and after stages, where the room evolves from a dated and worn environment into a bright, modern living area.
The completed space was then staged to showcase its full potential, demonstrating how a simple upgrade like interior painting and trim work can dramatically improve both aesthetics and functionality. The result is a clean, polished, and welcoming environment that feels refreshed and ready for everyday living.
Projects like this demonstrate the impact of expert craftsmanship and attention to detail in interior renovations. Whether you are preparing your home for sale or simply looking to update your living space, professional painting and trim upgrades offer one of the most effective ways to enhance your home’s value and appearance.

Pepper plants are a delightful addition to any garden, offering a vibrant burst of color and spice to your culinary creations. However, even experienced gardeners can encounter challenges when growing pepper plants. In this blog, we'll explore some common issues you might face and provide practical solutions to help your pepper plants thrive.
1. Slow or Stunted Growth
Issue: Slow or stunted growth in pepper plants can be discouraging, but there are specific steps you can take to address this issue effectively.
Solution:
a. Soil Health:
- Well-Draining Soil: Ensure your pepper plants are in well-draining soil to prevent waterlogged roots, which can inhibit growth.
- Organic Matter: Incorporate plenty of organic matter, such as compost or well-rotted manure, into the soil to improve its texture and nutrient content.
- pH Level: Test the soil pH and adjust it to the ideal range between 6.0 and 6.8 using lime or sulfur as needed.
b. Fertilization:
- Balanced Fertilizer: Use a balanced, slow-release fertilizer designed for vegetables to provide essential nutrients steadily throughout the growing season.
- Compost: Amend the soil with compost to enhance nutrient availability and soil structure. This can promote healthier growth.
c. Watering:
- Consistent Moisture: Maintain consistent soil moisture levels by watering your pepper plants regularly but avoid waterlogging. Aim for 1-2 inches of water per week, adjusting based on your local climate and weather conditions.
- Mulching: Apply mulch around the base of the plants to retain soil moisture and regulate temperature.
2. Yellowing Leaves
Issue: Yellowing leaves can be a sign of various underlying problems, but addressing them promptly can restore the vibrancy of your pepper plants.
Solution:
a. Nutrient Deficiencies:
- Balanced Fertilization: Use a well-balanced fertilizer that includes micronutrients to address nutrient deficiencies.
- Specific Nutrients: If you suspect a particular deficiency, such as magnesium, iron, or nitrogen, apply the appropriate nutrient supplement following package instructions.
b. Pest and Disease Control:
- Pest Inspection: Regularly inspect the leaves and stems for common pests like aphids and mites. Remove affected leaves and treat with organic pesticides if necessary.
- Disease Management: Look out for signs of diseases like bacterial leaf spot or fungal issues. Apply organic fungicides or bactericides as recommended.
3. Blossom Drop
Issue: When pepper plants drop their blossoms prematurely, it can hinder fruit development and lead to disappointment.
Solution:
a. Temperature Control:
- Stable Temperatures: Ensure your pepper plants are exposed to consistent temperatures between 70°F and 80°F (21°C to 27°C) during flowering. Avoid sudden temperature fluctuations by providing shelter or using row covers.
b. Pollination:
- Assist with Pollination: If growing peppers indoors or in a greenhouse, help with pollination by gently shaking the plants or using a small brush to transfer pollen between flowers. Outdoor pepper plants are usually pollinated by insects.
4. Wilting Plants
Issue: Wilting or drooping pepper plants can be a sign of various problems, but proper care can revive them.
Solution:
a. Watering:
- Consistent Moisture: Adjust your watering routine to keep the soil consistently moist but not waterlogged. Water early in the day to prevent fungal issues.
- Drainage: Ensure proper soil drainage by amending the soil or using raised beds to prevent waterlogged roots.
b. Pest Control:
- Pest Inspection: Examine the undersides of leaves for signs of pests like aphids, spider mites, or whiteflies. Treat infestations promptly with biological insecticides.
5. Curling Leaves
Issue: Curling or misshapen leaves indicate stress in pepper plants, which can be caused by various factors.
Solution:
a. Environmental Stress:
- Stable Conditions: Ensure your pepper plants are in an environment with stable humidity, temperature, and adequate air circulation. Avoid sudden changes in conditions.
- Proper Ventilation: Adequate air circulation can reduce humidity and prevent fungal issues.
b. Pest and Disease Management:
- Pest Inspection: Regularly inspect your plants for pests and diseases, addressing them promptly with organic remedies as needed.
6. Sunscald
Issue: Sunscald can lead to discolored, leathery patches on pepper fruits when exposed to intense sunlight.
Solution:
a. Shade Cloth:
- Sun Protection: Shield your pepper plants from harsh sunlight during the hottest part of the day using shade cloth or by planting them where they receive some filtered sunlight.
b. Pruning:
- Fruit Shading: Prune excess foliage to allow better fruit shading, reducing the risk of sunscald. Ensure that there's a balance between foliage and fruit.
7. Pepper Plant Pests and Diseases
Issue: Aphids, mites, whiteflies, and various diseases can affect pepper plants, but you can manage them effectively.
Solution:
a. Regular Inspection:
- Vigilant Monitoring: Regularly inspect your pepper plants for signs of pests or diseases, paying close attention to the undersides of leaves and stems.
b. Organic Remedies:
- Pest Control: Use organic remedies like neem oil, insecticidal soap, or diatomaceous earth for pest control.
- Disease Management: Apply organic fungicides or bactericides as recommended to manage diseases like powdery mildew or bacterial spot.
While growing pepper plants can present various challenges, these common issues are manageable with the right knowledge and care. Regular monitoring, proper soil preparation, and timely intervention can help you enjoy a bountiful harvest of vibrant, spicy peppers. Remember that gardening is a learning experience, and each challenge you face is an opportunity to improve your skills and enjoy the rewards of homegrown peppers in your favorite dishes.

This whole home interior painting and trim upgrade project in Lancaster highlights how a professionally executed finish can completely transform the look, feel, and flow of an entire living space. The project began with a dated interior featuring worn paint, visible wall imperfections, and aging trim that no longer reflected a clean, modern aesthetic. While the home’s structure remained solid, the overall appearance felt dull and lacked the brightness, consistency, and refinement homeowners are looking for today.
Our team began with a comprehensive preparation process across the entire home, which is one of the most critical steps in achieving a high-quality and long-lasting paint finish. Every surface was carefully cleaned, patched, and sanded to create a smooth and uniform base. All floors, fixtures, and furnishings were fully protected using professional-grade coverings, and trim lines throughout the home were precisely taped to ensure sharp, clean edges. This level of preparation not only enhances the final appearance but also ensures durability and consistency from room to room.
As the project progressed, premium-quality paints were applied using a combination of rolling and precision cutting techniques to achieve a smooth, even finish across all wall and ceiling surfaces. The selected color palette focused on modern, neutral tones designed to maximize natural light and create a cohesive, open feel throughout the home. At the same time, all trim, baseboards, and interior details were upgraded with a crisp white finish, adding contrast, depth, and a polished look that ties every space together.
During the final stages, detailed touch-ups and trim refinements were completed in every room to achieve a flawless, professional-grade result. Each edge, corner, and transition was carefully inspected and perfected, ensuring consistency and craftsmanship at every level. The transformation is especially noticeable when comparing the before and after, as the home evolves from a worn, outdated environment into a bright, modern, and refreshed living space.
Once completed, the home was staged to highlight its full potential and demonstrate how a whole home painting upgrade can dramatically improve both aesthetics and functionality. The final result is a clean, cohesive, and welcoming interior that feels updated, spacious, and move-in ready.
Projects like this showcase the value of expert craftsmanship and attention to detail in full-home interior renovations. Whether you are preparing your property for sale or looking to modernize your living space, a whole home interior painting and trim upgrade remains one of the most effective ways to increase both visual appeal and overall property value in Lancaster, MA and surrounding areas.
Our team started with a detailed preparation process, which is one of the most critical steps in achieving a high-quality paint finish. All surfaces were carefully cleaned, patched, and sanded to ensure a smooth and even base. Floors and furniture were fully protected using professional-grade coverings, and trim areas were precisely taped to guarantee clean, sharp lines. This level of preparation ensures that the final result is not only visually appealing but also long-lasting.
As the painting phase progressed, high-quality paints were applied using a combination of rolling and cutting techniques to create a consistent, smooth finish across all wall surfaces. The color selection focused on modern, neutral tones that enhance natural light and create a more open, inviting atmosphere. At the same time, the trim and baseboards were upgraded with a crisp, clean white finish, adding contrast and definition throughout the space.
During the final stages, detailed touch-ups and trim work were completed to achieve a flawless result. Every corner, edge, and transition was carefully inspected and refined, ensuring a professional-grade finish that stands out. The transformation is most noticeable when comparing the before and after stages, where the room evolves from a dated and worn environment into a bright, modern living area.
The completed space was then staged to showcase its full potential, demonstrating how a simple upgrade like interior painting and trim work can dramatically improve both aesthetics and functionality. The result is a clean, polished, and welcoming environment that feels refreshed and ready for everyday living.
Projects like this demonstrate the impact of expert craftsmanship and attention to detail in interior renovations. Whether you are preparing your home for sale or simply looking to update your living space, professional painting and trim upgrades offer one of the most effective ways to enhance your home’s value and appearance.

This whole home interior painting and trim upgrade project in Lancaster highlights how a professionally executed finish can completely transform the look, feel, and flow of an entire living space. The project began with a dated interior featuring worn paint, visible wall imperfections, and aging trim that no longer reflected a clean, modern aesthetic. While the home’s structure remained solid, the overall appearance felt dull and lacked the brightness, consistency, and refinement homeowners are looking for today.
Our team began with a comprehensive preparation process across the entire home, which is one of the most critical steps in achieving a high-quality and long-lasting paint finish. Every surface was carefully cleaned, patched, and sanded to create a smooth and uniform base. All floors, fixtures, and furnishings were fully protected using professional-grade coverings, and trim lines throughout the home were precisely taped to ensure sharp, clean edges. This level of preparation not only enhances the final appearance but also ensures durability and consistency from room to room.
As the project progressed, premium-quality paints were applied using a combination of rolling and precision cutting techniques to achieve a smooth, even finish across all wall and ceiling surfaces. The selected color palette focused on modern, neutral tones designed to maximize natural light and create a cohesive, open feel throughout the home. At the same time, all trim, baseboards, and interior details were upgraded with a crisp white finish, adding contrast, depth, and a polished look that ties every space together.
During the final stages, detailed touch-ups and trim refinements were completed in every room to achieve a flawless, professional-grade result. Each edge, corner, and transition was carefully inspected and perfected, ensuring consistency and craftsmanship at every level. The transformation is especially noticeable when comparing the before and after, as the home evolves from a worn, outdated environment into a bright, modern, and refreshed living space.
Once completed, the home was staged to highlight its full potential and demonstrate how a whole home painting upgrade can dramatically improve both aesthetics and functionality. The final result is a clean, cohesive, and welcoming interior that feels updated, spacious, and move-in ready.
Projects like this showcase the value of expert craftsmanship and attention to detail in full-home interior renovations. Whether you are preparing your property for sale or looking to modernize your living space, a whole home interior painting and trim upgrade remains one of the most effective ways to increase both visual appeal and overall property value in Lancaster, MA and surrounding areas.
Our team started with a detailed preparation process, which is one of the most critical steps in achieving a high-quality paint finish. All surfaces were carefully cleaned, patched, and sanded to ensure a smooth and even base. Floors and furniture were fully protected using professional-grade coverings, and trim areas were precisely taped to guarantee clean, sharp lines. This level of preparation ensures that the final result is not only visually appealing but also long-lasting.
As the painting phase progressed, high-quality paints were applied using a combination of rolling and cutting techniques to create a consistent, smooth finish across all wall surfaces. The color selection focused on modern, neutral tones that enhance natural light and create a more open, inviting atmosphere. At the same time, the trim and baseboards were upgraded with a crisp, clean white finish, adding contrast and definition throughout the space.
During the final stages, detailed touch-ups and trim work were completed to achieve a flawless result. Every corner, edge, and transition was carefully inspected and refined, ensuring a professional-grade finish that stands out. The transformation is most noticeable when comparing the before and after stages, where the room evolves from a dated and worn environment into a bright, modern living area.
The completed space was then staged to showcase its full potential, demonstrating how a simple upgrade like interior painting and trim work can dramatically improve both aesthetics and functionality. The result is a clean, polished, and welcoming environment that feels refreshed and ready for everyday living.
Projects like this demonstrate the impact of expert craftsmanship and attention to detail in interior renovations. Whether you are preparing your home for sale or simply looking to update your living space, professional painting and trim upgrades offer one of the most effective ways to enhance your home’s value and appearance.
8