
Search results for "Cost tracking" in Home Design Ideas
 Chicology
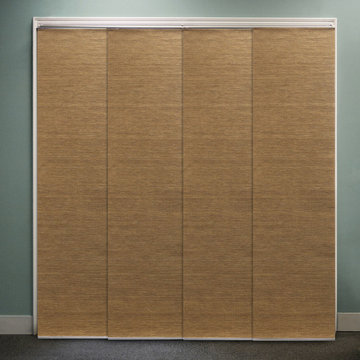
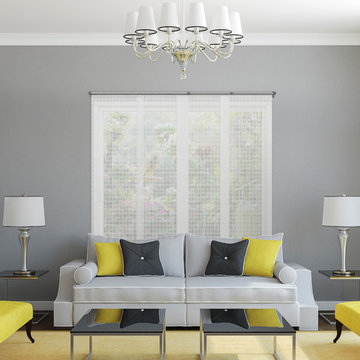
Chicology Adjustable Sliding Panels are optimal for bringing modern style and elegance into any home. Highly versatile, they are perfect for everything from patio and French doors to room dividers and closet doors.
Available in a variety of natural woven materials and fabrics, they are stylish, cost effective solutions. Pick a material rich in texture to inspire a feeling of exploration or opt for a smooth fabric perfect for a minimalist design. They are modern day answer to vertical blinds, with wider fabric panels, free of clacking sounds.
Designed with the customer in mind, we made installation a breeze. Included in the packing is all the hardware for ceiling and wall installation, and inside and outside frame mounts. The telescopic track is adjustable anywhere from 44 to 80-inches wide. For wider needs, two tracks can be installed next to each other for a seamless appearance. Each of the four panels are 22-inches wide and 96 inches tall. Simply trim the panel height to what you need and install the bottom rails for a custom-look finish. Built cordless with a smooth track, these panels can open from right to left, left to right, and right down the center. Our cordless panels are safe for young children and pets.
Measurement: Customizable SizeThis product is adjustable in both Width and Height. Width is adjustable from 44" to 80". Height is trimmable up to a maximum of 96".
 Nicky James Interior Design
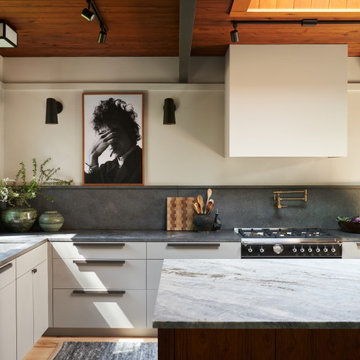
Eat-in kitchen - mid-sized 1960s l-shaped light wood floor, brown floor and wood ceiling eat-in kitchen idea in New York with an undermount sink, marble countertops, gray backsplash, an island, flat-panel cabinets, white cabinets, granite backsplash, stainless steel appliances and gray countertops

Find the right local pro for your project

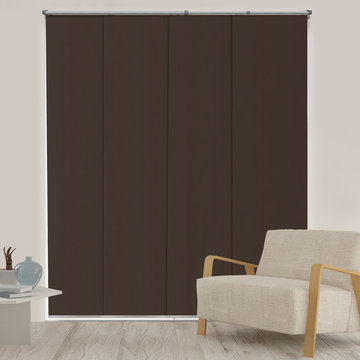 Chicology
Chicology Adjustable Sliding Panels are optimal for bringing modern style and elegance into any home. Highly versatile, they are perfect for everything from patio and French doors to room dividers and closet doors.
Available in a variety of natural woven materials and fabrics, they are stylish, cost effective solutions. Pick a material rich in texture to inspire a feeling of exploration or opt for a smooth fabric perfect for a minimalist design. They are modern day answer to vertical blinds, with wider fabric panels, free of clacking sounds.
Designed with the customer in mind, we made installation a breeze. Included in the packing is all the hardware for ceiling and wall installation, and inside and outside frame mounts. The telescopic track is adjustable anywhere from 44 to 80-inches wide. For wider needs, two tracks can be installed next to each other for a seamless appearance. Each of the four panels are 22-inches wide and 96 inches tall. Simply trim the panel height to what you need and install the bottom rails for a custom-look finish. Built cordless with a smooth track, these panels can open from right to left, left to right, and right down the center. Our cordless panels are safe for young children and pets.
Measurement: Customizable SizeThis product is adjustable in both Width and Height. Width is adjustable from 44" to 80". Height is trimmable up to a maximum of 96".
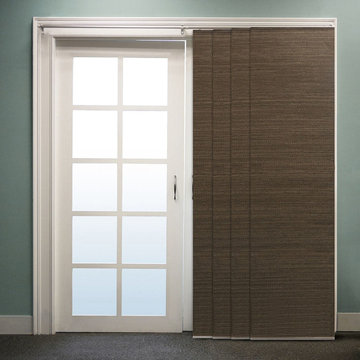 Chicology
Chicology Adjustable Sliding Panels are optimal for bringing modern style and elegance into any home. Highly versatile, they are perfect for everything from patio and French doors to room dividers and closet doors.
Available in a variety of natural woven materials and fabrics, they are stylish, cost effective solutions. Pick a material rich in texture to inspire a feeling of exploration or opt for a smooth fabric perfect for a minimalist design. They are modern day answer to vertical blinds, with wider fabric panels, free of clacking sounds.
Designed with the customer in mind, we made installation a breeze. Included in the packing is all the hardware for ceiling and wall installation, and inside and outside frame mounts. The telescopic track is adjustable anywhere from 44 to 80-inches wide. For wider needs, two tracks can be installed next to each other for a seamless appearance. Each of the four panels are 22-inches wide and 96 inches tall. Simply trim the panel height to what you need and install the bottom rails for a custom-look finish. Built cordless with a smooth track, these panels can open from right to left, left to right, and right down the center. Our cordless panels are safe for young children and pets.
Measurement: Customizable SizeThis product is adjustable in both Width and Height. Width is adjustable from 44" to 80". Height is trimmable up to a maximum of 96".
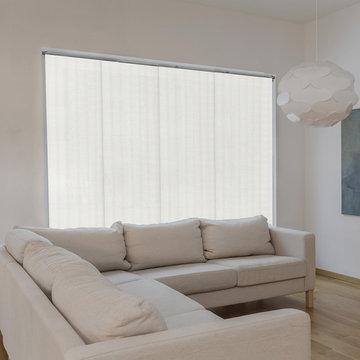 Chicology
Chicology Adjustable Sliding Panels are optimal for bringing modern style and elegance into any home. Highly versatile, they are perfect for everything from patio and French doors to room dividers and closet doors.
Available in a variety of natural woven materials and fabrics, they are stylish, cost effective solutions. Pick a material rich in texture to inspire a feeling of exploration or opt for a smooth fabric perfect for a minimalist design. They are modern day answer to vertical blinds, with wider fabric panels, free of clacking sounds.
Designed with the customer in mind, we made installation a breeze. Included in the packing is all the hardware for ceiling and wall installation, and inside and outside frame mounts. The telescopic track is adjustable anywhere from 44 to 80-inches wide. For wider needs, two tracks can be installed next to each other for a seamless appearance. Each of the four panels are 22-inches wide and 96 inches tall. Simply trim the panel height to what you need and install the bottom rails for a custom-look finish. Built cordless with a smooth track, these panels can open from right to left, left to right, and right down the center. Our cordless panels are safe for young children and pets.
Measurement: Customizable Size. This product is adjustable in both Width and Height. Width is adjustable from 44" to 80". Height is trimmable up to a maximum of 96".

 Chicology
Chicology Adjustable Sliding Panels are optimal for bringing modern style and elegance into any home. Highly versatile, they are perfect for everything from patio and French doors to room dividers and closet doors.
Available in a variety of natural woven materials and fabrics, they are stylish, cost effective solutions. Pick a material rich in texture to inspire a feeling of exploration or opt for a smooth fabric perfect for a minimalist design. They are modern day answer to vertical blinds, with wider fabric panels, free of clacking sounds.
Designed with the customer in mind, we made installation a breeze. Included in the packing is all the hardware for ceiling and wall installation, and inside and outside frame mounts. The telescopic track is adjustable anywhere from 44 to 80-inches wide. For wider needs, two tracks can be installed next to each other for a seamless appearance. Each of the four panels are 22-inches wide and 96 inches tall. Simply trim the panel height to what you need and install the bottom rails for a custom-look finish. Built cordless with a smooth track, these panels can open from right to left, left to right, and right down the center. Our cordless panels are safe for young children and pets.
Measurement: Customizable Size. This product is adjustable in both Width and Height. Width is adjustable from 44" to 80". Height is trimmable up to a maximum of 96".
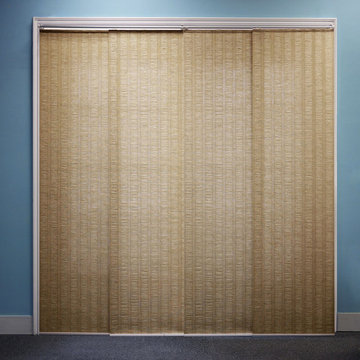 Chicology
Chicology Adjustable Sliding Panels are optimal for bringing modern style and elegance into any home. Highly versatile, they are perfect for everything from patio and French doors to room dividers and closet doors.
Available in a variety of natural woven materials and fabrics, they are stylish, cost effective solutions. Pick a material rich in texture to inspire a feeling of exploration or opt for a smooth fabric perfect for a minimalist design. They are modern day answer to vertical blinds, with wider fabric panels, free of clacking sounds.
Designed with the customer in mind, we made installation a breeze. Included in the packing is all the hardware for ceiling and wall installation, and inside and outside frame mounts. The telescopic track is adjustable anywhere from 44 to 80-inches wide. For wider needs, two tracks can be installed next to each other for a seamless appearance. Each of the four panels are 22-inches wide and 96 inches tall. Simply trim the panel height to what you need and install the bottom rails for a custom-look finish. Built cordless with a smooth track, these panels can open from right to left, left to right, and right down the center. Our cordless panels are safe for young children and pets.
Measurement: Customizable SizeThis product is adjustable in both Width and Height. Width is adjustable from 44" to 80". Height is trimmable up to a maximum of 96".


 William Hoffman Architect
4 Steps to Achieving a Rewarding Cost Effective Home Renovation
1 Home Renovation an Introduction
A home renovation due to changes in family needs and space requirements can be a challenging, but also a rewarding experience. As a homeowner, gathering and coordinating resources and possibly help from professional consultants are required. Once the construction phase has started, patience, endurance and commitment to follow through are necessary. Despite the challenges, the rewards of a well-planned and successfully completed project are meaningful, adding aesthetic and economic value, also providing the opportunity to personalize a home, encompassing the function, comfort and aesthetics to accommodate individual taste and lifestyle.
A renovation of an existing home is a viable alternative to moving or building a new home, assuming that a home is structurally sound, the expenditure to enlarge or improve can be a cost effective alternative. A home possessing charm, style, historical significance, established landscaping or an exceptional location could be a significant motivation to consider purchasing another home with the intent to renovate.
The complexity of a project could be relatively simple, changing the use of a room, consolidating two rooms into one, or opening up a room to the outdoors. It could also be a more involved task requiring planning, design and construction documents to build a second floor addition, the addition of a new wing or completely gutting the interior. Some projects could be completed in a weekend’s work or more complex projects, using a “Master Plan”, a plan which provides overall guidance; a renovation can be accomplished all at once or divided into manageable projects over a period of time. With the home evolving gradually allowing the renovation to be planned, timed and tailored to meet individual needs and circumstances.
The due diligence phase should precede the decision to renovate whether it’s an existing home or a home that is purchased with the intent to renovate. The due diligence phase will reveal the factors affecting the nature and scope of the project or if a renovation makes sense.
Every renovation project is unique relative to personal requirements, architectural style & construction type. This guide will be helpful in developing an understanding of the preliminary groundwork required to realize a successful project. If properly planned, a home renovation project can be a positive and rewarding experience resulting in a comfortable, practical and an attractive living environment.
The first step of the planning process is documenting the goals and long-range plans referred to as the “Project Program”. This will dictate the nature, scope and feasibility of the project. Providing a guide to achieving defined goals, the timing or phasing of the project and budget required to achieve the desired end result.
2 Documenting Existing Conditions
Once the “Project Program”, has been established, the next step is to determine what there is to work with. This requires documenting the home’s floor plan and site elements which includes drawing an “as built” floor & site plan consisting of the existing exterior walls, interior rooms, doors, windows, etc. and surrounding site elements, landscape and other significant exterior features. Additionally understanding and noting on the “as built” plan, the structural, mechanical and electrical systems as necessary. Gathering the “existing condition” information defines what there is to work with, creating the framework from which to facilitate and organize the decision making process and develop effective “project program” solutions.
3 Evaluating Existing Conditions
The goals and long-range plans have been established, and the existing floor plan and site elements have been documented. Before developing design solutions, the next step is to evaluate existing conditions. The evaluation includes: a detailed analysis of the structural, mechanical and electrical systems, determining the condition of the house, noting functional and aesthetic deficiencies. At the same time recognizing the home’s strengths, assets and evaluating its relationship to its site. The remaining parameters will be defined by the local jurisdiction’s zoning regulations, these regulations will define the “envelope”, within which the proposed project will be required to fit:
•required front, side & rear yard setbacks
•maximum allowable lot coverage & height
The previous three steps have provided the necessary foundation to start the design phase. The goals and long range plans have been established, existing conditions have been documented and the evaluation of what there is to work with are now in place. This will provide the framework from which to facilitate and organize design solutions. The consolidation of this information is manifested in the development of the “Master Plan” which will become the road map by which sound decision-making can be made as a home renovation evolves. Keeping the project, on a linear path, avoiding redundancies and back tracking, on time, within budget, concluding with a well crafted finished product. After all the “up front” research and documentation has been completed, the design phase of the project can now precede, with the creation of diagrammatic design drawings. Organizing interior spaces, taking into account the external elements, prevailing breezes, solar orientation, view, existing outdoor features, etc. Through the development of schematic sketches themes will emerge followed by design development drawings. Wise planning and renovation decisions can save money and time at the same time provide a well crafted finished project. The “Master Plan” provides a strategic path in the planning and decision making process leading to a successful and rewarding home renovation, which will add value and considerable enjoyment, for many years, living in a newly renovated home.
By virtue of having gone through these steps, frustrations sometimes encountered during a home renovation will be minimized, allowing the renovation to be a gratifying and rewarding experience. Being aware of the process allows one to become an “Educated Client,” which is worth quite a bit more than one might realize. The uneducated client may not realize the benefit of going through the planning, evaluation and documentation groundwork. He will only realize its benefits after having completed a prior renovation project. This rational approach keeps the design process on a direct path to achieving prescribed goals.
4 Exploring Design Solutions & Developing a Master Plan
The previous three steps have provided the necessary foundation to start the design phase. The goals and long range plans have been established, existing conditions have been documented and the evaluation of what there is to work with are now in place. This will provide the framework from which to facilitate and organize design solutions. The consolidation of this information is manifested in the development of the “Master Plan” which will become the road map by which sound decision-making can be made as a home renovation evolves. Keeping the project, on a linear path, avoiding redundancies and back tracking, on time, within budget, concluding with a well crafted finished product.
By virtue of having gone through these steps, frustrations sometimes encountered during a home renovation will be minimized, allowing the renovation to be a gratifying and rewarding experience. Being aware of the process allows one to become an “Educated Client,” which is worth quite a bit more than one might realize. The uneducated client may not realize the benefit of going through the planning, evaluation and documentation groundwork. He will only realize its benefits after having completed a prior renovation project. This rational approach keeps the design process on a direct path to achieving prescribed goals.
After all the “up front” research and documentation has been completed, the design phase of the project can now precede, with the creation of diagrammatic design drawings. Organizing interior spaces, taking into account the external elements, prevailing breezes, solar orientation, view, existing outdoor features, etc. Through the development of schematic sketches themes will emerge followed by design development drawings. Wise planning and renovation decisions can save money and time at the same time provide a well crafted finished project. The “Master Plan” provides a strategic path in the planning and decision making process leading to a successful and rewarding home renovation, which will add value and considerable enjoyment, for many years, living in a newly renovated home.
 HRS Home Remodeling Services
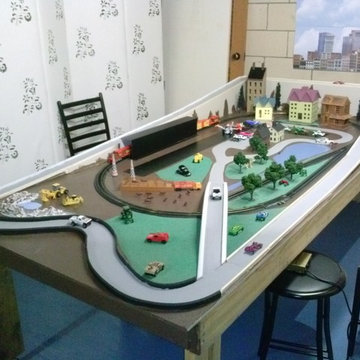
This is built out of 2x6 jack boards and a 4x8 sheet of plywood. The HO train was added inside so the 4 yr. old grand boys can't reach it. The airport and car track will keep the boys busy for hours. The sloped car track is made out of aluminum with wood railings on the edges. The houses are not HO scale but do nicely as the grand daughters painted them to match the background. This will be a Christmas present. Total cost to date is about $150.00.

Sponsored
Sunbury, OH

J.Holderby - Renovations
Franklin County's Leading General Contractors - 2X Best of Houzz!

 Northeast Awning & Window Co.
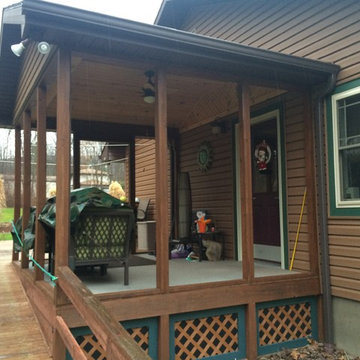
This is a recent job we did in Waymart PA using our 4-Track Enclosure System designed to be easily installed without expensive remodeling costs. All units are all custom made to fit your openings exactly and come with a 10 year warranty against factory defect.These vinyl pane windows offer the perfect solution for homeowners seeking to close in their existing patio.
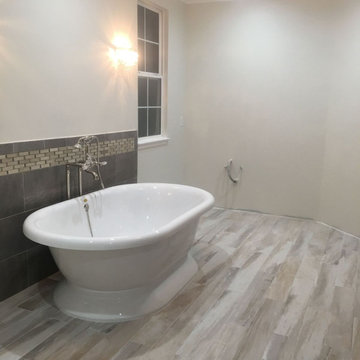
 Amazing Cabinetry & Bath
Learn how to sidestep common pitfalls, from poor planning to subpar materials, ensuring your renovation project stays on track and delivers the dream bathroom you deserve. Don't let costly blunders hinder your remodeling success!
#bathroom_design
#bathroom_decor
#bathroom_remodel
#bathrooms
#Mission_Viejo
#bathroom_renovation
 Oran Remodeling Inc.
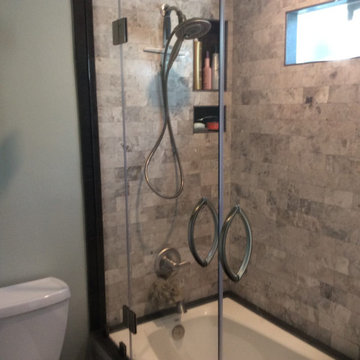
We began this project by having the client meet with our kitchen designer and coming up with the best use of their galley/wall style kitchen and bathroom. We ended on a layout that relocated some of the appliances and installed a new kitchen island and vanity for the bathroom. We also added electrical and gas lines for an oven, cook-top, outlets and hood vent.
In addition we also:
Demo all heater, cap, patch, and repair wall.
Replace 6 cans in small office space- customer to provide cans and lightbulbs.
Install new light fixture in the hall.
Move hall receptacle down.
Remove door, molding hinges between kitchen and front room. (NOT MAIN STUDIO. Enlarge opening/ move light switch and Recep. Remove molding around bath door and main studio door (one side), no patching needed- painters will do.
Demo all tile on walls and in shower in the bathroom, hand bars, soap dispenser, medicine cabinet, mirror, 4 light fixtures, paper towel holder, the cabinet on the wall over toilet, shelf over toilet, toilet paper holder, towel holder on door and walls.
Enlarge opening of the shower,- Ok to demo shower for all glass enclosure- If the cost is the same- as just enlarging opening with new glass door.
Install new tile on walls in bathroom from top to bottom (exclude floor and ceiling).
Create a place in the shower for shower niche and install niche.
Install tile on shower walls and floor.
Install shower door – customer to supply.
Install bath hardware- TP holder, towel rod, bath hooks, tower shelf.
Replace shower head and knobs (like for like).
New hot mop, new wood stud as necessary, replace fan to code install new shower door (customer will supply).
Install new toilet, vanity, mirrored medicine cabinet, replace 2 light fixtures.
Install in the kitchen faucet and sink.
Replace current light with chandelier light (like for like).
Replace kitchen track light with new track light.
Install 9 LED fluorescent lights in loft space (above small office)- customer to supply.
Build and install a 8’x10’ wall, drywall both sides. Reduced size of the wall- Revise Bid (was 12’x12).
Move 2 track lights in the main workspace.
Replace (4) fluorescents lights in the studio.
Install Polycarbonate cover over bath skylight.
Replace dimmer switches and timers (4).
Install vinyl cove base under kitchen cabinets.
Remove black cabinet conversing fire sprinkler pipes- install modify existing bookcase cabinets.
Bury electrical flexible conduit and box (next to back door).
Sponsored
Sunbury, OH
J.Holderby - Renovations
Franklin County's Leading General Contractors - 2X Best of Houzz!
 Oran Remodeling Inc.
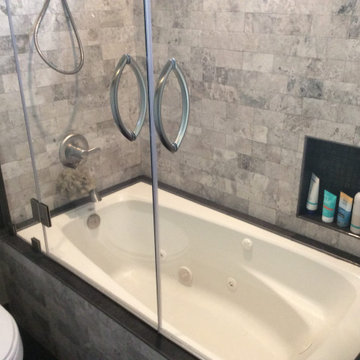
We began this project by having the client meet with our kitchen designer and coming up with the best use of their galley/wall style kitchen and bathroom. We ended on a layout that relocated some of the appliances and installed a new kitchen island and vanity for the bathroom. We also added electrical and gas lines for an oven, cook-top, outlets and hood vent.
In addition we also:
Demo all heater, cap, patch, and repair wall.
Replace 6 cans in small office space- customer to provide cans and lightbulbs.
Install new light fixture in the hall.
Move hall receptacle down.
Remove door, molding hinges between kitchen and front room. (NOT MAIN STUDIO. Enlarge opening/ move light switch and Recep. Remove molding around bath door and main studio door (one side), no patching needed- painters will do.
Demo all tile on walls and in shower in the bathroom, hand bars, soap dispenser, medicine cabinet, mirror, 4 light fixtures, paper towel holder, the cabinet on the wall over toilet, shelf over toilet, toilet paper holder, towel holder on door and walls.
Enlarge opening of the shower,- Ok to demo shower for all glass enclosure- If the cost is the same- as just enlarging opening with new glass door.
Install new tile on walls in bathroom from top to bottom (exclude floor and ceiling).
Create a place in the shower for shower niche and install niche.
Install tile on shower walls and floor.
Install shower door – customer to supply.
Install bath hardware- TP holder, towel rod, bath hooks, tower shelf.
Replace shower head and knobs (like for like).
New hot mop, new wood stud as necessary, replace fan to code install new shower door (customer will supply).
Install new toilet, vanity, mirrored medicine cabinet, replace 2 light fixtures.
Install in the kitchen faucet and sink.
Replace current light with chandelier light (like for like).
Replace kitchen track light with new track light.
Install 9 LED fluorescent lights in loft space (above small office)- customer to supply.
Build and install a 8’x10’ wall, drywall both sides. Reduced size of the wall- Revise Bid (was 12’x12).
Move 2 track lights in the main workspace.
Replace (4) fluorescents lights in the studio.
Install Polycarbonate cover over bath skylight.
Replace dimmer switches and timers (4).
Install vinyl cove base under kitchen cabinets.
Remove black cabinet conversing fire sprinkler pipes- install modify existing bookcase cabinets.
Bury electrical flexible conduit and box (next to back door).
 Allreno
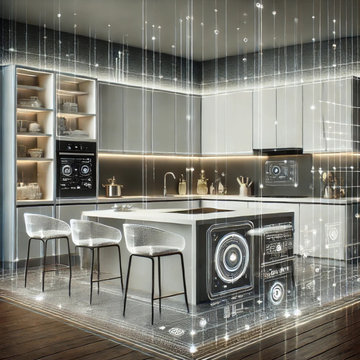
In What Order Should You Renovate a Kitchen? Revolutionizing Kitchen and Bath Renovation with Allreno's Design AI
Renovating a kitchen can be one of the most exciting and rewarding home improvement projects. However, with so many decisions to make, it can also be overwhelming. From selecting kitchen cabinets to choosing countertops and appliances, the process often involves careful planning and organization. So, how do you ensure the renovation goes smoothly? One important factor is knowing the right order in which to tackle the project.
The Right Order for Kitchen Renovation
Renovating a kitchen involves multiple steps, and knowing the proper order of operations is crucial for both time efficiency and cost savings. Here’s a general guideline for how to approach your kitchen renovation:
1. Planning and Design: The first step in any renovation is planning. This includes deciding on the layout, design, and features you want in your kitchen. At this stage, you’ll also need to think about your budget and timeline. It’s essential to finalize these details before moving forward with the actual work.
2. Demolition: Once the design is set, it’s time to remove old fixtures, cabinets, appliances, and flooring. Demolition can be a messy process, but it’s necessary for starting fresh. Having a professional handle this phase is often a smart move to ensure everything is safely removed.
3. Structural Work: If you plan on altering the layout of the kitchen by knocking down walls or adding new plumbing or electrical work, now is the time to do it. Structural changes can be complicated and costly, so it’s important to ensure these are completed before installing any new elements.
4. Plumbing and Electrical Work: With the structure in place, you can begin installing plumbing and electrical systems. This might include adding new water lines, sinks, or electrical outlets for appliances. It’s best to bring in licensed professionals for this stage, as electrical and plumbing work requires expert knowledge.
5. Cabinet Installation: Once the plumbing and electrical work are in place, you can install the kitchen cabinets. Cabinets are one of the most important elements of the kitchen, and the Allreno design AI can make this process easier. Allreno's AI-driven platform allows you to visualize how different kitchen cabinets will fit into your space, ensuring you make the best choice based on your preferences and layout.
6. Countertops: After the cabinets are installed, it’s time to add countertops. Whether you choose granite, quartz, or a more budget-friendly option, countertops are a focal point of the kitchen, and they should complement the cabinets and other design elements.
7. Flooring: Now that the major structural elements are in place, it’s time to install your flooring. Whether you opt for tile, hardwood, or vinyl, flooring should be installed after the cabinets and countertops to prevent any damage during the installation process.
8. Appliances and Fixtures: With the foundation in place, you can now add your appliances (oven, refrigerator, dishwasher, etc.) and fixtures (sink, faucets, lighting). Allreno’s AI can also help here by offering kitchen design recommendations based on available appliances and space dimensions.
9. Final Touches: The last step is adding the finishing touches to your kitchen. This includes painting the walls, adding backsplash tiles, and installing accessories like handles and knobs on your cabinets. This is also the stage where you can implement any stylistic choices to make the space uniquely yours.
How Allreno's AI Transforms the Renovation Process
One of the biggest challenges of a kitchen renovation is visualizing how everything will come together. Allreno’s design AI changes that by offering an intuitive platform that brings your ideas to life. Here’s how:
• Personalized Design Recommendations: Allreno’s AI suggests design elements based on your preferences, style, and space dimensions. Whether it’s selecting the perfect kitchen cabinets or countertop finishes, the AI ensures everything works together cohesively.
• 3D Visualization: With Allreno’s AI-driven design tools, you can visualize your kitchen layout in 3D before any work begins. This allows you to see how different elements will fit into your space and make adjustments as needed.
• Efficient Project Management: Allreno helps you streamline the entire renovation process by generating accurate material lists, estimates, and timelines. This means you can avoid costly errors and keep your renovation on track.
Conclusion
Renovating a kitchen is an exciting project, but it requires careful planning and organization to ensure it’s done right. By following a strategic order of operations and leveraging cutting-edge technology like Allreno’s design AI, homeowners can streamline the process, save time and money, and bring their dream kitchen to life with ease. Allreno not only simplifies the design process but also provides innovative solutions that make kitchen and bath renovations faster and more efficient than ever before.
Ready to get started with your kitchen renovation? Allreno's AI-powered design platform is here to help you every step of the way.
 Marpillero Pollak Architects
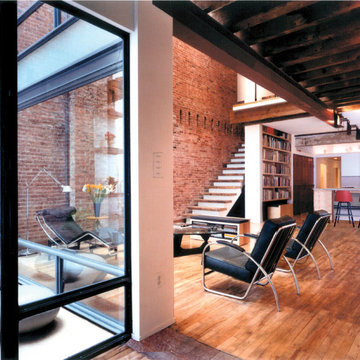
The adaptive reuse of the ground and basement floors of an 1860s industrial structure integrates work and living spaces, using salvaged and low-cost everyday materials.
10