
Search results for "Deep cleaning" in Home Design Ideas

Find the right local pro for your project


Sponsored
Columbus, OH

Hope Restoration & General Contracting
Columbus Design-Build, Kitchen & Bath Remodeling, Historic Renovations

 Cravotta Interiors
Kitchen at Deep Eddy. Clean and simple. Gloss painted wood-clad ceiling. Light weathered gray finished oak floors.
Example of a trendy l-shaped light wood floor, gray floor and shiplap ceiling kitchen design in Austin with flat-panel cabinets, dark wood cabinets, stainless steel appliances, an island and white countertops
Example of a trendy l-shaped light wood floor, gray floor and shiplap ceiling kitchen design in Austin with flat-panel cabinets, dark wood cabinets, stainless steel appliances, an island and white countertops
 Tile Doctor Ltd
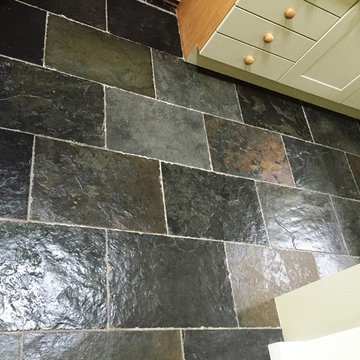
This small rough Chinese Slate floor in the kitchen of a house in the village of Cheadle near Stockport in Greater Manchester had not had any sealer put on it for many years and was very grubby (dishevelled as described by the customer) looking even after the customer had tried to clean it.
Sealers do take a lot of punishment, especially in a high traffic area such as a small kitchen and will wear off over time and once this happens the floor will start to lose its appearance as dirt becomes ingrained in the stone and it can no longer be cleaned effectively.
As we have to apply a liberal amount of water with this sort of work, the first step was to remove the Kicker boards at the bottom of the Kitchen units and silicone the Kitchen units that were fixed; this stops water seeping in and blowing the MDF allowing us to concentrate on cleaning the Slate without causing any damage.
I started the cleaning process by applying a strong dilution of Tile Doctor Pro-Clean to get rid of the built up dirt and any remaining sealer, leaving it to soak into the Slate before scrubbing the floor with a black scrub pad fitted to buffing machine running at slow speed. Tile Doctor Pro-Clean is a strong alkaline cleaner/stripper that is safe to use on natural stone, we do have stronger products available if required but in this case a strong dilution of Pro-Clean was sufficient to tackle any remaining sealer.
This process gave the Slate and grout lines a good deep clean and after rinsing the floor with water which was then extracted using a wet vacuum I repeated the process on stubborn areas until satisfied the floor was as clean and free of old sealer. Last stage of the cleaning process was to give the floor a final rinse and then get it as dry as possible using the wet vacuum to soak up the moisture.
The floor was quite small so I was able to leave the floor to dry off over lunch time and then on my return managed to get it fully dry with a little heat from a heat gun. The customer wanted a mat finish so once dry I applied Tile Doctor Colour Grow sealer which impregnates into the pores of the natural stone protecting it from within and enhancing the natural colours of the Slate at the same time.
For general cleaning of Sealed stone floors, we recommend the use of a PH Neutral Cleaner as anything with a strong PH will degrade the life of the sealer over time.
Steve Keary
Greater Manchester Tile Doctor
 Tile Doctor Ltd
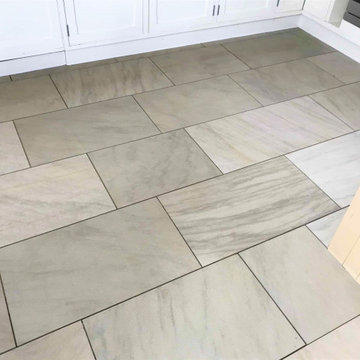
I received an enquiry from a property in Crowthorne to come and survey an unknown Flagstone Floor in a converted barn that was ready to be rented out. The owners where concerned the stone was letting the rest of the property down due to it being dirty and heavily stained, particularly around the kitchen and entrance areas. If your selling or renting out a property it really needs to look its best if you want to achieve a good price. Having spoken over the phone we agreed a date for me to pop over to complete a survey.
From further inspection I confirmed the stone was in fact a Sandstone, it was also clear that the sealer protecting the stone from ingrained dirt had worn away and was now allowing dirt and staining to ruin the appearance of the flagstones. It was a large floor so I measured up so I could work out the quantities of cleaning and sealing products needed and then walked the customer through the cleaning process. Later that day I sent over a detailed quotation which was accepted, and a date agreed for my return.
I should mention this work took place during the Covid restrictions, fortunately being a rental property, I was able to work in the property alone.
To deep clean the floor and remove the ingrained dirt and staining I used a strong dilution of Tile Doctor Pro-Clean. It is sprayed onto the floor and left to soak in for five minutes before agitating with a Black scrubbing pad fitted to a weighted buffing machine. The resultant slurry was then wet extracted away using a powerful high-pressure van mounted extracting system.
This action cleaned up most of the stone nicely however certain areas where heavily stained, particularly in the kitchen area where food and drink stains were more apparent. To tackle this, I applied a stronger cleaner/stripper product called Tile Doctor Remove and Go this time allowing ten minutes for it to soak in before scrubbing the surface with a very coarse 100-grit soft milling pad. This took quite a few attempts each time extracting the slurry away and then inspecting the floor to see if more work was needed.
Happy the stains have been removed, I then focused on renovating the surface Sandstone after the application of the coarse pad. This involves the application of several finer grit burnishing pads which close the pores and adds a subtle polish to the Sandstone. As I started with 100-grit pad it was necessary to gradually refine the surface with an incremental series of pads that included 200, 400 and finally 800-grit pads. Then to ensure a uniform finish across the floor I continued the 400 and 800 grit pads throughout the property. Water is used to lubricate the process and this turns into a fine slurry that is rinse extracted as before.
The cleaning process took up the whole of the first day and I am pleased to say the Sandstone floor looked very clean after I had finished.
The stone was then allowed dry off overnight with the aid of an industrial air mover and I returned later the next day to apply a new protective seal. In the meantime, my customer had been over to check out the floor and were over the moon with how it looked and wanted to keep the finish as natural as possible.
With this in mind, I applied Tile Doctor Ultra-Seal sealer to the Sandstone throughout, only two coats were needed. This is a premium sealer that is almost invisible and works by penetrating the stone thus preventing dirt from becoming ingrained. Once done the floor looked very clean and much brighter than before, it now had that wow factor which will help it attract a good yield in the rental market.
The trouble with rental properties of course is making sure the tenant uses the right product to maintain the floor and not a typical supermarket tile cleaner that are only designed for use on Ceramic and Porcelain tiles. In fact, these types of cleaning product can slowly strip the sealer off the floor so it’s always worth checking the label before purchasing. Fortunately Tile Doctor sells a product called Neutral Cleaner that is ideal for maintaining sealed stone floors, so I left them with a complimentary bottle and recommended they get some more to leave under the sink for the new tenant.
Dennis Buckland
Berkshire Tile Doctor
 Tile Doctor Ltd
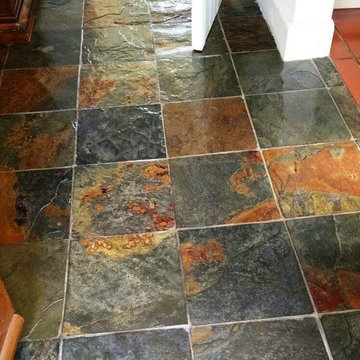
The photographs below are of rough Chinese Slate floor tiles installed at a house in Dorchester; they had not been deep cleaned in a long time and the combination of pets and grandchildren had taken its toll on the floor. Rough Slate from China is a relatively inexpensive product and although long lasting and value for money the texture of the Slate is difficult to maintain and thus difficult to keep clean even if fully sealed
To clean the tiles I used a strong dilution of Tile Doctor Pro-Clean which was left to soak into the Slate for a good ten minutes before working it in with a buffing machine fitted with a black scrubbing pad. This action removed the ground in dirt and any old sealer and a stiff brush was then run along the grout lines with more Pro-Clean to get them as clean as possible. The floor was then rinsed thoroughly and any stubborn areas retreated; a wet vacuum was used to extract the soiled water from the surface of the stone in order to get it as dry as possible.
The floor was left to dry overnight and I returned the next day to seal using three coats of Tile Doctor Seal and Go sealer which is a water based sealer (so no smell) that leaves a nice subtle shine to floor.
The slate and the grout looked really dull and dirty before we started and now the floor looks like it was recently laid.
For aftercare we don’t recommend the use of a Floor Steamer as they work on a 100 degrees and this damages the sealer; for regular cleaning use Tile Doctor Ph Neutral Cleaner using a two bucket system, whereby you apply the cleaning solution with a jug, wipe the floor and then squeeze off the excess into the second bucket, this stops you reapplying dirty water onto a clean floor.
Stuart Tibu
Dorset Tile Doctor
 Tile Doctor Ltd
I was recently contacted by a client who had just moved into a large Victorian property in the West Cheshire village of Tarvin about renovating their Victorian tiled hallway. Apparently, the floor was in good condition, and it would just be a case of removing what was left of the old sealer, deep cleaning the tiles and then applying a fresh seal. Unless the floor has been regularly maintained with the same sealer it’s important to remove all traces of old sealers before applying fresh.
Victorian Hallway Before Cleaning Tarvin Cheshire
A lot of the work we do at Tile Doctor can be a lot more involved, often requiring the sourcing of matching replacement tiles and rebuilding large sections of tiled flooring so straight forward clean and seal job is always welcome.
To remove what was left of the sealer and the ingrained dirt from the pores of the Victorian tile I dressed the floor with a strong dilution of Tile Doctor Pro-Clean. On this occasion I used a 1:3 dilution with water and applied it to the floor with a mop. I left it to soak into the tile for fifteen minutes before scrubbing so it could get to work breaking down the old sealer.
During this time, I set up a weighted floor buffer and fitted a black buffing pad, these pads are designed for scrubbing hard floors and lifting out the dirt. I applied a little water as required during this process to ensure the pad was lubricated. Shortly the cleaning solution darkened as the old sealer and dirt was released from the tile.
The soil was rinsed away with water and then removed using a wet vacuum. Once clear the floor was inspected and the process repeated until I was satisfied it was as clean as it could be and free of sealer.
I left the floor to dry off overnight and returned the next day to apply a new sealer. Before doing so however I like to use a damp meter to take moisture readings from the floor. This is needed to ensure it is dry enough to seal which is important as any moisture in the tile can affect the sealer and lead to an inconsistent finish.
To seal I started with the application of a single coat of Tile Doctor Colour Grow which is a colour intensifying breathable impregnator that soaks into the tile improving appearance and adding protection from within. Any excess sealant was removed by wiping the floor with a microfibre cloth and then it was left to dry for an hour.
This was followed with four coats of Tile Doctor Seal and Go Extra which is an acrylic breathable sealer which adds a pleasing subtle shine to the tile. This is an important feature when choosing a sealer for old floors where moisture needs to be allowed to rise through the tile, otherwise it can become trapped under the floor and reach out to the walls causing rising damp.
The customer was very happy with the revamped hallway which made the house a lot brighter and welcoming. Before closing I should mention that for aftercare cleaning I recommend Tile Doctor Neutral cleaner which is designed for the daily cleaning for sealed tiles, this is important as most domestic supermarket cleaners are simply too strong and can prematurely erode the sealer.
Alastair Robb
West Cheshire Tile Doctor

Sponsored
Columbus, OH
Hope Restoration & General Contracting
Columbus Design-Build, Kitchen & Bath Remodeling, Historic Renovations
 Friedman & Shields
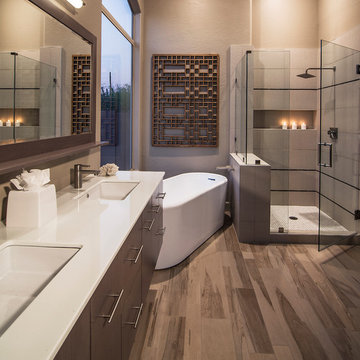
Bathroom - large contemporary master beige tile and porcelain tile dark wood floor and brown floor bathroom idea in Phoenix with flat-panel cabinets, brown cabinets, beige walls, an undermount sink, quartzite countertops, a hinged shower door and white countertops

 Boyce Design + Build
This inviting space features a decorative concrete patio with a custom concrete fire pit and Ipe floating bench. The lush landscaping and cedar privacy fence provides a tranquil setting for city living.
 Toronto Interior Design Group
Gillian Jackson
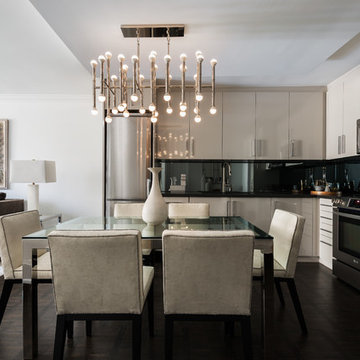
Inspiration for a small contemporary l-shaped dark wood floor and brown floor open concept kitchen remodel in Toronto with an undermount sink, flat-panel cabinets, gray cabinets, quartz countertops, stainless steel appliances, no island and black backsplash
Inspiration for a small contemporary l-shaped dark wood floor and brown floor open concept kitchen remodel in Toronto with an undermount sink, flat-panel cabinets, gray cabinets, quartz countertops, stainless steel appliances, no island and black backsplash



 1 st house cleaning miami
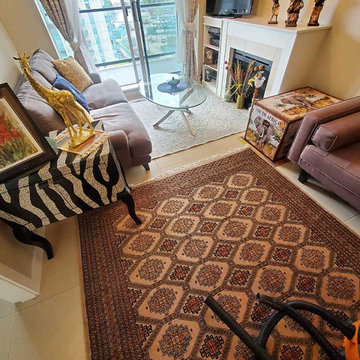
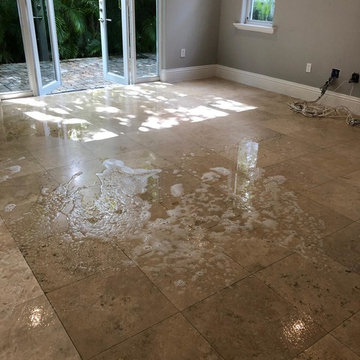
Living room - large modern formal and open concept living room idea in Miami

Living room - transitional formal light wood floor living room idea in San Francisco with beige walls

 Spruce Interior Design
Rich Caplan
Trendy gray floor living room photo in San Francisco with no fireplace and no tv
Trendy gray floor living room photo in San Francisco with no fireplace and no tv
34