
Search results for "Deep cleaning" in Home Design Ideas
 Tile Doctor Ltd
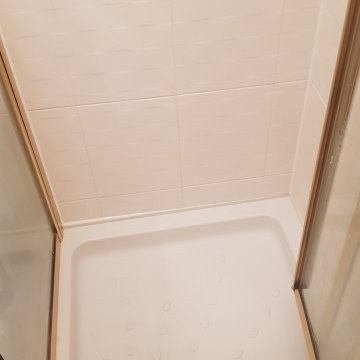
The pictures below detail the renovation of Ceramic Tiled Shower Cubicleat a property in Bolton Upon Dearne South Yorkshire. I was called in as the homeowners dreaded using the shower due to the state of the tiles, grout and cubicle in general.
As you can see from the photograph the grout was filthy, the silicone was mouldy, and the shower frame was caked in mouldy dirt. Over the years there had been a build-up of hard water and staining from products which leave a residue. They had used everyday cleaning products, but these had not been able to touch the problem as it had been left for too long.
I discussed with the clients how Tile Doctor could help, and how we would be able to deep clean the shower area and replace the mouldy silicone. I was confident we could get the renovate the cubicle and get it looking like new again. They were happy to accept my price and we arranged a time to complete the job. It would certainly be far cheaper than ripping out the shower cubicle and replacing with new.
Bolton Upon Dearne is a small village in the very middle of South Yorkshire, it is almost the same distance away from the centres of Barnsley, Rotherham and Doncaster. It has a rich history of coal mining but like many pit villages it has suffered since the pit closures of the 80’s and 90’s.
To start the shower was treated with Tile Doctor Oxy Gel, being a gel this product sticks well to the vertical surfaces giving it time to break down grease and grime, you’ll see from the picture just how much dirt was released.
This was followed with a strong dilution of Tile Doctor Duo Clean which is great for restoring lighter coloured grout back to its original state as well as removing mould. After scrubbing the soiled water was easily drained away using the shower hose. The transformation was amazing, the area already looked so much more inviting!
Next the old silicone that had gone mouldy was removed with a sharp knife, this is a slow work as you have avoid damaging the tile or the shower tray. Additionally, a clean and dry surface is required for the new silicone to adhere well.
The tiles were Ceramic which are given a glazed surface during manufacture, so they don’t need a specialist sealant like natural stone. However, the surface of grout is cementous and attracts dirt easily so the whole shower wall was sealed using a can of Tile Doctor Wall and Grout Sealer. This gives a layer which will protect the tiles and grout and will ensure the tiles are easier to keep clean.
For everyday cleaning I recommended they use Tile Doctor Aqua-Pro which is an effective, yet pH neutral tile and grout cleaner designed for everyday use in Bathrooms and Kitchens. The formula eliminates soap scum build-up and hard water deposits and its neutral formula won’t prematurely degrade the sealer. Used regularly this will prevent the build-up they had previously experienced and will keep the tiles looking good for some time to come.
As you can imagine my client was very happy with the completed work.
Matthew Lovett
South Yorkshire Tile Doctor

 Tile Doctor Ltd
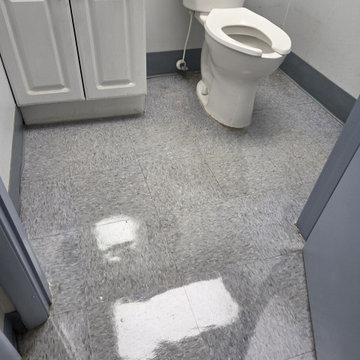
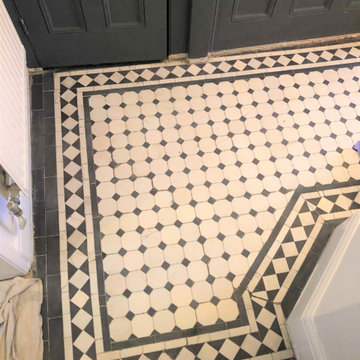
The owners of this Edwardian property in Finchley had purchased it a couple of years prior and since then had slowly been renovating it to restore its original character. The project was almost complete and now attention had turned to the tiled floor. The tiles were in quite a state and I was asked to work our Tile Doctor magic and bring it back to its original condition.
When they moved in the hallway had been covered with carpet which gave the tiles underneath some protection. Unfortunately, however the carpet has been secured with carpet grippers that had been glued to the tiles around the edges. There were also paint splashes on the surface that would need dealing with. On top of that the floor had a few missing tiles that had been back filled by cement to provide a level base for the carpet, the client wanted like them replaced if possible.
After surveying the floor, I explained what could be done and ever completed a small test clean to demonstrate how the tiles would look once deep cleaned. I was confident on being able to source very similar reclaimed tiles so replacing the missing should not be a problem. The client was very happy with the initial test result and my quotation so booked me in to restore the floor.
On my return I started by applying Tile Doctor Remove and Go to soften up the glue which allowed it to be carefully peeled off the tiles with scrappers. Once all the carpet adhesive was gone, I worked a strong dilution of Tile Doctor Remove and Go into the tiles using a black pad to work the cleaning solution deeper into the tiles. A wet vacuum was used to remove the slurry created, and I followed this by giving the tiles an extra clean using a 200-grit diamond burnishing pad lubricated with water.
The last step in the cleaning process was to give the floor an acid rinse using Tile Doctor Grout Clean-up, I did this for several reasons, first it removes old grout smears from the surface of the tile and second it neutralised any efflorescent salts lying dormant in the floor. This can be quite a problem for old floors which don’t have the benefit of a protective damp proof membrane under the floor. The floor was given a final rinse with water which was again extracted with a wet vacuum.
I then set about lifting all the loose tiles (approximately ten) and carefully removing the concrete infills. I had previously managed to source replacements for these holes from original features. Unfortunately, they didn’t sell the correct sized octagon tiles, so I had bought 150mm square tiles and then needed to cut them on site to get the right size.
After cutting and fixing the tiles I fixed them in place and regrouted the rest of the floor.
I then left the floor to dry out overnight and returned in the morning. Before applying a sealer, I took several moisture readings with the damp meter to make sure the tiles were dry enough to take the sealer.
I was able to confirm the floor was dry, so went ahead and applied three coats of Tile Doctor Colour Grow sealant. Colour Grow is an impregnating sealer that is fully breathable sealer which is important when it comes to old floors like these that don’t have a damp proof membrane installed.
My client was very happy with the renovated floor and for aftercare I left them with a bottle of Tile Doctor Neutral Tile Cleaner and gave advice on how best to clean the floor going forward.
Andrew Newstead
North London Tile Doctor
Find the right local pro for your project
 Tile Doctor Ltd
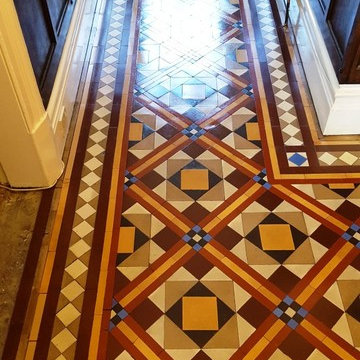
The colourful and diverse geometric patterns of a Victorian tiled floor can give a property a regal, elegant and timeless feel, making it a popular choice even in the 21st century. However, as time passes without regular care and maintenance, Victorian tiles can quickly lose their colour and appear deadened by the buildup of dirt and dust over several months (and sometimes years).
This property owner in Hebden a very small village in North Yorkshire of less than 300 people, had this common problem. Her Victorian tiled hallway had not been adequately maintained and was now more difficult to keep clean than ever. To add to the problem, most of the tiles along the edges were either broken, cracked, or filled with holes, probably I suspect from the installation of carpet grippers at some point in the past.
At this point, the property owner turned to Tile Doctor to see what could be done.
Before beginning a deep clean of the entire length of the hallway, it was first necessary to source and install replacement tiles for those that had been broken and damaged. I also relaid any that were loose.
When finished, I left the tiles to set and returned the next day to start the clean. My choice of cleaner in this situation was Tile Doctor Pro Clean, which was scrubbed into the floor with a special pad fitted to a rotary machine to break down ingrained dirt and stains. Pro Clean does this very effectively on all types of tile, including natural stone and of course Victorian tiles.
The floor was then rinsed with water and the soiled cleaning solution extracted from the floor using a vet vacuum. Stubborn areas were re-treated with more Pro Clean, and when I was satisfied with the condition of the tiles the floor was given a final but thorough rinse to remove any trace of cleaning product.
The floor was then left to dry completely overnight to ensure all excess moisture had disappeared, leaving it fresh to be sealed. I returned in the morning for a third day of work to seal the Victorian tiles with four coats of Tile Doctor Seal and Go, a topical sealer which provides a rich satin finish to really add depth to the colours in the tile while protecting it against dirt and stains.
The customer was delighted with the restoration and couldn’t quite believe the huge improvement in the appearance of the tiles, especially in regards to the enhancement in the different colours. Another satisfied customer!
Nigel Stoker
North West Yorkshire Tile Doctor
 Tile Doctor Ltd
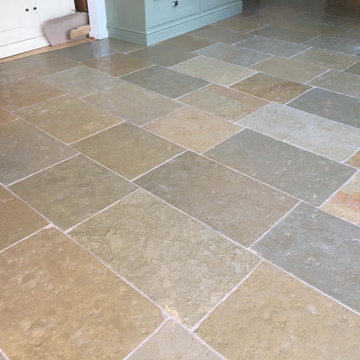
Laid six years ago at a house in Farnham this Sandstone tiled kitchen floor was routinely trampled on by two teenagers, gardening parents and two large dogs. All of this had taken its toll of the sealer which had worn off and without its protection the Sandstone tile and grout had turned an indistinguishable sea of brown.
The floor now needed a deep clean and reseal to restore it appearance and get it looking its best for which I had planned should take two days, the first day for cleaning and drying, the second for sealing and quoted accordingly. My client was happy with the quote and we scheduled a date to do the work.
Farnham is a market town in Surrey and is largest town in the borough of Waverley. It is quite a historic town, with many old buildings, including a number of Georgian houses. With good access links to the A3 and London by train its popular with commuters and I often get requests to work here.
I began by taping up the wooden skirting and the plinths in the kitchen to protect them from splashing during the work. Then armed with Tile Doctor Pro-Clean and a stiff brush I set about cleaning up the grout. The dirt released was removed with a wet vacuum before it had a chance to dry then using more Pro-Clean and a 17” buffing machine fitted with a rotating black nylon pad I cleaned the tiles.
The unamused dogs had been banished to the garden. I love dogs but they were chasing my machine around, so I needed to keep them out of the way. The floor tiles were surprisingly dirty, and the client was quite shocked by the amount of dirt I manged to extract.
Once finished I left the floor to dry off fully overnight, sealing a damp floor is never recommended and can result in a patchy appearance.
Returning the next day, I first checked for areas that needed further attention and then took several moisture readings with a damp meter to check the floor was dry. Satisfied that it was, I was ready to apply the sealer.
We had discussed choice of sealer previously and for this floor I had recommended a Tile Doctor sealer called Seal and Go Extra which would be ideal for her traffic heavy floor. Sealing is an important step as it protects the tiles and grout from dirt becoming ingrained in the stone and improves the look of the stone. Seal and Go Extra is also super tough and should last for years if cleaned with the right product. It sets with a subtle sheen but not a shine which she definitely didn’t want. Three coats of sealer were applied which takes around two hours to be dry to the touch but really needs 24 hours for it to cure.
The sealer brought out the variety of colours in the stone floor and the family were happy with their new floor, now they just had to keep the dogs out of the way for 24 hours!
For aftercare I recommended the use of Tile Doctor Neutral Tile Cleaner to keep the floor in great condition.
Rupert Mcleod
West Surrey Tile Doctor
 Tile Doctor Ltd
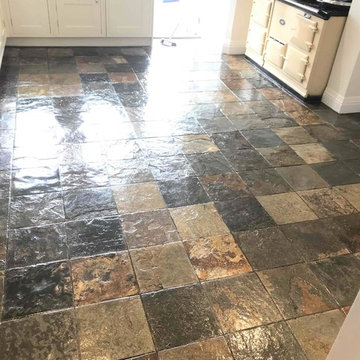
I recently completed the renovation of a Multi-Coloured Slate tiled kitchen floor in Sutton Coldfield. I was actually at the property before Christmas to survey the floor and quote for the work however the owners had planned to have a new kitchen installed in the new year, so we decided it was best for me to wait until after the installation to complete the work.
The slate was in good condition but like any stone floor you do need to maintain the sealer to prevent dirt becoming ingrained in the stone. Sealer do wear off overtime especially in the high foot traffic areas such as Kitchens and within a few years the tiles become dull and difficult to clean effectively.
The kitchen was installed on schedule and I got the call to arrange a visit to deep clean and reseal the floor which would take to two days, one to clean and one to seal.
To begin the restoration, I soaked the slate in a strong dilution of Tile Doctor Pro-Clean and left it to soak in for about ten minutes re-applying extra solution where it dried. Pro-Clean is a powerful tile cleaner that will strip old sealers when applied in concentrated form. I agitated the product using a black pad fitted to a rotary buffing machine. I paid particular attention to the grout which the customer had trouble keeping clean. The rotary pad struggles to reach into the recesses of the grout lines so I also made sure to scrub the solution into the grout with a grout brush.
Once I was satisfied that the Slate and the Grout was clean and clear of old sealers, I gave the whole floor a thorough rinse with water using a wet vacuum to extract the soil and get the floor as dry as possible. The floor was then left to dry off fully overnight.
Returning to the property the next day, I ran some quick damp tests to check for any excess moisture that might have prevented me from sealing the floor. We will always do this as excess moisture can affect the sealer curing.
The customer was very happy with the clean and the floor was dry, so we discussed sealer options to find out their preference for Matt or Satin finish. With the decision made to go with a Satin finish I began the application of the Tile Doctor Seal and Go which enhances the look of the stone with an aesthetically pleasing low-sheen finish, as well as providing on-going protection against ingrained dirt and staining.
A total of four coats of Seal and Go were needed to seal the Slate tiles and as you can see from the photos the sealer really put the life back into the floor.
Trevor Preece
Staffordshire Tile Doctor


 Elton R Construction
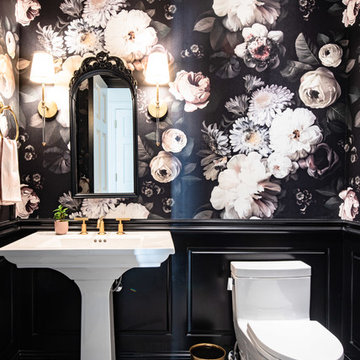
The wallpaper is a dark floral by Ellie Cashman Design.
The floor tiles are Calacatta honed 2x2 hexs.
The lights are Camille Sconces in hand rubbed brass by visual comfort.
 Custom Kitchens by John Wilkins, Inc.
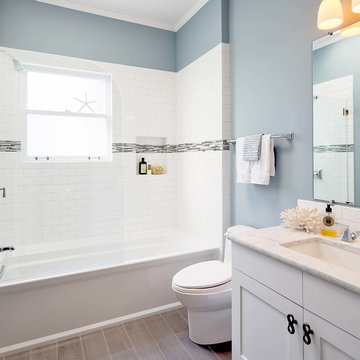
The layout of this bathroom was reconfigured by locating the new tub on the rear wall, and putting the toilet on the left of the vanity.
The wall on the left of the existing vanity was taken out.
 Studio M Interiors
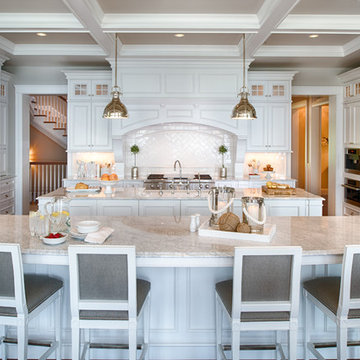
Kitchen - traditional u-shaped dark wood floor kitchen idea in Minneapolis with recessed-panel cabinets, white cabinets, white backsplash, two islands, granite countertops and ceramic backsplash

 Bruns Architecture
Tricia Shay Photography
Inspiration for a mid-sized contemporary gray two-story mixed siding house exterior remodel in Milwaukee with a shed roof
Inspiration for a mid-sized contemporary gray two-story mixed siding house exterior remodel in Milwaukee with a shed roof
 Haus Interior Design
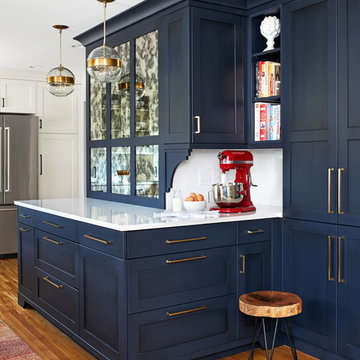
Before renovating, this bright and airy family kitchen was small, cramped and dark. The dining room was being used for spillover storage, and there was hardly room for two cooks in the kitchen. By knocking out the wall separating the two rooms, we created a large kitchen space with plenty of storage, space for cooking and baking, and a gathering table for kids and family friends. The dark navy blue cabinets set apart the area for baking, with a deep, bright counter for cooling racks, a tiled niche for the mixer, and pantries dedicated to baking supplies. The space next to the beverage center was used to create a beautiful eat-in dining area with an over-sized pendant and provided a stunning focal point visible from the front entry. Touches of brass and iron are sprinkled throughout and tie the entire room together.
Photography by Stacy Zarin

 Vosper Boligstyling & Fotografering ApS
Busy Bees Photography
Example of a mid-sized danish open concept light wood floor family room design in Copenhagen with white walls
Example of a mid-sized danish open concept light wood floor family room design in Copenhagen with white walls

Sponsored
Columbus, OH

Wannemacher Interiors
Customized Award-Winning Interior Design Solutions in Franklin Cnty OH
 CITYDESKSTUDIO, Inc.
Project Team:
Ben Awes, AIA, Principal-In-Charge, Bob Ganser AIA, Nate Dodge
Photographer: Alyssa Lee
www.alyssaleephotography.com
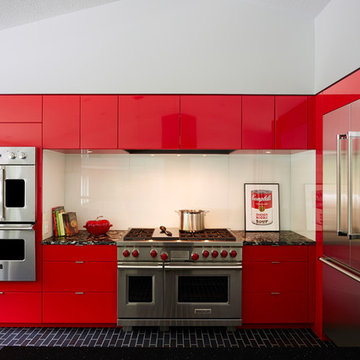
Trendy l-shaped kitchen photo in Minneapolis with flat-panel cabinets, red cabinets, white backsplash, glass sheet backsplash and stainless steel appliances
Trendy l-shaped kitchen photo in Minneapolis with flat-panel cabinets, red cabinets, white backsplash, glass sheet backsplash and stainless steel appliances


 Charmean Neithart Interiors
www.erikabiermanphotography.com
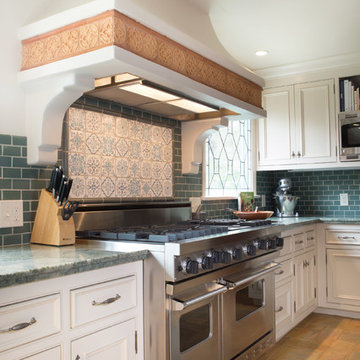
Mid-sized tuscan terra-cotta tile kitchen pantry photo in Los Angeles with a drop-in sink, shaker cabinets, white cabinets, granite countertops, blue backsplash, ceramic backsplash, stainless steel appliances and an island
Mid-sized tuscan terra-cotta tile kitchen pantry photo in Los Angeles with a drop-in sink, shaker cabinets, white cabinets, granite countertops, blue backsplash, ceramic backsplash, stainless steel appliances and an island


 Sandra Oster Interiors
Phillip Ennis Photography
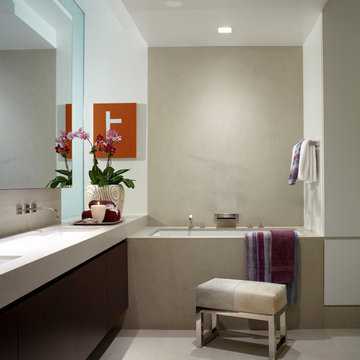
Example of a large trendy master japanese bathtub design in New York with flat-panel cabinets, dark wood cabinets, white walls, an undermount sink and solid surface countertops
Example of a large trendy master japanese bathtub design in New York with flat-panel cabinets, dark wood cabinets, white walls, an undermount sink and solid surface countertops
 Navarro Construction
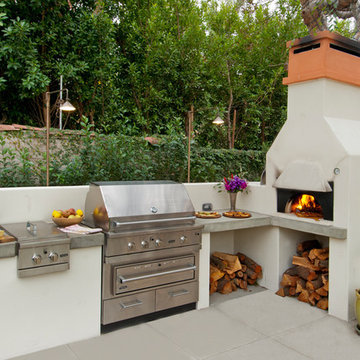
Example of a tuscan backyard concrete paver patio design in Los Angeles with no cover and a bbq area
 Whirlpool Canada
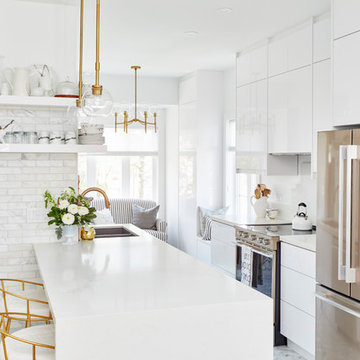
Example of a trendy kitchen design in Toronto with a double-bowl sink, flat-panel cabinets, white cabinets, white backsplash, glass sheet backsplash, stainless steel appliances and white countertops
37