
Search results for "Deep cleaning" in Home Design Ideas
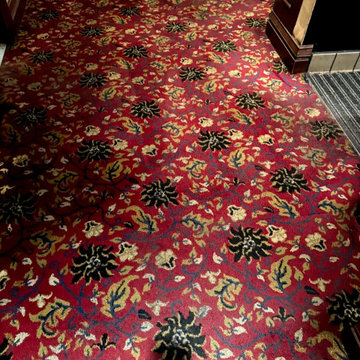

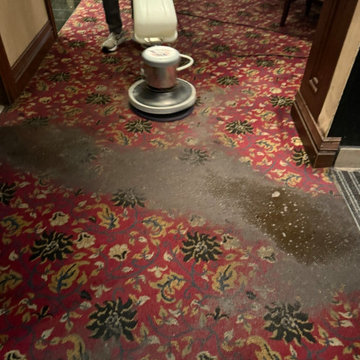
 Cyclone Professional Cleaners
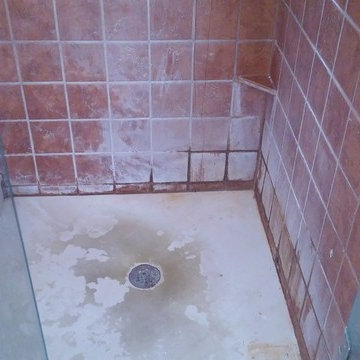
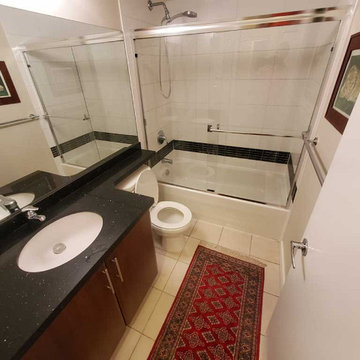
Bathroom shower in need of deep cleaning, mildew scraping and caulk.
Elegant home design photo in Dallas
Elegant home design photo in Dallas
Find the right local pro for your project

 Tile Doctor Ltd
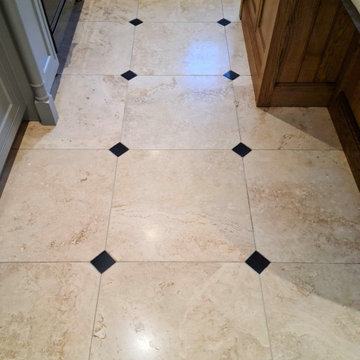
The pictures show a large Limestone floor laid through much of the ground floor of a property situated on the outskirts of York seventeen years prior.
The owners had three dogs that slept in their own doggy room. The floor in this room was in the worst condition of the five rooms as it had been subject to significant wear and tear. The Limestone tiles looked dull with ingrained dirt and the grout was stained and patchy.
The original tiler had laid the floor well, but he had applied a satin topical sealer to the stone most of which had worn off over the years. A floor like this would need a little maintenance and the sealer reapplying from time to time to maintain it.
I completed a test clean for the client to show them what could be achieved which came out well. Happy with the result they accepted my quote for the restoration work, and we booked in a suitable time to complete the work.
The area was quite large, so I separated the job into rooms and started by protecting the skirtings and woodwork from splashing etc. I decided to do a chemical clean first to remove what was left of the old sealer but more importantly to give the grout a thorough clean which was making the floor look scruffy.
For this I opted to apply a strong dilution of Tile Doctor Pro-Clean which was left to dwell for a short while and then worked in with a mechanical rotary cleaner. It gets to work on the ingrained dirt and sealer. It should also help to get rid of the doggy smells. This process turns the cleaning solution black and is then extracted using a wet vacuum keeping the mess to a minimum. I paid particular attention to the grout which was deeply discoloured and found that some areas required going over a couple of times to get them clean. I was only just getting started on the cleaning but immediately the floor was looking so much better.
I then deep cleaned the Limestone with a set of diamond burnishing pads, working in sequence from the 400 grit through to 1500 grit. A small amount of water was used to aid the lubrication and after each pad have been over the entire area few times the solution is rinsed off with more water and extracted with the wet vacuum.
The floor came back to almost new and as the client wanted a satin finish, I ended by applying a 3000-grit pad to add a deeper polish to the Limestone. The floor was then left overnight to dry.
The last step of polishing with the 3000-grit pad already leaves the floor quite dry however I always like to check before sealing so just to be sure I took some reading with a damp meter. The readings were fine, so I started applying the first of two coats of Tile Doctor Ultra Seal to finish the floor. This is an impregnating sealer (as opposed to the previous topical sealer) that soaks into the stone protecting it from within but without affecting its appearance. This product was chosen in consultation with the client who was specific about how they wanted to floor to look.
The floor now looked superb. Both the client and l were very pleased with the finished floor and so where the dogs! For aftercare I recommended Tile Doctor Stone Soap which is designed for cleaning polished stone floors like these, it’s a gentle stone cleaner that helps maintain the patina and ideal for this type of floor.
Nigel Stoker
North West Yorkshire Tile Doctor

Sponsored
Columbus, OH

Hope Restoration & General Contracting
Columbus Design-Build, Kitchen & Bath Remodeling, Historic Renovations

 Atricia Banks
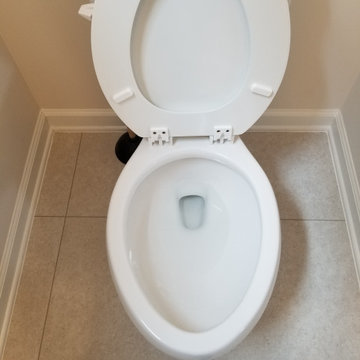
Deep Cleaned Toilet, Floors and Baseboards
Small minimalist bathroom photo in Other with a freestanding vanity
Small minimalist bathroom photo in Other with a freestanding vanity
 Tile Doctor Ltd
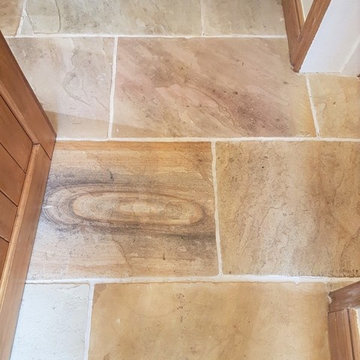
The pictures below are of a multi coloured sandstone floor installed at a property in East Keswick which is a village approximately halfway between Harrogate and Leeds. (Not to be confused with the more famous Keswick in the Lake District)
The stone floor had not been cleaned professionally for ten years and although the grout looked clean It was clear that any sealer that was once present had long since worn off leaving the stone unprotected. The result was dirt had become deeply ingrained in the Sandstone leading causing the stone to darken and hide its true beauty and rich colouring. The client had tried lots of different products to clean the floor but had not had any luck.
I visited the property and carried out a few successful patch tests resulting in the floor becoming much cleaner. They were happy to go ahead with my quote and we arranged a time to return and complete the work.
I prepared the area before starting, taping up the skirting boards and doors to protect them from the splashing that can happen during the intensive cleaning process.
To get the sandstone clean I applied a medium dilution of Tile Doctor Pro-Clean to the floor and allowed it to soak in for ten minutes. The solution was then worked into the Sandstone using a rotary floor machine fitted with a black scrubbing pad. More Pro-Clean was applied with a hand-held scrubbing brush to get deep into the grout lines and to reach into the corners.
Once done the floor was rinsed with water and the soil extracted with a wet vacuum. The floor was inspected, and the process repeated until I was satisfied that the stone and grout had released all the trapped dirt. After a final rinse, the wet vacuum was used to get as much moisture out of the stone as possible and then the floor left to dry out fully overnight.
Returning the following morning, I first checked that the floor was dry using a damp meter. The sealer won’t cure if there is any moisture in the stone and I’ve been known to reschedule sealing a floor if the readings are too high. On this occasion I was satisfied that the floor was within acceptable levels, so I was ready to seal the floor.
I used three coats of Tile Doctor Colour Grow to seal the floor, this is an impregnating sealer which intensifies natural colours whilst providing durable protection against stains, an essential feature in an area such as a hallway which is subject to constant foot traffic.
As you can see from the photos the transformation was quite impressive, the floor became much lighter and almost unrecognisable, the natural colours of the stone were now visible, and the floor looked beautiful. The client was very happy with the end result and has said they would not hesitate to recommend me to others.
Nigel Stoker
North West Yorkshire Tile Doctor
 Tile Doctor Ltd
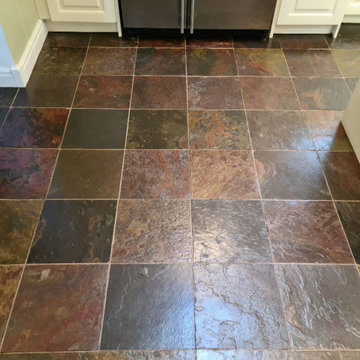
The pictures above are of a 12 metre squared Chinese slate floor in the kitchen of a property in Harrogate which had been laid ten years prior. You can see from the photographs that the grout had darkened and the slate itself had lost a lot of its character and colour.
Sealers typically last between three to five years so by now there was little protection left and so dirt had become trapped in the pores of the stone and grout making it difficult to keep clean. It was now overdue a deep clean and the application of a fresh seal.
I went over to survey the floor and provide a quote for stripping off what was left of the original sealer, cleaning the floor, and then resealing. I had been recommended by a previous customer so happy with my track record and the price I quoted, they asked me to do the work. They had received a quote from another firm which as it turned out was a lot more expensive than mine.
Given there was little sealer left to remove I decided to start by scrubbing the floor with a strong concentration of Tile Doctor Pro-Clean which was left to soak into the slate for ten minutes. Then I worked the solution in with a rotary machine fitted with a black scrubbing pad. Pro-Clean is a very versatile product that will strip the sealer off a floor when used in a strong dilution with water, it will also remove deep seated dirt too.
Due to the riven nature of the tiles however I found the black pad was struggling to reach into the crevices of the tile so to achieve the desired result I resorted to scrubbing the floor on my hands and knees with a scrubbing brush. Its important that the floor is as clean as it possibly can be before sealing otherwise you simply lock the dirt in and it will never look clean.
The floor was left to dry off overnight and I returned the next day to apply the new sealer. First, I checked to ensure that the floor was fully dry using a damp meter. The sealer would not cure properly if the floor damp and this can detract from the finished appearance.
I was happy with the readings, so I started to apply the first coat of Tile Doctor Seal and Go which I felt was the best product sealing Slate. The stone needed four coats; each one being left to dry before applying the next. Seal and Go is a stain resistant sealer which results in a low sheen silky appearance, it is good on surfaces such as the Chinese Slate which tend to be more porous and being water based it does not leave a smell as it dries.
The client was very happy with the result and mentioned to me that it had never looked that good even when new.
For aftercare cleaning I recommended the use of Tile Doctor Neutral Tile Cleaner which will keep the floor in the best condition. This is a pH neutral cleaner which can be used daily and won’t compromise the newly laid sealer like many of the stronger products you find in supermarkets.
Nigel Stoker
North West Yorkshire Tile Doctor





33