
Search results for "Deterioration" in Home Design Ideas
 Custom Surface Solutions
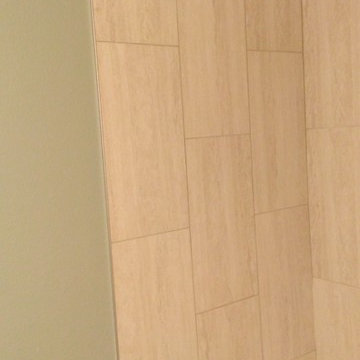
Custom Surface Solutions (www.css-tile.com) - Owner Craig Thompson (512) 430-1215. This project shows new 12 x 24 tile installed vertically with offset layout pattern on wall and floor. Includes shower box with linear glass accent tile back and vertical glass accent band. Tile edges are finished with Schluter Jolly satin aluminum profile edge trim.
 Staprans Design
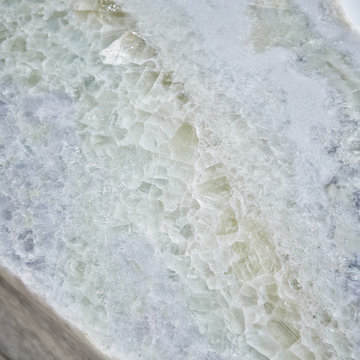
Example of a huge trendy master beige tile and mosaic tile mosaic tile floor corner bathtub design in San Francisco with a pedestal sink, furniture-like cabinets, light wood cabinets and marble countertops
 David Morello Garden Enterprises, Inc.
David Morello
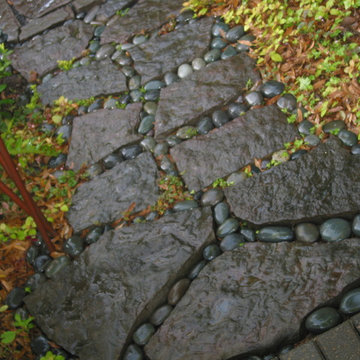
Design ideas for a traditional landscaping in Houston.
Design ideas for a traditional landscaping in Houston.
Find the right local pro for your project

 SUPERIOR CHIMNEY SERVICES CORPORATION
Do you know what ends our time of enjoying the wonderful Fall colors? Rain. The other day when it rained, it took most of those bright yellow leaves and brought them to the ground. It saddened me not only because the colors were gone, but now the leaves have to be cleaned up. And with the trees being larger, those leaves went everywhere. All over the ground, in the tall bushes, stuck on the window sills, lodged in the gutters and up at the chimney. Nature’s going to happen so, what are the effects of Fall rain and the Chimney? Let’s take a further look.
Fall Rain and the Chimney
The Fall leaves are gorgeous and fall is many homeowners favorite time of year. But as with all seasons, it comes to an end. The Fall rain combined with wind takes those colorful leaves and distributes them…everywhere. Especially on the roof where your chimney is located. By having an annual chimney inspection, we’ll take a look to ensure the safety of your chimney stays intact for the upcoming harsher season: Winter.
The Exterior Chimney
With Fall, we have two of the elements to be concerned about and that’s the leaves and rain. Here are a few areas we check and the effects of fall rain and the chimney. Let’s start at the top:
Chimney Cap: The chimney cap is vital for protecting the opening of your chimney which leads to the interior of your home. We inspect the chimney cap ensuring it is tightly secured to the exterior chimney termination. The chimney is typically the tallest part of your home and gets exposed to the harshest winds, rain, snow, animals and blowing debris. All of that hits the chimney cap trying to find that weak spot so it can get inside the chimney. If it does, that debris is easily ignited and can cause harm to your home.
Chimney Crown: This is the slab of concrete that covers the chimney and extends beyond the bricks or materials that make up the chimney. This is to provide protection from the elements. But remember the chimney crown can also develop cracks over time. This is where crown coat can extend the life of the chimney crown ensuring the elements stay where they should… outside.
Brick, Stone and Mortar: The structure of the chimney can be made of brick, stone or other materials. If it is made of brick or stone, then mortar is involved. All of these materials are porous, meaning that it can absorb water and snow melt, which breaks down over time. As a result, this needs to be checked looking for loose bricks, missing mortar, cracks in either one of these materials and more. Tuckpointing is a good solution to ensure the elements stay out. The use of Chimney Saver is a great way to preserve the bricks, stones and mortar as it waterproofs and protects the materials for about 8 – 10 years and slows down the aging process.
Flashing: This is the material that protects the connection of the roof to the chimney. A critical and common area for leaks. The flashing moves the water away from the chimney and down the roof. The flashing adheres to the chimney with a seal, which dries out over time. This area needs to be checked to ensure the seal is strong and doesn’t allow water to get in.
Before the cold sets in and you want to turn on or fire up the fireplace, be sure to take into consideration the effects of fall rain and the chimney. Contact us today at 877-244-6349 to set up an appointment.
 Olde Wood Ltd.
J. Albert Studios
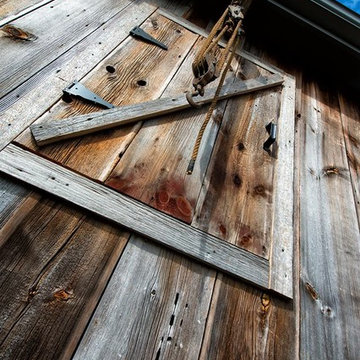
Huge traditional brown two-story wood exterior home idea in Cleveland
Huge traditional brown two-story wood exterior home idea in Cleveland
 Green Gorge Construction
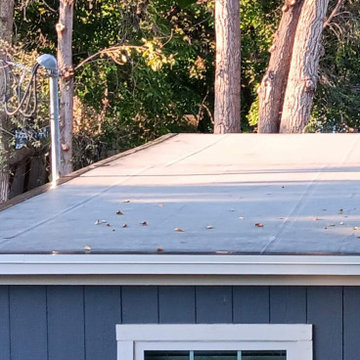
Due to its deteriorating condition, the asphalt roll roofing on this ADU required replacement before the Fall rains. Asphalt roll roofing generally lasts only 5-10 years, leading to ongoing maintenance challenges. The original 1×10 sheathing showed significant sagging in several spots, resulting in standing water not suitable for asphalt. Additionally, there was a complete absence of ventilation after improper installation of R-21 fiberglass insulation, leaving no air gap between the sheathing and insulation. A noticeable hump along the center of the roof indicated that the load-bearing wall had been supporting that section since construction, contributing to light sagging between the walls.
The old roof was completely removed down to the joists, revealing a solid base for the new installation. The central hump was eliminated by shaving the high point along that line. 2×6 beams were ripped in half then nailed on top of the existing joists, creating a 1.5″ gap for insulation and providing strong attachment points for the OSB sheathing, which was secured with screws to prevent any potential issues with nail heads popping through over the roof’s expected lifespan of over 50 years. The EPDM membrane was then adhered using glue and contact cement along the edges of each sheet, with the ends folded over the roof edges and secured with termination bars. Drip edge flashing was added and taped to ensure a water-tight seal, and EPDM-safe caulking was applied over the seams for additional protection. Finally, all exposed wood was primed and painted.
The new roof features a 60mil commercial-grade EPDM rubber membrane, offering a lifespan exceeding 50 years, in stark contrast to the 5-10 year lifespan of asphalt roll roofing.
Using two sheets of EPDM for installation streamlined the process, resulting in one single seam across the entire roof, compared to the asphalt roll’s dimensions of 3 feet wide by 33 feet long, which created 8 vertical seams and 9 horizontal seams—significantly increasing the risk of leakage and failure. Wrapping the rubber over the edge of the roof effectively addressed concerns about water infiltration at the edges, an issue prevalent with the asphalt and drip edge interface.
Another benefit to removing the splitting 1×10 decking and replacing it with OSB sheathing is the increase in structural integrity, moisture resistance, longevity and consistency.
The project successfully transformed the ADU’s roof from a maintenance-prone asphalt roll system to a highly durable 60mil EPDM rubber membrane. By addressing critical structural issues, including sagging sheathing and inadequate ventilation, the team ensured that the new roof not only offers superior water resistance and longevity but also meets higher performance standards for insulation and durability. The replacement process eliminated common weak points, such as numerous seams and poor edge sealing, which were vulnerabilities in the old roofing system. The result is a streamlined, secure installation that provides peace of mind and long-term value, with a lifespan extending well beyond the original roof.


 Regenesis Ecological Design
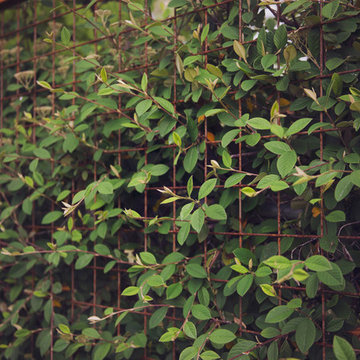
A modern steel mesh fence contrasts with spring growth of Cotoneaster multiflorus
http://annacaitlinphotography.com/
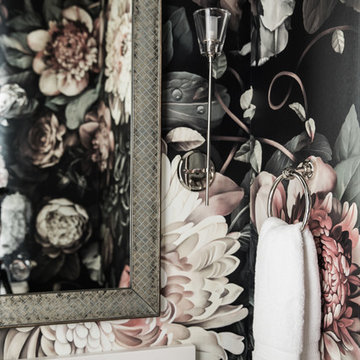

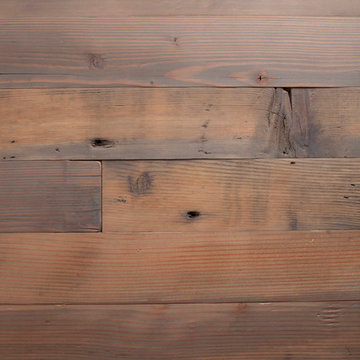
 Paul Arcoite
Reclaimed fir T&G with faded grey finish.
Photo: Sterling Lorence
Example of a beach style deck design in Vancouver
Example of a beach style deck design in Vancouver


 User
UserPhoto Credit: N. Leonard
Large elegant enclosed dark wood floor and brown floor family room photo in New York with a standard fireplace, a wall-mounted tv and blue walls
Large elegant enclosed dark wood floor and brown floor family room photo in New York with a standard fireplace, a wall-mounted tv and blue walls
 Gallery KBNY
The owner of this historic and landmarked town-home renovation in Hudson Square, originally built in 1826, hired Gallery Kitchen and Bath to fully gut-renovate this 3-unit row-home. The scope of work included a full-scale renovation of the owners unit, including the renovation of the kitchen, one 4-piece master ensuite bathroom, one 3-piece bathroom with a walk-in steam shower, and a beautiful powder room. Additional work in the owners unit also included flooring, electrical upgrade, major plumbing work, new HVAC system, restoration of a fireplace, installation of a fully integrated smart home system and landmarked approved windows.
CELLAR RENOVATION IN NYC LANDMARKED TOWN-HOME
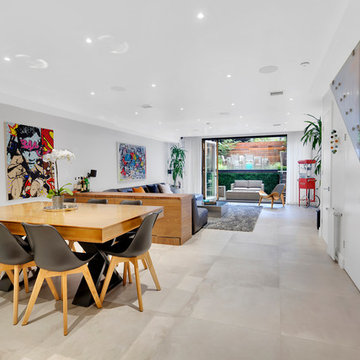
Rounding out the owners unit we renovated the cellar, which was converted into an entertainment space and featured a custom glass curtain wall, along with a custom staircase with an exposed brick wall. During the demolition phase of the cellar, our team discovered 56 wine jugs filled with wine from the prohibition era, leading us to name this project the prohibition house. For the two tenant units, Gallery Kitchen and Bath undertook the renovation of 2 kitchens, 4 bathrooms, new hardwood flooring throughout, along with detailed carpentry work in the entire home.
WHY GALLERY KITCHEN AND BATH
After interviewing multiple contractors, our client decided on Gallery Kitchen and Bath primarily because of our turnkey design, selection, and build process. In a renovation of this magnitude it is crucial to have a centralized full service contractor under one roof to handle all of the aspects and simultaneous moving parts of the project. Decentralizing the entire process by having multiple unaffiliated vendors handle various parts of the process can easily become chaotic, time consuming, and costly.
Because Gallery Kitchen and Bath undertook the entire process, from the design of the entire space to the selection and procurement of all finishes and fixtures, down to the procurement of all permits and LPC filings, it made a seemingly chaotic project a’lot more manageable.
PHASE 1: DESIGN, SELECTION, PROCUREMENT
Our client wanted the renovation to incorporate a fully modern design into his Hudson Square town-house. Being that this is a landmarked property, the exterior facade had to be restored and kept with the original aesthetic, the interior of the home however was a whole different story.
In keeping up with the modern aesthetic, our designers went to work to design a custom kitchen that included fully custom flat panel base cabinets in a white high gloss finish and an absolute matte black appliance/pantry wall. The kitchen design also included a white quartz countertop and backsplash with a waterfall edge island. To bring warmth to the modern kitchen, our designers incorporated a rifted and quartered select oak wood floor in a herringbone pattern, and custom blended stain with matte polyurethane finish. For continuity, the wood floor was also extended throughout the entire owners unit.
In the ensuite bathroom we created a “wet area” which houses a standalone soaking tub as well as a beautiful rainfall shower, completely leveled with the rest of the floor in the bathroom. Some highlights within this space include a tiled square drain, large niche cutouts with a carrera marble accents. Once again, to bring warmth to this modern bathroom, our designers incorporated a floating rustic oak vanity and carrera marble mosaic floor tile.
Last on the list on the owners unit floor was the cellar, which our client wanted to utilize as an entertainment space for his friends and family. During the design phase, we incorporated an open concept layout, wedding the indoor and outdoor space with a custom glass curtain wall. The design also included custom walnut built-ins that serve as a custom wet bar and storage piece.
With the design approved and selections made our office liaisons moved to procure all of the material selections and finishes.
PHASE 2: DEMO
Because this home is almost two centuries old, we had to take extra precaution during the interior demolition phase of the project. One specific area that we had to pay special attention to was the existing brick. Over time the mortar in old brick homes deteriorates and turns into dust – for this reason it was extremely important that a thorough and ongoing inspection of the exteriors and interior walls took place during the demolition of the space.
After 14 30-yard debris containers and 56 wine filled jugs from the prohibition era later , the demolition of this historic Hudson Square town-home came to an end. If you are wondering whether we tried the wine? After notifying the owner we agreed to open one of the jugs and try them together – nothing but vinegar.
PHASE 3: BUILD
One of the challenges in a renovation project of this scope is nailing down the logistics and delivery of fixtures and finish material. Adding to this challenge was a narrow entry door that required us to use a boom truck in order to deliver some of the larger materials on site. To ensure a succinct time schedule, we boomed all of the materials through the 3rd floor for the entire project and worked our renovation work from top floor to cellar. This technique also insured that any unexpected water issues during the renovation process would not damage a finished floor.
With all roughing and framing complete, the Gallery KBNY team proceeded to execute on the design plan.
THE REVEAL
From what was once a dilapidated town-home with nothing but potential, to a glamorous and luxurious modern interior space – the prohibition house was complete. Ready to speak with us about your renovation project? Contact us to schedule your free consultation and let Gallery KBNY show you why our all-inclusive approach to your renovation is the smartest way to renovating in NYC.
 Adeline Ray Design Studio
Photography by:
Moments on Film: Photography by Clint
Powder room - small transitional ceramic tile powder room idea in Houston with an undermount sink, white cabinets, marble countertops, a one-piece toilet, flat-panel cabinets and beige walls
Powder room - small transitional ceramic tile powder room idea in Houston with an undermount sink, white cabinets, marble countertops, a one-piece toilet, flat-panel cabinets and beige walls

 Tile Doctor Ltd
This customer from the historic city of Cardiff was keen to see what Tile Doctor could do to put some life back into their treasured Limestone kitchen floor that was laid in 2008. My first observations were mainly centred on the horrific condition of the surface which although adequately sealed initially the floor had not received any subsequent maintenance and its condition had deteriorated over time. The light shining in from the patio doors highlighted all the imperfections in the floor caused by surface wear and tear commonly seen in high traffic areas such as a kitchen.
Upon closer inspection, there were further problems: the floor was stained and scuffed, and in most places the sealer had worn off completely allowing the dirt to become ingrained into the pores of the Limestone. Additionally the grout was recessed but was now flush with the tile surface due to dirt build-up. There were also areas contaminated with grease and kitchen cooking oil.
The Limestone floor tiles were 20mm thick French Limestone, and had been laid very well so there was no requirement to do any tile or grout repairs however to get this floor back to its original condition the surface would need to be reconditioned using the Tile Doctor four stage burnishing system.
I started by giving the floor a wash with a medium dilution of Tile Doctor Pro-Clean, focusing mainly on the grout lines in order to remove the muck that had built-up there. I used a special stiff grout brush for this activity; it’s quite narrow and ideal for grout scrubbing.
This worked well, but the significant build-up of dirt along some of the grout lines meant more work was required. I tackled this problem with a hand scraper assisted with steam. At the end of this process, the whole floor was then rinsed down with water to remove any soil and the resulting slurry was then extracted using a wet vacuum.
The next step was to start the burnishing process, which basically involves applying four diamond encrusted floor pads in sequence over the floor. Each pad is a different grade, starting with the most abrasive coarse pad and moving through to the finer grades using a little water to lubricate and rinsing away any slurry between each pad.
I eventually finished with the extra fine pad which builds up shine and lustre on the tile; it had taken two days to clean the grout and burnish the Limestone but the floor was much improved and so after a final rinse down I left the floor to dry off overnight with the aid of the underfloor heating.
During this time, I also addressed the stained Limestone in the area of the kitchen where the dustbin was situated. This had been a major upset for the customer and I’m happy to report I managed to deal with it. However, it was quite an involved process, so I’ll write about this in a separate post.
On the third day I came back to seal the floor, checking first that it had dried sufficiently with a damp meter. Fortunately, the underfloor heating had done a great job of drying the stone and I was able to seal the floor using three coats of Tile Doctor Colour Grow sealant. This sealant not only provides a durable seal but also penetrates deep into the pores of the stone protecting it from within and enhancing the natural colours of the Limestone in the process.
After the final layer of sealant, I worked over the floor again with the extra fine burnishing pad both to add shine again following sealing, and to ensure that no smear marks were visible as the lighting conditions were unforgiving and highlighted any imperfections.
The customer was delighted with the results: so much so, in fact, that they booked me in to restore their Victorian hallway floor as well but that’s a story for another time!
Julian Iancono
SE Wales Tile Doctor

 Jon Allen Fine Metal Art
'Escape' challenges you. It dares you to not accept the status quo. It dares you to wonder, to want. It dares you to ask, to think. It is a conversation piece. It's a companion. It's an inspiration. It's just what you needed. It's like nothing you've ever seen. It is all of this and so much more.
Number of Pieces: 1
Dimensions: 48" W x 24" L x 1.5" off the wall
Care & Cleaning: Clean with a soft cloth and plain soap & water
Other Features: Hardware is pre-installed for simple hanging and this piece of original artwork is signed
 The Artists Hands - Faux Finishes
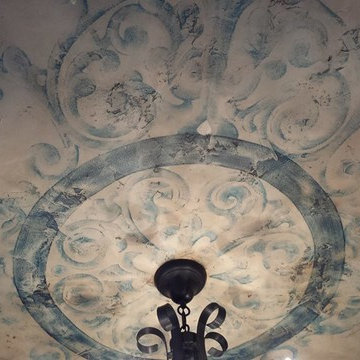
Hand painted ceiling distressed into a glazed textured finish. Copyright © 2016 The Artists Hands
Eat-in kitchen - mid-sized mediterranean u-shaped terra-cotta tile eat-in kitchen idea in Houston with flat-panel cabinets, white cabinets, an undermount sink, granite countertops, white backsplash, porcelain backsplash and stainless steel appliances
Eat-in kitchen - mid-sized mediterranean u-shaped terra-cotta tile eat-in kitchen idea in Houston with flat-panel cabinets, white cabinets, an undermount sink, granite countertops, white backsplash, porcelain backsplash and stainless steel appliances
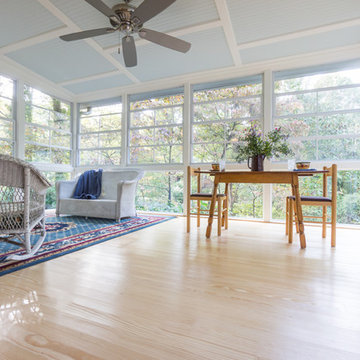
 Paradise Found Construction
The homes in Heritage Hills in Chapel Hill, NC are representative of the popularity and explosive growth of American Home Ownership that occurred during the economic expansion that followed the end of WW II. They were designed and built to foster the benefits and sense of “community”, where families could come together and share theirs and their children’s lives. They are typically in very desirable locations within their larger communities, and remodeling them with modern amenities, increasing the performance and efficiency of them, and having them Green Certified (independent third-party verified) makes them extremely attractive to buyers, and helps to raise other property values within the neighborhood.
Green Certified Remodeled Homes offer significant value and advantage in the marketplace over similar homes in their area, which is especially important as a new, younger era of home buyers enter the market. Current trends suggest that younger (as well as many “seasoned”) homeowners are interested in smaller, more efficient (and thus affordable) homes situated closer to shopping, their work, entertainment opportunities, and access to the economic and environmental benefits of mass transit.
These older homes also offer an additional value that is continuing to gain visibility and appreciation in the market place. They were built from lumber from slower-growth trees (denser and harder wood), and as such offer superior structural support compared to the same home built using lumber from today’s faster-growing (softer and less-dense wood) trees.
Robin and Kent had lived in their 2-story Gambrel Roof home in Heritage Hills since 1994. The house was structurally sound, due in large part to the old-growth (and denser) yellow pine that was used in its framing. They loved the quiet neighborhood, its sense of community and amenities, and their home. It suited their life-style and needs; and they had decided that they would remain in the home. It was showing its age, and was in need of general repairs and maintenance, and its energy, water, and indoor air quality performance was continuing to increase their ongoing cost of ownership.
Robin loved the screen porch that looked out on their private and nicely landscaped back yard, but she wanted to be able to use it in the colder months of the year. She was unsatisfied with the kitchen and the mud room / laundry room, and the darkness of other living spaces. A previous water leak in the laundry room had resulted in a large patch of mold that had compromised flooring, wall board, and insulation and contributed to the homes reduced indoor air quality.
The home lacked insulation in the crawl, and inadequate insulation in the attic. The single HVAC unit had been replaced a few years earlier with a more efficient unit, but with a single programmable thermostat control on the first floor and aging and un-insulated ducting, the second floor was often over-heated in the summer months.
The original wood windows had begun to deteriorate and were drafty and inefficient, and the original wood-burning fireplace was an open conduit for escaping conditioned air as well as an inlet for wood-smoke smelling air being pulled into the home. The siding had been replaced a few years earlier with a cement-fiber product, but the exterior wood trim was compromised and beginning to look unsightly. Its original architecture had been altered over the years in ways that presented ongoing maintenance and durability issues, as well as disrupting the elegance of the original design.
Kent has worked for over 30 years in the Environmental Sciences field, and is considered to be a national expert in understanding the sources of, and human exposure to pollutants in indoor environments. He had always been very conscious and cautious about the effects on indoor air quality that the construction, furnishings, and products used in home had on him and his family.
Project Goals
Increase the performance of their home by improving energy efficiency by at least 40% and lowering their natural gas and electric utility costs.
Increase the performance of their home by reducing water usage by at least 40% and lowering the water utility costs.
Increase the comfort of their home that was being compromised by an inadequate HVAC design, inadequate insulation, inefficient and compromised wood windows, and copious air intrusions and drafts.
Improve the healthiness of the homes indoor air quality that was being compromised by an open wood-burning fireplace, and prior water intrusion that had allowed colonies of mold to thrive.
Create a new Kitchen, Family Room, Home Office, Mudroom, and Laundry Room that featured some of the latest designs and trends and harmonized with the rest of the homes charm.
Increase the usefulness and aesthetics of the screened porch by creating a warm and inviting semi-conditioned 3-Season Room that extended the times during the year that it was comfortable.
Introduce day-lighting into areas of the home that were dark and uninviting.
Brighten and harmonize all of the interior finishes.
Protect and restore the exterior of the home with superior-performing products and finishes.
Achieve Gold Level Green Home Certification in conformance with the ICC 700-2012 National Green Building Standards (NGBS).
47