
Search results for "Difficulties" in Home Design Ideas
 RAJ Kitchen and Bath, LLC
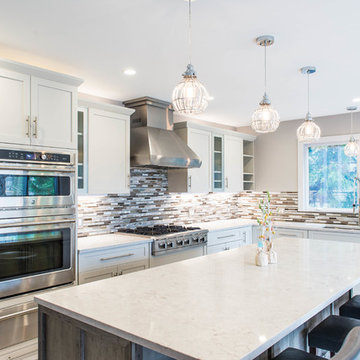
There were a few difficulties in making this kitchen any better than how it was. There was a separate staircase that had access to the second floor which was located in the kitchen. This left just enough room to push the dining room to one side. Then, there was the porch. A really nice panoramic view of the back, but was somehow under-used by the family during the summer months. Then, it was the size of the kitchen. It simply was way too small for a growing family, and while it had a peninsular in place, the flow just didn’t work. I remember watching them one day demonstrating how awkward it was using the kitchen. We got it! We had our marching orders to go and figure out how to make this kitchen work for this family.
Everything in the room was fair play. The design was done to make the kitchen very open. For a few ideas, we incorporated the porch in the kitchen by using the nana wall idea but it ended up being too cost prohibitive to do so. We then decided to do a permanent fix by using a commercial glass wall application. Once we figured that out, we moved back inside and removed the staircase. This gave us two added benefits. One allowed us to really reconfigure the kitchen and the other opened up the second floor for a huge built in closet system.
We relocated the windows, added a fire place with a built In TV above. From there, it was onto the kitchen itself which contained a huge Island with seating, large kitchen sink and built in appliances which was set up in a way to take advantage of the new layout. We re-positioned the kitchen facing the beautiful views outside rather than looking towards a wall. Now, when you enter the house up the entry stairs, the kitchen now draws you into the magnificent new open space. This is now setup for entertaining, relaxation, hanging out and most of all, preparing meals in a room where you only have to leave if you want to.
This one was all about the design. Design was what made this space. Setting this space up for success was crucial, and this kitchen is a great example of how design can cover a multitude of sins in Kitchen designs.
… Just close your eyes for a second and imagine waking up one winter morning and having a cup of coffee and watching the snow fall through those huge windows, leaning up against those 3D feature walls while watching the kids sitting around the table enjoying those warm radiant heated floors in this spacious kitchen…..
 Design Builders, Inc.
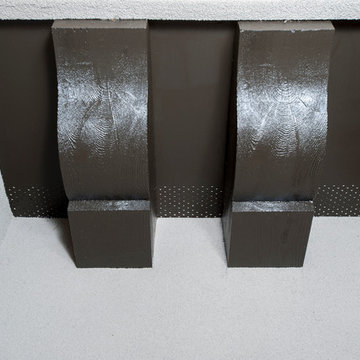
Connecting to the home with minimal difficulty and modifications to the original home's design.
Inspiration for a contemporary home design remodel in DC Metro
Inspiration for a contemporary home design remodel in DC Metro
 G. Christianson Construction, Inc.
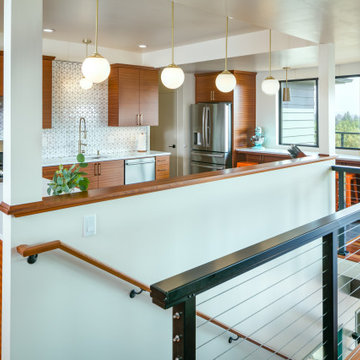
These clients fell in love with this home immediately when they saw it on the market, and quickly made the offer. From the unique lighting, retro architectural details, and view of the cascades, this home was full of potential to be remodeled to fit the lifestyle and personality of it’s new owners. Through the design process, we identified the aspects of the home that these owners loved, such as the Living Room soffit, grasscloth wallpaper, floating staircase and outdoor-feel basement. We then pinpointed the difficulties that the floor plan and materials presented for their lifestyle, such as the closed-off/compartmentalized floor plan, shag carpet in the living room, outdated finishes, lack of wood, and a newer kitchen that was an outlier within the style of the house. The finished product is a magazine-worthy transformation that thoughtfully unifies the owner’s personal style and the home’s retro roots.
Find the right local pro for your project
 Fish Creek Finish Carpentry
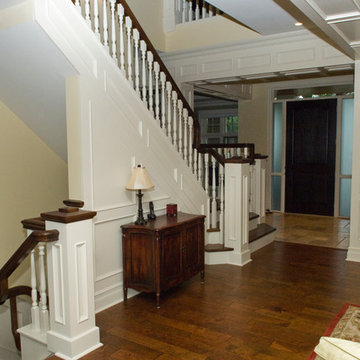
These homeowners came to us through a recommendation from a client who was extremely happy with the work we did for them in the past. This project was in the inner city and the homeowners tore down their old house and built their new home in its place. Keeping with the charm of the original home, the main goal for the home was to make it look like a brand new 100 year old home. We were brought on to work on the entire home with the exception of the kitchen (entry, family room, ceiling work, office/ den, living room, fireplace, window trims, 5 bedrooms, and 4 bathrooms).
In addition to our custom woodworking, these homeowners leaned heavily on our design suggestions. From an execution standpoint, this home was extremely detailed, and getting the balance from room to room and throughout the entire home was crucial for achieving the correct look. In addition, the methods and materials used 100 years ago have since had drastic improvements, making the lifetime and quality of the finished product substantially better, but also adding a higher degree of difficulty to accomplish accurate looking details.
The end result of this project was a work of art. A home that thad the appearance of a 100 year old home, with modern materials and methods to ensure quality and longevity. Everything from their dramatic entry and staircase to their floor-to-ceiling hand-finished den showcases a skill set and eye for detail essential to accomplishing the lofty goals of this home.
 Lennox Masonry
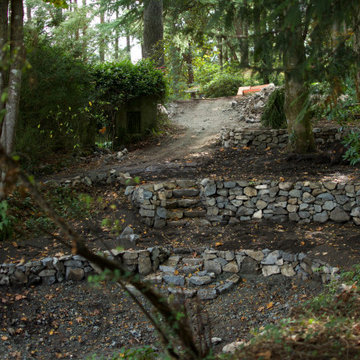
This project entailed the draining of a 200,000 cubic foot pond which was originally constructed in the early 1900s in order to install a water feature. I had previously dammed the lower pond, which was roughly equivalent in size to the upper pond, with stonework to match the existing stone walkways. The lower pond will be utilized as a catch-basin in an effort to keep the upper pond’s water level at a sufficient height through a pump system.
After the removal of over a 100 years worth of sediment, I began constructing several terraces, stone steps, stone walkways, and several stone retaining walls — all stone features were built without the use of mortar so as to allow plant growth, such as vines and flowering plants to grow through the stonework.
The difficulty I faced, oddly enough, was trying to be as random as possible with the placement of the stones, so as to make the stonework appear as though it had been built alongside some of the pre-existing 100-year-old stone walls scattered across other areas of the property. In essence, I forced myself to leave larger gaps in between stones where I typically wouldn’t, as well as leave some stones protruding from the wall, and allowing the wall to slightly fluctuate in height. All of which required me to become a perfectionist of randomness, which was quite trying of me.
The top 2 feet of the 2,000-foot upper pond was then faced and retained with stone.
 RAJ Kitchen and Bath, LLC
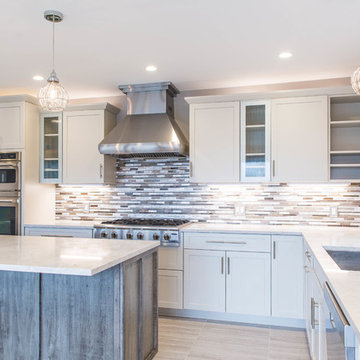
There were a few difficulties in making this kitchen any better than how it was. There was a separate staircase that had access to the second floor which was located in the kitchen. This left just enough room to push the dining room to one side. Then, there was the porch. A really nice panoramic view of the back, but was somehow under-used by the family during the summer months. Then, it was the size of the kitchen. It simply was way too small for a growing family, and while it had a peninsular in place, the flow just didn’t work. I remember watching them one day demonstrating how awkward it was using the kitchen. We got it! We had our marching orders to go and figure out how to make this kitchen work for this family.
Everything in the room was fair play. The design was done to make the kitchen very open. For a few ideas, we incorporated the porch in the kitchen by using the nana wall idea but it ended up being too cost prohibitive to do so. We then decided to do a permanent fix by using a commercial glass wall application. Once we figured that out, we moved back inside and removed the staircase. This gave us two added benefits. One allowed us to really reconfigure the kitchen and the other opened up the second floor for a huge built in closet system.
We relocated the windows, added a fire place with a built In TV above. From there, it was onto the kitchen itself which contained a huge Island with seating, large kitchen sink and built in appliances which was set up in a way to take advantage of the new layout. We re-positioned the kitchen facing the beautiful views outside rather than looking towards a wall. Now, when you enter the house up the entry stairs, the kitchen now draws you into the magnificent new open space. This is now setup for entertaining, relaxation, hanging out and most of all, preparing meals in a room where you only have to leave if you want to.
This one was all about the design. Design was what made this space. Setting this space up for success was crucial, and this kitchen is a great example of how design can cover a multitude of sins in Kitchen designs.
… Just close your eyes for a second and imagine waking up one winter morning and having a cup of coffee and watching the snow fall through those huge windows, leaning up against those 3D feature walls while watching the kids sitting around the table enjoying those warm radiant heated floors in this spacious kitchen…..

 AS Hanging Display Systems
 Hanging systems offer a great way to address the difficulties of mounting to beautiful exposed brick walls while avoiding damage to them as well. To mount a wall hanging or artwork on brick you can use one of our several rail systems, which come equipped with mounting hardware to ensure the hanging remains secure.
 Beahm & Son, Ltd.
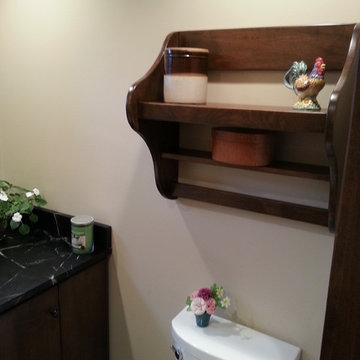
We were lucky enough to have the opportunity to help an older couple in our local community. They approached us with a project that they thought would be impossible. Turn a 6x6 first floor pantry into a fully functioning bathroom. Normally this space limitation would not be a problem but the plumbing presented a difficulty that already scared away 2 other contractors. We were able to overcome this obstacle with the help of our experienced staff who keep up to date on the newest devices and products in the remodeling industry.
We had a very enjoyable experience designing and remodeling this room. Even with the small space limitations we believe we came up with a very unique and rustic feel for their 1890's farm house. I must end on all the custom wood work that our employees made for this project. From the custom, two-sided, door to the little, wooden, wall shelf we made all of the wooden pieces you see in this project and most of them were unique creations specifically for this job.
 RFK Kitchens
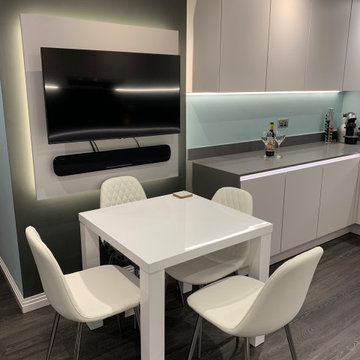
All the way through the design, planning and installation, we felt very comfortable with the team at RFK, especially with the added challenges and difficulties caused by the pandemic. The final result is we now have a fantastic and stunning new kitchen that is exactly what we imagined and hoped.
MALCOM & MICHELE
 Randy Angell Designs
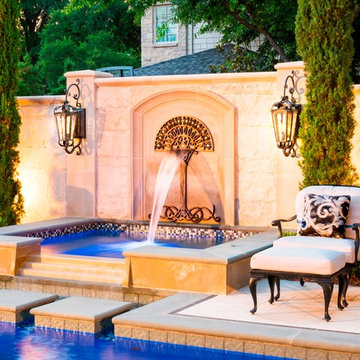
Our clients wish list was fairly simple: a small, traditional pool with a raised spa. They wanted enough deck space for light entertaining around the pool, but due to their generous covered veranda, they did not require much more than that. Oh--and a little yard space for the dog!
The entire design was really driven by a very strong central sight line through the house, all the way from the front door. Using this as the center-line for the pool, we pushed the pool as far toward the rear property line as code would allow and then created the main focal feature of the project: a seven-foot-tall limestone and cast stone wall, with a laser-cut steel sculpture, created the project designer. The cast stone columns and center arch echo the architecture of the home and create the perfect backdrop for the raised spa. The same wrought-iron gas lanterns used at the front entry of the home are repeated on columns here.
The color palette is subtle and classic, much like the interior of the home and the decor within the grand veranda directly adjacent the pool. 18"x30" blocks of limestone were used to create the wall at the rear of the property, and harmonizing with the veneer on the home. The pool is finished with Pennsylvania Premier coping, with a bull-nosed edge, shadowed by a 2" band of black granite. The surrounding decks are Travertine pavers in a 'Versailles' pattern, bordered by a 12" band of Pennsylvania stone. The pool utilizes three different glass tiles for a highly customized style. The glass mosaic on the wet deck and in the spa is a custom blend created by the homeowner and the designer. A grey/green Diamondbrite interior finish completes the soft hues that make this project aesthetically soothing to the eye.
The homeowner had been through 4 different home builders during the construction of their dream home. Understandably, when it came to the pool, they wanted to be certain they didn't go through the same difficulties and sought out a company with the reputation and the creativity that would exceed their expectations. After seeing our detailed design study for their admittedly "compact space", they knew they had found just the right company.
 Pacific Garden Design
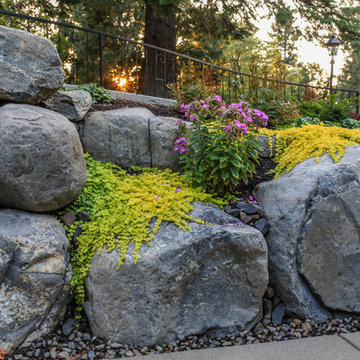
With a narrow driveway and leaning concrete retaining walls, parking was a major challenge at this 1938 brick Tudor on Spokane's South Hill. Crumbling concrete stairs added another layer of difficulty, and after a particularly rough winter, the homeowners were ready for a change. The failing concrete walls were replaced with stacked boulders, which created space for a new, wider driveway. Natural stone steps offer access to the backyard, while the new front stairs and sidewalk provide a safe route to the front door. The original iron railings were preserved and modified to be reused with the new stairs.
 The Nelson Team
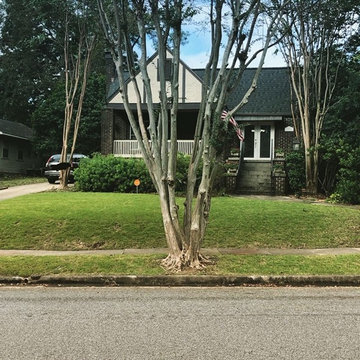
Before picture to demonstrate difficulty of slope to maintain
This is an example of a traditional partial sun retaining wall landscape in Birmingham.
This is an example of a traditional partial sun retaining wall landscape in Birmingham.
 Pennsylvania Landscape & Nursery Association
u2014 ALE: Wayne Rain Garden
Pennsylvania Landscape & Nursery Association
u2014 ALE: Wayne Rain Garden
Terren Landscapes http://www.terrenlandscapes.com
2014 PLNA Awards for Landscape Excellence winner
Category: Residential Up to $15,000
Award Level: Gold
Project Description:
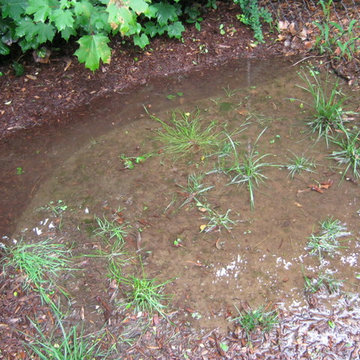
Our company was contracted by the client to provide a creative solution to an ongoing drainage problem. Their property is located within 30 feet of a local stream that collects storm water from the surrounding area. The nearby stream and high water table caused the lawn area at the side of their home to flood and to remain waterlogged for a few days after each storm. The client not only had difficulty growing plants in the existing conditions, but also had a problem with mosquitoes due to standing water.
Our goal was to design a self-contained, naturalistic rain garden that slowed storm water runoff, allowed for percolation, and promoted infiltration while permitting excess clean water to enter the nearby stream with diminished force. As designed, the rain garden allows the earth to slowly and more naturally
absorb excess storm water while filtering out toxins such as excess nitrogen and phosphorous which are frequently found in the landscape, therefore reducing the contaminants entering the stream.
A percolation test was conducted with criteria of absorbing a one-inch rainstorm within four hours without overflow. The one-inch storm calculation included an existing downspout from the home, which would be piped into the rain garden to reduce roof runoff. The first test failed due to a deep layer of high clay-content soil. Excavation continued until a layer of sandy loam was reached, the percolation test was repeated, and a successful test result was achieved. Next, the entire rain garden basin was excavated to the sandy loam layer and the soil amended with compost and sand to create a highly porous planting media.
Geotextile fabric was placed to help reduce migration of the surface stone into the soil and allow for minimal maintenance. Gravel, river stone and small boulders were carefully placed to achieve the look of a natural streambed.
A palette of mostly native plants with a few non-invasive ornamentals were chosen for their ability to survive in extreme conditions ranging from floods to drought and were placed according to their specific preferences.
Wetland plants were chosen for the lowest portion of the rain garden as that area remains saturated for longer periods of time, with a Chionanthus virginicus as a focal point surrounded by irises and ferns at the lowest depth.
Plants tolerant of drier conditions were chosen for the upper edges of the garden. The beautiful colors of Monarda, Ligularia, Eupatorium, Solidago, Chelone, and Rudbeckia were scattered within the upper edge, while movement and softness were incorporated by use of the graceful Nassella that lines the border. Finally, winter interest was provided with a backdrop of Cornus sericea.
As built, this small rain garden creates tremendous impact by decreasing the amount of storm water runoff not only on our client's property, but also in the neighboring stream. It serves as a means of slowing the water and providing an area for infiltration back into the earth. The plants provide a habitat for birds, butterflies, and insects, working in harmony with nature and providing beautiful visual interest year-round.
Photo Credit:
Lisa C. Falls
 RAJ Kitchen and Bath, LLC
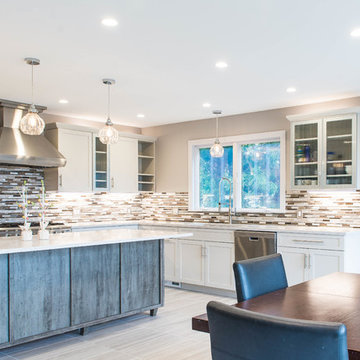
There were a few difficulties in making this kitchen any better than how it was. There was a separate staircase that had access to the second floor which was located in the kitchen. This left just enough room to push the dining room to one side. Then, there was the porch. A really nice panoramic view of the back, but was somehow under-used by the family during the summer months. Then, it was the size of the kitchen. It simply was way too small for a growing family, and while it had a peninsular in place, the flow just didn’t work. I remember watching them one day demonstrating how awkward it was using the kitchen. We got it! We had our marching orders to go and figure out how to make this kitchen work for this family.
Everything in the room was fair play. The design was done to make the kitchen very open. For a few ideas, we incorporated the porch in the kitchen by using the nana wall idea but it ended up being too cost prohibitive to do so. We then decided to do a permanent fix by using a commercial glass wall application. Once we figured that out, we moved back inside and removed the staircase. This gave us two added benefits. One allowed us to really reconfigure the kitchen and the other opened up the second floor for a huge built in closet system.
We relocated the windows, added a fire place with a built In TV above. From there, it was onto the kitchen itself which contained a huge Island with seating, large kitchen sink and built in appliances which was set up in a way to take advantage of the new layout. We re-positioned the kitchen facing the beautiful views outside rather than looking towards a wall. Now, when you enter the house up the entry stairs, the kitchen now draws you into the magnificent new open space. This is now setup for entertaining, relaxation, hanging out and most of all, preparing meals in a room where you only have to leave if you want to.
This one was all about the design. Design was what made this space. Setting this space up for success was crucial, and this kitchen is a great example of how design can cover a multitude of sins in Kitchen designs.
… Just close your eyes for a second and imagine waking up one winter morning and having a cup of coffee and watching the snow fall through those huge windows, leaning up against those 3D feature walls while watching the kids sitting around the table enjoying those warm radiant heated floors in this spacious kitchen…..
 Slimstone - Cortile Germany
CORTILE CONCRETE TILES
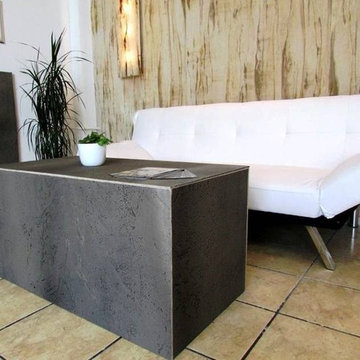
Introducing Cortile Surfaces, a new generation of surfacing materials. Thin, lightweight, and flexible, Cortile veneers can transform ordinary surfaces with the look and feel of stone with less difficulty, expense and weight than traditional stonework. Available in Concrete, Rust, Sandstone and Slate, learn how to interpret these materials in a whole new way.
Joining the characteristics of stone with the versatility of a veneer, Cortile can be used for many different applications and substrates. Thin, flexible sheets between 1-3mm thick and weighing only 7-11 ounces per square foot are created through an innovative hand-crafted process. The flexibility and lightweight nature of this environmentally-friendly product opens up architectural opportunities that would be impractical, impossible, or cost-prohibitive to replicate with traditional stone.
 Granit Architects + Interiors
The brief:
Our clients own an apartment in a mansion block overlooking Clapham Common. They wanted to modernise and bring the apartment up to date and had a few goals:
To change the existing small cellular spaces in the apartment to create a new open-plan room
To extend into the loft and create a new master bedroom suite
To create a roof terrace for some much-needed private outdoor space
The key to the brief was to ensure a good connection between the different levels of the apartment and ensure natural light could flood into all spaces. The apartment is in a conservation area, which was an important consideration.
The solution:
We changed the primary room space to run from the front to the back of the building. This change created the large kitchen dining living space our clients wanted, an area with good natural light throughout and at all times of the day.
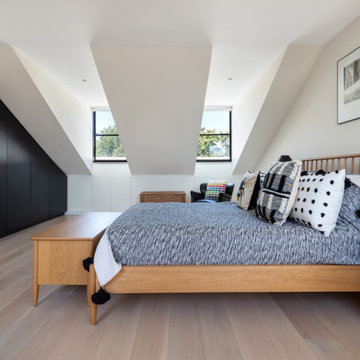
We created a master bedroom suite in the loft space, with generous room size and lots of natural light.
The limitations of the building’s form meant that a critical aspect to creating these larger living spaces was carefully considered smaller areas, including the bathrooms and a pocket utility room. The circulation space was carefully considered, too, with the landings used for storage in the form of new joinery.
The stairs were vital in the design. Creating an in-between/half level meant we made the most of the flat roof extension for a bedroom suite and terrace. It also helped natural light get into the centre of the apartment, creating a clear connection between the different floors.
The stairs also help to mark the difference between the existing and the new. We shifted the design from a minimalist take on traditional metal balustraded stairs to open tread steel stairs with a glazed balustrade.
Externally, we kept the design quite simple and in keeping with the context. By adding dormers to the front and back, we created a sculptural and fun loft space.
The result:
A spacious, light and luxurious apartment for our clients Gareth and Mary in a Clapham Common Conservation area.
We asked about their experience with Granit, and we are pleased with their response:
Our experience overall is very good, even with the unexpected difficulties created by Covid.
If you are thinking of appointing an architect and interior design firm, Granit should be seriously considered.
 Lennox Masonry
This project entailed the draining of a 200,000 cubic foot pond which was originally constructed in the early 1900s in order to install a water feature. I had previously dammed the lower pond, which was roughly equivalent in size to the upper pond, with stonework to match the existing stone walkways. The lower pond will be utilized as a catch-basin in an effort to keep the upper pond’s water level at a sufficient height through a pump system.
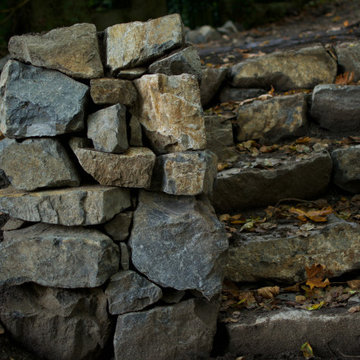
After the removal of over a 100 years worth of sediment, I began constructing several terraces, stone steps, stone walkways, and several stone retaining walls — all stone features were built without the use of mortar so as to allow plant growth, such as vines and flowering plants to grow through the stonework.
The difficulty I faced, oddly enough, was trying to be as random as possible with the placement of the stones, so as to make the stonework appear as though it had been built alongside some of the pre-existing 100-year-old stone walls scattered across other areas of the property. In essence, I forced myself to leave larger gaps in between stones where I typically wouldn’t, as well as leave some stones protruding from the wall, and allowing the wall to slightly fluctuate in height. All of which required me to become a perfectionist of randomness, which was quite trying of me.
The top 2 feet of the 2,000-foot upper pond was then faced and retained with stone.
 Tile Doctor Ltd
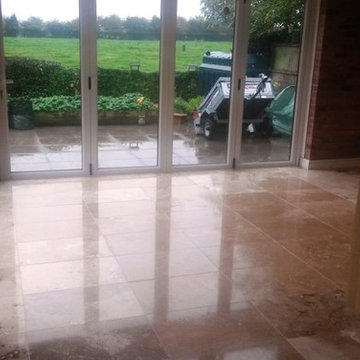
This customer had some real difficulty in getting their fantastic Travertine tiled kitchen area looking as good as it should. The cleaning methods they had previously employed were unable to prevent the tiles from appearing dull, and the customer was also unable to deal with the displeasing marks and small cracks damaging the stone.
Keen to get the floor back to looking its best, the customer called me down to their property, which overlooks the beautiful countryside area of Ashbourne, to see what could be done to restore the tiles.
Upon my arrival at the property, I assessed the situation and resolved that the best way to restore the polish and general appearance of the floor was to use a process known as burnishing. The burnishing process, which involves the application of four diamond encrusted polishing pads of varying grit, works to grind away ingrained dirt while smoothing and polishing rough surfaces. Most commonly we use burnishing to restore the shine to Limestone and Marble tiles, but it can be used on most types of natural stone floor where a deep polish is required.
To start the process, I applied the Coarse 400 grit burnishing pad to the floor using a small amount of water as lubrication in order to break down and remove any old sealer from the stone. Once this had been done across the entirety of the floor, I removed any soiled water with a wet-vac machine; this removal of soiled residue was repeated after each use of a burnishing pad.
Next, I moved on to the Medium 800 grit pad which is less coarse than the 400 grit, but still rough enough still to break down layers of ingrained dirt. I followed this up with the application of a Fine 1500 grit pad, which started to smooth down the rough areas of the surface to prepare the floor for a final polish with an even finer burnishing pad later on. Before moving straight on to the final of the four pads, I took the time to carefully fill in the all of the small cracks and holes in the stone, before leaving the floor to dry until the next day.
The next morning, I returned to the property to finish off the floor restoration. As soon as I arrived I used a damp tester to make sure the floor was completely dry. Noticing a number of small damp spots, I opted to use my heat gun to speed up the drying process.
Once the floor was completely dry, I used the Very Fine 3000 burnishing pad – the last of the four – without any lubricant to finally achieve a high quality polished finish. For polished floors it is recommended to use an impregnating sealer that penetrates into the pores of the stone rather than sitting on the surface of the floor, as this ensures the quality of the polish isn’t damaged.
As such I opted to use Tile Doctor Colour Grow to seal the tiles. This is a colour intensifying sealer that provides durable surface protection and allows the surface to breathe whilst enhancing the natural colours in the stone. It’s important that any sealer that doesn’t penetrate into the stone is removed by polishing it off with a cloth.
After completing the seal, I went over the floor for a final time with the 3000 grit diamond burnishing pad to leave a smooth and shiny polished finish. Needless to say that the customer was very happy with result as they had never before been able to get the floor looking this good!
Tony Olmet
Derbyshire Tile Doctor
 Frankel Design Build
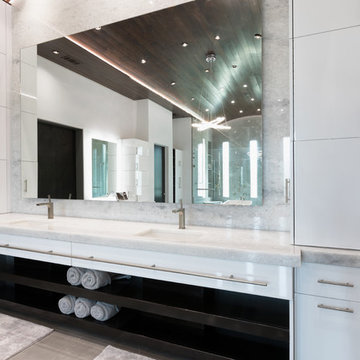
This project, sitting on a little more than 3.5 acres on Rivercrest was completed in 3 years with a total square footage of more than 26,000 square feet.
Typically modern homes are smaller. At a certain size, usually around 4,000 square feet, the difficulty with modern or contemporary architecture becomes scale, and the minimalist idea gets lost. Whenever you get to this scale of house at over 26,000 square feet, this problem adds a layer of complexity.
Connie Anderson Photography
 Frankel Design Build
This project, sitting on a little more than 3.5 acres on Rivercrest was completed in 3 years with a total square footage of more than 26,000 square feet.
Typically modern homes are smaller. At a certain size, usually around 4,000 square feet, the difficulty with modern or contemporary architecture becomes scale, and the minimalist idea gets lost. Whenever you get to this scale of house at over 26,000 square feet, this problem adds a layer of complexity.
Connie Anderson Photography
25