
Search results for "Doctorate" in Home Design Ideas
 Tile Doctor Ltd
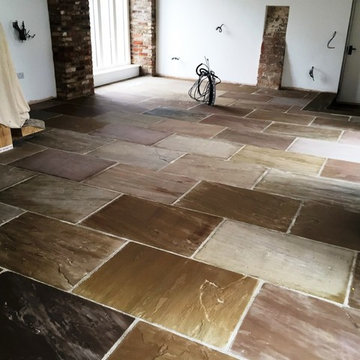
Yorkstone is a variety of Sandstone unique to Yorkshire, and is known for its hard wearing and durable qualities. It was first manufactured during medieval times, but is still used for a range of building and construction purposes including, of course, tiled floors in houses. Yorkstone comes in a variety of natural colours, depending on the mineral makeup of the stone, and means that the tiled floors often have a unique look to them.
This customer, living in the small Yorkshire town of Driffield is the lucky owner of a fantastic new Yorkstone tiled living room floor. Unfortunately, the floor had been installed by an independent builder, as opposed to a professional tiling company, and had been left with no sealer to ensure it would stay looking great for a long time to come. Over time, the lack of a sealer has allowed the dirt to become ingrained in the stone, making it increasingly difficult for the customer to keep the tiles clean. I was called in to bring completion to what was an unfinished job!
As you can see from the photographs, the entire floor was quite dusty and dull looking following the recent installation. To get the tiles clean, I mixed a strong 60-40 mix of Tile Doctor Pro Clean and clean water. Pro Clean is a reliable alkaline cleaner suitable for use on most natural stone floors, including Sandstone, Quarry, and Slate.
The cleaning solution was applied to the floor and left to dwell for 20 minutes, allowing it time to penetrate the stone. Then, using my 17” rotary machine fitted with a black scrubbing pad, I proceeded to deep clean the tiles, leaving them looking immediately cleaner and more vibrant. Any resulting cleaning residue was promptly soaked up using a wet vacuum.
The process was repeated in the more stubborn areas, and I gave the floor a final rinse with water and left it to dry. Typically, we would leave a 12 to 24 hour drying period, depending on whether there is a damp proof membrane installed. However, this floor had underfloor heating and so dried really quickly, allowing me to seal it on the same day.
The customer wished to have a matt, natural finish for the Yorkstone tiled living room, so I applied two coats of Tile Doctor Colour Grow, our impregnating sealer which offers a natural, no-sheen look for textured floors, while providing durable protection against ingrained dirt and stains.
As the name of the product suggests, Colour Grow contains colour intensifying properties which really helped to accentuate the rich variety of colours in the customer’s Yorkstone tiles. The results were fantastic and you can see from the water test we performed after the sealer dried how water now bubbles up on the surface of the stone.
Ronnie Phipps
East Yorkshire Tile Doctor
 Tile Doctor Ltd
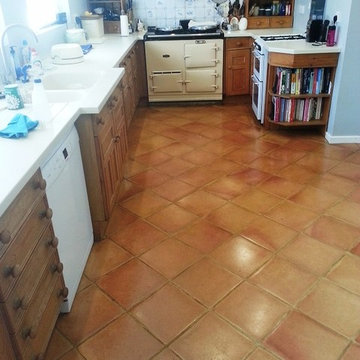
As part of our service we advise customers on best practice for maintaining the appearance of the floor and I’m happy to report this client in Ampthill who has a Terracotta tiled floor that we had fully restored a few years ago had followed to the letter.
Having two dogs and two children, the floor gets a lot of traffic and as expected over a period of time the sealer does wear thin in the busier areas. Should the sealer become too damaged dirt can get underneath and gradually the seal will deteriorate to the point where restoration will be needed again.
By keeping on top of the maintenance our client has kept a beautiful terracotta floor in great condition however as the sealer was wearing he called us back to do a maintenance clean and top up the sealer an activity which we are able to complete in one day rather than the several days needed to do a full restoration.
To maintain the floor, I applied a Tile Doctor fine diamond burnishing pad fitted to a rotary machine and with a little water sprayed onto the tiles to lubricate the process the top was burnished, this took the dirt off the top of the tiles and left a clean surface to top up the seal. The floor was then rinsed to remove the soil generated by the process.
Having removed any damaged sealer an industrial air mover was switched on to get the floor as dry as possible, we then tested the damp levels at various intervals until the floor was dry for re-sealing.
To re-seal two coats of Tile Doctor Seal and Go we applied to the floor allowing the first coat to dry before applying the second. Once the second coat had dried a white polishing pad was used to buff the tiles.
Andrew Evans
Bedfordshire Tile Doctor
 Tile Doctor Ltd
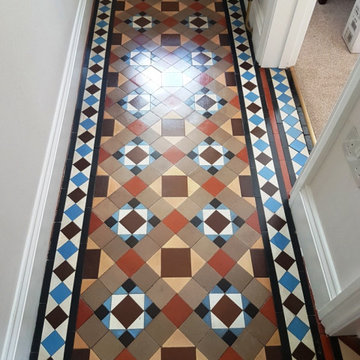
I was contacted by a homeowner who had moved into a property in the small Yorkshire market town of Masham and discovered a Victorian tiled floor under the hallway carpet. Realising this was a valuable period feature he was keen to see if it could be restored. As you can imagine he was delighted when I told him that it should be possible, and he was keen to get it uncovered and back on show.
After discussing the floor on the phone, I visited the property and removed the carpet so we could take a long look at the Victorian tile’s underneath. The carpet had protected the floor well and it was in good physical order, (i.e. no cracks etc.) it was just very dirty but was also marked with paint splashes from some untidy decorating work from the past. I confirmed none of these issues should present a problem and got the go ahead for the work to start.
There was no sealer on the floor, so I started the cleaning process using a medium dilution of Tile Doctor Pro-Clean which was worked into the tiles using a coarse 200-grit pad fitted to a rotary floor buffer. I then used a 400-grit hand-held diamond block to clean the edges which couldn’t be reached by the machine. This also removed the paint splashes which should have been on the skirting boards and not the floor!
The floor was then rinsed with water and the soil extracted with a wet vacuum. I was able to inspect the floor at this stage and spot treat areas that needed more work as they were a little stubborn. It wasn’t a large hallway and except for the paint it only needed a light clean. The result was I was able to complete the cleaning process by lunch time. I dried the floor as much as possible and left an air blower in the space for a couple of hours.
I returned later that afternoon and checked the floor for moisture using a damp meter. The floor was mostly dry, but some areas needed some more help with a heat gun. It was late summer and so still warm and so there was no need on this occasion to leave the floor overnight.
Once I was happy the floor was dry, I started sealing the tiles with the first of four coats of Tile Doctor Seal and Go. This is a specially formulated water-based blend of acrylic polymers that provides both a stain resistant surface seal and a durable low-sheen finish. It is perfect for a floor of this age as it allows moisture vapour to pass through, this is an important feature when considering a sealer for old floors which will not have a damp-proof membrane installed. If you were to apply a non-breathable sealer moisture can get trapped under the floor causing it to spread out to the walls resulting in rising damp.
The combination of the cleaning and new sealer brought the floor back to life and it now looked in keeping with the rest of the property which had numerous other period features. My client was over the moon with the difference and very happy to see the back of the grubby carpet.
Nigel Stoker
North West Yorkshire Tile Doctor
Find the right local pro for your project
 Tile Doctor Ltd
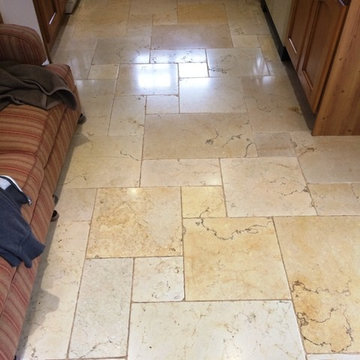
Polished stone floors will lose their shine over time depending on the amount of wear and cleaning products used and this Travertine Tiled Floor in Lower Woodrow had basically experienced this problem. The solution is to burnish the floor with diamond encrusted pads, a process that will remove any dirt and bring back the polish.
We started by smothering the floor is a mild dilution of Tile Doctor Pro-Clean and left it to dwell for ten minutes. We then scrubbed the grout lines using a stiff grout brush to get the grout clean. Next we fitted a course diamond burnishing pad to a rotary machine and slowly burnished each and every tile. We then extracted the slurry using a wet vacuum and rinsed. We continued this procedure with the medium, fine and very fine pads rinsing in-between until the shine had been restored. We then left the floor overnight to dry.
Upon our return we sealed the floor using Tile Doctor Colour Grow which is an impregnating sealer that soaks into he pores of the stone protecting it from within and enhancing the natural colours in the stone. Once the seal had dried I used a white buffing pad attached to the rotary machine and buffed the travertine to a nice shine.
Stuart Ford
Wiltshire Tile Doctor
 Tile Doctor Ltd
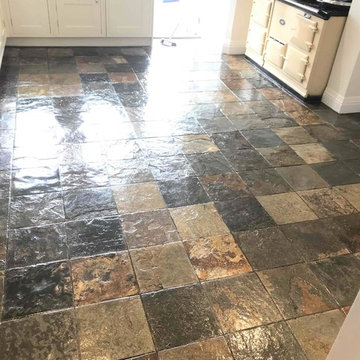
I recently completed the renovation of a Multi-Coloured Slate tiled kitchen floor in Sutton Coldfield. I was actually at the property before Christmas to survey the floor and quote for the work however the owners had planned to have a new kitchen installed in the new year, so we decided it was best for me to wait until after the installation to complete the work.
The slate was in good condition but like any stone floor you do need to maintain the sealer to prevent dirt becoming ingrained in the stone. Sealer do wear off overtime especially in the high foot traffic areas such as Kitchens and within a few years the tiles become dull and difficult to clean effectively.
The kitchen was installed on schedule and I got the call to arrange a visit to deep clean and reseal the floor which would take to two days, one to clean and one to seal.
To begin the restoration, I soaked the slate in a strong dilution of Tile Doctor Pro-Clean and left it to soak in for about ten minutes re-applying extra solution where it dried. Pro-Clean is a powerful tile cleaner that will strip old sealers when applied in concentrated form. I agitated the product using a black pad fitted to a rotary buffing machine. I paid particular attention to the grout which the customer had trouble keeping clean. The rotary pad struggles to reach into the recesses of the grout lines so I also made sure to scrub the solution into the grout with a grout brush.
Once I was satisfied that the Slate and the Grout was clean and clear of old sealers, I gave the whole floor a thorough rinse with water using a wet vacuum to extract the soil and get the floor as dry as possible. The floor was then left to dry off fully overnight.
Returning to the property the next day, I ran some quick damp tests to check for any excess moisture that might have prevented me from sealing the floor. We will always do this as excess moisture can affect the sealer curing.
The customer was very happy with the clean and the floor was dry, so we discussed sealer options to find out their preference for Matt or Satin finish. With the decision made to go with a Satin finish I began the application of the Tile Doctor Seal and Go which enhances the look of the stone with an aesthetically pleasing low-sheen finish, as well as providing on-going protection against ingrained dirt and staining.
A total of four coats of Seal and Go were needed to seal the Slate tiles and as you can see from the photos the sealer really put the life back into the floor.
Trevor Preece
Staffordshire Tile Doctor
 Tile Doctor Ltd
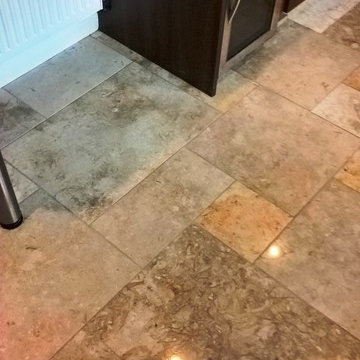
The photographs below are of a Polished limestone floor that had been installed in the Kitchen of a house in Cheltenham approximately eight years prior. The polish and sealer had worn off over that time allowing dirt to become ingrained into the pores of the stone making it difficult to clean.
This is a common problem with all types of porous stone and tile which need to be sealed to maintain their appearance. Sealers do wear down over time with use however and need to be maintained, this is why Tile Doctor have created a maintenance program whereby we pop by every 12 months to give the floor a light clean and top-up the sealer, it only takes a few hours, but it keeps your sealer in good condition.
Cheltenham by the way is a lovely town situated on the edge of the Cotswolds which is an area of Outstanding Natural Beauty. It has a racecourse and is well known for the mineral springs which were discovered here in 1716.
My first job was to protect the wooden kitchen units from any splashes by covering them some cotton sheets. Next, I set about restoring the Limestone’s appearance using a set of Burnishing Pads which is a form of polishing which involves the sequential application of four diamond encrusted pads of different grit levels.
The first pad applied is a Coarse 400 grit pad which is applied to the floor with a buffing machine and lubricated with water. This process grinds away the top layer of dirt and staining from the stone, along with any old sealer, the floor is then rinsed to remove the soil that is generated. I then move through the system, applying the Medium and then Fine pads using less and less water as you go but rinsing in-between and extracting the water with a wet-vac machine.
Once I was happy with the stone I scrubbed the grout lines to remove any soiling that the pads had failed to pick up. The floor was then given a final rinse and the wet vacuum used to extract as much moisture as possible. The floor was then left to dry out completely overnight.
The next day I gave the floor a polish with the Very Fine 3,000 grit diamond burnishing pad, this is applied using a technique we call a “spray burnish” due to the fact that very little water is used during its application.
The next step was to seal the stone using for which I used Tile Doctor Colour Grow which is an impregnating sealer that protects the stone from within by occupying its pores. Colour Grow also has the added benefit of intensifying the natural colours in the stone. The floor was then left to dry for an hour before I gave it one final dry polish using the Very Fine burnishing pad.
My customer was very happy with the final result and made the comment that they thought the floor looked brand new.
Malcolm Crowther
Gloucester Tile Doctor
 Tile Doctor Ltd
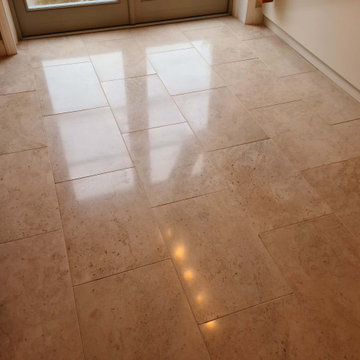
I recently went to survey a floor in Harrogate which I immediately recognised as beige Moleanos Limestone which comes from Portugal. If you have been reading my previous posts you will remember I am not a fan of this type of stone as it is very difficult to clean, polish or seal. This particular floor was laid around 5 years prior and was now looking quite dull and was in need of reviving.
The client didn’t want to spend much so l suggested l could spray burnish the floor to get her shine back again and remove the splash marks. We do this a lot for owners of polished stone floors as part of an annual maintenance package, it is a low cost option that uses a very fine 3,000 grit burnishing pad to renovate the stone and bring up the shine. However, I pointed out to her that this process wouldn’t clean her grout which was making her floor look scruffy.
I priced up the different options and after weighing up the quotes I’m pleased to say she decided to go for a full clean and seal. The full process involves the use of different grades of diamond encrusted burnishing pads from low to very fine grits to renovate the Limestone and also a chemical clean of the grout followed by a fresh seal.
I returned on the scheduled date and after preparing the floor I started cleaning the Limestone by running over the tiles with a 400-grit coarse burnishing pad lubricated with water. The soil was rinsed off with more water and extracted with a wet vacuum. This process was repeated with the 800 and 1500-grit pads which starts to build-up the polish on the stone.
I then turned my attention to the grout with a strong dilution of Tile Doctor Pro-Clean which was left to soak into the grout for ten minutes before scrubbing it by hand with a stiff brush. After a final rinse and extraction with the wet vacuum the tile and grout were looking much cleaner and was left to dry off overnight.
On Day 2 I stated with the application of the 3,000-grit pad which is the last step in the polishing processed and builds up a lovely satin finish on the stone floor. This is done using only a little water and is basically the spray burnish technique I referred to earlier. This process has the added advantage of leaving the floor dry.
With the stone tiles looking lovely and the grout clean the last step was to seal it all in and protect it from dirt and future staining with the application of a sealer. For this I used two coats of Tile Doctor Ultra Seal.
My client was very pleased she had spent the extra money to achieve the floor she had always wanted, apparently it had never looked this good even when new. We discussed the annual maintenance plan to ensure the floor remained looking this good.
Nigel Stoker
North West Yorkshire TIle Doctor
 Tile Doctor Ltd
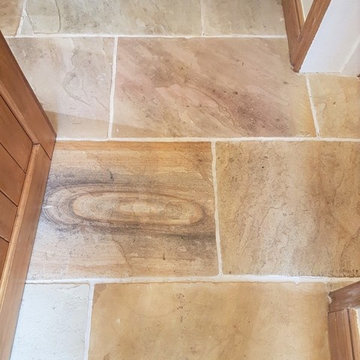
The pictures below are of a multi coloured sandstone floor installed at a property in East Keswick which is a village approximately halfway between Harrogate and Leeds. (Not to be confused with the more famous Keswick in the Lake District)
The stone floor had not been cleaned professionally for ten years and although the grout looked clean It was clear that any sealer that was once present had long since worn off leaving the stone unprotected. The result was dirt had become deeply ingrained in the Sandstone leading causing the stone to darken and hide its true beauty and rich colouring. The client had tried lots of different products to clean the floor but had not had any luck.
I visited the property and carried out a few successful patch tests resulting in the floor becoming much cleaner. They were happy to go ahead with my quote and we arranged a time to return and complete the work.
I prepared the area before starting, taping up the skirting boards and doors to protect them from the splashing that can happen during the intensive cleaning process.
To get the sandstone clean I applied a medium dilution of Tile Doctor Pro-Clean to the floor and allowed it to soak in for ten minutes. The solution was then worked into the Sandstone using a rotary floor machine fitted with a black scrubbing pad. More Pro-Clean was applied with a hand-held scrubbing brush to get deep into the grout lines and to reach into the corners.
Once done the floor was rinsed with water and the soil extracted with a wet vacuum. The floor was inspected, and the process repeated until I was satisfied that the stone and grout had released all the trapped dirt. After a final rinse, the wet vacuum was used to get as much moisture out of the stone as possible and then the floor left to dry out fully overnight.
Returning the following morning, I first checked that the floor was dry using a damp meter. The sealer won’t cure if there is any moisture in the stone and I’ve been known to reschedule sealing a floor if the readings are too high. On this occasion I was satisfied that the floor was within acceptable levels, so I was ready to seal the floor.
I used three coats of Tile Doctor Colour Grow to seal the floor, this is an impregnating sealer which intensifies natural colours whilst providing durable protection against stains, an essential feature in an area such as a hallway which is subject to constant foot traffic.
As you can see from the photos the transformation was quite impressive, the floor became much lighter and almost unrecognisable, the natural colours of the stone were now visible, and the floor looked beautiful. The client was very happy with the end result and has said they would not hesitate to recommend me to others.
Nigel Stoker
North West Yorkshire Tile Doctor
 Tile Doctor Ltd
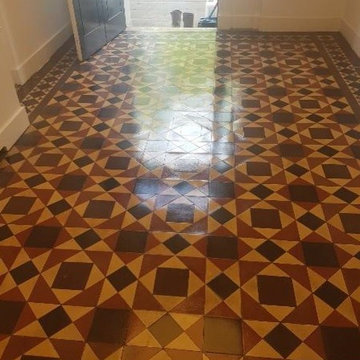
These are photos of a Victorian tiled floor we renovated at the new Scottish head office of the Peoples Postcode Lottery in the centre of Edinburgh City where the building was going through a multi million pound refurbishment. Edinburgh has a lot of Georgian and Victorian architecture, much of which is listed and as a result many still have original Victorian tiled flooring.
I’ve not really looked at the Postcode Lottery until now but put simply you give the lottery £10 a month and your postcode is your winning ticket number, there are prize draws every day and if your postcode comes up every one in the system with that postcode wins; they also give 31% to charity which is impressive.
You can see from the photograph that the floor was in good physical condition but was looking tired and dull. This is not unusual for Victorian tiles as once the sealer wears down dirt can penetrate into the pores of the tile causing it to lose its appearance.
On the first day we set about stripping the floor of what remained of the old sealant using a strong dilution of Tile Doctor Pro-Clean which is an industrial strength alkaline tile and grout cleaning product that is safe to use on Tile and Stone. The product is applied to the floor, left to soak in for ten minutes and the scrubbed into the tile using a black scrubbing pad fitted to a rotary bonnet machine. The floor was then rinsed and the now soiled cleaning solution extracted using a wet vacuum.
The process was repeated several times until we were happy the floor was clean and free of sealer and then given a final rinse with water. Before leaving for the day the floor was dried as much as possible using the wet vacuum to extract as much moisture as possible.
On the second day our first task was to check the floor with a damp meter in several places to ensure the tiles had dried off overnight. All was well and we began the process of sealing the floor with a Tile Doctor Seal and Go. This is a topical sealer which provides a high-quality low-sheen finish and protection against ingrained dirt and stains.
Victorian tiles are quite porous and five coats were needed to fully seal the floor. This took some time to complete as you have to wait until the first coat is dry before applying the next however it was well worth the effort as the floor looked fantastic afterwards.
Thomas Wilson
Edinburgh Tile Doctor
 Tile Doctor Ltd
Shipley is a town in West Yorkshire that was heavily shaped by the Industrial Revolution and the Victorian period. It became particularly well-known for its textile industry and some of the original mills in which textiles were manufactured still survive in the town today. Being in West Yorkshire, Shipley is also part of what is commonly known as ‘Brontë country’ – once home to the famous Brontë sisters.
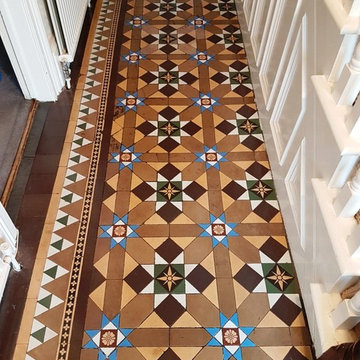
Many Victorian era properties still survive in the area too and all too often the original Victorian tiled floors contained within are not well maintained. I recently visited a customer in Shipley who had a Victorian tiled hallway that was in need of a deep clean and seal. What’s more, the customer told me that there were around 20 loose tiles in the hallway that would need to be reinstalled.
On the first day, I started by refitting the 20 loose tiles in the hallway. The problem however was a lot worse than originally thought and, in the end, I had to take up 108 tiles, so I could rebuild the base of the floor, and then relay them. This process took up most of the day but at least the adhesive and grout would be set in time for cleaning the next day.
On day two I focused on deep cleaning the tiles and removing any remaining sealer by applying a strong dilution of Tile Doctor Pro-Clean. Pro-Clean is a strong alkaline heavy-duty tile and grout cleaner that serves the purpose of both cleaning the stone and when used in a strong dilution will strip off sealers.
I applied the Pro Clean liberally across the length of the hallway and left it to soak into the tiles for about twenty minutes. This allows the product time to breakdown the sealer and dirt before being scrubbed in with a black scrubbing pad.
Special attention had to be paid to parts of the floor which had suffered paint splashes from previous decoration. I was also surprised to find that there were even some chewing gum stains marking the tiles. These were removed using the combination of a steam cleaner, more Pro-Clean and the careful use of a handheld scraper.
The floor was then given a thorough rinse with fresh water and then dried as much as possible with a wet vacuum. It was then also left to dry off overnight.
Upon returning to the property the next day I checked for any moisture issues with a damp tester. Thankfully, the floor proved dry and I could proceed with sealing the tiles which was done using four coats of Tile Doctor Seal and Go that leaves a deep satin finish that the customer had requested.
Nigel Stoker
North West Yorkshire Tile Doctor
 Tile Doctor Ltd
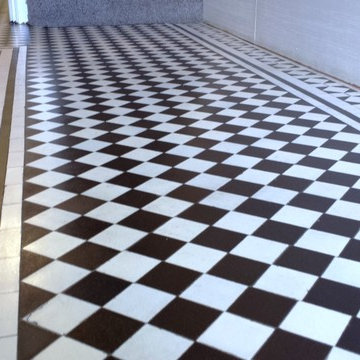
Sometimes you survey a job and you know that if you get the chance to restore it the results will be totally fantastic! This was the case with this Victorian black & white chequer tiled floor in the hallway of a large terraced Victorian house in Cardiff which dated back to around 1900 and was now looking well past its best, I know this because my family used to live in the house opposite. It was a well laid floor with no readings of dampness; I believe it’s imperative you check a floor for dampness before starting so you know what the baseline damp level is and which sealers will work with the floor.
My first action was to hoover the floor and then scrape as much debris off the surface as possible, and then as always I mixed 50/50 Tile Doctor HBU (Heavy Build-Up) remover with Pro-Clean and on this occasion because I wanted the white tiles to become really white I added the same amount of Tile Doctor Grout Clean-Up. This special recipe created a very formidable and strong cleaning solution which is what the job called for. I swept it over the whole floor letting it soak in for about ten minutes and then worked it into the floor using a scrubbing machine fitted with a coarse black pad adding more of the solution to the floor where it was drying out as I went.
The next step was to rinse the floor twice with water and extract the now filthy cleaning solution using a wet vacuum. At this point I inspected the tiles and I could see there were still a few stubborn areas with spots of paint and glue which I addressed with a decorators steam plate together with a scraper and hand held scrubbing pad.
I was now happy that the floor was clean and ready to be sealed, before sealing though it’s important to remove any trace of cleaning solution as it may contaminate the sealer so I gave the floor a thorough rinse and extracted as much of the water as possible to reduce drying times.
I left the floor to dry for 48hrs before coming back to seal the tiles taking a reader on my damp meter first to establish they had indeed dried out. To seal the floor I used eight coats of Tile Doctor Seal & Go which really works well on Victorian tiles and in this case made the whites really stand out.
The customer wanted this floor to look good because they were selling the property and were due to have an open day. The clean tiles really gave the house the wow factor and period features are so desirable these days so I don’t think it will take long to sell.
 Tile Doctor Ltd
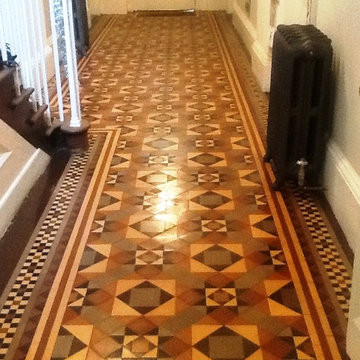
This hallway floor was actually at a house in the town of Stamford which is just over the northern border of Northamptonshire and slightly out of my area; however I was recommended to the owner by another client which is always welcome and a testimonial in itself. I work right across the county so it wasn’t long before I was in the general area and arranged a visit to carry out an inspection of the Victorian Quarry tiled floor and provide a quote for a full restoration.
The owner of the house had just moved in recently and although the floor was in good overall physical, it was in need of a thorough clean and new seal to bring back some life to the tiles. Additionally she was having lots of other building work done to the house and she wanted to retain this as an original feature of the property. My quote was accepted and I was able to book the work in for the following week.
These first photos show how dull the floor looked due to a build-up of builder’s dust and general wear and tear. They also show some of the equipment needed to undertake the following cleaning process.
I used a brush and vacuum to remove as much loose debris and dust from the surface of the floor as possible. I then applied a strong dilution of Tile Doctor Pro Clean to the floor which is a strong alkaline cleaner which can also be used to remove sealers; the solution was left it to dwell for roughly ten minutes before agitating it with scrubbing pads and brushes to remove the muck that was lifted to the surface. This was then wet-vacuumed twice to remove all the slurry and neutralise any chemicals.
As it was such an old property I then used a steamer to heat up the tiles and draw up any contaminants and assist with the drying process. I also chose to install two fans and a dehumidifier to dry the floor even further.
With the cleaning process complete – and achieving a marked difference to the appearance of the floor – I left the tiles to finish drying for 24 hours.
Upon my return to the house, I checked for any excess moisture by running damp tests as this has the potential to affect the performance of the sealer. Once satisfied with the results, I sealed the floor with two coats of Tile Doctor Colour Grow, a colour enhancing sealant which offers both a robust surface seal and an aesthetically pleasing finish.
I also carried out water repellency tests to ensure the sealer was working as expected and the floor had sufficient protection and will be hard-wearing for a hallway which is a high traffic area.
On my client’s return to the house she was very happy with the final results – in fact, she was also in contact about some further work in the New Year!
Phil Vissian
Northamptonshire Tile Doctor
 Tile Doctor Ltd
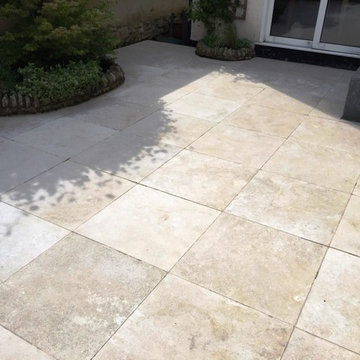
This was a job I did earlier in May this year where I was asked to clean this lovely Limestone patio installed at the rear of a house in Haddenham near Thame on the Oxfordshore borders which had succumbed to the ravages of the English winter weather and was far from looking its best.
As a Tile Doctor and carpet technician I have invested a lot in powerful high pressure machinery that can make light work of interior and exterior installations so taking on this patio was not a problem and it was nice to work outside for a change.
On arrival I set-up the high pressure equipment and then proceeded to pressure wash the patio in order to get the worst of the dirt out of the tile. Then I soaked the tiles in a strong dilution of Tile Doctor Pro-Clean which was left to dwell for thirty minutes. The next process was to use a deck brush to scrub the cleaner into the stubborn areas and then rinse the patio with clean water which was then removed using a wet vacuum. After letting it dry I then had to re clean the worst areas again following the same process until I was satisfied with the condition of the tile.
The patio soon dried in the warm sun and later that day I was able to seal it using a couple of coats of Tile Doctor Colour Grow which is a colour enhancing impregnating sealer that can be used internally and externally, it works really on Limestone and did well to bring out the natural colours in the stone.
 Tile Doctor Ltd
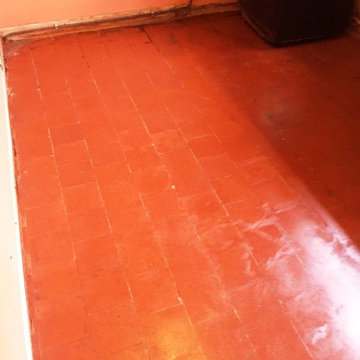
It’s been my experience that it’s not un-common to discover fantastic tiled floors hidden underneath an additional layer of flooring usually carpet or linoleum. This was the case with this property, situated in the town of Canley, Coventry, where the owner had found a Quarry tiled floor underneath Vinyl tiles which had been stuck down using an adhesive.
Quarry tiles are typically hard wearing and very durable and a sensible choice for flooring in high traffic areas of both residential and commercial properties, a tiled floor is of course a difficult to remove so it’s not surprising that tiles do get covered over rather than replaced during redecoration.
Taste’s change and like most property owners who unearth hidden tiled floors, my client was keen to restore them as an original feature. Despite the amount of adhesive and the poor state of the Quarry tiles, I was confident that the floor could be restored to new, so we agreed a date for me to come back to the property and complete the work.
The process of cleaning the Quarry tiled floor – including remove large amounts of adhesive – took a total of two days to complete.
I started by carefully removing the Vinyl tiles using a hand scraper which as you can imagine was a lot of manual effort and the adhesive proved quite difficult to remove. In the end I had to use a combination of a very coarse 50 grit pad fitted to a heavy rotary machine lubricated with water, to clear the area completely of the substance.
The resulting slurry was rinsed away, and the floor was then given a thorough acid rinse with Tile Doctor Grout Clean-Up. Grout Clean-Up is a cleaner which contains concentrated phosphoric acid, and is designed to dissolve minerals such as salts and cement left on the surface of the tile.
This was followed by a final thorough rinse with water, and the excess moisture was soaked up with a wet-vac machine.
After the cleaning process was complete, I left the floor to dry off completely for 24 hours. Upon my return to the house the next day, I checked for any dampness that could have damaged the performance of the sealer, thankfully, the floor was dry and ready to seal, and so I proceeded to apply several coats of Tile Doctor Seal & Go Extra.
Seal & Go Extra is a fully breathable sealer that provides for effective moisture transmission. It provides durable surface protection against dirt and stains, and is suitable for most kinds of internal, natural stone tiled floors, including Quarry, Victorian and Flagstone.
As you can see from the photographs the Quarry tiles came out really well and it’s hard to believe that this is the same floor.
Mick Gayton
Warwickshire Tile Doctor
 Tile Doctor Ltd
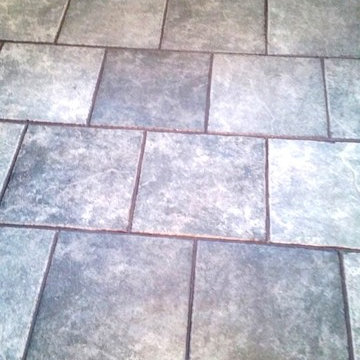
Here’s a quick grout cleaning and re-colouring job I completed in the town of Canvey Island, Essex. Canvey Island lies on the south east coast, and lies just above sea level which in my job is always worth noting as the area can be prone to flooding. This wasn’t the problem here though, simply put, my client was unhappy with the colour of their grout, and wanted it re-coloured to a darker shade to match the grey Ceramic floor tiles.
Cleaning the grout before re-colouring is essential because, as many readers are probably well aware, grouts are porous and therefore can very easily absorb dirt and grease. Most often this will result in grout discolouration if not dealt with promptly.
So, as mentioned above the first step in the re-colouring process involved cleaning the grout lines. For this Tile Doctor has a special Pre-Treat Cleaner which is sprayed on and scrubbed into the grout to both remove any existing dirt and also to prepare the grout joints for a superior bond with the Grout Colourant. Once complete the grout lines looked clean and refreshed.
To clean the ceramic I diluted one part Tile Doctor Pro-Clean to three parts water, and used it to wash down the Ceramic tiles, leaving a consistent level of cleanliness across the entire floor. I then rinsed the floor with water which was then extracted using a wet vacuum and waited for 3 hours for the floor to dry.
Once dry, I began the process of applying the Charcoal Grey (as chosen by the client) Grout Colourant to the grout lines. As well as changing the colour the colourant also forms a barrier over the grout sealing it in and protecting it from future staining for years to come.
Then, once dry, the floor was given another quick clean using a light spray of water and a white buffing pad, resulting in an aesthetically pleasing sheen finish. My client was very happy with the outcome and now has the floor they wanted.
Nick Murphy
South Essex Tile Doctor
 Tile Doctor Ltd
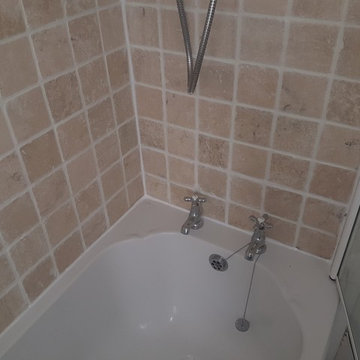
Here’s a quick example of an interesting tiled shower cubicle at a property in Edinburgh that was well overdue for a refresh, including deep cleaning and recolouring do the grout lines that had become stained and mouldy. This is a problem that the majority of property owners experience due to the simple fact that shower cubicles come into contact with damaging acid-based shampoos and soaps on a daily basis.
The short-term solution for this is to wash the shower cubicle down with water after each use, however busy people do not always remember to do so! The prognosis is bad discolouration, mould growth and staining if the problem if proper care isn’t taken. In this case, the problem had worsened to the point that the property owner decided to contact Tile a Doctor to provide a thorough refresh of the tiles.
Our process for refreshing shower cubicles in a similar state to this one is simple, but highly effective. I started by mixing a strong solution of our high alkaline cleaner, known as Tile Doctor Pro Clean (diluted to an appropriate level with water), before applying it directly to the tile and grout.
Next, I worked it in using specialised handheld grout brushes , with the alkaline in the Pro Clean neutralising the acidic staining and mould growth had leaving the area clean and fresh. Pro Clean is suitable for use on all kinds of natural stone, and on both verticals and horizontal surfaces. Once satisfied the grout had been cleaned to the best of my abilities, I quickly dried the entire area using a heat gun.
To restore the appearance of the installation back to it’s optimal appearance I chose to recolour the grout lines with our Light Grey grout colourant, which matched in very nicely. This is just one of ten different colours of grout colourant we offer. The colourant was left to dry for a short period before I cleaned off any excess. The final stage of the refresh involved stripping off the old discoloured silicone from around the bath and replacing it with fresh silicone.
The customer was very impressed by the speed and efficiency of the refresh. With the work completed to a high standard in just a few hours, she now has one less problem to worry about – and a very smart looking shower cubicle! Another satisfied customer.
Thomas Wilson
Edinburgh Tile Doctor
 Tile Doctor Ltd
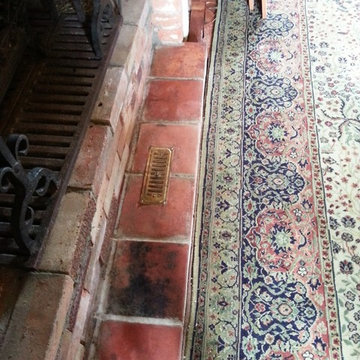
The oldest properties often have the most interesting tiled features and this Quarry Tiled Fireplace was a fine example. The customer lived in a quaint old cottage just outside the main town centre of Bedford and contacted us about restoring their fantastic Quarry tiled fireplace. While the customer knew that the cottage itself was over 200 years old, they had no idea whether or not the fireplace is an original feature.
However, it’s safe to say that the fireplace is very old in its own right, and that it had been a long time since it had experienced any kind of professional maintenance. It goes without saying that as any kind of tiles get older they will need more frequent care to keep them looking at their best. Here, the Quarry tiles desperately needed cleaning up as they were covered in old candle wax and what looked to be several years’ worth of general dirt. This had significant dulled the natural shades in the stone, leaving it looking lifeless and unappealing. The tiles would also require a fresh seal to ensure protection against muck in the future, and to help restore the colour to the stone.
Firstly, I applied Tile Doctor Oxy-Gel tile cleaner, which is particularly effective on tricky areas as being in a gel form it adheres better to non-horizontal areas. It was left it to dwell on the tiles for around twenty minutes so it could penetrate into the pores and get to work lifting out and dissolving the dirt that had been trapped in there over the years . Oxy-Gel is suitable for use on a wide range of natural stone tiles, including Quarry, Travertine and Slate. In this situation it cut through and removed most of the candlewax quite easily, and softened the stubborn residue to a point where I could easily remove the rest manually with handheld scrappers.
I then left area it to dry, with an air mover installed to reduce drying time. The advantage of using a gel product is that uses a smaller amount of moisture than a standard liquid cleaner, and therefore allows the tile to dry – and to be sealed – quicker; and in this case we were able to seal the same day where-as normally we would have to wait until the next day.
Once the tiles were completely dry, I sealed the fireplace with Tile Doctor Colour Grow which is an impregnating sealer that fills the pores of the stone to prevent dirt and general muck from becoming ingrained, making the tiles much easier to keep clean in the long-term.
The added benefit of Colour Grow is that – as its name suggests – it emphasises the natural colours in the stone. This was something that the Quarry fireplace was desperately in need of, and the Colour a Grow quickly got the job done!
The customer was very pleased with the finished results. The clean removed years’ worth of muck, while the fresh seal brought out the natural beauty in the Quarry tiles and, at the same time, will protect the tiles on future candle-lit evenings.
Andrew Evans
Bedfordshire Tile Doctor
 Tile Doctor Ltd
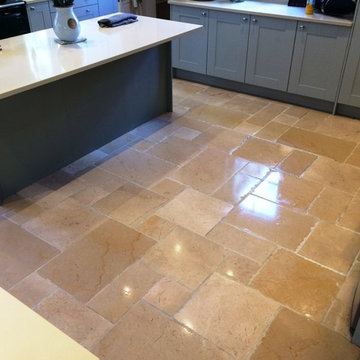
Earlier this year I was contacted by a lady in Icklesham which is a small village near Hastings. My client requested a deep clean for her Limestone tiled kitchen floor which had, over time, become quite dirty, with the grout in particular being very much worse for wear. Limestone is a popular choice for tiled floors however it needs to be sealed to ensure dirt doesn’t get into the pores of the stone otherwise it becomes difficult to clean and if the sealer is not maintained it will wear down and the floor will lose its protection especially in high traffic areas such as kitchens.
Cleaning a Limestone tiled kitchen floor
My product of choice for cleaning this floor was Tile Doctor Pro-Clean, which I found to be particularly effective in lifting ingrained dirt out of the grout. I used a stiff grout brush to work the solution of Pro-Clean diluted with warm water to work the cleaner deep into the grout. I also used a buffing machine fitted with a scrubbing pad and more Pro-Clean to lift the dirt out of the Limestone tiles. It wasn’t long before the dirty grout lines began to disappear, and the floor was well on its way to looking great again.
Once I’d also cleaned the nearby utility room, bathroom and cloakroom in a similar manner, I gave the floor a thorough rinse with fresh water before using a wet-dry vac machine to remove the soiled water from the surface of the tiles. I removed as much moisture from the Limestone tile and grout as possible to speed up the drying process as it’s important to ensure a stone floor is bone dry before sealing it as any excess moisture will compromise the sealer.
Applying Tile Doctor Colour Grow sealer to Limestone tiles
I left the floor for three days to dry before returning and used a damp meter on my return to confirm the floor was in-deed dry, spring had arrived and the sunshine really helped. My choice of sealer for the Limestone tiles was Tile Doctor Colour Grow, a product which soaks into the pores of the stone to enhance the colour of tiles whilst also providing durable protection. In this case two coats of Colour Grow were applied and as you can see from the photographs this really did bring out the fantastic natural colours in the Limestone and exaggerate the shading. At the same time, the added surface protection will help the floor stay looking great for longer, even with a lot of usage.
When she returned from dog walking, my client was so pleased with the final result that she almost screamed the house down! She was so pleased, in fact, that she promised to have me return every year to ensure her floor was maintained to a high standard. I was also really happy with my work, particularly in terms of getting the grout into far better condition than it had been before.
 Tile Doctor Ltd
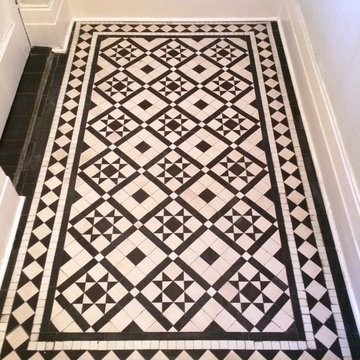
This job was at a house in near Windermere in South Cumbria, a place which is very popular amongst tourists to the Lake District. My client had a Black and White Victorian tiled floor in dire need of a clean and re-seal.
Prior to the application of any cleaning products, my first task was to run damp tests to make sure there were no inherent damp problems. With old floors of this type it’s good to know if there is a damp problem as this will affect the choice of sealer and also the length of time the floor requires to dry.
Fortunately, there were no damp issues present, and I was able to proceed however had the floor been damp and being December I would have offered to carry out the clean and seal in the Summer, when the water tables were lower and the damp levels would be more settled, thus creating a better environment for the sealer to operate in.
I started cleaning the Victorian tiles with Tile Doctor Remove & Go, a product which breaks down old sealers in preparation for a fresh seal to be applied. The product is diluted with water and then scrubbed into the floor with a scrubbing pad fitted to rotary machine; the resulting slurry is then removed using a wet vacuum.
Next step was to apply Tile Doctor Pro-Clean which was applied liberally to the floor, left to dwell for a short period and then agitated with a black scrubbing pad to lift out the ingrained dirt. I also paid special attention to cleaning the grout lines with a stiff scrubbing brush. The floor was then rinsed with clean water, and the resulting residue was extracted using a wet-vac machine.
After the cleaning was completed, the tiles were left for a couple of days to allow them ample time to dry. Upon my return to the house I checked the damp levels again and then applied two coats of the impregnating, colour enhancing sealer Tile Doctor Colour Grow which gives the black tiles more depth of colour, along with the robust surface seal and Matt finish my client had requested.
My client was exceptionally pleased the results – but really, the photographs speak for themselves.
Heidi Taylor
South Cumbria
 Tile Doctor Ltd
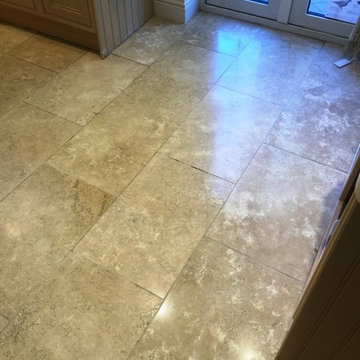
This customer, who lives in East Byfleet had been experiencing difficulties in keeping her fantastic Travertine tiled kitchen floor in good condition. Over the years it had suffered from a heavy build up of dirt and oily stains, not to mentioned a number of cracks and small holes. Needless to say, the customer was keen to restore the Travertine tiles to their former glory.
To begin the restoration, I applied Tile Doctor Remove and Go across the entirety of the large tiled area. This heavy duty remover breaks down any old sealers and other coatings, leaving the area ready to cleaned or, in this case, burnished.
Burnishing is a method for cleaning and polishing certain types of high-end stone, including Travertine, Marble, and Limestone. Our burnishing system involves the application of four diamond encrusted pads of varying grits. Firstly, I applied the Coarse grit pad, which helps to break down any dirt and stains on the surface of the tiles. Then, I worked my way through the Medium, Fine, and Very Fine pads, using a little water as lubricant, to gradually refine the polish on the Travertine. It was then rinsed and left to dry.
To round off the first day of work, I filled any cracks and holes using our two-part resin system which greatly improved the look of the tile.
The following day I returned to the property to seal the tiles checking first that the floor had dried. All was well so I proceeded to seal the floor using our colour intensifying impregnating sealer Tile Doctor Colour Grow. Once that was dry, I added the finishing touches by buffing the floor with a soft white buffing pad. As you can see from the photographs, the combination of a fresh seal and polish worked wonders.
We did such a good job with the floor that the customer asked if we could also improve the appearance of their natural stone fireplace which was suffering from bad rust and oil stains however I do a separate write up on that.
Wayne White
West Surrey Tile Doctor
18