
Search results for "Doctorate" in Home Design Ideas
 Tile Doctor Ltd
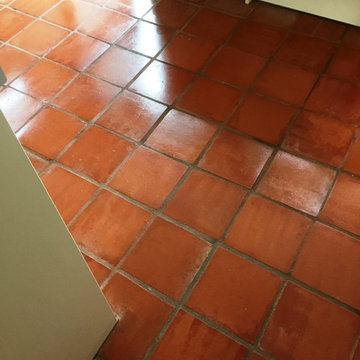
Newly built properties are not without their problems and often take a while to resolve all the snagging which occasionally extends to resolving problems with newly laid tiled floors. At this new property in the village of Malvern, and overlooked by the Malvern hills, the builders had left the Terracotta tiled kitchen floor covered in grout smears (also known as Grout Haze) following installation. They had also neglected to seal the tiles, which was actually quite fortunate in this case as they would have sealed in the grout haze, making it more difficult to remove.
Naturally, the property owner wanted the problem to be resolved as soon as possible, and for me to make the tiles easy to keep clean in future, which can be achieved by sealing the tile.
Before starting work, I made sure to fully protect any exposed woodwork with a plastic sheet covering to protect them from potential damage. I then proceeded to give the floor a thorough clean, using Tile Doctor Remove and Go to clean the floor and eradicate some stains that had been left behind as a result of the building work.
Next, I paid special attention to the grout, where the very visible problem of grout haze had arisen. To neutralise these smears I used Tile Doctor Grout Clean Up, a concentrated phosphoric acid cleaner that can also remove alkaline mineral deposits and efflorescence. Grout Clean Up is only to be used on acid resistant stone, as sensitive stone can suffer from irreparable etching if it comes into contact with the product.
Once completely clean and free of grout smears the floor was thoroughly rinsed with water to remove any trace of product and then dried as much as possible with a wet vacuum, afterwards an air mover was installed to speed up the drying process.
Later that afternoon the floor was dry and I was able to apply a sealer. To do this I opted to use several coats of Tile Doctor Seal and Go Extra, a topical, fully breathable sealer that works really well on Terracotta.
The sealer builds up a layer of protection on the surface of the tiles, protecting against ingrained dirt and stains. Seal and Go Extra also provides a high quality sheen finish which really did well to enhance the look of the Terracotta.
The property owner was exceptionally pleased with the results, and to have this problem dealt with quickly and efficiently, additionally the sealer will ensure the Kitchen floor is easy to keep clean in the future.
 Tile Doctor Ltd
Terrazzo is a quite a bit different from the natural stone floors we most commonly work with. It’s a type of flooring material that was made popular by Venetian builders in Italy in the 1920s, but is ultimately descended from styles of design that date back hundreds of years. A typical Terrazzo floor consists of chips of marble or granite set in concrete and polished to result in a smooth surface.
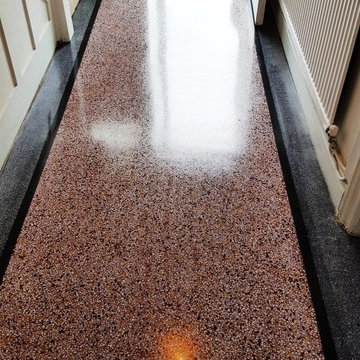
This Terrazzo floor, installed in the hallway of a property in Bridgend, South Wales, was in relatively good physical condition, but it had clearly lost its shine due to the build-up of dirt and muck over the years. In fact, it was first installed in around 1940! The owner was keen to have it rejuvenated to its best possible condition, so they asked me to come in to see what I could do.
My first course of action was to apply Tile Doctor Pro Clean liberally across the floor and leave it to dwell for a short period. This is a high alkaline cleaner that is designed to deal with light to moderate soil build-up, and to strip away any old sealer remaining on the floor. I scrubbed the product in using a black pad fitted to a rotary machine and vacuumed up the resulting cleaning with a wet-vac machine.
Next, to restore the shine to the floor, I undertook a process known as burnishing, which involves the application of diamond encrusted polishing pads. We will typically start with a Coarse grit pad to level off any uneven areas of the floor and grind down any particularly stubborn marks and stains. Then, we gradually refine the polish on the floor using Medium and Fine grit pads. A small amount of water is used as lubrication with each pad.
After I had finished applying the first three pads in our four-pad system, I gave the floor a thorough rinse and left it to dry overnight.
I returned to the property the next day and immediately ran some damp tests to check for excess moisture issues, which one might expect with an old floor like this one. Thankfully, the floor proved dry – and I could finish the burnishing process with the fourth and final Very Fine diamond encrusted burnishing pad, which achieved a beautiful shine finish.
Finally, I sealed the floor with three coats of Tile Doctor Colour Grow, an impregnating sealer which provides robust protection and enhances the coloured patterns in the Terrazzo.
As you can see from the photos above, the floor is looking so much more colourful and bright after a deep clean, polish and a fresh seal. The customer was over the moon!
Julian Iancono
South East Wales Tile Doctor
 Tile Doctor Ltd
This was an unusual request to clean a modern piece of contemporary artwork by New York City artist Mel Kendrick on display in one of the gardens of the Wormsley Estate. I’m no art expert but having done some research on the internet it appears to be part of a collection known as “Markers” that were on display at the Madison Square Park in 2009. The work is made from concrete cast into different coloured sections and fitted together to form a rather larger piece of art which having been exposed to the UK elements was now starting to discolour and go orange in part.
Cleaning Modern Concrete Artwork
Being such a prestigious work of art i had to be careful not to damage the stone in anyway so after careful consideration I worked out a process using an alkaline cleaning product Tile Doctor Pro-Clean.
To get the statue clean I used a warm water dilution of Tile Doctor Pro Clean working it into small areas at a time spraying the solution on and scrubbing with a brush, then rinsing it off with clean water. This process took some time but certainly did the trick.
Sealing a Concrete Artwork
With this project being outdoors and with it taking a couple of days I had to pick a good weather window and fortunately the weather held out long enough so I could continue and seal the concrete in order to protect it going forward. Again careful consideration had to be given to the choice of sealer and in the end I went with Tile Doctor Ultra Seal which is an impregnating sealer that soaks into the pores protecting from within and most importantly it’s a natural look sealer that does not change or enhance the colours.
If you’re a lover a modern art then you should appreciate the difference and will agree with me that the statue now looks new again.
Find the right local pro for your project
 Tile Doctor Ltd
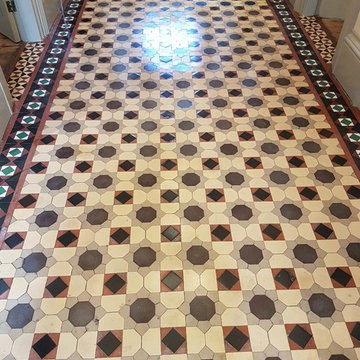
I recently re-visited a Victorian period property in the Leeds suburb of Headingley which had an unusually large tiled entrance hall which we believe to be as old as the property itself. I say re-visited as I actually gave this floor a deep clean and reseal around five years ago; it’s always nice to be asked to return to a job as it shows the customers was very happy with the work. However, with five years of wear and tear the sealer had worn down and the floor was now starting to trap dirt, also it had lost the attractive shine added by the sealer and the owner felt it was time to have it done again. Additionally, the owner had recently had the whole house decorated and wanted the floor to look its best and match the fresh appearance of the property.
Sealers do wear off with use and so it is inevitable that the tiles will need to be cleaned and sealed again with time. Given it hadn’t had a professional clean and seal for five years the floor wasn’t looking too bad as you can see from the picture, it was just a bit dull in the high traffic areas such as along the centre. I’ve certainly seen a lot worse.
Initially I wasn’t 100% sure on which cleaning method l was going to use on this floor. Originally l thought about using a coarse 200-grit burnishing pad to take off a couple of layers of sealer and then re-apply 2 more coats. However, the finish on the floor wasn’t even across the width of the hallway and l felt using that approach wouldn’t resolve that. Additionally, a lot of tiles were pitted and a burnishing pad would struggle to get into the holes. So instead I decided to completely strip the floor and re-seal it which would ensure a uniform finish across the floor.
I used a strong 50:50 dilution of Tile Doctor Pro-Clean on the tiles and scrubbed it in with a black floor pad which removed the old sealer and ingrained dirt. The large floor pads are not very effective in the corners and edges, so I used a 6-inch red buffing pad fitted to a hand buffer for those. The floor was rinsed with water and the soil extracted using a wet vacuum. After inspecting the floor some areas were retreated with a repeat of the same process.
After a final rinse and extraction of the soiled water the floor was left to dry overnight.
The next day after first checking the floor was dry with a damp meter it was sealed with four coats of Tile Doctor Seal and Go. This is a water based sealer that gives a lovely sheen and allows the colours to shine through as well as letting the floor breath, which is important in properties of this age that usually do not have a damp proof membrane.
I was very pleased with the finished result as the pictures show and glad that l had chosen to do a deep clean and not just apply more coats of sealer. The client was over the moon.
Nigel Stoker
North West Yorkshire Tile Doctor
 Tile Doctor Ltd
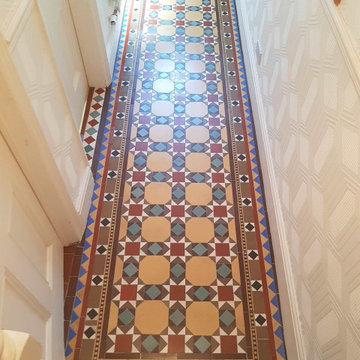
Recently we were asked to quote on restoring a Victorian tiled hallway floor in one of the large houses in the North Wales seaside resort of Rhos-on-Sea. It was a lovely period property that overlooked the sea and the floor a fine example of Victorian tiling and a real asset to the property.
Naturally, we have to take precautions when visiting properties these days, especially when surveying floors inside properties however we have amended our working practices to include more PPE and social distancing and so its not a problem.
On first impressions the floor looked to be in good order however it had some broken and loose tiles that needed replacing and then the floor given a good clean and seal. Fortunately, Victorian tiles are still popular, and you can find replacements, I also know that difficult to source tiles can often be found by asking other Tile Doctors many of whom have quite a collection. A quote was given for the work, which was accepted, and a date set to commence the work which would take three days.
Rhos-on-Sea is a very picturesque town situated between Llandudno and Colwyn Bay by passed by north wales main trunk road A55 leading to the main ferry port of Holyhead to Ireland. When you turn off the A55 into Rhos-on-Sea your transferred to a large seaside promenade with a wide walkway which is used by the towns many retired residents who appreciate the splendid coastal views.
The first job was to cut out and remove the damaged tiles then prepare the subbase with rapid set self-levelling compound to take the new tiles. Once this had set, I was able to cut and fit the replacements. There were a few areas that needed attention and so this work took up by most of the first day.
Once the sealer was dry, we were able to let the owner see the result who was really pleased and apparently has since received many compliments. For aftercare we recommend using Tile Doctor Neutral Cleaner which has a effective neutral pH formula that won’t prematurely erode the sealer with use like stronger products you find in supermarkets.
Andrew Robb
North Wales Tile Doctor
 Tile Doctor Ltd
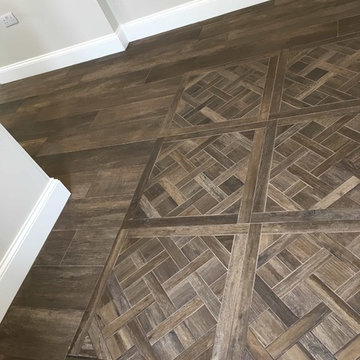
Grout haze or grout smears as it is often called can be a huge problem when laying tiles. Grout haze is basically grout that has been left to dry on the surface of the tile after installation. It’s a common problem which is exacerbated by the use of quick drying products. Take for example this interesting Wood Effect Ceramic Tile installation at a house in Guildford following installation by a builder.
I was a bit slow in following up on the initial enquiry as we had been very busy so by the time, I got in touch I was told they had employed someone else to carry out the work. I apologised for my late response and said to call me if he needed help in the future. Three days later I got a call so we arranged a visit so that I could carry out a test and quote a price.
As it turns out the builder had returned and failed to remove the grout haze and so had a rival firm that seemed more interested in selling unnecessary sealer than fixing the problem. I was astonished to see what a state the builder had left his floor. Grout was all over the floor with footprints walked across thresholds and more. I could understand it if there was some grout was missed after installation but not to this level!
I carried out a successful test and confirmed to the customer that there was absolutely no need to rip and replace his £2k floor. We agreed a date to resolve the problem and to say he was relieved was an understatement!
The builders had used Mapei grout which contains polymers. Polymers offer better flexibility and adhesion, however in order to remove the grout haze we would first need to break down the polymers in the grout first and this is why the rival firm failed.
With that in mind, my first action was to apply Tile Doctor Remove and Go to the floor and leave it to dwell for five to ten minutes. I then worked it into the tile using a scrubbing pad fitted to a rotary machine.
After washing the soil away with warm water and extracting with a wet vacuum I applied Tile Doctor Grout Clean-up to treat the grout. Grout Clean-up is an acid-based product that breaks down the grout so it can be rinsed away and extracted as before. Afterwards I rinsed the floor with warm water and extracted again to remove any trace of product and neutralise the floor. After removing as much moisture as possible with the wet vacuum I speed dried the tiles with a blower.
Ceramic tiles won’t accept a sealer so once the floor had dried the job was finished and it took less than a day.
The customer was over the moon with the difference. While his floor was in such a state, he has been unable to bring in new furniture as the serious possibility of removing the tiles was hanging over him.
Relieved that the problem was now resolved he kindly left the following review:
“I had a floor that had just been laid with very heavy grout haze. I had already had advice from two other professional floor cleaners who had advised me that the floor was irreparable and would need to be pulled up. As soon as I spoke with Rupert, it was clear he was extremely knowledgeable. He asked questions none of the other companies had. By understanding the specific nature of the problem, he was able to solve it by first removing the grout polymers and then applying an acid wash. The floor came up brilliantly. Rupert was the only person I spoke to that could fix this, everyone else told me I needed to replace my floor! Superbly knowledgeable, professional and did an excellent job. Don’t bother speaking to anyone else, just call Rupert! “
Rupert Mcleod
West Surrey Tile Doctor
 Tile Doctor Ltd
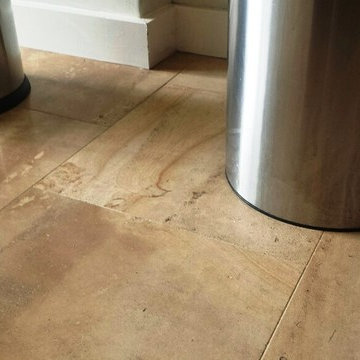
The following post is follows on from the Limestone tiled kitchen floor restoration I recently completed in Cardiff. You may recall that the floor had not been maintained properly since it was first installed in 2008 and one of the key problems I had to deal with during that particular restoration was a number of dark stains left on the tiles by the kitchen dustbin. Here’s a detailed account of how I tacked the staining.
To deal with the stains, I suggested to the client that I experiment with a Tile Doctor product called Reduxa, which is formulated to remove certain stains, including red wine stains, from natural stone. It is suitable on Limestone, Marble and Travertine tiles, amongst others. Nonetheless, I did have to advise the client that unfortunately some stains are unavoidably permanent and that there was no guarantee that the product would be able to remove these particular stains. Had the sealer been maintained on this floor, then the problem would have been much easier to tackle. However, in this case the sealer had worn off over the years.
I began treating the problem area by applying the Reduxa solution, before heating up the tile with a heat gun to lift out the stains. This process of spraying and heating was repeated around eight times.
To cut a long story short, the process worked very well, and both myself and the client were amazed at the results the Reduxa stain removal solution had on the floor. This product really does what it says on the label!
If you would like more information on the product, check out the video on the Reduxa page on the Tile Doctor website.
Julian Iancono
SE Wales Tile Doctor
 Tile Doctor Ltd
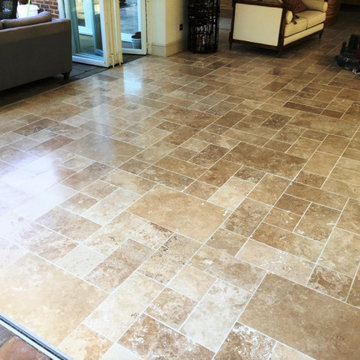
This property in Godalming had the whole downstairs floor tiled with Fired Earth Limestone tiles nine years prior and had never had it cleaned or maintained professionally. The once beautiful stone was now looking dull and the grout had turned black with dirt leaving the floor looking uninviting.
This is quite normal for stone floors as it is the sealer that protects the stone from dirt and enhances its look. Most sealers wear off after three to four years sealer and in this case after nine years it was well overdue a deep clean and reseal.
I visited the property to survey the floor. It was indeed looking in need of some attention and the kitchen was particularly bad. To restore the appearance of the Limestone tile and grout the floor would need to be stripped of what remains of the old sealer, then deep cleaned with attention to the grout, polished with burnishing pads and then finally resealed. I was confident I could get it restored to a nearly new finish and to prove it I completed a small demonstration clean which the homeowner was very happy with. They agreed to my quote and we scheduled in a couple of days to carry out the work.
On day one I started by cleaning the grout using a strong dilution of Tile Doctor Pro-Clean. its run along the grout line and then left to soak in for about ten minutes so it can get to work breaking down dirt and old sealer. The grout is then scrubbed using a grout brush which is then scrubbed backwards and forwards along the grout line until clean. The area is then rinsed with water and all the waste removed with a wet vacuum cleaner.
Next, I turned my attention to the Limestone tiles which needed stripping of any remaining sealer, cleaned and polished. I find the best way to do this is by apply a set of diamond encrusted Burnishing pads in sequence starting with a coarse 400-grit followed by 800, 1500 and finally finishing with an extra fine 3000 grit. Water is used to lubricate the burnishing process and the slurry is rinsed and extracted off the floor between pads. Each pad is run over the tiles three times, and it was a large floor so as you can imagine this process took most of the day.
I left the floor to dry out overnight and returned the next day to seal the Limestone. Before doing that, I reviewed my previous day’s work and I cleaned up any areas that needed further attention. Next step was to ensure the floor was dry as I don’t recommend applying a sealer to damp tile as you won’t get an even appearance, so before sealing a floor I tested for moisture using a damp meter.
To seal the floor, I applied two coats of Tile Doctor Ultra Seal which is an impregnating sealer that works by occupying the small pores in the stone to prevent dirt becoming ingrained there. Limestone is a light stone and most customers like that appearance so I find it best not to use a colour enhancing sealer as it can darken the stone. Ultra-Seal doesn’t contain any colour enhancer and leaves the floor with a natural finish whilst allowing the stone variations and patterns to show through.
Once the sealer was dry, I gave it a further polish with the 3000-grit pad which further brought out the natural beauty of the stone. My client was very happy with the floor, it really lifted the who area and the Kitchen in particular.
Rupert Mcleod
West Surrey Tile Doctor

 The Home Doctors Inc
Working with a layout by Don Hundenski of Carrara Kitchen and Bath The Home Doctors helped design and install this wonderfull, warm kitchen for one of our clients that has been in the Home Doctor family for many years. Opening up the wall really loosened up the space making the flow and feel of the kitchen vary satisfying.
The Home Doctors
 Tile Doctor Ltd
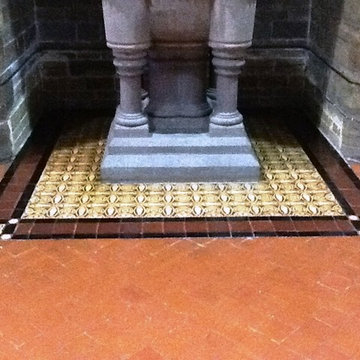
The following job was a bit different from the kitchen and hallway restorations we normally get asked to do, in fact this request came from the vicar of St. Mary’s Church in Far Cotton who wanted us to restore some beautiful old Quarry tiles which lead up to the main aisle. The church dates back to 1885 and given the wear on some of the tiles I can only assume they date back to the same Victorian period; the church is a really welcoming, community-focused place, so it was a pleasure for me to be asked to complete the work.
The vicar’s main concern was the large amount of melted candle wax around the font – so much so that this his normal cleaners had been unable to remove it. He also wanted to know if the floors could be sealed to make ongoing maintenance easier – and this was certainly something we would be able to provide. The following photos show the condition of the floor before we started.
The next photo shows the work in progress from halfway down the aisle. We started by breaking down any old sealer and the troublesome candle wax, using a black stripping pad in combination of Tile Doctor Pro Clean to deep clean the floor. Since Pro Clean, a high alkaline cleaner, is highly versatile and can be used on all kinds of natural stone and tile.
While the church has cleaners that come in regularly to keep the building tidy for the parishioners, the old tiles really benefitted from a deep clean which tackled the stubborn ingrained dirt and staining that had built up over many years.
Once I was satisfied that the tiles had been cleaned to the best of my abilities, they were then left for two weeks to fully dry as it is an old church and, understandably, there were some inherent damp issues. As aforementioned, the vicar was keen to have the tiles sealed to make them easier to keep clean and protect them against ingrained dirt and staining for the future. There are only a few situations in which we wouldn’t recommend sealing tiles, such as if they are patio tiles which will already be under constant exposure to the weather.
The best choice of sealer for this particular situation was Tile Doctor Colour Grow, which is an impregnating, breathable sealer that won’t trap moisture in the floor and will provide great protection against further staining. Additionally, as an impregnating sealer, Colour Grow penetrates into the pores of the tile protecting it from within and with the added benefit of enhancing the natural colours and restoring the life and character back in the old, dull tiles. I applied it using a paint pad, before polishing it off.
I’m pleased to report that the restoration was a great success. The vicar was very impressed with the work, and I’m sure the church community will also be very happy with the new, vibrant tiles.
Phil Vissian
Northamptonshire Tile Doctor
 Tile Doctor Ltd
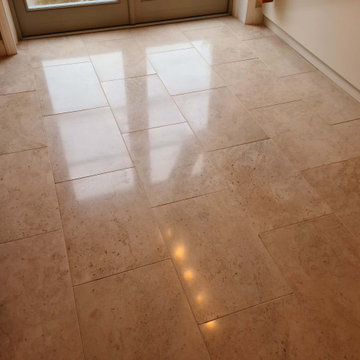
I recently went to survey a floor in Harrogate which I immediately recognised as beige Moleanos Limestone which comes from Portugal. If you have been reading my previous posts you will remember I am not a fan of this type of stone as it is very difficult to clean, polish or seal. This particular floor was laid around 5 years prior and was now looking quite dull and was in need of reviving.
The client didn’t want to spend much so l suggested l could spray burnish the floor to get her shine back again and remove the splash marks. We do this a lot for owners of polished stone floors as part of an annual maintenance package, it is a low cost option that uses a very fine 3,000 grit burnishing pad to renovate the stone and bring up the shine. However, I pointed out to her that this process wouldn’t clean her grout which was making her floor look scruffy.
I priced up the different options and after weighing up the quotes I’m pleased to say she decided to go for a full clean and seal. The full process involves the use of different grades of diamond encrusted burnishing pads from low to very fine grits to renovate the Limestone and also a chemical clean of the grout followed by a fresh seal.
I returned on the scheduled date and after preparing the floor I started cleaning the Limestone by running over the tiles with a 400-grit coarse burnishing pad lubricated with water. The soil was rinsed off with more water and extracted with a wet vacuum. This process was repeated with the 800 and 1500-grit pads which starts to build-up the polish on the stone.
I then turned my attention to the grout with a strong dilution of Tile Doctor Pro-Clean which was left to soak into the grout for ten minutes before scrubbing it by hand with a stiff brush. After a final rinse and extraction with the wet vacuum the tile and grout were looking much cleaner and was left to dry off overnight.
On Day 2 I stated with the application of the 3,000-grit pad which is the last step in the polishing processed and builds up a lovely satin finish on the stone floor. This is done using only a little water and is basically the spray burnish technique I referred to earlier. This process has the added advantage of leaving the floor dry.
With the stone tiles looking lovely and the grout clean the last step was to seal it all in and protect it from dirt and future staining with the application of a sealer. For this I used two coats of Tile Doctor Ultra Seal.
My client was very pleased she had spent the extra money to achieve the floor she had always wanted, apparently it had never looked this good even when new. We discussed the annual maintenance plan to ensure the floor remained looking this good.
Nigel Stoker
North West Yorkshire TIle Doctor
 Tile Doctor Ltd
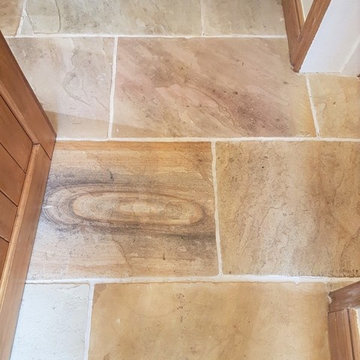
The pictures below are of a multi coloured sandstone floor installed at a property in East Keswick which is a village approximately halfway between Harrogate and Leeds. (Not to be confused with the more famous Keswick in the Lake District)
The stone floor had not been cleaned professionally for ten years and although the grout looked clean It was clear that any sealer that was once present had long since worn off leaving the stone unprotected. The result was dirt had become deeply ingrained in the Sandstone leading causing the stone to darken and hide its true beauty and rich colouring. The client had tried lots of different products to clean the floor but had not had any luck.
I visited the property and carried out a few successful patch tests resulting in the floor becoming much cleaner. They were happy to go ahead with my quote and we arranged a time to return and complete the work.
I prepared the area before starting, taping up the skirting boards and doors to protect them from the splashing that can happen during the intensive cleaning process.
To get the sandstone clean I applied a medium dilution of Tile Doctor Pro-Clean to the floor and allowed it to soak in for ten minutes. The solution was then worked into the Sandstone using a rotary floor machine fitted with a black scrubbing pad. More Pro-Clean was applied with a hand-held scrubbing brush to get deep into the grout lines and to reach into the corners.
Once done the floor was rinsed with water and the soil extracted with a wet vacuum. The floor was inspected, and the process repeated until I was satisfied that the stone and grout had released all the trapped dirt. After a final rinse, the wet vacuum was used to get as much moisture out of the stone as possible and then the floor left to dry out fully overnight.
Returning the following morning, I first checked that the floor was dry using a damp meter. The sealer won’t cure if there is any moisture in the stone and I’ve been known to reschedule sealing a floor if the readings are too high. On this occasion I was satisfied that the floor was within acceptable levels, so I was ready to seal the floor.
I used three coats of Tile Doctor Colour Grow to seal the floor, this is an impregnating sealer which intensifies natural colours whilst providing durable protection against stains, an essential feature in an area such as a hallway which is subject to constant foot traffic.
As you can see from the photos the transformation was quite impressive, the floor became much lighter and almost unrecognisable, the natural colours of the stone were now visible, and the floor looked beautiful. The client was very happy with the end result and has said they would not hesitate to recommend me to others.
Nigel Stoker
North West Yorkshire Tile Doctor
 Tile Doctor Ltd
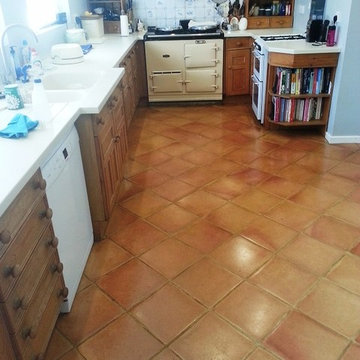
As part of our service we advise customers on best practice for maintaining the appearance of the floor and I’m happy to report this client in Ampthill who has a Terracotta tiled floor that we had fully restored a few years ago had followed to the letter.
Having two dogs and two children, the floor gets a lot of traffic and as expected over a period of time the sealer does wear thin in the busier areas. Should the sealer become too damaged dirt can get underneath and gradually the seal will deteriorate to the point where restoration will be needed again.
By keeping on top of the maintenance our client has kept a beautiful terracotta floor in great condition however as the sealer was wearing he called us back to do a maintenance clean and top up the sealer an activity which we are able to complete in one day rather than the several days needed to do a full restoration.
To maintain the floor, I applied a Tile Doctor fine diamond burnishing pad fitted to a rotary machine and with a little water sprayed onto the tiles to lubricate the process the top was burnished, this took the dirt off the top of the tiles and left a clean surface to top up the seal. The floor was then rinsed to remove the soil generated by the process.
Having removed any damaged sealer an industrial air mover was switched on to get the floor as dry as possible, we then tested the damp levels at various intervals until the floor was dry for re-sealing.
To re-seal two coats of Tile Doctor Seal and Go we applied to the floor allowing the first coat to dry before applying the second. Once the second coat had dried a white polishing pad was used to buff the tiles.
Andrew Evans
Bedfordshire Tile Doctor
 Tile Doctor Ltd
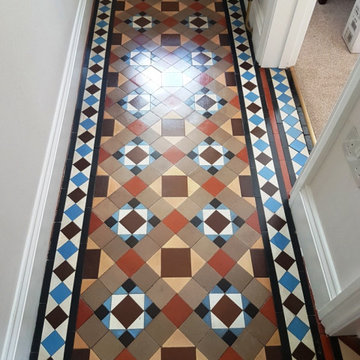
I was contacted by a homeowner who had moved into a property in the small Yorkshire market town of Masham and discovered a Victorian tiled floor under the hallway carpet. Realising this was a valuable period feature he was keen to see if it could be restored. As you can imagine he was delighted when I told him that it should be possible, and he was keen to get it uncovered and back on show.
After discussing the floor on the phone, I visited the property and removed the carpet so we could take a long look at the Victorian tile’s underneath. The carpet had protected the floor well and it was in good physical order, (i.e. no cracks etc.) it was just very dirty but was also marked with paint splashes from some untidy decorating work from the past. I confirmed none of these issues should present a problem and got the go ahead for the work to start.
There was no sealer on the floor, so I started the cleaning process using a medium dilution of Tile Doctor Pro-Clean which was worked into the tiles using a coarse 200-grit pad fitted to a rotary floor buffer. I then used a 400-grit hand-held diamond block to clean the edges which couldn’t be reached by the machine. This also removed the paint splashes which should have been on the skirting boards and not the floor!
The floor was then rinsed with water and the soil extracted with a wet vacuum. I was able to inspect the floor at this stage and spot treat areas that needed more work as they were a little stubborn. It wasn’t a large hallway and except for the paint it only needed a light clean. The result was I was able to complete the cleaning process by lunch time. I dried the floor as much as possible and left an air blower in the space for a couple of hours.
I returned later that afternoon and checked the floor for moisture using a damp meter. The floor was mostly dry, but some areas needed some more help with a heat gun. It was late summer and so still warm and so there was no need on this occasion to leave the floor overnight.
Once I was happy the floor was dry, I started sealing the tiles with the first of four coats of Tile Doctor Seal and Go. This is a specially formulated water-based blend of acrylic polymers that provides both a stain resistant surface seal and a durable low-sheen finish. It is perfect for a floor of this age as it allows moisture vapour to pass through, this is an important feature when considering a sealer for old floors which will not have a damp-proof membrane installed. If you were to apply a non-breathable sealer moisture can get trapped under the floor causing it to spread out to the walls resulting in rising damp.
The combination of the cleaning and new sealer brought the floor back to life and it now looked in keeping with the rest of the property which had numerous other period features. My client was over the moon with the difference and very happy to see the back of the grubby carpet.
Nigel Stoker
North West Yorkshire Tile Doctor
 Tile Doctor Ltd
Shipley is a town in West Yorkshire that was heavily shaped by the Industrial Revolution and the Victorian period. It became particularly well-known for its textile industry and some of the original mills in which textiles were manufactured still survive in the town today. Being in West Yorkshire, Shipley is also part of what is commonly known as ‘Brontë country’ – once home to the famous Brontë sisters.
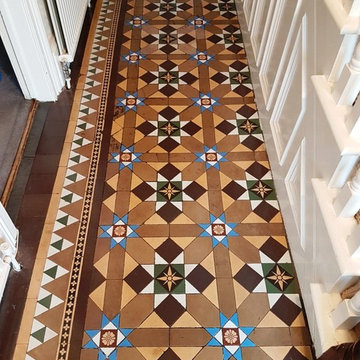
Many Victorian era properties still survive in the area too and all too often the original Victorian tiled floors contained within are not well maintained. I recently visited a customer in Shipley who had a Victorian tiled hallway that was in need of a deep clean and seal. What’s more, the customer told me that there were around 20 loose tiles in the hallway that would need to be reinstalled.
On the first day, I started by refitting the 20 loose tiles in the hallway. The problem however was a lot worse than originally thought and, in the end, I had to take up 108 tiles, so I could rebuild the base of the floor, and then relay them. This process took up most of the day but at least the adhesive and grout would be set in time for cleaning the next day.
On day two I focused on deep cleaning the tiles and removing any remaining sealer by applying a strong dilution of Tile Doctor Pro-Clean. Pro-Clean is a strong alkaline heavy-duty tile and grout cleaner that serves the purpose of both cleaning the stone and when used in a strong dilution will strip off sealers.
I applied the Pro Clean liberally across the length of the hallway and left it to soak into the tiles for about twenty minutes. This allows the product time to breakdown the sealer and dirt before being scrubbed in with a black scrubbing pad.
Special attention had to be paid to parts of the floor which had suffered paint splashes from previous decoration. I was also surprised to find that there were even some chewing gum stains marking the tiles. These were removed using the combination of a steam cleaner, more Pro-Clean and the careful use of a handheld scraper.
The floor was then given a thorough rinse with fresh water and then dried as much as possible with a wet vacuum. It was then also left to dry off overnight.
Upon returning to the property the next day I checked for any moisture issues with a damp tester. Thankfully, the floor proved dry and I could proceed with sealing the tiles which was done using four coats of Tile Doctor Seal and Go that leaves a deep satin finish that the customer had requested.
Nigel Stoker
North West Yorkshire Tile Doctor
 Tile Doctor Ltd
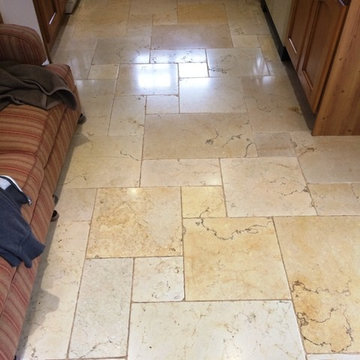
Polished stone floors will lose their shine over time depending on the amount of wear and cleaning products used and this Travertine Tiled Floor in Lower Woodrow had basically experienced this problem. The solution is to burnish the floor with diamond encrusted pads, a process that will remove any dirt and bring back the polish.
We started by smothering the floor is a mild dilution of Tile Doctor Pro-Clean and left it to dwell for ten minutes. We then scrubbed the grout lines using a stiff grout brush to get the grout clean. Next we fitted a course diamond burnishing pad to a rotary machine and slowly burnished each and every tile. We then extracted the slurry using a wet vacuum and rinsed. We continued this procedure with the medium, fine and very fine pads rinsing in-between until the shine had been restored. We then left the floor overnight to dry.
Upon our return we sealed the floor using Tile Doctor Colour Grow which is an impregnating sealer that soaks into he pores of the stone protecting it from within and enhancing the natural colours in the stone. Once the seal had dried I used a white buffing pad attached to the rotary machine and buffed the travertine to a nice shine.
Stuart Ford
Wiltshire Tile Doctor
 Tile Doctor Ltd
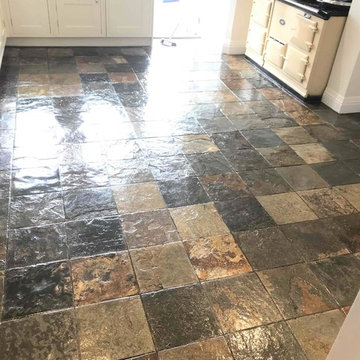
I recently completed the renovation of a Multi-Coloured Slate tiled kitchen floor in Sutton Coldfield. I was actually at the property before Christmas to survey the floor and quote for the work however the owners had planned to have a new kitchen installed in the new year, so we decided it was best for me to wait until after the installation to complete the work.
The slate was in good condition but like any stone floor you do need to maintain the sealer to prevent dirt becoming ingrained in the stone. Sealer do wear off overtime especially in the high foot traffic areas such as Kitchens and within a few years the tiles become dull and difficult to clean effectively.
The kitchen was installed on schedule and I got the call to arrange a visit to deep clean and reseal the floor which would take to two days, one to clean and one to seal.
To begin the restoration, I soaked the slate in a strong dilution of Tile Doctor Pro-Clean and left it to soak in for about ten minutes re-applying extra solution where it dried. Pro-Clean is a powerful tile cleaner that will strip old sealers when applied in concentrated form. I agitated the product using a black pad fitted to a rotary buffing machine. I paid particular attention to the grout which the customer had trouble keeping clean. The rotary pad struggles to reach into the recesses of the grout lines so I also made sure to scrub the solution into the grout with a grout brush.
Once I was satisfied that the Slate and the Grout was clean and clear of old sealers, I gave the whole floor a thorough rinse with water using a wet vacuum to extract the soil and get the floor as dry as possible. The floor was then left to dry off fully overnight.
Returning to the property the next day, I ran some quick damp tests to check for any excess moisture that might have prevented me from sealing the floor. We will always do this as excess moisture can affect the sealer curing.
The customer was very happy with the clean and the floor was dry, so we discussed sealer options to find out their preference for Matt or Satin finish. With the decision made to go with a Satin finish I began the application of the Tile Doctor Seal and Go which enhances the look of the stone with an aesthetically pleasing low-sheen finish, as well as providing on-going protection against ingrained dirt and staining.
A total of four coats of Seal and Go were needed to seal the Slate tiles and as you can see from the photos the sealer really put the life back into the floor.
Trevor Preece
Staffordshire Tile Doctor
 Tile Doctor Ltd
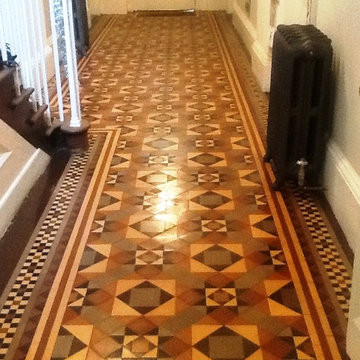
This hallway floor was actually at a house in the town of Stamford which is just over the northern border of Northamptonshire and slightly out of my area; however I was recommended to the owner by another client which is always welcome and a testimonial in itself. I work right across the county so it wasn’t long before I was in the general area and arranged a visit to carry out an inspection of the Victorian Quarry tiled floor and provide a quote for a full restoration.
The owner of the house had just moved in recently and although the floor was in good overall physical, it was in need of a thorough clean and new seal to bring back some life to the tiles. Additionally she was having lots of other building work done to the house and she wanted to retain this as an original feature of the property. My quote was accepted and I was able to book the work in for the following week.
These first photos show how dull the floor looked due to a build-up of builder’s dust and general wear and tear. They also show some of the equipment needed to undertake the following cleaning process.
I used a brush and vacuum to remove as much loose debris and dust from the surface of the floor as possible. I then applied a strong dilution of Tile Doctor Pro Clean to the floor which is a strong alkaline cleaner which can also be used to remove sealers; the solution was left it to dwell for roughly ten minutes before agitating it with scrubbing pads and brushes to remove the muck that was lifted to the surface. This was then wet-vacuumed twice to remove all the slurry and neutralise any chemicals.
As it was such an old property I then used a steamer to heat up the tiles and draw up any contaminants and assist with the drying process. I also chose to install two fans and a dehumidifier to dry the floor even further.
With the cleaning process complete – and achieving a marked difference to the appearance of the floor – I left the tiles to finish drying for 24 hours.
Upon my return to the house, I checked for any excess moisture by running damp tests as this has the potential to affect the performance of the sealer. Once satisfied with the results, I sealed the floor with two coats of Tile Doctor Colour Grow, a colour enhancing sealant which offers both a robust surface seal and an aesthetically pleasing finish.
I also carried out water repellency tests to ensure the sealer was working as expected and the floor had sufficient protection and will be hard-wearing for a hallway which is a high traffic area.
On my client’s return to the house she was very happy with the final results – in fact, she was also in contact about some further work in the New Year!
Phil Vissian
Northamptonshire Tile Doctor
 Tile Doctor Ltd
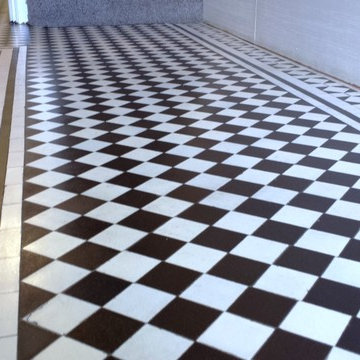
Sometimes you survey a job and you know that if you get the chance to restore it the results will be totally fantastic! This was the case with this Victorian black & white chequer tiled floor in the hallway of a large terraced Victorian house in Cardiff which dated back to around 1900 and was now looking well past its best, I know this because my family used to live in the house opposite. It was a well laid floor with no readings of dampness; I believe it’s imperative you check a floor for dampness before starting so you know what the baseline damp level is and which sealers will work with the floor.
My first action was to hoover the floor and then scrape as much debris off the surface as possible, and then as always I mixed 50/50 Tile Doctor HBU (Heavy Build-Up) remover with Pro-Clean and on this occasion because I wanted the white tiles to become really white I added the same amount of Tile Doctor Grout Clean-Up. This special recipe created a very formidable and strong cleaning solution which is what the job called for. I swept it over the whole floor letting it soak in for about ten minutes and then worked it into the floor using a scrubbing machine fitted with a coarse black pad adding more of the solution to the floor where it was drying out as I went.
The next step was to rinse the floor twice with water and extract the now filthy cleaning solution using a wet vacuum. At this point I inspected the tiles and I could see there were still a few stubborn areas with spots of paint and glue which I addressed with a decorators steam plate together with a scraper and hand held scrubbing pad.
I was now happy that the floor was clean and ready to be sealed, before sealing though it’s important to remove any trace of cleaning solution as it may contaminate the sealer so I gave the floor a thorough rinse and extracted as much of the water as possible to reduce drying times.
I left the floor to dry for 48hrs before coming back to seal the tiles taking a reader on my damp meter first to establish they had indeed dried out. To seal the floor I used eight coats of Tile Doctor Seal & Go which really works well on Victorian tiles and in this case made the whites really stand out.
The customer wanted this floor to look good because they were selling the property and were due to have an open day. The clean tiles really gave the house the wow factor and period features are so desirable these days so I don’t think it will take long to sell.
 Tile Doctor Ltd
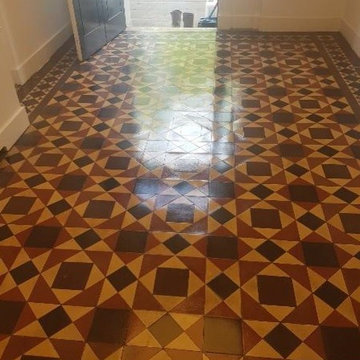
These are photos of a Victorian tiled floor we renovated at the new Scottish head office of the Peoples Postcode Lottery in the centre of Edinburgh City where the building was going through a multi million pound refurbishment. Edinburgh has a lot of Georgian and Victorian architecture, much of which is listed and as a result many still have original Victorian tiled flooring.
I’ve not really looked at the Postcode Lottery until now but put simply you give the lottery £10 a month and your postcode is your winning ticket number, there are prize draws every day and if your postcode comes up every one in the system with that postcode wins; they also give 31% to charity which is impressive.
You can see from the photograph that the floor was in good physical condition but was looking tired and dull. This is not unusual for Victorian tiles as once the sealer wears down dirt can penetrate into the pores of the tile causing it to lose its appearance.
On the first day we set about stripping the floor of what remained of the old sealant using a strong dilution of Tile Doctor Pro-Clean which is an industrial strength alkaline tile and grout cleaning product that is safe to use on Tile and Stone. The product is applied to the floor, left to soak in for ten minutes and the scrubbed into the tile using a black scrubbing pad fitted to a rotary bonnet machine. The floor was then rinsed and the now soiled cleaning solution extracted using a wet vacuum.
The process was repeated several times until we were happy the floor was clean and free of sealer and then given a final rinse with water. Before leaving for the day the floor was dried as much as possible using the wet vacuum to extract as much moisture as possible.
On the second day our first task was to check the floor with a damp meter in several places to ensure the tiles had dried off overnight. All was well and we began the process of sealing the floor with a Tile Doctor Seal and Go. This is a topical sealer which provides a high-quality low-sheen finish and protection against ingrained dirt and stains.
Victorian tiles are quite porous and five coats were needed to fully seal the floor. This took some time to complete as you have to wait until the first coat is dry before applying the next however it was well worth the effort as the floor looked fantastic afterwards.
Thomas Wilson
Edinburgh Tile Doctor
17