
Search results for "Effective learning" in Home Design Ideas
 Corynne Pless
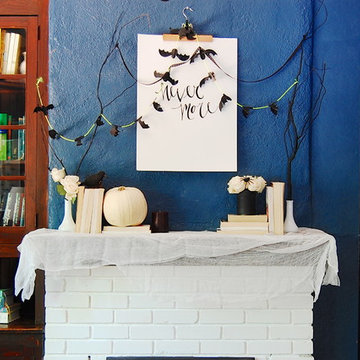
Photo and styling: Corynne Pless © 2013 Houzz
Inspiration for a transitional living room remodel in New York
Inspiration for a transitional living room remodel in New York
 Cachet Wine Cellars
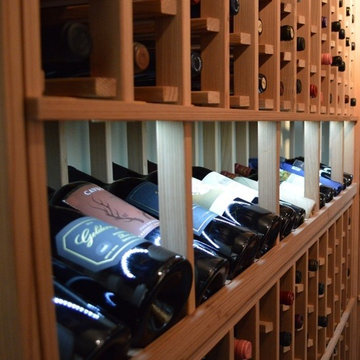
Nestled between individual bottle racks is a high reveal display row. High reveal display rows tilt wines to a 15-degree angle to effectively put them and their labels on display. Pitching the bottles at an angle also keeps the cork moist, preventing it from shrinking. When the cork decreases in volume, it will allow air to mix with the wine, resulting in wine oxidation.
High reveal display racks are the perfect place to showcase your most prized vintages. The custom wine racks California were constructed from unfinished Premium Redwood.
The recessed LED lighting illuminates high reveal display row to great effect.
Learn more about this project: https://www.winecellarsbycoastal.com/laguna-beach-california-residential-wine-room-installation-with-wine-display-rack.aspx
Coastal Custom Wine Cellars
8 Waltham Rd.
Ladera Ranch, CA 92694
+1 (949) 200-8134
Connect with us on Facebook: https://www.facebook.com/CoastalCustomWineCellars
 Showplace Cabinetry
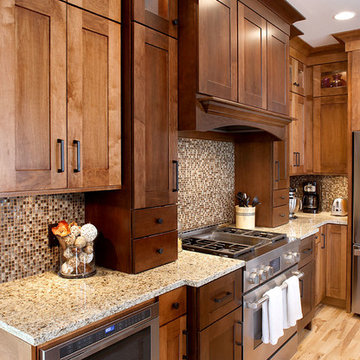
Door style: Pendleton W | Species: Maple | Finish: Harvest, Autumn
Note how the maple Harvest and Autumn stains were paired for a lovely two-toned effect.
Learn more about Showplace maple: http://www.showplacewood.com/WoodsFin2/woodsM.0.html
Find the right local pro for your project
 Wine Cellar Specialists
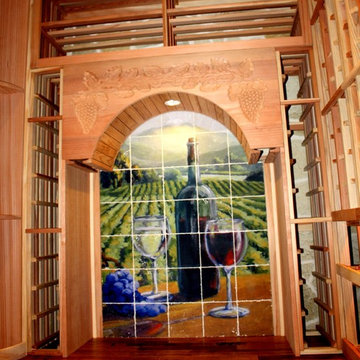
This arch display contains glass stemware custom wine racks, for added convenience.
These, along with the tabletop, provide the perfect area at which to decant and sample wines.
A puck LED light was also installed; it illuminates the arch display and tabletop to beautiful effect.
To learn more, continue on through the project, and check out: http://www.winecellarspec.com/wine-room-small-magnificent-colleyville-texas/
Wine Cellar Specialists
1134 Commerce Drive
Richardson
(972)454-0480
75081
https://winecellarspec.com/

 safe ZOnea
If you’re active on GardenWeb sharing plant photos, asking for advice, tracking seasonal progress you already understand how much detail goes into gardening. Soil pH, rainfall, emerging leaves, bloom counts, fertilizer schedules it adds up fast. But all that rich information often remains buried in posts, lists or memory. What if you could visualize that data and turn it into clear quick insights? That’s where a graph maker becomes a game-changer for your gardening workflow.
1. Why garden data belongs on a graph
On GardenWeb, you’ll find forums for everything from perennial care, vegetable gardening, patios, herbs, even cooking and craft projects. While plant lovers share observations and ask questions, many track progress manually in spreadsheets or memory. A graph maker flips that around:
Instead of a list of numbers (e.g., “Soil test: pH 6.4 in May, 6.1 in October”), you get a line graph showing the decline over time.
Instead of guessing which plant bloomed most, you see a bar chart comparing counts across plants.
Instead of manually calculating average rainfall effect, you plot scatter points of bloom count vs. rainfall.
By turning your data into visuals, you’re not just recording—you’re analysing, learning and improving. For GardenWeb users this means smarter decisions: Which fertilizer actually improves bloom count? Which shady spot recovers slower? A graph maker gives clarity.
2. What is a graph maker and how to use one
A graph maker is a web tool or software that lets you input raw data (numbers, dates, categories) and output visual charts like line graphs, bar charts, scatter plots, etc. It might allow you to import a spreadsheet, select chart type, customize colours, label axes, and export the image for your blog, forum post or personal log.
Here’s how you could apply it for gardening:
Log blooms per week for each rose plant.
Using the graph maker, choose line graph to track changes over weeks.
Label your y-axis “Number of Blooms”, x-axis “Week of Year”.
Add colour lines for each plant for easy comparison.
Export as PNG and embed it in a GardenWeb forum post: “See bloom trend for my ‘Peace’ vs ‘Knock Out’ roses”.
This isn’t just pretty-to-look-at: it makes the trend obvious, invites discussion (“Hey, your ‘Knock Out’ line dips after week 28—what changed?”) and helps you refine your routine.
3. Use these specific scenarios on GardenWeb
A. Soil pH and plant health tracking
After multiple tests you have pH values over time and bloom results. Upload both datasets into the graph maker, produce a dual-axis line graph: soil pH on one axis, bloom count on the other. Post your findings in the “Soil, Fertility & Nutrients” forum and get feedback.
B. Seasonal pest or disease appearance
Record number of aphids spotted each month and whether you used treatment. A bar chart via the graph maker can show pre- and post-treatment figures. Then ask the “Insect & Disease Control” forum for advice based on your visual data.
C. Yield comparison between varieties
You grow two zucchini varieties. You keep weekly yield in pounds. Use the graph maker for a side-by-side bar chart. Share in the “Vegetable Gardening” forum: “Which was better this year? See the chart”.
D. Rainfall vs growth rate
You log weekly rainfall and growth (in cm) of your tomato plants. Use scatter plot in graph maker. If a pattern emerges, you’re ready to post: “Is my growth plateau due to drought? Chart shows a clear correlation.”
4. Why this elevates your GardenWeb contributions
When you post with a chart made by a graph maker, you’re doing more than asking or showing off. You’re investigating. You’re analysing. You invite the community to give feedback on data, not just anecdotes. That elevates the discussion. Instead of “My plant died, any ideas?” you post “See this graph of pH drop and bloom count—what might be the limiting factor?” High-quality visuals raise your post’s value and garner more thoughtful responses.
Plus, your posts become useful references for others: someone else can say, “Cool graphic, can you share your data sheet?” You build credibility and help the forum become a learning hub—not just a Q&A board.
5. Tips for using a graph maker effectively in the GardenWeb context
Keep it simple: One chart, one insight. Don’t overcrowd.
Label clearly: Titles, axis labels, units (e.g., cm/week, mg/L, °F).
Use readable colours: Avoid faint tones that vanish on mobile.
Annotate when needed: Add notes like “Fertiliser switched week 12” or “Shade cloth added”.
Provide context in your post: Don’t leave the chart alone—write a few sentences explaining what it shows and what you’re seeking.
Embed carefully: Make sure your image displays properly in GardenWeb; check mobile view.
Share raw data: If possible link to your spreadsheet so others can replicate or comment.
Be open to feedback: The chart invites questions; embrace them.
6. Possible pitfalls and how to avoid them
Bad data = bad chart: If your measurements aren’t consistent, your graph will mislead. Use standardized data collection.
Too much complexity: Multi-axis charts, too many variables—confusing. Stick to one or two variables.
Overlooking mobile viewers: Many GardenWeb users browse via phones. Use large fonts and simple visuals.
Ignoring the narrative: Chart alone won’t answer. Explain what it means and what you need.
Outdated charts: If you update your data annually, keep your visuals current or label them clearly as “2024 data”.
7. Final thoughts
On GardenWeb you’ll find a vibrant community of gardeners, DIYers, cooks and design lovers.Using a graph maker for your posts and progress turns your experience from casual hobby-logging into smart data-driven gardening. You’ll not only learn more—your peers will learn more, too.
So next time you log your plant growth, record your yield, test your soil or track pests—don’t just note it. Plot it. Use a graph maker. Share it in the forum. Let your garden tell the story, and let the community help you write the next chapter.
 Archviz-studio.com
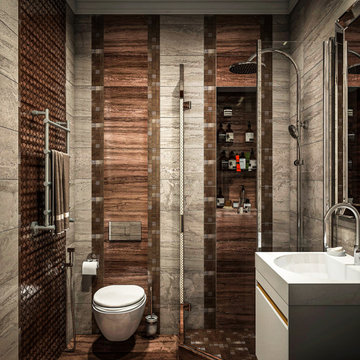
The idea of decorating a bathroom in beige and brown. The dark shade successfully emphasizes the architectural elements. Tiles are used for wall decoration. Wooden floor variation looks harmonious with white. Accent inserts in the interior visually attract attention and make the atmosphere richer. The bathroom furniture is white to match the main background. There is a shower in the corner with a glass partition. Such a shower looks aesthetically pleasing and visually increases the volume of the room. You can also see the shelves built into the wall for bathroom accessories. Ceiling-mounted light bulbs illuminate the bathroom, while the illuminated mirror creates a beautiful visual effect.
Learn more about our 3D Rendering services - https://www.archviz-studio.com/
 Techo-Bloc
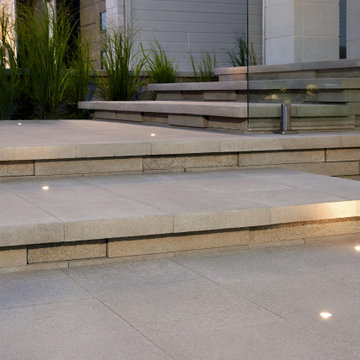
These modern front entrance steps were inspired by our Graphix retaining wall and our Raffinato wall caps!
The Graphix wall’s varying depths and unique but simple installation process creates a 3 dimensional visual effect. The mix of smooth and chiseled textures add another factor of visual interest to this wall, making it perfect for design lovers and those seeking something sleek and out of the box
The smooth look of the Raffinato collection brings modern elegance to your tailored spaces. Use these as wall caps for the Raffinato wall, as step treads on your outdoor steps or around pools as your modern pool coping option.

Sponsored
Sunbury, OH

J.Holderby - Renovations
Franklin County's Leading General Contractors - 2X Best of Houzz!
 Techo-Bloc
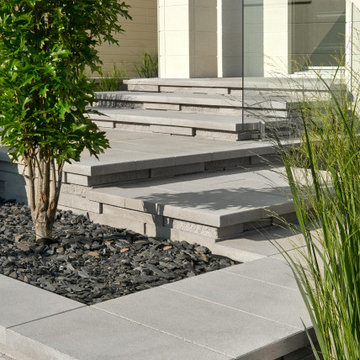
These modern front entrance steps were inspired by our Graphix retaining wall and our Raffinato wall caps!
The Graphix wall’s varying depths and unique but simple installation process creates a 3 dimensional visual effect. The mix of smooth and chiseled textures add another factor of visual interest to this wall, making it perfect for design lovers and those seeking something sleek and out of the box
The smooth look of the Raffinato collection brings modern elegance to your tailored spaces. Use these as wall caps for the Raffinato wall, as step treads on your outdoor steps or around pools as your modern pool coping option.
 Rustico Tile & Stone
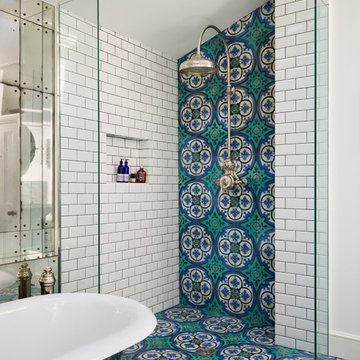
Philadelphia Encaustic-style Cement Tile - custom made and provided by Rustico Tile and Stone. Wholesale prices and worldwide shipping for Cement Tiles.
Rustico Tile and Stone offers 2 types of this Concrete Tile. Our MeaLu Collection features this specific tile and other in-stock, ready-to-ship Cement tiles. Or customize your tile with designs from our Traditional Collection.
Learn more by calling or emailing us today! (512) 260-9111 / info@rusticotile.com
Bathroom design and installation completed by Drummonds UK - "Makers of Bathrooms"
 Westlake Royal Building Products
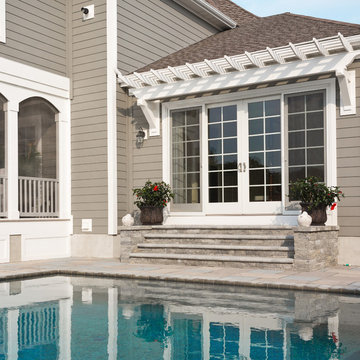
Premium siding from Celect® Cellular Composite Siding by Royal® is made from recyclable, state-of-the-art cellular materials. Which means it faithfully reproduces the deep grain texture and solid heft of real wood. And every style is equally unaffected by mold, mildew, weather and the effects of time.
 Granit Architects + Interiors
Photo Credit: Andy Beasley
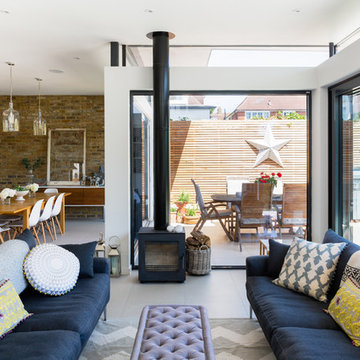
Exposed brick walls, dark joinery and contrasting textures and soft furnishings allows this space to have a lovely homely feel while still being a contemporary family home. A wood burning fire in the sitting area creates a toasty corner, even in an open plan room. A multi use space for entertaining and family life this project is still a hit, and a favourite of ours and the public. The space can be opened up to bring the outside, in. By opening up the huge sliding glazed doors onto the patio you create an even larger space where life can spill out into the garden, and equally lets nature into the home with a breath of fresh air.
The pendant lights above the table from John Lewis – William Bottle Glass Pendants from the Croft collection £130 each. These are such simple lights with a hint of detail and a slightly industrial feel ties in beautifully with the metal star table lamp on the bespoke side table.
 Designtheory Inc.
Valerie Wilcox
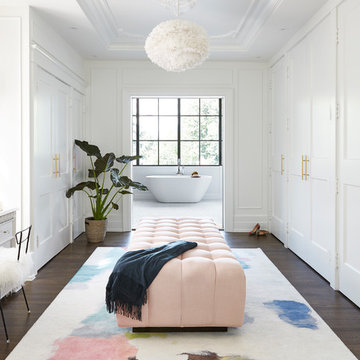
Dressing room - mid-sized transitional gender-neutral brown floor and dark wood floor dressing room idea in Toronto with shaker cabinets and white cabinets
Dressing room - mid-sized transitional gender-neutral brown floor and dark wood floor dressing room idea in Toronto with shaker cabinets and white cabinets

Sponsored
Sunbury, OH
J.Holderby - Renovations
Franklin County's Leading General Contractors - 2X Best of Houzz!
 PLANT Architect Inc.
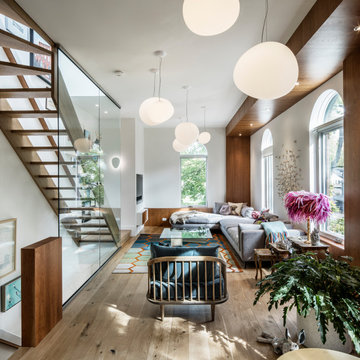
This three-storey 19th-century building was originally a dairy. In the 1980s it was vertically subdivided into three narrow townhouse units. To expand the apparent width of the second-floor living area, we replaced the existing enclosed stair with a new stair behind transparent floor-to-ceiling glass panels. View facing east through second-floor living area, with reclaimed wide board white oak flooring and cherry wall framing.
 Wanda Ely Architect Inc.
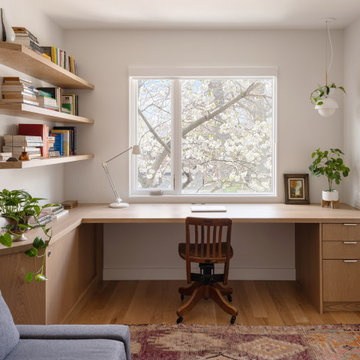
On the second floor, the main office space takes advantage of beautiful west light. In the spring, the cherry tree outside bursts into bloom, creating a soft, ethereal view. Faceted floating shelves and a built-in desk provide storage and negotiate the transition space between the old house and the new addition.

 Maria Killam
Tracey Ayton Photography
Inspiration for a mid-sized transitional enclosed light wood floor family room remodel in Vancouver with white walls and a standard fireplace
Inspiration for a mid-sized transitional enclosed light wood floor family room remodel in Vancouver with white walls and a standard fireplace
 Decor by Christine Interior Decorating & Design
Stephani Buchman
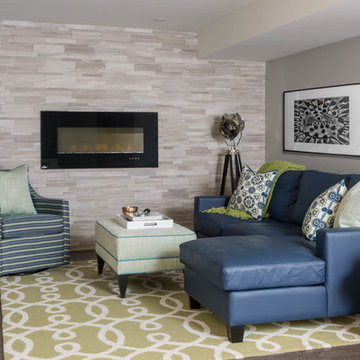
Transitional dark wood floor family room photo in Toronto with gray walls, a ribbon fireplace and a tile fireplace
Transitional dark wood floor family room photo in Toronto with gray walls, a ribbon fireplace and a tile fireplace


 McCollum Interiors
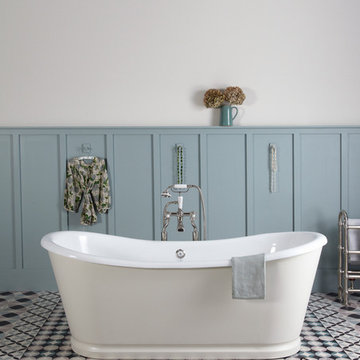
Bath Grand La Rochelle Painted In Vintage 1884, Panelling painted in Mylands Colours of London "Long Acre No. 102".
Freestanding bathtub - cottage multicolored floor freestanding bathtub idea in New York with multicolored walls
Freestanding bathtub - cottage multicolored floor freestanding bathtub idea in New York with multicolored walls
 Mihaly Slocombe
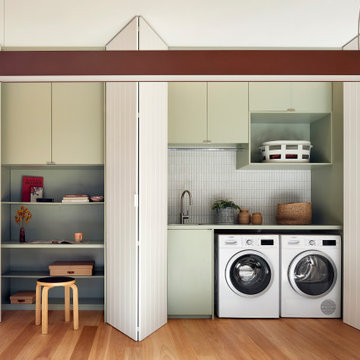
Brunswick Parlour transforms a Victorian cottage into a hard-working, personalised home for a family of four.
Our clients loved the character of their Brunswick terrace home, but not its inefficient floor plan and poor year-round thermal control. They didn't need more space, they just needed their space to work harder.
The front bedrooms remain largely untouched, retaining their Victorian features and only introducing new cabinetry. Meanwhile, the main bedroom’s previously pokey en suite and wardrobe have been expanded, adorned with custom cabinetry and illuminated via a generous skylight.
At the rear of the house, we reimagined the floor plan to establish shared spaces suited to the family’s lifestyle. Flanked by the dining and living rooms, the kitchen has been reoriented into a more efficient layout and features custom cabinetry that uses every available inch. In the dining room, the Swiss Army Knife of utility cabinets unfolds to reveal a laundry, more custom cabinetry, and a craft station with a retractable desk. Beautiful materiality throughout infuses the home with warmth and personality, featuring Blackbutt timber flooring and cabinetry, and selective pops of green and pink tones.
The house now works hard in a thermal sense too. Insulation and glazing were updated to best practice standard, and we’ve introduced several temperature control tools. Hydronic heating installed throughout the house is complemented by an evaporative cooling system and operable skylight.
The result is a lush, tactile home that increases the effectiveness of every existing inch to enhance daily life for our clients, proving that good design doesn’t need to add space to add value.
 Rebath Heaven
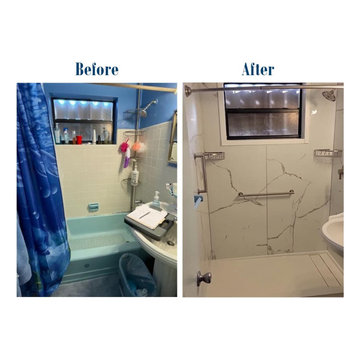
A bathroom renovation is a smart investment. Not only will it enhance your lifestyle, but it will also increase the value of your property. Contact us to learn more about the benefits of a bathroom renovation.
9