
Search results for "Electrical condenser" in Home Design Ideas
 Advance Design Studio, Ltd.
Jennifer and Dan have lived in their Deer Park Illinois home for 15 years, slowly making minor fixes like painting and decorating; but they had a new plan for their kitchen the entire time. An awkwardly placed garage door, and an island cooktop with a terrible downdraft made a full-scale kitchen remodel an absolute must. Jennifer had many ideas in mind and wanted to work with a company that could provide high-end work, while partnering with a designer that would tailor the kitchen to her ideas.
She was intrigued by the phrase “Common Sense Remodeling” in Advance Design’s feature she discovered while perusing an issue of the community’s Quintessential Barrington Magazine. Doing further research on the company’s website, as she looked through project profiles and read about Advance Design’s “Common Sense Remodeling” philosophy, she promptly scheduled an appointment to see if the people and ideas she read about were truly who they said they were. The more she read, the more she knew that the “Common Sense” approach to remodeling they described was exactly the type of company she was looking for.
The partnership was sealed after an initial consultation with Owner Todd Jurs and Project Designer Michelle Lecinski. They displayed a combination of friendliness, professionalism and respect that was unmatched by any of the other companies Jennifer talked to. She knew that with Advance Design, she would be able to retain the vision that she had in mind with high-quality craftsmanship.
“I reached out to Advance Design because of the ‘Common Sense Remodeling’ tagline,” Jennifer said. “That’s what lingered for me”. “Advance Design was the most respectful- of the house and of my design ideas, and the most professional of the handful of companies that looked at my project”.
Soon after the meeting Jennifer began working with Michelle on the project design. They quickly developed chemistry. Jennifer loved how Michelle researched and located every detail that Jennifer wanted for the kitchen. Between the two of them, every concept and idea was worked through and perfected. “Jennifer had definite ideas about what she wanted the new kitchen to look like, she just didn’t know how to bring it all together. We worked together really well to make her ideas into the practical reality necessary for a well-functioning kitchen, with the look and feel that she had envisioned”, says Michelle.
“Michelle was wonderful in using the CAD system she would show me new drawings every time we changed the layout while working through the design,” Jennifer said. “She was a really wonderful partner in execution, she made sure everything happened quickly and easily.”
The finished design drew out elements of Jennifer’s style and personality. The pair call the look “sophisticated farmhouse” to describe the kitchen renovation to family and friends. The result was a beautifully crafted, authentic-feeling space that satisfied Jennifer’s dreams 15 years in the making. The whole project consisted of a kitchen remodel, mudroom upgrade with powder room, and garage entry relocation. “The projects I personally like the best, are the ones that put the client’s dreams on display,” Project Designer Michelle said. “And this is one of those projects.”
The main focal point of the kitchen is custom zinc and brass ventilation hood with a vintage sheen, which was hand made to order by a small company in Indiana named Vogler Metalworking. “It’s like sculpture, a true work of art”, says Jennifer. Your eye is immediately drawn towards this elegant yet practical hood that eliminated the home’s downdraft problem and added a striking conversation piece at the same time. The carpenters had to use special gloves when transporting and installing it, so they didn’t smudge it with fingerprints. The beautiful hood centers proudly over the stunning black enamel and brass LaCornue Range. “I had a friend who had a LaCornue range and after learning how easy it was to cook perfect meals, I was convinced I wanted to have one”, says Jennifer. This unique, breathtaking combination anchors the entire kitchen and is apparent immediately as you walk into the great room the surrounds the space.
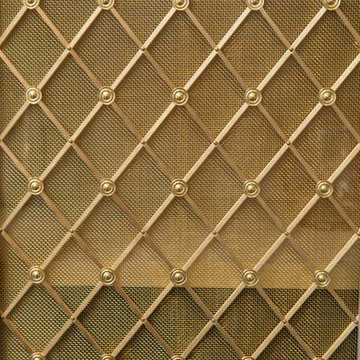
DuraSupreme Crestwood cabinets with a Kendall Panel add function and sophistication. A custom gray paint color paired with a storm blue was developed so that the new kitchen looked like it belonged to the existing space. Unlacquered brass faucets and hardware were important to Jennifer because she wanted the living finishes to age over time. Remarkable brass diamond mesh cabinet door inserts imported from the UK continue to add this one-of-a-kind kitchen renovation; giving it a “you won’t see this everywhere” quality. The use of old railcar flooring for the coffee bar countertop and reclaimed oak for the open shelving gives an authenticity to the space uncommon in kitchens today.
Jennifer and Michelle fell in love with the Limestone Grey Stone while they were investigating unique island countertop ideas. They liked the fact that the limestone as a living finish will age and change over time. Calcutta Miel Quartz countertops made for an excellent pairing around the perimeter, as it’s durable and perfect for cooking preparations. A textured white subway tile backsplash that runs to the ceiling keeps your eye moving towards the open shelving, and to the main focal point of the stunning range hood combination.
“The kitchen functions beautifully, and it’s gorgeous,” beams Jennifer as she gestures with both hands while smiling ear to ear. “The most important thing was I wanted a kitchen that had a wonderful flow, cooked beautiful meals and was a great gathering place for family and friends, and this space does that perfectly! Beauty wise, it turned out exactly how I had envisioned. I felt the function part was the hardest part, and that was nailed”!
Relocating the garage entry to the new mudroom was a huge priority and has finally separated the family’s arriving home functions from their kitchen. Now coats and shoes and bags have their own area for dropping once members arrive home. Matching gray DuraSupreme cabinetry helped create gorgeous, purposeful lockers for the family. A reclaimed vintage sink and custom wall paper were added to the tiny powder room to beautify the once previously only functional space. Advance Design was even able to create a custom space for their dog to sleep while the family is away.
“It was unbelievable that a project of this size was completed in such a short time, and I think that’s because of the large amount of planning and preparation that went into it,” Jennifer marveled, “When we started, we were ready, and everything was prepared”.
When it came to execution, Project Manager Justin Davis and his crew were quick, accessible, and organized. Projects like this kitchen are typically completed in as little as 8-10 weeks. Jennifer’s kitchen however despite the relocation of some challenging HVAC in a soffit and moving of an exterior door was completed remarkably fast in part because the team was working with an existing tile floor that ran throughout the first floor that the client really loved.
“You get to know these people really well because they’re living in your house while you’re living in your house. They were so fast and really good, it didn’t take as long as even planned” reported Jennifer. “I would text Justin and he always responded almost immediately. I got to know all the guys who were working in our house and they were all wonderful people”.
Details in a customized kitchen like this one require skill and care from the people who install it. “All the guys on the job were skilled at what the did. I wanted small details like little feet to look like furniture, that is where their carpentry skill came in to make these all perfect”, said Jennifer. “The tile guys were wonderful. They even let me determine how I wanted the texture with the grout to appear for a salt and pepper look; now that is a very skilled trade person making it custom”.
In Jennifer’s interview, she continued to reference Advance Design’s “Common Sense Remodeling”, so I took a minute to ask her exactly what that phrase meant to her and how it played out in her experience with her project and the Advance Design team. Here is what she said: “I was intrigued about Common Sense Remodeling and in my head that there would be clear costs and prices, great communication between the design team, the execution team and me”, said Jennifer. They did deliver on that, it was so clear about the cost breakdown, what I could expect from everyone who came to my house, and everything that we had ordered. That to me is the Common Sense”!
It’s great to see a client take literally our assertion that a well-planned remodeling project is simply “Common Sense”! She anticipated each step of the way would be clear, concise, and predictable, all the while protecting the outcome due to the careful upfront planning. “Advance Design delivered on their ‘Common Sense Remodeling’ promise,” Jennifer said. “From the design team, to the execution team - everything was straight forward like I imagined. The project turned out exactly how I envisioned, I enjoyed this process and absolutely would recommend Advance Design Studio to anyone.”
 Johnson + Fernàndez Interior Design
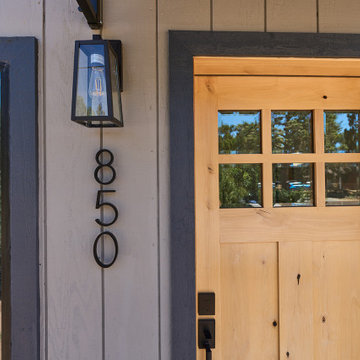
This fully electric new build offers designer grade materials and finishes from top to bottom. From the exterior, the home displays all new Milgard Trinsic V300 black frame windows, which are sun coated, fire rated, and offer SmartTouch locking. You get amazing views from every room in the house! Enjoy an expansive Trex composite decking and railing system right off the main entrance that the whole family can enjoy. Walk inside and experience the entire space in Everylife luxury vinyl flooring, a Waypoint kitchen with a shaker door style in Sage green and an Almond maple finish island, Calacatta Gold quartz countertops and backsplash, and all the designer faucets and fixtures anyone can ever dream of. Just off the kitchen is a powder bathroom with a decorative Daltile cement tile and a Cantrell vanity. Down the hall, you will find the full bathroom with a Delta Classic 500 bathtub, a Homewerks Bluetooth exhaust fan, Esmer porcelain tile shower enclosure, and a Cauley vanity. At the end of the hallway are two guest bedrooms with their own closets and storage space. The home also offers a Tankless water heater located in the laundry room along with an ACPro 3-ton R410a heat pump condenser and mini split systems in every room. Gas line is on the property and capped for possible conversion.
 Johnson + Fernàndez Interior Design
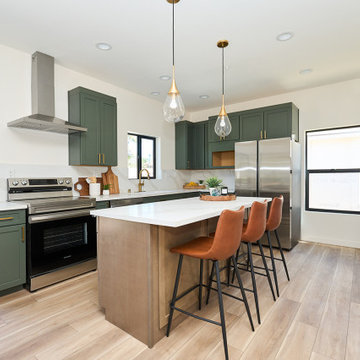
This fully electric new build offers designer grade materials and finishes from top to bottom. From the exterior, the home displays all new Milgard Trinsic V300 black frame windows, which are sun coated, fire rated, and offer SmartTouch locking. You get amazing views from every room in the house! Enjoy an expansive Trex composite decking and railing system right off the main entrance that the whole family can enjoy. Walk inside and experience the entire space in Everylife luxury vinyl flooring, a Waypoint kitchen with a shaker door style in Sage green and an Almond maple finish island, Calacatta Gold quartz countertops and backsplash, and all the designer faucets and fixtures anyone can ever dream of. Just off the kitchen is a powder bathroom with a decorative Daltile cement tile and a Cantrell vanity. Down the hall, you will find the full bathroom with a Delta Classic 500 bathtub, a Homewerks Bluetooth exhaust fan, Esmer porcelain tile shower enclosure, and a Cauley vanity. At the end of the hallway are two guest bedrooms with their own closets and storage space. The home also offers a Tankless water heater located in the laundry room along with an ACPro 3-ton R410a heat pump condenser and mini split systems in every room. Gas line is on the property and capped for possible conversion.
Find the right local pro for your project
 Paradise Valley Spas
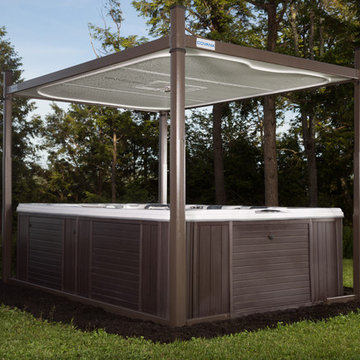
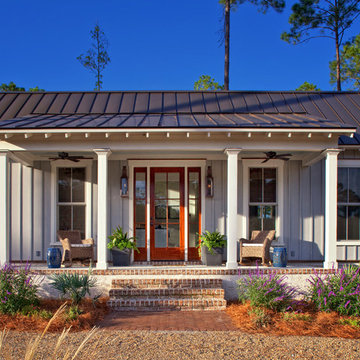
What if you could access your hot tub or swim spa with style? What if it was as simple as turning a key? No more removing snow, ice or other debris. No more straining to lift your cover. With Covana, you can equip your hot tub or swim spa with one of the highest insulation covers on the market.
Covana systems are more than just hot tub covers. They are also completely automated gazebos which offer you maximum comfort, safety, and intimacy. Made with state-of-the-art materials, Covana products are designed to endure the most rigorous climates while saving you money on unnecessary water, heating bills, and maintenance products.

 Joni Spear Interior Design
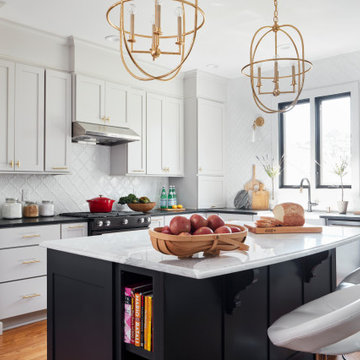
Small kitchen with large impact. White Carrera marble island is centered around black soapstone counters. The corner cabinet doubles as an appliance garage and dishes are visible in the built-in cabinet storage.
 VELUX
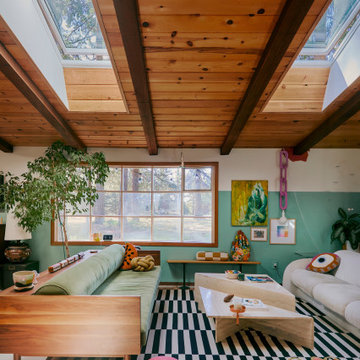
VELUXInspiration for a 1960s open concept beige floor, exposed beam, vaulted ceiling and wood ceiling living room remodel in Charlotte with green walls

 Landis Architects | Builders
HDBros
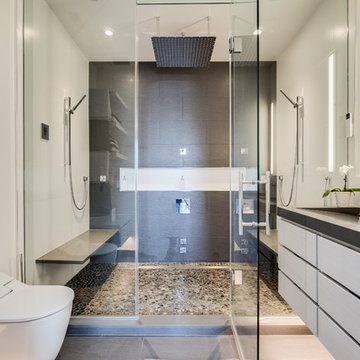
The clients wanted a unique and spa-like master bath retreat to complement their already beautiful downtown loft. They wanted design solutions and attention to detail that would help distinguish their duplex apartment as a one-of-a-kind space tailored to their specific needs. The existing master bath did not have the sleek contemporary look they prefer, and the shower was too small. We enlarged the shower by removing a tub in an adjacent hall bath. The clients were willing to change the full hall bath into a powder room as they already had two full baths on the lower level. A simple palette of white, gray, and black enhances the contemporary design.
We removed the wall between the master and hall bath, removed the hall bath tub, and built a new wall. We had to install all new plumbing rough-ins for the new fixtures.
The new shower is 7-feet 9-inches by 4-feet -- enlarged from the original 4-foot square – with a linear drain in the floor.
• The owners selected a river rock floor to provide acupressure and an organic touch to the modern room.
• The black back wall has a large niche set with the same contrasting white tile as the side walls. The niche is outlined with metal trim.
• Adding drama and the feel of a waterfall is an oversized 23-inch square rain head in the ceiling.
The clients wanted two benches. Our crew mounted stainless steel L-brackets on the side walls. Our countertop fabricator routed the underside of the engineered quartz benches so the brackets sit flush. The clients also wanted a steam shower, so the glass doors span from the base to the tiled ceiling. We angled the shower ceiling such that the condensation drips would float back to the rear wall instead of straight down. Also set in the walls are waterproof blue-tooth enabled speakers.
The clients were inspired by a photo of a countertop with dual ramp sinks. However, there were no references or design information. Our team stepped up to the challenge and created a detailed shop drawings with consultations between our designer, stone fabricator, and in-house plumber.
A concealed tank/wall hung toilet fits the clean design lines. We installed the tank in the existing wall which had 2x6 framing. The toilet’s bidet seat (with remote control) required an electrical circuit.
In one corner of the bathroom is a single unit wall-mounted drawer with five floating shelves above. The towel bars that are attached to each shelf are appliance pulls.
The room has layers of light, including LED strips under the toilet, vanity, and shelving to highlight the floating/wall mounted units. The medicine cabinets have surface mounted lights, and there are recessed lights in the room, as well as in the shower.
We also renovated the hall powder room with new flooring, vanity, and fixtures.
 Kathleen Jennison
An Arts & Crafts Bungalow is one of my favorite styles of homes. We have quite a few of them in our Stockton Mid-Town area. And when C&L called us to help them remodel their 1923 American Bungalow, I was beyond thrilled.
As per usual, when we get a new inquiry, we quickly Google the project location while we are talking to you on the phone. My excitement escalated when I saw the Google Earth Image of the sweet Sage Green bungalow in Mid-Town Stockton. "Yes, we would be interested in working with you," I said trying to keep my cool.
But what made it even better was meeting C&L and touring their home, because they are the nicest young couple, eager to make their home period perfect. Unfortunately, it had been slightly molested by some bad house-flippers, and we needed to bring the bathroom back to it "roots."
We knew we had to banish the hideous brown tile and cheap vanity quickly. But C&L complained about the condensation problems and the constant fight with mold. This immediately told me that improper remodeling had occurred and we needed to remedy that right away.
The Before: Frustrations with a Botched Remodel
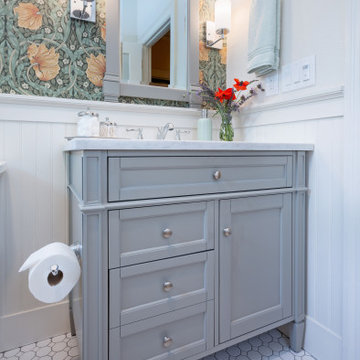
The bathroom needed to be brought back to period appropriate design with all the functionality of a modern bathroom. We thought of things like marble countertop, white mosaic floor tiles, white subway tile, board and batten molding, and of course a fabulous wallpaper.
This small (and only) bathroom on a tight budget required a little bit of design sleuthing to figure out how we could get the proper look and feel. Our goal was to determine where to splurge and where to economize and how to complete the remodel as quickly as possible because C&L would have to move out while construction was going on.
The Process: Hard Work to Remedy Design and Function
During our initial design study, (which included 2 hours in the owners’ home), we noticed framed images of William Morris Arts and Crafts textile patterns and knew this would be our design inspiration. We presented C&L with three options and they quickly selected the Pimpernel Design Concept.
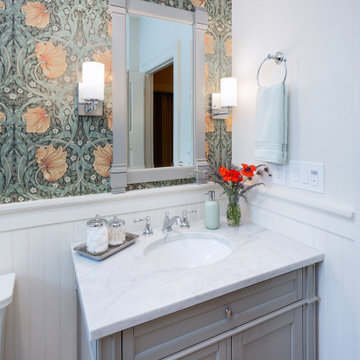
We had originally selected the Black and Olive colors with a black vanity, mirror, and black and white floor tile. C&L liked it but weren’t quite sure about the black, We went back to the drawing board and decided the William & Co Pimpernel Wallpaper in Bayleaf and Manilla color with a softer gray painted vanity and mirror and white floor tile was more to their liking.
After the Design Concept was approved, we went to work securing the building permit, procuring all the elements, and scheduling our trusted tradesmen to perform the work.
We did uncover some shoddy work by the flippers such as live electrical wires hidden behind the wall, plumbing venting cut-off and buried in the walls (hence the constant dampness), the tub barely balancing on two fence boards across the floor joist, and no insulation on the exterior wall.
All of the previous blunders were fixed and the bathroom put back to its previous glory. We could feel the house thanking us for making it pretty again.
The After Reveal: Cohesive Design Decisions
We selected a simple white subway tile for the tub/shower. This is always classic and in keeping with the style of the house.
We selected a pre-fab vanity and mirror, but they look rich with the quartz countertop. There is much more storage in this small vanity than you would think.
The Transformation: A Period Perfect Refresh
We began the remodel just as the pandemic reared and stay-in-place orders went into effect. As C&L were already moved out and living with relatives, we got the go-ahead from city officials to get the work done (after all, how can you shelter in place without a bathroom?).
All our tradesmen were scheduled to work so that only one crew was on the job site at a time. We stayed on the original schedule with only a one week delay.
The end result is the sweetest little bathroom I've ever seen (and I can't wait to start work on C&L's kitchen next).
Thank you for joining me in this project transformation. I hope this inspired you to think about being creative with your design projects, determining what works best in keeping with the architecture of your space, and carefully assessing how you can have the best life in your home.
 Kathleen Jennison
An Arts & Crafts Bungalow is one of my favorite styles of homes. We have quite a few of them in our Stockton Mid-Town area. And when C&L called us to help them remodel their 1923 American Bungalow, I was beyond thrilled.
As per usual, when we get a new inquiry, we quickly Google the project location while we are talking to you on the phone. My excitement escalated when I saw the Google Earth Image of the sweet Sage Green bungalow in Mid-Town Stockton. "Yes, we would be interested in working with you," I said trying to keep my cool.
But what made it even better was meeting C&L and touring their home, because they are the nicest young couple, eager to make their home period perfect. Unfortunately, it had been slightly molested by some bad house-flippers, and we needed to bring the bathroom back to it "roots."
We knew we had to banish the hideous brown tile and cheap vanity quickly. But C&L complained about the condensation problems and the constant fight with mold. This immediately told me that improper remodeling had occurred and we needed to remedy that right away.
The Before: Frustrations with a Botched Remodel
The bathroom needed to be brought back to period appropriate design with all the functionality of a modern bathroom. We thought of things like marble countertop, white mosaic floor tiles, white subway tile, board and batten molding, and of course a fabulous wallpaper.
This small (and only) bathroom on a tight budget required a little bit of design sleuthing to figure out how we could get the proper look and feel. Our goal was to determine where to splurge and where to economize and how to complete the remodel as quickly as possible because C&L would have to move out while construction was going on.
The Process: Hard Work to Remedy Design and Function
During our initial design study, (which included 2 hours in the owners’ home), we noticed framed images of William Morris Arts and Crafts textile patterns and knew this would be our design inspiration. We presented C&L with three options and they quickly selected the Pimpernel Design Concept.
We had originally selected the Black and Olive colors with a black vanity, mirror, and black and white floor tile. C&L liked it but weren’t quite sure about the black, We went back to the drawing board and decided the William & Co Pimpernel Wallpaper in Bayleaf and Manilla color with a softer gray painted vanity and mirror and white floor tile was more to their liking.
After the Design Concept was approved, we went to work securing the building permit, procuring all the elements, and scheduling our trusted tradesmen to perform the work.
We did uncover some shoddy work by the flippers such as live electrical wires hidden behind the wall, plumbing venting cut-off and buried in the walls (hence the constant dampness), the tub barely balancing on two fence boards across the floor joist, and no insulation on the exterior wall.
All of the previous blunders were fixed and the bathroom put back to its previous glory. We could feel the house thanking us for making it pretty again.
The After Reveal: Cohesive Design Decisions
We selected a simple white subway tile for the tub/shower. This is always classic and in keeping with the style of the house.
We selected a pre-fab vanity and mirror, but they look rich with the quartz countertop. There is much more storage in this small vanity than you would think.
The Transformation: A Period Perfect Refresh
We began the remodel just as the pandemic reared and stay-in-place orders went into effect. As C&L were already moved out and living with relatives, we got the go-ahead from city officials to get the work done (after all, how can you shelter in place without a bathroom?).
All our tradesmen were scheduled to work so that only one crew was on the job site at a time. We stayed on the original schedule with only a one week delay.
The end result is the sweetest little bathroom I've ever seen (and I can't wait to start work on C&L's kitchen next).
Thank you for joining me in this project transformation. I hope this inspired you to think about being creative with your design projects, determining what works best in keeping with the architecture of your space, and carefully assessing how you can have the best life in your home.
 FOUR POINT DESIGN BUILD INC
LOFT | Luxury Industrial Loft Makeover Downtown LA | FOUR POINT DESIGN BUILD INC
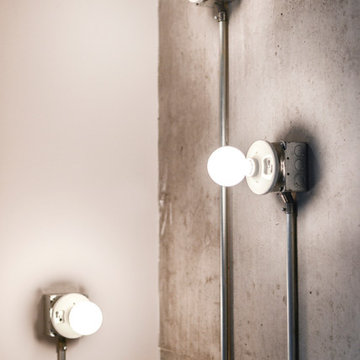
A gorgeous and glamorous 687 sf Loft Apartment in the Heart of Downtown Los Angeles, CA. Small Spaces...BIG IMPACT is the theme this year: A wide open space and infinite possibilities. The Challenge: Only 3 weeks to design, resource, ship, install, stage and photograph a Downtown LA studio loft for the October 2014 issue of @dwellmagazine and the 2014 @dwellondesign home tour! So #Grateful and #honored to partner with the wonderful folks at #MetLofts and #DwellMagazine for the incredible design project!
Photography by Riley Jamison
#interiordesign #loftliving #StudioLoftLiving #smallspacesBIGideas #loft #DTLA
AS SEEN IN
Dwell Magazine
LA Design Magazine
 Zelaya Properties LLC
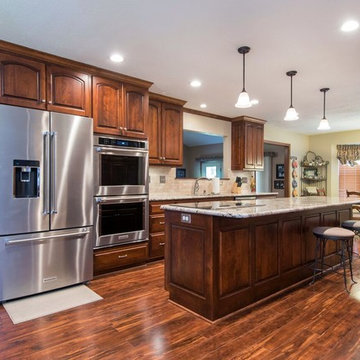
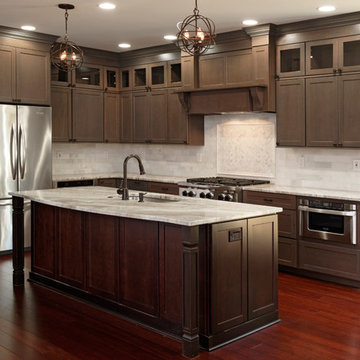
We used: Custom cherry cabinetry in Arts & Crafts Shaker style by Kabinart in Boulder and Espresso stains. Liberty Hardware Venetian bronze 1-1/2" cabinet knobs. KitchenAid Architect II Series 22 CF counter-depth French door refrigerator. KitchenAid Architect Series II 27" convection single wall oven. KitchenAid 36" 6-burner dual fuel freestanding commercial-style range. KitchenAid Architect II Series 24" dishwasher. Sharp Insight Pro Series 24" built-in microwave drawer (Model #KB6524PS). Crystorama Solaris 12" wide pendant lights in English bronze. Granite countertops in Brown Fantasy. 3"x6" polished marble backsplash.
Paint colors:
Walls: Glidden Silver Cloud 30YY 63/024
Ceilings/Trims/Doors: Glidden Swan White GLC23
Robert B. Narod Photography
 14+CO Design Studio
Small trendy master medium tone wood floor and beige floor home design photo in New York with white walls and no fireplace

 TimberTech
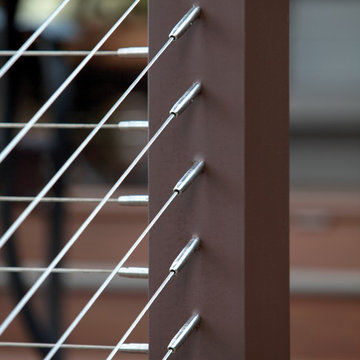
Using TimberTech's CableRail in this application offers the ultimate view of your surroundings. Made of strong, stainless steel, CableRail by Feeney installs easily and lasts.
 Tomecek Studio Architecture
Photography by John Gibbons
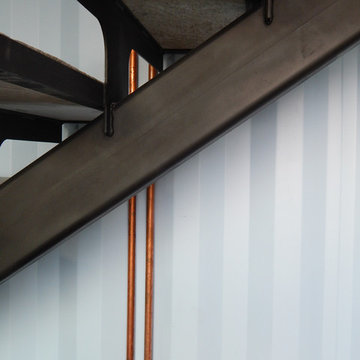
This project is designed as a family retreat for a client that has been visiting the southern Colorado area for decades. The cabin consists of two bedrooms and two bathrooms – with guest quarters accessed from exterior deck.
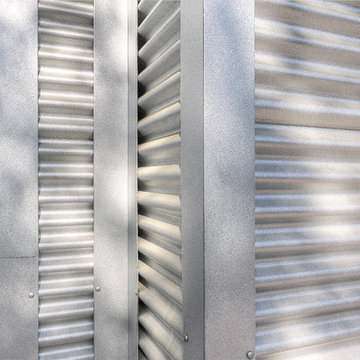
Project by Studio H:T principal in charge Brad Tomecek (now with Tomecek Studio Architecture). The project is assembled with the structural and weather tight use of shipping containers. The cabin uses one 40’ container and six 20′ containers. The ends will be structurally reinforced and enclosed with additional site built walls and custom fitted high-performance glazing assemblies.

 Kathleen Jennison
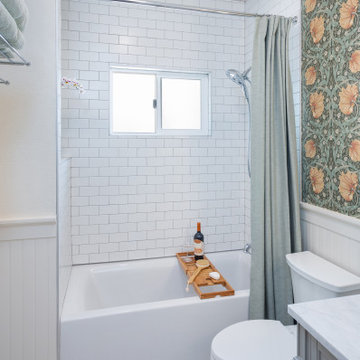
An Arts & Crafts Bungalow is one of my favorite styles of homes. We have quite a few of them in our Stockton Mid-Town area. And when C&L called us to help them remodel their 1923 American Bungalow, I was beyond thrilled.
As per usual, when we get a new inquiry, we quickly Google the project location while we are talking to you on the phone. My excitement escalated when I saw the Google Earth Image of the sweet Sage Green bungalow in Mid-Town Stockton. "Yes, we would be interested in working with you," I said trying to keep my cool.
But what made it even better was meeting C&L and touring their home, because they are the nicest young couple, eager to make their home period perfect. Unfortunately, it had been slightly molested by some bad house-flippers, and we needed to bring the bathroom back to it "roots."
We knew we had to banish the hideous brown tile and cheap vanity quickly. But C&L complained about the condensation problems and the constant fight with mold. This immediately told me that improper remodeling had occurred and we needed to remedy that right away.
The Before: Frustrations with a Botched Remodel
The bathroom needed to be brought back to period appropriate design with all the functionality of a modern bathroom. We thought of things like marble countertop, white mosaic floor tiles, white subway tile, board and batten molding, and of course a fabulous wallpaper.
This small (and only) bathroom on a tight budget required a little bit of design sleuthing to figure out how we could get the proper look and feel. Our goal was to determine where to splurge and where to economize and how to complete the remodel as quickly as possible because C&L would have to move out while construction was going on.
The Process: Hard Work to Remedy Design and Function
During our initial design study, (which included 2 hours in the owners’ home), we noticed framed images of William Morris Arts and Crafts textile patterns and knew this would be our design inspiration. We presented C&L with three options and they quickly selected the Pimpernel Design Concept.
We had originally selected the Black and Olive colors with a black vanity, mirror, and black and white floor tile. C&L liked it but weren’t quite sure about the black, We went back to the drawing board and decided the William & Co Pimpernel Wallpaper in Bayleaf and Manilla color with a softer gray painted vanity and mirror and white floor tile was more to their liking.
After the Design Concept was approved, we went to work securing the building permit, procuring all the elements, and scheduling our trusted tradesmen to perform the work.
We did uncover some shoddy work by the flippers such as live electrical wires hidden behind the wall, plumbing venting cut-off and buried in the walls (hence the constant dampness), the tub barely balancing on two fence boards across the floor joist, and no insulation on the exterior wall.
All of the previous blunders were fixed and the bathroom put back to its previous glory. We could feel the house thanking us for making it pretty again.
The After Reveal: Cohesive Design Decisions
We selected a simple white subway tile for the tub/shower. This is always classic and in keeping with the style of the house.
We selected a pre-fab vanity and mirror, but they look rich with the quartz countertop. There is much more storage in this small vanity than you would think.
The Transformation: A Period Perfect Refresh
We began the remodel just as the pandemic reared and stay-in-place orders went into effect. As C&L were already moved out and living with relatives, we got the go-ahead from city officials to get the work done (after all, how can you shelter in place without a bathroom?).
All our tradesmen were scheduled to work so that only one crew was on the job site at a time. We stayed on the original schedule with only a one week delay.
The end result is the sweetest little bathroom I've ever seen (and I can't wait to start work on C&L's kitchen next).
Thank you for joining me in this project transformation. I hope this inspired you to think about being creative with your design projects, determining what works best in keeping with the architecture of your space, and carefully assessing how you can have the best life in your home.
 Outdora
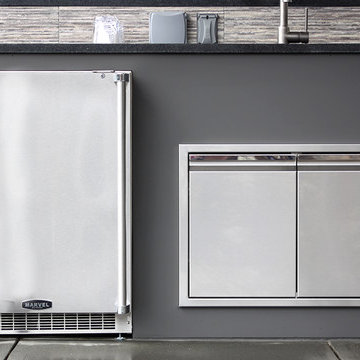
24 Inch Built-In Marvel Outdoor Refrigerator
The Marvel refrigerator is designed for efficient outdoor use, and this Stainless Steel Outdoor Marvel Refrigerator is equipped with two tempered glass shelves, three door-mounted shelves, and 6.54 cubic feet of space. Chill marinades, food for the barbecue, and beverages in this 24 inch model with an automatic defrost. The most notable feature of the undercounter refrigerator is the MicroSentry™ refrigeration monitor—a digital monitor on the Marvel refrigerator that shows the interior temperature of the compact refrigerator in real time so perishables are properly chilled. And in the event of a power failure, an alarm will sound from the MicroSentry system.
Leveling legs match the height of this unit to a countertop, and when paired with easy-roll casters from our accessories assortment you can wheel this model about your outdoor space. An automatic interior light illuminates the contents and the stainless door features a full-length door handle for an easy grip. Customize the model with a lock and right or left hinges. Cutting-edge microprocessor technology creates superior temperature control and the compressor creates ultra-quick cooling.
A Marvel refrigerator lends additional ease when you host a backyard barbecue—pull beverages and appetizers from the Marvel refrigerator as needed. The commercial condenser creates better airflow, and thanks to front-vented refrigeration you can install this model under a countertop or next to other appliances. The stainless steel refrigerator is UL-listed for safe outdoor use, and these outdoor refrigerators have a temperature range of 35˚ F to 43˚ F. Browse luxury ice makers, beverage dispensers, and outdoor freezers at Outdora. Our Marvel refrigerator models are impeccably crafted, and you can keep produce and perishables at the peak of freshness in a luxury Marvel refrigerator.
Beautifully unique outdoor kitchen on the Eastside of Sonoma.
Outdoor Kitchen includes:
+ LX2 Series 42 inch Built-in Alfresco Grill w/ Rotisserie and Infrared SearZone.
+ Alfresco VersaPower Cooker
+ 24 inch Built-in Marvel Outdoor Refrigerator
+ Twin Eagles Tall Trash Drawer
+ Twin Eagles 30 inch Triple Drawer and Door Combo
+ Twin Eagles 24 inch Single Access Door
+ Twin Eagles 19 inch Triple Storage Drawer
+ Twin Eagles 30 inch Access Door
+ Bromic Tungsten Smart-Heat 6000 Watt Electric Heater
+ Outdoor Dual Duplex Wall Switch Plate and Gang Box
Construction by: JKT & Associates
Photos by: Theilen Photography
 DryAway by Jilidoni Designs
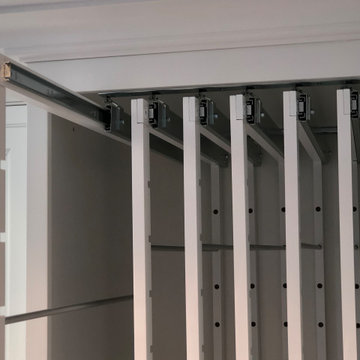
DryAway’s revolutionary and patented design is the smarter way to dry your clothes. DryAway is a series of drying racks that retract out of sight and out of the way, that saves you money while protecting the environment and your clothes! Easily installed in 2, 4, 6 or 8 frames and available in five colors. Visit us online at DryAway.net or Call us today! 855-379-2929
3