
Search results for "Escalate" in Home Design Ideas
 Kathleen Jennison
An Arts & Crafts Bungalow is one of my favorite styles of homes. We have quite a few of them in our Stockton Mid-Town area. And when C&L called us to help them remodel their 1923 American Bungalow, I was beyond thrilled.
As per usual, when we get a new inquiry, we quickly Google the project location while we are talking to you on the phone. My excitement escalated when I saw the Google Earth Image of the sweet Sage Green bungalow in Mid-Town Stockton. "Yes, we would be interested in working with you," I said trying to keep my cool.
But what made it even better was meeting C&L and touring their home, because they are the nicest young couple, eager to make their home period perfect. Unfortunately, it had been slightly molested by some bad house-flippers, and we needed to bring the bathroom back to it "roots."
We knew we had to banish the hideous brown tile and cheap vanity quickly. But C&L complained about the condensation problems and the constant fight with mold. This immediately told me that improper remodeling had occurred and we needed to remedy that right away.
The Before: Frustrations with a Botched Remodel
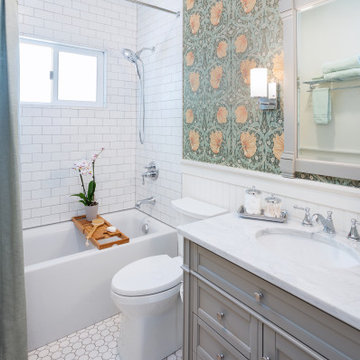
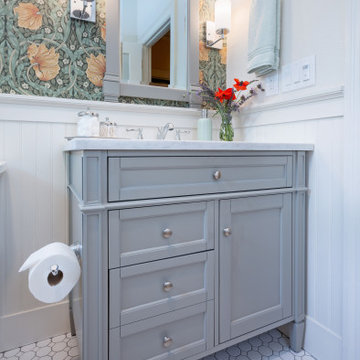
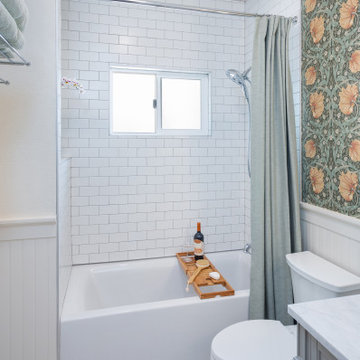
The bathroom needed to be brought back to period appropriate design with all the functionality of a modern bathroom. We thought of things like marble countertop, white mosaic floor tiles, white subway tile, board and batten molding, and of course a fabulous wallpaper.
This small (and only) bathroom on a tight budget required a little bit of design sleuthing to figure out how we could get the proper look and feel. Our goal was to determine where to splurge and where to economize and how to complete the remodel as quickly as possible because C&L would have to move out while construction was going on.
The Process: Hard Work to Remedy Design and Function
During our initial design study, (which included 2 hours in the owners’ home), we noticed framed images of William Morris Arts and Crafts textile patterns and knew this would be our design inspiration. We presented C&L with three options and they quickly selected the Pimpernel Design Concept.
We had originally selected the Black and Olive colors with a black vanity, mirror, and black and white floor tile. C&L liked it but weren’t quite sure about the black, We went back to the drawing board and decided the William & Co Pimpernel Wallpaper in Bayleaf and Manilla color with a softer gray painted vanity and mirror and white floor tile was more to their liking.
After the Design Concept was approved, we went to work securing the building permit, procuring all the elements, and scheduling our trusted tradesmen to perform the work.
We did uncover some shoddy work by the flippers such as live electrical wires hidden behind the wall, plumbing venting cut-off and buried in the walls (hence the constant dampness), the tub barely balancing on two fence boards across the floor joist, and no insulation on the exterior wall.
All of the previous blunders were fixed and the bathroom put back to its previous glory. We could feel the house thanking us for making it pretty again.
The After Reveal: Cohesive Design Decisions
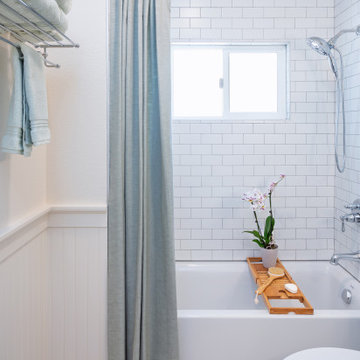
We selected a simple white subway tile for the tub/shower. This is always classic and in keeping with the style of the house.
We selected a pre-fab vanity and mirror, but they look rich with the quartz countertop. There is much more storage in this small vanity than you would think.
The Transformation: A Period Perfect Refresh
We began the remodel just as the pandemic reared and stay-in-place orders went into effect. As C&L were already moved out and living with relatives, we got the go-ahead from city officials to get the work done (after all, how can you shelter in place without a bathroom?).
All our tradesmen were scheduled to work so that only one crew was on the job site at a time. We stayed on the original schedule with only a one week delay.
The end result is the sweetest little bathroom I've ever seen (and I can't wait to start work on C&L's kitchen next).
Thank you for joining me in this project transformation. I hope this inspired you to think about being creative with your design projects, determining what works best in keeping with the architecture of your space, and carefully assessing how you can have the best life in your home.
 Christine Karnofsky Landscape Design & Consulting
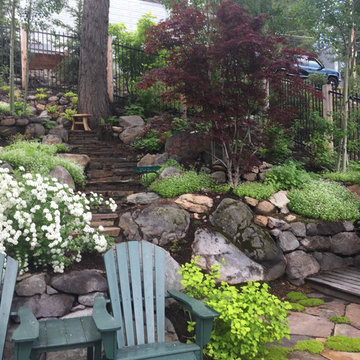
Design ideas for a large traditional partial sun backyard stone water fountain landscape in Sacramento.
 Inplace Studio
Jim Brady
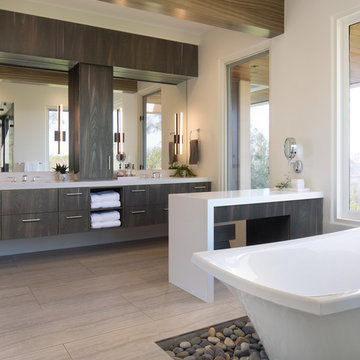
Inspiration for a large contemporary master white tile and porcelain tile freestanding bathtub remodel in San Diego with flat-panel cabinets, medium tone wood cabinets and quartz countertops
Inspiration for a large contemporary master white tile and porcelain tile freestanding bathtub remodel in San Diego with flat-panel cabinets, medium tone wood cabinets and quartz countertops
Find the right local pro for your project
 Kathleen Jennison
An Arts & Crafts Bungalow is one of my favorite styles of homes. We have quite a few of them in our Stockton Mid-Town area. And when C&L called us to help them remodel their 1923 American Bungalow, I was beyond thrilled.
As per usual, when we get a new inquiry, we quickly Google the project location while we are talking to you on the phone. My excitement escalated when I saw the Google Earth Image of the sweet Sage Green bungalow in Mid-Town Stockton. "Yes, we would be interested in working with you," I said trying to keep my cool.
But what made it even better was meeting C&L and touring their home, because they are the nicest young couple, eager to make their home period perfect. Unfortunately, it had been slightly molested by some bad house-flippers, and we needed to bring the bathroom back to it "roots."
We knew we had to banish the hideous brown tile and cheap vanity quickly. But C&L complained about the condensation problems and the constant fight with mold. This immediately told me that improper remodeling had occurred and we needed to remedy that right away.
The Before: Frustrations with a Botched Remodel
The bathroom needed to be brought back to period appropriate design with all the functionality of a modern bathroom. We thought of things like marble countertop, white mosaic floor tiles, white subway tile, board and batten molding, and of course a fabulous wallpaper.
This small (and only) bathroom on a tight budget required a little bit of design sleuthing to figure out how we could get the proper look and feel. Our goal was to determine where to splurge and where to economize and how to complete the remodel as quickly as possible because C&L would have to move out while construction was going on.
The Process: Hard Work to Remedy Design and Function
During our initial design study, (which included 2 hours in the owners’ home), we noticed framed images of William Morris Arts and Crafts textile patterns and knew this would be our design inspiration. We presented C&L with three options and they quickly selected the Pimpernel Design Concept.
We had originally selected the Black and Olive colors with a black vanity, mirror, and black and white floor tile. C&L liked it but weren’t quite sure about the black, We went back to the drawing board and decided the William & Co Pimpernel Wallpaper in Bayleaf and Manilla color with a softer gray painted vanity and mirror and white floor tile was more to their liking.
After the Design Concept was approved, we went to work securing the building permit, procuring all the elements, and scheduling our trusted tradesmen to perform the work.
We did uncover some shoddy work by the flippers such as live electrical wires hidden behind the wall, plumbing venting cut-off and buried in the walls (hence the constant dampness), the tub barely balancing on two fence boards across the floor joist, and no insulation on the exterior wall.
All of the previous blunders were fixed and the bathroom put back to its previous glory. We could feel the house thanking us for making it pretty again.
The After Reveal: Cohesive Design Decisions
We selected a simple white subway tile for the tub/shower. This is always classic and in keeping with the style of the house.
We selected a pre-fab vanity and mirror, but they look rich with the quartz countertop. There is much more storage in this small vanity than you would think.
The Transformation: A Period Perfect Refresh
We began the remodel just as the pandemic reared and stay-in-place orders went into effect. As C&L were already moved out and living with relatives, we got the go-ahead from city officials to get the work done (after all, how can you shelter in place without a bathroom?).
All our tradesmen were scheduled to work so that only one crew was on the job site at a time. We stayed on the original schedule with only a one week delay.
The end result is the sweetest little bathroom I've ever seen (and I can't wait to start work on C&L's kitchen next).
Thank you for joining me in this project transformation. I hope this inspired you to think about being creative with your design projects, determining what works best in keeping with the architecture of your space, and carefully assessing how you can have the best life in your home.
 DC Interiors & Renovations
Luxurious Master Bathroom
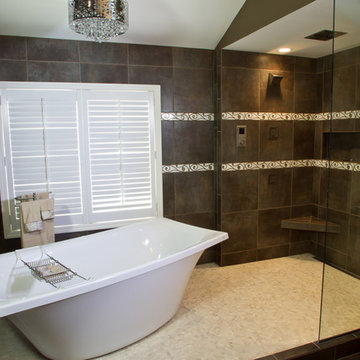
Example of a mid-sized transitional master brown tile and stone tile porcelain tile freestanding bathtub design with an undermount sink, flat-panel cabinets, medium tone wood cabinets, granite countertops, a one-piece toilet and brown walls
Example of a mid-sized transitional master brown tile and stone tile porcelain tile freestanding bathtub design with an undermount sink, flat-panel cabinets, medium tone wood cabinets, granite countertops, a one-piece toilet and brown walls
 Seattle Staged to Sell and Design LLC
Alex Dudko & Allie Lopresti
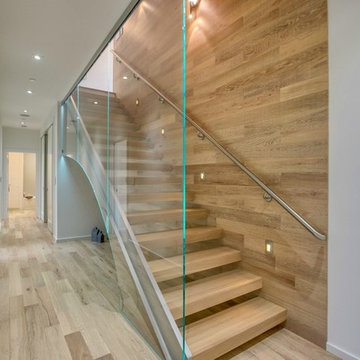
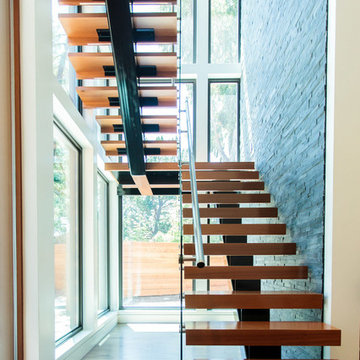
Staircase - contemporary staircase idea in Seattle
Staircase - contemporary staircase idea in Seattle
 Kathleen Jennison
An Arts & Crafts Bungalow is one of my favorite styles of homes. We have quite a few of them in our Stockton Mid-Town area. And when C&L called us to help them remodel their 1923 American Bungalow, I was beyond thrilled.
As per usual, when we get a new inquiry, we quickly Google the project location while we are talking to you on the phone. My excitement escalated when I saw the Google Earth Image of the sweet Sage Green bungalow in Mid-Town Stockton. "Yes, we would be interested in working with you," I said trying to keep my cool.
But what made it even better was meeting C&L and touring their home, because they are the nicest young couple, eager to make their home period perfect. Unfortunately, it had been slightly molested by some bad house-flippers, and we needed to bring the bathroom back to it "roots."
We knew we had to banish the hideous brown tile and cheap vanity quickly. But C&L complained about the condensation problems and the constant fight with mold. This immediately told me that improper remodeling had occurred and we needed to remedy that right away.
The Before: Frustrations with a Botched Remodel
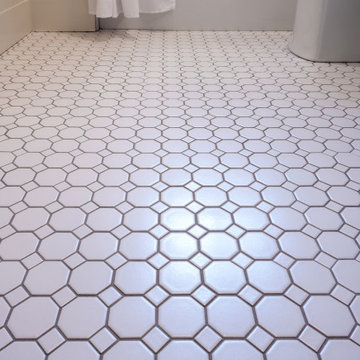
The bathroom needed to be brought back to period appropriate design with all the functionality of a modern bathroom. We thought of things like marble countertop, white mosaic floor tiles, white subway tile, board and batten molding, and of course a fabulous wallpaper.
This small (and only) bathroom on a tight budget required a little bit of design sleuthing to figure out how we could get the proper look and feel. Our goal was to determine where to splurge and where to economize and how to complete the remodel as quickly as possible because C&L would have to move out while construction was going on.
The Process: Hard Work to Remedy Design and Function
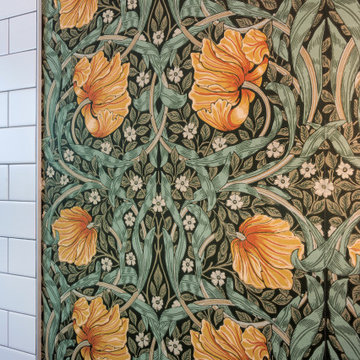
During our initial design study, (which included 2 hours in the owners’ home), we noticed framed images of William Morris Arts and Crafts textile patterns and knew this would be our design inspiration. We presented C&L with three options and they quickly selected the Pimpernel Design Concept.
We had originally selected the Black and Olive colors with a black vanity, mirror, and black and white floor tile. C&L liked it but weren’t quite sure about the black, We went back to the drawing board and decided the William & Co Pimpernel Wallpaper in Bayleaf and Manilla color with a softer gray painted vanity and mirror and white floor tile was more to their liking.
After the Design Concept was approved, we went to work securing the building permit, procuring all the elements, and scheduling our trusted tradesmen to perform the work.
We did uncover some shoddy work by the flippers such as live electrical wires hidden behind the wall, plumbing venting cut-off and buried in the walls (hence the constant dampness), the tub barely balancing on two fence boards across the floor joist, and no insulation on the exterior wall.
All of the previous blunders were fixed and the bathroom put back to its previous glory. We could feel the house thanking us for making it pretty again.
The After Reveal: Cohesive Design Decisions
We selected a simple white subway tile for the tub/shower. This is always classic and in keeping with the style of the house.
We selected a pre-fab vanity and mirror, but they look rich with the quartz countertop. There is much more storage in this small vanity than you would think.
The Transformation: A Period Perfect Refresh
We began the remodel just as the pandemic reared and stay-in-place orders went into effect. As C&L were already moved out and living with relatives, we got the go-ahead from city officials to get the work done (after all, how can you shelter in place without a bathroom?).
All our tradesmen were scheduled to work so that only one crew was on the job site at a time. We stayed on the original schedule with only a one week delay.
The end result is the sweetest little bathroom I've ever seen (and I can't wait to start work on C&L's kitchen next).
Thank you for joining me in this project transformation. I hope this inspired you to think about being creative with your design projects, determining what works best in keeping with the architecture of your space, and carefully assessing how you can have the best life in your home.
 Kathleen Jennison
An Arts & Crafts Bungalow is one of my favorite styles of homes. We have quite a few of them in our Stockton Mid-Town area. And when C&L called us to help them remodel their 1923 American Bungalow, I was beyond thrilled.
As per usual, when we get a new inquiry, we quickly Google the project location while we are talking to you on the phone. My excitement escalated when I saw the Google Earth Image of the sweet Sage Green bungalow in Mid-Town Stockton. "Yes, we would be interested in working with you," I said trying to keep my cool.
But what made it even better was meeting C&L and touring their home, because they are the nicest young couple, eager to make their home period perfect. Unfortunately, it had been slightly molested by some bad house-flippers, and we needed to bring the bathroom back to it "roots."
We knew we had to banish the hideous brown tile and cheap vanity quickly. But C&L complained about the condensation problems and the constant fight with mold. This immediately told me that improper remodeling had occurred and we needed to remedy that right away.
The Before: Frustrations with a Botched Remodel
The bathroom needed to be brought back to period appropriate design with all the functionality of a modern bathroom. We thought of things like marble countertop, white mosaic floor tiles, white subway tile, board and batten molding, and of course a fabulous wallpaper.
This small (and only) bathroom on a tight budget required a little bit of design sleuthing to figure out how we could get the proper look and feel. Our goal was to determine where to splurge and where to economize and how to complete the remodel as quickly as possible because C&L would have to move out while construction was going on.
The Process: Hard Work to Remedy Design and Function
During our initial design study, (which included 2 hours in the owners’ home), we noticed framed images of William Morris Arts and Crafts textile patterns and knew this would be our design inspiration. We presented C&L with three options and they quickly selected the Pimpernel Design Concept.
We had originally selected the Black and Olive colors with a black vanity, mirror, and black and white floor tile. C&L liked it but weren’t quite sure about the black, We went back to the drawing board and decided the William & Co Pimpernel Wallpaper in Bayleaf and Manilla color with a softer gray painted vanity and mirror and white floor tile was more to their liking.
After the Design Concept was approved, we went to work securing the building permit, procuring all the elements, and scheduling our trusted tradesmen to perform the work.
We did uncover some shoddy work by the flippers such as live electrical wires hidden behind the wall, plumbing venting cut-off and buried in the walls (hence the constant dampness), the tub barely balancing on two fence boards across the floor joist, and no insulation on the exterior wall.
All of the previous blunders were fixed and the bathroom put back to its previous glory. We could feel the house thanking us for making it pretty again.
The After Reveal: Cohesive Design Decisions
We selected a simple white subway tile for the tub/shower. This is always classic and in keeping with the style of the house.
We selected a pre-fab vanity and mirror, but they look rich with the quartz countertop. There is much more storage in this small vanity than you would think.
The Transformation: A Period Perfect Refresh
We began the remodel just as the pandemic reared and stay-in-place orders went into effect. As C&L were already moved out and living with relatives, we got the go-ahead from city officials to get the work done (after all, how can you shelter in place without a bathroom?).
All our tradesmen were scheduled to work so that only one crew was on the job site at a time. We stayed on the original schedule with only a one week delay.
The end result is the sweetest little bathroom I've ever seen (and I can't wait to start work on C&L's kitchen next).
Thank you for joining me in this project transformation. I hope this inspired you to think about being creative with your design projects, determining what works best in keeping with the architecture of your space, and carefully assessing how you can have the best life in your home.
 Spaces Renewed
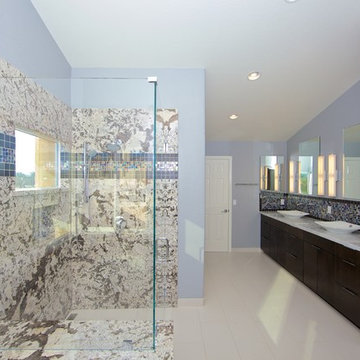
Slab granite showers are not only beautiful and unique, but provide a grout free, water resistant shower surround. White tile floors provide the perfect anchor to support the movement,. color and variation found in this granite. Vessel sinks, wall mounted faucets, and slab door cabinets add to the contemporary feel of this space
 The Outdoor Kitchen Design Store
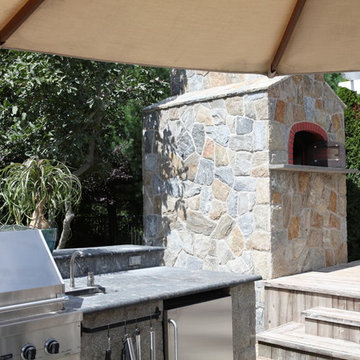
Michael Gotowala founder of THE OUTDOOR KITCHEN DESIGN STORE/Outdoor Pizza Ovens are todays hottest trend in Outdoor Living. Outdoor Living should look, feel and taste FABULOUS.
The free standing wood fired Tuscany Fire Outdoor Pizza Oven is perfect for family outings.
The realism is the trend of outdoor dining and preparation that reaches far beyond the grill. The wood fired Outdoor Pizza oven can cook pizza, calzones, baked stuff shells, breads and much more.
Two ways to cook with the Wood Fired Pizza Oven.
One way with the door open and flamed pushed to the side and pizza place on the other. The Pizza is cooked right on the floor of the oven.
Secondly is the old fashioned hearth oven technique of escalating the temperature of the oven and then closing the door with the food placed in the now temperate oven heat.
The Outdoor Pizza oven is a great way to anchor teens home outdoors with family and friends.
Michael Gotowala founder of THE OUTDOOR KITCHEN DESIGN STORE.Outdoor Living should look, feel and taste FABULOUS.
The free standing DI FIORE Outdoor Pizza Oven is perfect for family outings.
The realism is the trend of outdoor dining and preparation that reaches far beyond the grill. The wood fired Outdoor Pizza oven can cook pizza, calzones, baked stuff shells, breads and much more.
Two ways to cook with the Wood Fired Pizza Oven.
One way with the door open and flamed pushed to the side and pizza place on the other. The Pizza is cooked right on the floor of the oven.
Secondly is the old fashioned hearth oven technique of escalating the temperature of the oven and then closing the door with the food placed in the now temperate oven heat.
The Outdoor Pizza oven is a great way to anchor teens home outdoors with family and friends.
For more great Outdoor Pizza Oven ideas and projects go to THE OUTDOOR KITCHEN DESIGN STORE.
www.Outdoorkitchendesigner.com www.OutdoorLivingDesignerCt.com
For more great Outdoor Pizza Oven ideas and projects go to THE OUTDOOR KITCHEN DESIGN STORE.
www.Outdoorkitchendesigner.com
Michael Gotowala founder of THE OUTDOOR KITCHEN DESIGN STORE

 The Outdoor Kitchen Design Store
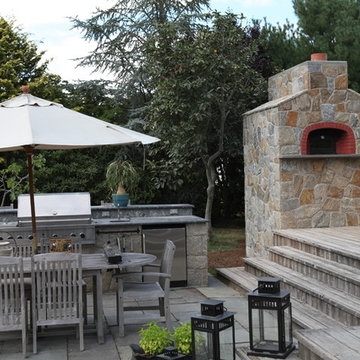
Michael Gotowala founder of THE OUTDOOR KITCHEN DESIGN STORE.Michael Gotowala founder of THE OUTDOOR KITCHEN DESIGN STORE.Outdoor Living should look, feel and taste FABULOUS.
The free standing DI FIORE Outdoor Pizza Oven is perfect for family outings.
The realism is the trend of outdoor dining and preparation that reaches far beyond the grill. The wood fired Outdoor Pizza oven can cook pizza, calzones, baked stuff shells, breads and much more.
Two ways to cook with the Wood Fired Pizza Oven.
One way with the door open and flamed pushed to the side and pizza place on the other. The Pizza is cooked right on the floor of the oven.
Secondly is the old fashioned hearth oven technique of escalating the temperature of the oven and then closing the door with the food placed in the now temperate oven heat.
The Outdoor Pizza oven is a great way to anchor teens home outdoors with family and friends.
Michael Gotowala founder of THE OUTDOOR KITCHEN DESIGN STORE.Outdoor Living should look, feel and taste FABULOUS.
The free standing DI FIORE Outdoor Pizza Oven is perfect for family outings.
The realism is the trend of outdoor dining and preparation that reaches far beyond the grill. The wood fired Outdoor Pizza oven can cook pizza, calzones, baked stuff shells, breads and much more.
Two ways to cook with the Wood Fired Pizza Oven.
One way with the door open and flamed pushed to the side and pizza place on the other. The Pizza is cooked right on the floor of the oven.
Secondly is the old fashioned hearth oven technique of escalating the temperature of the oven and then closing the door with the food placed in the now temperate oven heat.
The Outdoor Pizza oven is a great way to anchor teens home outdoors with family and friends.
For more great Outdoor Pizza Oven ideas and projects go to THE OUTDOOR KITCHEN DESIGN STORE.
www.Outdoorkitchendesigner.com www.OutdoorLivingDesignerCt.com
For more great Outdoor Pizza Oven ideas and projects go to THE OUTDOOR KITCHEN DESIGN STORE.
www.Outdoorkitchendesigner.com Michael Gotowala founder of THE OUTDOOR KITCHEN DESIGN STORE
 The Outdoor Kitchen Design Store
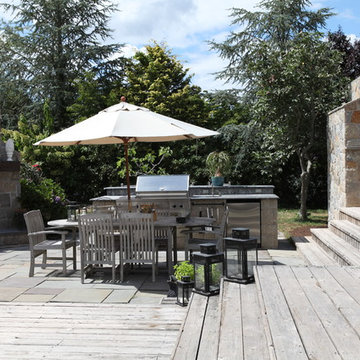
Outdoor Pizza Ovens are todays hottest trend in Outdoor Living. Outdoor Living should look, feel and taste FABULOUS.
The free standing wood fired Tuscany Fire Outdoor Pizza Oven is perfect for family outings.
The realism is the trend of outdoor dining and preparation that reaches far beyond the grill. The wood fired Outdoor Pizza oven can cook pizza, calzones, baked stuff shells, breads and much more.
Two ways to cook with the Wood Fired Pizza Oven.
One way with the door open and flamed pushed to the side and pizza place on the other. The Pizza is cooked right on the floor of the oven.
Secondly is the old fashioned hearth oven technique of escalating the temperature of the oven and then closing the door with the food placed in the now temperate oven heat.
The Outdoor Pizza oven is a great way to anchor teens home outdoors with family and friends.
Michael Gotowala founder of THE OUTDOOR KITCHEN DESIGN STORE.Outdoor Living should look, feel and taste FABULOUS.
The free standing DI FIORE Outdoor Pizza Oven is perfect for family outings.
The realism is the trend of outdoor dining and preparation that reaches far beyond the grill. The wood fired Outdoor Pizza oven can cook pizza, calzones, baked stuff shells, breads and much more.
Two ways to cook with the Wood Fired Pizza Oven.
One way with the door open and flamed pushed to the side and pizza place on the other. The Pizza is cooked right on the floor of the oven.
Secondly is the old fashioned hearth oven technique of escalating the temperature of the oven and then closing the door with the food placed in the now temperate oven heat.
The Outdoor Pizza oven is a great way to anchor teens home outdoors with family and friends.
For more great Outdoor Pizza Oven ideas and projects go to THE OUTDOOR KITCHEN DESIGN STORE.
www.Outdoorkitchendesigner.com www.OutdoorLivingDesignerCt.com
For more great Outdoor Pizza Oven ideas and projects go to THE OUTDOOR KITCHEN DESIGN STORE.
www.Outdoorkitchendesigner.com
Michael Gotowala founder of THE OUTDOOR KITCHEN DESIGN STORE
 The Outdoor Kitchen Design Store
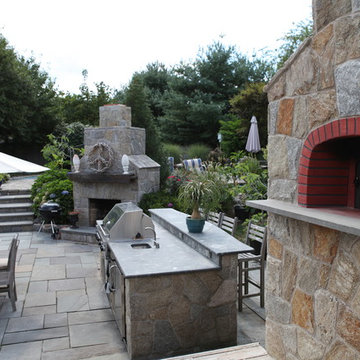
Outdoor Living should look, feel and taste FABULOUS.
The free standing DI FIORE Outdoor Pizza Oven is perfect for family outings.
The realism is the trend of outdoor dining and preparation that reaches far beyond the grill. The wood fired Outdoor Pizza oven can cook pizza, calzones, baked stuff shells, breads and much more.
Two ways to cook with the Wood Fired Pizza Oven.
One way with the door open and flamed pushed to the side and pizza place on the other. The Pizza is cooked right on the floor of the oven.
Secondly is the old fashioned hearth oven technique of escalating the temperature of the oven and then closing the door with the food placed in the now temperate oven heat.
The Outdoor Pizza oven is a great way to anchor teens home outdoors with family and friends.
Michael Gotowala founder of THE OUTDOOR KITCHEN DESIGN STORE.Outdoor Living should look, feel and taste FABULOUS.
The free standing DI FIORE Outdoor Pizza Oven is perfect for family outings.
The realism is the trend of outdoor dining and preparation that reaches far beyond the grill. The wood fired Outdoor Pizza oven can cook pizza, calzones, baked stuff shells, breads and much more.
Two ways to cook with the Wood Fired Pizza Oven.
One way with the door open and flamed pushed to the side and pizza place on the other. The Pizza is cooked right on the floor of the oven.
Secondly is the old fashioned hearth oven technique of escalating the temperature of the oven and then closing the door with the food placed in the now temperate oven heat.
The Outdoor Pizza oven is a great way to anchor teens home outdoors with family and friends.
For more great Outdoor Pizza Oven ideas and projects go to THE OUTDOOR KITCHEN DESIGN STORE.
www.Outdoorkitchendesigner.com www.OutdoorLivingDesignerCt.com
For more great Outdoor Pizza Oven ideas and projects go to THE OUTDOOR KITCHEN DESIGN STORE.
www.Outdoorkitchendesigner.com
Michael Gotowala founder of THE OUTDOOR KITCHEN DESIGN STORE
 User
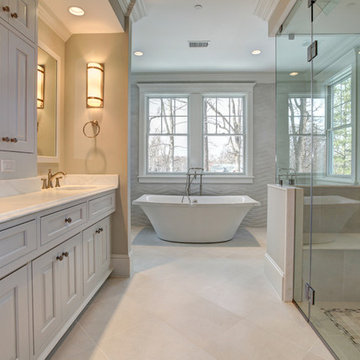
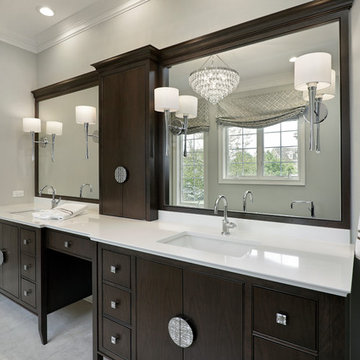
UserThis suburban master bath blends contemporary and transitional design elements. The non-traditional shape of this bath creates a unique layout, featuring his and her vanities, a free-standing tub, and a enclosed shower space.
 Kathleen Jennison
An Arts & Crafts Bungalow is one of my favorite styles of homes. We have quite a few of them in our Stockton Mid-Town area. And when C&L called us to help them remodel their 1923 American Bungalow, I was beyond thrilled.
As per usual, when we get a new inquiry, we quickly Google the project location while we are talking to you on the phone. My excitement escalated when I saw the Google Earth Image of the sweet Sage Green bungalow in Mid-Town Stockton. "Yes, we would be interested in working with you," I said trying to keep my cool.
But what made it even better was meeting C&L and touring their home, because they are the nicest young couple, eager to make their home period perfect. Unfortunately, it had been slightly molested by some bad house-flippers, and we needed to bring the bathroom back to it "roots."
We knew we had to banish the hideous brown tile and cheap vanity quickly. But C&L complained about the condensation problems and the constant fight with mold. This immediately told me that improper remodeling had occurred and we needed to remedy that right away.
The Before: Frustrations with a Botched Remodel
The bathroom needed to be brought back to period appropriate design with all the functionality of a modern bathroom. We thought of things like marble countertop, white mosaic floor tiles, white subway tile, board and batten molding, and of course a fabulous wallpaper.
This small (and only) bathroom on a tight budget required a little bit of design sleuthing to figure out how we could get the proper look and feel. Our goal was to determine where to splurge and where to economize and how to complete the remodel as quickly as possible because C&L would have to move out while construction was going on.
The Process: Hard Work to Remedy Design and Function
During our initial design study, (which included 2 hours in the owners’ home), we noticed framed images of William Morris Arts and Crafts textile patterns and knew this would be our design inspiration. We presented C&L with three options and they quickly selected the Pimpernel Design Concept.
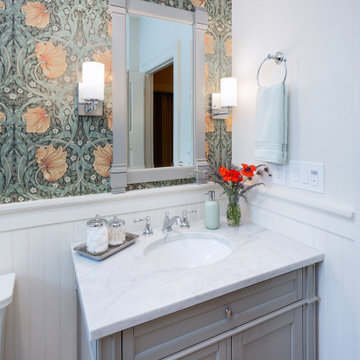
We had originally selected the Black and Olive colors with a black vanity, mirror, and black and white floor tile. C&L liked it but weren’t quite sure about the black, We went back to the drawing board and decided the William & Co Pimpernel Wallpaper in Bayleaf and Manilla color with a softer gray painted vanity and mirror and white floor tile was more to their liking.
After the Design Concept was approved, we went to work securing the building permit, procuring all the elements, and scheduling our trusted tradesmen to perform the work.
We did uncover some shoddy work by the flippers such as live electrical wires hidden behind the wall, plumbing venting cut-off and buried in the walls (hence the constant dampness), the tub barely balancing on two fence boards across the floor joist, and no insulation on the exterior wall.
All of the previous blunders were fixed and the bathroom put back to its previous glory. We could feel the house thanking us for making it pretty again.
The After Reveal: Cohesive Design Decisions
We selected a simple white subway tile for the tub/shower. This is always classic and in keeping with the style of the house.
We selected a pre-fab vanity and mirror, but they look rich with the quartz countertop. There is much more storage in this small vanity than you would think.
The Transformation: A Period Perfect Refresh
We began the remodel just as the pandemic reared and stay-in-place orders went into effect. As C&L were already moved out and living with relatives, we got the go-ahead from city officials to get the work done (after all, how can you shelter in place without a bathroom?).
All our tradesmen were scheduled to work so that only one crew was on the job site at a time. We stayed on the original schedule with only a one week delay.
The end result is the sweetest little bathroom I've ever seen (and I can't wait to start work on C&L's kitchen next).
Thank you for joining me in this project transformation. I hope this inspired you to think about being creative with your design projects, determining what works best in keeping with the architecture of your space, and carefully assessing how you can have the best life in your home.
 Kathleen Jennison
An Arts & Crafts Bungalow is one of my favorite styles of homes. We have quite a few of them in our Stockton Mid-Town area. And when C&L called us to help them remodel their 1923 American Bungalow, I was beyond thrilled.
As per usual, when we get a new inquiry, we quickly Google the project location while we are talking to you on the phone. My excitement escalated when I saw the Google Earth Image of the sweet Sage Green bungalow in Mid-Town Stockton. "Yes, we would be interested in working with you," I said trying to keep my cool.
But what made it even better was meeting C&L and touring their home, because they are the nicest young couple, eager to make their home period perfect. Unfortunately, it had been slightly molested by some bad house-flippers, and we needed to bring the bathroom back to it "roots."
We knew we had to banish the hideous brown tile and cheap vanity quickly. But C&L complained about the condensation problems and the constant fight with mold. This immediately told me that improper remodeling had occurred and we needed to remedy that right away.
The Before: Frustrations with a Botched Remodel
The bathroom needed to be brought back to period appropriate design with all the functionality of a modern bathroom. We thought of things like marble countertop, white mosaic floor tiles, white subway tile, board and batten molding, and of course a fabulous wallpaper.
This small (and only) bathroom on a tight budget required a little bit of design sleuthing to figure out how we could get the proper look and feel. Our goal was to determine where to splurge and where to economize and how to complete the remodel as quickly as possible because C&L would have to move out while construction was going on.
The Process: Hard Work to Remedy Design and Function
During our initial design study, (which included 2 hours in the owners’ home), we noticed framed images of William Morris Arts and Crafts textile patterns and knew this would be our design inspiration. We presented C&L with three options and they quickly selected the Pimpernel Design Concept.
We had originally selected the Black and Olive colors with a black vanity, mirror, and black and white floor tile. C&L liked it but weren’t quite sure about the black, We went back to the drawing board and decided the William & Co Pimpernel Wallpaper in Bayleaf and Manilla color with a softer gray painted vanity and mirror and white floor tile was more to their liking.
After the Design Concept was approved, we went to work securing the building permit, procuring all the elements, and scheduling our trusted tradesmen to perform the work.
We did uncover some shoddy work by the flippers such as live electrical wires hidden behind the wall, plumbing venting cut-off and buried in the walls (hence the constant dampness), the tub barely balancing on two fence boards across the floor joist, and no insulation on the exterior wall.
All of the previous blunders were fixed and the bathroom put back to its previous glory. We could feel the house thanking us for making it pretty again.
The After Reveal: Cohesive Design Decisions
We selected a simple white subway tile for the tub/shower. This is always classic and in keeping with the style of the house.
We selected a pre-fab vanity and mirror, but they look rich with the quartz countertop. There is much more storage in this small vanity than you would think.
The Transformation: A Period Perfect Refresh
We began the remodel just as the pandemic reared and stay-in-place orders went into effect. As C&L were already moved out and living with relatives, we got the go-ahead from city officials to get the work done (after all, how can you shelter in place without a bathroom?).
All our tradesmen were scheduled to work so that only one crew was on the job site at a time. We stayed on the original schedule with only a one week delay.
The end result is the sweetest little bathroom I've ever seen (and I can't wait to start work on C&L's kitchen next).
Thank you for joining me in this project transformation. I hope this inspired you to think about being creative with your design projects, determining what works best in keeping with the architecture of your space, and carefully assessing how you can have the best life in your home.
 Kathleen Jennison
An Arts & Crafts Bungalow is one of my favorite styles of homes. We have quite a few of them in our Stockton Mid-Town area. And when C&L called us to help them remodel their 1923 American Bungalow, I was beyond thrilled.
As per usual, when we get a new inquiry, we quickly Google the project location while we are talking to you on the phone. My excitement escalated when I saw the Google Earth Image of the sweet Sage Green bungalow in Mid-Town Stockton. "Yes, we would be interested in working with you," I said trying to keep my cool.
But what made it even better was meeting C&L and touring their home, because they are the nicest young couple, eager to make their home period perfect. Unfortunately, it had been slightly molested by some bad house-flippers, and we needed to bring the bathroom back to it "roots."
We knew we had to banish the hideous brown tile and cheap vanity quickly. But C&L complained about the condensation problems and the constant fight with mold. This immediately told me that improper remodeling had occurred and we needed to remedy that right away.
The Before: Frustrations with a Botched Remodel
The bathroom needed to be brought back to period appropriate design with all the functionality of a modern bathroom. We thought of things like marble countertop, white mosaic floor tiles, white subway tile, board and batten molding, and of course a fabulous wallpaper.
This small (and only) bathroom on a tight budget required a little bit of design sleuthing to figure out how we could get the proper look and feel. Our goal was to determine where to splurge and where to economize and how to complete the remodel as quickly as possible because C&L would have to move out while construction was going on.
The Process: Hard Work to Remedy Design and Function
During our initial design study, (which included 2 hours in the owners’ home), we noticed framed images of William Morris Arts and Crafts textile patterns and knew this would be our design inspiration. We presented C&L with three options and they quickly selected the Pimpernel Design Concept.
We had originally selected the Black and Olive colors with a black vanity, mirror, and black and white floor tile. C&L liked it but weren’t quite sure about the black, We went back to the drawing board and decided the William & Co Pimpernel Wallpaper in Bayleaf and Manilla color with a softer gray painted vanity and mirror and white floor tile was more to their liking.
After the Design Concept was approved, we went to work securing the building permit, procuring all the elements, and scheduling our trusted tradesmen to perform the work.
We did uncover some shoddy work by the flippers such as live electrical wires hidden behind the wall, plumbing venting cut-off and buried in the walls (hence the constant dampness), the tub barely balancing on two fence boards across the floor joist, and no insulation on the exterior wall.
All of the previous blunders were fixed and the bathroom put back to its previous glory. We could feel the house thanking us for making it pretty again.
The After Reveal: Cohesive Design Decisions
We selected a simple white subway tile for the tub/shower. This is always classic and in keeping with the style of the house.
We selected a pre-fab vanity and mirror, but they look rich with the quartz countertop. There is much more storage in this small vanity than you would think.
The Transformation: A Period Perfect Refresh
We began the remodel just as the pandemic reared and stay-in-place orders went into effect. As C&L were already moved out and living with relatives, we got the go-ahead from city officials to get the work done (after all, how can you shelter in place without a bathroom?).
All our tradesmen were scheduled to work so that only one crew was on the job site at a time. We stayed on the original schedule with only a one week delay.
The end result is the sweetest little bathroom I've ever seen (and I can't wait to start work on C&L's kitchen next).
Thank you for joining me in this project transformation. I hope this inspired you to think about being creative with your design projects, determining what works best in keeping with the architecture of your space, and carefully assessing how you can have the best life in your home.
 STYLE WISE Interior Design
You can see more photos of the mechanics of the home and learn more about the energy-conserving technology by visiting this project on Bone Structure's website: https://bonestructure.ca/en/portfolio/project-15-580/
The materials selected included the stone, tile, wood floors, hardware, light fixtures, plumbing fixtures, siding, paint, doors, and cabinetry. Check out this very special and style focused detail: horizontal grain, walnut, frameless interior doors - adding a very special quality to an otherwise ordinary object.
 Alair Homes Longmont
Suzanne Deller www.suzannedeller.com
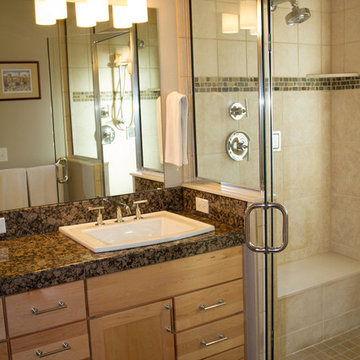
Sauna - small traditional gray tile and porcelain tile porcelain tile and brown floor sauna idea in Denver with a drop-in sink, a two-piece toilet, recessed-panel cabinets, light wood cabinets, granite countertops, beige walls and a hinged shower door
Sauna - small traditional gray tile and porcelain tile porcelain tile and brown floor sauna idea in Denver with a drop-in sink, a two-piece toilet, recessed-panel cabinets, light wood cabinets, granite countertops, beige walls and a hinged shower door
6