
Search results for "Essentially gain" in Home Design Ideas
 Castle Building & Remodeling
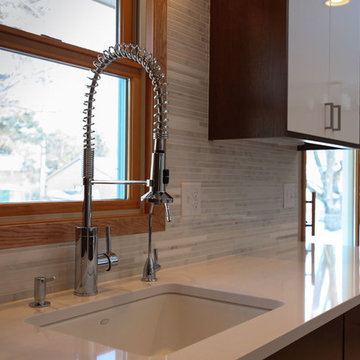
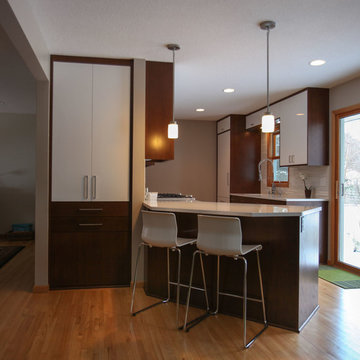
The owners of this 1956 Brooklyn Park home called us in to create a more functional and updated kitchen. They entertain and cook a lot, so requested that we add more countertop space, utilize the wasted area in front of the sliding glass door, and maximize storage. They also had a great inspiration photo that helped us to create the warm yet sleek look. The kitchen received a major transformation with the dark hickory chocolate frameless cabinetry and contrasting high gloss white doors and quartz countertops. By moving the refrigerator the owners gained workspace on either side of the new gas range. We placed an angled peninsula near the sliding glass door. The peninsula provides seating for two, great working space, and cabinetry with roll-outs. An existing closet was transformed into a functional pantry, adding drawers to the base and roll-outs behind the upper doors. Under cab lighting, pendants, and puck lights supplement the recess lights without overwhelming the room. Other unique features in this kitchen are the essentially hidden Broan Elite range hood, the Mirabelle spring-style single handle faucet, under counter water purification system and the beautiful linear marble backsplash.

 John
JohnCoco coir is a versatile and sustainable growing medium that is gaining popularity among gardeners. Made from the fibrous husk of coconuts, it’s an eco-friendly alternative to peat moss and can greatly enhance the quality of your soil. In gardening, it is often utilized in systems like Coco Coir Hydroponic, where it helps create an efficient water and nutrient delivery system.
What is Coco Coir?
Coco coir is a natural fiber extracted from coconut husks. It has a neutral pH, excellent water retention, and is reusable, making it a favorite among gardeners who prefer organic and sustainable practices. It is available in different forms such as blocks, bricks, or loose coir, each requiring some preparation before use in gardening.
Benefits of Using Coco Coir in Gardening
Coco coir offers several advantages for gardening. Here are the benefits of using coco coir in gardening:
Holds up to 10 times its weight in water, ensuring plants have consistent moisture.
Promotes oxygen flow to plant roots, leading to healthier root systems.
Coco coir is a renewable and eco-friendly alternative to peat moss.
It can be washed, rehydrated, and reused, reducing waste.
Naturally pH neutral, making it suitable for various plants without major adjustments.
Enhances the texture and moisture retention of garden soil.
How to Prepare Coco Coir for Planting
Preparing coco coir for planting involves a few essential steps. First, you need to hydrate the coir block, as it typically comes in a compressed form. Place the block in a large container and add warm water, allowing the block to expand and absorb the water. Once fully expanded, the coir should be fluffed up by breaking it apart with your hands or a tool to ensure it becomes loose and airy. After the coir has been fluffed, it is important to drain any excess water, as overly wet coir can lead to root suffocation. Finally, since coco coir is inert and does not contain nutrients, it’s a good idea to add organic compost or liquid fertilizer to enrich the coir before planting.
Do You Need to Soak Coco Coir Before Planting?
Yes, soaking coco coir before planting is necessary. Since it comes in a compressed form, it needs to be broken down and hydrated for proper use. The soaking process allows the coir to expand and release the fibers, making it usable as a growing medium. After soaking, the coir should be fluffed to ensure the water is evenly distributed. Draining any excess water is crucial because overly wet coir may impede plant root health.
How to Prepare Coco Peat for Planting
Coco peat, a fine, powdery form of coco coir, is highly beneficial for seed starting and improving water retention in soil. To prepare coco peat, it first needs to be hydrated, similar to how you prepare coir blocks. Slowly add water to the peat in a container and allow it to absorb and fluff up. Once hydrated, coco peat can be used on its own or mixed with other growing media such as perlite or vermiculite for added aeration and drainage. It is advisable to check the pH level of your final mix, as coco peat generally has a neutral pH, but adjustments may be necessary depending on the plants being grown.
Can You Use Just Coco Coir for Plants?
Yes, coco coir can be used by itself to grow plants, especially in hydroponic systems or as a seed-starting medium. However, because coco coir does not naturally contain nutrients, you will need to provide regular fertilizer to support plant growth. This makes it particularly suitable for plants grown in controlled environments, such as hydroponics, where nutrient solutions can be carefully managed. In traditional soil-based gardening, mixing coco coir with other organic materials like compost is recommended to provide essential nutrients and improve the overall soil structure.
How to Use Coco Coir in Hydroponics
Coco coir is widely used in hydroponic systems due to its water retention and aeration properties. To use coco coir in hydroponics, it first needs to be soaked and hydrated, as discussed earlier. Once the coir is fully prepared, it can be placed in the hydroponic system. Since coco coir does not contain natural nutrients, you will need to supply a balanced nutrient solution tailored for hydroponic plants. Regular monitoring of water and nutrient levels is essential to prevent nutrient imbalances or root rot. One of the benefits of coco coir in hydroponics is its reusability. After completing a growing cycle, the coir can be washed, rehydrated, and used again in future plantings.
Using Coco Coir as a Soil Amendment
Coco coir is also an excellent soil amendment, as it improves the texture and moisture retention of garden soil. To use coco coir in this way, mix loose coir with your existing garden soil at a ratio of one part coco coir to two parts soil. This will help retain moisture without compacting the soil, improving both water drainage and root growth. For optimal results, you can also add organic compost to the mix, ensuring that the nutrient levels are sufficient for plant growth. Coco coir works particularly well in raised beds, where it helps maintain proper soil structure over time.
Advantages of Using Coco Coir Over Peat Moss
While peat moss has been traditionally used as a growing medium, coco coir offers several advantages over it. Coco coir is a renewable resource, as it is a byproduct of coconut processing, while peat moss is harvested from peat bogs that take centuries to regenerate. Coco coir is also more durable, as it can be reused multiple times without breaking down, while peat moss disintegrates after a single use. Another key benefit is its neutral pH, whereas peat moss is more acidic and may require balancing to meet the needs of specific plants.
Conclusion
Coco coir is a highly versatile and sustainable growing medium that benefits both novice and experienced gardeners alike. Whether you are using it for hydroponics, as a soil amendment, or as a standalone medium for growing plants, knowing how to properly prepare and use it is key to maximizing its benefits. By following the steps detailed above, you can improve water retention, aeration, and overall plant health in your garden, all while contributing to eco-friendly gardening practices.
 San Luis Kitchen Co.
When the homeowners decided to move from San Francisco to the Central Coast, they were looking for a more relaxed lifestyle, a unique place to call their own, and an environment conducive to raising their young children. They found it all in San Luis Obispo. They had owned a house here in SLO for several years that they had used as a rental. As the homeowners own and run a contracting business and relocation was not impossible, they decided to move their business and make this SLO rental into their dream home.
As a rental, the house was in a bare-bones condition. The kitchen had old white cabinets, boring white tile counters, and a horrendous vinyl tile floor. Not only was the kitchen out-of-date and old-fashioned, it was also pretty worn out. The tiles were cracking and the grout was stained, the cabinet doors were sagging, and the appliances were conflicting (ie: you could not open the stove and dishwasher at the same time).
To top it all off, the kitchen was just too small for the custom home the homeowners wanted to create.
Thus enters San Luis Kitchen. At the beginning of their quest to remodel, the homeowners visited San Luis Kitchen’s showroom and fell in love with our Tuscan Grotto display. They sat down with our designers and together we worked out the scope of the project, the budget for cabinetry and how that fit into their overall budget, and then we worked on the new design for the home starting with the kitchen.
As the homeowners felt the kitchen was cramped, it was decided to expand by moving the window wall out onto the existing porch. Besides the extra space gained, moving the wall brought the kitchen window out from under the porch roof – increasing the natural light available in the space. (It really helps when the homeowner both understands building and can do his own contracting and construction.) A new arched window and stone clad wall now highlights the end of the kitchen. As we gained wall space, we were able to move the range and add a plaster hood, creating a focal nice focal point for the kitchen.
The other long wall now houses a Sub-Zero refrigerator and lots of counter workspace. Then we completed the kitchen by adding a wrap-around wet bar extending into the old dining space. We included a pull-out pantry unit with open shelves above it, wine cubbies, a cabinet for glassware recessed into the wall, under-counter refrigerator drawers, sink base and trash cabinet, along with a decorative bookcase cabinet and bar seating. Lots of function in this corner of the kitchen; a bar for entertaining and a snack station for the kids.
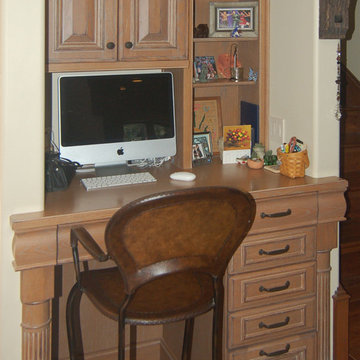
After the kitchen design was finalized and ordered, the homeowners turned their attention to the rest of the house. They asked San Luis Kitchen to help with their master suite, a guest bath, their home control center (essentially a deck tucked under the main staircase) and finally their laundry room. Here are the photos:
I wish I could show you the rest of the house. The homeowners took a poor rental house and turned it into a showpiece! They added custom concrete floors, unique fiber optic lighting, large picture windows, and much more. There is now an outdoor kitchen complete with pizza oven, an outdoor shower and exquisite garden. They added a dedicated dog run to the side yard for their pooches and a rooftop deck at the very peak. Such a fun house.
Wood-Mode Fine Custom Cabinetry, Barcelona
Find the right local pro for your project
 Castle Building & Remodeling
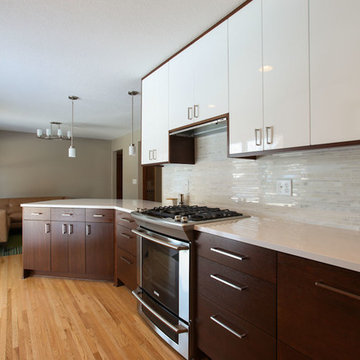
The owners of this 1956 Brooklyn Park home called us in to create a more functional and updated kitchen. They entertain and cook a lot, so requested that we add more countertop space, utilize the wasted area in front of the sliding glass door, and maximize storage. They also had a great inspiration photo that helped us to create the warm yet sleek look. The kitchen received a major transformation with the dark hickory chocolate frameless cabinetry and contrasting high gloss white doors and quartz countertops. By moving the refrigerator the owners gained workspace on either side of the new gas range. We placed an angled peninsula near the sliding glass door. The peninsula provides seating for two, great working space, and cabinetry with roll-outs. An existing closet was transformed into a functional pantry, adding drawers to the base and roll-outs behind the upper doors. Under cab lighting, pendants, and puck lights supplement the recess lights without overwhelming the room. Other unique features in this kitchen are the essentially hidden Broan Elite range hood, the Mirabelle spring-style single handle faucet, under counter water purification system and the beautiful linear marble backsplash.
 Souris River Designs / Outdoor Comfort Solutions
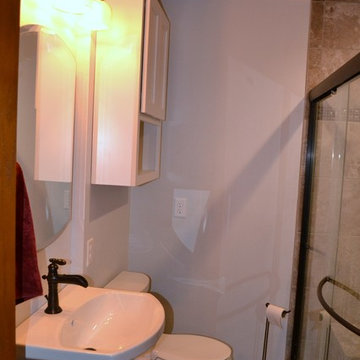
This bathroom is on the small side, and the homeowners were ready for a refresh that updated the finishes in the space while adding storage without taking up valuable floor space. We added a pedestal sink to gain more circulation space, and included a recessed medicine cabinet, toilet-topper cabinet, and custom shelving to store bathroom essentials. The tile shower features a bench and shampoo recess with a glass door that opens up the space as well. A natural stone/stainless steel mosaic tile gives the shower an accent without being too overpowering. Grab bars that match the faucet finishes offer help if needed without taking away from the beauty of the bathroom's design.
 Castle Building & Remodeling
The owners of this 1956 Brooklyn Park home called us in to create a more functional and updated kitchen. They entertain and cook a lot, so requested that we add more countertop space, utilize the wasted area in front of the sliding glass door, and maximize storage. They also had a great inspiration photo that helped us to create the warm yet sleek look. The kitchen received a major transformation with the dark hickory chocolate frameless cabinetry and contrasting high gloss white doors and quartz countertops. By moving the refrigerator the owners gained workspace on either side of the new gas range. We placed an angled peninsula near the sliding glass door. The peninsula provides seating for two, great working space, and cabinetry with roll-outs. An existing closet was transformed into a functional pantry, adding drawers to the base and roll-outs behind the upper doors. Under cab lighting, pendants, and puck lights supplement the recess lights without overwhelming the room. Other unique features in this kitchen are the essentially hidden Broan Elite range hood, the Mirabelle spring-style single handle faucet, under counter water purification system and the beautiful linear marble backsplash.
 Schulte Design Build
For this full-home remodel, the homeowners were looking for a design-build firm with strong credentials, sustainable practices, and a personal touch. After an extensive search, they chose Schulte Design Build for our expertise, approachability, and commitment to high-quality craftsmanship.
From the beginning, collaboration was essential. The homeowners had a well-defined vision but remained open to professional insights, allowing us to create a design that balanced functionality, sustainability, and budget-conscious decisions. Energy efficiency played a key role in the project, with strategic upgrades such as relocating the water heater and switching to a hybrid model. We also adjusted the backup furnace to side vent, reducing roof penetrations and improving overall efficiency.
Accessibility was another priority, and our team incorporated thoughtful ADA-friendly solutions throughout the home. The material selection process was equally intentional, ensuring that finishes aligned with the homeowners’ aesthetic goals while staying within budget. Our design team worked closely with them to achieve a refined and cohesive look without compromising quality.
Project management and clear communication were crucial to the success of this remodel. With regular check-ins and project tracking software, we kept the process organized and transparent, providing a seamless experience from start to finish. The construction phase lasted six months, during which the homeowners stayed actively involved while trusting our team to bring their vision to life.
The end result is a beautifully transformed home that integrates modern efficiencies, accessibility, and timeless design. Beyond the renovation itself, the homeowners gained a deeper understanding of their home’s functionality and feel more connected to their space than ever before. At Schulte Design Build, we take pride in guiding homeowners through the remodeling journey with expertise, integrity, and a collaborative spirit.

Sponsored
Sunbury, OH

J.Holderby - Renovations
Franklin County's Leading General Contractors - 2X Best of Houzz!
 Leslie Goodwin Photography
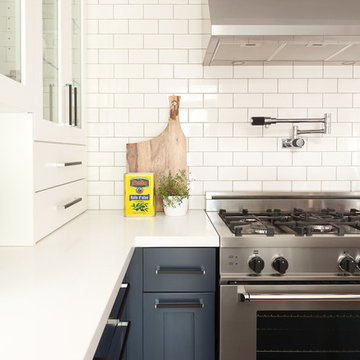
Design by Barbara Magnoni of South Hill Interiors | https://www.southhillinteriors.com
© Leslie Goodwin Photography
 Castle Building & Remodeling
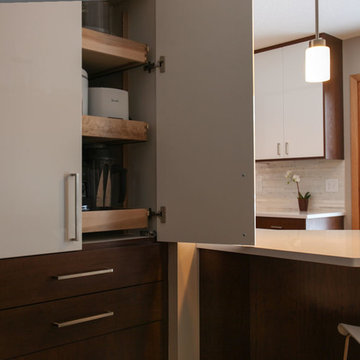
The owners of this 1956 Brooklyn Park home called us in to create a more functional and updated kitchen. They entertain and cook a lot, so requested that we add more countertop space, utilize the wasted area in front of the sliding glass door, and maximize storage. They also had a great inspiration photo that helped us to create the warm yet sleek look. The kitchen received a major transformation with the dark hickory chocolate frameless cabinetry and contrasting high gloss white doors and quartz countertops. By moving the refrigerator the owners gained workspace on either side of the new gas range. We placed an angled peninsula near the sliding glass door. The peninsula provides seating for two, great working space, and cabinetry with roll-outs. An existing closet was transformed into a functional pantry, adding drawers to the base and roll-outs behind the upper doors. Under cab lighting, pendants, and puck lights supplement the recess lights without overwhelming the room. Other unique features in this kitchen are the essentially hidden Broan Elite range hood, the Mirabelle spring-style single handle faucet, under counter water purification system and the beautiful linear marble backsplash.
 Schulte Design Build
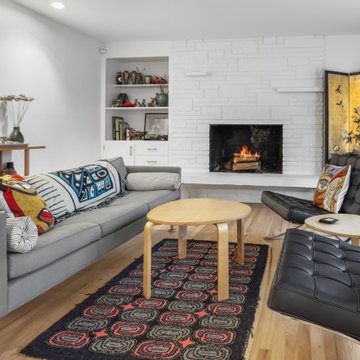
For this full-home remodel, the homeowners were looking for a design-build firm with strong credentials, sustainable practices, and a personal touch. After an extensive search, they chose Schulte Design Build for our expertise, approachability, and commitment to high-quality craftsmanship.
From the beginning, collaboration was essential. The homeowners had a well-defined vision but remained open to professional insights, allowing us to create a design that balanced functionality, sustainability, and budget-conscious decisions. Energy efficiency played a key role in the project, with strategic upgrades such as relocating the water heater and switching to a hybrid model. We also adjusted the backup furnace to side vent, reducing roof penetrations and improving overall efficiency.
Accessibility was another priority, and our team incorporated thoughtful ADA-friendly solutions throughout the home. The material selection process was equally intentional, ensuring that finishes aligned with the homeowners’ aesthetic goals while staying within budget. Our design team worked closely with them to achieve a refined and cohesive look without compromising quality.
Project management and clear communication were crucial to the success of this remodel. With regular check-ins and project tracking software, we kept the process organized and transparent, providing a seamless experience from start to finish. The construction phase lasted six months, during which the homeowners stayed actively involved while trusting our team to bring their vision to life.
The end result is a beautifully transformed home that integrates modern efficiencies, accessibility, and timeless design. Beyond the renovation itself, the homeowners gained a deeper understanding of their home’s functionality and feel more connected to their space than ever before. At Schulte Design Build, we take pride in guiding homeowners through the remodeling journey with expertise, integrity, and a collaborative spirit.
 Schulte Design Build
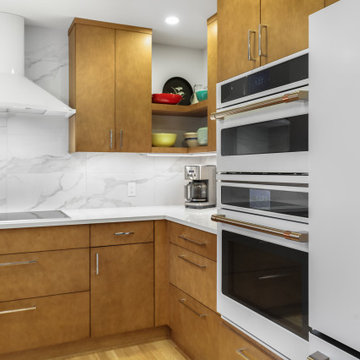
For this full-home remodel, the homeowners were looking for a design-build firm with strong credentials, sustainable practices, and a personal touch. After an extensive search, they chose Schulte Design Build for our expertise, approachability, and commitment to high-quality craftsmanship.
From the beginning, collaboration was essential. The homeowners had a well-defined vision but remained open to professional insights, allowing us to create a design that balanced functionality, sustainability, and budget-conscious decisions. Energy efficiency played a key role in the project, with strategic upgrades such as relocating the water heater and switching to a hybrid model. We also adjusted the backup furnace to side vent, reducing roof penetrations and improving overall efficiency.
Accessibility was another priority, and our team incorporated thoughtful ADA-friendly solutions throughout the home. The material selection process was equally intentional, ensuring that finishes aligned with the homeowners’ aesthetic goals while staying within budget. Our design team worked closely with them to achieve a refined and cohesive look without compromising quality.
Project management and clear communication were crucial to the success of this remodel. With regular check-ins and project tracking software, we kept the process organized and transparent, providing a seamless experience from start to finish. The construction phase lasted six months, during which the homeowners stayed actively involved while trusting our team to bring their vision to life.
The end result is a beautifully transformed home that integrates modern efficiencies, accessibility, and timeless design. Beyond the renovation itself, the homeowners gained a deeper understanding of their home’s functionality and feel more connected to their space than ever before. At Schulte Design Build, we take pride in guiding homeowners through the remodeling journey with expertise, integrity, and a collaborative spirit.
 The Decorating Therapist
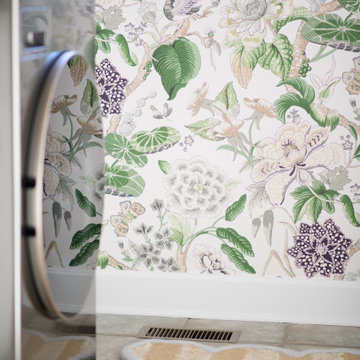
This client's laundry room was in desperate need of both a refresh and improved functionality. Despite being in a large house, the original laundry space was cramped and inefficient. We saw an opportunity to maximize the room’s potential by rethinking its layout and creating a more thoughtful design. The solution? We moved everything to one side, opening up the space and creating a clear passageway through the room, eliminating the haphazard, cluttered feel of the original design.
The original setup had no cabinetry, only a utility sink and side-by-side washer/dryer, which offered little in terms of storage or counter space. We started from scratch, replacing the outdated layout with a full-size stackable washer/dryer, which made far better use of the vertical space—immediately gaining a significant amount of room. The addition of countertop space and wall cabinets (15” deep for plenty of storage) completely transformed the functionality, giving the client a place to set down laundry baskets and store essentials. We also retained the original flooring, but added a playful wall covering and accent paint to bring a fresh, fun vibe that complemented the earthy and cool tones in the room. The window, which had been completely covered, was opened up to allow natural light to flood the space, enhancing the bright, airy feel. Finally, the new tall pantry closet in the far corner provided even more storage, keeping everything organized and in its place. Now, instead of being a space to hide, this laundry room is a showpiece—neat, functional, and welcoming, right across from the garage.
 Schulte Design Build
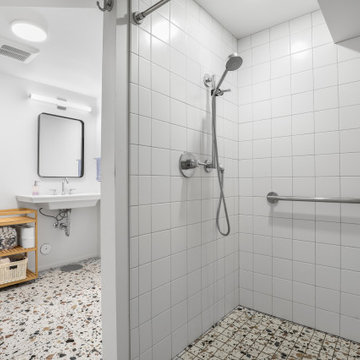
For this full-home remodel, the homeowners were looking for a design-build firm with strong credentials, sustainable practices, and a personal touch. After an extensive search, they chose Schulte Design Build for our expertise, approachability, and commitment to high-quality craftsmanship.
From the beginning, collaboration was essential. The homeowners had a well-defined vision but remained open to professional insights, allowing us to create a design that balanced functionality, sustainability, and budget-conscious decisions. Energy efficiency played a key role in the project, with strategic upgrades such as relocating the water heater and switching to a hybrid model. We also adjusted the backup furnace to side vent, reducing roof penetrations and improving overall efficiency.
Accessibility was another priority, and our team incorporated thoughtful ADA-friendly solutions throughout the home. The material selection process was equally intentional, ensuring that finishes aligned with the homeowners’ aesthetic goals while staying within budget. Our design team worked closely with them to achieve a refined and cohesive look without compromising quality.
Project management and clear communication were crucial to the success of this remodel. With regular check-ins and project tracking software, we kept the process organized and transparent, providing a seamless experience from start to finish. The construction phase lasted six months, during which the homeowners stayed actively involved while trusting our team to bring their vision to life.
The end result is a beautifully transformed home that integrates modern efficiencies, accessibility, and timeless design. Beyond the renovation itself, the homeowners gained a deeper understanding of their home’s functionality and feel more connected to their space than ever before. At Schulte Design Build, we take pride in guiding homeowners through the remodeling journey with expertise, integrity, and a collaborative spirit.
Sponsored
Sunbury, OH
J.Holderby - Renovations
Franklin County's Leading General Contractors - 2X Best of Houzz!
 Schulte Design Build
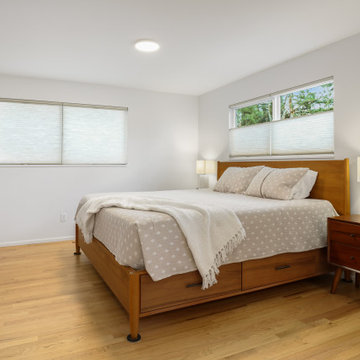
For this full-home remodel, the homeowners were looking for a design-build firm with strong credentials, sustainable practices, and a personal touch. After an extensive search, they chose Schulte Design Build for our expertise, approachability, and commitment to high-quality craftsmanship.
From the beginning, collaboration was essential. The homeowners had a well-defined vision but remained open to professional insights, allowing us to create a design that balanced functionality, sustainability, and budget-conscious decisions. Energy efficiency played a key role in the project, with strategic upgrades such as relocating the water heater and switching to a hybrid model. We also adjusted the backup furnace to side vent, reducing roof penetrations and improving overall efficiency.
Accessibility was another priority, and our team incorporated thoughtful ADA-friendly solutions throughout the home. The material selection process was equally intentional, ensuring that finishes aligned with the homeowners’ aesthetic goals while staying within budget. Our design team worked closely with them to achieve a refined and cohesive look without compromising quality.
Project management and clear communication were crucial to the success of this remodel. With regular check-ins and project tracking software, we kept the process organized and transparent, providing a seamless experience from start to finish. The construction phase lasted six months, during which the homeowners stayed actively involved while trusting our team to bring their vision to life.
The end result is a beautifully transformed home that integrates modern efficiencies, accessibility, and timeless design. Beyond the renovation itself, the homeowners gained a deeper understanding of their home’s functionality and feel more connected to their space than ever before. At Schulte Design Build, we take pride in guiding homeowners through the remodeling journey with expertise, integrity, and a collaborative spirit.
 Schulte Design Build
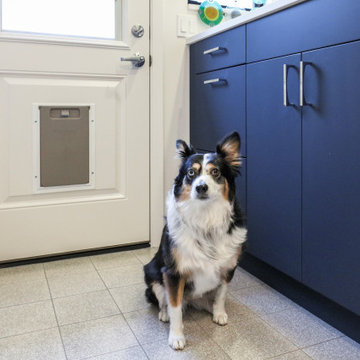
For this full-home remodel, the homeowners were looking for a design-build firm with strong credentials, sustainable practices, and a personal touch. After an extensive search, they chose Schulte Design Build for our expertise, approachability, and commitment to high-quality craftsmanship.
From the beginning, collaboration was essential. The homeowners had a well-defined vision but remained open to professional insights, allowing us to create a design that balanced functionality, sustainability, and budget-conscious decisions. Energy efficiency played a key role in the project, with strategic upgrades such as relocating the water heater and switching to a hybrid model. We also adjusted the backup furnace to side vent, reducing roof penetrations and improving overall efficiency.
Accessibility was another priority, and our team incorporated thoughtful ADA-friendly solutions throughout the home. The material selection process was equally intentional, ensuring that finishes aligned with the homeowners’ aesthetic goals while staying within budget. Our design team worked closely with them to achieve a refined and cohesive look without compromising quality.
Project management and clear communication were crucial to the success of this remodel. With regular check-ins and project tracking software, we kept the process organized and transparent, providing a seamless experience from start to finish. The construction phase lasted six months, during which the homeowners stayed actively involved while trusting our team to bring their vision to life.
The end result is a beautifully transformed home that integrates modern efficiencies, accessibility, and timeless design. Beyond the renovation itself, the homeowners gained a deeper understanding of their home’s functionality and feel more connected to their space than ever before. At Schulte Design Build, we take pride in guiding homeowners through the remodeling journey with expertise, integrity, and a collaborative spirit.

 safe ZOnea
Staging a home for sale or for a major transition is a strange in-between state. You are still living in the space, but you are also preparing it to impress strangers, support showings, and remain functional until the final move-out day. That tension between “home” and “product” is where storage quietly becomes one of your smartest tools. Used well, storage lets you reduce clutter, protect important items, and create the kind of rooms that photograph beautifully and feel calm when buyers walk through the door.
A staged move is rarely just about shifting boxes from one address to another. It is about managing timing, presentation, and stress at the same time. When storage is built into the plan from day one, the entire process feels less rushed and more strategic. Rooms open up gradually, essentials stay accessible, and you never feel like you are drowning in half-packed chaos. Understanding how to use storage as a staging partner, not just a place to dump excess stuff, is what turns a messy transition into a controlled, professional-looking move.
Why Storage Is the Backbone of Every Staged Move
Visual space is emotional space. When every surface is covered, and every corner is full, buyers feel crowded before they have even evaluated the layout. Storage gives you a way to pull back without making drastic decisions about what to keep or donate. Seasonal décor, bulky furniture, duplicate items, archives, and personal collections can be moved out early, so the home reads cleaner and more open while still feeling lived-in. That balance between warmth and simplicity is exactly what good staging tries to achieve.
In more complex situations, such as live-work properties or home offices, storage becomes even more important. You may need to keep a business running while also presenting a polished environment to viewers. Partnering with local movers in Boston makes it easier to shift equipment, files, and nonessential pieces into storage in phases, so work can continue while the visible areas of the property stay controlled and presentable.
How Staging and Storage Work Together to Control Visual Impact
Staging works best when every object in a room has a clear purpose. A sofa frames a conversation. A table suggests gathering. A lamp softens the mood. Everything else that is not essential to that story competes for attention. Storage supports staging by giving you a clean staging bench off-site, where nonessential items can wait without being constantly shuffled between rooms or piled into overstuffed closets.
The art lies in deciding what stays and what goes. Family photos, extensive collections, excess seating, and rarely used appliances often move into storage first. What remains should be enough to show scale, comfort, and function without revealing the full weight of daily life. Commercial properties go through a similar filtering process. Extra desks, surplus equipment, outdated signage, and inactive files often move out early so the active workspace feels lean, efficient, and future-ready before a relocation supported by commercial movers takes place.
Strategic Timing of Storage before the Actual Move
The worst time to think about storage is when boxes are already stacked in the hallway. In a staged move, storage decisions ideally begin as soon as you know the property will be listed or the space will be transitioned. That might be a month or more before the main moving date. Starting early gives you time to sort, label, and prioritize instead of throwing things together in a panic.
An early storage phase also helps you test how the home feels with less in it. You may discover that removing a few large pieces transforms a cramped room into an open, inviting space. For commercial spaces, early storage lets operations continue with fewer interruptions. Departments can send nonessential items out in waves. When the main relocation comes, much of the excess is already safely stored, and what remains is easier for a commercial movers Boston team to handle with speed and care.
The Emotional Psychology behind Letting Storage Hold Your Belongings
Letting belongings leave the house ahead of you can feel unsettling. There is always a quiet fear that once something is out of sight, it will be forgotten, damaged, or harder to reclaim. That is why some people resist using storage even when they know it would make the staging process easier. Acknowledging that emotion instead of dismissing it helps you plan more honestly and avoids last-minute regret.
The reality is that good storage is not a black hole; it is a temporary pause. When items are packed thoughtfully, labeled clearly, and placed in an environment you trust, they become easier to manage than when they are tucked into random cupboards or stacked in spare rooms. For many people, living with fewer visible possessions during staging actually reduces tension. The home feels lighter and easier to maintain. Businesses notice the same effect when storage removes outdated equipment and clutter from the floor. The workspace looks more focused, and staff can concentrate on current tasks instead of navigating around accumulated history.
Protecting Assets While They Live in Storage
Sending belongings into storage is only a good idea if they come back in the same or better condition. That is where quality control matters. Furniture, textiles, electronics, files, and artwork each have different vulnerabilities. Moisture, temperature swings, dust, and rough handling can all damage them in ways that only become obvious later. Choosing the right type of storage and packing accordingly is central to the genius of using storage as part of a staged move rather than as a desperate overflow container.
Climate-controlled units, padded wrapping, elevated pallets, careful stacking, and clearly marked boxes all reduce risk. The goal is to handle items fewer times, not more. When storage is integrated into the move plan, belongings can travel directly from the home to storage and later from storage to the new address with minimal extra movement. Many owners coordinate those transfers through a well trusted movers in Boston, so the same team that moves items out early also manages their final delivery, preserving continuity and accountability.
How Storage Reduces Risk during Multi-Phase Moves
Few staged moves happen in a single clean step. There are often gaps between listing and selling, between selling and closing, between closing and final move-out. If renovations, inspections, or office reconfigurations are involved, the timeline becomes even more layered. Storage absorbs those gaps, so you are not forced to live among towers of boxes or stack equipment in hallways waiting for the next phase.
By treating storage as a flexible middle ground, you can move things out gradually while still having access when needed. For example, archived files can go first, followed by seasonal décor, then surplus furniture. As each stage ends, fewer items remain to be shifted on the final date. This phased approach reduces the risk of rushed, late-night packing sessions, careless stacking, and damaged items. It also makes it easier for commercial moving crews to work efficiently because they are handling a manageable volume of goods at each phase rather than everything at once.
Using Storage to Maintain Clean Show-Ready Conditions
One of the hardest parts of staging is keeping the property consistently show-ready. Every viewing becomes its own small event. Floors need to be cleared, surfaces wiped, and personal items tucked away. When too many belongings remain in the home, each showing takes a heavy amount of effort. Storage cuts that workload dramatically by taking nonessentials completely off the stage.
With fewer items to move and hide, maintaining a neutral, inviting look becomes much more realistic. You are not scrambling to stuff things into closets or push items under the bed. Instead, the home sits closer to show condition all the time, and the final touches before a viewing are minimal. In commercial environments, using storage helps maintain a professional appearance for clients and staff, even while the space is being prepared for a larger transition. Active tools and furniture stay in play, while inactive pieces quietly support the future from storage.
Storage as a Strategic Tool in Business Relocation Planning
For businesses, storage is more than a convenience; it is part of risk management. Office relocations and staged commercial moves have to juggle lease deadlines, equipment deliveries, IT cutovers, and staffing realities. Trying to shift everything in one move often results in downtime, lost files, and strained teams. Storage turns the move into a series of controlled steps instead of a single disruptive jump.
Unused furniture, archived documents, and non-critical inventory can be moved into storage weeks ahead of the main relocation. As the new space becomes ready, items can move out of storage and directly into position. This reduces double-handling and keeps the old and new locations from filling with half-unpacked material. A business that coordinates these flows with professional commercial movers in Boston usually experiences smoother transitions, because storage is treated as a working part of the operational plan rather than a leftover problem.
The Hidden Cost Benefits of Proper Storage Planning
On paper, storage looks like an extra expense. In reality, poorly managed moves cost far more. When everything is rushed into boxes at the last minute, items are damaged, misplaced, or transported multiple times. Extra labor hours, emergency packing supplies, replacement furniture, and extended timelines quickly outweigh the cost of well-used storage. Staging without storage also tends to keep homes and offices crowded longer, which can hurt impressions and, in the case of a sale, influence offers.
When storage is integrated from the beginning, you minimize waste. You handle items fewer times, you know where things are, and you avoid paying people to shift the same objects repeatedly. Staged homes that look better often sell faster or draw stronger interest, which helps recover investment on the back end. Businesses benefit from less downtime, safer handling of equipment, and predictable work schedules. Those gains are why many clients prefer partnering with a commercial moving company in Boston that understands storage as a cost-control tool, not just a place to park overflow.
Conclusion
The true genius of using storage during a staged home move is that it quietly rewrites the rules of transition. Instead of treating space as something that must absorb every box and belonging until the last possible moment, you treat storage as a flexible extension of the home or office. This shift in thinking opens rooms, clears sightlines, and makes every phase of the move more intentional. Staging becomes easier, maintenance becomes lighter, and the stress of living in a half-moved environment drops noticeably. When storage is chosen carefully, used early, and coordinated with the overall moving plan, it protects both physical assets and emotional energy. Buyers and visitors see a calm, collected space. You experience a less chaotic path from “here” to “there.” Whether you are selling a home, repositioning a business, or managing a complex phased relocation, storage can turn a disruptive event into a managed, almost elegant process.
For people who want that level of control and care during a staged move, Stairhopper movers have built a strong reputation by treating storage, timing, and transport as parts of one connected strategy. Their team is known for listening closely, planning around real-life constraints, and moving both residential and commercial clients through transitions with calm, steady execution. They approach every project as a partnership, aligning storage use, staging needs, and final delivery so that what matters most arrives safely, on schedule, and with as little disruption as possible.
Frequently Asked Questions
Q1. When should I arrange storage for a staged home move?
Ideally, four to six weeks before listing or transition, so clearing, packing, and staging can happen gradually without rushed decisions or last-minute stress.
Q2. Is climate-controlled storage necessary for staged moves?
It is highly recommended for wood furniture, electronics, artwork, and documents, since temperature and humidity swings can quietly damage materials over time.
Q3. How does storage help keep a home show-ready?
By moving nonessential items off-site, daily tidying becomes simpler, and each room can stay closer to a staged condition between viewings or inspections.
Q4. Can storage reduce the length of the final moving day?
Yes. When many items are moved into storage in advance, the final moving day focuses on essentials, which shortens timelines and reduces physical and mental strain.
Q5. Is storage useful for short-term business relocations?
Even in short relocations, storage helps prevent overcrowded offices and allows departments to move in phases without interrupting everyday operations.
Q6. How do I decide what should go into storage first?
Start with rarely used items, seasonal décor, surplus furniture, and archived materials, then work toward pieces that are visually distracting or make rooms feel cramped.
Q7. Will using storage make it harder to find things later?
Not if packing and labeling are done carefully. Clear categories, room-based labels, and simple inventories make stored items easier to locate than when scattered at home.
Q8. Does storage still make sense if my move happens in one day?
Yes, because staging and preparation begin well before that day. Storage keeps the home functional and attractive during the weeks leading up to the final move.
 Marwood Design
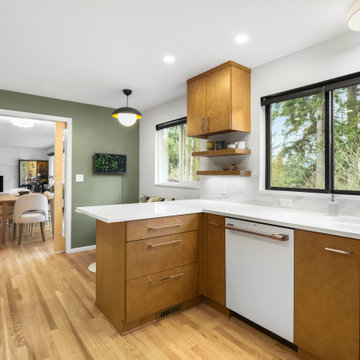
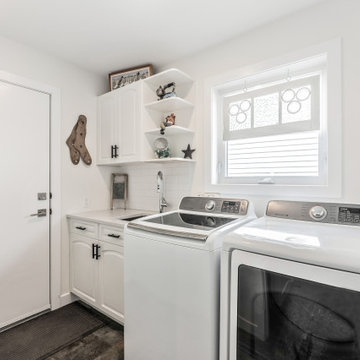
The goal of this project was to have a modern kitchen with a country home elegance. In this example, we mix three essential ingredients for creating a country homestyle cooking space: modern features, rustic elements, and industrial-inspired accents. When blended just right, the result is a sophisticated kitchen that's also warm and inviting keeping the charm of an old country kitchen. There are no hard-set rules for modern farmhouse colors. However, a winning palette seen in many spaces combines pastels, black, and natural wood tones. We loved the original walnut floor and worked with earthy colours of light greens and coffee hues to make the kitchen inviting to an old farmhouse with all the functions of modern appliances.
We were able to accomplish all the needs of the client’s project that started out as kitchen renovation. The project scope refocused to renovating the main floor living area, a new kitchen, updated laundry room and new powder room. The main floor kitchen space felt cramped due to a small dining room near the sliding doors. To gain space we started with a smaller foot print of the kitchen island and moved the dining area to the right of the island opening up the kitchen, gaining space with natural light flowing through the sliding doors. We removed the old dated popcorn ceilings and relocated the pot lights to give better lighting in areas that needed it and removed lights that didn’t need it. The end result is a country kitchen with character and charm.
 Marwood Design
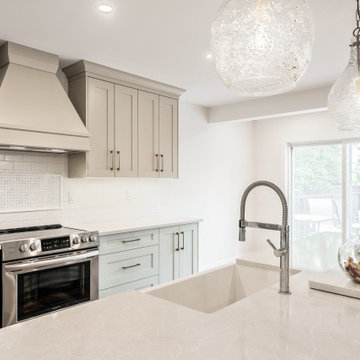
The goal of this project was to have a modern kitchen with a country home elegance. In this example, we mix three essential ingredients for creating a country homestyle cooking space: modern features, rustic elements, and industrial-inspired accents. When blended just right, the result is a sophisticated kitchen that's also warm and inviting keeping the charm of an old country kitchen. There are no hard-set rules for modern farmhouse colors. However, a winning palette seen in many spaces combines pastels, black, and natural wood tones. We loved the original walnut floor and worked with earthy colours of light greens and coffee hues to make the kitchen inviting to an old farmhouse with all the functions of modern appliances.
We were able to accomplish all the needs of the client’s project that started out as kitchen renovation. The project scope refocused to renovating the main floor living area, a new kitchen, updated laundry room and new powder room. The main floor kitchen space felt cramped due to a small dining room near the sliding doors. To gain space we started with a smaller foot print of the kitchen island and moved the dining area to the right of the island opening up the kitchen, gaining space with natural light flowing through the sliding doors. We removed the old dated popcorn ceilings and relocated the pot lights to give better lighting in areas that needed it and removed lights that didn’t need it. The end result is a country kitchen with character and charm.
 Marwood Design
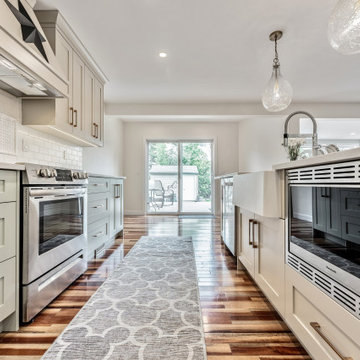
The goal of this project was to have a modern kitchen with a country home elegance. In this example, we mix three essential ingredients for creating a country homestyle cooking space: modern features, rustic elements, and industrial-inspired accents. When blended just right, the result is a sophisticated kitchen that's also warm and inviting keeping the charm of an old country kitchen. There are no hard-set rules for modern farmhouse colors. However, a winning palette seen in many spaces combines pastels, black, and natural wood tones. We loved the original walnut floor and worked with earthy colours of light greens and coffee hues to make the kitchen inviting to an old farmhouse with all the functions of modern appliances.
We were able to accomplish all the needs of the client’s project that started out as kitchen renovation. The project scope refocused to renovating the main floor living area, a new kitchen, updated laundry room and new powder room. The main floor kitchen space felt cramped due to a small dining room near the sliding doors. To gain space we started with a smaller foot print of the kitchen island and moved the dining area to the right of the island opening up the kitchen, gaining space with natural light flowing through the sliding doors. We removed the old dated popcorn ceilings and relocated the pot lights to give better lighting in areas that needed it and removed lights that didn’t need it. The end result is a country kitchen with character and charm.
 Marwood Design
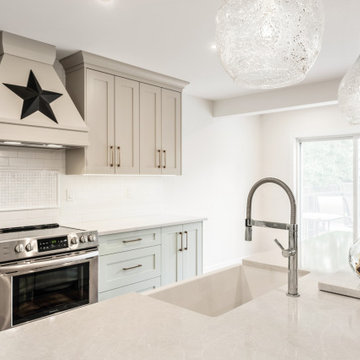
The goal of this project was to have a modern kitchen with a country home elegance. In this example, we mix three essential ingredients for creating a country homestyle cooking space: modern features, rustic elements, and industrial-inspired accents. When blended just right, the result is a sophisticated kitchen that's also warm and inviting keeping the charm of an old country kitchen. There are no hard-set rules for modern farmhouse colors. However, a winning palette seen in many spaces combines pastels, black, and natural wood tones. We loved the original walnut floor and worked with earthy colours of light greens and coffee hues to make the kitchen inviting to an old farmhouse with all the functions of modern appliances.
We were able to accomplish all the needs of the client’s project that started out as kitchen renovation. The project scope refocused to renovating the main floor living area, a new kitchen, updated laundry room and new powder room. The main floor kitchen space felt cramped due to a small dining room near the sliding doors. To gain space we started with a smaller foot print of the kitchen island and moved the dining area to the right of the island opening up the kitchen, gaining space with natural light flowing through the sliding doors. We removed the old dated popcorn ceilings and relocated the pot lights to give better lighting in areas that needed it and removed lights that didn’t need it. The end result is a country kitchen with character and charm.
3