
Search results for "Eventually pushed" in Home Design Ideas
 Inspired Remodeling & Tile by Peter Bales
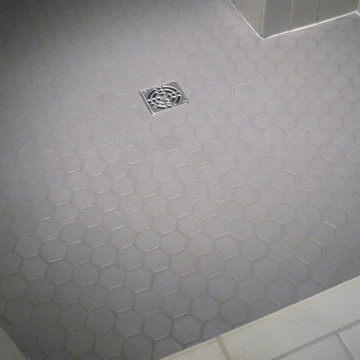
This amazing shower in Bloomfield, Indiana features all the details! From the arched doorway to the recessed niche, this shower has the amenities to make it luxurious, but also the extra detail in the tile design to push it over the top! The wall tiles are a marble-looking porcelain tile that is 12x24. The floor features 2" grey hex tiles. The mosaic is a mixture of grey glass and marble framed with marble and glass trim pieces. The plumbing wall is highlighted with 6" square tile set diagonally framed with marble trim pieces as well. The 'window' to the left of the door will eventually get a piece of glass to contain the water, but was designed to let in lots of light and keep the open feel to the bathroom which is not especially large. As with all of my showers, it's waterproofed using the Kerdi waterproofing system from Schluter to make sure the water actually goes down the drain! A fantastic shower all the way around!
 Inspired Remodeling & Tile by Peter Bales
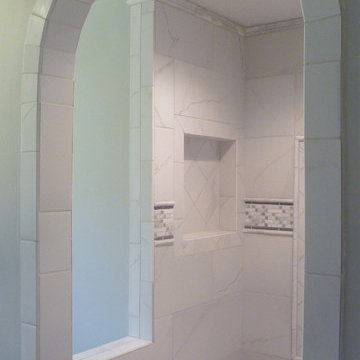
This amazing shower in Bloomfield, Indiana features all the details! From the arched doorway to the recessed niche, this shower has the amenities to make it luxurious, but also the extra detail in the tile design to push it over the top! The wall tiles are a marble-looking porcelain tile that is 12x24. The floor features 2" grey hex tiles. The mosaic is a mixture of grey glass and marble framed with marble and glass trim pieces. The plumbing wall is highlighted with 6" square tile set diagonally framed with marble trim pieces as well. The 'window' to the left of the door will eventually get a piece of glass to contain the water, but was designed to let in lots of light and keep the open feel to the bathroom which is not especially large. As with all of my showers, it's waterproofed using the Kerdi waterproofing system from Schluter to make sure the water actually goes down the drain! A fantastic shower all the way around!
 Land Design Associates, Inc.
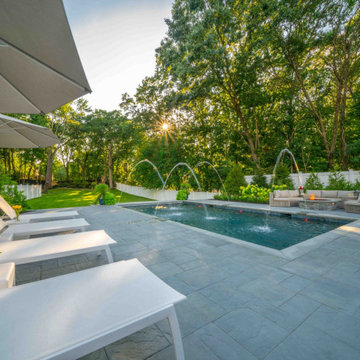
You won’t be disappointed to have a staycation at this beautiful Wellesley property. The homeowner came to us looking to completely overhaul their blank-slate property into a pool paradise. Our team creatively worked to design the pool area and the outcome was a truly special place to swim and relax.
The pool is the centerpiece of this backyard, it is a sleek design that seamlessly integrates into the landscape. It’s surrounded by a bluestone coping and a large patio made of Cambridge Pavers. The steps and retaining wall at the end of the pool are beautifully veneered with Berkshire natural stone. The stonework really tops off the hardscape, providing an appealing contrast to the paver patio material.
There are two features that really set this pool apart – the pool fountain jets and the automatic cover. The homeowner wanted “fountains like the Bellagio.” We worked with Environmental Pools to make that dream a reality. It was a tough decision to opt either for an infinity edge or an automatic cover for the pool, the homeowner eventually decided that it would be a better investment to have the automatic pool cover. With the push of a button, the cover goes from totally hidden to completely covering the pool for safety and keeping any leaves or dirt getting into the water. Clients often comment on how happy they are with their automatic pool covers. Automatic covers drastically reduce the time necessary to clean and maintain the pool, leaving them more time to simply enjoy and unwind outside.
Next to the pool is a wood-burning fire pit, a perfect place to sit and hang out and maybe even have a S’more in between cannonballs into the deep end. A row of lounge chairs ensures that everyone’s got a place to relax and soak in the sun.
As the homeowners have young kids it was essential to save a large amount of space for a beautifully manicured lawn. Whether you’re looking to throw a frisbee, play some cornhole, or kick a soccer ball there is more than enough room for activities.
Find the right local pro for your project
 Inspired Remodeling & Tile by Peter Bales
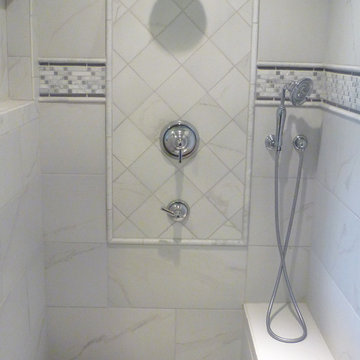
This amazing shower in Bloomfield, Indiana features all the details! From the arched doorway to the recessed niche, this shower has the amenities to make it luxurious, but also the extra detail in the tile design to push it over the top! The wall tiles are a marble-looking porcelain tile that is 12x24. The floor features 2" grey hex tiles. The mosaic is a mixture of grey glass and marble framed with marble and glass trim pieces. The plumbing wall is highlighted with 6" square tile set diagonally framed with marble trim pieces as well. The 'window' to the left of the door will eventually get a piece of glass to contain the water, but was designed to let in lots of light and keep the open feel to the bathroom which is not especially large. As with all of my showers, it's waterproofed using the Kerdi waterproofing system from Schluter to make sure the water actually goes down the drain! A fantastic shower all the way around!
 Jacobs Grant Design ltd
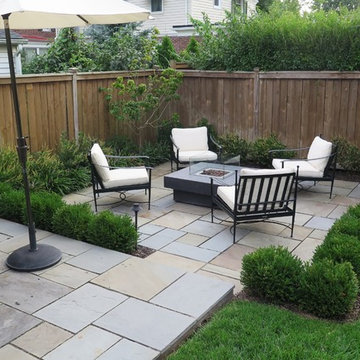
Somehow the yard and patio spaces seem larger than the small space that it is. The original patio was placed against the house and the lawn pushed to the outside edge of the yard. In this new design, the yard gets center stage. The edge plantings, including two climbing hydrangea vines, will eventually make the fence a wall of green.
 Inspired Remodeling & Tile by Peter Bales
This amazing shower in Bloomfield, Indiana features all the details! From the arched doorway to the recessed niche, this shower has the amenities to make it luxurious, but also the extra detail in the tile design to push it over the top! The wall tiles are a marble-looking porcelain tile that is 12x24. The floor features 2" grey hex tiles. The mosaic is a mixture of grey glass and marble framed with marble and glass trim pieces. The plumbing wall is highlighted with 6" square tile set diagonally framed with marble trim pieces as well. The 'window' to the left of the door will eventually get a piece of glass to contain the water, but was designed to let in lots of light and keep the open feel to the bathroom which is not especially large. As with all of my showers, it's waterproofed using the Kerdi waterproofing system from Schluter to make sure the water actually goes down the drain! A fantastic shower all the way around!
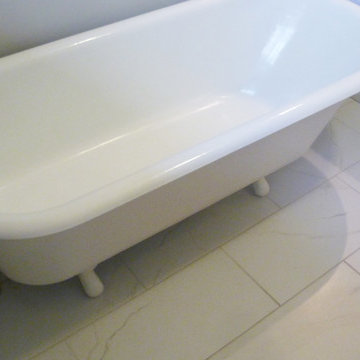
This picture shows the cast iron tub and the tile floors that match the tile in the shower.
 Jacobs Grant Design ltd
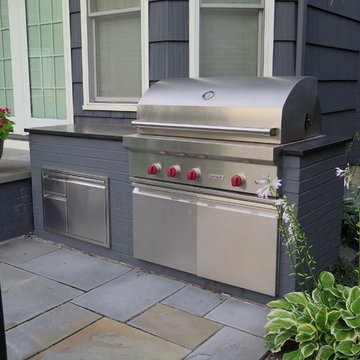
Somehow the yard and patio spaces seem larger than the small space that it is. The original patio was placed against the house and the lawn pushed to the outside edge of the yard. In this new design, the yard gets center stage. The edge plantings, including two climbing hydrangea vines, will eventually make the fence a wall of green.
 Pacific HVAC Air Conditioner
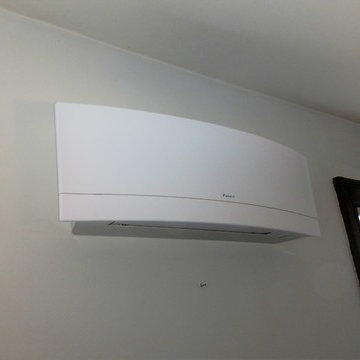
 two dust filters and two air quality filters
Example of a classic home design design in New York
Example of a classic home design design in New York
 Lincoln Lighthill Architect
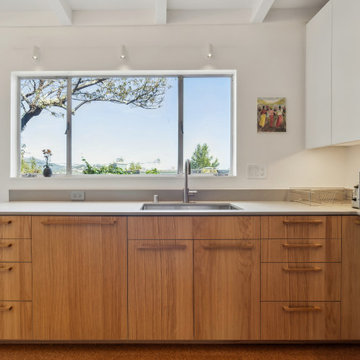
How do you modernize modernism on a budget? This house had charming midcentury character and lots of potential but had been neglected for many years and was sorely in need of a refresh to bring it up to modern standards of comfort, finish, and sustainability. The tight budget dictated that it would not be a down-to-the-studs, gut remodel, but more of a surgical intervention.
Built in 1955, the house had settled on the downhill side, making the floors slope almost 4” from the front to the back of the house. Using an innovative and inexpensive push-pile method, the foundation was reinforced and the house was jacked back up. It now sits solidly on bedrock and the floor is level to within a half-inch throughout.
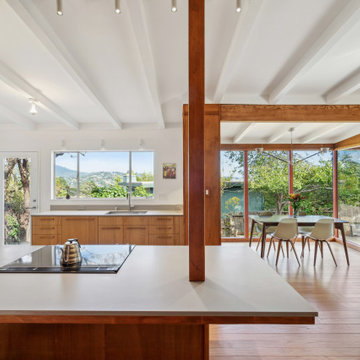
Inside, the original kitchen was worn and needed replacement. This presented an opportunity to remove the walls separating it from the living and dining area and create a wide-open great room with a peninsula counter for guests to gather and an almost continuous wall of windows to take in views of the hills, trees, and bay.
Throughout the rest of the house, most finishes were restored, or replaced when necessary. Wood floors were refinished, and new cork flooring, a slightly less durable but much less expensive alternative to tile and similar materials, was used in all wet areas, with the added benefit of warmth and resiliency. The existing textured walls and ceilings were skim-coated smooth with plaster, dark beams painted white, and existing wood wall paneling in the living room was cleaned and color-matched where new pieces were required. All of the existing frameless, direct-glazed windows were replaced with double pane units, and a new floor-to-ceiling window on the south side of the living room provides a key source of natural light.
In the bathrooms, existing tile and vanities were saved, and a strangely colored tub and sinks were re-glazed. Flooring, toilets, lighting, double medicine cabinets, and paint in each space make these mostly unaltered rooms feel new again.
Sustainability and comfort upgrades include an induction range (step one of an eventual transition to full electrification), spray foam insulation under the floor, spray-in cellulose in the walls, and warm-dim LED lighting throughout on a simple whole-house control system. Combined with a modern thermostat, the house’s systems are all accessible via app from anywhere.
And the most sustainable feature of all? What we didn’t do: tear it down and start over. In a country that demolishes a million homes a year- 1% of our residential housing stock- reusing an existing home is the greenest solution of all.
 Lincoln Lighthill Architect
How do you modernize modernism on a budget? This house had charming midcentury character and lots of potential but had been neglected for many years and was sorely in need of a refresh to bring it up to modern standards of comfort, finish, and sustainability. The tight budget dictated that it would not be a down-to-the-studs, gut remodel, but more of a surgical intervention.
Built in 1955, the house had settled on the downhill side, making the floors slope almost 4” from the front to the back of the house. Using an innovative and inexpensive push-pile method, the foundation was reinforced and the house was jacked back up. It now sits solidly on bedrock and the floor is level to within a half-inch throughout.
Inside, the original kitchen was worn and needed replacement. This presented an opportunity to remove the walls separating it from the living and dining area and create a wide-open great room with a peninsula counter for guests to gather and an almost continuous wall of windows to take in views of the hills, trees, and bay.
Throughout the rest of the house, most finishes were restored, or replaced when necessary. Wood floors were refinished, and new cork flooring, a slightly less durable but much less expensive alternative to tile and similar materials, was used in all wet areas, with the added benefit of warmth and resiliency. The existing textured walls and ceilings were skim-coated smooth with plaster, dark beams painted white, and existing wood wall paneling in the living room was cleaned and color-matched where new pieces were required. All of the existing frameless, direct-glazed windows were replaced with double pane units, and a new floor-to-ceiling window on the south side of the living room provides a key source of natural light.
In the bathrooms, existing tile and vanities were saved, and a strangely colored tub and sinks were re-glazed. Flooring, toilets, lighting, double medicine cabinets, and paint in each space make these mostly unaltered rooms feel new again.
Sustainability and comfort upgrades include an induction range (step one of an eventual transition to full electrification), spray foam insulation under the floor, spray-in cellulose in the walls, and warm-dim LED lighting throughout on a simple whole-house control system. Combined with a modern thermostat, the house’s systems are all accessible via app from anywhere.
And the most sustainable feature of all? What we didn’t do: tear it down and start over. In a country that demolishes a million homes a year- 1% of our residential housing stock- reusing an existing home is the greenest solution of all.
 Land Design Associates, Inc.
You won’t be disappointed to have a staycation at this beautiful Wellesley property. The homeowner came to us looking to completely overhaul their blank-slate property into a pool paradise. Our team creatively worked to design the pool area and the outcome was a truly special place to swim and relax.
The pool is the centerpiece of this backyard, it is a sleek design that seamlessly integrates into the landscape. It’s surrounded by a bluestone coping and a large patio made of Cambridge Pavers. The steps and retaining wall at the end of the pool are beautifully veneered with Berkshire natural stone. The stonework really tops off the hardscape, providing an appealing contrast to the paver patio material.
There are two features that really set this pool apart – the pool fountain jets and the automatic cover. The homeowner wanted “fountains like the Bellagio.” We worked with Environmental Pools to make that dream a reality. It was a tough decision to opt either for an infinity edge or an automatic cover for the pool, the homeowner eventually decided that it would be a better investment to have the automatic pool cover. With the push of a button, the cover goes from totally hidden to completely covering the pool for safety and keeping any leaves or dirt getting into the water. Clients often comment on how happy they are with their automatic pool covers. Automatic covers drastically reduce the time necessary to clean and maintain the pool, leaving them more time to simply enjoy and unwind outside.
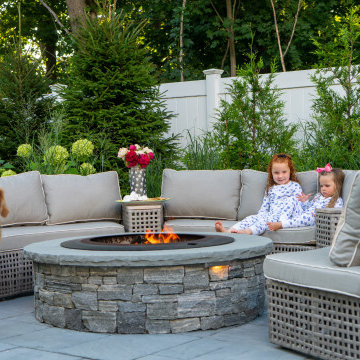
Next to the pool is a wood-burning fire pit, a perfect place to sit and hang out and maybe even have a S’more in between cannonballs into the deep end. A row of lounge chairs ensures that everyone’s got a place to relax and soak in the sun.
As the homeowners have young kids it was essential to save a large amount of space for a beautifully manicured lawn. Whether you’re looking to throw a frisbee, play some cornhole, or kick a soccer ball there is more than enough room for activities.
 Inspired Remodeling & Tile by Peter Bales
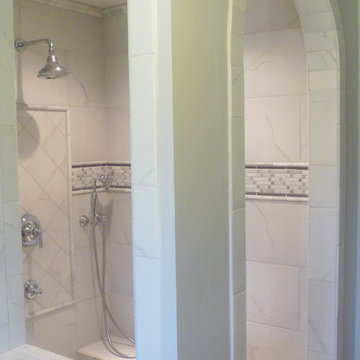
This amazing shower in Bloomfield, Indiana features all the details! From the arched doorway to the recessed niche, this shower has the amenities to make it luxurious, but also the extra detail in the tile design to push it over the top! The wall tiles are a marble-looking porcelain tile that is 12x24. The floor features 2" grey hex tiles. The mosaic is a mixture of grey glass and marble framed with marble and glass trim pieces. The plumbing wall is highlighted with 6" square tile set diagonally framed with marble trim pieces as well. The 'window' to the left of the door will eventually get a piece of glass to contain the water, but was designed to let in lots of light and keep the open feel to the bathroom which is not especially large. As with all of my showers, it's waterproofed using the Kerdi waterproofing system from Schluter to make sure the water actually goes down the drain! A fantastic shower all the way around!
 Lincoln Lighthill Architect
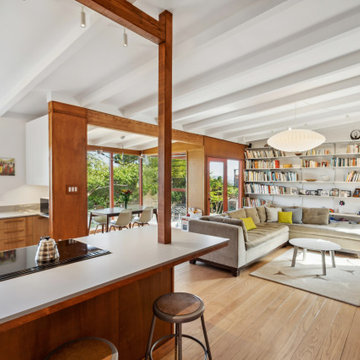
How do you modernize modernism on a budget? This house had charming midcentury character and lots of potential but had been neglected for many years and was sorely in need of a refresh to bring it up to modern standards of comfort, finish, and sustainability. The tight budget dictated that it would not be a down-to-the-studs, gut remodel, but more of a surgical intervention.
Built in 1955, the house had settled on the downhill side, making the floors slope almost 4” from the front to the back of the house. Using an innovative and inexpensive push-pile method, the foundation was reinforced and the house was jacked back up. It now sits solidly on bedrock and the floor is level to within a half-inch throughout.
Inside, the original kitchen was worn and needed replacement. This presented an opportunity to remove the walls separating it from the living and dining area and create a wide-open great room with a peninsula counter for guests to gather and an almost continuous wall of windows to take in views of the hills, trees, and bay.
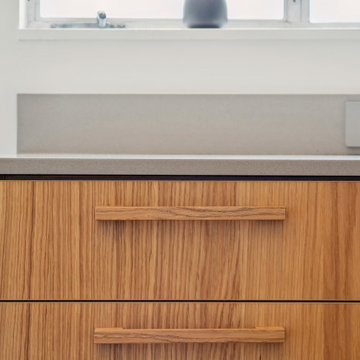
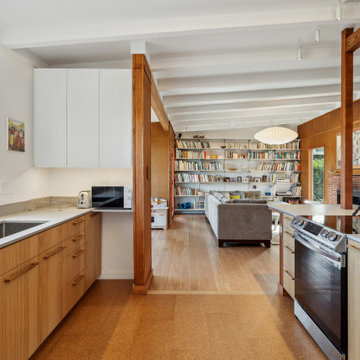
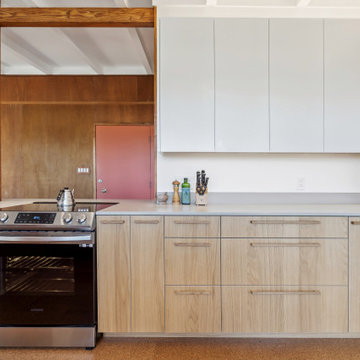
Throughout the rest of the house, most finishes were restored, or replaced when necessary. Wood floors were refinished, and new cork flooring, a slightly less durable but much less expensive alternative to tile and similar materials, was used in all wet areas, with the added benefit of warmth and resiliency. The existing textured walls and ceilings were skim-coated smooth with plaster, dark beams painted white, and existing wood wall paneling in the living room was cleaned and color-matched where new pieces were required. All of the existing frameless, direct-glazed windows were replaced with double pane units, and a new floor-to-ceiling window on the south side of the living room provides a key source of natural light.
In the bathrooms, existing tile and vanities were saved, and a strangely colored tub and sinks were re-glazed. Flooring, toilets, lighting, double medicine cabinets, and paint in each space make these mostly unaltered rooms feel new again.
Sustainability and comfort upgrades include an induction range (step one of an eventual transition to full electrification), spray foam insulation under the floor, spray-in cellulose in the walls, and warm-dim LED lighting throughout on a simple whole-house control system. Combined with a modern thermostat, the house’s systems are all accessible via app from anywhere.
And the most sustainable feature of all? What we didn’t do: tear it down and start over. In a country that demolishes a million homes a year- 1% of our residential housing stock- reusing an existing home is the greenest solution of all.
 Lincoln Lighthill Architect
How do you modernize modernism on a budget? This house had charming midcentury character and lots of potential but had been neglected for many years and was sorely in need of a refresh to bring it up to modern standards of comfort, finish, and sustainability. The tight budget dictated that it would not be a down-to-the-studs, gut remodel, but more of a surgical intervention.
Built in 1955, the house had settled on the downhill side, making the floors slope almost 4” from the front to the back of the house. Using an innovative and inexpensive push-pile method, the foundation was reinforced and the house was jacked back up. It now sits solidly on bedrock and the floor is level to within a half-inch throughout.
Inside, the original kitchen was worn and needed replacement. This presented an opportunity to remove the walls separating it from the living and dining area and create a wide-open great room with a peninsula counter for guests to gather and an almost continuous wall of windows to take in views of the hills, trees, and bay.
Throughout the rest of the house, most finishes were restored, or replaced when necessary. Wood floors were refinished, and new cork flooring, a slightly less durable but much less expensive alternative to tile and similar materials, was used in all wet areas, with the added benefit of warmth and resiliency. The existing textured walls and ceilings were skim-coated smooth with plaster, dark beams painted white, and existing wood wall paneling in the living room was cleaned and color-matched where new pieces were required. All of the existing frameless, direct-glazed windows were replaced with double pane units, and a new floor-to-ceiling window on the south side of the living room provides a key source of natural light.
In the bathrooms, existing tile and vanities were saved, and a strangely colored tub and sinks were re-glazed. Flooring, toilets, lighting, double medicine cabinets, and paint in each space make these mostly unaltered rooms feel new again.
Sustainability and comfort upgrades include an induction range (step one of an eventual transition to full electrification), spray foam insulation under the floor, spray-in cellulose in the walls, and warm-dim LED lighting throughout on a simple whole-house control system. Combined with a modern thermostat, the house’s systems are all accessible via app from anywhere.
And the most sustainable feature of all? What we didn’t do: tear it down and start over. In a country that demolishes a million homes a year- 1% of our residential housing stock- reusing an existing home is the greenest solution of all.

 Five Star Tree Care
Adding woodchips underneath your trees has many benefits. Some of these benefits include:
-soil moisture retention
-nutrient leaching when decomposing over time
-smother weeds and invasive plants
But before you add any woodchips to your gardens and trees, it’s important to make sure you aerate the root zone. Doing so improves the oxygen supply and leaching to the roots. You will see more growth when there is more oxygen. Our team at Five Star Tree Services has come up with a guide on how you can use woodchips in your gardens.
Where To Place Woodchips
Even though there are many benefits for your trees, there is a right and wrong way to use them. If used incorrectly, you can actually end up hurting your tree instead of helping it. This can happen when there is an excessive amount piled up around a tree, its roots, and the trunk. Woodchips should never touch the trunk of a tree for extended periods of time. What happens is that moisture is retained in the chips and will eventually cause the tree to rot. The end result is death if not caught in time.
An indication of rot and decay is fruiting bodies or mushrooms. It is important to keep an eye out for these indicators by taking a good look at your trees. To avoid this situation, make sure to evenly and carefully spread out the chips around the root zone. Clear any chips away from the trunk by an inch or two.
When applied correctly; you will see your trees thrive and prosper. They will stay healthy and vivacious from the moisture retention and gradual organic leaching.
Soil Compaction
Soil compaction can dramatically affect your trees. This is often an overlooked issue for many landscapers. Due to things like foot traffic, large amounts of rain, construction, and the use of heavy machinery, are all factors that result in soil compaction. Things like water and nutrients can’t saturate through the soil when it becomes too compact. This results in soil that is without minerals and dry. When this happens, tree roots struggle to push through the soil, resulting in stressed trees.
Preventing Soil Compaction
If a tree is left in compacted soil, it will eventually die. One way to avoid this if you are having any construction done in your yard is to set up a Tree Protection Zone, or TPZ. Fences are used to create a barrier where heavy equipment and machinery can’t go in. When heavy machinery is used, this creates extremely compact soil and has been known to crush roots.
How Five Star Tree Services Can Help
Using woodchips is a great way to help your gardens thrive. But it is vitally important to use it properly, otherwise you will end up hurting your trees, instead of helping them. If you require any Richmond Hill Tree Care Services, don’t hesitate to give us at Five Star Tree Services a call at (416) 990-3355!
 Lincoln Lighthill Architect
How do you modernize modernism on a budget? This house had charming midcentury character and lots of potential but had been neglected for many years and was sorely in need of a refresh to bring it up to modern standards of comfort, finish, and sustainability. The tight budget dictated that it would not be a down-to-the-studs, gut remodel, but more of a surgical intervention.
Built in 1955, the house had settled on the downhill side, making the floors slope almost 4” from the front to the back of the house. Using an innovative and inexpensive push-pile method, the foundation was reinforced and the house was jacked back up. It now sits solidly on bedrock and the floor is level to within a half-inch throughout.
Inside, the original kitchen was worn and needed replacement. This presented an opportunity to remove the walls separating it from the living and dining area and create a wide-open great room with a peninsula counter for guests to gather and an almost continuous wall of windows to take in views of the hills, trees, and bay.
Throughout the rest of the house, most finishes were restored, or replaced when necessary. Wood floors were refinished, and new cork flooring, a slightly less durable but much less expensive alternative to tile and similar materials, was used in all wet areas, with the added benefit of warmth and resiliency. The existing textured walls and ceilings were skim-coated smooth with plaster, dark beams painted white, and existing wood wall paneling in the living room was cleaned and color-matched where new pieces were required. All of the existing frameless, direct-glazed windows were replaced with double pane units, and a new floor-to-ceiling window on the south side of the living room provides a key source of natural light.
In the bathrooms, existing tile and vanities were saved, and a strangely colored tub and sinks were re-glazed. Flooring, toilets, lighting, double medicine cabinets, and paint in each space make these mostly unaltered rooms feel new again.
Sustainability and comfort upgrades include an induction range (step one of an eventual transition to full electrification), spray foam insulation under the floor, spray-in cellulose in the walls, and warm-dim LED lighting throughout on a simple whole-house control system. Combined with a modern thermostat, the house’s systems are all accessible via app from anywhere.
And the most sustainable feature of all? What we didn’t do: tear it down and start over. In a country that demolishes a million homes a year- 1% of our residential housing stock- reusing an existing home is the greenest solution of all.
 Lincoln Lighthill Architect
How do you modernize modernism on a budget? This house had charming midcentury character and lots of potential but had been neglected for many years and was sorely in need of a refresh to bring it up to modern standards of comfort, finish, and sustainability. The tight budget dictated that it would not be a down-to-the-studs, gut remodel, but more of a surgical intervention.
Built in 1955, the house had settled on the downhill side, making the floors slope almost 4” from the front to the back of the house. Using an innovative and inexpensive push-pile method, the foundation was reinforced and the house was jacked back up. It now sits solidly on bedrock and the floor is level to within a half-inch throughout.
Inside, the original kitchen was worn and needed replacement. This presented an opportunity to remove the walls separating it from the living and dining area and create a wide-open great room with a peninsula counter for guests to gather and an almost continuous wall of windows to take in views of the hills, trees, and bay.
Throughout the rest of the house, most finishes were restored, or replaced when necessary. Wood floors were refinished, and new cork flooring, a slightly less durable but much less expensive alternative to tile and similar materials, was used in all wet areas, with the added benefit of warmth and resiliency. The existing textured walls and ceilings were skim-coated smooth with plaster, dark beams painted white, and existing wood wall paneling in the living room was cleaned and color-matched where new pieces were required. All of the existing frameless, direct-glazed windows were replaced with double pane units, and a new floor-to-ceiling window on the south side of the living room provides a key source of natural light.
In the bathrooms, existing tile and vanities were saved, and a strangely colored tub and sinks were re-glazed. Flooring, toilets, lighting, double medicine cabinets, and paint in each space make these mostly unaltered rooms feel new again.
Sustainability and comfort upgrades include an induction range (step one of an eventual transition to full electrification), spray foam insulation under the floor, spray-in cellulose in the walls, and warm-dim LED lighting throughout on a simple whole-house control system. Combined with a modern thermostat, the house’s systems are all accessible via app from anywhere.
And the most sustainable feature of all? What we didn’t do: tear it down and start over. In a country that demolishes a million homes a year- 1% of our residential housing stock- reusing an existing home is the greenest solution of all.
 Meredith Heron Design
Donna Griffith for House and Home Magazine
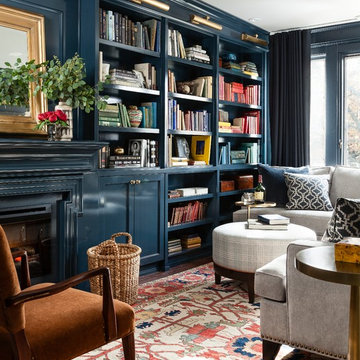
Small elegant carpeted family room photo in Toronto with blue walls and a standard fireplace
Small elegant carpeted family room photo in Toronto with blue walls and a standard fireplace
2