
Search results for "Existing" in Home Design Ideas
 Kankel Conroy Rose & Hill Landscape Architecture
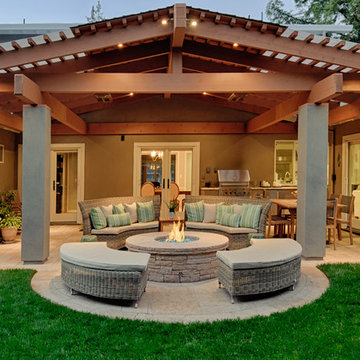
The homeowners desired an outdoor space that felt more rustic than their refined interior spaces, but still related architecturally to their house. Cement plaster support arbor columns provide enough of visual tie to the existing house exterior. Oversized wood beams and rafter members provide a unique outdoor atmosphere. Structural bolts and hardware were minimized for a cleaner appearance. Structural connections and supports were engineered to meet California's stringent earthquake standards.
Ali Atri Photography
 Liz Schupanitz Designs
Cooking for Two
Location: Plymouth, MN, United States
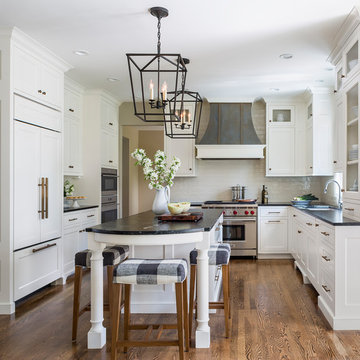
When this couple’s last child graduated from college they began the process of looking for a new home. After a lengthy search they decided to stay with the neighborhood they loved, saving money by remodeling rather than starting over.
The top priorities on their wish list were adding character to their 1990’s era home with a classic white kitchen and a larger island while keeping within the existing footprint. With the intention of honing their cooking skills, they were also considering better appliances and two ovens.
Challenges and Solutions
Design a larger island with seating for at least two. The existing island was small and the area behind the seating was less than recommended clearances.
To solve this challenge, the seating area of the island was extended out into the open area of the kitchen. This created a larger island with seating for three, extra storage and a bookshelf across from the range.
The original kitchen had a range with microwave above, so adding another oven was a challenge with limited wall space.
Because the adjoining dining room is used infrequently, the homeowner was open to placing the second oven and microwave in the walkway. This made room for the small buffet between the built in refrigerator and ovens, creating one of her favorite areas.
The client requested a white painted kitchen but wanted to make sure it had warmth and character. To achieve this the following elements were chosen:
1) Cabinets painted with Benjamin Moore Capitol White, a luminous and warm shade of white.
2) The Range hood was painted with warm metallic shades to reflect the bronze of the Ashley Norton hardware.
3) Black Aqua Grantique granite was chosen for countertops because it looks like soapstone and adds contrast.
4) Walker Zanger Café tile in Latte was chosen for it’s handmade look with uneven edges.
5) The to-the-counter-cabinet with glass door shows off serving dishes and lends sophisticated charm.
The result is a welcoming classic kitchen, where this couple enjoys cooking more often and sharpening their skills with gourmet appliances.
Liz Schupanitz Designs
Photographed by: Andrea Rugg Photography

Find the right local pro for your project
 Pennsylvania Landscape & Nursery Association
Terren Landscapes http://www.terrenlandscapes.com
Project Entry: Pembrooke Estate Rain Garden
2014 PLNA Awards for Landscape Excellence Winner
Category: Sustainable Landscape &60,000-$120,000
Award Level: Silver
Project Description:
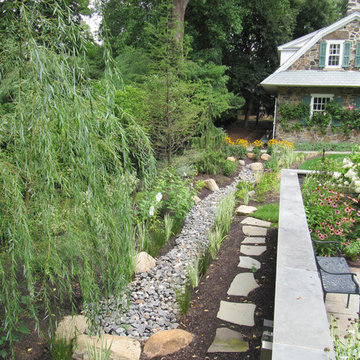
The client contracted our company to solve multiple existing drainage problems. In a heavy rain event the existing French drain system would overflow, causing water to pool in the driveway. After investigating the system we found that the capacity of the French drain was undersized for the amount of storm water from the large rain events received in recent years. As a result of our findings and at the request of the homeowner, we designed a storm water management system to capture all storm water from the structures on the property and regenerate the underground aquifers for the volume of a 5.8” rainstorm. In addition to the new drain system, the homeowners wanted a rain garden to provide a backdrop for an existing formal garden, provide a habitat for wildlife, and provide screening from an adjacent neighbor.
Throughout the design process many challenges were presented, including an existing gas line, which ran directly through the area that best suited the bioswale. The existence of the gas line caused us to alter the shape and depth of the bioswale in some areas. We also inspected the existing downspouts to make sure there were no obstructions that would impede the system’s efficiency, and then conducted a test pit dig to make sure we had sufficient percolation rates for disposal of storm water.
To effectively capture the storm water runoff, the existing downspouts were piped from the main house and the large detached garage to a large catch basin located at the low point in the driveway. The driveway catch basin contains two outlet pipes at different elevations within the basin allowing water from smaller rain events to enter the bioswale and rain garden area to percolate into the soil before excess water overflows into a sediment trap which filters out any debris and is then piped to an underground StormTech® pit to slowly percolate into the ground. The other outlet pipe in the driveway catch basin is used for larger storm water events, taking the water directly to the StormTech® pit.
Accepting and slowing the velocity of the storm water, mitigation of erosion, and filtering out pollutants contained in the “first flush” of rainfall are the primary functions of the bioswale and rain garden. Planting these areas with mostly native plant species helps carry out these functions while attracting and providing shelter for wildlife.
The ‘Niobe’ weeping willow is the centerpiece of the rain garden, connecting with the axis of the existing formal garden. To screen the neighboring property we chose Chamaecyparis nootkatensis ‘Pendula’ for its graceful evergreen habit and tolerance of wet sites. ‘Ivory Halo’ dogwood and Panicum ‘Cloud Nine’ were used for screening as well as winter interest. To provide deciduous structure to the garden Taxodium distichum and Magnolia virginiana were used in conjunction with witch hazel. Mostly native wetland perennials were used due to their tolerance of wet conditions and occasional drought.
The area above the StormTech® pit provides space for the client’s family to relax. The rain garden and bioswale provide screening, storm water management, a habitat for wildlife, and plants that enhance the adjacent formal garden.
Photo Credit: Terren Landscapes
 Urbanism Designs
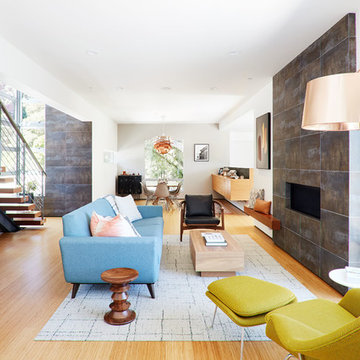
Inspiration for a contemporary open concept medium tone wood floor and brown floor living room remodel in San Francisco with white walls and a standard fireplace

 Devi Dutta Architecture
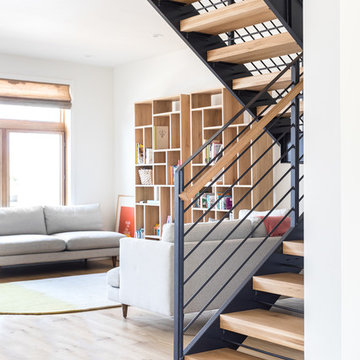
Trendy wooden u-shaped open and cable railing staircase photo in San Francisco

Sponsored
Columbus, OH

Hope Restoration & General Contracting
Columbus Design-Build, Kitchen & Bath Remodeling, Historic Renovations
 Pennsylvania Landscape & Nursery Association
Terren Landscapes http://www.terrenlandscapes.com
2014 PLNA Awards for Landscape Excellence Winner
Category: Residential $30,000-$60,000
Award Level: Silver
Project Description:
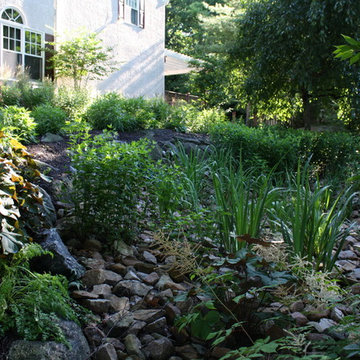
Our company was contracted to do a master plan for the family who was in desperate need of a rear yard renovation. The existing lawn area remained saturated throughout most of the year and the runoff from the neighboring property ran across their back yard, down the side of their property and all the way to the sidewalk in front of their house. The water was so intense that it had begun to cut through the back yard and erode the soil across the sidewalk and into the nearby storm drain.
By identifying these drainage problems and discussing solutions with the homeowner, we were able to design and create the aesthetically pleasing and sustainable solution of a rain garden. The goal was to slow down storm water runoff, and catch pollution and sediment by creating a rain garden that acts as a filter prior to entering the storm drain, while enhancing the aesthetics of the property.
The rain garden created was a shallow depression, 12 - 16" deep that collects rainfall runoff from all downspouts of the home and water collected into perforated pipes underneath the lawn area. The perforated pipe begins at the highest elevation in the yard and ends in the rain garden, the new lowest elevation that has been excavated down to an 8" depth. The perforated pipe captures the runoff water and allows the water to seep slowly back into the
ground as it runs across the property and into the garden. The garden was lined with a geotextile filter fabric to aide in removing contaminants from the water, prevent migration of the stone in to the soil, and minimalize maintenance.
A large variety of plant material was chosen, focusing mainly on native wetland species for their tolerance of our local soil types, moisture conditions and
the habitat they provide for wildlife. The garden was abundant with native wildlife and was a sustainable ecosystem for birds and butterflies upon completion of the project.
After planting, we arranged decorative stone throughout the garden to slow the flow of water and help prevent erosion. The combination of vegetative and stone surfaces provides temporary storage for runoff before the water either evaporates or infiltrates the soil.
The surrounding beds throughout the property were also all amended with compost and replanted with plants that work in harmony with the rain garden. The front, side, and rear yards are a beautiful display of colors that bloom throughout the seasons and the plants throughout the entire property provide food and shelter for native wildlife.
The rear yard that was once a muddy play space for the kids is now a dry lawn space that can be utilized by the family and their neighbors. This multi functional garden has become the focal point of the residence.
Photo Credit:
Terren Landscapes
 Flegel's Construction Co., Inc.
Copyright 2016 Dean J. Birinyi
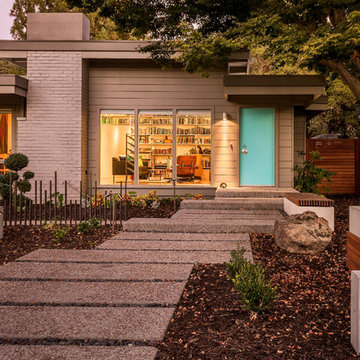
Inspiration for a 1960s gray one-story wood flat roof remodel in San Francisco
Inspiration for a 1960s gray one-story wood flat roof remodel in San Francisco
 William Hoffman Architect
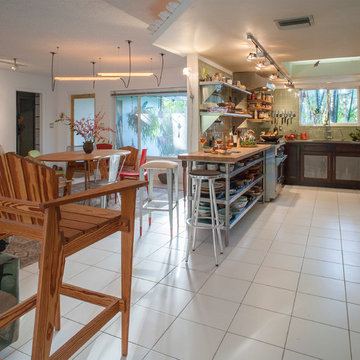
What simply started out as the purchase of a 30” Wolf gas stove to replace the old, turned into a complete kitchen renovation. The original intent was to replace the existing stove with the new. The new Wolf came other issues one being installing an adequate exhaust system to meet the needs of the stove. One thing led to the next and with that a new kitchen. The renovation included removing all existing fixtures, cabinetry and lighting. The existing tile floor remained the same but with some added area that was previously under existing base cabinets.
The goal of the project, once the decision was made to do a complete renovation, was to update the kitchen creating an eclectic aesthetic with all new fixtures of the best quality that could be afforded. Listed below are the changes that were made. All fixtures remained in their existing locations other than removing small piece of wall that allowed an extended length of the new bakers table to extend 24” into the existing dining and living room space to pull the spaces together and provide a small eating bar with adjoining bar stools. One stool was a custom design and fabrication (Marlin Stool)
Fixtures
1. Existing gas stove replaced with new 30” gas Wolf stove.
2. Existing Refrigerator replace with new 36” stainless steel Jen-Air refrigerator with bottom freezer.
3. Existing Dishwasher replace with new Jen-Air stainless steel interior and exterior dishwasher.
4. Existing base cabinets replaced with a combination of open and closed tables and cabinets. Two stainless steel commercial kitchen tables with an open bases and shelving. One with a stainless steel top the other a bakers table with a wood butcher block top. The cabinets were Kraft Made traditional wood base cabinets with a Kaffe finish and Fireslate counter surface. These cabinets were customized with stainless steel perforated door inserts and Mockett stainless steel drawer and door pulls.
5. Surface counter and table material included wood butcher block, stainless steel and Fireslate.
6. Overhead shelving included open commercial kitchen stainless steel shelves and open Appleply wood shelves with Rakks aluminum shelf brackets.
7. Existing lighting was replaced with Zumtobel track lighting with Ushio lamps, Lutron dimmers and an up lighted coffered ceiling (see Superman).
8. Existing kitchen sink was replaced with a large single compartment sink from Kindred with an In-Sinkerator Evolution garbage disposal. Filter water tap was added that connects to an Everprue water filter system.
9. Walls were tiled with Bottle Green 4 1/4” x 4 1/4” Daltile to staying consistent with existing original house tile.
10. The ceiling was reworked as required with a plaster finish
11. Marine grade caulk was used as required.
12. A soffit with up lighting was added to the periphery of kitchen facing the adjoining living and dining rooms.
13. Silver Masonite peg board storage wall adjacent to refrigerator.
Credits:
• Little Pete the Parakeet.....for being there
• Catalina Aguirre.....pots
• Many Friends....pots
• David D’Imperio.....Sputnik lamp
• Jose Maria Concha Sali.....painting
• Ron Meyers.....Plates on wall
• Bill Sanders.....Bunny screen painting
• William Hoffman....Beverly lamp
• William Hoffman.....marlin stool
• William Hoffman.....Gulfstream side chair
• William Hoffman.....Gulfstream dining table
• William Hoffman.....5 from 1 plywood chair
Bill Sanders Photography
 Dominic Paul Mercadante Architecture
Brian Vanden Brink Photographer
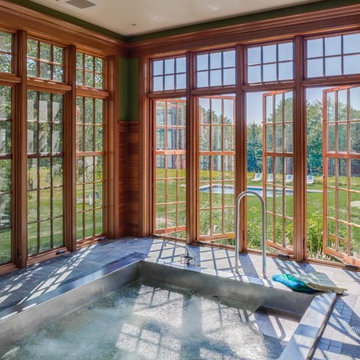
Spa Room with Pool beyond
Hot tub - large country indoor stone and rectangular hot tub idea in Portland Maine
Hot tub - large country indoor stone and rectangular hot tub idea in Portland Maine
 TKS Design Group
Download our free ebook, Creating the Ideal Kitchen. DOWNLOAD NOW
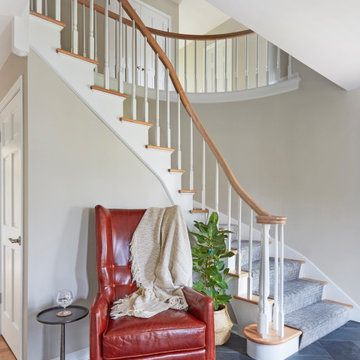
Lakefront property in the northwest suburbs of Chicago is hard to come by, so when we were hired by this young family with exactly that, we were immediately inspired by not just the unusually large footprint of this 1950’s colonial revival but also the lovely views of the manmade lake it was sited on. The large 5-bedroom home was solidly stuck in the 1980’s, but we saw tons of potential. We started out by updating the existing staircase with a fresh coat of paint and adding new herringbone slate to the entry hall.
The powder room off the entryway also got a refresh - new flooring, new cabinets and fixtures. We ran the new slate right through into this space for some consistency. A fun wallpaper and shiplap trim add a welcoming feel and set the tone for the home.
Next, we tackled the kitchen. Located away from the rest of the first floor, the kitchen felt a little isolated, so we immediately began planning for how to better connect it to the rest of the first floor. We landed on removing the wall between the kitchen and dining room and designed a modified galley style space with separate cooking and clean up zones. The cooking zone consists of the refrigerator, prep sink and cooktop, along with a nice long run of prep space at the island. The cleanup side of the kitchen consists of the main sink and dishwasher. Both areas are situated so that the user can view the lake during prep work and cleanup!
One of the home’s main puzzles was how to incorporate the mudroom and area in front of the patio doors at the back of the house. We already had a breakfast table area, so the space by the patio doors was a bit of a no man’s land. We decided to separate the kitchen proper from what became the new mudroom with a large set of barn doors. That way you can quickly hide any mudroom messes but have easy access to the light coming in through the patio doors as well as the outdoor grilling station. We also love the impact the barn doors add to the overall space.
The homeowners’ first words to us were “it’s time to ditch the brown,” so we did! We chose a lovely blue pallet that reflects the home’s location on the lake which is also vibrant yet easy on the eye. Countertops are white quartz, and the natural oak floor works well with the other honey accents. The breakfast table was given a refresh with new chairs, chandelier and window treatments that frame the gorgeous views of the lake out the back.
We coordinated the slate mudroom flooring with that used in the home’s main entrance for a consistent feel. The storage area consists of open and closed storage to allow for some clutter control as needed.
Next on our “to do” list was revamping the dated brown bar area in the neighboring dining room. We eliminated the clutter by adding some closed cabinets and did some easy updates to help the space feel more current. One snag we ran into here was the discovery of a beam above the existing open shelving that had to be modified with a smaller structural beam to allow for our new design to work. This was an unexpected surprise, but in the end we think it was well worth it!
We kept the colors here a bit more muted to blend with the homeowner’s existing furnishings. Open shelving and polished nickel hardware add some simple detail to the new entertainment zone which also looks out onto the lake!
Next we tackled the upstairs starting with the homeowner’s son’s bath. The bath originally had both a tub shower and a separate shower, so we decided to swap out the shower for a new laundry area. This freed up some space downstairs in what used to be the mudroom/laundry room and is much more convenient for daily laundry needs.
We continued the blue palette here with navy cabinetry and the navy tile in the shower. Porcelain floor tile and chrome fixtures keep maintenance to a minimum while matte black mirrors and lighting add some depth the design. A low maintenance runner adds some warmth underfoot and ties the whole space together.
We added a pocket door to the bathroom to minimize interference with the door swings. The left door of the laundry closet is on a 180 degree hinge to allow for easy full access to the machines. Next we tackled the master bath which is an en suite arrangement. The original was typical of the 1980’s with the vanity outside of the bathroom, situated near the master closet. And the brown theme continued here with multiple shades of brown.
Our first move was to segment off the bath and the closet from the master bedroom. We created a short hall from the bedroom to the bathroom with his and hers walk-in closets on the left and right as well as a separate toilet closet outside of the main bathroom for privacy and flexibility.
The original bathroom had a giant soaking tub with steps (dangerous!) as well as a small shower that did not work well for our homeowner who is 6’3”. With other bathtubs in the home, they decided to eliminate the tub and create an oversized shower which takes up the space where the old tub was located. The double vanity is on the opposite wall and a bench is located under the window for morning conversations and a place to set a couple of towels.
The pallet in here is light and airy with a mix of blond wood, creamy porcelain and marble tile, and brass accents. A simple roman shade adds some texture and it’s top-down mechanism allows for light and privacy.
This large whole house remodel gave our homeowners not only the ability to maximize the potential of their home but also created a lovely new frame from which to view their fabulous lake views.
Designed by: Susan Klimala, CKD, CBD
Photography by: Michael Kaskel
For more information on kitchen and bath design ideas go to: www.kitchenstudio-ge.com
 Dual Concept Design
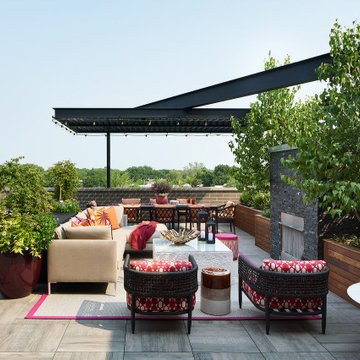
An expansive patio with a floating architectural pergola, built-in flower planters, and vibrant colors in furniture and accessories.
Example of a large transitional concrete paver patio container garden design in Chicago with a pergola
Example of a large transitional concrete paver patio container garden design in Chicago with a pergola

Sponsored
Columbus, OH
Hope Restoration & General Contracting
Columbus Design-Build, Kitchen & Bath Remodeling, Historic Renovations
 kimberly peck architect
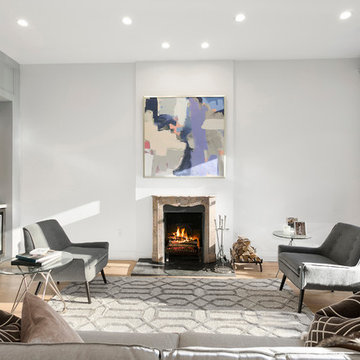
When the developer found this brownstone on the Upper Westside he immediately researched and found its potential for expansion. We were hired to maximize the existing brownstone and turn it from its current existence as 5 individual apartments into a large luxury single family home. The existing building was extended 16 feet into the rear yard and a new sixth story was added along with an occupied roof. The project was not a complete gut renovation, the character of the parlor floor was maintained, along with the original front facade, windows, shutters, and fireplaces throughout. A new solid oak stair was built from the garden floor to the roof in conjunction with a small supplemental passenger elevator directly adjacent to the staircase. The new brick rear facade features oversized windows; one special aspect of which is the folding window wall at the ground level that can be completely opened to the garden. The goal to keep the original character of the brownstone yet to update it with modern touches can be seen throughout the house. The large kitchen has Italian lacquer cabinetry with walnut and glass accents, white quartz counters and backsplash and a Calcutta gold arabesque mosaic accent wall. On the parlor floor a custom wetbar, large closet and powder room are housed in a new floor to ceiling wood paneled core. The master bathroom contains a large freestanding tub, a glass enclosed white marbled steam shower, and grey wood vanities accented by a white marble floral mosaic. The new forth floor front room is highlighted by a unique sloped skylight that offers wide skyline views. The house is topped off with a glass stair enclosure that contains an integrated window seat offering views of the roof and an intimate space to relax in the sun.
 Dominic Paul Mercadante Architecture
Brian Vanden Brink Photographer
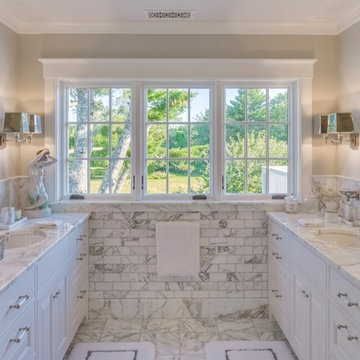
Vanity area of Master bath
Example of a large classic master gray tile and marble tile marble floor and white floor alcove shower design in Portland Maine with beaded inset cabinets, white cabinets, a one-piece toilet, an undermount sink, marble countertops, a hinged shower door and beige walls
Example of a large classic master gray tile and marble tile marble floor and white floor alcove shower design in Portland Maine with beaded inset cabinets, white cabinets, a one-piece toilet, an undermount sink, marble countertops, a hinged shower door and beige walls
 TimeLine Renovations Inc.
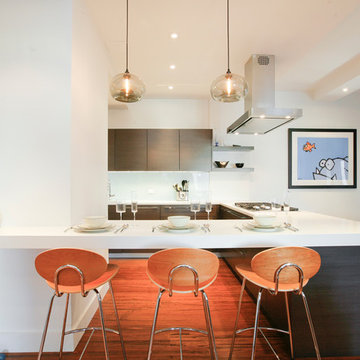
Going house hunting to find the dream home is difficult in every aspect, especially in NYC. The first apartment may have a feature that the other has but very rarely will one place have all. Most important is making sure the location and size works and everything else can be incorporated later. As the apartment our clients selected was "move in" condition its surely was not for what they work looking for in creating their dream home. We first started by creating a "wish list" of all of the essentials, which included; open kitchen, walk in closet, office space , larger master bathroom with stand up shower and soaking tub. With creating many different floor plan options, the only way we would achieve this was by sacrificing the 3rd bedroom. At this stage the 3rd bedroom was very easy for them to sacrifice as it gave them all of the wish list for now. In the future ,they could easily take the square footage from the new oversized living room and add that 3rd bedroom if it were necessary. Our first goal in the demolition stage was to remove all existing interior partition walls and start with a fresh new slate. By removing the existing kitchen walls the New Kitchen layout now combines it with the living room. The cabinetry is 2 tone color, flat slab doors for the modern look. State of the art appliances were installed; Integrated panels were installed on the fridge, wall oven, microwave, cook top. The sink is the ultimate chefs prep station sliding butcher block with bowls that slide over the sink. A garage cabinet was installed to conceal smaller appliances. The cantilever counter top adds the additional seating space for guests while keeping the bottom portion open for the view. The existing walk in closet was relocated to achieve the New Master Bathroom, Combining the spaces now gave us the option to add all the features. Floating vanity with double sinks, soaking tub, stand up shower. The glossy rectified tiles used are 12x36 and when installed make the grout line disappear and make it look like a solid wall. The chocolate floor tiles are randomly staggered then wrap up the tub platform and continue up one wall to create an accent. No tile edge was used but all tiles that meet on a 90 degree outside corner are mitered; tub platform, walls and shower niches. Heated floors were installed to keep the feet warm on the cold winter days. In the Master Bedroom we built a bed frame accent wall. Serves for multiple functions; eliminates night stands by using the niches for alarm clock / phone charger station, lights were added inside the niches for accent lights and raised wall paper was used to finish this beautiful feature. Each his and hers niche has an outlet, 4 way switch for the accent lights and 4 way switch for the recessed lights above when they are done reading in bed. Custom steps were built for easy up and down off the bed for the little puppies that could not possibly make the jump up. Other features throughout the apartment include; New bamboo floors throughout. Since the concrete ceiling slab cannot be chopped , soffits and drop ceilings were built throughout the apartment to accommodate recessed lights. Low voltage recessed lights were used with multiple zone dimmers for energy efficiency. Remote operated shades were installed The overall design was for the apartment was modern, simple lines and true elegance. The newly renovated apartment will be enjoyed by them, friends and family for many years to come...
edit
 PLANT Architect Inc.
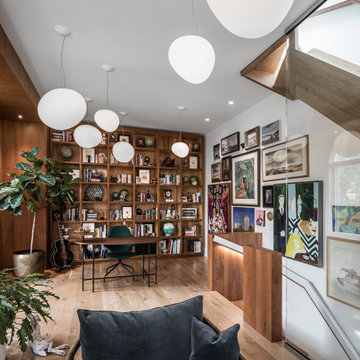
The open-plan second floor now provides efficient gallery space for a portion of the owners' contemporary art collection. Bubble lights – the Gregg Pendant, designed by Ludovica +Roberto Palomba for Foscarini – provide even lighting throughout this tall, narrow space.
Sponsored
Columbus, OH
Hope Restoration & General Contracting
Columbus Design-Build, Kitchen & Bath Remodeling, Historic Renovations
 Visual Existence
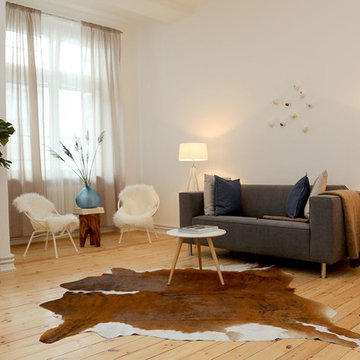
Inspiration for a mid-sized scandinavian enclosed light wood floor living room remodel in Berlin with white walls and no fireplace
 Western Cabinets
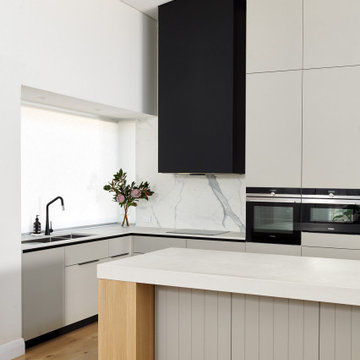
An existing 70’s brick home nestled streets away from the beach, is in dire need of a transformation. The existing home had the bones to accommodate a substantial renovation, some modifications to the layout, adding an extension and exaggerating the existing raked ceilings in the main living area impacts the new home.
The home itself is a relatively disjointed 70’s home, so cleaver planning was imperative to make the most of the interior space. Large open plan living areas with adjoining outdoor entertaining was important. The owners are a young family who enjoy family and entertaining so interaction with the outdoor alfresco was essential not only for quality of living but to appear as a continuation of the main living area to increase the zone visually.
My client’s fresh approach; introduction of modern materials with a hint of Scandinavian and industrial, an improved working area and a functional space for cooking and preparing meals.
 Lurie Building Design
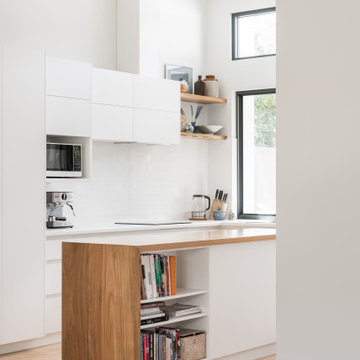
Design work started with a modest design focused on improving the kitchen, living, dining and outdoor living areas. However, a feasibility study determined that a better option was to fully remodel the existing dwelling, resulting in reclaiming some of the front veranda to increase the size of the living and dining areas. The remaining section created an alcove to the main bedroom, increasing privacy and creating a dedicated outdoor area.
A large awning, cantilevered so as not to impose on the existing septic, created a separate outdoor living area. A teak facade, that will weather to grey in the salty sea air over time, was added to extend high above the box gutter, conceal the solar panels and cap the ends of the separation walls. The roof was repitched and the internal ceilings raked upwards from the teak facade, thereby increasing the internal volume and allowing for the addition of high-light windows in rooms on the ridge side of the dwelling to capture the vista, increase natural light, ventilation and sense of space.
A skillion roof outside the back kitchen area was strategically positioned out of sight from the inside of the home and created a second outdoor area in the rear courtyard, serving as the main entry point. A gate house was incorporated in the rear fence to enhance the entry. The rear courtyard reclaimed an existing parking bay to create space for the cellar/music room.
8