
Search results for "Extract" in Home Design Ideas
 Tile Doctor Ltd
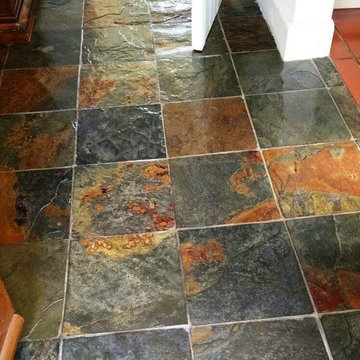
The photographs below are of rough Chinese Slate floor tiles installed at a house in Dorchester; they had not been deep cleaned in a long time and the combination of pets and grandchildren had taken its toll on the floor. Rough Slate from China is a relatively inexpensive product and although long lasting and value for money the texture of the Slate is difficult to maintain and thus difficult to keep clean even if fully sealed
To clean the tiles I used a strong dilution of Tile Doctor Pro-Clean which was left to soak into the Slate for a good ten minutes before working it in with a buffing machine fitted with a black scrubbing pad. This action removed the ground in dirt and any old sealer and a stiff brush was then run along the grout lines with more Pro-Clean to get them as clean as possible. The floor was then rinsed thoroughly and any stubborn areas retreated; a wet vacuum was used to extract the soiled water from the surface of the stone in order to get it as dry as possible.
The floor was left to dry overnight and I returned the next day to seal using three coats of Tile Doctor Seal and Go sealer which is a water based sealer (so no smell) that leaves a nice subtle shine to floor.
The slate and the grout looked really dull and dirty before we started and now the floor looks like it was recently laid.
For aftercare we don’t recommend the use of a Floor Steamer as they work on a 100 degrees and this damages the sealer; for regular cleaning use Tile Doctor Ph Neutral Cleaner using a two bucket system, whereby you apply the cleaning solution with a jug, wipe the floor and then squeeze off the excess into the second bucket, this stops you reapplying dirty water onto a clean floor.
Stuart Tibu
Dorset Tile Doctor
 Spin Design Limited
The kitchen and Dining areas are a popular gathering spot in most homes. A lot of entertaining is done in this room as family and friends gather in an area close to where meals and appetizers are being prepared. It also is a place where the family may meet at the end of the day to talk about the day’s events.
There is no doubt about the fact that these spaces are where memories are made and shared on a regular basis.
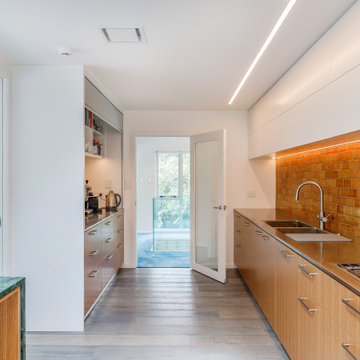
The colour of the earth beneath your feet, a cup of coffee in the morning, a dollop of honey on toast and a bar of caramel chocolate. The tiles bring warmth and contentment to the space. MIDDLE EARTH TILES’ GOLDEN MANUKA Tile was laid with 33% offset. The tile was chosen as not only for the wonderful tone in colour, but because Middle Earth tiles are a “Cradle to Grave” product. The raw material are extracted close to the manufacturing site, they will last for many years, even centuries and the designs are timeless. Middle Earth tiles can be returned to the environment with no ill effects at the end of their life cycle.
The European Oak Rutherglen Engineered Wood Flooring was chosen because of its subtle blue hue. Continuing the theme of the sea from the carpet. The grain of the wood adds texture and interest and works beautifully with all the other materials in the space.
The VERDE GUATAMALA Stone BENCHTOP is simply gorgeous. Its intensity of colour and its grain make for a wonderful feature island benchtop. The clients fell in love with this stone, as for them it evoked Pounamu.
 Eppright Homes, LLC
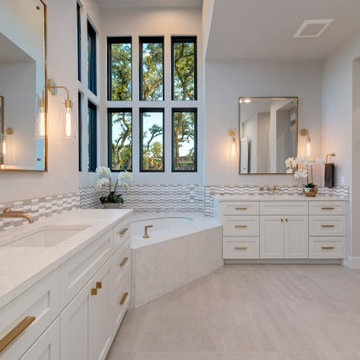
Located in the Exemplary Lake Travis ISD and the new Signal Hill Estates at Bee Cave features One Acre minimum homesites with ease of access to the heart of Bee Cave and TX HWY 71. Neighborhood amenities—Gated access to 61 homes on over 80 acres. 10 acre private park including hike and bike trails, and community playscape.
Find the right local pro for your project
 Tile Doctor Ltd
This job was for a repeat client in Toft near Cambridge who had aa stunning large hallway that was tiled in beautiful pale Limestone. My client had asked me back to work on the floor having previously completed the deep clean and seal of a Terracotta floor previously.
The Limestone tiling in the entrance hall had years of some type of topical sealer applied to it. This caused the stone to look slightly discoloured and from certain lights showed up hundreds of scratches and smudges embedded in the seal. I’ve tried to capture this problem in the photographs on this page, but it was very difficult.
A topical sealer sits on the surface of the tile where it is vulnerable to scratching, hallways are generally high traffic areas and so more likely to see this sort of problem. Ideally an impregnating sealer should have been applied, impregnators work by occupying the pores in the stone thus preventing soiling from becoming ingrained in the stone.
Before starting we protected the woodwork against splashing with blue film, I don’t usually make a great deal of mess, but you can never be too careful when working in someone’s property especially one as beautiful as this.
To strip off the old sealer I began by applying a strong dilution of Tile Doctor Remove and Go to the Limestone tiles. I split the floor into sections and used a 400-grit diamond burnishing pad to work the Tile Doctor Remove and Go into the tiles. The floor was then rinsed off using our high-pressure cleaning system that applies pressurised hot water to the floor whilst simultaneously extracting the soil with its built-in vacuum. The system is quite heavy, so it is built into my van, and I run a large flexible hose to a spinner tool that does the cleaning. It is an expensive tool, but it saves a lot of time and leaves the floor fairly dry afterwards.
The 400-grit pad had released a lot of the sealer but there were quite a few layers to get through, so I changed the burnishing pad to a coarse 200-grit pad and repeated the process. After another rinse and extract I would see it had the desired effect and I was able to carry on building up the finish on the Limestone by apply the 400-grit followed by the 800, 1500 grit pads. It was a large floor and so this took up much of the day so once complete I left for the day so it could dry off overnight.
The next day I finished the polishing process with the application of a 3000-grit burnishing pad which is applied with a little water sprayed onto the tile and really brings up the polish on the stone. This process has the added advantage of leaving the floor dry so not long afterwards I was able to move on to sealing.
For this floor two coats of Tile Doctor Ultra-Seal were applied, it is an impregnating sealer that won’t alter the colour of the tiles leaving a natural look.
My client was much happier with the new finish and has asked for another quotation on some more Terracotta flooring that needs attention. For aftercare I recommend using Tile Doctor stone soap, it’s a special formula that builds on the patina which will help maintain the polished appearance of the Limestone.
Tom Conlon
Cambridge Tile Doctor
 Valentini Kids Furniture Brooklyn NY
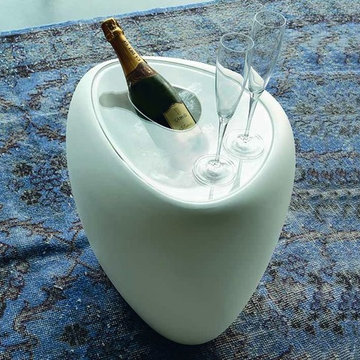
Ios End Table by Tonin Casa
Made in Italy
The Ios by Tonin Casa is a uniquely-shaped modern end table with a plexiglass top. The base is made using polyethylene rotational molding technology and is available in a matt white, beige or anthracite color. The Ios end table comes in two versions: the ordinary top end table and the end table with a bottle holder top. The ordinary end table top can be ordered in transparent, black, red ruby, white opal, transparent fuchsia or transparent smoked gray plexiglass and the bottle holder top is available in either transparent or transparent smoked gray plexiglass. Both versions of the Ios end table feature an internal storage area that can be revealed by a simple extraction of the end table top. Optionally, an internal light can be installed (not included in the price, can be purchased separately).
Features:
Designed by Nicola Tonin
The base is made of molded polyethylene available in a white, beige or anthracite matt color
Available in two table top versions: an ordinary top and a bottle holder top
The end table ordinary top is available in a transparent, black, red ruby, white opal, transparent fuchsia or transparent smoked gray plexiglass
The bottle holder top is available in either transparent or transparent smoked gray plexiglass
Features internal storage
Optionally, an internal light can be installed (not included in the price, can be purchased separately)
The starting price is for the End Table with an ordinary top in transparent plexiglass. The light is not included and can be purchased separately.
Dimensions:
End Table: W20" x D18.5" x H19.7"
 Tile Doctor Ltd
This detailed Victorian tiled hallway at a property in Camden was overdue some much-needed repair and maintenance. The owners of the property appreciated that original period features like this add a lot of value to a property and asked me to visit the property to quote for renovating it. The property was in a terrace of similar properties most of which appeared to have retained their Victorian character.
I inspected the floor and found there were a couple of loose, cracked, worn and broken tiles that needed to be replaced. In addition, the floor tiles needed a deep clean and then seal to bring back the wow factor. I was confident we could renovate the floor but at that point unsure if we would be able to find exact match replacements for the damaged tiles. Fortunately, Victorian tiles are still in demand and I knew of several companies I could check with so I was confident they could be found.
We discussed how long the work would take and assuming I could source the replacements agreed a price for the full restoration of the floor. After doing some research I managed to find suitable replacements with a company called Original Style and the work was scheduled for the following month.
Firstly, we prepared all areas with protective tapes to threshold edges and skirting.
This was followed by spaying the tiles with a strong dilution of Tile Doctor Remove & Go which is product designed to remove old sealers and coatings. After about ten minutes the tiles were scrubbed with black scrubbing pads and scrubbing brushes. Fresh water was used to rinse the floor and the slurry was extracted using a wet vacuum.
The floor was inspected and then a second clean carried out, this time using Tile Doctor Pro-Clean which is a Tile and Grout cleaning agent. The same process of application was used and after rinsing and extracting the dirt the tiles were given a steam clean. This ensured all the dirt was lifted out of the pores of the tile and the floor was now as clean as it possible could be.
The next step was the remove the loose and cracked tiles using the reclaimed tiles we had sourced earlier. Some cuts were necessary to get the replacements to match the originals but overall the plan worked. A quick drying adhesive was used to secure the tiles so we could apply the grout shortly after. The whole floor was then re-grouted and cleaned off to ensure a good match. The floor was left to dry off overnight, and you could already see it was now looking considerably improved.
Returning the next morning we checked the floor was dry using a moisture meter, this is important as to apply a sealer to damp tiles will lead to a patchy experience. All was well so we were ready to apply the sealer.
To start a single base coat of Tile Doctor Colour Grow sealer was applied to the floor and left to dry. This sealer is an impregnator that protects from within by occupying the pores in the clay tile improving colour in the process. This sealer does leave a matt finish however and the client wanted a subtle shine so one dry it was followed by four coats of Tile Doctor Seal & Go. The combination of the two sealers works really well to add long lasting protection to the tiles and provide the desired finish to the floor.
The floor was much improved, and the client was delighted. The detailed pattern and colours were now much more prominent, and the hallway looked much more inviting for both the owner and their guests. For the aftercare of Victorian tiles, I recommended the use of Tile Doctor Neutral Cleaner which is pH neutral and won’t prematurely erode the life of the sealer.
Nigel Voyce
North London Tile Doctor

 Refined House, LLC
Example of a small transitional kids' gray tile and ceramic tile ceramic tile and white floor alcove shower design with shaker cabinets, blue cabinets, a two-piece toilet, gray walls, an undermount sink, quartz countertops and a hinged shower door
 Utopia 360 Studio
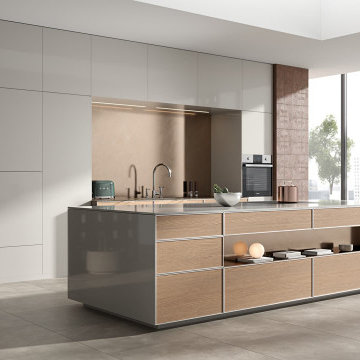
SieMatic Kitchen 3D Visualization
This 3D visualization captures the timeless elegance and precision engineering of a luxury SieMatic kitchen. Designed around the brand’s iconic handleless aesthetic (inspired by the SieMatic SLX concept), the render highlights a harmonious balance between functional minimalism and warm, tactile materials.
Key Visual Highlights
Signature Handleless Cabinetry: Features SieMatic’s integrated recessed handle channels with subtle, dimmable LED strip lighting that creates a floating effect across seamless matte-lacquered cabinet fronts.
Monolithic Island: A central waterfall island crafted from book-matched Calacatta marble, paired with an integrated cantilevered smoked-oak breakfast bar to introduce organic warmth.
Material Palette: A refined contrast of velvety, finger-print-resistant matte slate surfaces, warm dark timber, and subtle bronze anodized aluminum accents.
Lighting & Atmosphere: Soft, natural daylight streams through floor-to-ceiling glass doors, creating realistic soft shadows and highlighting the micro-textures of the stone grain and wood veneers.
Architectural Integration: Flush-mounted induction cooktops, concealed pocket-door appliance garages, and integrated ceiling extraction maintain a clean, uncluttered spatial flow.
 Hoke Ley
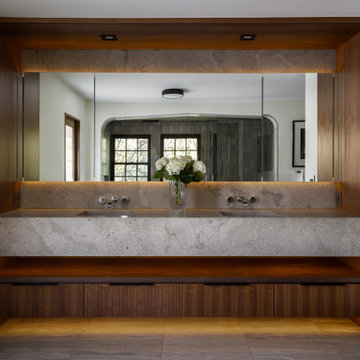
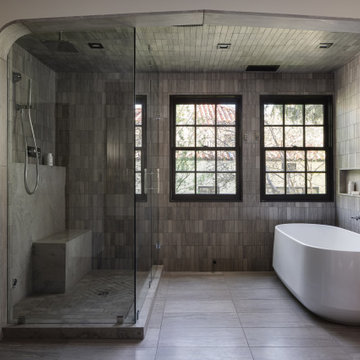
As designers, we have a responsibility to honor the planet we extract precious materials from. One of the best ways that we can do this is by creating spaces that are timeless in their aesthetic, eliminating the desire to tear out and replace what is still in great physical condition.
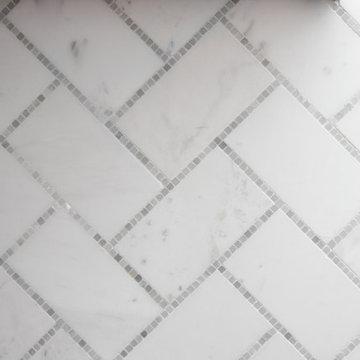
We used Missouri-mined @phenixmarble extensively throughout the interior and exterior of the Oakwood Residence. The seamless vanity, custom depressed arch, wall base, and shower feature fossilized Fleuri slabs while the floor, wall, and ceiling tile feature various sizes of Napoleon Gray marble.
Our hope is that this beautiful natural stone serves many generations of homeowners over its lifetime.
Plumbing fixtures are Kohler Components. Switches and outlets are Legrand Adorne. Decorative lighting by Rejuvenation. Custom walnut cabinetry. Custom marble tile, countertop, sinks, and wall base in Phenix Fleuri and Napoleon Gray.
 Spin Design Limited
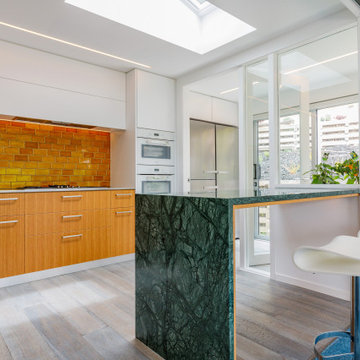
The kitchen and Dining areas are a popular gathering spot in most homes. A lot of entertaining is done in this room as family and friends gather in an area close to where meals and appetizers are being prepared. It also is a place where the family may meet at the end of the day to talk about the day’s events.
There is no doubt about the fact that these spaces are where memories are made and shared on a regular basis.
The colour of the earth beneath your feet, a cup of coffee in the morning, a dollop of honey on toast and a bar of caramel chocolate. The tiles bring warmth and contentment to the space. MIDDLE EARTH TILES’ GOLDEN MANUKA Tile was laid with 33% offset. The tile was chosen as not only for the wonderful tone in colour, but because Middle Earth tiles are a “Cradle to Grave” product. The raw material are extracted close to the manufacturing site, they will last for many years, even centuries and the designs are timeless. Middle Earth tiles can be returned to the environment with no ill effects at the end of their life cycle.
The European Oak Rutherglen Engineered Wood Flooring was chosen because of its subtle blue hue. Continuing the theme of the sea from the carpet. The grain of the wood adds texture and interest and works beautifully with all the other materials in the space.
The VERDE GUATAMALA Stone BENCHTOP is simply gorgeous. Its intensity of colour and its grain make for a wonderful feature island benchtop. The clients fell in love with this stone, as for them it evoked Pounamu.
 24-7 LOCKOUT
24-7 Lockout offers Up to 50% Discounts for Residential & Automotive locksmith services.
☑️Re-key 3 Locks & Get 1 for Free:
https://www.24-7lockout.com/rekey-services
☑️Re-key 5 Locks & Get 2 for Free https://www.24-7lockout.com/rekey-services
☑️AUTOMOTIVE KEYS
Buy 1 get 1 for 50% OFF https://www.24-7lockout.com/automotive-locksmith
☑️RESIDENTIAL LOCKS
Buy 2 Locks & get 1 for free https://www.24-7lockout.com/residential
☑️COMMERCIAL LOCKS
Buy 2 Locks get 1 for 50% OFF https://www.24-7lockout.com/commercial-locksmith
☑️LOCKOUTS SERVICES:
25% OFF - 1st time customer received https://www.24-7lockout.com/emergency-locksmith-services
For more information, you can contact us at:
✅ Email: service247lockout@gmail.com
✅ WhatsApp: https://wa.me/14088999039
✅ Yelp: https://m.yelp.com/biz/24-7-lockout-sunnyvale-3
✅ Website: WWW.24-7Lockout.com
• Top Local Mobile Locksmith Services •
#car_Keys #cars_Keys_sunnyvale #SunnyvaleCA #BMW #BENZ #Locksmith #Tool_ #Programdevice #DiagnosticDevice #KeyProgramming #Locksmith #Automotive #Diagnostic_tool #CarDiagnostic #CarProgram #basic_diagnostic #new_year #christmas #promotion #special_price #limited_time #Gift #Price #Offer #SunnyvaleCA #24_7lockout #California #mobilelocksmithservices
 Hoke Ley
As designers, we have a responsibility to honor the planet we extract precious materials from. One of the best ways that we can do this is by creating spaces that are timeless in their aesthetic, eliminating the desire to tear out and replace what is still in great physical condition.
We used Missouri-mined @phenixmarble extensively throughout the interior and exterior of the Oakwood Residence. The seamless vanity, custom depressed arch, wall base, and shower feature fossilized Fleuri slabs while the floor, wall, and ceiling tile feature various sizes of Napoleon Gray marble.
Our hope is that this beautiful natural stone serves many generations of homeowners over its lifetime.
Plumbing fixtures are Kohler Components. Freestanding bathtub in Kohler Ceric. Steam shower with Kohler Anthem and Kohler Components trims. Switches and outlets are Legrand Adorne. Decorative lighting by Rejuvenation. Custom walnut cabinetry. Custom marble tile, countertop, sinks, and wall base in Phenix Fleuri and Napoleon Gray.

 threshold interiors
Location: New York, NY, United States
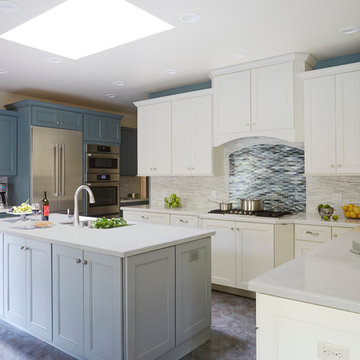
This Loft was tastefully renovated back in the '90s, but was due for an update and an expansion of the kitchen and dining areas to accommodate the client's cooking skills and entertaining needs. EnlargIing the island and adding cabinetry to delineate the office, bar and dining areas was a priority. The bathroom was updated to feel like a tranquil spa with beautiful new tile, plumbing fixtures and cabinets. Our biggest challenge was coordinating the entire renovation while our client was out of town for the Summer!
Photographed by: James Salomon

 All Surface Restoration
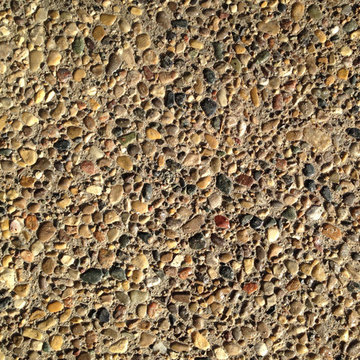
Exposed aggregate driveway after cleaning & sealing with Paver Gloss Sealer.
Photo of a mid-sized front yard driveway in Detroit.
Photo of a mid-sized front yard driveway in Detroit.
 Tile Doctor Ltd
I thought I would share this case history of a Yellow and Black Victorian Tiled floor that we worked on at a large house in Lancaster last year. It’s a great example of the typical problems we face with old Victorian floors, especially around door thresholds where the transition between the different foundation invariable cause problems.
I didn’t know the full history of the floor, but it was now in quite a state and recent renovation work had left the floor unstable with loose and cracked tiles. The tiles needed to be removed and then the damaged subfloor carefully scraped out and replaced. Once that was done the floor would need relaying and then cleaned and sealed so everything would blend in.
After visiting the property and providing a quotation we were given the go ahead and agreed a date to do the work.
We returned on the agreed date and set about carefully removing the loose and cracked Victorian tiles and put them aside for later use. Some would need replacing however this would not present a problem and they are still widely available, and I have several contacts I can turn to for this.
Once this was done and the subfloor exposed and cleaned up, I used self-levelling cement to bring the floor level up and in-line with the existing. This now needed to set hard, so the rest of the day was spent cleaning up the tiles we removed earlier with Tile Doctor Grout Clean-up and Pro-clean. Our goal is to reuse as many of the original tiles as possible to preserve the heritage of the floor.
The next day with the new subfloor set it was ready for tiling. This involves laying out the tiles first without adhesive carefully cutting and fitting new tiles as needed to maintain the overall pattern of the floor. Once I was happy the tiles were moved to a board and then fitted with fresh adhesive.
I came back on day three with the aim of cleaning the floor so it could be sealed however whilst inspecting my new tiling I was disappointed to discover some were not as level as I had hoped. I had noticed the replacement tiles were not the same thickness as the originals the previous day but I had worked around this by using different levels of adhesive, clearly this plan was not as effective as I had hoped for.
To counter this problem, I used a set of 50-Grit, 100-grit and then 200-grit diamond pads in sequence to mill the floor flat and remove the lippage between them. This is done with water to lubricate the process and a weighted floor buffer. The pads generate a lot of slurry and so you need to rinse this off with more water and extract all the soil after each pad.
I followed this up with various Diamond burnishing pads of increasingly finer grits across the whole floor until we achieved a consistent finish and had the added benefit of getting the whole floor clean. More water is used to rinse the tiles after burnishing and the soil extracted with a wet vacuum as before. Once done and inspected the floor was left to dry off overnight.
Tile Doctor Colour Grow was applied to enhance the appearance of the tiles and protect them going forward. This product copes well with damp which can always be a problem with old floors like this one with no damp proof membrane present.
The floor looked amazing when finished and our attention to detail had really paid off, in fact you simply could not tell we had done any tiling work or replaced any tiles. For aftercare I recommend the use of Tile Doctor Neutral Cleaner which is designed for the regular cleaning of sealed tiles.
Russell Taylor
Lancashire Tile Doctor
 TreHus Architects+Interior Designers+Builders
Example of a large classic u-shaped dark wood floor eat-in kitchen design in Minneapolis with a double-bowl sink, recessed-panel cabinets, white cabinets, white backsplash, stainless steel appliances, an island and black countertops
 Tile Doctor Ltd
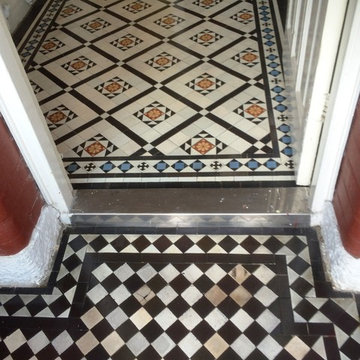
Recently I travelled down to the village of Prestwood in the Chiltern Hills of southern Buckinghamshire, to work on a Victorian tiled porch and hallway. Victorian tiles are commonly found in the entrance areas of older houses and unfortunately in this case the tiles had become heavily ingrained with dirt over time, and had suffered from additional paint and plaster spillages. The result was an unsightly mess; my client was considering covering the floor with lino after several unsuccessful attempts at cleaning it. I was called upon to provide a professional clean and seal, restoring these great Victorian tiles back to looking their best again.
On my first day at the house, I mixed up a solution of 50 per cent Tile Doctor Pro-Clean, a high alkaline cleaner, and NanoTech HBU (formerly known as Ultra Clean), which is a cleaning product that contains nano-sized abrasive particles that penetrate deep into the stone to lift ingrained dirt to the surface. This solution was worked into the tiles using abrasive scrubbing pads fitted to one of my commercial rotary machines.
The cleaning process left over a slurry of residue which I rinsed away with clean water and extracted with a wet vacuum. I was still left with the issue of stubborn paint spillages, so I applied a layer of Tile Doctor Remove & Go, a stripper with cleaning properties which is very effective at breaking down paint and adhesive stains.
Once the paint spillages had been dealt with I gave the area another rinse with clean water. I then left the house, allowing the floor enough time to dry overnight.
Upon my return the day I set about sealing the newly cleaned Victorian tiles. Before starting the sealing process I inspected the floor to check for any dampness, knowing that any excess moisture could potentially damage the performance of the sealer.
When I was satisfied that the tiles were fully dried, I applied Tile Doctor Seal & Go, a sealer which offers durable surface protection, along with an aesthetically pleasing, low-sheen finish which brings out the colour in the stone. This product can be used to seal internal, porous surfaces including Victorian, Slate, textured Quarry and Sandstone tiles.
The process made an amazing difference to the floor as you can see from the photographs; additionally the restoration of such an original feature adds a lot of value and looks so much better than lino!
Colin Ford
South Buckinghamshire Tile Doctor
 LL Flooring
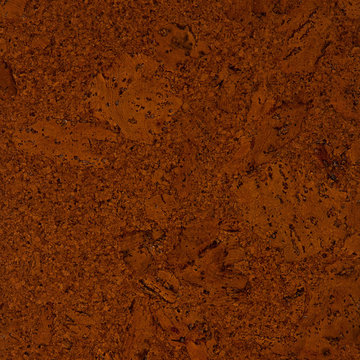
Lisbon Cork Co. Ltd. Fine Cork Flooring combines the beauty of a natural material with the comfort of a cushioned surface. It is durable, acoustical, and a great insulator. The bark of the cork tree is peeled without destroying the tree and it grows back within nine years, ready to be harvested again. Warm to the touch and resilient, cork floors are a joy to live with. Cork is considered a green product because the same tree can be harvested numerous times.
 About All Floors
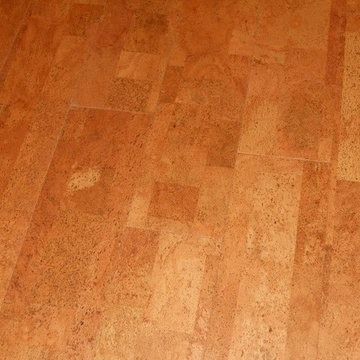
Close up of Cork Planking
Home design - mid-sized contemporary cork floor home design idea in Philadelphia with light wood cabinets, stainless steel appliances and an island
Home design - mid-sized contemporary cork floor home design idea in Philadelphia with light wood cabinets, stainless steel appliances and an island
30