
Search results for "Extremely heavy" in Home Design Ideas

 Sidetex Company
Shake Siding Close Up A Cape Cod style house with Alside Pelican Bay cedar shake siding, Color: Cape Cod Gray. Installed by Sidetex in North Haven CT 06473

 Not Just Closets
SOME OF OUR PROJECTS
We at Not Just Closets are proud of our workmanship, our creativity, and the help we have been able to provide to our many clients. We look forward to meeting you, and working with you to find just the right solution to your space organization problems. Perhaps photos of your project will wind up here in the Portfolio section.
We will be adding to the examples in this web page as we complete more projects. This web page was created on 11/05/2013, so expect the examples displayed to continue to grow in the coming years.
We were pleased to be invited to do a new Master Bedroom Closet project for a home in Albuquerque that was featured in the 2013 Parade of Homes. Perhaps you visited it during the 2013 Parade? The next 4 images are from that home.
The closet was long and narrow but there was plenty of space for hanging clothes and drawer units as well as for folded clothes, shoes and other items. All this was accomplished without sacrificing elbow room in this narrow space.
Views from the bathroom into the Master Closet.
Another perspective of the Master Closet.
The closets shown here were designed for a NE Heights home in Albuquerque. They were installed and photos were taken before any clothes or other items were added. The dark pullout in the first image is a clothes hamper.
These light colored cabinets were chosen for the Master Bedroom closet to help keep the space bright and light. Note the two rows of hangars for shirts and dresses above, and pants below.
The double row of drawers in this closet replaces the typical Chest of Drawers without sacrificing the extra space needed for the chest. This is a great addition to any closet.
The last closet photo shows a two-door vertical storage closet on the right that is very flexible to configure. It can be outfitted to store clothes, shoes, jewelry, or other items. Also note the extra-length hangar space for formal dresses or long gowns.
Not Just Closets was also contracted to do the Pantry in the above home. Please notice that the shelving wraps around the corners, providing the greatest amount of storage space. Also you will find that the spacing on the shelves was designed to allow for a large number of varying size items in the pantry. There are large shelves on the bottom since large items are usually heavy and bulky. Seldom-used items can also be stored on the top shelf.
The storage shelves shown are in a large walk-in pantry, with a concommitantly large number of shelves. Dark colored cabinets were chosen for the Pantry to match the Kitchen cabinets.
We were asked to design and install the closets for a house in the October 2014 Parade of Homes. The view is of an extremely large walk-in closet with upper and lower hanging bars, tall hanging areas, and a huge amount of cabinet and drawer storage.
The next two views portray the same closet, demonstrating the size of the closet and the many wrap around hanging areas, shelves, storage cabinets, and drawers. All four walls were filled with these features.
The closet also has a pull-down ironing board, allowing for quick refreshing of creases in trousers or straightening of dresses.
Not Just Closets also does commercial installations, as evidenced by the corporate office kitchen and file storage solutions shown here. This photo is of a work center island incorporating file storage. Not shown is another large set of shelves for bulk storage.
The back side of the work center also has cabinets for storage.
This is a view of the Break Center at the corporate office. The counter, sink and upper and lower cabinets were all designed and installed by Not Just Closets.
Photo A - Shown is a corner shelf unit for a child's closet in a 2015 Parade of Homes residence. The corner unit stores many toys in a neat, orderly fashion.
Photo B - Hanging space above drawers illustrates the versatility of our units.
Every inch of space is utilized in this Master Bedroom Closet in the 2015 Parade of Homes residence.
Roll-out shelves offer convenience and easy access to a pantry in the 2015 Parade of Homes kitchen.
This customer said - "Total 100% customer satisfaction. I love it! It is the crown jewel of the room. Every woman who has seen it has mentioned they are jealous of it all". We agree.
This closet was custom-designed for blueprint storage for an architect.
Master Bedroom closet units offer a variety of ways to hang and store clothes. Above the double hang and drawer unit are wardrobe lifts (not shown at the top of this photograph) to store seasonal clothes.
A small bedroom closet can be made more useful with the right combination of hangs (hanging racks) and shelving.
An entry closet with double hangs and a convenient bench for removing and storing shoes.
This is a Master Bedroom Closet with adjustable shelves to organize and optimize the storage needs of the customer. The large nest of small drawers just exudes an aura of organization, and the shoe storage is adjusted to hold different sizes of boots and shoes.

 TradeMark GC, LLC
TradeMark GC w/ Designer Traci Whatley of 75 Cabinets
Minimalist wine cellar photo in Philadelphia
Minimalist wine cellar photo in Philadelphia
Find the right local pro for your project

 ARCLIGHT INTERNATIONAL
A glowing villa would set the tone for what is housed within. The entire project was illuminated with a single custom uplight from Hydrel. Each uplight was manufactured with the junction box on the bottom so not add any additional visual clutter to the floor. They were recessed into a floor covered in 1/2"x1/2" taupe colored tile.
The cover plate was cast aluminum 12"x12" in a square with an eight inch diameter opening to coddle a heavy molded piece of borosilicate made to fit flush with plate and floor tile. The glass was selected for its excellent thermal properties and extremely low expansion. It also has exceptional crystal clear clarity.
The fixtures housed a krypton gas filled PAR 38 SPOT from GE Lamps on an adjustable swing arm. GE Lamps were chosen because of the single rolled bullnose edge design the lens has were it connects to the parabolic glass sides. Others fix the lens to the edge creating two rolled edges and a crease. These edges capture and project the light and create more than one artifact prarabola caused by the lens edge and the way it is attached. This creates distracting and multiple visual parabolas being projected on the the walls and ceilings. A single one is problematic, having multiple ones with so many fixture being used becomes overwhelmingly distracting.
The fixture housing was also designed to be 12" deep keeping the top of the lamp recess 4" below the glass. The swing arm also contained a custom gimbal ring that allowed for both a lens and an internal louver to be mounted just above the lamp face. The louver was a custom black color in a custom large cell egg crate design of 1/2"x1/2"x1/2" size. The entire interior of this uplight was custom painted so that all parts were powder coated with Paxton Matte Black, named for the client who helped perfect the exact black color.
The color was tested and fabricated multiple times before the results were finally achieved. It was to be an exceptionally matte black that did not reflect in the slightst way any light or light source. It was supposed to be void of reflectance. The larger size of the uplight was selected over other choices because the lighting designer wanted to illuminate the 24" wide columns and pilasters through out the project. Smaller lamps and fixtures came out of the floor with a steep reverse parabola grazing the architecture. The depth of the custom fixture was dictated by the desire to have the narrow portion of the parabola effect occur inside the fixture before it even was viewable. The beam emitted from the fixture came out almost as fat as the columns were wide. The fixture was positioned a half inch from the vertical walls to keep the center beam six inches away. This helped perfectly graze the wall surface as well as control up light glare. The louvers were exactly the size of the floor tile so there was a consistency to the floor grid even within the light fixtures.
The position of the lamp and the 45° cutoff of the louver kept the visual cutoff at around 20° where people would be standing. You really have to hold your head near the wall and look down into the fixtures in order to see the source.
Everything was also dimmed with multiple presets for the clients command and a preprogrammed fade that started at dusk and continually reduced itself as the night progressed into early morning. The entire building would be bathed in a soft candle like glow of 10% from 2 am until sunrise with on the hour 2 minute fades from 80% brightness.
Photo: Robert Cook


 Tile Doctor Ltd
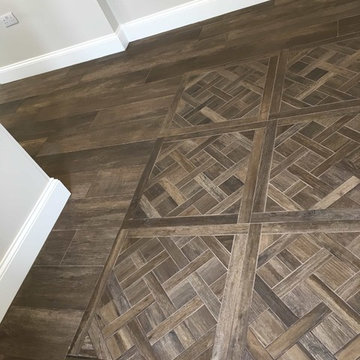
Grout haze or grout smears as it is often called can be a huge problem when laying tiles. Grout haze is basically grout that has been left to dry on the surface of the tile after installation. It’s a common problem which is exacerbated by the use of quick drying products. Take for example this interesting Wood Effect Ceramic Tile installation at a house in Guildford following installation by a builder.
I was a bit slow in following up on the initial enquiry as we had been very busy so by the time, I got in touch I was told they had employed someone else to carry out the work. I apologised for my late response and said to call me if he needed help in the future. Three days later I got a call so we arranged a visit so that I could carry out a test and quote a price.
As it turns out the builder had returned and failed to remove the grout haze and so had a rival firm that seemed more interested in selling unnecessary sealer than fixing the problem. I was astonished to see what a state the builder had left his floor. Grout was all over the floor with footprints walked across thresholds and more. I could understand it if there was some grout was missed after installation but not to this level!
I carried out a successful test and confirmed to the customer that there was absolutely no need to rip and replace his £2k floor. We agreed a date to resolve the problem and to say he was relieved was an understatement!
The builders had used Mapei grout which contains polymers. Polymers offer better flexibility and adhesion, however in order to remove the grout haze we would first need to break down the polymers in the grout first and this is why the rival firm failed.
With that in mind, my first action was to apply Tile Doctor Remove and Go to the floor and leave it to dwell for five to ten minutes. I then worked it into the tile using a scrubbing pad fitted to a rotary machine.
After washing the soil away with warm water and extracting with a wet vacuum I applied Tile Doctor Grout Clean-up to treat the grout. Grout Clean-up is an acid-based product that breaks down the grout so it can be rinsed away and extracted as before. Afterwards I rinsed the floor with warm water and extracted again to remove any trace of product and neutralise the floor. After removing as much moisture as possible with the wet vacuum I speed dried the tiles with a blower.
Ceramic tiles won’t accept a sealer so once the floor had dried the job was finished and it took less than a day.
The customer was over the moon with the difference. While his floor was in such a state, he has been unable to bring in new furniture as the serious possibility of removing the tiles was hanging over him.
Relieved that the problem was now resolved he kindly left the following review:
“I had a floor that had just been laid with very heavy grout haze. I had already had advice from two other professional floor cleaners who had advised me that the floor was irreparable and would need to be pulled up. As soon as I spoke with Rupert, it was clear he was extremely knowledgeable. He asked questions none of the other companies had. By understanding the specific nature of the problem, he was able to solve it by first removing the grout polymers and then applying an acid wash. The floor came up brilliantly. Rupert was the only person I spoke to that could fix this, everyone else told me I needed to replace my floor! Superbly knowledgeable, professional and did an excellent job. Don’t bother speaking to anyone else, just call Rupert! “
Rupert Mcleod
West Surrey Tile Doctor



Sponsored
Sunbury, OH

J.Holderby - Renovations
Franklin County's Leading General Contractors - 2X Best of Houzz!

 In Your Space Interior Design
Designed By Runa Novak
In Your space Interior Design
Example of a small minimalist medium tone wood floor powder room design in Chicago with a wall-mount sink
Example of a small minimalist medium tone wood floor powder room design in Chicago with a wall-mount sink

 Mayita Dinos Garden Design
mayitadinosphotography.com
Design ideas for a tropical landscaping in Los Angeles.
Design ideas for a tropical landscaping in Los Angeles.

 Patio Productions
The 9 Piece Capistrano Square Dining Set by Forever Patio (FP-CAP-9SQDN-MC) will make every outdoor dining experience memorable with its ample seating and elegance to match. The set seats 8 adults comfortably, and includes 8 dining chairs and a dining table with a glass top. This set features variegated Mocha wicker with half-round strands that create a luxurious, contemporary look and feel. Each strand of wicker is infused with UV-inhibitors that prevent cracking, chipping and fading ordinarily caused by sunlight. Every piece is constructed with thick-gauged, powder-coated aluminum frames that make the set extremely durable and corrosion resistant. Also included with the set are cushions covered in fade- and mildew-resistant Sunbrella® fabric, available in a wide selection of colors. The comfort, beauty and quality of this dining set make it one that you will enjoy for years to come.
Set includes: eight (8) dining chairs with cushions and one (1) dining table with a glass top.
Features:
High-Density Polyethylene (HDPE) all-weather wicker is infused with UV inhibitors that prevent fading and cracking ordinarily caused by sunlight.
Half-round wicker design gives it a more tactile, luxurious look and texture.
Thick-gauged, powder-coated aluminum frame offers long lasting durability and rust resistance.
Sunbrella® cushion covers provide unmatched fade, moisture and mildew resistance, and can be easily unzipped for cleaning.
Cushions are made from quick-drying polyurethane foam wrapped in moisture and mildew-eliminating Dacron fibers.
Tempered glass table top designed for outdoor exposure.
Full-sized design provides deep, comfortable seating. Compare dimensions to lesser brands to see the difference!
Designed to match the entire Capistrano Collection. Call to build your own custom set.

 Ehrlich Yanai Rhee Chaney Architects
The ground floor volumes wrapped in an elongated hand-fired brick, emphasizing the horizontality of the architecture that lays solidly on the land.
(Photography by: Matthew Millman)
 Riddle Construction & Design
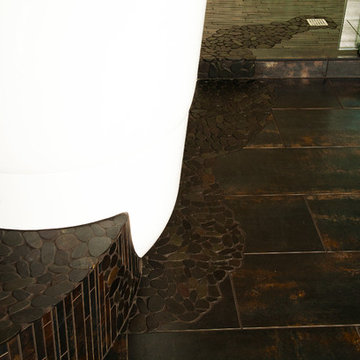
close up of pebble tile design around soaking tub.
Inspiration for a large asian master white tile and porcelain tile porcelain tile home design remodel in Seattle with a vessel sink, flat-panel cabinets, medium tone wood cabinets, quartz countertops, a two-piece toilet and beige walls
Inspiration for a large asian master white tile and porcelain tile porcelain tile home design remodel in Seattle with a vessel sink, flat-panel cabinets, medium tone wood cabinets, quartz countertops, a two-piece toilet and beige walls


Sponsored
Sunbury, OH
J.Holderby - Renovations
Franklin County's Leading General Contractors - 2X Best of Houzz!

 Windy City Painters
This West Town porch had suffered years of Chicago's harshest conditions. Road salt from winter streets, freeze-thaw cycles that crack metal bonds, and Lake Michigan humidity had transformed the iron railings into a rust catastrophe. The homeowner called Windy City Painters because they knew surface-level repainting wouldn't hold. We delivered a complete restoration using industrial-grade products and techniques that Chicago demands. The transformation took precision, the right chemistry, and an understanding of how brutal our climate actually is.
MATERIALS AND PRODUCTS
Windy City Painters selected RustDestroyer rust-converting primer as the foundation. This product chemically bonds to rust particles, converting them into a stable surface rather than simply covering them. The topcoat is Sherwin-Williams Corothane Aliphatic Urethane, specifically chosen because aliphatic urethanes resist yellowing, maintain flexibility in Chicago's temperature extremes, and provide superior weather resistance. We use 220-grit sandpaper between coats, stainless steel wire wheels for rust removal, and two full coats of finish. No shortcuts. No budget brands that fail in freeze-thaw cycles.
THE PROCESS
Step 1: Wire Wheel to Bare Metal (45 words)
We attached a stainless steel wire wheel to our equipment and removed every flake of loose rust and paint. This isn't cosmetic—it eliminates the corrosion source entirely. Rust spreads beneath paint. By going to bare metal, we stopped the problem at its root. Chicago's salt exposure demands this aggressive approach.
Step 2: Apply RustDestroyer Rust-Converting Primer (48 words)
After the surface was clean, we applied RustDestroyer according to spec. This primer chemically converts remaining rust particles into a protective layer, then bonds everything together. It's the critical bridge between corroded metal and lasting finish. One coat of RustDestroyer on bare metal creates the stable foundation that allows Corothane to perform properly throughout Chicago's cycles.
Step 3: Sand and Inspect Between Coats (42 words)
Once the primer cured, we lightly sanded with 220-grit paper. This step seems small but matters enormously—it removes dust, smooths any drips, and ensures perfect adhesion for the topcoat. We inspected every inch for missed spots. Chicago's humidity can trap moisture under topcoat if prep is rushed.
Step 4: Apply Two Coats of Corothane Topcoat (50 words)
We applied the first coat of Sherwin-Williams Corothane Aliphatic Urethane evenly, let it cure fully, then applied the second coat. Two coats guarantee coverage and durability. One coat thins under Chicago's sun and freeze-thaw stress. Corothane's flexibility is crucial—it moves with the metal as temperatures swing 50+ degrees in a single day.
CHICAGO-SPECIFIC CHALLENGES
West Town sits blocks from Lake Michigan. Humidity here is relentless. Winter brings road salt that penetrates every micro-gap in paint. Spring freeze-thaw cycles expand and contract iron, cracking weak coatings. Summer sun accelerates UV breakdown. Fall brings moisture creep before freezing begins again. Generic paints fail fast. Windy City Painters uses products engineered for this exact climate. RustDestroyer stops the chemical source of rust. Corothane's aliphatic formula resists yellowing under UV while maintaining the flexibility that stops cracking. The two-coat system ensures thickness that protects through all four seasons.
WHAT TO EXPECT LONG-TERM
With proper application and two coats of Corothane, this porch should remain rust-free and attractive for 7-10 years. This assumes normal Chicago weather exposure and no damage from impact or intentional scratching. Homeowners should rinse salt off railings after heavy winter storms and inspect annually for any paint cracks. Windy City Painters stands behind our work. If you see rust appearing in year 3 or 4, something failed—and we'll address it. This level of confidence comes from using the right products and proper technique.
PRO TIPS
1. Never paint over rust. If your railing shows orange or flaking, wire-wheel it first. Windy City Painters refuses shortcuts that fail.
2. Timing matters. Paint in spring or early fall when humidity is lower and temperatures are stable. Avoid summer heat and winter moisture.
3. Inspect annually. Catch paint cracks before rust starts underneath. A small touch-up now prevents a full restoration later.
Contact Windy City Painters at windypainters.com or 773-818-6331 for your free estimate.
FAQS
Q: Why is Corothane better than cheaper urethanes? A: Aliphatic urethanes resist UV yellowing and maintain flexibility in extreme temperature swings. Chicago needs flexible protection, not brittle coatings that crack.
Q: How do I know if my railing needs wire-wheeling? A: If you see rust flakes, discoloration, or pitting, wire-wheeling is essential. Windy City Painters inspects free and explains exactly what's needed.
Q: Can you paint over old paint if it's not rusted? A: Sometimes, but we always inspect. If the old paint is loose or the metal beneath shows any corrosion, we start over with wire-wheeling.
Q: What's the cost difference between one coat and two? A: Two coats cost more upfront but last 7-10 years versus 3-4 years with one coat. Windy City Painters recommends the investment.
Q: How do I protect my railing between professional paintings? A: Rinse salt off after winter storms, keep paint clean, and report any cracks immediately. Prevention beats restoration.
Q: Does RustDestroyer work on all metal? A: It works on iron, steel, and rust-prone alloys. Windy City Painters uses it exclusively for rust conversion because it's proven.
Q: Why do West Town homes rust faster than other neighborhoods? A: Proximity to Lake Michigan increases humidity. Combined with road salt, the freeze-thaw cycles hit West Town and River West harder than inland areas.
Q: Can I apply Corothane myself? A: Technically yes, but surface prep (wire-wheeling and RustDestroyer application) is where most DIYers fail. Windy City Painters handles this correctly.
Q: How often should I repaint my porch? A: Every 7-10 years with proper two-coat application. If you see rust sooner, the original prep was insufficient.
Q: What neighborhoods does Windy City Painters serve? A: We serve West Town, River West, and all of Chicago. Call 773-818-6331 for your area.
 Kingston Krafts
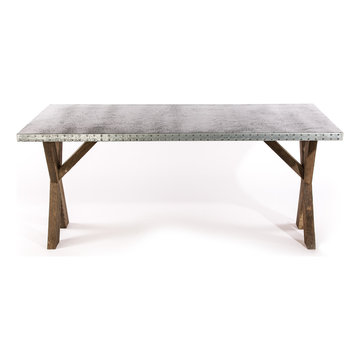
Round Zinc Table Made by Kingston Krafts
Example of a country home design design in Providence
Example of a country home design design in Providence

 ROAM Architecture
Detail of LED wall sconce with white glass tile background
Inspiration for a small contemporary kids' white tile and glass tile porcelain tile and gray floor alcove bathtub remodel in New York with flat-panel cabinets, dark wood cabinets, a two-piece toilet, green walls and an integrated sink
Inspiration for a small contemporary kids' white tile and glass tile porcelain tile and gray floor alcove bathtub remodel in New York with flat-panel cabinets, dark wood cabinets, a two-piece toilet, green walls and an integrated sink



 IQnewswire
The End of the Ultra-Slim Wedding Suit
For several years, men’s formalwear was dominated by narrow lapels, short jackets and trousers cut close to the leg. The style created a sharp outline, but it often left little room for sitting, dancing or eating comfortably. Current tailoring is moving towards a more balanced shape, with cleaner shoulders, a defined waist and trousers that follow the leg without gripping it.This change does not mean that wedding suits have become oversized. The newer approach sits between skinny and loose. It keeps the structure expected of formal clothing while allowing the cloth to hang properly. For grooms, that balance is useful during a day that may involve a ceremony, photographs, dinner and several hours on the dance floor.
Look For Shape Rather Than Tightness
A well-fitted suit should create a clear outline without relying on tension. Collections of Marc Darcy suits include tailored three-piece designs, checks and textured fabrics that suit the current preference for visible structure and considered proportions.
The jacket should sit close enough to define the waist, but the front button should fasten without pulling the cloth into an X-shaped crease. At the shoulders, the seam should finish close to the natural shoulder point. Extra width can make the jacket look borrowed, while a shoulder that is too narrow may cause the upper sleeve to collapse.
Fit should be assessed while moving as well as standing. Reach forward, sit down and raise both arms. A tailored jacket will never feel like casual sportswear, but it should allow the groom to carry out ordinary movements without sharp restriction across the back or chest.
Give The Jacket Enough Length
Very short suit jackets became common alongside skinny trousers, but they can disrupt the proportions of a three-piece outfit. If the jacket finishes too high, the waistcoat may appear longer than the outer layer and the trousers may look as though they begin too low.
A more traditional jacket length usually covers most of the seat and divides the body more evenly. This can make the legs appear longer without shortening the jacket excessively. The correct length depends on height and body proportions, so two men wearing the same chest size may still need different jacket lengths.
View the suit from the back and side rather than relying on a front-facing mirror. The vents should lie flat, and the hem should not lift away from the body. A side photograph can reveal an unbalanced jacket more clearly than the changing-room mirror.
Choose Trousers That Fall Cleanly
The move away from very tight tailoring is most noticeable in suit trousers. A modern tailored leg can still be neat at the ankle, but it should provide enough room through the seat and thigh for the fabric to fall without horizontal lines.
Trouser pockets offer a useful fit check. If they pull open while standing, the waist or hips may be too tight. The fly should lie flat, and the waistband should remain in place without depending on an overtightened belt. Higher-rise trousers can work particularly well with a waistcoat because they reduce the chance of shirt fabric appearing between the two pieces.
The hem should make gentle contact with the shoe rather than gathering heavily around it. A short hem can work with narrow trousers but taking it too far may make the suit look dated once the current cropped style moves on. A slight break is easier to wear with different formal shoes and tends to look balanced in full-length wedding photographs.
Let The Waistcoat Support the Silhouette
A waistcoat adds structure through the centre of the outfit, but only when it fits correctly. It should lie flat against the shirt and cover the trouser waistband. Tightening the back strap cannot correct a waistcoat that is the wrong size or too short.
Current three-piece styling often places greater emphasis on the waistcoat. Double-breasted designs, contrasting fabrics and wider openings can distinguish the groom without requiring a brightly coloured jacket. When the groom removes the jacket later, the waistcoat keeps the outfit looking complete.
Allow room for a full meal and several hours of wear. A waistcoat that feels acceptably close during a brief fitting may become uncomfortable at dinner. Sit down with every button fastened and check whether the lower edge presses into the waist or causes the front to bow.
Use Stronger Lapels Carefully
Wider notch and peak lapels are returning after years of extremely narrow designs. A broader lapel can frame the shirt and tie, balance the shoulders and give the jacket a more formal character. Peak lapels create a particularly strong line on double-breasted jackets and evening suits.
The lapel width should still suit the wearer. A very broad lapel can overwhelm a smaller frame, while an extremely narrow one may look out of proportion on a broad chest. The shirt collar, tie width and lapel should relate to one another without matching exactly.
A wider lapel also leaves less need for decorative extras. A simple buttonhole flower or plain pocket square may be enough. Large lapel pins can crowd the upper part of the jacket, especially when the cloth already contains a check.
Avoid Buying According to the Size Label Alone
The same labelled size can fit differently across designs because cut, fabric and construction affect the garment. Begin with accurate chest, waist, inside-leg and approximate jacket-length measurements. Compare those figures with the retailer’s size information rather than ordering the size worn in another brand without checking.
If the jacket fits at the shoulders but needs slight shaping through the waist, a tailor can often make the adjustment. Sleeves and trouser hems are also commonly altered. Major changes to the shoulder line or jacket length are more difficult and may not be economical.
Do not choose the smallest size that can be fastened. A suit that looks tight in the fitting room is unlikely to become more comfortable during a long wedding day. Cloth should skim the body and return to a clean position after movement.
Balance a checked suit with simple styling
Texture and checks remain popular in wedding tailoring, particularly for country houses, converted barns and traditional venues. These fabrics already add depth to the outfit, so the cut should remain controlled and the accessories relatively quiet.
A plain white, pale blue or cream shirt gives a checked suit a clear foundation. Choose a tie from one of the secondary colours in the cloth rather than introducing another strong pattern. A white pocket square works when the suit contains several shades and does not need further decoration.
Shoes should support the proportions of the trousers. A very slim shoe may appear too small beneath a fuller hem, while a heavy casual sole can pull attention away from the tailoring. Oxfords, Derbies and refined brogues usually provide enough visual weight without looking bulky.
Coordinate the wedding party without forcing one fit
Matching groomsmen suits can become difficult when every member of the party has a different build. Insisting on an identical close fit may leave some men comfortable and others visibly restricted. A better approach is to keep the cloth, colour and main design consistent while adjusting jacket and trouser sizes for each person.
The groom can stand apart through a waistcoat, lapel shape or accessory rather than wearing a suit cut much tighter than everyone else. This creates a connection across the group without treating one silhouette as suitable for every body.
Arrange fittings early enough to identify size and alteration issues. Group orders should be checked well before the wedding, particularly when trousers need hemming or jackets require sleeve adjustments. Each person should try the complete outfit with the intended shirt and shoes.
Judge the suit by the whole day
A wedding fitting often lasts less than half an hour, while the suit may be worn for twelve hours or more. Comfort should therefore be tested under realistic conditions. Sit for several minutes, walk upstairs and check the waistband after moving around.
Pay attention to the parts that cannot be seen clearly in a mirror. The collar should remain close to the shirt at the back of the neck. Jacket vents should not pull apart, and the trouser seat should follow the body without sagging or strain.
The current move towards balanced tailoring gives grooms more room to choose clothes that look formal without feeling restrictive. Clean shoulders, a shaped jacket and trousers with a natural fall will outlast extreme proportions. A suit that allows the groom to stand, sit and celebrate comfortably is also more likely to look composed in photographs taken throughout the day.

 T.A. French - Custom Builder
Example of a mid-sized transitional dark wood floor and brown floor double front door design in Austin with gray walls and a black front door

 The Artists Hands - Faux Finishes
This remodeled bedroom was upgraded to an elegant and sophisticated master retreat. Using metallic plasters and various techniques of application with this beautiful repeat stencil pattern, this accent wall is a stunning focal feature of this master bedroom. Copyright © 2016 The Artists Hands
27