
Search results for "Eye level" in Home Design Ideas
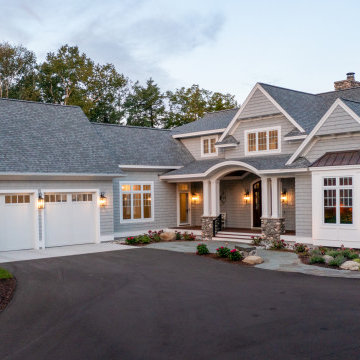
 Edgewater Design Group
Our clients were relocating from the upper peninsula to the lower peninsula and wanted to design a retirement home on their Lake Michigan property. The topography of their lot allowed for a walk out basement which is practically unheard of with how close they are to the water. Their view is fantastic, and the goal was of course to take advantage of the view from all three levels. The positioning of the windows on the main and upper levels is such that you feel as if you are on a boat, water as far as the eye can see. They were striving for a Hamptons / Coastal, casual, architectural style. The finished product is just over 6,200 square feet and includes 2 master suites, 2 guest bedrooms, 5 bathrooms, sunroom, home bar, home gym, dedicated seasonal gear / equipment storage, table tennis game room, sauna, and bonus room above the attached garage. All the exterior finishes are low maintenance, vinyl, and composite materials to withstand the blowing sands from the Lake Michigan shoreline.

 Land2c Landscape Architecture
Land2c
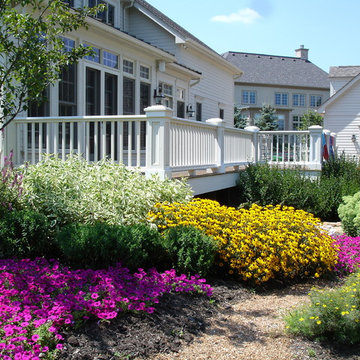
Picea pungens f. glauca 'Baby Blue Eyes', Baby Blue Eyes Spruce, and a cluster of yuccas are the dramatic anchor of this corner bed.
Design ideas for a mid-sized mediterranean full sun front yard stone landscaping in Seattle for summer.
Design ideas for a mid-sized mediterranean full sun front yard stone landscaping in Seattle for summer.
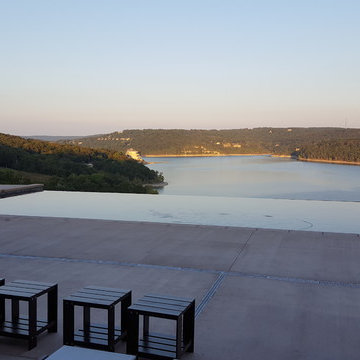
 Rhodes Custom Pools, Inc.
Custom concrete vanishing edge pool overlooking Table Rock Lake near Branson Missouri. Project materials and details included 4 tons of rebar, 90+ yards of shotcrete, over-sized plumbing, Pentair equipment and controller, traditional charcoal grey marcite plaster, NPT tile, poured in place concrete coping, concrete decking, and a vanishing edge water leveler.
Find the right local pro for your project

 Industrial Projects
Creating a comfortable outdoor living space is a priority for many homeowners and DIY enthusiasts. With rising summer temperatures, installing a shade tarp in your backyard offers an affordable and effective solution for sun protection. We’ve developed this detailed, step-by-step guide to help you confidently install a shade tarp that not only shields you from the sun but also adds aesthetic appeal to your outdoor area.
Benefits of Installing a Backyard Shade Tarp
Before diving into the installation process, let’s explore the key benefits of having a backyard shade tarp:
Provides UV Protection: Keeps your family and guests safe from harmful sun exposure.
Reduces Outdoor Temperatures: Creates a cooler, more enjoyable outdoor space.
Protects Outdoor Furniture: Extends the life of patio furniture by reducing sun damage.
Enhances Outdoor Aesthetics: Adds a modern, stylish look to your yard.
Budget-Friendly: More affordable compared to permanent structures like pergolas.
Materials and Tools You’ll Need
To begin your DIY backyard shade project, gather the following materials and tools:
Materials:
Shade tarp (UV-resistant and breathable)
Sturdy posts or existing structures (trees, fences, walls)
Mounting hardware (eye bolts, D-rings, turnbuckles, snap hooks)
Nylon or polyester rope, or stainless-steel wire
Concrete (if installing new posts)
Tools:
Power drill
Measuring tape
Level
Ladder
Wrench or adjustable spanner
Post hole digger (if installing new posts)
Step 1: Plan Your Shade Tarp Layout
The first step in installing your backyard shade tarp is careful planning. Take time to assess your outdoor area and answer these key questions:
Where is the sun’s path throughout the day?
What size and shape of tarp best suits your space?
Will you anchor the tarp to existing structures or install new posts?
What height do you want the tarp to sit at for maximum shade and airflow?
Pro Tip: Use string or garden hoses to visualize the tarp layout on the ground before making permanent decisions.
Step 2: Measure and Mark Anchor Points
Once you’ve determined the tarp’s location and orientation:
Measure the tarp dimensions.
Mark the exact points where each corner of the tarp will be anchored.
Ensure that the anchor points are at least 5–10% longer than the tarp size to allow for tensioning and slight adjustments.
Consider slope angles for water runoff. Aim for at least a 20-degree angle to prevent water pooling on the tarp.
Step 3: Install Support Posts (If Necessary)
If your backyard lacks existing anchor points like trees or fences, you’ll need to install sturdy support posts:
Dig post holes at least 24 inches deep and 8-12 inches wide for stability.
Set posts in concrete, making sure they remain plumb and level.
Allow the concrete to cure for at least 24–48 hours before applying tension from the tarp.
We recommend using pressure-treated wood, galvanized steel poles, or aluminum posts for longevity and strength.
Step 4: Install Mounting Hardware
With your anchor points ready, it’s time to install the necessary hardware:
Attach eye bolts or pad eyes securely into walls, posts, or other fixed structures.
For added flexibility and adjustability, install turnbuckles or tensioners to fine-tune the tarp’s tightness.
Connect snap hooks, D-rings, or carabiners to make assembly and disassembly easier.
Make sure all hardware is rated for outdoor use to prevent rust and corrosion.
Step 5: Attach and Tension the Shade Tarp
Now it’s time for the most satisfying part—mounting the shade tarp:
Begin by attaching one corner of the tarp to an anchor point.
Gradually attach the remaining corners, moving diagonally for even tension.
Adjust each connection point using your turnbuckles, ropes, or cables.
Pull the tarp tight enough to avoid sagging, but not so tight that it risks tearing.
Check that the tarp maintains the desired slope for rainwater runoff and adjust tension as needed.
Step 6: Final Adjustments and Safety Check
Before enjoying your new shaded area:
Inspect all anchor points and hardware for stability.
Test the tarp’s tension and make adjustments for even distribution.
Ensure that no sharp edges or loose connections remain that could damage the tarp or pose a safety hazard.
Confirm that the tarp is secure in windy conditions by giving it a gentle tug.
If you live in an area with frequent high winds, consider removing the tarp during storms to prevent damage.
Step 7: Enjoy Your Shaded Backyard Oasis
Once installed, your backyard shade tarp provides a comfortable and protective space for outdoor gatherings, relaxation, or family activities. You can decorate underneath with outdoor furniture, string lights, or potted plants to create a personalized outdoor retreat.
Maintenance Tips for Long-Lasting Shade Tarp Performance
To extend the life of your shade tarp, follow these maintenance guidelines:
Regularly check for wear and tear, especially around anchor points and seams.
Clean the tarp periodically with mild soap and water to prevent mildew buildup.
Store the tarp indoors during harsh weather seasons if it's not designed for year-round use.
Tighten hardware as needed to maintain proper tension and avoid sagging.
By following these simple care steps, your shade tarp will continue to deliver years of sun protection and outdoor comfort.
Conclusion: Upgrade Your Outdoor Space with a DIY Shade Tarp
Installing a shade tarp in your backyard is a cost-effective and rewarding DIY project. With careful planning, quality materials, and proper installation techniques, you’ll enjoy cool, shaded outdoor living all season long. This step-by-step guide ensures your project goes smoothly from start to finish.
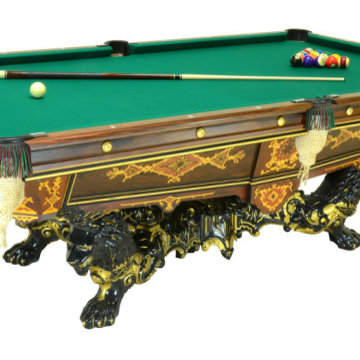
 Peters Billiards
Original Catalog Description from 1878-1895:
From the J. M. Brunswick and Balke Company catalog:
The Monarch.
This magnificent table embodies great solidity and massiveness of construction, with elegance and grace of design. It is very ornamental, the sides being of wood tastefully inlaid with various colored mosaics, and the legs being of iron finished in black and gold. A leveling screw in the center of the feet assists in establishing a perfect level over the entire surface of the table. It is unique in style and a departure from the established idea of a billiard table, and has met with much favor among those of acknowledged taste.
Inlaid with California laurel, burl ash, French walnut, birds-eye maple, rosewood, ebony, mahogany and tulipwood.
Construction patented September 7, 1875. Leveling Apparatus patented November 30, 1875.
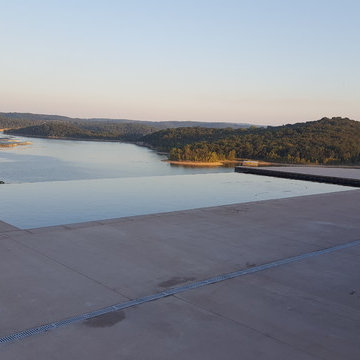 Rhodes Custom Pools, Inc.
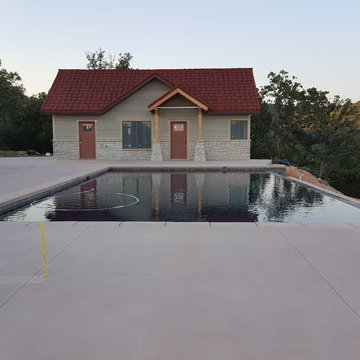
Custom concrete vanishing edge pool overlooking Table Rock Lake near Branson Missouri. Project materials and details included 4 tons of rebar, 90+ yards of shotcrete, over-sized plumbing, Pentair equipment and controller, traditional charcoal grey marcite plaster, NPT tile, poured in place concrete coping, concrete decking, and a vanishing edge water leveler.
 Rhodes Custom Pools, Inc.
Custom concrete vanishing edge pool overlooking Table Rock Lake near Branson Missouri. Project materials and details included 4 tons of rebar, 90+ yards of shotcrete, over-sized plumbing, Pentair equipment and controller, traditional charcoal grey marcite plaster, NPT tile, poured in place concrete coping, concrete decking, and a vanishing edge water leveler.
Sponsored
Columbus, OH
Free consultation for landscape design!

Peabody Landscape Group
Columbus' Reliable Landscape Design & Contracting
 Rhodes Custom Pools, Inc.
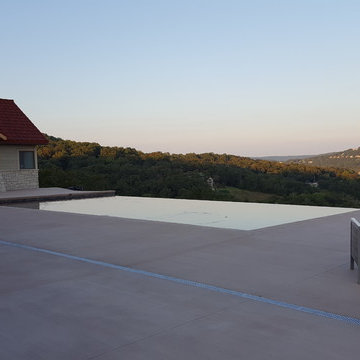
Custom concrete vanishing edge pool overlooking Table Rock Lake near Branson Missouri. Project materials and details included 4 tons of rebar, 90+ yards of shotcrete, over-sized plumbing, Pentair equipment and controller, traditional charcoal grey marcite plaster, NPT tile, poured in place concrete coping, concrete decking, and a vanishing edge water leveler.
 Rhodes Custom Pools, Inc.
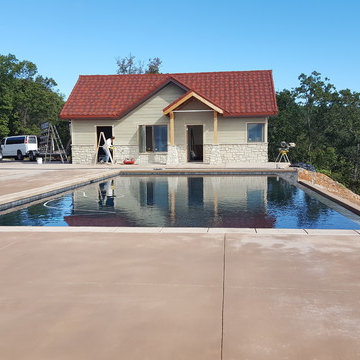
Custom concrete vanishing edge pool overlooking Table Rock Lake near Branson Missouri. Project materials and details included 4 tons of rebar, 90+ yards of shotcrete, over-sized plumbing, Pentair equipment and controller, traditional charcoal grey marcite plaster, NPT tile, poured in place concrete coping, concrete decking, and a vanishing edge water leveler.
 Rhodes Custom Pools, Inc.
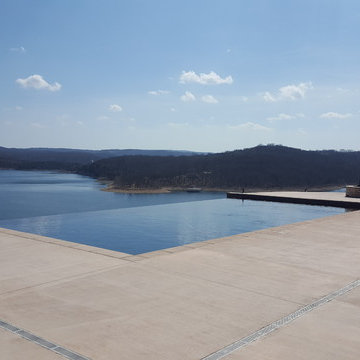
Custom concrete vanishing edge pool overlooking Table Rock Lake near Branson Missouri. Project materials and details included 4 tons of rebar, 90+ yards of shotcrete, over-sized plumbing, Pentair equipment and controller, traditional charcoal grey marcite plaster, NPT tile, poured in place concrete coping, concrete decking, and a vanishing edge water leveler.
 Rhodes Custom Pools, Inc.
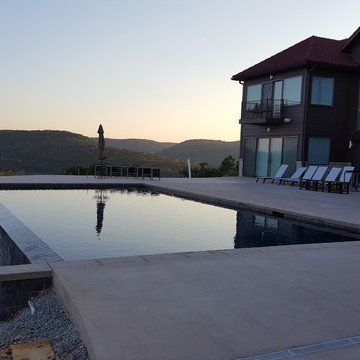
Custom concrete vanishing edge pool overlooking Table Rock Lake near Branson Missouri. Project materials and details included 4 tons of rebar, 90+ yards of shotcrete, over-sized plumbing, Pentair equipment and controller, traditional charcoal grey marcite plaster, NPT tile, poured in place concrete coping, concrete decking, and a vanishing edge water leveler.
 Siobhan's Outdoor Transformations
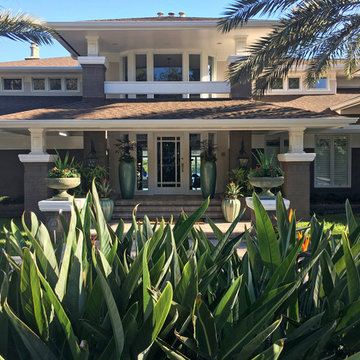
Feeling Frank Lloyd Wright's design aesthetic on the exterior of my client's house, I suggested we do a nod to Frank. But this being Florida, one could forgo a strict interruption of historical correctness. This impressive house, located on a knoll, overlooking a river needed a bit of eye candy– something to draw the eye to the entrance. The before pics show some pots and glass bottles. As an exterior designer, enhancing my client's home's architecture is a primary objective. In some cases I suggest upgrades to the existing architecture. Plants are important, but if a house is not presenting well from the street, sometimes small adjustments can make a big difference. Decluttering in some cases can make a big difference. Some houses could use more than minor adjusting– House color changes, pathways, paving, etc... But this client's house needed no architectural upgrading, just icing on this fabulous multi- leveled "cake".
Scale and color are important considerations if you are looking to create, eye-pleasing curb appeal. My goal was to simplify some of the elements and also add a WOW factor.
 Rhodes Custom Pools, Inc.
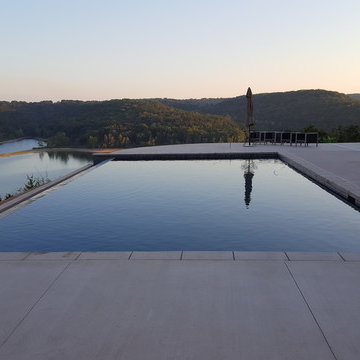
Custom concrete vanishing edge pool overlooking Table Rock Lake near Branson Missouri. Project materials and details included 4 tons of rebar, 90+ yards of shotcrete, over-sized plumbing, Pentair equipment and controller, traditional charcoal grey marcite plaster, NPT tile, poured in place concrete coping, concrete decking, and a vanishing edge water leveler.

 Spring Creek Design
This old farmhouse (ca. late 18th century) has undergone many renovations over the years. Spring Creek Design added its stamp in 2008, with a small mudroom addition and a complete interior renovation.
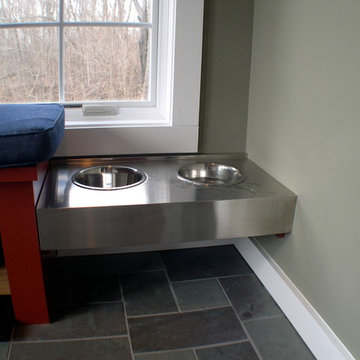
The addition encompasses a 1st floor mudroom with extensive cabinetry and closetry. Upon entering the space from the driveway, cabinet and countertop space is provided to accommodate incoming grocery bags. Next in line are a series of “lockers” and cubbies - just right for coats, hats and book bags. Further inside is a wrap-around window seat with cedar shoe racks beneath. A stainless steel dog feeding station rounds out the amenities - all built atop a natural Vermont slate floor.
On the lower level, the addition features a full bathroom and a “Dude Pod” - a compact work and play space for the resident code monkey. Outfitted with a stand-up desk and an electronic drum kit, one needs only emerge for Mountain Dew refills and familial visits.
Within the existing space, we added an ensuite bathroom for the third floor bedroom. The second floor bathroom and first floor powder room were also gutted and remodeled.
The master bedroom was extensively remodeled - given a vaulted ceiling and a wall of floor-to-roof built-ins accessed with a rolling ladder.
An extensive, multi-level deck and screen house was added to provide outdoor living space, with secure, dry storage below.
Design Criteria:
- Update house with a high sustainability standard.
- Provide bathroom for daughters’ third floor bedroom.
- Update remaining bathrooms
- Update cramped, low ceilinged master bedroom
- Provide mudroom/entryway solutions.
- Provide a window seating space with good visibility of back and side yards – to keep an eye on the kids at play.
- Replace old deck with a updated deck/screen porch combination.
- Update sitting room with a wood stove and mantle.
Special Features:
- Insulated Concrete Forms used for Dude Pod foundation.
- Soy-based spray foam insulation used in the addition and master bedroom.
- Paperstone countertops in mudroom.
- Zero-VOC paints and finishes used throughout the project.
- All decking and trim for the deck/screen porch is made from 100% recycled HDPE (milk jugs, soda, water bottles)
- High efficiency combination washer/dryer.
 DESIGN 4 CORNERS
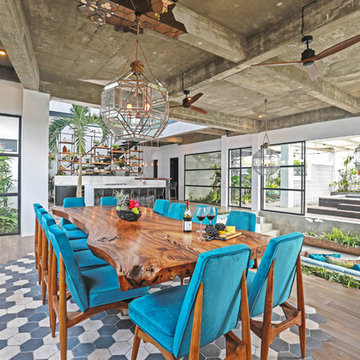
Example of an island style brown floor great room design in San Diego with white walls
 Infinite Possibilities Landscape & Design
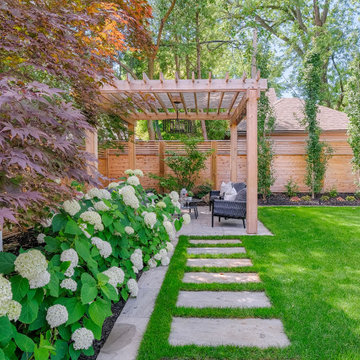
Inspiration for a large transitional full sun backyard stone and wood fence landscaping in Toronto with a pergola for summer.
 Georgio Home
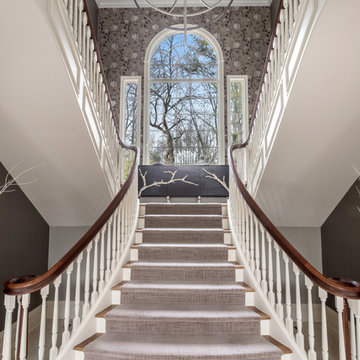
Inspiration for a large transitional wooden u-shaped staircase remodel in New York with painted risers
 TVL Creative Ltd.
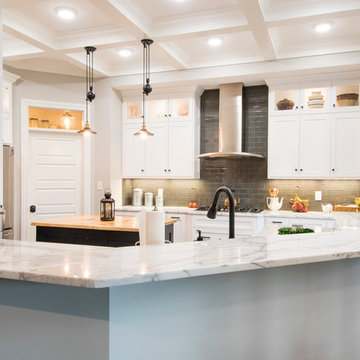
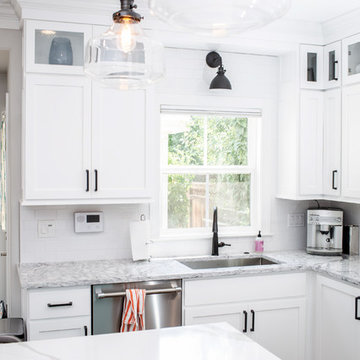
This project has been a labor of love for quite some time! The design ideas started flowing for this space back in 2016, and we are so excited to have recently completed the build-out process after our lengthy planning time frame. These wonderful clients completed a bathroom renovation with us last year, and we absolutely loved the charming, clean-lined farmhouse aesthetic we produced there. Wanting to carry that similar aesthetic into the kitchen, our clients hired us to transform their dated 90's builder-grade kitchen into a stunning showpiece for their home. While no major fixtures or appliances were relocated, nor were there major architectural changes, this space's transformation is a jaw-dropper. We began by removing the existing yellowed oak wood cabinets and replaced them with gorgeous custom cabinets from Tharp Cabinet Company. These cabinets are a very simple shaker style in a bright white paint color. We paired these fresh and bright cabinet with black hardware for a dramatic pop. We utilized the Blackrock pulls from Amerock and adore the playful contrast these pieces provide. On the backsplash, we used a very simple and understated white subway tile for a classic and timeless look that doesn't draw the eye away from the focal island or surrounding features. Over the range, we used a stunning mini-glass mosaic tile from TileBar that shimmers and showcases a variety of colors based on the time of day and light entry. The island is our favorite piece in this kitchen: a custom-built focal point from Tharp, painted in a gorgeous custom blue from Benjamin Moore. The island is topped with a dramatic slab of Arabescato from Pental Surfaces. On the perimeter cabinets, we've utilized the stunning White Fusion quartz, also from Pental. For final touches, we've utilized matte black wall sconces over the windows from Rejuvenation, and have a gorgeous sink faucet from Delta Faucet. Throughout the main level, we refinished the hardwood floors to bring them to a more soft, neutral brown color. New paint is carried throughout the house as well. We adore the bright simplicity of this space, and are so excited that our clients can enjoy this family friendly stunner for years to come!
 Alair Homes Plano
This house was built in 1994 and our clients have been there since day one. They wanted a complete refresh in their kitchen and living areas and a few other changes here and there; now that the kids were all off to college! They wanted to replace some things, redesign some things and just repaint others. They didn’t like the heavy textured walls, so those were sanded down, re-textured and painted throughout all of the remodeled areas.
The kitchen change was the most dramatic by painting the original cabinets a beautiful bluish-gray color; which is Benjamin Moore Gentleman’s Gray. The ends and cook side of the island are painted SW Reflection but on the front is a gorgeous Merola “Arte’ white accent tile. Two Island Pendant Lights ‘Aideen 8-light Geometric Pendant’ in a bronze gold finish hung above the island. White Carrara Quartz countertops were installed below the Viviano Marmo Dolomite Arabesque Honed Marble Mosaic tile backsplash. Our clients wanted to be able to watch TV from the kitchen as well as from the family room but since the door to the powder bath was on the wall of breakfast area (no to mention opening up into the room), it took up good wall space. Our designers rearranged the powder bath, moving the door into the laundry room and closing off the laundry room with a pocket door, so they can now hang their TV/artwork on the wall facing the kitchen, as well as another one in the family room!
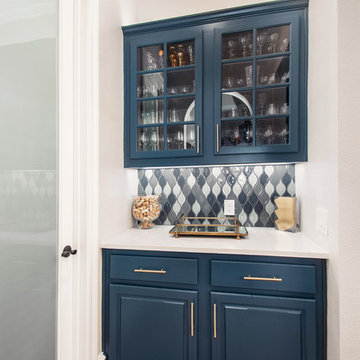
We squared off the arch in the doorway between the kitchen and bar/pantry area, giving them a more updated look. The bar was also painted the same blue as the kitchen but a cool Moondrop Water Jet Cut Glass Mosaic tile was installed on the backsplash, which added a beautiful accent! All kitchen cabinet hardware is ‘Amerock’ in a champagne finish.
In the family room, we redesigned the cabinets to the right of the fireplace to match the other side. The homeowners had invested in two new TV’s that would hang on the wall and display artwork when not in use, so the TV cabinet wasn’t needed. The cabinets were painted a crisp white which made all of their decor really stand out. The fireplace in the family room was originally red brick with a hearth for seating. The brick was removed and the hearth was lowered to the floor and replaced with E-Stone White 12x24” tile and the fireplace surround is tiled with Heirloom Pewter 6x6” tile.
The formal living room used to be closed off on one side of the fireplace, which was a desk area in the kitchen. The homeowners felt that it was an eye sore and it was unnecessary, so we removed that wall, opening up both sides of the fireplace into the formal living room. Pietra Tiles Aria Crystals Beach Sand tiles were installed on the kitchen side of the fireplace and the hearth was leveled with the floor and tiled with E-Stone White 12x24” tile.
The laundry room was redesigned, adding the powder bath door but also creating more storage space. Waypoint flat front maple cabinets in painted linen were installed above the appliances, with Top Knobs “Hopewell” polished chrome pulls. Elements Carrara Quartz countertops were installed above the appliances, creating that added space. 3x6” white ceramic subway tile was used as the backsplash, creating a clean and crisp laundry room! The same tile on the hearths of both fireplaces (E-Stone White 12x24”) was installed on the floor.
The powder bath was painted and 12x36” Ash Fiber Ceramic tile was installed vertically on the wall behind the sink. All hardware was updated with the Signature Hardware “Ultra”Collection and Shades of Light “Sleekly Modern” new vanity lights were installed.
All new wood flooring was installed throughout all of the remodeled rooms making all of the rooms seamlessly flow into each other. The homeowners love their updated home!
Design/Remodel by Hatfield Builders & Remodelers | Photography by Versatile Imaging
 Envision Web
Stuart Wade, Envision Virtual Tours
Bobcat Lodge- Lake Rabun
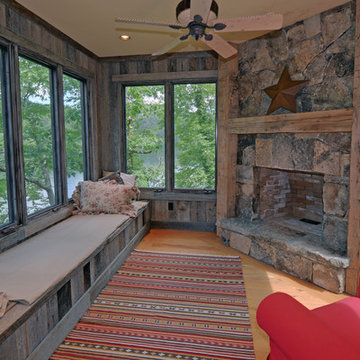
Be welcomed to this perfect mountain/lake lodge through stone pillars down a driveway of stamped concrete and brick paver patterns to the porte cochere. The design philosophy seen in the home's exterior extends to the interior with 10 fireplaces, the finest materials, and extraordinary craftsmanship.
Great Room
Enter the striking foyer with the antique heart pine, walnut and bird's-eye maple inlaid pattern that harmonizes with the natural unity of the spacious great room. The visually anchored stone fireplace accented by hand hewn circa 1800 oak beams silhouettes the soft lake views making a dynamic design statement. The great room was designed with togetherness in mind and features high vaulted ceilings, wormy oak flooring with walnut borders, a spacious dining area, a gourmet kitchen and for softer and more intimate moments a keeping room.
Kitchen:
Wormy chestnut cabinets,
Complimenting South American granite countertops
Wolf cooktop, double oven
Preparation bar
Serving Buffet
Separate wet bar
Walk-in Pantry
Laundry Room: entrance off the foyer, wormy chestnut cabinets and South American granite
Keeping Room: Nestled off the kitchen area intimately scaled for quieter moments, wormy chestnut ceilings with hand hewn oak beams from Ohio and Pennsylvania, wormy oak flooring accented with walnut and sycamore, and private fireplace
Powder Room off foyer
Three Master Bedroom Suites: each with its own unique full bathroom and private alcove with masonry wood burning fireplace
Master suite on the main floor with full bath enlivened by a fish theme with earthtones and blue accents, a copper soaking tub, large shower and copper sinks
Upstairs master suite with wormy oak flooring sits snug above the lake looking through a tree canopy as from a tree house facilitating a peaceful, tranquil atmosphere- full bath features jetted tub, separate shower, large closet, and friendly lizards sitting on copper sinks
Terrace Level Master Suite offers trey ceilings, entrance to stone terrace supported by cyprus tree trunks giving the feel of a rainforest floor: Full bath includes double mosaic-raised copper sinks, antler lighting, jetted tub accented with aquatic life tiles and separate water closet
This warm and inviting rustic interior perfectly balances the outdoor lake vistas with the comfort of indoor living.moving directly to the outdoor living spaces. A full length deck supported by cyprus trees offers the opportunity for serious entertaining. The stone terrace off the downstairs family room leads directly to the two stall boathouse for lakeside entertaining with its own private fireplace.
Terrace Level:
14 foot ceilings, transom windows
A master suite
A guest room with trey ceilings, wool carpet, and full bath with copper sinks,double vanity and riverock shower
Family room with focal stone fireplace, wet bar with wine cooler, separate kitchen with sink, mini refrigerator and built in microwave
Wine closet with hand painted plaster finish
A full bath for drippy swimmers with oversized river rock shower accented with crayfish and salamander tiles
Extras
All windows are Loewen windows
A ridge vent system
Custom design closets
Poured foundation for house and boathouse
European spruce framing
Exterior siding: 1 x 12 pressure treated pine with 1 x 4 batten strips
Siding has three coat process of Sikkens stain finish
Ten masonry fireplaces
Stacked rock from Rocky Gap Virginia
Eight foot custom Honduran Pine
True plaster walls with three coat process faux finish
Locust hand rails for the deck
Support cyprus tree trunks from Charleston
Outside light fixtures custom made in NY
Five hot water heaters, circulating pump
Duel fuel heat pump/propane, 1000 gallon buried propane tank, four zone heating system
Two laundry rooms
All Fireplaces set up for flat screen TV's
Adjacent lot available for purchase
56