
Search results for "Final method" in Home Design Ideas

 Sunspace Design, Inc.
Kittery Junction was originally constructed by the York Harbor & Beach Railroad Co. between 1886 and 1887. In the days when the locomotive was the preferred method of transportation for much of America’s population, this project site provided both passenger and freight service between Portsmouth, New Hampshire, and York Beach, Maine. It was usually the case that a train station constructed during this period would have its own unique architecture, and this site was no exception.
Now privately owned, this structure proudly stands overlooking Barrell’s Pond. To capture this view, the new owner approached our design team with a vision of a master bedroom Victorian conservatory facing the serene body of water. Respectful of the existing architectural details, Sunspace Design worked to bring this vision to reality using our solid conventional walls, custom Marvin windows, and a custom shop-built octagonal conservatory glass roof system. This combination enabled us to meet strong energy efficiency requirements while creating a classic Victorian conservatory that met the client’s hopes.
The glass roof system was constructed in the shop, transported to site, and raised in place to reduce on site construction time. With windows and doors provided by a top window manufacturer, the 2’ x 6’ wall construction with gave us complete design control. With solid wood framing, fiberglass R-21 insulation in the walls, and sputter coated low-E sun control properties in the custom glass roof system, the construction is both structurally and thermally sound. The end result is a comfortable Victorian conservatory addition that can easily withstand the harsh elements of a Maine winter.
We’ve been designing and building conservatories in New England since 1981. This project stands as a model of our commitment to quality. We utilize this construction process for all of our sunrooms, skylights, conservatories, and orangeries to ensure a final product that is unsurpassed in quality and performance.
 Sunspace Design, Inc.
Kittery Junction was originally constructed by the York Harbor & Beach Railroad Co. between 1886 and 1887. In the days when the locomotive was the preferred method of transportation for much of America’s population, this project site provided both passenger and freight service between Portsmouth, New Hampshire, and York Beach, Maine. It was usually the case that a train station constructed during this period would have its own unique architecture, and this site was no exception.
Now privately owned, this structure proudly stands overlooking Barrell’s Pond. To capture this view, the new owner approached our design team with a vision of a master bedroom Victorian conservatory facing the serene body of water. Respectful of the existing architectural details, Sunspace Design worked to bring this vision to reality using our solid conventional walls, custom Marvin windows, and a custom shop-built octagonal conservatory glass roof system. This combination enabled us to meet strong energy efficiency requirements while creating a classic Victorian conservatory that met the client’s hopes.
The glass roof system was constructed in the shop, transported to site, and raised in place to reduce on site construction time. With windows and doors provided by a top window manufacturer, the 2’ x 6’ wall construction with gave us complete design control. With solid wood framing, fiberglass R-21 insulation in the walls, and sputter coated low-E sun control properties in the custom glass roof system, the construction is both structurally and thermally sound. The end result is a comfortable Victorian conservatory addition that can easily withstand the harsh elements of a Maine winter.
We’ve been designing and building conservatories in New England since 1981. This project stands as a model of our commitment to quality. We utilize this construction process for all of our sunrooms, skylights, conservatories, and orangeries to ensure a final product that is unsurpassed in quality and performance.
 Tile Doctor Ltd
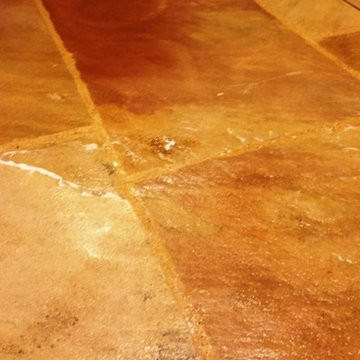
Sandstone is a particularly popular choice for kitchen and hallway floors amongst home owners in the UK. It not only possesses beautiful natural shades and features, but it is also typically hard wearing, making it an ideal stone for tiled flooring in high traffic areas of a house and can often be found laid as large riven flagstones in pubs and other commercial premises.
Naturally, just like any other type of tiled floor, Sandstone needs to be maintained using appropriate products and methods. A lack of adequate surface sealer in particular leaves Sandstone susceptible to ingrained dirt, and can leave distinct, unsightly patches such as those in the photograph below.
In this instance, I visited a client in the old Essex town of Thaxted, who believed that her four square meter Sandstone tiled floor might be suffering from damp issues after lifting up the mats covering the area.
However, when I arrived at the property and ran damp tests, I found the issue to be superficial. The Sandstone floor however did require attention in the form of a deep clean and a fresh seal to tackle the white patches and prevent further discolouration.
To begin the cleaning process I spread Tile Doctor Remove & Go evenly across the floor. It was left to dwell for approximately 15 minutes, during which time it worked to break down the old sealer remaining on the tiles. I then agitated the area twice over with both a black scrubbing pad fitted to a rotation machine lift away any dirt.
The resultant slurry was removed using a wet vacuum and the floor was then rinsed with water and then mixed a strong solution of one part Tile Doctor Pro Clean to three parts water which was used to give the floor a final clean and scrub the grout clean before using the wet vacuum again and giving the floor a final rinse with water.
After completing the cleaning process I left the floor to dry over the weekend. Upon my return to the house I proceeded to seal the tiles with three coats of Tile Doctor Colour Grow which is an impregnating sealer that soaks into the pores of the stone and provide durable surface protection going forward. Colour Grow is also specially designed to let the floor breathe and enhance the natural colours in the stone and, in this case, really helped to intensify the natural sand-coloured shades in the tiles.
The difference made to these Sandstone tiles was really noticeable, with the white patches completely removed and the surface more generally back to looking like new, needless to say, my client was very happy with the results.
Nick Murphy
South Essex Tile Doctor
Find the right local pro for your project

 Light it Up AV & Turf
Project Description
Govee Permanent Outdoor Lights 2 Precision Home Installation
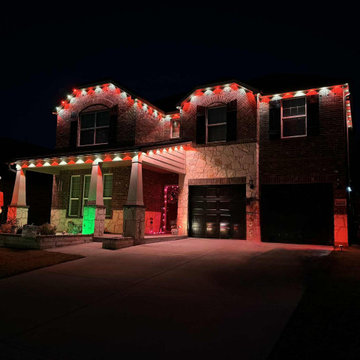
This project features the professional installation of the next-generation Govee Permanent Outdoor Lights 2 system. Known for their upgraded brightness and enhanced color rendering, these lights require a precise, calculated layout—especially since the manufacturer guidelines restrict cutting into the main line, presenting a unique installation challenge.
Key Features of This Installation:
Next-Gen Exterior Illumination: Outfitted with the newly released Govee Permanent Outdoor Lights 2, delivering brilliant architectural down-lighting, incredible holiday presets, and daily accent lighting.
Creative Technical Problem Solving: Because these specialized strands could not be cut without voiding the integrity of the system, we meticulously engineered the run layout. To achieve a perfectly flush finish at the roofline edge, we successfully executed a custom shortening and capping technique on the final strands.
Flawless Eave Integration: The lights were mounted at the optimal distance from the fascia to ensure a perfectly uniform, triangular cone wash down the home's exterior walls, eliminating hot spots and dark gaps.
Smart Ecosystem Control: Fully integrated into the homeowner's smart ecosystem, allowing for voice control, scheduled automation, and endless customization through the native app interface.
Our Specialized Lighting Expertise
Smart lighting systems require more than just hanging a strand—they require precision planning. We specialize in handling high-end retail and commercial systems, providing:
Advanced Layout Mapping: Ensuring your runs look symmetrical and perfectly tailored to your roofline before a single clip is mounted.
Out-of-the-Box Troubleshooting: Finding safe, manufacturer-approved technical workarounds for complex roof lines where standard plug-and-play methods fall short.
Clean Wire Management: Tucking and hiding all jump wires and power supplies for a seamless daytime appearance.
 Light it Up AV & Turf
Project Description
Govee Permanent Outdoor Lights 2 Precision Home Installation
This project features the professional installation of the next-generation Govee Permanent Outdoor Lights 2 system. Known for their upgraded brightness and enhanced color rendering, these lights require a precise, calculated layout—especially since the manufacturer guidelines restrict cutting into the main line, presenting a unique installation challenge.
Key Features of This Installation:
Next-Gen Exterior Illumination: Outfitted with the newly released Govee Permanent Outdoor Lights 2, delivering brilliant architectural down-lighting, incredible holiday presets, and daily accent lighting.
Creative Technical Problem Solving: Because these specialized strands could not be cut without voiding the integrity of the system, we meticulously engineered the run layout. To achieve a perfectly flush finish at the roofline edge, we successfully executed a custom shortening and capping technique on the final strands.
Flawless Eave Integration: The lights were mounted at the optimal distance from the fascia to ensure a perfectly uniform, triangular cone wash down the home's exterior walls, eliminating hot spots and dark gaps.
Smart Ecosystem Control: Fully integrated into the homeowner's smart ecosystem, allowing for voice control, scheduled automation, and endless customization through the native app interface.
Our Specialized Lighting Expertise
Smart lighting systems require more than just hanging a strand—they require precision planning. We specialize in handling high-end retail and commercial systems, providing:
Advanced Layout Mapping: Ensuring your runs look symmetrical and perfectly tailored to your roofline before a single clip is mounted.
Out-of-the-Box Troubleshooting: Finding safe, manufacturer-approved technical workarounds for complex roof lines where standard plug-and-play methods fall short.
Clean Wire Management: Tucking and hiding all jump wires and power supplies for a seamless daytime appearance.
 Light it Up AV & Turf
Project Description
Govee Permanent Outdoor Lights 2 Precision Home Installation
This project features the professional installation of the next-generation Govee Permanent Outdoor Lights 2 system. Known for their upgraded brightness and enhanced color rendering, these lights require a precise, calculated layout—especially since the manufacturer guidelines restrict cutting into the main line, presenting a unique installation challenge.
Key Features of This Installation:
Next-Gen Exterior Illumination: Outfitted with the newly released Govee Permanent Outdoor Lights 2, delivering brilliant architectural down-lighting, incredible holiday presets, and daily accent lighting.
Creative Technical Problem Solving: Because these specialized strands could not be cut without voiding the integrity of the system, we meticulously engineered the run layout. To achieve a perfectly flush finish at the roofline edge, we successfully executed a custom shortening and capping technique on the final strands.
Flawless Eave Integration: The lights were mounted at the optimal distance from the fascia to ensure a perfectly uniform, triangular cone wash down the home's exterior walls, eliminating hot spots and dark gaps.
Smart Ecosystem Control: Fully integrated into the homeowner's smart ecosystem, allowing for voice control, scheduled automation, and endless customization through the native app interface.
Our Specialized Lighting Expertise
Smart lighting systems require more than just hanging a strand—they require precision planning. We specialize in handling high-end retail and commercial systems, providing:
Advanced Layout Mapping: Ensuring your runs look symmetrical and perfectly tailored to your roofline before a single clip is mounted.
Out-of-the-Box Troubleshooting: Finding safe, manufacturer-approved technical workarounds for complex roof lines where standard plug-and-play methods fall short.
Clean Wire Management: Tucking and hiding all jump wires and power supplies for a seamless daytime appearance.
 Light it Up AV & Turf
Project Description
Govee Permanent Outdoor Lights 2 Precision Home Installation
This project features the professional installation of the next-generation Govee Permanent Outdoor Lights 2 system. Known for their upgraded brightness and enhanced color rendering, these lights require a precise, calculated layout—especially since the manufacturer guidelines restrict cutting into the main line, presenting a unique installation challenge.
Key Features of This Installation:
Next-Gen Exterior Illumination: Outfitted with the newly released Govee Permanent Outdoor Lights 2, delivering brilliant architectural down-lighting, incredible holiday presets, and daily accent lighting.
Creative Technical Problem Solving: Because these specialized strands could not be cut without voiding the integrity of the system, we meticulously engineered the run layout. To achieve a perfectly flush finish at the roofline edge, we successfully executed a custom shortening and capping technique on the final strands.
Flawless Eave Integration: The lights were mounted at the optimal distance from the fascia to ensure a perfectly uniform, triangular cone wash down the home's exterior walls, eliminating hot spots and dark gaps.
Smart Ecosystem Control: Fully integrated into the homeowner's smart ecosystem, allowing for voice control, scheduled automation, and endless customization through the native app interface.
Our Specialized Lighting Expertise
Smart lighting systems require more than just hanging a strand—they require precision planning. We specialize in handling high-end retail and commercial systems, providing:
Advanced Layout Mapping: Ensuring your runs look symmetrical and perfectly tailored to your roofline before a single clip is mounted.
Out-of-the-Box Troubleshooting: Finding safe, manufacturer-approved technical workarounds for complex roof lines where standard plug-and-play methods fall short.
Clean Wire Management: Tucking and hiding all jump wires and power supplies for a seamless daytime appearance.

 EvB General Contractor
Alcove shower - small traditional 3/4 beige tile and stone tile travertine floor alcove shower idea in Orange County with shaker cabinets, dark wood cabinets, a two-piece toilet, green walls, a drop-in sink and tile countertops

 User
A NJ garden design project. Sweet Woodruff and Phlox subulata are in full bloom.
We service the NY & NJ areas. http://www.summersetgardens.com/
845-590-7306

 Zelaya Properties LLC
We used: Custom cherry cabinetry in Arts & Crafts Shaker style by Kabinart in Boulder and Espresso stains. Liberty Hardware Venetian bronze 1-1/2" cabinet knobs. KitchenAid Architect II Series 22 CF counter-depth French door refrigerator. KitchenAid Architect Series II 27" convection single wall oven. KitchenAid 36" 6-burner dual fuel freestanding commercial-style range. KitchenAid Architect II Series 24" dishwasher. Sharp Insight Pro Series 24" built-in microwave drawer (Model #KB6524PS). Crystorama Solaris 12" wide pendant lights in English bronze. Granite countertops in Brown Fantasy. 3"x6" polished marble backsplash.
Paint colors:
Walls: Glidden Silver Cloud 30YY 63/024
Ceilings/Trims/Doors: Glidden Swan White GLC23
Robert B. Narod Photography
 Dallas Builders Association
The Dallas Builders Association’s Parade of Homes — presented by Atmos Energy — will hold open six luxury Dallas residences from 10 a.m. to 5 p.m. on May 7. This scattered-site, self-guided tour benefits Operation FINALLY HOME, an organization that provides custom mortgage-free homes to combat-wounded U.S. military veterans and their families. The Association’s eighth project is currently underway in Irving.
Featured homes are situated in several neighborhoods in Dallas, including Briarwood, Midway Hollow, and East Dallas near White Rock Lake, as well as in West Dallas just south of the Trinity River.
Hoffmann Homes builds award-winning innovative green homes using quality materials, sustainable building practices, smart technologies, and reliable and efficient energy sources for maximum comfort.
Pioneering home builder and residential developer Alan Hoffmann was first inspired to pursue alternative construction methods after visiting his ancestral home on the Spanish island of Ibiza. The 400 year old home had three-foot thick perimeter walls comprised of stone excavated from the building site. The mass of these walls allowed the ground’s ambient temperature to conduct up through the walls to keep the house cool in the summer and warmer in the winter. Hoffmann replicates this elegantly simple system today in his distinctive mode of construction with Insulated Concrete Forms (ICFs).
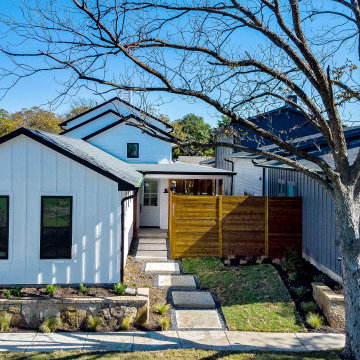
Our Parade of Homes build in the Abode @ White Rock community is 2111 Autumn Sage Place. Old-world features such as thick thermal mass walls, breezeways and whitewashed cement finishes are reimagined in a modern context in Hoffmann Homes’ newest build. Situated in the Abode @ White Rock green community, the home features high-performance windows, proper housing orientation and a storm shelter/pantry. Each home in the community is certified with the Department of Energy’s Net Zero Ready program, Energy Star Program and Green Built Texas.
While every Hoffmann Home starts with a high-performance building envelope (ICF), they also include conditioned attics, seal combustion furnaces, whole house dehumidification, whole house water filtration for indoor air and water quality. The homes are also solar-ready and are pre-wired for rapid electric vehicle charging. Other features include a natural gas tankless water heater, high-efficiency gas furnace, sealed combustion gas fireplace. These natural gas appliances help reduce energy use, lower utility costs and reduce emissions while increasing homeowner comfort.
For more info visit www.hoffmannhomes.com.
Tickets for the Parade of Homes are $25 for ages 12 and older. They are available at ParadeofHomesDallas.com. Tour maps will be emailed to ticket holders a week prior to the event.
 Tile Doctor Ltd
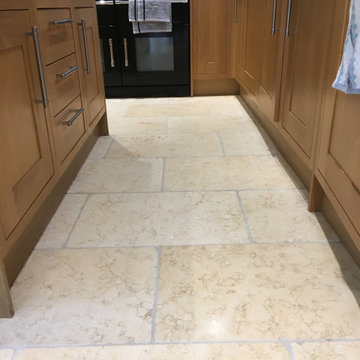
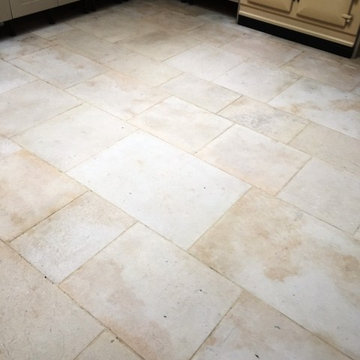
My client had recently moved into a bungalow in Godalming where they inherited the Limestone tiled kitchen floor pictured below. The previous owner had not looked after the floor very well and by the time they moved in it was pretty filthy. Limestone is a natural but porous stone where, unless sealed, attracts dirt into its tiny holes and as you would expect Cream Limestone shows the dirt easily. The protective seal had long since worn off this floor and was now ingrained with dirt it was now looking permanently dirty.
Before quoting I conducted a small test clean to work out the best method to renovate the stone and this also gives the client a good idea of how the floor will look after its finished. They were delighted with the initial result and happy with my quote gave me the go ahead.
On arrival first I helped the customer remove his tables and chairs and I then set about tapping up the plinths in the kitchen and the skirtings to protect them from cleaning solutions and equipment. The cleaning equipment I have invested in works more efficiently in open spaces, so it’s worth spending time at the beginning preparing the area first.
Next, I used a deck brush to apply a mixture of water and Tile Doctor Pro-Clean to the dirtiest tiles. Tile Doctor Pro-Clean works well when left to dwell for ten minutes or so. I also applied the same product to the grout over half the room so it could get a head start breaking down the dirt. Then using a stiff brush, I scrubbed the grout clean. Once it was worked loose, I extracted the now dirty solution with a wet vacuum.
With the grout clean I turned my attention back to the tiles with where the Pro-Clean had been left to soak in. Giving them a quick brush, I noted that what appeared to be permanently ingrained dirt had now come loose. To get the tiles really clean I used a 17″ rotary machine fitted with diamond encrusted buffer pads. This removes the tiny dots of dirt on the stone and with it comes any existing sealer and dirt.
A set of four burnishing pads were used, starting with a 400-grit, and finishing with a 3000-grit pad. The first 400-grit pad is coarse, and the grits become smoother as you work through the set. Water is used to lubricate the process and the released dirt is extracted in-between using the wet vacuum mentioned earlier. This process does take time but by the end of day one the floor was looking a lot better.
The next step is sealing however the floor needs to be bone dry for that, so I left a couple of industrial fans in place and left the Limestone to dry off overnight.
Returning the following day my first job was to ensure the floor was dry by taking multiple moisture readings with a damp meter. The readings were good, so I was able to make a start applying the sealer which for this floor was Tile Doctor Ultra Seal.
Ultra-Seal is an impregnating sealer that soaks into those small holes in the stone I mentioned earlier, I occupies the pores thus preventing dirt from becoming ingrained. The other feature of this sealer is it doesn’t change the appearance or colour of the stone leaving it with a very natural finish. Two coats of sealer were applied, leaving the seal to dry between each coat.
After the final coat was dried, I gave it a final polish with a soft nylon pad and the floor was finished. Before leaving we discussed after care which for this floor, I recommended Tile Doctor Stone Soap and I requested that the customer to stay out of the kitchen for a couple of hours while the sealer cured. They were over the moon with the new floor and could not believe the difference it had made to their kitchen.
Rupert Mcleod
West Surrey Tile Doctor
 Tile Doctor Ltd
Bridgwater is known to be one of Somerset’s liveliest towns. With a history dating back over 1000 years, it has many traditions, including a carnival which happens every November, and is hailed as the world’s largest illumination procession.
What wasn’t looking lively, however, was this Limestone tiled kitchen floor at a house in the town. It had been laid five years previously but at the time of laying hadn’t been sealed with adequate amounts of sealer.
As a result, the Limestone had absorbed a lot of wet footprints and other dirty stains. The sealer simply broke down after a while, leaving the homeowner with a floor that never looked clean no matter how much they cleaned it – using all kinds of products. In fact, the tiles looked blackened and mouldy, as you can see in the photos below.
It was time for the homeowner to seek out professional assistance, so she decided to contact her local Tile Doctor. I was asked to completely restore the look of the floor – something the homeowner had deemed impossible at this point.
In practice, I knew the floor could be restored using the right products and methods including a really deep clean and resealing with the right type of sealer for these tiles.
I scrubbed in Tile Doctor Remove and Go, which is a powerful coatings remover which draws out ingrained stains and strips away any old sealer remaining on the tiles. The floor was then rinsed thoroughly with plain water to neutralise it, and the resulting soiled solution was extracted using a wet vacuum. I repeated the process on stubborn areas, eventually transforming the floor back to its natural and clean state.
I allowed the Limestone to dry out completely overnight before returning to the property to seal the tiles. This is important as the slightest amount of excess moisture can damage the performance of the sealer, and we would’ve been back to square one!
After checking with a damp meter, I could see everything was fine, so I proceeded to seal the floor with Tile Doctor Colour Grow, which is not only a robust impregnating sealer that will protect the floor going forward but also enhancing the natural colours in the stone at the same time.
In the space of two days, the Limestone tiles had been completely transformed. Now it had been properly sealed, the floor will be much easier to clean and therefore should stay looking great for a long time to come. The customer was very happy to have finally resolved the problem with some assistance from the Somerset Tile Doctor!
Dave Hurst
Somerset Tile Doctor
 LOREC Ranch Home Furnishings
Cowboy Kitchen
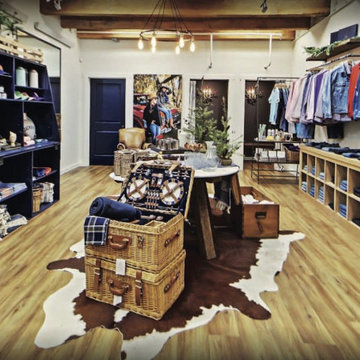
LOREC Ranch is renowned for its artisanal approach to creating cowboy kitchen table cabinets, a tradition deeply rooted in both craftsmanship and rustic charm. The ranch’s approach to woodworking melds time-honored techniques with innovative methods, producing cabinets that epitomize the rugged elegance of cowboy culture.
Selecting the Wood
The process begins with the selection of high-quality wood. At LOREC Ranch, the choice of lumber is critical to the final product. They use a variety of hardwoods such as oak, pine, and walnut. Each type of wood offers unique characteristics—oak for its strength and durability, pine for its workability and warm hue, and walnut for its rich, dark tones. The wood is carefully sourced from sustainable forests, ensuring both environmental responsibility and superior quality. Once procured, the wood undergoes a thorough drying process to reduce moisture content, which is crucial for preventing future warping or cracking.
Design and Craftsmanship
Design is a pivotal stage in the creation of cowboy kitchen table cabinets. LOREC Ranch's designs often draw inspiration from traditional cowboy aesthetics, incorporating elements like sturdy, rugged lines and intricate detailing that reflects the essence of Western life. The design phase involves detailed planning and sketching, ensuring that the cabinets not only serve their functional purpose but also enhance the rustic charm of any kitchen. Cowboy Kitchens are a stable of the American Midwest.
The next step is crafting the cabinet frames. Skilled artisans at LOREC Ranch use a combination of modern and traditional techniques. While some aspects of the construction process involve high-tech machinery for precision cutting and joining, much of the fine detailing is done by hand. This includes hand-carving and finishing touches that give each cabinet a unique, handcrafted feel. The artisans' expertise ensures that every joint is perfectly aligned and every surface is smooth and ready for finishing.
Assembly and Finishing
Once the components are cut and shaped, they are assembled using time-tested joinery techniques. LOREC Ranch favors methods such as dovetail and mortise-and-tenon joints, which not only enhance the strength and durability of the cabinets but also align with the traditional craftsmanship that defines their products of the Cowboys Kitchen. The assembly process is meticulous, ensuring that each piece fits together seamlessly and stands the test of time.
Finishing is where the cabinets truly come to life. LOREC Ranch uses a range of techniques to achieve a finish that complements the wood’s natural beauty while providing protection against wear and tear. This often involves multiple coats of stain or varnish, each applied with care to enhance the wood’s grain and texture. The finishing process is both art and science, requiring a delicate balance to ensure the cabinets not only look beautiful but are also resistant to daily use.
Quality Control and Delivery
Before any cabinet leaves the workshop, it undergoes rigorous quality control. Every detail is inspected to ensure that the cabinet meets LOREC Ranch’s high standards. This includes checking for structural integrity, finish consistency, and overall craftsmanship. Only after passing this thorough inspection are the Cowboys Kitchens cabinets prepared for delivery.
At LOREC Ranch, the journey of creating cowboy kitchen cabinets is a blend of tradition and innovation. From selecting the finest wood to the final touches of finishing, every step is executed with precision and care. The result is a product that is not only a testament to the rich heritage of cowboy craftsmanship but also a functional and stylish addition to any kitchen.
The Cowboy Kitchen by LOREC Ranch Home Furnishings is a celebration of the rustic, western lifestyle, offering a unique blend of rugged charm and modern practicality. Designed for those who appreciate the simplicity and warmth of western living, the Cowboy Kitchen collection includes a variety of furniture and decor that can transform any kitchen into a western oasis. Central to this collection are the cowboy kitchen tables and cowboy kitchen cabinets, which feature solid wood construction, intricate detailing, and finishes that reflect the natural beauty of the materials used. These pieces are ideal for creating a western style kitchen that feels both authentic and welcoming.
LOREC Ranch's cowboy kitchen tables are crafted with both functionality and style in mind. Whether you’re looking for a cowboy dining table for family meals or a cowboy kitchen fold-up table for smaller spaces, these pieces are designed to meet a variety of needs. The hideaway kitchen tables and Murphy kitchen tables offer innovative solutions for maximizing space without sacrificing the rustic aesthetic. For those interested in DIY projects, cowboy kitchen table plans are available, allowing you to customize your table to suit your specific preferences and space requirements.
In addition to tables, the cowboy kitchen cabinets and cowboy kitchen armoires are key elements in creating a cohesive western style kitchen. These cowboy cabinets are made from high-quality wood and feature designs that are both practical and decorative, with ample storage space and a style that echoes the rugged charm of the American frontier. The western style kitchen cabinets are perfect for those who want to bring a touch of the wild west into their home while ensuring their kitchen remains functional and organized.
To complete the look, cowboy kitchen decor items, such as western-themed accents and accessories, are available to enhance the overall atmosphere of the western kitchens. These decor pieces complement the larger furniture items, tying together the rustic aesthetic and creating a warm, inviting space that feels like a true cowboy's kitchen. Whether you’re looking to create a completely western-themed kitchen or just want to add a few rustic touches, LOREC Ranch’s Cowboy Kitchen collection offers everything you need to bring your vision to life

 Elizabeth Aldrich
Bigger is better, right? Not anymore!
Tiny homes are the latest trend for both home buyers and home builders. From small cabins to budget houses to granny flats, it’s clear that the saying “less is more” is finally starting to ring true.
You might think that smaller spaces means less room for creativity, but you’d be wrong. In fact, these tiny homes and granny flats tend to be far more diverse and creatively designed than full-sized homes and McMansions that often all look the same. People are building rustic cabins, mid-century modern flats, urban industrial lofts, and even treehouses.
There’s a lot of inspiration to be had with the inside of a tiny home as well. Having such a limited amount of space in which to both store your belongings and live comfortable forces you to get creative. And people have developed some great solutions. From lofted beds to rooftop patios to Murphy style kitchen tables that fold up into the wall, people everywhere are finding ways to still have it all in their small homes.
Here are some of our favorite ways to make a tiny home more usable and livable.
Build a lofted bed.
This might be the most popular method for creating more space in everything from small houses to shared kids’ bedrooms to dorm rooms. Elevating the bed gives you plenty of space underneath for a desk, bookshelves, or a living area. You can easily buy a lofted bed, but they are usually twin beds, and they’re not as fun as some of the custom built ones out there. People are starting to build hanging beds into their homes, for example. Shorten the rope, add a ladder, and you have yourself a lofted bed.
Get a futon.
Another popular option, couches that convert into beds solve a lot of space issues by being multi-functional. Even if you do get yourself a lofted bed, you might want to consider a sofa-bed for your living area as well so that you can host guests. This solves the biggest problem with tiny living – not being able to have friends and family stay over!
Build a Murphy table.
Murphy-style furniture, or furniture that folds down from the wall and then folds back up when you’re done, has gone out of style a bit. But we don’t think it’s deserved its reputation as outdated, and with the surge in tiny homes, it’s only a matter of time before these come back in style. You can build a Murphy table to serve as your dining area with folding chairs that hang from wall pegs, or you can build a Murphy desk if you need some space to do work.
This is only the start. There are plenty of inventive ideas out there for creating small, multi-purpose living spaces that are cozy instead of cramped. Get those creative juices flowing, and go small!

 Homestead Doors, Inc.
Door #10
FP3190
Flat 3 Panel Interior Door with Farmhouse Sticking
Solid Poplar stiles and rails
MDF panels
Painted White
1 x 4 door casing
1 x 6 baseboard
Bravura 336B door knob
Call us for a quote on your door project
419-684-9582
Visit https://www.door.cc
 Tile Doctor Ltd
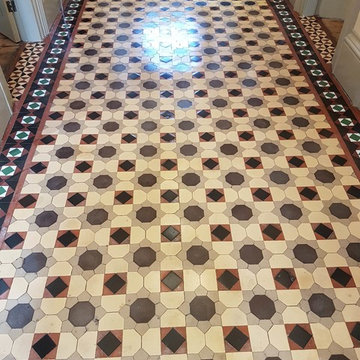
I recently re-visited a Victorian period property in the Leeds suburb of Headingley which had an unusually large tiled entrance hall which we believe to be as old as the property itself. I say re-visited as I actually gave this floor a deep clean and reseal around five years ago; it’s always nice to be asked to return to a job as it shows the customers was very happy with the work. However, with five years of wear and tear the sealer had worn down and the floor was now starting to trap dirt, also it had lost the attractive shine added by the sealer and the owner felt it was time to have it done again. Additionally, the owner had recently had the whole house decorated and wanted the floor to look its best and match the fresh appearance of the property.
Sealers do wear off with use and so it is inevitable that the tiles will need to be cleaned and sealed again with time. Given it hadn’t had a professional clean and seal for five years the floor wasn’t looking too bad as you can see from the picture, it was just a bit dull in the high traffic areas such as along the centre. I’ve certainly seen a lot worse.
Initially I wasn’t 100% sure on which cleaning method l was going to use on this floor. Originally l thought about using a coarse 200-grit burnishing pad to take off a couple of layers of sealer and then re-apply 2 more coats. However, the finish on the floor wasn’t even across the width of the hallway and l felt using that approach wouldn’t resolve that. Additionally, a lot of tiles were pitted and a burnishing pad would struggle to get into the holes. So instead I decided to completely strip the floor and re-seal it which would ensure a uniform finish across the floor.
I used a strong 50:50 dilution of Tile Doctor Pro-Clean on the tiles and scrubbed it in with a black floor pad which removed the old sealer and ingrained dirt. The large floor pads are not very effective in the corners and edges, so I used a 6-inch red buffing pad fitted to a hand buffer for those. The floor was rinsed with water and the soil extracted using a wet vacuum. After inspecting the floor some areas were retreated with a repeat of the same process.
After a final rinse and extraction of the soiled water the floor was left to dry overnight.
The next day after first checking the floor was dry with a damp meter it was sealed with four coats of Tile Doctor Seal and Go. This is a water based sealer that gives a lovely sheen and allows the colours to shine through as well as letting the floor breath, which is important in properties of this age that usually do not have a damp proof membrane.
I was very pleased with the finished result as the pictures show and glad that l had chosen to do a deep clean and not just apply more coats of sealer. The client was over the moon.
Nigel Stoker
North West Yorkshire Tile Doctor
 Studio Munroe
Photography by Thomas Kuoh
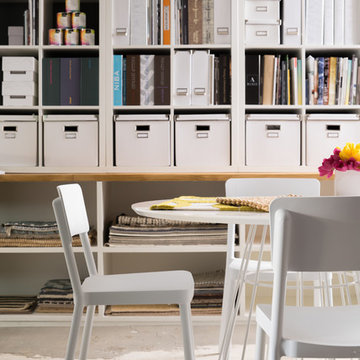
Inspiration for a contemporary home design remodel in San Francisco
Inspiration for a contemporary home design remodel in San Francisco
 Allreno
Bathroom Renovation: How Allreno Simplifies Your Remodel – Save Time and Money
When it comes to bathroom renovation, creating a space that’s functional, stylish, and tailored to your needs can feel like a daunting task. But with Allreno, the process becomes streamlined, efficient, and remarkably simple. Whether you’re planning a small update or a full-scale remodel, Allreno’s cutting-edge app and services are designed to help you achieve your dream bathroom with ease.
Why Choose Allreno for Your Bathroom Renovation?
Allreno stands out in the renovation industry by leveraging advanced artificial intelligence to automate complex processes, cutting down the time and cost typically associated with bathroom remodels. Through our platform, homeowners and professionals alike can design, plan, and execute renovations in a fraction of the time it takes with traditional methods.
Our innovative approach focuses on:
• Custom Designs: With Allreno, you can visualize your bathroom renovation in real-time, experimenting with layouts, finishes, and fixtures to find the perfect fit.
• Cost Efficiency: Our AI technology optimizes material use and labor planning, saving you money without compromising on quality.
• Seamless Execution: From selecting a bathroom vanity to finalizing the layout, Allreno simplifies every step of the process.
Comparing Allreno to Leading Competitors
When exploring bathroom renovation options, it’s important to consider the services and value offered by different providers. Here’s how Allreno stacks up against major players like Home Depot, Houzz, Block Renovation, and Angi.com:
• Home Depot: Known for its wide range of DIY and contractor-friendly products, Home Depot offers accessibility but lacks the personalized design and AI-powered planning that Allreno provides.
• Houzz: While Houzz excels in inspiration and connecting homeowners with professionals, its platform does not streamline the actual renovation process like Allreno’s app does.
• Block Renovation: Specializing in high-quality bathroom remodels, Block offers comprehensive services but often at a premium price. Allreno delivers comparable results with significant cost savings.
• Angi.com: Angi connects homeowners with contractors but doesn’t offer the integrated design-to-execution experience that sets Allreno apart.
Bathroom Vanity: The Centerpiece of Your Renovation
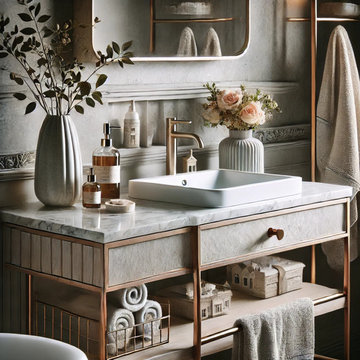
A bathroom vanity is often the focal point of any bathroom design. Choosing the right vanity can elevate the entire look and feel of your space. With Allreno, selecting the perfect bathroom vanity becomes an enjoyable experience. Our app allows you to browse a curated collection of high-quality vanities, customize dimensions, and visualize how they’ll look in your remodeled space.
Allreno’s vanities combine style, functionality, and durability, ensuring they not only look great but also stand the test of time. Whether you prefer a modern minimalist design or a classic, timeless aesthetic, Allreno has options to suit every taste.
Expert Tips for Bathroom Renovation
Renovating a bathroom requires careful planning and attention to detail. Here are some expert tips to keep in mind:
1. Set a Realistic Budget: Determine how much you’re willing to spend and allocate funds for unexpected expenses.
2. Plan the Layout: Consider functionality and flow when designing the space. Allreno’s app makes this step easy with AI-generated layouts tailored to your needs.
3. Choose Durable Materials: Bathrooms face moisture and wear, so opt for high-quality, water-resistant materials.
4. Focus on Lighting: Proper lighting enhances both the functionality and ambiance of your bathroom.
5. Hire Professionals: While DIY can be tempting, working with experienced contractors ensures the job is done right.
Explore Our Complete Guide to New York Bathroom Remodels
For New York homeowners, bathroom renovations come with unique challenges and opportunities. Explore our complete guide to New York bathroom remodels, with expert tips on bathroom renovation and a breakdown of costs to help you plan. From navigating small spaces to complying with building codes, our guide provides all the insights you need for a successful project.
Why Allreno is the Future of Bathroom Renovation
With Allreno, you’re not just renovating a bathroom—you’re transforming the way renovations are done. Our app eliminates the stress and inefficiency of traditional methods, empowering you to achieve stunning results in less time and with less hassle.
Ready to start your bathroom renovation journey? Download the Allreno app today and experience the difference for yourself. Whether it’s finding the perfect bathroom vanity or planning a complete remodel, Allreno is here to make your dream bathroom a reality.
Tags: ai design, bathroom renovation, renovation, bathroom design, interior design
 Allreno
Bathroom Renovation: How Allreno Simplifies Your Remodel – Save Time and Money
When it comes to bathroom renovation, creating a space that’s functional, stylish, and tailored to your needs can feel like a daunting task. But with Allreno, the process becomes streamlined, efficient, and remarkably simple. Whether you’re planning a small update or a full-scale remodel, Allreno’s cutting-edge app and services are designed to help you achieve your dream bathroom with ease.
Why Choose Allreno for Your Bathroom Renovation?
Allreno stands out in the renovation industry by leveraging advanced artificial intelligence to automate complex processes, cutting down the time and cost typically associated with bathroom remodels. Through our platform, homeowners and professionals alike can design, plan, and execute renovations in a fraction of the time it takes with traditional methods.
Our innovative approach focuses on:
• Custom Designs: With Allreno, you can visualize your bathroom renovation in real-time, experimenting with layouts, finishes, and fixtures to find the perfect fit.
• Cost Efficiency: Our AI technology optimizes material use and labor planning, saving you money without compromising on quality.
• Seamless Execution: From selecting a bathroom vanity to finalizing the layout, Allreno simplifies every step of the process.
Comparing Allreno to Leading Competitors
When exploring bathroom renovation options, it’s important to consider the services and value offered by different providers. Here’s how Allreno stacks up against major players like Home Depot, Houzz, Block Renovation, and Angi.com:
• Home Depot: Known for its wide range of DIY and contractor-friendly products, Home Depot offers accessibility but lacks the personalized design and AI-powered planning that Allreno provides.
• Houzz: While Houzz excels in inspiration and connecting homeowners with professionals, its platform does not streamline the actual renovation process like Allreno’s app does.
• Block Renovation: Specializing in high-quality bathroom remodels, Block offers comprehensive services but often at a premium price. Allreno delivers comparable results with significant cost savings.
• Angi.com: Angi connects homeowners with contractors but doesn’t offer the integrated design-to-execution experience that sets Allreno apart.
Bathroom Vanity: The Centerpiece of Your Renovation
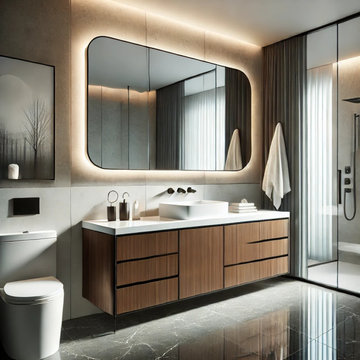
A bathroom vanity is often the focal point of any bathroom design. Choosing the right vanity can elevate the entire look and feel of your space. With Allreno, selecting the perfect bathroom vanity becomes an enjoyable experience. Our app allows you to browse a curated collection of high-quality vanities, customize dimensions, and visualize how they’ll look in your remodeled space.
Allreno’s vanities combine style, functionality, and durability, ensuring they not only look great but also stand the test of time. Whether you prefer a modern minimalist design or a classic, timeless aesthetic, Allreno has options to suit every taste.
Expert Tips for Bathroom Renovation
Renovating a bathroom requires careful planning and attention to detail. Here are some expert tips to keep in mind:
1. Set a Realistic Budget: Determine how much you’re willing to spend and allocate funds for unexpected expenses.
2. Plan the Layout: Consider functionality and flow when designing the space. Allreno’s app makes this step easy with AI-generated layouts tailored to your needs.
3. Choose Durable Materials: Bathrooms face moisture and wear, so opt for high-quality, water-resistant materials.
4. Focus on Lighting: Proper lighting enhances both the functionality and ambiance of your bathroom.
5. Hire Professionals: While DIY can be tempting, working with experienced contractors ensures the job is done right.
Explore Our Complete Guide to New York Bathroom Remodels
For New York homeowners, bathroom renovations come with unique challenges and opportunities. Explore our complete guide to New York bathroom remodels, with expert tips on bathroom renovation and a breakdown of costs to help you plan. From navigating small spaces to complying with building codes, our guide provides all the insights you need for a successful project.
Why Allreno is the Future of Bathroom Renovation
With Allreno, you’re not just renovating a bathroom—you’re transforming the way renovations are done. Our app eliminates the stress and inefficiency of traditional methods, empowering you to achieve stunning results in less time and with less hassle.
Ready to start your bathroom renovation journey? Download the Allreno app today and experience the difference for yourself. Whether it’s finding the perfect bathroom vanity or planning a complete remodel, Allreno is here to make your dream bathroom a reality.
Tags: ai design, bathroom renovation, renovation, bathroom design, interior design
4