
Search results for "Formulations" in Home Design Ideas
 DMB Interior Design-Build
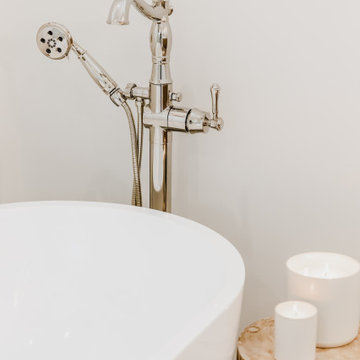
The Master Suite of the Elmwood project was formulated from scratch in the spacious addition of a branching household. Our clients wanted to keep the neighborhood they loved while creating space for a growing family. DMB Design came into the project at the blueprint phase, offering our intentional consideration to the layout of the space before its physical creation. This offered us an opportunity to present our idealized iteration of a self-contained sanctuary space. We created a spa-inspired atmosphere, starting with the floating tub that captured our hearts from the very beginning. You'll find plenty of space to hang your robe in the 15-foot walk in closet complete with floor-to-ceiling custom built-ins. The suite maintains an aura of romance, creating a sense of delicacy without an ounce of fussiness.
 Decorative Philosophy
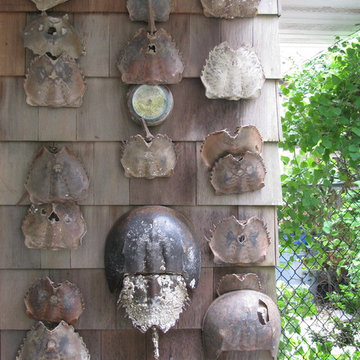
Karen's passion for the venerable horseshoe crab has existed since childhood. Having rescued many by putting them gently back into the surf, the ones that have been lunch for the gulls, find their way to the wall by her studio entrance. Note the latest, the largest she has ever found, lower center, just the other day. Must be over 40 years old, and look at the barnacles!
The collection isn't all out here, the more delicate molts some as small as a baby's hand, are kept safely in boxes for drawing and nature studies.
So happy that in so many states, this incredible creature that remains unchanged since many years prior to when dinosaurs roamed the earth, are now protected. Many drug companies are formulating the blood in the lab now or at least taking it without harming the crabs.
I just love these creatures.
Karen La Du for Decorative Philosophy
 Progressive Design Build
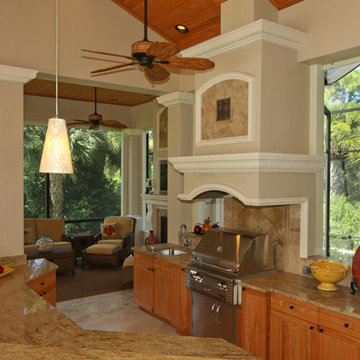
An extreme makeover turns an unassuming lanai deck into an outdoor oasis. These Bonita Bay homeowners loved the location of their home, but needed it to fit their current lifestyle. Because they love to entertain, they wanted to maximize their outdoor space—one that would accommodate a large family and lots of guests.
Working with Progressive Design Build, Mike Spreckelmeier helped the homeowners formulate a list of ideas about what they wanted to achieve in the renovation; then, guided them through the process of planning their remodel.
The renovation focused on reconfiguring the layout to extend the outdoor kitchen and living area—to include a new outdoor kitchen, dining area, sitting area and fireplace. Finishing details comprised a beautiful wood ceiling, cast stone accents, and porcelain tile. The lanai was also expanded to include a full size bocce ball court, which was fully encased in a beautiful custom colonnade and screen enclosure.
With the extension of the outdoor space came a need to connect the living area to the existing pool and deck. The pool and spa were refinished; and a well thought-out low voltage remote-control relay system was installed for easy control of all of the outdoor and landscape lighting, ceiling fans, and hurricane shutters.
This outdoor kitchen project turned out so well, the Bonita Bay homeowners hired Progressive Design Build to remodel the front of their home as well.
To create much needed space, Progressive Design Build tore down an existing two-car garage and designed and built a brand new 2.5-car garage with a family suite above. The family suite included three bedrooms, two bathrooms, additional air conditioned storage, a beautiful custom made stair system, and a sitting area. Also part of the project scope, we enlarged a separate one-car garage to a two-car garage (totaling 4.5 garages), and build a 4,000 sq. ft. driveway, complete with landscape design and installation.
Find the right local pro for your project
 Designs Daly
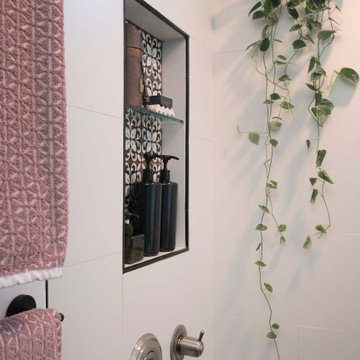
Designs Daly was commissioned to conduct a comprehensive remodel of the property to transform it into a highly desirable rental space. Our expert team executed a harmonious blend of contemporary, bohemian and aesthetically pleasing accents, which have been thoughtfully integrated throughout the primary residence, as well as the front and backyard patios and detached apartment. Our design approach has been formulated to meet the diverse needs of the potential occupants who are keen to reside in the vibrant environment of Ventura, CA.
 Laidlaw Schultz architects
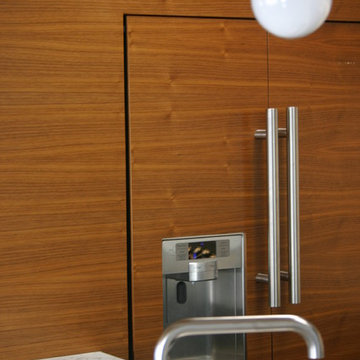
The project’s starting point was to understand the building’s original post and beam structure and to use that internal logic to formulate a sympathetic remodel. With an emphasis on the upper back unit, the owner’s private residence within this recently purchased Edward Killingsworth triplex, the first order of business was to strip the excess out and to return the complex to something that resembled the original. With a limited budget, the tact was to restore where possible, and to insert where needed, but always with a sympathetic eye. The kitchen quickly became the primary focus and it was soon realized that by removing the division between the existing galley and family room that the essence of the structural system could be revealed. Once opened the datum of the layered beams was adhered to with the kitchen reinforcing this overhead water line. The primary internal wall was then highlighted with a new wood veneer with the refrigerator recessed (borrowing a bit of space from the master closet) and the existing heater chromed.
 MarbleSeal Technologies
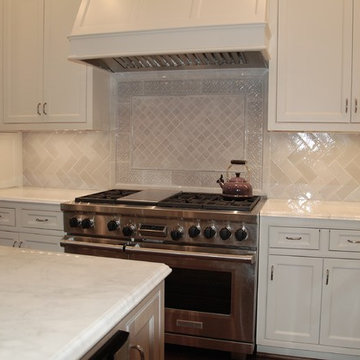
Clearstone™ is a specially formulated polyester resin based system, which is water clear and non-yellowing. It can be applied to many types of natural stone including marble, limestone, travertine, onyx and sandstone.
 Spray-Net Vancouver
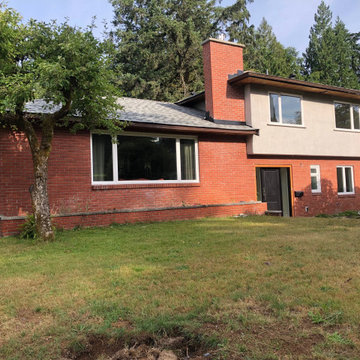
BEFORE photo. Full revamp including staining the brick, spray painting vinyl windows and spray painting the stucco. See after photo for the reveal!
Our stain delivers the breathability & permanent colour transformation you need to cost-effectively revamp your home.
Since the porosity of each brick can differ, we’ve formulated a stain that combines the adhesiveness of a paint with the permanent finish of a stain.
When latex paint is applied to brick, the film simply lays on top of the surface. This stops moisture inside of the brick from evaporating, leading to blistering & peeling. Our stain travels deep into the pores of your brick and through the chemical process of crystallization, it becomes part of the brick itself, allowing your brick to continuously breathe. For brick with decreased porosity, our stain also has the unique ability to grip to the top of the surface for optimal adhesion.
Give us a call to book your free in-home consultation!
(604) 260-4525
 Progressive Design Build
The goal for this husband and wife team was to create a functional home for their family. Because they love to entertain, they wanted to see how they could accommodate guests and extended family—improving the layout and functionality of their Bonita Bay home of more than eight years.
Having worked with remodeling contractors in the past, they were reluctant to proceed. They had experienced a remodeling fiasco that drug on beyond their expected completion dates and went well over budget. This time, they hired a local architect, an interior designer, and Progressive Design Build as the general contractor. The three teams worked together to formulate a clear vision and plans for the renovation. Once this husband and wife team knew exactly what they wanted to achieve and had a design plan in hand, they set about creating a modern and functional outdoor living space. The three teams worked together to finalize the design and the budget—no headaches, not delays.
After six months (two months finalizing the design and budget, and four months to build), this project finished on time and on budget and resulted in a beautiful outdoor living space that consisted of a massive outdoor kitchen with a separate dining area and sitting area, 20-foot tall vaulted ceilings, a beautiful glass fireplace and cost stone balustrades. It was finished with cast stone columns, huge stucco arches, a high tech lighting system and porcelain tile floors.
 Gappsi
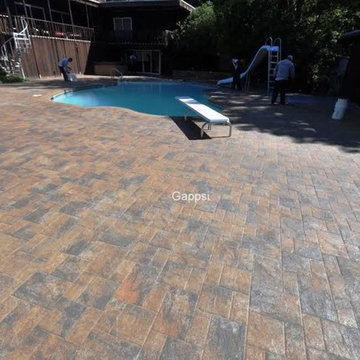
Nicolock oyster ridge stone pavers being sealed in Patchogue NY 11772. The sealing process begins with pressure washing the entire patio, removing all dirt/debris from the stone surface and in between the joints. Next, Nexgel Techniseal synthetic sand is applied in between the pavers joints and vibrated with a mechanical plate compactor. The plate compactor has rubber rollers to prevent the stones from cracking or scratching. This vibrating process allows the sand to fall in between the joints and density. Then, we clean the pavers with brooms and landscape blowers, to clean the excess sand from the pavers surface and to evenly spread the sand in between the pavers joints. The next step is to wash the pavers by misting water to penetrate the synthetic sand into the pavers joints all the way down below the pavers. The sand and water activate a chemical reaction of the pollen that’s in the sand to cause the sand to harden. Finally, the application of the sealer, two parts components urethane dealer, specially formulated for Gappsi, is applied to the pavers surface and the sand joints to prevent stones from staining, extend their life cycle and further enhance their texture, color, and surface. Call Gappsi at 631-543-1177 for any cleaning, sealing, paver driveways/patio restoration and repairs in Patchogue 11772 NY.
 Progressive Design Build
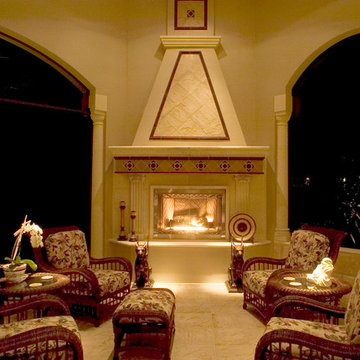
The goal for this husband and wife team was to create a functional home for their family. Because they love to entertain, they wanted to see how they could accommodate guests and extended family—improving the layout and functionality of their Bonita Bay home of more than eight years.
Having worked with remodeling contractors in the past, they were reluctant to proceed. They had experienced a remodeling fiasco that drug on beyond their expected completion dates and went well over budget. This time, they hired a local architect, an interior designer, and Progressive Design Build as the general contractor. The three teams worked together to formulate a clear vision and plans for the renovation. Once this husband and wife team knew exactly what they wanted to achieve and had a design plan in hand, they set about creating a modern and functional outdoor living space. The three teams worked together to finalize the design and the budget—no headaches, not delays.
After six months (two months finalizing the design and budget, and four months to build), this project finished on time and on budget and resulted in a beautiful outdoor living space that consisted of a massive outdoor kitchen with a separate dining area and sitting area, 20-foot tall vaulted ceilings, a beautiful glass fireplace and cost stone balustrades. It was finished with cast stone columns, huge stucco arches, a high tech lighting system and porcelain tile floors.
 Visionary Home Remodeling Inc.
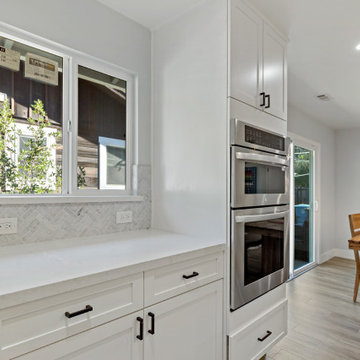
THIS MASTERPIECE WAS FORMULATED WITH ONE THING IN MIND : FAMILY! THIS BEAUTIFUL SPACE HAS A GREAT OPEN CONCEPT FROM THE FRONT DOOR TO THE FIREPLACE. WE WERE ABLE TO REINVENT THE SPACE BY KNOCKING DOWN TWO WALLS AND REALLY STRIPPING ALL THE ELECTRICAL AND PLUMBING FROM THE WALLS. THE CLIENTS WERE VERY HAPPY WITH THE RESULTS. THE SLIDING DOORS WERE A STRUCTUAL CHANGE AND THE ISLAND WAS ALSO A HUGE HIT FOR THE CLIENTS. ALL ISNTALLATIONS FO LIGHTING WINDOWS DOORS CABINETS FLOORING AND EVEN THE LAUNDRY AND BATHROOM WERE ALL DONE BY VHRCA INC AND VHRCA DESIGNS
 Cavé Studio
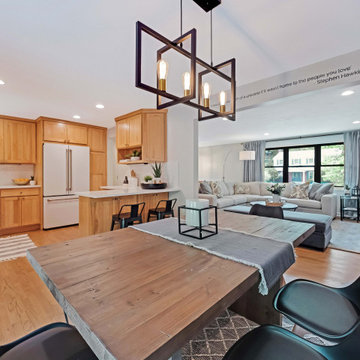
This is a view from the dining room to the kitchen and living room.
DTSH Interiors brought in furniture for the eat in kitchen, dining, and living room as well as added Belgian Linen window treatments.
The exterior of the home received a major facelift and transformation, including new light fixtures, updated roof and facia, updated wood beams, wood door, wood ceiling and stone added to the entrance and more. This took the home from a dated look to an updated and fresh "modern farmhouse" aesthetic.
The kitchen layout remained intact, while appliances, fixtures, hardware, countertops and backsplashes were upgraded . All three bathrooms in the house were also renovated, original hardwood floors were refinished and carpet and tile flooring throughout replaced. Additionally, the dated built-in brick fireplace on the ground floor game room was redesigned. The new fireplace design would now directly tie in with the modern farmhouse style of the exterior, complete with the addition of a large wooden mantle.
DTSH Interiors formulated a plan for six rooms; the living room, dining room, master bedroom, two children's bedrooms and ground floor game room, with the inclusion of the complete fireplace re-design.
The interior also received major upgrades during the whole-house renovation. All of the walls and ceilings were resurfaced, the windows, doors and all interior trim was re-done.
The end result was a giant leap forward for this family; in design, style and functionality. The home felt completely new and refreshed, and once fully furnished, all elements of the renovation came together seamlessly and seemed to make all of the renovations shine.
During the "big reveal" moment, the day the family finally returned home for their summer away, it was difficult for me to decide who was more excited, the adults or the kids!
The home owners kept saying, with a look of delighted disbelief "I can't believe this is our house!"
As a designer, I absolutely loved this project, because it shows the potential of an average, older Pittsburgh area home, and how it can become a well designed and updated space.
It was rewarding to be part of a project which resulted in creating an elegant and serene living space the family loves coming home to everyday, while the exterior of the home became a standout gem in the neighborhood.
 Windy City Painters
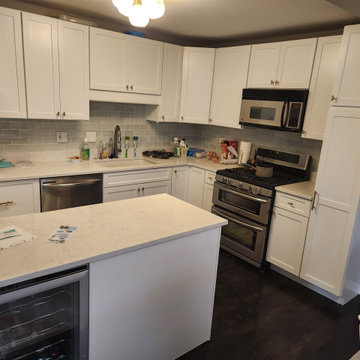
Refresh Your Space with the Best Kitchen Cabinet Painting in Chicago!
Looking for a Kitchen Cabinet Painting Transformation in Wicker Park? Our premier Chicago painting company just completed this stunning cabinet refinishing project, proving that you don't need a full remodel to achieve a high-end, designer look.
As local Chicago painters specializing in professional cabinet painting, we understand the unique aesthetic of Windy City homes—from historic bungalows to modern West Loop condos. Our team focuses on high-durability finishes and meticulous cabinet spraying techniques that deliver a smooth, factory-like appearance. From thorough degreasing and sanding to the final topcoat, every step is handled with the expert care your home deserves. These Wicker Park homeowners are absolutely thrilled with their kitchen's modern new vibe!
Kitchen Cabinet Painting: Frequently Asked Questions
How long does the professional kitchen cabinet painting process typically take from start to finish?
Most residential projects take between five to seven business days. This timeframe includes the removal of doors for off-site spraying, meticulous on-site masking of your kitchen "shell," and the necessary curing time between coats to ensure a rock-hard, durable finish.
What type of paint or finish do you use to ensure the cabinets don't chip or peel over time?
We utilize industrial-grade Italian coatings or high-end waterborne alkyd enamels specifically formulated for cabinetry. These products are much harder than standard wall paint, providing superior resistance to moisture, kitchen grease, and the daily wear and tear of a busy Chicago household.
Do I need to empty all of my kitchen cabinets and drawers before the painters arrive?
While you don't necessarily need to empty the backs of the shelves, we require all items to be moved at least six inches back from the front edges. However, for the best dust-free results, we highly recommend emptying them completely to protect your cookware.
Can you paint cabinets that are made of laminate, thermofoil, or or dark-stained oak?
Yes, we can! The secret lies in the bonding primer. We use specialized high-adhesion primers that "bite" into slick surfaces like laminate or seal the grain of deep oak, ensuring the color stays vibrant and the surface remains perfectly smooth without peeling.
How should I clean and maintain my newly painted cabinets to keep them looking fresh for years?
To maintain the finish, simply wipe them down with a soft microfiber cloth and a gentle mixture of warm water and mild dish soap. Avoid using harsh chemical cleaners, abrasive scrubbing pads, or wax-based polishes, as these can break down the protective topcoat over time.

 Laidlaw Schultz architects
The project’s starting point was to understand the building’s original post and beam structure and to use that internal logic to formulate a sympathetic remodel. With an emphasis on the upper back unit, the owner’s private residence within this recently purchased Edward Killingsworth triplex, the first order of business was to strip the excess out and to return the complex to something that resembled the original. With a limited budget, the tact was to restore where possible, and to insert where needed, but always with a sympathetic eye. The kitchen quickly became the primary focus and it was soon realized that by removing the division between the existing galley and family room that the essence of the structural system could be revealed. Once opened the datum of the layered beams was adhered to with the kitchen reinforcing this overhead water line. The primary internal wall was then highlighted with a new wood veneer with the refrigerator recessed (borrowing a bit of space from the master closet) and the existing heater chromed.
 All Surface Restoration
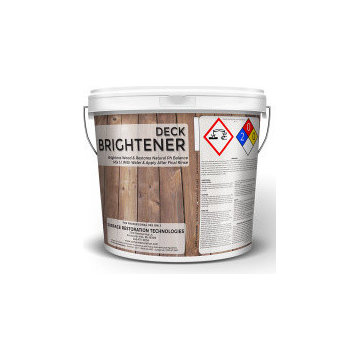
Deck Brightener is designed to be used after Deck Stripper to neutralize the surface and restore the natural beauty of exterior wood. Deck Brightener removes rust or tannin stains caused by fallen leaves and is recommended for use on all species of wood, including redwood.
Deck Brightener is an oxalic acid solution that removes dirt, grime, tannin, rust, and fungi stains from wood surfaces. This liquid concentrate is mixed with water (two parts water to one part concentrate) to brighten and restore the natural beauty of exterior wood. Deck Brightener will not harm wood fibers, grass, or plants when used properly. Deck Brightener is recommended for surface preparation prior to initial application of clear and semi-transparent finishes and stains. It is used as a neutralizer and brightener for all wood species that have been cleaned with Deck Stripper.
Even new wood needs to be cleaned in order to remove mill scale so the surface can more easily absorb deck stains. Deck Brightener is not formulated to remove intact paint, stain, or clear finishes and may dull painted and metal surfaces if not quickly rinsed.
Order Deck Brightener shipped via UPS Ground at:
www.surfacerestoration.com/shop
 Adobe Interiors
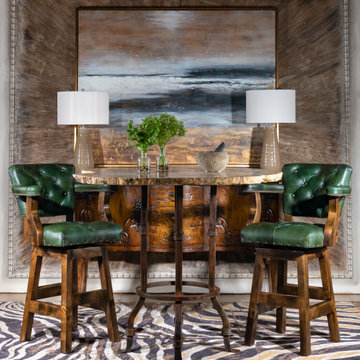
Our Chisum Hunter Barstool is available in both counter and bar height. Featuring a full 360 degree swivel, padded arm rest and button tufted seat and back. Using a rich, olive green burnished leather give the chisum Hunters Barstool a rustic elegant sophistication. American Alder wood is used to construct the frame with a dark walnut hand rubbed finish. The Chisum Hunter Barstool is 100% American Made to the highest standards of quality and craftsmanship.
Overall Barstool Dimensions: 43" H x 26" W x 22" D
Seat Height: 30"
Top of Arm Height: 40"
Overall Counter Stool Dimension: 38" H x 26" W x 22" D
Seat Height: 25"
Top of Arm Height: 35"
Leather Description: Dyes and waxes are hand applied to South American raw material to impart a transparent clarity. This coupled with substrate gives the leather a sophisticated, pebble grain appearance. All of the aniline dyes applied to the hides are hand rubbed in North Carolina by skilled artisans drawing from years of creative experience creating an impressive patina. The absence of pigments adds to the natural softness of the hides. A light protective top, utilizing a proprietary formulation developed by the tannery creates the exquisite touch this leather is known for and makes the leather suitable for active family homes. Because of the depth and transparency of this leather, natural markings will be exposed and should not be confused as defects or deficiencies, but appreciated as Nature's Autograph of Authenticity found in the finest full grain leathers.
100% top grain cowhide leather is characterized by variations in shade, texture, color and grain. Healed marks and scars are to be expected and enhance the natural beauty of the hides. These variations should not be considered defects as they are normal and unique features of genuine 100% top grain cowhide leather.
Frame Construction: Made with American Alder Wood, our frames are glued, screwed and dowelled at the joints. Two coats of high quality stain is hand rubbed on the wood finish and then sealed with industrial grade clear coat.
 McClure Tables
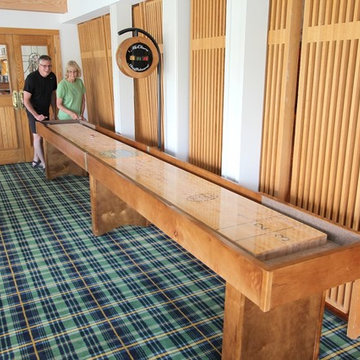
The perfect furniture for your game room or man cave, McClure's Competitor shuffleboard table features a 18'' by 2'' hard maple playing field with a specially formulated finish. Each table comes with its own complete lifetime warranty, and comes available in Cinnamon, Chestnut, Mahogany, or Mocha finish on Maple. We also custom finish any shuffleboard to complement any game room or bar decor.
Each Competitor II shuffleboard table is made in Michigan and crafted from 100% solid North American maple. Available in 9, 12, 14, and 16 foot sizes, your order comes complete with 8 pucks and 1 can of shuffleboard wax powder. Additional options include a traditional or electronic scoring unit in a mtaching finish. McClure Tables shuffleboards are built with the highest quality local material and first-class craftsmanship.
 Tile Doctor Ltd
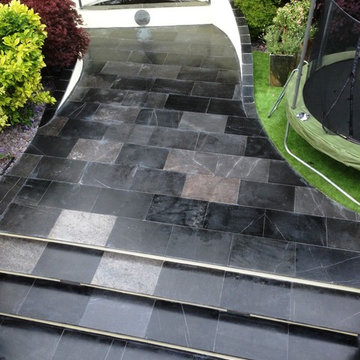
Details of a Limestone patio I was asked to clean at a property in the affluent neighbourhood of Alderly Edge, Cheshire, famous for being the home of choice for several Premier League footballers. In fact Alderly Edge, which lies not too far south of Manchester and is one of the most sought after places to live in the UK. My client was unhappy with the look of the patio had previously been sealed using a topical sealer, and this had left the tiles looking dull and lifeless.
Limestone is a fantastic natural stone, popularly used for internal floors as well as patios, it comes in a variety of fantastic colours and shades. What my client really wanted for the patio was a wet look to bring out the character of the Limestone. So, my job was to strip the old sealer off and replace it will one that would achieve the desired finish.
To strip the old sealer from the patio, I used a series of fine diamond encrusted burnishing pads which are applied in order from Coarse, Medium, Fine and then Super Fine. The coarse pad is effective at stripping off sealer without damaging the tile, and without the need to use a liquid product. The finer burnishing pads then rebuild the appearance of the Limestone to provide a nice deep shine.
The new sealer of choice was Tile Doctor Colour Grow, which can be used on both internal and external natural stone surfaces. Colour Grow is an impregnating sealer which penetrates deep into the pores of the stone, providing both long-lasting resistance and durable protection against ingrained dirt and stains. As you can see from the photos, Colour Grow is also specially formulated to intensify the natural colours in the stone, and it really helped to bring the Limestone back to life again.
The finished job left this patio with the wet, polished look my client had requested. She was very pleased with the result and amazed by just how quickly such a marked difference could be made. Another happy client!
Steve Keary
North Cheshire Tile Doctor
 Tile Doctor Ltd
Another quick job here in Cheshire, this time in the town of Wilmslow. Much like Alderly Edge, where I recently completed another job, Wilmslow is an affluent area known for its upmarket lifestyle and as a popular option for residence amongst celebrities and famous figures. In fact it is currently, and has previously been, home to several Premier League footballers from the nearby clubs Manchester United and Manchester City.
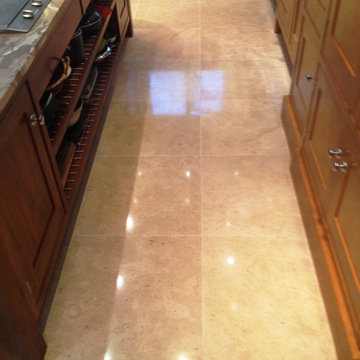
This job was another case of where a tiled floor had lost its shine due to the sealer wearing away over time. In this instance, my client had a Travertine tiled floor in her kitchen that she wanted to me to restore back to looking at its best.
Travertine is a fantastic natural stone which possesses unique features that no other stone can offer. It offers a particularly distinctive design style, making it a popular choice both for commercial and residential use. Many homeowners use Travertine tiles for kitchen flooring, bathroom walls and floors and for external floors, such as patios.
The process of stripping off old sealer can be done effectively and relatively quickly without using a liquid stripper. The best method is to use a series of fine diamond encrusted burnishing pads, which is exactly what I did in this case. The burnishing pads are applied in sequence from coarse, medium, fine and superfine to remove the old sealer without damaging the Travertine and then re-polish to a lovely polished shine.
One the floor had been burnished, rinsed and dried; I proceeded to re-seal the floor with Tile Doctor Colour Grow. Colour Grow is particularly effective when to seal porous natural stone surfaces such as Travertine and Limestone, whether internal or external. This is because the product is specially formulated to penetrate deep into the pores of the stone, providing durable surface protection from within.
The other key benefit of Colour Grow is that it intensifies the colours within the stone, as you can from the photos. This adds additional character and flair to already impressive household features like this Travertine floor.
The finished results were exactly what my client had hoped for. It goes to show that with the right methods and know-how such a big difference can be made to the appearance of tiled floors. I was very happy to help.
Steve Keary
North Cheshire Tile Doctor
20