
Search results for "Improve interesting" in Home Design Ideas

 Mottram Architecture
Timber frame homes offer unique challenges during a remodel. What often makes them beautiful and attractive to most homeowners, also makes them challenging for space requirements.
Context: The lovely couple that owned this home were struggling with some interesting floor plan challenges that just didn't work for their family. The loved the beautiful timbers and woodwork of their home, but the dramatically sloping ceilings on the second floor, particularly in the bathroom, just didn't work for this 1 1/2 bath home. Needing to use the skylight to approach the toilet was a less then ideal scenario. Although the bathroom footprint was more then adequate, the sloped ceiling only made half of the space useable. Check out the Before/After post on our blog to see the photos of the house pre-renovation. As much as they loved all the wood features in their home, another challenge they had was light. The wood ceiling made everything inside the house darker, even with a fantastic array of south facing windows, there were spaces in the home that felt dark and small. When they contacted us they wanted to know how could they make their brighter and more inviting, were there solutions to the 2nd floor sloped ceiling issues, and if they were going to do all of this work, how could they make their home more comfortable and efficient. A nagging water leak in the upstairs bathroom spurred them into action and here is how we solved their dilemma.
Conclusion: First, we added a little dormer to the rear of the house so we could get full headroom in nearly all of the upstairs bathroom! Then we decided to extend that dormer one more timber bay over to create a walk in closet with natural light and plenty of space. Since we were contemplating energy efficiency, we resolved a nagging issue that is present in a lot of timber frame construction, air tightness. Commonly found in timber frame construction, fiberglass insulation is installed in the rafter bays and board ceilings are installed over top. Unfortunately, board ceilings are anything but air tight, and fiberglass insulation needs to be in an airtight cavity for maximum effectiveness. So we were able to solve two issues at the same time for this homeowner. We removed the board ceiling and fiberglass insulation, we dense packed the rafter bays with cellulose insulation, and installed sheetrock in place of the boards. The boards were salvaged for re-use by the homeowner, and the space and light quality was dramatically improved. Some may think that losing the board ceiling took something away from the space, but what you'll see in the pictures is that it highly accentuates the heavy timbers and really makes them stand out in a beautiful way. Now with this added airtightness, better insulation, and brighter space, the homeowner hardly runs their wood stove, and it's so quiet in the space, an added bonus from changing the insulation. It became necessary to also add a sheetrock ceiling to the living room to hide the plumbing from the new bathroom layout above. Changing this ceiling gave the homeowner some real quality lighting that was lacking in the living room before. The brighter ceiling and new lighting layout completely transforms the living room into a space you want to hang out, even though the layout didn't change at all. When the homeowner saw the finished spaces she said "I can't believe this is my house, I want to live in this house"
Energy Efficiency: I touched a little on the efficiency above, but like all projects done with Mottram Architecture, we always want to leave you with a little extra. Timber frame construction with board ceilings and fiberglass insulation are notoriously leaky! If you want to know what we think about fiberglass insulation, check our our blog post on Why Fiberglass Insulation Sucks. By installing cellulose insulation and covering it with sheetrock we were able to greatly reduce the heat flowing out of this home. It not only improves cashflow it improves the comfort level in the space. Who wants to sit in their living room and feel a draft? Let us remind you, we are not saying cellulose insulation is an air barrier, we use the sheetrock to help with that, but it does significantly reduce the air flow over fiberglass insulation. And when we reduce the airflow, we reduce the heat flow. And when we reduce the heat flow, we reduce the need to re-heat that drafty air from outside. When it comes to energy efficiency the first and best place to start is air infiltration. We greatly reduced the air infiltration with the new insulation, but we also added a hat and warm boots. What I mean by that is, we improved the insulation in the roof, and we installed insulation in the basement. Maybe it's a silly analogy, but when you think about keeping warm, we always start with the hat and boots! With sustainability in mind, the next project will be to add a deck to the front of this house with rain catchment barrels from the metal roof. They are planning to plant a garden in the spring and the rain catchment system will help to irrigate the new garden.
Builder: East Shore Builders
Photographer: Michael Eric Berube
 Mottram Architecture
Timber frame homes offer unique challenges during a remodel. What often makes them beautiful and attractive to most homeowners, also makes them challenging for space requirements.
Context: The lovely couple that owned this home were struggling with some interesting floor plan challenges that just didn't work for their family. The loved the beautiful timbers and woodwork of their home, but the dramatically sloping ceilings on the second floor, particularly in the bathroom, just didn't work for this 1 1/2 bath home. Needing to use the skylight to approach the toilet was a less then ideal scenario. Although the bathroom footprint was more then adequate, the sloped ceiling only made half of the space useable. Check out the Before/After post on our blog to see the photos of the house pre-renovation. As much as they loved all the wood features in their home, another challenge they had was light. The wood ceiling made everything inside the house darker, even with a fantastic array of south facing windows, there were spaces in the home that felt dark and small. When they contacted us they wanted to know how could they make their brighter and more inviting, were there solutions to the 2nd floor sloped ceiling issues, and if they were going to do all of this work, how could they make their home more comfortable and efficient. A nagging water leak in the upstairs bathroom spurred them into action and here is how we solved their dilemma.
Conclusion: First, we added a little dormer to the rear of the house so we could get full headroom in nearly all of the upstairs bathroom! Then we decided to extend that dormer one more timber bay over to create a walk in closet with natural light and plenty of space. Since we were contemplating energy efficiency, we resolved a nagging issue that is present in a lot of timber frame construction, air tightness. Commonly found in timber frame construction, fiberglass insulation is installed in the rafter bays and board ceilings are installed over top. Unfortunately, board ceilings are anything but air tight, and fiberglass insulation needs to be in an airtight cavity for maximum effectiveness. So we were able to solve two issues at the same time for this homeowner. We removed the board ceiling and fiberglass insulation, we dense packed the rafter bays with cellulose insulation, and installed sheetrock in place of the boards. The boards were salvaged for re-use by the homeowner, and the space and light quality was dramatically improved. Some may think that losing the board ceiling took something away from the space, but what you'll see in the pictures is that it highly accentuates the heavy timbers and really makes them stand out in a beautiful way. Now with this added airtightness, better insulation, and brighter space, the homeowner hardly runs their wood stove, and it's so quiet in the space, an added bonus from changing the insulation. It became necessary to also add a sheetrock ceiling to the living room to hide the plumbing from the new bathroom layout above. Changing this ceiling gave the homeowner some real quality lighting that was lacking in the living room before. The brighter ceiling and new lighting layout completely transforms the living room into a space you want to hang out, even though the layout didn't change at all. When the homeowner saw the finished spaces she said "I can't believe this is my house, I want to live in this house"
Energy Efficiency: I touched a little on the efficiency above, but like all projects done with Mottram Architecture, we always want to leave you with a little extra. Timber frame construction with board ceilings and fiberglass insulation are notoriously leaky! If you want to know what we think about fiberglass insulation, check our our blog post on Why Fiberglass Insulation Sucks. By installing cellulose insulation and covering it with sheetrock we were able to greatly reduce the heat flowing out of this home. It not only improves cashflow it improves the comfort level in the space. Who wants to sit in their living room and feel a draft? Let us remind you, we are not saying cellulose insulation is an air barrier, we use the sheetrock to help with that, but it does significantly reduce the air flow over fiberglass insulation. And when we reduce the airflow, we reduce the heat flow. And when we reduce the heat flow, we reduce the need to re-heat that drafty air from outside. When it comes to energy efficiency the first and best place to start is air infiltration. We greatly reduced the air infiltration with the new insulation, but we also added a hat and warm boots. What I mean by that is, we improved the insulation in the roof, and we installed insulation in the basement. Maybe it's a silly analogy, but when you think about keeping warm, we always start with the hat and boots! With sustainability in mind, the next project will be to add a deck to the front of this house with rain catchment barrels from the metal roof. They are planning to plant a garden in the spring and the rain catchment system will help to irrigate the new garden.
Builder: East Shore Builders
Photographer: Michael Eric Berube

 Chi Renovation & Design
A new and improved kitchen layout that is perfect for this young family of four. With ample storage in the kitchen island and upper cabinets, we were able to keep the design low-maintenance and easy to keep clean, as clutter would have taken away from the light and airy aesthetic. A light gray kitchen island and subway tile backsplash paired with the bright white countertops and cabinets gave the space a refreshing contemporary look. Darker gray contrasts with the lighter color palette through the stainless steel appliances and unique pendant lights.
To the corner of the kitchen, you'll find a discreet built-in study. Fully equipped for those who work from home or for the children to finish school projects. This small office-kitchen space duo is perfect for bringing the whole family together, for meals and throughout the day.
Designed by Chi Renovation & Design who serve Chicago and it's surrounding suburbs, with an emphasis on the North Side and North Shore. You'll find their work from the Loop through Lincoln Park, Skokie, Wilmette, and all the way up to Lake Forest.
For more about Chi Renovation & Design, click here: https://www.chirenovation.com/
To learn more about this project, click here: https://www.chirenovation.com/portfolio/contemporary-kitchen-remodel/#kitchen-remodeling
Find the right local pro for your project

 TVL Creative Ltd.
This project is one of the most extensive TVL scopes to date! This house sits in a phenomenal site location in Golden and features a number of incredible and original architectural details. However, years of shifting had caused massive structural damage to the home on both the main and basement levels, resulting in shifting door frames, split drywall, and sinking floors. These shifts prompted the clients to seek remodeling assistance in the beginning of their renovation adventure. At first, the scope involved a new paint and lighting scheme with a focus on wall repair and structural improvement. However, the scope eventually evolved into a re-design of the entire home. Few spaces in this house were left untouched, with the remodeling scope eventually including the kitchen, living room, pantry, entryway and staircase, master bedroom, master bathroom, full basement, and basement bedrooms and bathrooms. Expanding the scope in this way allowed for a design that is cohesive space to space, and creates an environment that captures the essence of the family's persona at every turn. There are many stunning elements to this renovation, but a few favorites include the insanely gorgeous custom steel elements at the front entry, Tharp custom cabinetry in the kitchen and pantry, and unique stone in just about every room of the house. Our clients for this project are both geologists. This alone opened an entire world of unique interest in material that we have never explored before. From natural quartzite countertops that mimic mountain ranges to silky metallic accent tiles behind the bathtub, this project does not shy away from unique stone finds and accents. Conceptually, the clients' love for stone and natural elements is present just about everywhere: the dining room chandelier conceptually takes the form of stalactite, the island pendants are formed concrete, stacked stone adorns the large back wall of the shower, and a back-lit onyx art piece sits in a dramatic niche at the home's entry. We love the dramatic result of this renovation and are so thrilled that our clients can enjoy a home that truly reflects their passions for years to come!
 TVL Creative Ltd.
This project is one of the most extensive TVL scopes to date! This house sits in a phenomenal site location in Golden and features a number of incredible and original architectural details. However, years of shifting had caused massive structural damage to the home on both the main and basement levels, resulting in shifting door frames, split drywall, and sinking floors. These shifts prompted the clients to seek remodeling assistance in the beginning of their renovation adventure. At first, the scope involved a new paint and lighting scheme with a focus on wall repair and structural improvement. However, the scope eventually evolved into a re-design of the entire home. Few spaces in this house were left untouched, with the remodeling scope eventually including the kitchen, living room, pantry, entryway and staircase, master bedroom, master bathroom, full basement, and basement bedrooms and bathrooms. Expanding the scope in this way allowed for a design that is cohesive space to space, and creates an environment that captures the essence of the family's persona at every turn. There are many stunning elements to this renovation, but a few favorites include the insanely gorgeous custom steel elements at the front entry, Tharp custom cabinetry in the kitchen and pantry, and unique stone in just about every room of the house. Our clients for this project are both geologists. This alone opened an entire world of unique interest in material that we have never explored before. From natural quartzite countertops that mimic mountain ranges to silky metallic accent tiles behind the bathtub, this project does not shy away from unique stone finds and accents. Conceptually, the clients' love for stone and natural elements is present just about everywhere: the dining room chandelier conceptually takes the form of stalactite, the island pendants are formed concrete, stacked stone adorns the large back wall of the shower, and a back-lit onyx art piece sits in a dramatic niche at the home's entry. We love the dramatic result of this renovation and are so thrilled that our clients can enjoy a home that truly reflects their passions for years to come!

 Taproot Garden Design
Patrick & Topaze McCaffery - Taproot Garden Design
"October 2015: Plants in this design include: Arctostaphylos 'Byrd Hill' (Manzanita), Arctostaphylos densiflora 'Howard McMinn' (Manzanita), Calamagrostis foliosa (Mendocino Reed Grass), Ceanothus 'Ray Hartman' (Mountain Lilac), Cercis occidentalis (Western Redbud)
Citrus aurantifolia (Mexican Thornless Lime, Citrus x meyeri (Improved Meyer Lemon), Diplacus (Mimulus) aurantiacus (Sticky Monkey Flower), Epilobium (aka Zaushneria) cannum 'Everett's Choice' (California Fuchsia), Eriogonum umbellatum polyanthum 'Shasta Sulfur' (Sulfur Buckwheat), Galvezia speciosa ‘Firecracker’ (Bush Island Snapdragon), Lagerstroemia indica 'Natchez' (Crape Myrtle),
Penstemon heterophyllus 'Blue Springs' (Foothill Penstemon), Prunus persica ‘Hale Haven’ (Peach Tree), Prunus persica 'Red Baron' (Peach Tree), Punica granatum 'Wonderful' (Pomegranate Tree), Salvia clevelandii ‘Celestial Blue’ (Cleveland Sage), Salvia sonomensis ‘Mrs. Beard’ (Mrs. Beard Creeping Sage), Salvia spathacea (Hummingbird Sage)."
 Mottram Architecture
Timber frame homes offer unique challenges during a remodel. What often makes them beautiful and attractive to most homeowners, also makes them challenging for space requirements.
Context: The lovely couple that owned this home were struggling with some interesting floor plan challenges that just didn't work for their family. The loved the beautiful timbers and woodwork of their home, but the dramatically sloping ceilings on the second floor, particularly in the bathroom, just didn't work for this 1 1/2 bath home. Needing to use the skylight to approach the toilet was a less then ideal scenario. Although the bathroom footprint was more then adequate, the sloped ceiling only made half of the space useable. Check out the Before/After post on our blog to see the photos of the house pre-renovation. As much as they loved all the wood features in their home, another challenge they had was light. The wood ceiling made everything inside the house darker, even with a fantastic array of south facing windows, there were spaces in the home that felt dark and small. When they contacted us they wanted to know how could they make their brighter and more inviting, were there solutions to the 2nd floor sloped ceiling issues, and if they were going to do all of this work, how could they make their home more comfortable and efficient. A nagging water leak in the upstairs bathroom spurred them into action and here is how we solved their dilemma.
Conclusion: First, we added a little dormer to the rear of the house so we could get full headroom in nearly all of the upstairs bathroom! Then we decided to extend that dormer one more timber bay over to create a walk in closet with natural light and plenty of space. Since we were contemplating energy efficiency, we resolved a nagging issue that is present in a lot of timber frame construction, air tightness. Commonly found in timber frame construction, fiberglass insulation is installed in the rafter bays and board ceilings are installed over top. Unfortunately, board ceilings are anything but air tight, and fiberglass insulation needs to be in an airtight cavity for maximum effectiveness. So we were able to solve two issues at the same time for this homeowner. We removed the board ceiling and fiberglass insulation, we dense packed the rafter bays with cellulose insulation, and installed sheetrock in place of the boards. The boards were salvaged for re-use by the homeowner, and the space and light quality was dramatically improved. Some may think that losing the board ceiling took something away from the space, but what you'll see in the pictures is that it highly accentuates the heavy timbers and really makes them stand out in a beautiful way. Now with this added airtightness, better insulation, and brighter space, the homeowner hardly runs their wood stove, and it's so quiet in the space, an added bonus from changing the insulation. It became necessary to also add a sheetrock ceiling to the living room to hide the plumbing from the new bathroom layout above. Changing this ceiling gave the homeowner some real quality lighting that was lacking in the living room before. The brighter ceiling and new lighting layout completely transforms the living room into a space you want to hang out, even though the layout didn't change at all. When the homeowner saw the finished spaces she said "I can't believe this is my house, I want to live in this house"
Energy Efficiency: I touched a little on the efficiency above, but like all projects done with Mottram Architecture, we always want to leave you with a little extra. Timber frame construction with board ceilings and fiberglass insulation are notoriously leaky! If you want to know what we think about fiberglass insulation, check our our blog post on Why Fiberglass Insulation Sucks. By installing cellulose insulation and covering it with sheetrock we were able to greatly reduce the heat flowing out of this home. It not only improves cashflow it improves the comfort level in the space. Who wants to sit in their living room and feel a draft? Let us remind you, we are not saying cellulose insulation is an air barrier, we use the sheetrock to help with that, but it does significantly reduce the air flow over fiberglass insulation. And when we reduce the airflow, we reduce the heat flow. And when we reduce the heat flow, we reduce the need to re-heat that drafty air from outside. When it comes to energy efficiency the first and best place to start is air infiltration. We greatly reduced the air infiltration with the new insulation, but we also added a hat and warm boots. What I mean by that is, we improved the insulation in the roof, and we installed insulation in the basement. Maybe it's a silly analogy, but when you think about keeping warm, we always start with the hat and boots! With sustainability in mind, the next project will be to add a deck to the front of this house with rain catchment barrels from the metal roof. They are planning to plant a garden in the spring and the rain catchment system will help to irrigate the new garden.
Builder: East Shore Builders
Photographer: Michael Eric Berube
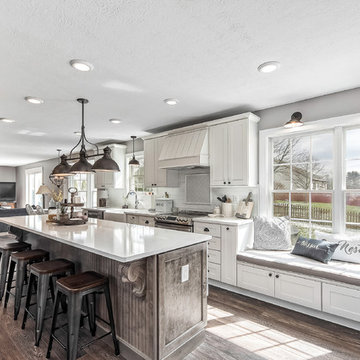
Sponsored
Sunbury, OH

J.Holderby - Renovations
Franklin County's Leading General Contractors - 2X Best of Houzz!
 TVL Creative Ltd.
This project is one of the most extensive TVL scopes to date! This house sits in a phenomenal site location in Golden and features a number of incredible and original architectural details. However, years of shifting had caused massive structural damage to the home on both the main and basement levels, resulting in shifting door frames, split drywall, and sinking floors. These shifts prompted the clients to seek remodeling assistance in the beginning of their renovation adventure. At first, the scope involved a new paint and lighting scheme with a focus on wall repair and structural improvement. However, the scope eventually evolved into a re-design of the entire home. Few spaces in this house were left untouched, with the remodeling scope eventually including the kitchen, living room, pantry, entryway and staircase, master bedroom, master bathroom, full basement, and basement bedrooms and bathrooms. Expanding the scope in this way allowed for a design that is cohesive space to space, and creates an environment that captures the essence of the family's persona at every turn. There are many stunning elements to this renovation, but a few favorites include the insanely gorgeous custom steel elements at the front entry, Tharp custom cabinetry in the kitchen and pantry, and unique stone in just about every room of the house. Our clients for this project are both geologists. This alone opened an entire world of unique interest in material that we have never explored before. From natural quartzite countertops that mimic mountain ranges to silky metallic accent tiles behind the bathtub, this project does not shy away from unique stone finds and accents. Conceptually, the clients' love for stone and natural elements is present just about everywhere: the dining room chandelier conceptually takes the form of stalactite, the island pendants are formed concrete, stacked stone adorns the large back wall of the shower, and a back-lit onyx art piece sits in a dramatic niche at the home's entry. We love the dramatic result of this renovation and are so thrilled that our clients can enjoy a home that truly reflects their passions for years to come!
 TVL Creative Ltd.
This project is one of the most extensive TVL scopes to date! This house sits in a phenomenal site location in Golden and features a number of incredible and original architectural details. However, years of shifting had caused massive structural damage to the home on both the main and basement levels, resulting in shifting door frames, split drywall, and sinking floors. These shifts prompted the clients to seek remodeling assistance in the beginning of their renovation adventure. At first, the scope involved a new paint and lighting scheme with a focus on wall repair and structural improvement. However, the scope eventually evolved into a re-design of the entire home. Few spaces in this house were left untouched, with the remodeling scope eventually including the kitchen, living room, pantry, entryway and staircase, master bedroom, master bathroom, full basement, and basement bedrooms and bathrooms. Expanding the scope in this way allowed for a design that is cohesive space to space, and creates an environment that captures the essence of the family's persona at every turn. There are many stunning elements to this renovation, but a few favorites include the insanely gorgeous custom steel elements at the front entry, Tharp custom cabinetry in the kitchen and pantry, and unique stone in just about every room of the house. Our clients for this project are both geologists. This alone opened an entire world of unique interest in material that we have never explored before. From natural quartzite countertops that mimic mountain ranges to silky metallic accent tiles behind the bathtub, this project does not shy away from unique stone finds and accents. Conceptually, the clients' love for stone and natural elements is present just about everywhere: the dining room chandelier conceptually takes the form of stalactite, the island pendants are formed concrete, stacked stone adorns the large back wall of the shower, and a back-lit onyx art piece sits in a dramatic niche at the home's entry. We love the dramatic result of this renovation and are so thrilled that our clients can enjoy a home that truly reflects their passions for years to come!
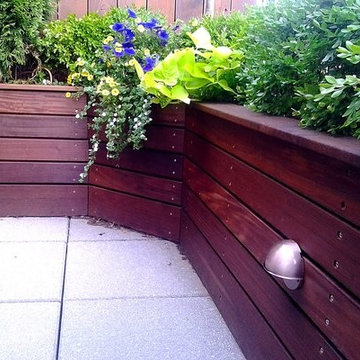
 NY Plantings Irrigation and Landscape Lighting
New york plantings terrace garden design nyc with custom built planters and landscape lights by newyorkplantings.
Greenroof is still in its infancy even though the concept has been around for a long time, even a hundred years or more.
NY plantings has the concept and business model to service the trade by providing expert contracting services, experienced professional staff and project management that effectively and efficiently gets the job done.
Who would be interested in working with nyp garden designers and landsp...nyc?
Landscape architects, designers, garden designers, landscape design professionals, general contractors, property owners, property management companies, project managers and anyone who requires a company that first is a master garden and NY landscaping company. Tree planting, garden installation and complete plantings installations including personalized design touches such as specimen shrubs, flowering trees, dwarf conifers and trees, landscape boulders and moss rock, flowers and climbers.
NY Plantings can work from a design concept only without requiring a detailed landscape drawing or garden plan. True enthusiasm and years of hands on experience mean that you don’t even need a detailed planting plan; in most cases lead designer, Todd Nappi makes suggestions or improvements to the typical NYC landscape Designer provided garden design plan that both achieve highly desirable results and can possibly even save money vs. the cost of the original rooftop garden design or traditional landscape.
A high technical aptitude with experience in building rooftop and terrace gardens from scratch, solving challenging issues onsite and the ability to make the right decisions prove that NY Plantings is a resource as a landscape or rooftop garden contractor to the Landscape Design trade.
Besides Gardening, Drip irrigation and landscape lighting NY Plantings has been also specializing in hard capes, outdoor construction such as decks, pergolas, custom built planter boxes, custom fence, lattice, trellis and living walls (vertical gardening)
Nyc terrace garden and custom built planter design by newyorkplantings. Greenroof design and construction is the new frontier for any urban epicenter and NY Plantings green roofing installers are up to the task.
As the green roof industry becomes more mature so will NY Plantings remain a resource as a contractor for providing and installing greenroof systems in Manhattan and the NY Metro areas.
#newyorkplantings
New York Plantings Garden Designers and Landscape contracting
432 E 14st
New York, NY 10009
Call: 347-558-7051
site url: http://www.newyorkplantings.com/
info@newyorkplantings.com
 Mottram Architecture
Timber frame homes offer unique challenges during a remodel. What often makes them beautiful and attractive to most homeowners, also makes them challenging for space requirements.
Context: The lovely couple that owned this home were struggling with some interesting floor plan challenges that just didn't work for their family. The loved the beautiful timbers and woodwork of their home, but the dramatically sloping ceilings on the second floor, particularly in the bathroom, just didn't work for this 1 1/2 bath home. Needing to use the skylight to approach the toilet was a less then ideal scenario. Although the bathroom footprint was more then adequate, the sloped ceiling only made half of the space useable. Check out the Before/After post on our blog to see the photos of the house pre-renovation. As much as they loved all the wood features in their home, another challenge they had was light. The wood ceiling made everything inside the house darker, even with a fantastic array of south facing windows, there were spaces in the home that felt dark and small. When they contacted us they wanted to know how could they make their brighter and more inviting, were there solutions to the 2nd floor sloped ceiling issues, and if they were going to do all of this work, how could they make their home more comfortable and efficient. A nagging water leak in the upstairs bathroom spurred them into action and here is how we solved their dilemma.
Conclusion: First, we added a little dormer to the rear of the house so we could get full headroom in nearly all of the upstairs bathroom! Then we decided to extend that dormer one more timber bay over to create a walk in closet with natural light and plenty of space. Since we were contemplating energy efficiency, we resolved a nagging issue that is present in a lot of timber frame construction, air tightness. Commonly found in timber frame construction, fiberglass insulation is installed in the rafter bays and board ceilings are installed over top. Unfortunately, board ceilings are anything but air tight, and fiberglass insulation needs to be in an airtight cavity for maximum effectiveness. So we were able to solve two issues at the same time for this homeowner. We removed the board ceiling and fiberglass insulation, we dense packed the rafter bays with cellulose insulation, and installed sheetrock in place of the boards. The boards were salvaged for re-use by the homeowner, and the space and light quality was dramatically improved. Some may think that losing the board ceiling took something away from the space, but what you'll see in the pictures is that it highly accentuates the heavy timbers and really makes them stand out in a beautiful way. Now with this added airtightness, better insulation, and brighter space, the homeowner hardly runs their wood stove, and it's so quiet in the space, an added bonus from changing the insulation. It became necessary to also add a sheetrock ceiling to the living room to hide the plumbing from the new bathroom layout above. Changing this ceiling gave the homeowner some real quality lighting that was lacking in the living room before. The brighter ceiling and new lighting layout completely transforms the living room into a space you want to hang out, even though the layout didn't change at all. When the homeowner saw the finished spaces she said "I can't believe this is my house, I want to live in this house"
Energy Efficiency: I touched a little on the efficiency above, but like all projects done with Mottram Architecture, we always want to leave you with a little extra. Timber frame construction with board ceilings and fiberglass insulation are notoriously leaky! If you want to know what we think about fiberglass insulation, check our our blog post on Why Fiberglass Insulation Sucks. By installing cellulose insulation and covering it with sheetrock we were able to greatly reduce the heat flowing out of this home. It not only improves cashflow it improves the comfort level in the space. Who wants to sit in their living room and feel a draft? Let us remind you, we are not saying cellulose insulation is an air barrier, we use the sheetrock to help with that, but it does significantly reduce the air flow over fiberglass insulation. And when we reduce the airflow, we reduce the heat flow. And when we reduce the heat flow, we reduce the need to re-heat that drafty air from outside. When it comes to energy efficiency the first and best place to start is air infiltration. We greatly reduced the air infiltration with the new insulation, but we also added a hat and warm boots. What I mean by that is, we improved the insulation in the roof, and we installed insulation in the basement. Maybe it's a silly analogy, but when you think about keeping warm, we always start with the hat and boots! With sustainability in mind, the next project will be to add a deck to the front of this house with rain catchment barrels from the metal roof. They are planning to plant a garden in the spring and the rain catchment system will help to irrigate the new garden.
Builder: East Shore Builders
Photographer: Michael Eric Berube
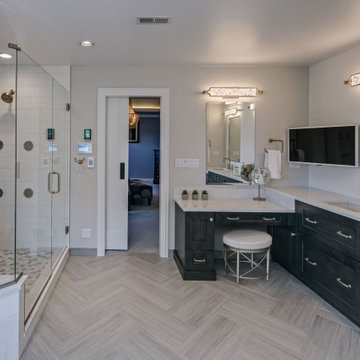
 Drury Design
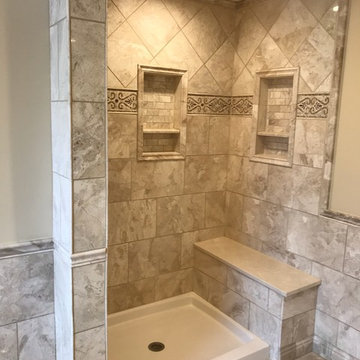
The original idea was to update the tile floor and the tub. That’s it.
A further discussion of wants and needs revealed intentions for an eventual larger shower and an improved vanity storage. It made sense to map out the possibilities and design our update with potential next steps in mind. The process was exciting, ultimately leading to the decision to do a full primary bath remodel.
Design Objectives:
-Maintain existing locations for all major bathroom functions
-Make the shower larger and more open
-Use luxurious materials throughout
-Improve vanity storage and define accessories for specific items
-Incorporate luxury shower fixtures
-Include the latest technology
Design Challenges
-Enlarging the shower in a typical rectangular shape would block the view and light from the alcove windows behind the tub
-Logical placement of the built-in shower caddy and all shower components in accordance with how and where they were to be used
-Keeping the long, back wall free from any shower modules to maintain the decorative tile design
-Combining the owner’s existing smart home system with a comprehensive shower system
-Planning cabinetry for hidden storage and use for various small appliances and make-up
-Integrating expensive shower wall tile with less expensive wall tile for aesthetic and budget purposes
-Incorporating special design features to balance the highly decorative shower tile
Design solutions:
-A clipped corner was planned for the shower bench seat – this allowed for a larger glass wall. The glass wall at the angled bench also brought more natural light into the shower
-Thoughtful shower space design prevented the crowding of features – the shower caddy and handheld shower head were placed on the full-height wall by the shower bench, the regular shower head and body sprays remained on the opposite wall, and the rain head was placed in the center of the shower
-A multi-port DTV system was installed, providing control of all shower components, including chromotherapy and music inside and outside the shower
-The lavish water-jet stone and glass decorative tile was paired with a less-expensive glass tile found in the mosaic
-Pull-out grooming organizers and electrical docking stations were incorporated into the cabinetry
Additional storage was created in the lower corner cabinet
The homeowners are thrilled with their new primary bathroom. Clear goals and carefully evaluated materials informed a fun and functional design that is both thoughtful and sumptuous!
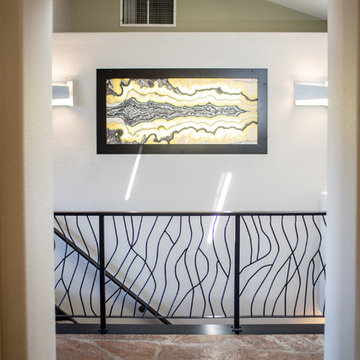 TVL Creative Ltd.
This project is one of the most extensive TVL scopes to date! This house sits in a phenomenal site location in Golden and features a number of incredible and original architectural details. However, years of shifting had caused massive structural damage to the home on both the main and basement levels, resulting in shifting door frames, split drywall, and sinking floors. These shifts prompted the clients to seek remodeling assistance in the beginning of their renovation adventure. At first, the scope involved a new paint and lighting scheme with a focus on wall repair and structural improvement. However, the scope eventually evolved into a re-design of the entire home. Few spaces in this house were left untouched, with the remodeling scope eventually including the kitchen, living room, pantry, entryway and staircase, master bedroom, master bathroom, full basement, and basement bedrooms and bathrooms. Expanding the scope in this way allowed for a design that is cohesive space to space, and creates an environment that captures the essence of the family's persona at every turn. There are many stunning elements to this renovation, but a few favorites include the insanely gorgeous custom steel elements at the front entry, Tharp custom cabinetry in the kitchen and pantry, and unique stone in just about every room of the house. Our clients for this project are both geologists. This alone opened an entire world of unique interest in material that we have never explored before. From natural quartzite countertops that mimic mountain ranges to silky metallic accent tiles behind the bathtub, this project does not shy away from unique stone finds and accents. Conceptually, the clients' love for stone and natural elements is present just about everywhere: the dining room chandelier conceptually takes the form of stalactite, the island pendants are formed concrete, stacked stone adorns the large back wall of the shower, and a back-lit onyx art piece sits in a dramatic niche at the home's entry. We love the dramatic result of this renovation and are so thrilled that our clients can enjoy a home that truly reflects their passions for years to come!
Sponsored
Delaware County, OH

Whisler Home Improvement
Franklin County's Committed Home Improvement Professionals

 L.Lee
2pcs fashion rattan wicker sofa Furniture set will be perfect for outdoor garden, backyard, patio and any other outdoor areas. Featured lightweight but strong rattan wicker and sturdy frame, this combo ensures long-term use. The PE rattan wicker is waterproof and UV-resistant, enabling it to withstand changeable weather. However, extra protection may be needed for some extreme weather conditions. The sleek sponge cushions will adorn your outdoor area. This rattan sofa set is your great companion to improve your quality of life.
Features:
-Made of high quality PE rattan wicker and steel frame
-Lightweight yet durable and quality construction
-Excellent hand-weaving technique with fashionable design, sleek and modern
-Weatherproof rattan wicker, waterproof and UV resistant
-Rattan seat board have corner stiffener for extra support and stability.
-Breathable seat cushions add comfort and removable cushion covers are easy to rinse
-Perfect for patio, pool side, backyard or other outdoor setting
-Sofas can be combined freely according to your interest
-Modern and stylish design fits perfectly with any outdoor décor
-Assembly Required
Specification:
-Rattan Color: Black
-Cushion Color: Picture Color
-Cushion Fabric: polyester fabric and sponge padded
-Corner Sofa Size (overall): 29.5" W×29.5"D×24.8" H
-Seat Cushion: 25.6” x 25.6” x 3.9” (L x D x Thickness)
-Back Cushion: 25.6” x 15.7” x 3.9” (L x D x Thickness)
-Arm Rest Cushion: 21.7” x 13.8” x 3.9” (L x D x Thickness)
-Weight Capacity for Each Seat: 265 lbs
-Rattan: PE
-Assembly required
Set includes:
-2×corner sofa
-2×seat cushions
-2×back cushions
-2× armrest cushions

 Day One Lighting
A private residential bar with LED back-lit onyx and under cabinet LED lighting.
Example of a trendy kitchen design in Miami with blue backsplash
Example of a trendy kitchen design in Miami with blue backsplash
 Mottram Architecture
The builder laid custom wide plank flooring in the upstairs hall and flex space stained to match the existing woodwork of the timber frame construction.
Timber frame homes offer unique challenges during a remodel. What often makes them beautiful and attractive to most homeowners, also makes them challenging for space requirements.
Context: The lovely couple that owned this home were struggling with some interesting floor plan challenges that just didn't work for their family. The loved the beautiful timbers and woodwork of their home, but the dramatically sloping ceilings on the second floor, particularly in the bathroom, just didn't work for this 1 1/2 bath home. Needing to use the skylight to approach the toilet was a less then ideal scenario. Although the bathroom footprint was more then adequate, the sloped ceiling only made half of the space useable. Check out the Before/After post on our blog to see the photos of the house pre-renovation. As much as they loved all the wood features in their home, another challenge they had was light. The wood ceiling made everything inside the house darker, even with a fantastic array of south facing windows, there were spaces in the home that felt dark and small. When they contacted us they wanted to know how could they make their brighter and more inviting, were there solutions to the 2nd floor sloped ceiling issues, and if they were going to do all of this work, how could they make their home more comfortable and efficient. A nagging water leak in the upstairs bathroom spurred them into action and here is how we solved their dilemma.
Conclusion: First, we added a little dormer to the rear of the house so we could get full headroom in nearly all of the upstairs bathroom! Then we decided to extend that dormer one more timber bay over to create a walk in closet with natural light and plenty of space. Since we were contemplating energy efficiency, we resolved a nagging issue that is present in a lot of timber frame construction, air tightness. Commonly found in timber frame construction, fiberglass insulation is installed in the rafter bays and board ceilings are installed over top. Unfortunately, board ceilings are anything but air tight, and fiberglass insulation needs to be in an airtight cavity for maximum effectiveness. So we were able to solve two issues at the same time for this homeowner. We removed the board ceiling and fiberglass insulation, we dense packed the rafter bays with cellulose insulation, and installed sheetrock in place of the boards. The boards were salvaged for re-use by the homeowner, and the space and light quality was dramatically improved. Some may think that losing the board ceiling took something away from the space, but what you'll see in the pictures is that it highly accentuates the heavy timbers and really makes them stand out in a beautiful way. Now with this added airtightness, better insulation, and brighter space, the homeowner hardly runs their wood stove, and it's so quiet in the space, an added bonus from changing the insulation. It became necessary to also add a sheetrock ceiling to the living room to hide the plumbing from the new bathroom layout above. Changing this ceiling gave the homeowner some real quality lighting that was lacking in the living room before. The brighter ceiling and new lighting layout completely transforms the living room into a space you want to hang out, even though the layout didn't change at all. When the homeowner saw the finished spaces she said "I can't believe this is my house, I want to live in this house"
Energy Efficiency: I touched a little on the efficiency above, but like all projects done with Mottram Architecture, we always want to leave you with a little extra. Timber frame construction with board ceilings and fiberglass insulation are notoriously leaky! If you want to know what we think about fiberglass insulation, check our our blog post on Why Fiberglass Insulation Sucks. By installing cellulose insulation and covering it with sheetrock we were able to greatly reduce the heat flowing out of this home. It not only improves cashflow it improves the comfort level in the space. Who wants to sit in their living room and feel a draft? Let us remind you, we are not saying cellulose insulation is an air barrier, we use the sheetrock to help with that, but it does significantly reduce the air flow over fiberglass insulation. And when we reduce the airflow, we reduce the heat flow. And when we reduce the heat flow, we reduce the need to re-heat that drafty air from outside. When it comes to energy efficiency the first and best place to start is air infiltration. We greatly reduced the air infiltration with the new insulation, but we also added a hat and warm boots. What I mean by that is, we improved the insulation in the roof, and we installed insulation in the basement. Maybe it's a silly analogy, but when you think about keeping warm, we always start with the hat and boots! With sustainability in mind, the next project will be to add a deck to the front of this house with rain catchment barrels from the metal roof. They are planning to plant a garden in the spring and the rain catchment system will help to irrigate the new garden.
Builder: East Shore Builders
Photographer: Michael Eric Berube
 Mottram Architecture
Michael Eric Berube, Maine Virtual Home ToursTimber frame homes offer unique challenges during a remodel. What often makes them beautiful and attractive to most homeowners, also makes them challenging for space requirements.
Context: The lovely couple that owned this home were struggling with some interesting floor plan challenges that just didn't work for their family. The loved the beautiful timbers and woodwork of their home, but the dramatically sloping ceilings on the second floor, particularly in the bathroom, just didn't work for this 1 1/2 bath home. Needing to use the skylight to approach the toilet was a less then ideal scenario. Although the bathroom footprint was more then adequate, the sloped ceiling only made half of the space useable. Check out the Before/After post on our blog to see the photos of the house pre-renovation. As much as they loved all the wood features in their home, another challenge they had was light. The wood ceiling made everything inside the house darker, even with a fantastic array of south facing windows, there were spaces in the home that felt dark and small. When they contacted us they wanted to know how could they make their brighter and more inviting, were there solutions to the 2nd floor sloped ceiling issues, and if they were going to do all of this work, how could they make their home more comfortable and efficient. A nagging water leak in the upstairs bathroom spurred them into action and here is how we solved their dilemma.
Conclusion: First, we added a little dormer to the rear of the house so we could get full headroom in nearly all of the upstairs bathroom! Then we decided to extend that dormer one more timber bay over to create a walk in closet with natural light and plenty of space. Since we were contemplating energy efficiency, we resolved a nagging issue that is present in a lot of timber frame construction, air tightness. Commonly found in timber frame construction, fiberglass insulation is installed in the rafter bays and board ceilings are installed over top. Unfortunately, board ceilings are anything but air tight, and fiberglass insulation needs to be in an airtight cavity for maximum effectiveness. So we were able to solve two issues at the same time for this homeowner. We removed the board ceiling and fiberglass insulation, we dense packed the rafter bays with cellulose insulation, and installed sheetrock in place of the boards. The boards were salvaged for re-use by the homeowner, and the space and light quality was dramatically improved. Some may think that losing the board ceiling took something away from the space, but what you'll see in the pictures is that it highly accentuates the heavy timbers and really makes them stand out in a beautiful way. Now with this added airtightness, better insulation, and brighter space, the homeowner hardly runs their wood stove, and it's so quiet in the space, an added bonus from changing the insulation. It became necessary to also add a sheetrock ceiling to the living room to hide the plumbing from the new bathroom layout above. Changing this ceiling gave the homeowner some real quality lighting that was lacking in the living room before. The brighter ceiling and new lighting layout completely transforms the living room into a space you want to hang out, even though the layout didn't change at all. When the homeowner saw the finished spaces she said "I can't believe this is my house, I want to live in this house"
Energy Efficiency: I touched a little on the efficiency above, but like all projects done with Mottram Architecture, we always want to leave you with a little extra. Timber frame construction with board ceilings and fiberglass insulation are notoriously leaky! If you want to know what we think about fiberglass insulation, check our our blog post on Why Fiberglass Insulation Sucks. By installing cellulose insulation and covering it with sheetrock we were able to greatly reduce the heat flowing out of this home. It not only improves cashflow it improves the comfort level in the space. Who wants to sit in their living room and feel a draft? Let us remind you, we are not saying cellulose insulation is an air barrier, we use the sheetrock to help with that, but it does significantly reduce the air flow over fiberglass insulation. And when we reduce the airflow, we reduce the heat flow. And when we reduce the heat flow, we reduce the need to re-heat that drafty air from outside. When it comes to energy efficiency the first and best place to start is air infiltration. We greatly reduced the air infiltration with the new insulation, but we also added a hat and warm boots. What I mean by that is, we improved the insulation in the roof, and we installed insulation in the basement. Maybe it's a silly analogy, but when you think about keeping warm, we always start with the hat and boots! With sustainability in mind, the next project will be to add a deck to the front of this house with rain catchment barrels from the metal roof. They are planning to plant a garden in the spring and the rain catchment system will help to irrigate the new garden.
Builder: East Shore Builders
Photographer: Michael Eric Berube
Sponsored
Columbus, OH
Free consultation for landscape design!

Peabody Landscape Group
Columbus' Reliable Landscape Design & Contracting

 Castle Building & Remodeling
Another beautiful Bungalow kitchen remodel in the Northrop neighborhood of South Minneapolis. These homeowners contacted Castle planning for a whole kitchen renovation, which included opening the existing kitchen into the dining room so the family could enjoy a more multi-purpose space.
The original (1927) built-in buffet cabinet between the kitchen and dining was re-homed to a vintage salvage room in Minneapolis for a new future life.
The homeowners did not want a boring kitchen. We also focused on matching the original style/feel of the home but rejuvenated. A fresh traditional kitchen design was planned to provide better function for the family’s needs and also a beautiful style to the heart of their home.
New hardwood floors carry into the kitchen to match the existing hardwoods. New custom-built flush-inset cabinetry was designed with a wonderful two-tone color scheme. The new cabinetry includes custom storage, glass uppers and accessories; silverware tray divides, trash pull-out, outlet docking drawer for phones to charge, custom shelf roll-outs and lazy susan corners.
Castle selected historic paint colors by Benjamin Moore to keep within the period of the home. The base cabinets are painted in Benjamin Moore, Tarrytown green and the uppers in a soft white (BM, Ballet white). By doing two cabinetry colors, Castle was able to create some unique interest and anchor the base cabinet to the floor while still having light walls with the white cabinetry.
New marble patterned Cambria Quartz countertops were selected in the luxurious and classic Torquay design. To complete the walls, traditional white subway tile was installed.
Along with the beautiful finishes, we also improved light quality in the space. New windows were installed increasing from 2 windows to 3 windows with an additional window to the backyard. We also installed 2 Solatubes for additional natural lighting. The Solatubes also include a solar-powered night light and additional light kit for night time use.
Overall, the new traditional kitchen is much like a spring day – light, airy and inviting!
Come see the space on Castle’s Educational Home Tour, Fall 2018!
 TVL Creative Ltd.
This project is one of the most extensive TVL scopes to date! This house sits in a phenomenal site location in Golden and features a number of incredible and original architectural details. However, years of shifting had caused massive structural damage to the home on both the main and basement levels, resulting in shifting door frames, split drywall, and sinking floors. These shifts prompted the clients to seek remodeling assistance in the beginning of their renovation adventure. At first, the scope involved a new paint and lighting scheme with a focus on wall repair and structural improvement. However, the scope eventually evolved into a re-design of the entire home. Few spaces in this house were left untouched, with the remodeling scope eventually including the kitchen, living room, pantry, entryway and staircase, master bedroom, master bathroom, full basement, and basement bedrooms and bathrooms. Expanding the scope in this way allowed for a design that is cohesive space to space, and creates an environment that captures the essence of the family's persona at every turn. There are many stunning elements to this renovation, but a few favorites include the insanely gorgeous custom steel elements at the front entry, Tharp custom cabinetry in the kitchen and pantry, and unique stone in just about every room of the house. Our clients for this project are both geologists. This alone opened an entire world of unique interest in material that we have never explored before. From natural quartzite countertops that mimic mountain ranges to silky metallic accent tiles behind the bathtub, this project does not shy away from unique stone finds and accents. Conceptually, the clients' love for stone and natural elements is present just about everywhere: the dining room chandelier conceptually takes the form of stalactite, the island pendants are formed concrete, stacked stone adorns the large back wall of the shower, and a back-lit onyx art piece sits in a dramatic niche at the home's entry. We love the dramatic result of this renovation and are so thrilled that our clients can enjoy a home that truly reflects their passions for years to come!

 Project Guru
View from the door showcases tall sloped ceiling, showpiece chandelier and high contrast of textures. The closet flows seamlessly into the bathroom. Photography Tim Manning, contractor DreamMaker Bath and Kitchen
119